
 I purchased three cans of Alexander’s Pinot Noir concentrate and the recipe on the label calls for 4 tsp. Bentonite and the other ingredients to be put in the fermenter before the wine yeast. The people at our local brewing store said to use Super Kleer instead and that it was better than Bentonite. I understood that both Bentonite and Super Kleer to be for clarifying before you bottle and not to be put in prior to the yeast? Am I confused?
Name: Debbie C.
State: Missouri
—–
Hello Debbie,
You are right to have some concern.
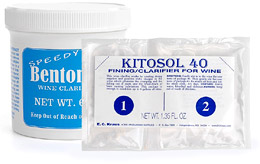
Bentonite is a fining agent (clarifier) that can either be added in moderate amounts before the fermentation or in larger amounts after the fermentation. It is a clay that is very unique because of the fact that it has a static charge that is stronger than usual. It is this property that makes Bentonite valuable as a fining agent.
Bentonite is able to collect dead yeast cells and drag them to the bottom of the fermentation vessel, leaving a clear wine. Being continually suspended throughout the wine is one of the key factors of how well the Bentonite will work. If it is added and just sits at the bottom of the fermenter, it will do very little in the way of clearing a wine.
When added before the fermentation, not as much Bentonite is needed because it is relying on the fermentation activity to keep it stirred up. It is constantly being churned up by the rise of CO2 gas bubbles that are being created by the wine yeast. This is why your wine recipe only calls for 4 teaspoons. If added after the fermentation, more is needed to be effective, and several periodic stirring sessions are required by the wine maker, as well.
Super Kleer is actually a combination of two different fining agents. Both are liquids: Chitosan and Kiesolsol. We sell something just like it called Kitosol 40. The Chitosan has a positive charge and the Kiesolsol has a negative charge. Each come in their own little pouch, and each are stirred into the wine separately.
I have never added Super Kleer or Kitosol 40 to a wine before the fermentation, so I can’t tell you what it will do to the fermentation with any certainty, but my best guess is that it would slow the fermentation down to a painful crawl. This is because the amounts that are prepared in these pouches are dosed for a finished wine — way more than you would ever want to add to a fermentation.
The presumed effect is that Super Kleer would interfere with the majority of the active wine yeast by continuously trying to collect them and drag them to the bottom in small clumps. This clumping would severely affect the wine yeasts’ ability to ferment.
Happy Winemaking,
Ed Kraus
—–
Ed Kraus is a 3rd generation home brewer/winemaker and has been an owner of E. C. Kraus since 1999. He has been helping individuals make better wine and beer for over 25 years.
Quick Guide To Understanding Brewing Water Chemistry
 In home brewing, water chemistry can have a huge impact on beer flavor and quality. For one, it has to be clean and free of microbiological contamination. That’s a given to prevent spoilage. But in addition to that, the concentration of minerals in your brewing water can impact not only flavor, but also mash performance, acidity, hop bitterness, yeast health, body, mouthfeel, and other factors. For these reasons, many home brewers pay fierce attention to the chemistry profile of the water they use for brewing.
When looking at the brewing water chemistry, brewers pay attention to the following minerals:
- Calcium – Lowers pH and helps with mash conversion.
- Magnesium – Lowers pH and aids yeast health.
- Sodium – Sodium can help give beer body, but too much might make a beer taste salty.
- Carbonate/Bicarbonate – These can slow the mashing process and make hop flavors taste harsh.
- Sulfate – Sulfate can introduce harsh, dry flavors.
- Chloride – May contribute sweetness.
Water Chemistry for Mashing
One of the many ways water chemistry comes into play in home brewing is with the mashing process. This is particularly important for all-grain brewers, but also partial mash brewers. The enzymes in malt need certain conditions in order to covert starches into sugars. One of the primary factors is pH, or acidity. The enzymes work best when working within a specific pH range. Pure water has a pH of about 7, whereas ideal conditions for enzyme activity is about 5.4-5.5. Certain malted barleys can lower pH more than others. Depending on the source water, it may be necessary to add mineral salts to raise or lower the brewing water’s pH for a given beer recipe.
Water Chemistry for Brewing Certain Styles
 Some styles of beer were developed based on the local water profiles of the breweries that made them. To recreate a Munich Dunkel or English Bitter, it may be necessary to replicate the brewing water chemistry of those locations.
Brewing water chemistry analysis and profiles for specific locations is widely available from books such as Homebrewing for Dummies, Designing Great Beers, and others.
So How Can Brewers Change Their Water?
Before making changes to your brewing water, it’s very important to establish a starting point, otherwise you’re just shooting in the dark. Consider checking with your local homebrew club. Someone may have already figured out the mineral content of your local water source and offer some recommendations for how to adjust your water, if at all. You can also check with the local water department for a water quality report. Another option is to use only reverse osmosis or distilled water, in which case you’re essentially starting from pure H2O. This would be the purist way of handling your brewing water chemistry.
 Once you’ve established a baseline, you can add minerals to adjust your water profile. There may be a balancing act between maintaining an appropriate pH level and replicating the water of a particular region. Once the concentration of the minerals listed above are established, a brewer can use the following to make adjustments:
- Gypsum – Gypsum adds calcium sulfate, which lowers pH. 1 teaspoon per five gallons adds 140 ppm of sulfate and 60 ppm of calcium.
- Calcium Carbonate – Calcium carbonate raises pH. For every teaspoon added to 5 gallons of water, it adds about 60 ppm of carbonate and 36 ppm of calcium.
- Magnesium Sulfate – As the name suggest, magnesium sulfate adds both magnesium and sulfate. 1 teaspoon in five gallons will increase sulfate by 100 ppm and magnesium by 25 ppm.
- Table Salt – Table salt contributes sodium and chloride. 1 teaspoon adds 170 ppm of chloride and 110 ppm of sodium.
*Source on ppm data: Homebrewing for Dummies
With these four ingredients, you can manage mash pH and effectively match any global water profile you want.
Though the calculations can certainly be made by hand, there are some water chemistry calculators which can help you determine how much of each to add to reach a certain water profile. BeerSmith is a software program for brewers with water calculations built in. Brewers Friend has a water chemistry calculator. Bru’n Water offers a water chemistry spreadsheet that will help you make adjustments.
 Conclusion
Before adjusting your brewing water chemistry, it’s important to know what you’re starting with. To start with a blank slate, use reverse osmosis or distilled water. Otherwise, contact your local water department a water analysis or profile or ask your local homebrew club for help. If those resources aren’t available to you, there are also water testing kits that can help you determine the mineral content of your water. Start paying attention to the mineral content of your water and pay attention to its effects on mash efficiency, yeast performance, and flavor. This is this essence of brewing water chemistry.
—–
David Ackley is a beer writer, brewer, and self-described “craft beer crusader.” He holds a General Certificate in Brewing from the Institute of Brewing and Distilling and is founder of the Local Beer Blog.
Style Guide: Tips On How To Brew A Kölsch
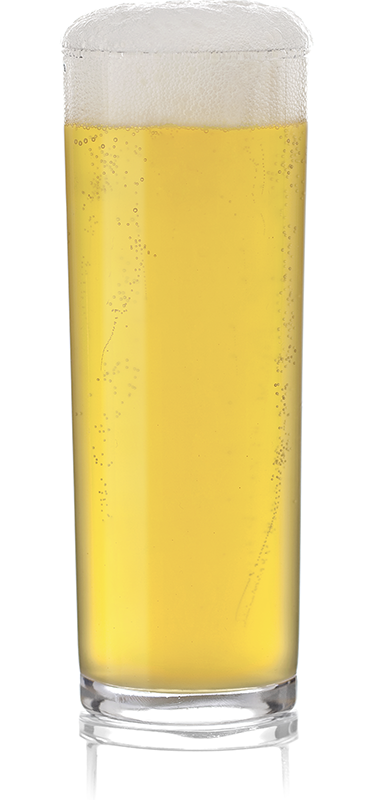 Crystal clear, the color of golden straw, a Kölsch is yet another excellent beer for summer drinking. With that in mind, here is a Kölsch profile overview along with some Kölsch brewing tips.
Kölsch is an ale style native to Köln, Germany, known to us Americans as Cologne. Technically, only beers brewed in Cologne may be called Kölsch (but I don’t think anyone will prosecute if you do!).
Kölsches are similar to light lagers in that they’re clean, crisp, and refreshing, however they typically have a more pronounced, moderate hoppiness than light lagers. They are also distinguished by a somewhat fruity yeast character and a distinctively dry finish.
Kölsch beers use very light malts, such as Pilsner or Two-Row, to achieve their pale color. They may contain a small proportion of wheat malt, usually around 10-20% of the total grain bill.
When it comes to hops, Kölsch beers have a few more IBUs than the standard light lager. The BJCP guidelines call for 20-30 IBUs, with most of the hops added early in the boil. To be authentic, a Kölsch should use German noble hops, specifically Spalt, Saaz, Tettnang, or Hallertau.
Though the Kölsches are typically brewed with top-fermenting ale yeasts, they are fermented at a cooler temperature, say 55°F to 65°F, and usually go through a lagering period at even colder temperatures. This blend between an ale and a lager makes a Kölsch recipe an excellent “entry-level” beer for drinkers making the transition from macro lagers into more adventurous craft beer styles.
Kölsch Brewing Tips:
- For the grain bill, starting with enough Pilsner or Two-Row malt to achieve an original gravity of about 1.047. Vienna malt is a suitable alternative. Use up to 1-2 lbs. of wheat malt if desired.
- When brewing a Kölsch extract recipe use a very pale malt extract, such as Stream Freak Light LME or Light DME, and may wish to use some Pilsner and/or wheat malt for a mini-mash to add some malty, grainy flavor.
- Hops should ideally be of the noble hops variety, such as Spalt, Saaz, Tettnang, or Hallertau. Perle, Northern Brewer, and Mt. Hood can work too. Add most, if not all of the hops at the 60 minute addition, aiming for about 25 IBUs.
- When making a Kölsch beer yeast selection is important. The Kölsch yeast strain is ideal, but lager yeasts and other German ale yeasts can be used as well.
- To achieve a dry finish, a highly attenuating yeast should be used. Mashing around 148°-150°F should produce a more fermentable wort, resulting in a lower final gravity and less residual sweetness.
- A key factor in creating an authentic Kölsch is to ferment it at fairly low
 temperatures. Primary fermentation should be around 55°-65°F, and secondary fermentation around 40°-50°F. These lower fermentation temperatures may mean that fermentation takes longer than it does for a typical ale.
These Kölsch brewing tips should be enough to get you going and maybe even produce your on Kölsch recipe. But, if you want to cut to the chase and start making Kölsch beer, now? The Brewer’s Best Kolsch Recipe Kit includes everything required for a five gallon batch.
—–
David Ackley is a beer writer, brewer, and self-described “craft beer crusader.” He is a graduate of the Siebel Institute of Technology’s “Start Your Own Brewery” program and the Oskar Blues Brew School in Brevard, NC.
My Original Gravity Is Too Low. What Should I Do?
 A common issue among beginning extract and partial mash homebrewers is that they undershoot their beer recipe’s anticipated original gravity. The original gravity is too low. This can happen for a number of reasons when beer brewing, but largely because many homebrew kits call for topping off with water to get five gallons of wort, without taking into account how the brew day went. (What if you spilled some wort or didn’t get all the extract out of the can?) This can throw off alcohol content, mouthfeel, IBUs – in short, turning the beer into something it wasn’t supposed to be. That’s not to say that it won’t be completely drinkable – it may well be. But some of us, for better or worse, are perfectionists.
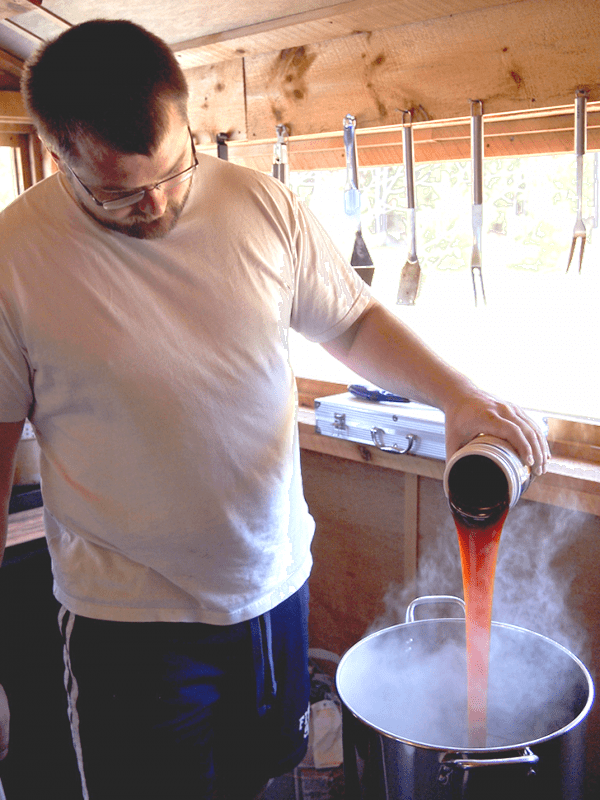
The best time for extract brewers to correct for gravity is right after the boil. Take a hydrometer reading before pitching the beer yeast to get your bearings. Plug your numbers into a dilution calculator to see if topping up to five gallons will get you to your target OG. If you think you’ll end up with the original gravity too low, read the tips below:
- Double-check your OG (original gravity) reading. Did you take the reading at the calibrated temperature for your hydrometer (usually 60˚F or 68˚F)? If not, did you correct for temperature using a hydrometer temperature correction calculator? Taking a reading out of the temperature range or failing to correct for temperature can throw off your reading by several points.
- Decide how you want to move forward. You have a few options here. Do you want to just go with what you’ve got? Do you want a full five gallon batch of beer? If you top off the wort to a full five gallons, you’ll have a lower alcohol beer than what you expected. If you only top off with enough water to hit your target original gravity, you’ll end up with less beer, but at least have the correct original gravity and alcohol content. Alternatively, you can mix in more fermentables in order to meet both your original gravity and your target batch volume.

- To hit your target volume, top off to five gallons. You’ll have a slightly weaker beer than intended, but this might be a worthwhile sacrifice for the sake of more beer. Trust me, I understand.
- To hit your target original gravity, top off to less than five gallons. Use a dilution calculator to figure out how much water to add so that you can hit your target gravity. You can also do the math by hand pretty easily. For example, if your three gallons of wort is 1.060 and your intended gravity is 1.040, plug in the numbers and solve for the volume of water (A2):
A1*B1 + A2*B2 = (A1+A2)*(target gravity)
(3 gallons at 60 gravity points) + (A2 gallons at 0 gravity points [water]) = (3 + A2) gallons at 40 gravity points
A2 = 1.5 gallons
- To hit your target volume and your target gravity, you can mix in more fermentables. Some may consider this the ultimate way to go when the original gravity is too low. Using the blending formula above, you can figure out how much additional fermentable ingredients you need. Mix up a small batch (about one-half to one gallon) of concentrated wort using DME (dried malt extract), sugar, honey, or molasses. Your fermentable ingredient will depend on your beer recipe and what you have on hand. DME will be the most beer-like, while excessive sugars may cause your beer to over attenuate. Dark DME or molasses may alter the color of your beer, so choose wisely. If you can, boil enough hops in the mini batch to maintain your level of IBUs.
Let’s work through an example.
My target OG was 1.052. Instead, I ended up with 4.5 gallons at 1.044. This is a much lower than expected original gravity. My measured IBUs (after dilution with water) was 30. First let’s figure out how much additional fermentable I need in a half-gallon mini-batch to hit my target OG:
(4.5 gallons * 44) + (0.5 gallons * X) = 5 gallons * 52
X = 124
To get a gravity of 1.124, my half-gallon batch needs about 1.48 lbs. of DME, 1.35 lbs. of cane sugar, or 1.48 lbs. of honey. (A beer recipe calculator can help you figure this out.)
About .3 ounces of a 5% alpha acid hop boiled for thirty minutes will yield about 30 IBUs in the mini-batch. You don’t necessarily have to add hops to the mini-batch, but it will keep you from diluting the bitterness of your beer.
Sure, it gets a little complicated. Most of the time when your original gravity is too low, you may just want to roll with whatever gravity you get. Here’s some tips for hitting your original gravity. But in the event that you need to make some adjustments, learning how to execute the above procedures is crucial for dealing with a lower than expected original gravity.
—–
David Ackley is a beer writer, brewer, and self-described “craft beer crusader.” He holds a General Certificate in Brewing from the Institute of Brewing and Distilling and is founder and editor of the Local Beer Blog.
So Tell Me, Why Is My Mead Still Cloudy?
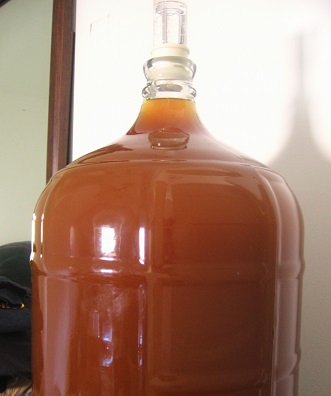 I started a batch of mead one year ago. It has stopped working but, it has not cleared. What can or should I do?
Name: Bruce T.
State: Iowa
—–
Hello Bruce,
Before you can know what to do you have to answer the question: why is the mead still cloudy? There are three things that instantly come to mind as a possibility.
Your Mead Could Still Be Cloudy Because It Is Still Fermenting:
Even though it has been a year, it is still possible for a fermentation to kick back up again. All it takes is some leftover sugar from the original fermentation. There is still yeast in the mead. It is just dormant. The slightest amount of fermentation could be the cause of your mead still being cloudy.
You can determine if the cloudiness is being caused by fermentation by taking a hydrometer reading. If you are getting a reading of .998 or higher on the Specific Gravity scale, then the mead is more than likely fermenting. You need to figure out how to get the fermentation to finish. Then the mead will clear on it’s own once the fermentation is done.
If this is the case, I would suggest going to the article on our website, Top 10 Reasons For Fermentation Failure and see if you can figure our why your are having the long, drawn-out fermentation.
Your Mead Could Still Be Cloudy Because It Has Spoiled:
Wine, mead and even beer can become spoiled from time to time. Bacteria is the main cause, but I have seen many cases where mold spores have taken over a batch. Both bacteria and mold can be airborne and land into a defenseless batch of mead. It can also come from being unsanitary with the equipment the mead comes in contact with. Either way, this could be why your mead is still cloudy.
If the spoilage is so progressed as to cause a cloudiness, you should be able to identify it simply by its odor. A sulfur odor is okay, but if you smell things like sauerkraut, rubber, fingernail polish, any of these would indicate that your mead is possibly infected and has been spoiled. There is nothing you can do to reverse this. It will simply need to be discarded.
Your Mead Could Still Be Cloudy Because It Has A Pectin Haze:
I saved this for last because it is the least likely. If you did not put any fruit in the mead, it is not likely at all, but if you did use fruit, there is a possibility that your mead could be experiencing a pectin haze from the pectin that was in the fruit.
 To determine if this is what’s going one, take a quart sample of the mead and add to it a teaspoon of pectic enzyme. Let the mead set for a few days. If the mead clears and creates no sediment in the process, this means you have a pectin haze was the reason your mead was still cloudy. If the mead does not clear at all, or clears, but creates sediment, then you do not have a pectin haze problem.
I do not know which one it is, but I’m fairly certain that one of the above is the answer as to the question: why is my mead still cloudy?
Hope this helps you out.
Best Wishes,
Ed Kraus
—–
Ed Kraus is a 3rd generation home brewer/winemaker and has been an owner of E. C. Kraus since 1999. He has been helping individuals make better wine and beer for over 25 years.
Express Your Mad Scientist: Experimenting With Homebrew
 To the chagrin of some, I like to experiment in the kitchen. Rather than follow set recipes or guidelines, I like to let the whimsy of the moment guide me, allowing sauces, herbs, and spices to point me in the direction of a dish, not necessarily knowing if the destination of my journey will end up good or bad.
It may be an undisciplined way to cook, but it is fun. Occasionally, it also turns out to be the way I want to brew. I like to go off the beaten path and experimenting with homebrew. While it’s important to hone your skills with the basics, what great chef – or brewer – wouldn’t want to venture off the commonly taken path from time to time?
The best part? Experimenting with homebrew is not hard. Here are a few tips for doing your own beer brewing experiments and creating beers that are specific to your unique tastes:
1. Use a Solid Base Recipe
One of the first homebrews I made was a jalapeno blonde ale. I started with an easy extract recipe as a blonde ale base:
7 lbs. Light Malt Extract
1 oz. Cascade hops at :60
1 oz. Willamette hops at :5
Fermentis Beer Yeast: Safale US-05
By starting with a good beer recipe – one I was familiar with – I knew what to expect from the base beer. From there, I wanted to play with getting the right combination of spice and heat from peppers while also imparting some vegetative pepper flavor. It was all trial and error and an opportunity to play. I sliced and gently roasted the peppers, then “dry-peppered” the beer in secondary.
Because I knew what flavor I would get from the base beer, it gave me flexibility to experiment with peppers to adjust the brew to my taste. You can do the same thing using extra ingredients in the secondary fermentation process and pulling tastes from the carboy or bucket to make sure it’s right for you. Try fruits, vegetables, or even herbs and spices when doing a beer brewing experiment!
2. Split Up Batches
When experimenting with homebrew many homebrewers may start with standard six and five-gallon carboys for fermentation, but if you go a step smaller, you can increase the options for experimentation you have with each batch you brew.
For example, if you split a batch and use two three-gallon fermenters instead of one five-gallon carboy, you increase your options to try out different dry-hopping ingredients and even different yeast strains. Why is this beneficial? It can help you hone your beer recipe and figure out what kind of tastes and aromas you like best, getting two different beers from one brew day.
For example, if you take the same base-level recipe for the blonde ale above, but use a different yeast option, you’ll get a beer with completely different flavors than with Safale US-05. Use a Belgian Wheat 3942, and you’ll end up with fruity characteristics. Or maybe go a little more out there and try Weihenstephen Weizen 3068 and see if banana and clove flavors shows up in your final product. This is a great way to quickly increase your knowledge of different ingredients by expanding your beer brewing experiments.
3. Tailor to Your Tastes
An important thing to remember when experimenting with homebrew is that you’re simply making beer for you to enjoy. Don’t be afraid to work from tastes or smells you like.
I love watermelon, so a couple years ago I made a watermelon wheat beer by hand-squeezing juice from watermelons sanitized with Star-San and added the juice to the secondary fermentation of an American wheat ale.
My wife loves apples and hard cider, so I’ve also tried combining apples with homebrewing. I started with a pretty simple base beer:
3.3 lbs. Light Malt Extract
1 lb. honey malt
2 oz. Cluster hops at :60
But, instead of topping off the wort with water, I used apple juice. I fermented with Wyeast 1056 for a clean yeast flavor and with some patience, ended up with a “beer” that smelled like a cider, but had a unique sweet and bitter taste combination thanks to the cider and hops.
When homebrewing, it’s important to remember that it’s OK to play around. Many chefs only become great once they move beyond their comfort zones. By experimenting with homebrew based on what you love and by thinking outside the box, you’ll find more ways to enjoy the hobby of homebrewing – and may even stumble on your next favorite beer!
—–
Bryan Roth is a beer nerd and homebrewer living in Durham, North Carolina. You can read his thoughts on beer and the beer industry on his blog, This Is Why I’m Drunk, and send him suggestions on how to get his wife to drink craft beer via Twitter at @bryandroth.
Essential! Learn About Wine Making Using A Hydrometer!
 One of the most important pieces of winemaking equipment is the wine hydrometer. Without this, you’re making wine blindly, and risk making a wine that’s not very palatable. If you don’t have one already, I recommend purchasing a wine hydrometer right now. It will be a piece of winemaking equipment that will pay for itself over and over again. Here’s some information on wine making using a hydrometer.
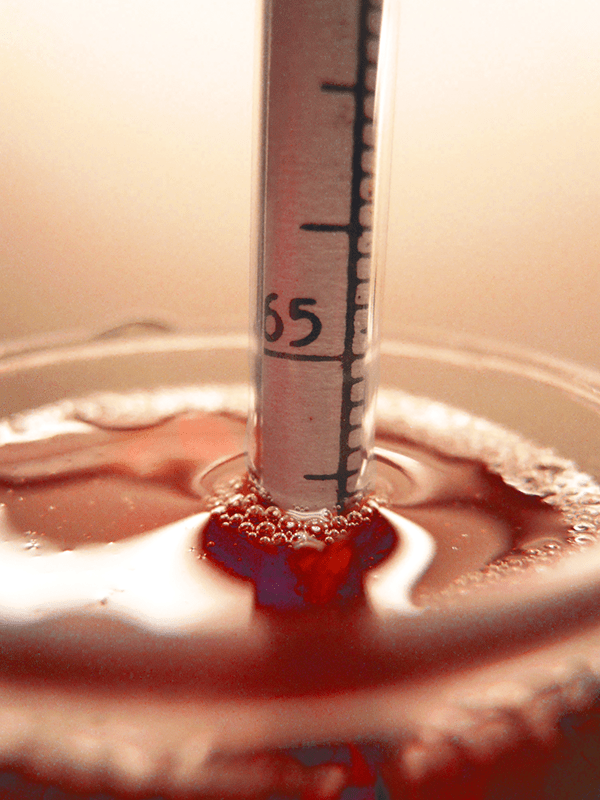
What is a wine hydrometer?
The quick and dirty description of what a wine hydrometer looks like is that it’s similar in structure to a thermometer. It’s often made of glass, and has a bulb-like bottom and a long stem. There are gradations marked on the side of the glass stem which when in use indicates to the user how much sugar is in a sample of wine.
How does a wine hydrometer work?
In scientific speak, a wine hydrometer measures the specific gravity of a fluid by displacing the liquid in which it is floating in proportion to the relative mass or “weight” of the solution. Yet another scientific way to define specific gravity is the ratio of the density of a solution compared with the density of a reference solution. In the case of liquid measurements, water is used as the reference solution to compare against wine.
How does this relate to sugar concentration? Well, water has no sugar in it, and has a specific gravity of 1.000. As sugar is added to water, the specific gravity increases. Thus, the amount that the specific gravity increases by is proportional to the concentration of sugar therein. The more sugar in the wine, the greater the specific gravity. As wine yeast consume sugar during fermentation, the specific gravity of your wine will drop. How much sugar is in your must or wine is proportional to the specific gravity of the solution. The amount of sugar will also help you determine what the alcohol level of your finished wine will be.
Why should I care about specific gravity?
Knowing the specific gravity that you determine with a wine hydrometer is important to the success of your fermentations and winemaking in general. Without a wine hydrometer, it’s much more difficult to determine the sugar level in your wine must or your wine, thus making it even more difficult to know how your fermentation is progressing and if there are any unexpected adjustments you need to make. Wine making using a hydrometer; monitoring the specific gravity of your must, you’ll be ready when an unexpected change occurs requiring your attention and adjustments, and you’ll be able to determine how much potential alcohol the wine you are creating will be and you can adjust accordingly if need be.
—–
Ed Kraus is a 3rd generation home brewer/winemaker and has been an owner of E. C. Kraus since 1999. He has been helping individuals make better wine and beer for over 25 years.
Insanely Simple Lesson On How to Measure Beer Color
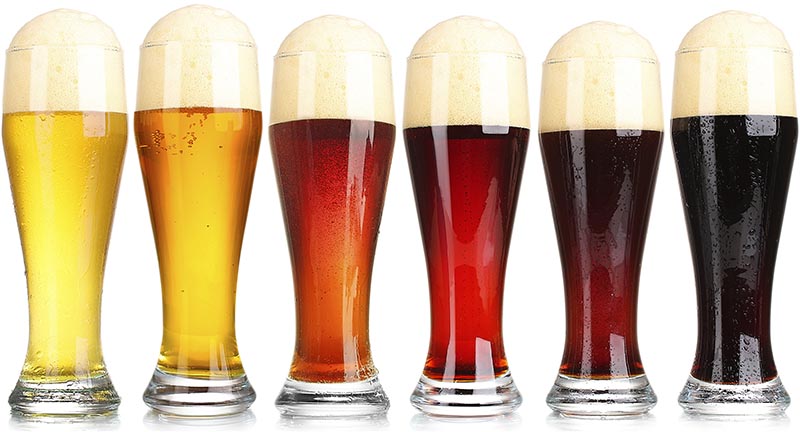 Beer color is often the first thing you notice when drinking a brew. It has a huge effect on your expectation of the beer, and beers that don’t fit the drinker’s expectations can be confusing or considered out of style. Imagine going to a bar and ordering stout and the beer comes back pale. Or you ask for a Pilsner and the beer you get is brown. You’d certainly send the beer back and ask for something else!
If you like to compete in homebrew competitions, it’s essential to present a beer within the color parameters for a particular beer style. There are a good number of beer calculators out there which will help you approximate a beer’s color as you’re developing a beer recipe, but after you brew the beer, you may want to measure your beer’s color to see how close you got to your estimate. While it’s possible to conduct a lab test with a light spectrometer and achieve a very specific result, for most of us, we can do the test with the naked eye and get reasonably accurate results.
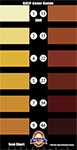 The Beer Judge Certification Program has developed a method for measuring beer color. It involves taking a sample of beer and placing it in a glass that is five centimeters in diameter. Via BJCP.org:
How To Measure Beer Color
- Measure a sample of beer in a clear glass or hard plastic cup with a path of 5cm (use the bottom edge of the guide as a measure). If the glass is not 5cm wide, pour a depth of 5cm and look down through the beer.
- Use a pure white sheet of paper or white tablecloth as a background.
- Use a natural light source or artificial light approximating sunlight. Do not use a flashlight to provide extra light. The color chart guide and the beer must be viewed using the same light source. Avoid casting shadows with your body or the beer glass.
- Look through the beer at the white background.
- Place the BJCP color chart guide next to the beer so that the beer (as viewed with the white background) and the guide can be seen together. Compare the color palettes and find the closest match. An exact match is unlikely, so look for the closest lightness/darkness match rather than attempting to match hue. If the sample is in between two color patches, interpolate.
 Using the BJCP color chart guide, you can easily get an approximation of your beer color in SRM (Standard Reference Method) units. To convert your measurement into Lovibond or EBC, try this Brewtoad Color Converter.
And that’s how to measure beer color in your brews. Pretty simple? Be sure to record the color of your homebrew beer in your homebrew notes!
—–
David Ackley is a beer writer, brewer, and self-described “craft beer crusader.” He holds a General Certificate in Brewing from the Institute of Brewing and Distilling and is founder and editor of the Local Beer Blog.
Centennial Blonde Ale Recipe (All-Grain and Extract)
 If you’ve ever found yourself looking for a light, refreshing blonde ale recipe with a well-rounded American hop profile, this could be the one for you!
Homebrewer Kevin Mattie’s Centennial Blonde Ale recipe is a pale, sessionable beer at just 4.2% ABV. The grain bill includes US two-row pale malt as the base, using Carapils for head retention and a combination of light crystal and Vienna malts for flavor and color.
On the hops side of the equation, a mix of Cascade and Centennial hops provide enough bitterness to set it apart from lifeless macro beers, but not nearly as much as an American pale ale or IPA. The choice of hops provides a touch of that piney, citrusy American hop flavor and aroma we all know and love.
For yeast, Mattie uses Danstar Nottingham Ale Yeast, a versatile dry ale yeast that’s clean fermenting, easy to use, and affordable.
Between its balance, sessionability, and simplicity, this sounds like a great brew to have on hand for summer!
Centennial Blonde Ale
(5.5-gallon batch, all-grain)
Specs
OG: 1.040
FG: 1.008
ABV: 4.2%
IBUs: 21.5
SRM: 3.9
Ingredients
7 lbs. Two-row pale malt
.75 lb. Carapils/Dextrine malt
.5 lb. Caramel/Crystal 10L malt
.5 lb. Vienna malt
.25 oz. Centennial hops at :55 (2.4 AAUs)
.25 oz. Centennial hops at :35 (2.4 AAUs)
.25 oz. Cascade hops at :20 (2 AAUs)
.25 oz. Cascade hops at :5 (2 AAUs)
1 packet Danstar Nottingham Ale Yeast
All Grain Directions: Mash crushed grains in 11 qts. of clean water at 150˚F. Hold mash for 60 minutes. Sparge with enough water at 175˚F to collect about 6.5 gallons of wort. Boil for 60 minutes, adding hops according to schedule. Whirlpool and chill wort to 68˚F. Pitch yeast and ferment at 68˚F for 10 days.
Extract Option: Replace the grain bill with 5 lbs. light DME and 1 lb. Carapils/Dextrine malt. Steep the crushed grains for 1 hr. at 155˚F then strain out. Add DME and enough water to make a 6.5-gallon boil. (For a 5-gallon kettle, a 3.5-gallon boil is fine.) Bring wort to a boil and boil for 60 minutes, adding hops according to schedule. Whirlpool and chill wort to 68˚F. If needed, mix in enough clean, bottled water to make 5.5 gallons. Pitch yeast and ferment at 68˚F for 10 days.
More Beer Recipes:
- Anchor Steam
- Fuller’s London Porter
- Westmalle Tripel
- Sierra Nevada Celebration Ale
- Pliny the Elder Double IPA
—–
David Ackley is a beer writer, brewer, and self-described “craft beer crusader.” He holds a General Certificate in Brewing from the Institute of Brewing and Distilling and is founder and editor of the Local Beer Blog.
Master The Art Of Lagering Beer At Home
 Lagering beer is a process that is necessary to actually produce the characteristic of a lager beer. The word “lager” comes from the German word for stockroom or warehouse, and to lager your beer is to lay it down in storage at cold temperatures. To develop the smooth, clean flavors required of lagers, it’s essential to practice good lagering techniques, whether you are lagering beer at a brewer or lagering beer at home.
The practice of lagering beer was developed by Bavarians who placed their beer in cold caves to improve the beer’s stability – essentially so that it would keep through the warmer seasons. Over time, this practice isolated bottom-fermenting yeast strains that preferred those cooler temperatures. The lager yeasts we use today in homebrewing are derived from those strains.
One of the main characteristics of lager yeasts – and one of the reasons lagers are fermented at lower temperatures – is that they produce fewer esters and other aromatic components than ale yeasts. A good example of this is the difference between the fruity, spicy characteristics of a Belgian ale against a clean German lager. Depending on the style you’re making, you may or may not want those prominent yeast characteristics. With the possible exception of some high gravity lagers (like bocks), most lagers should not have prominent fruity esters.
One thing to look out for when lagering beer at home is diacetyl. Diacetyl is a natural byproduct of fermentation. In high concentrations, it smells and tastes just like movie theater popcorn. In most lagers, diacetyl should not be detectable, though some lager styles permit a small amount of it. Luckily, yeast consumes the precursors of diacetyl. A diacetyl rest – a small increase in temperature between primary and secondary fermentation – is sometimes used when fermenting a lager.
So how does one go about lagering beer at home? Follow the procedures below for a standard lager fermentation:
- Pitching: Lagers require 2-3 times as much yeast as ales. For an average gravity lager, two liquid yeast packets should be sufficient. For a high gravity lager, you may need three. You can also make a yeast starter to grow your yeast colony to the appropriate size. Check out Mr. Malty’s Yeast Pitch Calculator to figure out exactly how much yeast you should pitch into your lager.
- Primary fermentation: Ferment your Lager beer within the temperature range specified by the yeast strain you’re using, usually between about 48°-52°F, though it can vary by as much as 5°-10° on either side depending on the particular beer yeast you’re using. Try to keep the temperature consistent. If you have a cool basement, you may be able to try lagering your homebrew beer during the winter (or even year round depending on your location) without a fridge or freezer.
- Diacetyl rest (optional): For 1-3 days at the end of primary fermentation, allow the fermentation temperature to increase to about 60°-65°F. During this time, the lager yeast will reduce diacetyl in the beer.
- Lagering/cold storage: Transfer the beer to a secondary fermenter and store for 1-2 months at 32°-40°F. Most homebrew lager recipes call for a 1-2 month lagering period, though the occasional strong lager may be kept in cold storage for three months or longer. During this time the beer will condition and flavor will improve over time.
Have you every tried lagering beer at home? What’s your favorite lager style? Share in the comments below!
—–
David Ackley is a beer writer, brewer, and self-described “craft beer crusader.” He holds a General Certificate in Brewing from the Institute of Brewing and Distilling and is founder and editor of the Local Beer Blog.