Exploring the Maillard Reaction in Beer Brewing

Beer After Maillard ReactionI recently brewed a Munich Dunkel lager. Everything about the brew day went smoothly, but a mysterious flavor presented itself later on. What happened?
My theory: I had an excessive Maillard reaction in my beer while brewing, resulting in an attack of melanoidins. I know these may be some strange words for some of you, but please hear me out.
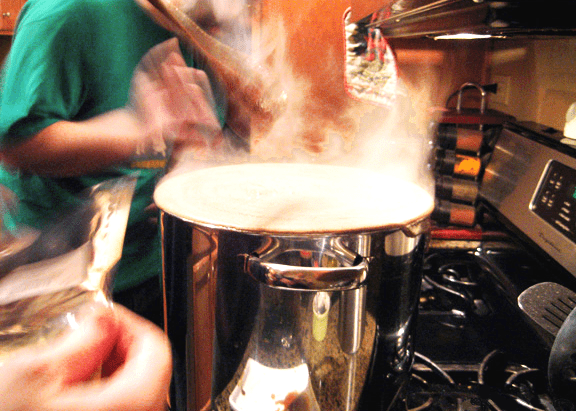
First let me share how my brew day went.
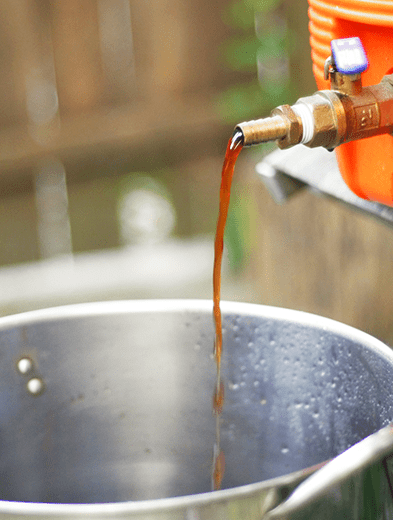
I was determined to brew a full five gallons of an all-grain batch, despite the fact that my brew kettle only holds five gallons. (A five-gallon batch of all-grain homebrew ought to have a kettle 7.5-gallons or larger.) The plan: mash enough grain for the five-gallon batch, collect 6+ gallons worth of wort by taking the first runnings, condensing, then the second runnings, condensing, and so on until I had enough sugars in the wort to eventually cut the batch with water and still reach my intended gravity. The brew day was long, but everything went pretty smoothly. I cut the batch with pre-boiled, pre-chilled water just before kegging to make my beer 5.6% ABV.
When I tasted the beer after secondary fermentation, I was excited by the depth and intensity of flavor. After packaging the beer, however, I was a little surprised to find a lingering sweet toffee flavor. Was it something in the beer recipe? The ingredients? That didn’t seem likely since some Munich Dunkles are made with as much as 100% Munich malt. Was the beer under attenuated? No. 71% attenuation is on par for Bavarian lager yeast. Was the beer under hopped? That couldn’t be it either. Even after diluting, my calculated bitterness was 25 IBUs. There must be something else at play.
Some online research led me to a new hypothesis: melanoidins.

What are melanoidins?
Shop All Grain System
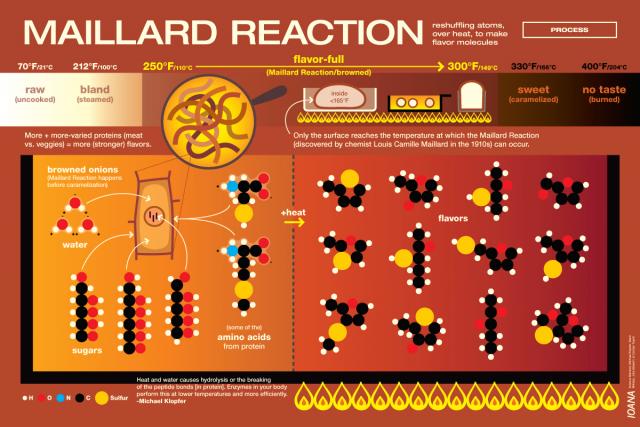
Melanoidins are formed when sugars and amino acids react together while heated in the presence of moisture. This reaction is called the Maillard reaction. The Maillard reaction is responsible for browning and flavor development in a variety of cooking applications. It’s often confused with caramelization, but in the context of boiling wort, what we usually encounter is the Maillard reaction in beer or home brewing.
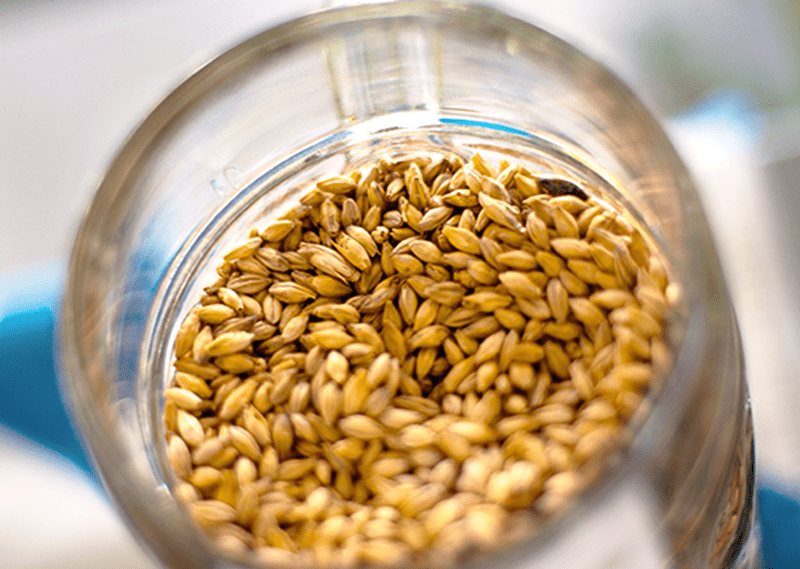
Melanoidins, which contribute flavors of toffee, nuts, and bread crusts, are present in some degree in a variety of malts, but can also be developed during the boil. The chemistry gets complicated pretty quickly:

“…reducing sugars interact with amino compounds (e.g., amino acids, simple peptides) to initially yield Schiff bases. These give rise to aldosamines and ketosamines by Amadori rearrangements. The latter may condense with another sugar molecule to form diketosamines, which are unstable and break down to give a range of products including hydroxymethylfurfural and reductones, and some of these products interact and polymerize to melanoidins.” – from “Melanoidins”, by Hornsey, Ian. The Oxford Companion to Beer. Oliver, Garrett; Colicchio, Tom (2011-09-09).

Makes complete sense now, right? Ha!
Let’s try the graphic approach.
Maillard Reaction Graphic

My theory is that the prolonged boil in this particular brew day resulted in an excess of melanoidin formation. The Munich Dunkel is supposed to have some melanoidin flavor, so it’s not a tragic fault, just a little out of balance. Luckily, I found that by increasing the carbonation on the keg, I could reduce the impact of the toffee-like after taste caused by the Maillard reaction in my beer.
Two lessons here:

  1. Pay attention to your boil time. Don’t go lengthening your boil time willy-nilly. While an extended boil may be beneficial for a Scotch ale, bock, or stout, it wouldn’t be appropriate for a lighter beer like a Kölsch or a pilsner.
  1. Shop Brew KettlesBrew within your limits. If I had been content with a three-gallon batch, I probably could have avoided the excessive melanoidins. Alternatively, I could have brewed two smaller batches, or done a partial mash brew using Munich malt extract instead of working so hard to condense the wort.

Well, lesson learned. But that’s one of the fun things about brewing, right?
—–
David Ackley is a beer writer, brewer, and self-described “craft beer crusader.” He holds a General Certificate in Brewing from the Institute of Brewing and Distilling and is founder and editor of the Local Beer Blog.

How to Harvest Yeast from Commercial Beer

Harvested Commercial Beer YeastWhen brewing homebrew clone recipes, yeast selection can often determine how accurately the clone represents the original beer. Luckily, many breweries are happy to share information about what strain of yeast they use, and these yeasts are often the same as the yeast strains currently available to homebrewers. Occasionally however, a brewery will use a proprietary strain of beer yeast that is not available on the market. So how does a homebrew get their hands on that coveted yeast? These are the times when a homebrewer may need to harvest yeast from commercial beer.
Many commercial breweries filter their beer, but once in a while you will come across a bottle or can that’s been re-fermented in the bottle – just like bottling on the homebrew level. A thin layer off yeast can be found at the bottom of the bottle or can. (Belgian brewers are famous for this; Sierra Nevada and the Alchemist’s Heady Topper are other examples.) With proper technique and impeccable sanitation, a homebrewer can actually harvest the beer yeast from the commercial beer, grow it into a pitch-able yeast culture, and use it to create an accurate clone of a commercial beer.
Let me reiterate:
When you harvest yeast from commercial beer, sanitation is crucial! Wild yeasts and bacteria will leap at the opportunity to grow in your yeast starter, so don’t give them the chance. Take care in every step to avoid contaminating your yeast culture.
I recently attempted to harvest yeast from a can of Bell’s Oberon Wheat Ale. The culture is waiting for my next batch. Follow the instructions below to harvest yeast from commercial beer:Shop Stir Plate

  1. Wash your hands and thoroughly clean and sanitize your workspace.
  1. Before opening the bottle or can, submerge it or spray it with your sanitizer of choice and allow to dry. This will sanitize the outside of the bottle or can.
  1. Prepare a sterilized mason jar, glass bottle, or flask. A drilled bung with an airlock is ideal, but at this phase, you can also just use a lid or bottle cap. Either soak the jar and its lid in sanitizer or boil in water for 20 minutes to kill off any rogue yeast or bacteria. Allow to cool to room/pitching temperature.
  1. Prepare a starter wort for the yeast using 1 cup of water and 100 grams of light dried malt extract or yeast food starter. Boil them together for 20 minutes to sterilize, then pour into your jar and cool to pitching temperature.
  1. Open the commercial beer and pour 90% of it into a glass. This is for you to drink and enjoy!
  1. Swirl the remaining beer and yeast and pitch into your starter container. Seal and allow to ferment. If you have a magnetic stir plate, use it, otherwise occasionally swirl the starter to give the yeast oxygen so they can reproduce.
  1. In a few days, you will have grown the yeast Shop Liquid Beer Yeastconsiderably, though it may be hard to detect with the naked eye. The yeast sample can be kept in the refrigerator until you’re ready to step it up. Use it as soon as possible, as it will lose viability over time. Follow the instructions for preparing a yeast starter to pitch your yeast culture into a five-gallon batch of homebrew!

Have you ever harvested yeast from commercial beer? What was the beer? How did it go? How did you culture the yeast? How did you prepare the yeast starter? Give any details you like in the comments section below.
—–
David Ackley is a beer writer, brewer, and self-described “craft beer crusader.” He holds a General Certificate in Brewing from the Institute of Brewing and Distilling and is founder and editor of the Local Beer Blog.

Own A Napa Vineyard

Yes, that’s right! You can own your own vineyard (2 vines) in California’s coveted Napa Valley for one year. Then have the crushed grapes sent to you so you can make your own Napa wine. This is a spectacular offer at a spectacular price. Quality, Napa-grown grapes sent to your door.
Here’s How It Works!
Carneros Della Notte vineyard in Napa valley is leasing their vines for one year. They will send you a certificate of ownership and mark your 2 vines by tagging them with whatever vineyard name you choose. Once the grapes (Pinot Noir) are harvested (in September), you have the option of having them sent to you so your can make your own private estate wine. Carneros Della Notte will contact you about how to do this shortly before the harvest. The crushed grapes will come to you directly from the vineyard in a 5 gallon package, crushed, and ready for fermentation. Just pay shipping.
Here’s What You Get:

  • A vineyard lease for one year (2 vines)
  • Certificate of ownership of your Napa vineyard, suitable for framing.
  • If you like, the opportunity to come visit your vines anytime. Please call ahead.
  • 2 invitations to the estate’s Annual Night Harvest Party.
  • The option of having the 5 gallons of crushed, Napa-grown, Pinot Noir grapes sent to you.
  • And as a bonus, 50% all Carneros Della Notte wine during the year.

Happy Winemaking,
Ed Kraus
—–
Ed Kraus is a 3rd generation home brewer/winemaker and has been an owner of E. C. Kraus since 1999. He has been helping individuals make better wine and beer for over 25 years.

Essential List Of British Beer Styles

Row Of British BeersAlong with Germany and Belgium, England is one of the epicenters of old world brewing. It’s the birthplace of such British beer styles as India pale ale, milk stout, and barley wine, to name a few styles.
From brown ales and bitters to porters and IPAs, many of the beer styles we know and love here in the US have their roots in England. Here is a list of British beer styles that put England on the world brewing map. This list is basic list with descriptions:

  • Mild – A mild ale is an English session beer, usually below 4% ABV. It’s dark in color, typically copper or brown. Milds tend to be malt forward with an emphasis on caramel, toast, and nutty flavors, often due to the use of mild ale malt. English ales such as these are often served from a cask, giving them a low carbonation and excellent drinkability – perfect for a long afternoon at the pub!
  • Bitter – Bitters refer to a group of English pale ales. Not surprisingly, this British beer style is more strongly hopped than Milds, though not usually as hoppy as American pale ales. It’s common to see some classic English hops featured in bitters, such as Challenger, North Down, Fuggles, and Kent Goldings. Like Scottish ales, bitters are named based on their alcoholic strength, with bitters being the most sessionable (about 3.5% ABV), special bitters containing a bit more of a punch (4-4.5%), and extra special bitters or ESBs packing the biggest wallop (about 5-6%). Brew your own English Bitter with the Brewer’s Best English Bitter recipe kit.
  • India Pale Ale – Though American brewers have adopted the IPA as their own, India Pale Ale is a British creation. India Pale Ales were brewed using more malt and more hops to help the ale survive the trip to India in the 19th century. The extra malt increased alcohol content, while the extra hops increased their preservative effect. An English IPA will be marked by the use of English ingredients, especially English hops like Northern Brewer, Challenger, Brewer’s Gold, Fuggles, and Kent Goldings.Shop Beer Recipe Kits
  • English Brown Ale – There are two distinct styles of English Brown Ale: Northern and Southern. The Northern Brown tends to be higher in gravity, slightly more bitter, and drier in the finish than the Southern version. The flavor of the Northern Brown Ale tends to be more nutty that caramel. Southern English Brown Ales are sessionable (usually under 4% ABV) with an emphasis on sweet malt flavor. There may be some flavors of dark fruit.
  • Porter – Porter was reportedly born in London and named after the porters who loved it so. This English beer style is a dark, brown ale, somewhat lighter in body than a stout. You can brew a clone of a popular English porter with our Steam Freak S. S. Tadcaster Porter recipe kit.
  • Milk Stout – Stout came about as a stronger version of porter. (Learn about some of the differences between stout and porter.) Stouts generally use more specialty malts like caramel malt, chocolate malt, and black malt than porter, and also more roasted barley. A milk stout, or cream stout, was invented in London. In addition to the ingredients above, it uses lactose sugar to sweeten it and give it extra body. Brewer’s Best offers a delicious Milk Stout recipe kit.
  • Shop Home Brew Starter KitBarley Wine – Barley wine is a strong ale brewed to the strength of wine, but using barley as the fermentable. It typically ranges from 7-12% ABV. Learn some tips for how to craft your own barley wine recipe on the E. C. Kraus Homebrewing Blog!

What are some of your favorite British beer styles? Did we miss something in our basic list of beer styles? Share in the comments below!
—–
David Ackley is a beer writer, brewer, and self-described “craft beer crusader.” He holds a General Certificate in Brewing from the Institute of Brewing and Distilling and is founder and editor of the Local Beer Blog.

A Quick Look At The Different Types Of Specialty Malts Used To Make Beer

Specialty Malt For All Grain BrewingWe recently covered a number of popular base malts, which form the majority, or foundation, of a given all-grain beer recipe. Most homebrew recipes will incorporate a small to moderate amount of specialty malts to give the beer additional character, color, and flavor. Every specialty malt has its own unique characteristics that it adds to a beer, which may be used alone or combined with other specialty malts to create a certain malt profile.
So what are some of the most popular specialty malts used in beer? Here’s a rundown of the descriptions of the different types of specialty malts you might use for partial-mash or all-grain brewing.

Most specialty malts are made from barley grain, but these first two are made from wheat and rye.

  • Wheat malt – Wheat malt is an adjunct grain that provides bready wheat flavor, body, head stability, and diastatic power, with little impact on color. A little may be added to ales and lagers, or a larger portion may be the backbone of a German weizen. If using a substantial amount of wheat, rice hulls are recommended to prevent a stuck mash.
  • Rye malt – Rye malt can be used in many of the same ways as wheat malt, but provides a distinctly different flavor, often described as spicy. Think of the flavor difference between wheat bread and rye bread. Rye also contributes body, and sometimes a mouthfeel described as oily or slick. Most rye pale ales will only use about 10-20% rye malt, while a German roggenbier may use as much as 100%.

All of the descriptions below are for the different types of specialty malts used in beer that are made from barley grain:

  • Carapils® malt – Carapils®, or dextrin malt, is a very lightly colored malt used to increase body and head retention without affecting color. This is accomplished due to the higher level of unfermentable dextrins in this malt. Generally only 5% or less is used in a grain bill.Shop Barley Grains
  • Munich malt– Munich malt can be used as either a base malt or a specialty malt. It is commonly added in smaller amount (1-2 lbs.) to add a malty or bready depth of flavor to the grain bill, though beers may be made with up to 100% Munich malt. Munich malt contains enough diastatic power to self-convert.
  • Aromatic malt – Aromatic malt is a Belgian-style Munch malt contributing, rich, sweet, toasted, and malty flavors to a beer. Commonly used in brown ales and darker Belgian styles such as dubbels.
  • Victory® malt – Victory® malt is a trademarked specialty malt made by Briess. As a lightly roasted malt, it has a nutty, biscuit-flavor characteristic. A small amount (~5%) may add a slight biscuit flavor to a lighter ale or lager. Use more in a darker beer to bring out those same flavors. No diastatic power.
  • Special B – Special B is another darker Belgian-style malt. At 118˚L, it is only appropriate for use in darker beer styles. For example, a pound in a Belgian dubbel or barleywine will contribute strong flavors of raisin or toffee.
  • Caramel malt – Of all the different types of specialty malts, this category is the broadest. A wide range of caramel and crystal malts provide color, body, and flavor to a number of beer styles. They’re rated by color, from 10 to 120 degrees Lovibond. At the lower end of the spectrum, they may offer flavors of caramel, biscuit, or honey. Sweet malt flavors become more rich into the 60 to 80 range. Caramel 90 and 120 offer darker color and flavors of raisins, dates, and burnt sugar. All caramel malts will contribute some unfermentable dextrins to your beer, increasing body and head retention.
  • Carafa malt – This type of specialty malt is a very dark, de-bittered roasted malt. Use it when aiming for a beer with color, but no astringent, roasted bitterness. Commonly used in swarzbier, dunkel, and black IPA, but also works in less roasty stouts and porters. Very dark at 500˚L.Shop Barley Crusher
  • Chocolate malt – A dark roasted malt offering chocolate flavor. A pound is plenty in a five-gallon porter or stout, though as much as two pounds may be used. A very small amount can be used to adjust color in amber or red ales.
  • Black patent – A very dark, very bitter specialty malt. Too much may make your beer taste burnt. Generally, 1-4 oz. of black patent in a stout will contribute plenty of dark roasted flavor and color.

This is just a brief list of the more common different types of specialty malts along with a description of their basic characteristics. There are many other specialty grains available that can used in beer as well. What are some of your favorite specialty malts?
—–
David Ackley is a beer writer, brewer, and self-described “craft beer crusader.” He holds a General Certificate in Brewing from the Institute of Brewing and Distilling and is founder and editor of the Local Beer Blog.

Is Feeding Sugar During The Fermentation Necessary?

Feeding Sugar To FermentationI am making two recipes of Peach wine now and want to know why they call for feeding sugar during the fermentation instead of adding it all at once? Adding the initial amount I get a reading of 1.055. What is the reason for adding of the sugar this way?…
Mark M. – GA
—–
Hello Mark,
It is the thinking of some home winemakers that by feeding sugar during the fermentation you are making it easier for the wine yeast to ferment. If you add the sugar incrementally, you are less likely to have a stuck fermentation.
The reason for this is because you are not ever letting the sugar concentration of the wine must get too high with this method: you put some sugar in the wine must; the yeast ferments it into alcohol; and then you add some more.
There is some valid reasoning behind this, but it sounds like the wine recipe you are looking at is taking it a little too far.
Too much sugar in any liquid can act as a preservative. As the sugar concentration goes higher, yeast, bacteria, molds, all have a more difficult time fermenting. The is why sugar syrups do not spoil at all. The sugar concentration is so extreme that nothing can touch it.
This is true for a wine must, as well. Sugar acts as a preservative on the wine must. As the sugar concentration goes up in a wine must, it becomes increasingly difficult for the wine yeast to ferment. However, if you are targeting an alcohol level of 14% or lower, you should not have any issues in this regard. The yeast can easily ferment the amount of sugar required to make 14% or less all at once. In these situations feeding the sugar to the fermentation is nothing but needless, extra work. You can go ahead and put all the sugar in at the same time.Shop Hydrometers
The winemakers that like feeding sugar during the fermentation are typically the winemakers who are trying to drive the alcohol up as much as they can in their homemade wine. The process of feeding sugar during the fermentation becomes necessary if you are trying to produce all the alcohol you can with the wine yeast.
The winemaker would start out by adding enough sugar to ferment 13% – 14% alcohol. As the fermentation began to run out of sugar and slow down, they would then add a little more to extend the fermentation. They would continue to add sugar in increasingly smaller amounts until the wine yeast couldn’t ferment anymore.
In this situation you are fighting two elements: the preservative effects of sugar and the preservative effects of alcohol. Just like when the sugar levels go up, the yeast have a harder time fermenting, the wine yeast have a harder time fermenting when the alcohol level goes up. This means that later in the fermentation things keep getting tougher and tougher to accomplish. The increased alcohol starts to preserve the wine, making the fermentation all that more sensitive to the sugar concentration levels.
I for one do not recommend driving the alcohol up with sugar for the simple reason that the wine will taste watery and out of balance. This is because of the numbing effects of alcohol on the tongue. We can no longer taste the fruit of the wine, only the hot of the alcohol.Shop Wine Making Kits
Mark, if I were in your shoes, I would forget about feeding sugar during the fermentation regardless of what the wine recipe directions say. Instead, I would simply use my hydrometer to determine how much sugar to add to end up with a wine that’s 12% or 13%. Just keep adding sugar until the potential alcohol scale on the hydrometer reads somewhere in this area.
Happy Winemaking,
Ed Kraus
—–
Ed Kraus is a 3rd generation home brewer/winemaker and has been an owner of E. C. Kraus since 1999. He has been helping individuals make better wine and beer for over 25 years.

5 Most Common Beginner Home Brewing Mistakes

Beginning Homebrewer v2Let’s face it: anyone can mess up a batch of beer. That said, people have been brewing beer for thousands of years and have learned a thing or two about how to do it. As a beginning home brewer, you have a wealth of information at your disposal to help you avoid falling into the common pitfalls. To help you avoid them, here are 5 of the most common beginner home brewing mistakes made by beginners:

  1. Lax cleaning and sanitation – Most homebrewers have heard that cleaning and sanitation are among the most important parts of homebrewing, yet it’s hard to know exactly what to do when you’ve never brewed before. Soak in One Step. Wipe down every surface with a damp cloth. Scrub with a non-abrasive brush if needed. Check all the nooks and crannies (especially bottling spigots!). No visible debris should remain. Sanitize using Star San or Iodophor following the manufacturer’s specifications. After the boil, aerate, pitch yeast, and don’t let anything else contact your brew that hasn’t been properly sanitized. Follow these steps and you will be fine.
  1. Adding 5 oz. of priming sugar no matter what – Rant warning: This is sort of a pet peeve of mine. Most homebrew recipe kits come with five ounces of priming sugar and they instruct the brewer to mix it all in on bottling day. It only takes a couple batches of foaming bottles to figure out something isn’t right. Get a digital scale and read how to avoid over-carbonating your homebrew.
  1. Brewing without temperature control Shop Homebrew Beginner KitThe very first batch I brewed was a German Oktoberfest. The salesperson at the shop where I bought the kit said I could just use an ale yeast. Sure, the beer turned out fine, but it was a stretch to call it a true Oktoberfest. Don’t sell yourself short and try to brew a lager as an ale. Even when you are brewing ales, pay attention to fermenting temperature and try to keep it within the recommended range for the yeast strain you’re using. Your beer will be immensely better for it. Read Controlling Homebrew Fermentation Temperatures for additional advice.
  1. Under pitching yeast – Another one of the most common beginner home brewing mistakes is under pitching. A lot of people will tell you that liquid yeast is the way to go because it offers more options and better flavor. This may be true in some cases, but you will almost never want to pitch just one pack of liquid yeast into your homebrew. This is because beer requires a certain number of yeast cells for a healthy fermentation, and a liquid yeast culture rarely contains enough. If you must use liquid yeast, prepare a yeast starter the day before. Alternatively, a 11.5-gram pack of dry yeast contains enough cells to ferment a standard five-gallon batch. Read more about pitching rates at Mr. Malty.Buy Temp Controller
  1. Worrying – There’s a reason Charlie Papazian’s mantra is known by homebrewers the world over: worrying is the exact opposite of what homebrewing is all about! Granted, there are occasions when you should be concerned about what’s happening with your brew, but you can prevent further mistakes by just letting go of worry. If you’re dealing with an infection or some mishap that may force you to throw out your beer, so be it, but nine times out of ten your batch will come out just fine. Read how Bryan Roth learned how to “Relax, Don’t Worry, and Have a Homebrew” in his guest post, Hops, Malt, & Zen.

Surely there are other things that can go wrong, but these are the most common beginner home brewing mistakes. What mistakes did you make when you were first starting out?
—–
David Ackley is a beer writer, brewer, and self-described “craft beer crusader.” He holds a General Certificate in Brewing from the Institute of Brewing and Distilling and is founder and editor of the Local Beer Blog.

Sanitizing Wine Making Equipment May Be Easier Than You Think!

Wine Bottles After Sanitizing Wine Making EquipmentI am filling up my shopping cart with everything I need to start making wine in one large order. I see there are several products for sanitizing wine making equipment. What’ the best sanitizer for wine making? Can you explain how to sanitize the wine making equipment? Should certain cleaners and sanitizers be used for certain materials (glass vs plastic vs stainless steel)? Are there also different recommendations for wine types? I have read on some forums that Campden tablets can add sodium to the wine is should never be used, and others say there is no difference. What are your thoughts?
Joe – CO
—–
Hello Joe,
Thanks for your great questions about sanitizing wine making equipment. And, thanks for the order you are sending our way. It is truly appreciated!
Before you use any sanitizers, the wine making equipment should be soapy-clean. None of these sanitizers have any detergent quality to them that will help you with the grime. The wine making equipment needs to be visibly clean, first. Once you have your equipment soapy-clean then any of these sanitizers will work equally well. Any of them will be adequate for sanitizing wine making equipment to the level needed to keep your wines from spoiling.
With that being said, some are easier to use than others; some work better in certain situations than others. There are some debates as to which product is the best sanitizer for wine making. In general, I try to stick with sanitizers that don’t require any rinsing when sanitizing my wine making equipment. This is simply for the mere fact that they require less work.
The two sanitizers I personally like are Basic A and One-Step. Either of these are great for large surface areas such as fermenters. Neither require rinsing, and in fact, work better if you don’t rinse them. They are oxygenating cleansers, which means that they do their sanitizing as they air-dry on the surface of the wine making equipment. You just wet the surface and allow to air-dry.Shop Basic A
Either of these sanitizers will work for smaller items such as air-locks and rubber stoppers, but for these types of items I prefer to use sodium metabisulfite. It works a little differently than an oxygenating cleanser in that when the sodium metabisulfite is mixed with water, the vapor that comes off of the solution is what does the actual sanitizing of the wine making equipment.
One simple thing I like to do is put a few inches of this solution in the bottom of a bucket fermenter; put in all my hoses, utensils, air-locks an anything else the will fit; and then seal it up air-tight for 30 or 40 minutes. Afterword, all you need to do is dump the solution out. No rinsing is necessary.
Sodium metabisulfite is also what I prefer to use for sanitizing wine bottles. All you need to do is put an inch of the solution in the bottom of each wine bottle for 30 minutes. Dump the solution out right before filling with the wine. No rinsing is necessary.
As for the using Campden tablets you mentioned, they could be used as well for sanitizing wine making equipment, but it is much easier to use sodium metabisulfite. They are essentially the same thing only the sodium metabisulfite is in powder form, not in tablets that need to be crushed up into a powder.
Shop Sodium MetabisulfiteYou mentioned Campden tablets adding sodium to the wine. There is very little truth to this at all. Most Campden tablets are made from potassium metabisulfite, not sodium metabisulfite. From a sanitation standpoint they work the same way, only one leaves behind residual potassium, not sodium.
When sodium metabisulfite is used as a sanitizer, the amount of sodium left behind is so small as to be undetectable. When sodium metabisulfite is added directly to the wine throughout the normal course of the wine making process, the amount of sodium added to the wine is less than one slice of pickle to 2 cases of wine – no way noticeable of or any significance.
Joe, I hope this answers your questions. Sanitizing wine making equipment is an important process. It’s shouldn’t be taken lightly or glossed over.
Happy Winemaking,
Ed Kraus
—–
Ed Kraus is a 3rd generation home brewer/winemaker and has been an owner of E. C. Kraus since 1999. He has been helping individuals make better wine and beer for over 25 years.

Killer Braggot Beer Recipe! (Extract & All-Grain)

Braggot BeerHave you ever heard of braggot beer? Braggot (also spelled bragot, bragaut, bracket, brackett, bragawd) is simply a hybrid between a beer and a mead, or a beer fortified with honey. I dove into Randy Mosher’s book Radical Brewing to learn a little more about brewing a braggot and discovered an easy braggot beer recipe for both extract and all-grain brewing.

Some Braggot History
With all the different types of beers out there and all the varieties of honey, to define a braggot (as one writer puts it) “with any degree of preciseness would be as difficult as to give an accurate definition of ‘soup.’” A braggot beer style is one that is hard to define. Though the name for braggot suggests origin in the British Isles, honey beers have been made for thousands of years in various regions around the world. The Hymn to Ninkasi, a Sumerian text dating to 1800 BC, mentions honey as a brewing ingredient.
Braggot seems to have gained some popularity in England in the mid-1500s. In addition to malt and honey, various herbs, spices, and fruits often found their way into a braggot beer recipe. Various accounts include cinnamon, pepper, cloves, heather, and ginger. Except for the most recent interpretations, hops were probably not used in braggot beer. Alcohol content was likely high. According to Mosher, braggot essentially disappeared in the mid-1800s and didn’t make a comeback until the recent homebrewing movement.

Brewing a Braggot Beer Recipe
Because of the elusive bragget beer style, as might be expected, the BJCP Guidelines for braggot give the homebrewer a lot of leeway. The overall impression should be “a harmonious blend of mead and beer, with the distinctive characteristics of both.” If using a base beer style, the braggot should retain some characteristics of that style. Other than that, pretty much anything goes, though the brewer should pay special attention to the characteristics of the particular honey being used.
Based on my experience, I recommend adding honey to a tried and true beer recipe (something that isn’t too hoppy, like a brown ale) to get a sense of the honey’s flavor, aroma, effect on fermentation, etc. Start with a pound of honey in a five-gallon batch, then increase to two pounds the next time around. Eventually you will find the balance that you enjoy. To preserve the aromatic qualities of the honey, I suggest adding it at the end of the boil, pouring it into the wort right after you turn off the heat.
Shop Steam Freak KitsIf you’re ready to take the plunge with a more adventurous braggot beer recipe, try this one from Radical Brewing:

BRONZE AGE BRAGGOT BEER RECIPE
Specifications
Batch Size: 5 gallons
OG: 1.100
ABV: 12-13.5%
IBUs: none
Ingredients (Braggot Recipe All-Grain)
8 lbs. wheat malt
8 lbs. cranberry honey
1 lb. two-row malt
0.1 oz. bog myrtle
1 wintergreen Lifesaver and a few drops of liquid smoke (or a few ounces of smoked malt)
1 packet wine yeast (such as Lalvin D-47)
Ingredients (Braggot Extract Recipe) 
6 lbs. Wheat LME
8 lbs. cranberry honey
0.1 oz. bog myrtle
1 wintergreen Lifesaver and a few drops of liquid smoke (or a few ounces of smoked malt)
6 lbs. cranberries, frozen then thawed (or 1/2 gallon of pure cranberry juice)
1 packet wine yeast (such as Lalvin D-47)
Directions: For all-grain, mash the grains with 1.5 qts. of water and hold at 150°-154°F. for 60 minutes. Sparge to collect 3-4 gallons of wort and bring to a boil. (For extract, mix LME with 3 gallons water and bring to a boil.) Add the bog myrtle and boil for 60 minutes. Turn off the heat and add the Lifesaver and liquid smoke (if not using smoked malt). Mix in the honey. If needed, top off with enough clean water to make five gallons.Shop Home Brew Starter Kit
Cool to about 60°F., aerate, and pitch yeast. Towards the end of primary fermentation, transfer to a sanitized secondary fermenter containing the cranberries or cranberry juice. Allow to ferment for an additional 2-4 weeks, then transfer to a third fermenter and allow to clear. Traditionally, this type of braggot beer would be still, but you may carbonate if you wish.
A final word of advice: Whenever doing heavy homebrew experimentation, it’s a good idea to start with a small batch, as little as one gallon. Honey can be expensive, so it’s worth giving your braggot a few tries to get the braggot beer recipe right. You may wish to cut the above recipe in half the first time around.
Have you made a braggot before? Share your tips in the comments!
—–
David Ackley is a beer writer, brewer, and self-described “craft beer crusader.” He holds a General Certificate in Brewing from the Institute of Brewing and Distilling and is founder and editor of the Local Beer Blog.

Break-It-Down! How To Evaluate Homebrew Beer

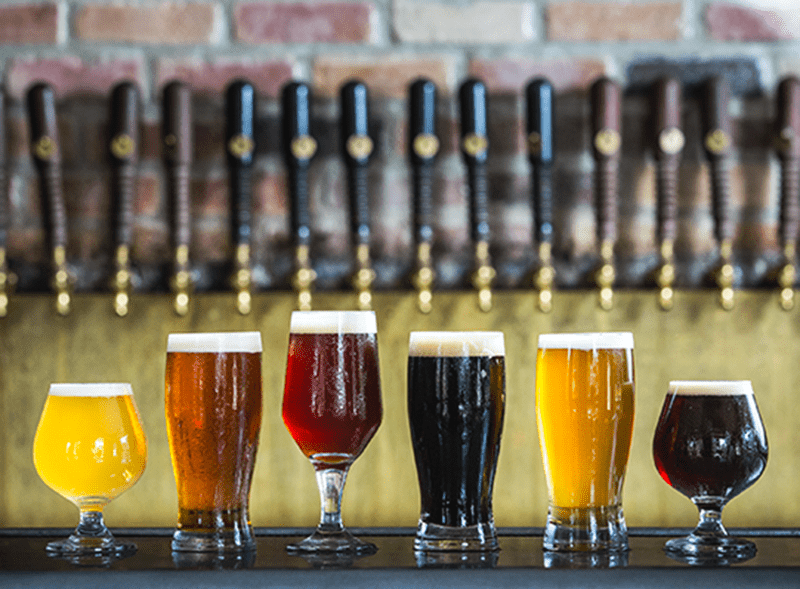
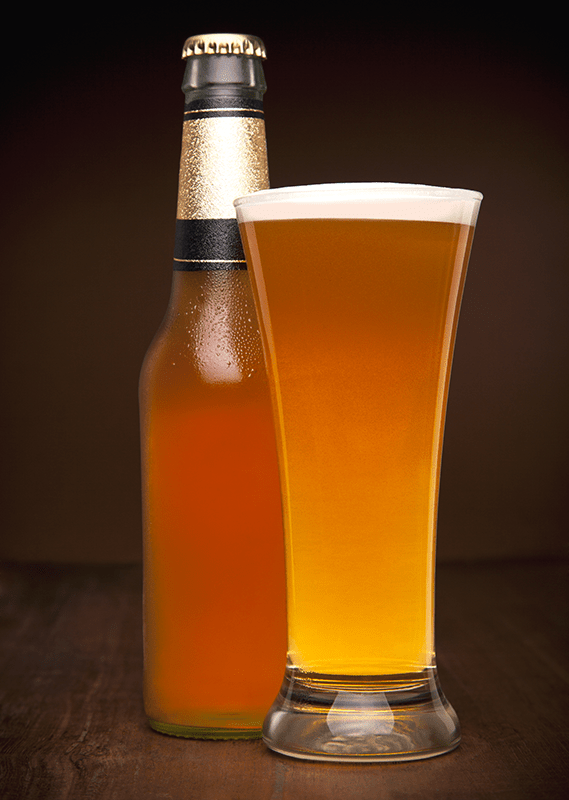
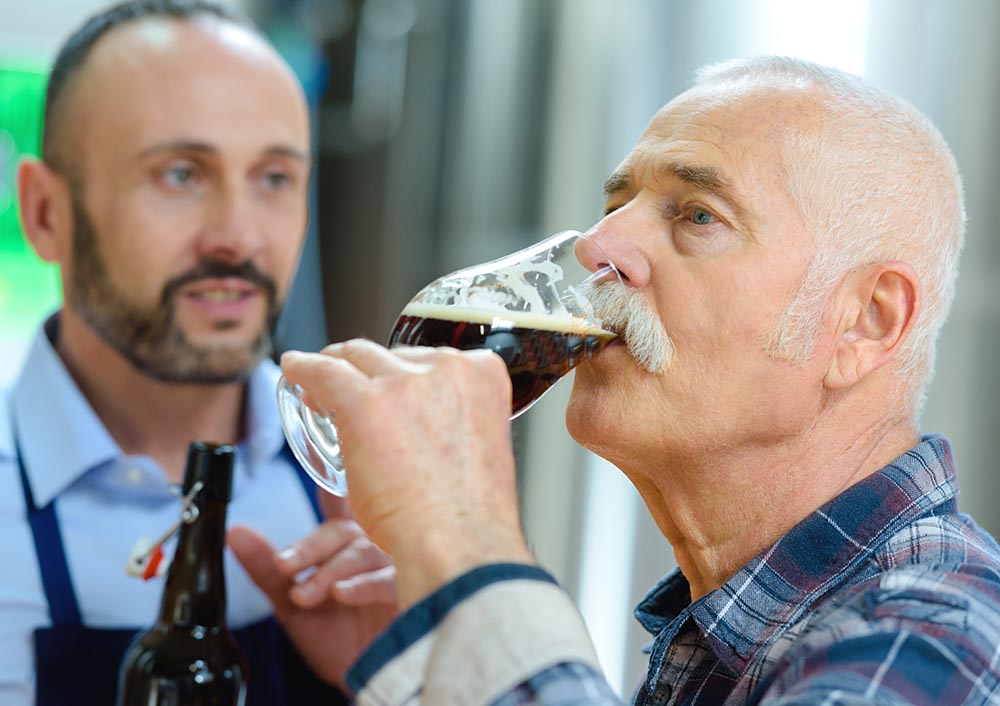
After weeks of patiently (or maybe not so patiently) waiting for your home brewed beer to ferment and condition, now comes the best part – drinking the fruits of your labor! Yes, there’s a time and a place for quaffing without paying much attention to what’s in the glass, but this is craft beer. Drinking it is an experience that involves all the senses, and the experience is just part of the reason why we love homebrewing to begin with. With that in mind here’s how to evaluate homebrew beer.
When evaluating home brew we generally pay attention to smell, sight, taste, mouthfeel, and overall impression. Keep in mind certain characteristics can be good or bad depending on the style being analyzed.

  • Aroma: When evaluating beer, aroma often comes first in a tasting session so we can analyze scents before they dissipate. We look for aromas from the malted grains: toast, biscuit, caramel, molasses, dates, chocolate, roast coffee, smoke. From the hops we can expect sensations of citrus, pine, or herbs. But try to go beyond the top-level descriptor. If citrus, is it orange, lemon, or grapefruit? We may also pick up earthy, onion-y, or woody aromas from the hops. Do you smell any alcohol? What characteristics can you pick up from the beer yeast? Bread, cloves, fruity esters? Finally, can you pick up any off-flavors? Some scents (burnt rubber, sulfur, wet cardboard) indicate a problem, while others may or may not be desirable depending on the style of beer in question. You may even want to start making some tasting notes.Shop Home Brew Starter Kit
  • Appearance: What color is the home brew? Don’t just look at whether it is cloudy or clear, but how cloudy is it? Opaque, or just a little hazy? Look at the head of foam. In published beer reviews, reviewers often measure the height by finger-width. (i.e. a two-finger head) Is the texture rocky or creamy? Is the carbonation effervescent or sparkling? How about lacing? Does the foam stick to the insides of the glass as you drink the home brew beer?
  • Flavor: When evaluating a beer you will find that, taste shares many of the same characteristics and descriptors as smell, as the two senses are closely related. You can use many of the same words in evaluating the beer’s flavor. Is the taste identical to the aroma? Is it what you expected? What are the differences? How does the flavor change as the home brew moves across your tongue, from the initial sensation to the finish? How does the home brew beer change as the glass warms in your hand?
  • Mouthfeel: Evaluate the beer’s body, carbonation level, and dryness. Is the body light, medium, or full? How highly carbonated is the home brew? Is the beer smooth from the use of wheat or oats? Dryness and astringency cross the line between taste and feel. Does the homebrew beer make your mouth pucker? This may be a desirable sensation for sour beers, but not so much for a milk stout.Shop Conical Fermenter
  • Overall impression: Put it all together. Do you like the homebrew? Would you drink a whole pint of it? Does the beer fit your expectations for the style? How is the balance?

Learning how to evaluate homebrew beer is as much about expanding your vocabulary as it is about enhancing your palate. Making tasting notes that will be relevant when read later. Not only can you train yourself to detect subtle flaws in your homebrew beer, but you can use your tasting abilities to inform future beer recipes. Keep in mind that different people have different palates, so it often helps to do a tasting with a group. Besides, it’s more fun that way!
Want to take your tasting abilities to the next level? Become a BJCP Beer Judge!
—–
David Ackley is a beer writer, brewer, and self-described “craft beer crusader.” He holds a General Certificate in Brewing from the Institute of Brewing and Distilling and is founder of the Local Beer Blog.