 Hello Kraus,
Please explain to me what is the difference between wine grapes and table grapes.
Thank you,
Mert B.
—–
Hello Mert,
This is a great question and one that gets down to the basics of learning how to make your own wine.
There are many significant differences between wine making grapes and table grapes – eating grapes as you called them:
Table grapes are crunchy-er with a stronger skin and firmer pulp than wine grapes. This not only makes them more pleasant and appealing to eat, but it also makes them hold up to the rigors of being transported long distances to your local market. As a consequence, grape you buy at the store tend to have less juice in relation to the amount of pulp.
The juice you get from the eating grapes is also not as sweet as the juice from wine grapes. A typical brix reading for table grapes is 17 to 19, whereas wine grapes are around 24 to 26 brix. This is important because it is the sugar that gets turned into alcohol during a fermentation — less sugar, less alcohol.
*Brix is a scale that represents the amount of sugar in a liquid as a percentage. It is the standard scale used by refractometers which are used to take these readings in the vineyard.
Another significant difference is that the acidity level of table grapes tend to be slightly lower that the average wine grape. This is to increase the grapes impression of sweetness while on the market. 
Having said all this, you can learn how to make your own wine using grapes you buy from the grocery store. You can run them through grape presses to get all the pulp out of the way. You can add extra sugar to bring the brix level up to that of a wine grape juice. And, you can adjust the acidity of the juice by adding acid blend to raise the acid level to what’s need for wine.
But all of this will not change the leading factor that makes a table grape far different from a wine grape… and that is flavor. While table grapes taste fine for popping into your mouth as a snack, once fermented, the flavor of the resulting wine is fairly uneventful and could also be described as non-existent.
While table grapes could be used for learning how to make your own wine – as a practice run, so to speak – do not expect this wine to bring any enthusiastic raves from family, friends and neighbors. The wine will be drinkable and may even be pleasant, but it will not be stellar.
Mert, I hope this answers your question about table grapes and wine grapes. It is a question that we get fairly often, so I plan on posting it on our wine making blog. If you have anymore questions, just let us know. We want to do everything we can to help you become a successful home winemaker.
Happy Wine Making
Ed Kraus
—–
Ed Kraus is a 3rd generation home brewer/winemaker and has been an owner of E. C. Kraus since 1999. He has been helping individuals make better wine and beer for over 25 years.
How Do I Increase the Alcohol Content of Homebrew?
 When making beer at home, yeast turns fermentable sugar into alcohol and CO2. Increase the fermentable sugar, and you increase the potential alcohol content. These higher-alcohol brews are often referred to as “high gravity”.
Why increase the alcohol content of a beer?
You may be interested in “upgrading” a beer recipe to a double or imperial version. Say you have a great stout recipe, but want to bump it up to an imperial stout. Add more fermentable sugar, and the potential alcohol goes up.
You may also want to increase the alcohol content of a beer to make it better for aging. Higher alcohol content helps prevent contamination and encourages flavors to develop over time. “Winter warmers” – higher gravity beer, often brewed with spices and other flavorings – make great holiday gifts. Brew a high-gravity spiced ale for New Year’s Eve, and let it age so you can pull it out for future New Year’s Eves and see how the “vintage” changes over time. (Hint: these 1-Liter amber bottles can give your beer an elegant look.)
By how much can you increase the content of a homebrew?
Most beer yeast will stall out at 12-15% alcohol by volume, some even way before that, depending on the strain. Some are more alcohol tolerant than others. Beyond a certain point, adding more fermentable sugar than the beer yeast can handle will only make the beer sweeter, not increase its alcohol.
Sources of fermentable sugar
There are several ways to add more fermentable sugars to your beer. This increases the original gravity of the beer, which is measured with a hydrometer.
- Malt – If brewing all-grain or partial mash, adding more malt will increase the gravity. Most of your gravity will come from an increase in base malt, but you may also increase the specialty malts to keep the flavors in balance.
- Malt extract
 – Adding malt extract to your recipe is an easy way to add more fermentables for both all-grain and extract brewers. Just mix it right in the kettle as usual.
- Sugar – Adjunct sugars offer yet another way to raise the gravity of a beer, but don’t limit yourself to plain old white table sugar. There are several types of sugar, from cane sugar and brown sugar to more exotic sugars like candi sugar and panela. Maple syrup and honey are also interesting sugar sources. Keep in mind that nearly 100% of the sugar will be fermented into alcohol. Generally speaking, the darker the sugar, the more color and flavor will be contributed to the beer.
Another option: add alcohol directly to the beer
If you want to make something along the lines of a bourbon barrel stout or a wine barrel saison, you can add liquor directly to the beer after fermentation. Flavored liqueurs can also be used to add fruit, chocolate, or coffee flavor to beer. This is a great option if you want to take a five-gallon batch and divide it into different experiments after fermentation.
Though there’s a time and a place for lower-alcohol, session beers, there are times when raising the alcohol content of a homebrew gives it an added level of sophistication. What are some of your favorite high-gravity beers?
—–
David Ackley is a writer, brewer, and craft beer marketing consultant. He holds a General Certificate in Brewing from the Institute of Brewing and Distilling and is founder of the Local Beer Blog.
I Need A Scuppernong Grape Wine Recipe
 I have almost 4 gallons of Scuppernong grape juice that I’ve gotten with my steam juicer this year. I would like to know how to make Scuppernon grape wine with it. I was needing to know how much water to add to it. I would like to know what other wine making materials/ingredients I will need. I already have equipment. Can you help me with a Scuppernong grape wine recipe?
Thanks Fred
—–
Hello Fred,
If you were making wine with actual wine grapes you would use 100% grape juice. This means if you have 5 gallons of juice, you make 5 gallons of wine. However, this is not the case with Scuppernong grapes. Their flavor is much stronger and more acidic. The Scuppernong juice needs to be diluted with water for these reasons.
Most Scuppernong grape wine recipes you run across will call for about 30 to 50 pounds of grapes to make a 5 gallon batch. This equates to about 2 or 3 gallons of juice. This is what I also suggest you use to make 5 gallons – 2 or 3 gallons of the Scuppernong juice.
If you want to get more accurate, you can purchase and acid testing kit and keep diluting the Scuppernong juice until the acidity drops to an acceptable level. This would be somewhere between .60% to .70% acidity. The directions that come along with the acid test kit will help you through the testing.
In an average growing season this should take about a ratio of 3 gallons water to 2 gallons of Scuppernong juice. Sometimes it can be equal part, 2.5 gallons water to 2.5 gallons of juice. Keep adding the water and testing the acidity until you reach at least the .70% acidity.
Because you have diluted the Scuppernong juice with water, you have also diluted the sugar concentration of the wine must. Sugar is what turns into alcohol during a fermentation. If there is not enough sugar in the wine must, there will not be enough alcohol in the wine when the fermentation is done. You will need to add sugar to keep the fermentation’s potential alcohol in a normal range. I would suggest adding 2-1/4 pounds of cane sugar for every gallon of water you use. This should get you a wine with about 12% to 14% alcohol.
 A more accurate way of controlling your wine’s alcohol content is to use a wine hydrometer. One of the scales on a wine hydrometer is called potential alcohol. This scale will tell you how much alcohol can be made with the sugar that is currently in the wine must. You just keep adding and dissolving sugar into the wine must until the potential alcohol scale reads the alcohol level you’d like to have. This is a limit to how much alcohol wine yeast can make. For this reason do not shoot for an alcohol level higher than 13%.
Other ingredients you will need to add for the Scuppernong grape wine recipe are as follows:
- Yeast Nutrient (1 teaspoon per gallon)
- Pectic Enzyme (1/8 teaspoon per gallon)
- Wine Tannin (1/4 teaspoon per gallon)
- Campden Tablets (1 crushed tablet per gallon. Add 24 hour before adding yeast)
- Wine Yeast (1 packet for every 1 to 5 gallons, Recommended: Lalvin K1V-1116)
If you need more information about how to go about making the wine, you might want to take a look at How To Make Wine that is on our website. It will give you a good overall run-down of what you need to do to finish this Scuppernong grape wine recipe.
Happy Wine Making,
Ed Kraus
—–
Ed Kraus is a 3rd generation home brewer/winemaker and has been an owner of E. C. Kraus since 1999. He has been helping individuals make better wine and beer for over 25 years.
6 Ways To Avoid A Homebrew Hangover
 One homebrewing topic that doesn’t get enough attention is over-consumption. Sure, we like to savor our beer, but having five gallons worth of it on hand makes it pretty tempting to imbibe more than we should. If for no other reason, avoiding a toxic hangover is reason enough to moderate how much beer we drink.
Without getting preachy, if you’re someone who wants to reduce your alcohol intake – and avoid the homebrew hangover that comes with it – you might consider some of these options:
- Brew lower gravity beers – “Session” beers – those with 4.5-5% or less alcohol by volume – are all the rage these days. It seems that consumers are more interested in enjoying a refreshing beverage over the course of a few hours, as opposed to getting the most ABV bang for your buck. You might consider keeping at least one session beer in the rotation on a regular basis. Some good options include a mild, summer ale, or English bitter.
- Drink from a keg – One of the advantages of a draft system is that you can pour as much or as little as you’d like. Want more than one beer but less than two? Easy! Draft systems are great for limiting your daily consumption (but it’s just as tempting to overdo it, so be careful!).

- Mix a shandy – Planning a long drinking session? Stretch your beer out further by blending it with something non-alcoholic, like ginger beer or soda. It sounds weird, I know, but they can actually be really refreshing and be an enjoyable way to avoid the homebrew hangover. Check out Shandy is Dandy for some shandy mixing recommendations.
- Avoid fusel alcohols – This point has more to do with the quality of the alcohol than the quantity. Fusel alcohols, or higher alcohols as they’re sometimes called, are often responsible for splitting headaches. By keeping your fermentation temperature under control, you can limit fusel alcohol production and at least some of the headache that comes with a hangover. Reducing fusel alcohols will have the adding benefit of reducing solvent-like off-flavors in your beer.
- Drink with food and water – Keeping hydrated is key to avoiding a homebrew hangover. If drinking at a hot homebrew festival or similar event, aim for a 1:1 ratio of beer to water (for every beer you try, drink an equal amount of water). And be sure to get some food in your stomach – just the break from drinking can be enough to keep things under control.
- Eat yogurt and dry yeast? You might have seen a recent news article about Jim Koch of Boston Beer Co. having a “secret remedy” that allows him to drink all day without getting drunk. I’m not sure about the validity of this method, but it’s worth a try, right?

What strategies do you use to keep from avoiding a homebrew hangover? Share in the comments below…
—–
David Ackley is a writer, brewer, and craft beer marketing consultant. He holds a General Certificate in Brewing from the Institute of Brewing and Distilling and is founder of the Local Beer Blog.
Is A Wine Refractometer A Good Alcohol Tester For Wine?
 I have been told that a wine refractometer works real nice as an alcohol tester for my wine must and also at the end is this true?
Gary
—–
Hello Gary,
Thanks for the great question. Testing the alcohol level of a wine is a subject that always seems to have some confusion among home winemakers.
A refractometer can not be used as an alcohol tester for wine. It will not test the alcohol level. A refractometer will only test the sugar level of a wine must or finished wine. This is no different than what a wine hydrometer can actually do. They both measure the sugar in a wine, not the alcohol.
By comparing two sugar level readings, one taken before the fermentation and another after, you can determine how much alcohol was made. This is because wine yeast consume sugar and turn some of it into alcohol. If you know how much sugar was consumed by the wine yeast, you can then determine how much alcohol was made.
This principal is exactly the same for a refractometer as it is for a hydrometer. Neither are alcohol testers, but they will allow you to calculate the alcohol level of a wine must or finished wine by comparing a current sugar reading (brix) with a beginning reading.
What makes the refractometer extremely useful — and more handy than a hydrometer in some cases — is that you can take accurate sugar readings with very small liquid samples — just a couple of drops is all that is needed. This makes it ideal for checking the ripeness of the grapes while out in the vineyard. You only need to squeeze the juice from a single grape to see how sweet the grapes are becoming. This is very valuable when trying to determine when to pick your grapes .
.
Alternately, the hydrometer needs enough sample for it to float. This could take as much as 4 or 5 ounces of wine or must. A hydrometer jar is also needed to hold the sample. So as you can see more time and effort is involved to take a reading with a hydrometer. This pretty much rules out taking a sugar reading on the fly as you might with a refractometer.
Gary, to answer your question more directly, a refractometer is a great tool for any winemaker to have. It is very handy, and it provides a quick way to get a sugar reading almost anytime, anywhere. But a wine refractometer is not an alcohol tester. It will not directly give you the alcohol level of your wine. This can only be done by comparing a beginning reading (before fermentation) with a current reading.
Happy Wine Making,
Ed Kraus
—–
Ed Kraus is a 3rd generation home brewer/winemaker and has been an owner of E. C. Kraus since 1999. He has been helping individuals make better wine and beer for over 25 years.
Oak Aged Imperial IPA: No Barrel Needed!
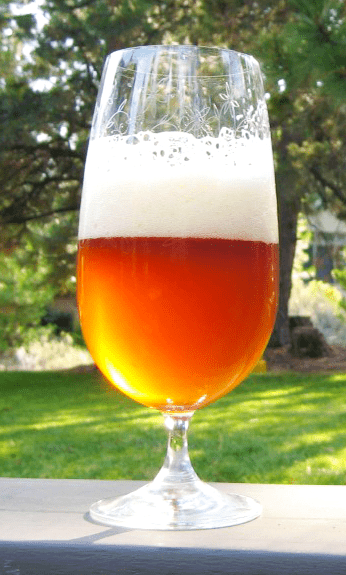 We Americans tend to like everything bigger and better – even our beer. For those of us who enjoy big hop bombs, a regular India Pale Ale doesn’t always cut it. Let’s take it to the next level with an IMPERIAL IPA.
Imperial IPAs are sometimes known as Double IPAs. All the word “imperial” or “double” means is that they have more of everything: more hops, more malt, and more alcohol. The color remains in the light amber to copper color range. Malt flavor should be present, but hops are the main event, usually American hop varieties. Most Imperial IPA beer recipes will have a substantial amount of late addition flavor and aroma hops, often with a decent to aggressive amount of dry hops for even more hop aroma. Alcohol content typically ranges from about 7.5-10% ABV.
The Imperial IPA beer recipe below goes one step further by incorporating oak flavor. In no way should the oak dominate the flavor of the beer. It should just be a subtle note that supports all of the other flavor elements.
In the event that you don’t have your own barrel, have no fear. Oak chips added to your beer during secondary fermentation can provide the same effect. I’d suggest tasting the beer while it ages on the oak chips to determine the level of oak flavor you’d like in your beer. If you’d like to add yet another dimension to your Oak Aged Imperial IPA, consider soaking the oak chips in whiskey for a couple days.
Ready to brew? Let’s do it!
Oak Aged Imperial IPA Beer Recipe (Partial Mash)
(5-gallon batch)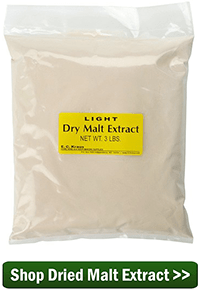
Specs
OG: 1.081
FG: 1.020
ABV: 8%
IBUs: 90
SRM: 11
Ingredients
1 lb. Weyerman Pale Ale Malt
1 lb. Briess Caramel 60 Malt
.5 lb. Briess Red Wheat Malt
9 lbs. Light Dry Malt Extract
1 oz. Northern Brewer hops at :90
1 oz. Northern Brewer hops at :30
1 oz. Cascade hops at :10
1 oz. Centennial hops at :10
1 oz. Cascade hops dry hopped for 7-10 days
1 oz. Centennial hops dry hopped for 7-10 days 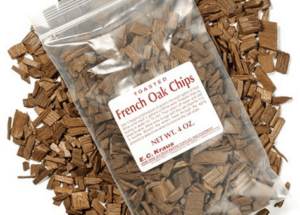
2 packs Wyeast 1028: London Ale yeast
1 oz. Toasted American oak chips
Directions
The night before brewing, pitch the Wyeast 1028 into a 2L yeast starter. On brew day, mix the crushed malts with 3 quarts of water at 160˚F in a large stockpot. Hold temperature at 152-155˚F for 45 minutes. Raise temperature to 170˚F and strain through a colander into your brew kettle. Rinse grains with 3 qts. water at 170˚F. Add enough water to make 3 gallons of wort and bring to boil. Total boil time will be 90 minutes. Add hops according to schedule above. During the last 20 minutes of the boil, stir in the dry malt extract. At the end of boil, chill wort with an ice bath or immersion wort chiller. Pour wort into a sanitized fermenter and top off with enough cool, clean, chlorine-free water to make 5.5 gallons. When wort is 70˚F or below, pitch yeast starter into the wort. Ferment at 68˚F for 7 days, then transfer to a secondary fermenter for 10-14 days or longer. Add dry hops with about 7 days left in secondary fermentation. Add toasted oak chips with 2-3 days left in secondary. Bottle or keg for about 2.2 vols CO2. This beer may benefit from some aging.
Do you like big, oak-aged beers? What are some of your favorite? So you have an Imperial IPA beer recipe you’d like to share with us? Comment Below…
—–
David Ackley is a beer writer, brewer, and self-described “craft beer crusader.” He holds a General Certificate in Brewing from the Institute of Brewing and Distilling and is founder of the Local Beer Blog.
Getting Started With A Beginner Wine Making Kit
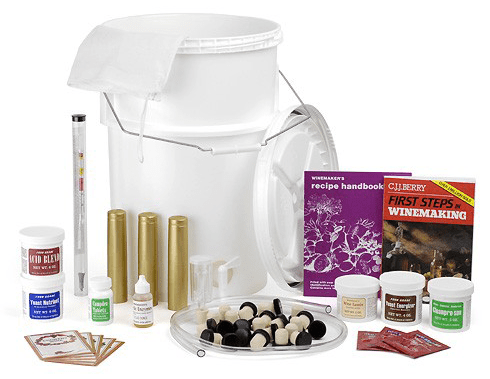 Although you do a good job of explaining the beginner wine making kits, I’m still not sure what I need to purchase. I’d like to start making fruit wines and was looking at the Your Fruit Necessities Box. I don’t have any wine making products at all so I would like to know what I need to buy in addition to this kit. Let’s say I want to start with strawberry wine. I have the beginner wine making kit in my shopping cart and now I need to add . . . bottles? strawberry fruit mix (how many cans)? any sanitizing equipment for the bottles? Anything else?
Chris
—–
Dear Chris,
Using the Your Fruit! Necessities Box is a great way to start making wine. Regardless if you’re wanting to make strawberry wine from whole fruits or from your County Fair canned strawberries, this will be the best way to start out. The wine making process will be the same as well, regardless if you choose to go with fresh or canned strawberries.
In the case of making strawberry wine you can go by the 5 gallon strawberry wine recipe in the center of our mailing catalog, or you can use the strawberry wine recipe listed on the wine recipe page of our website. The directions for making the wine can be found in both places as well. We call them The 7 Easy Steps To Making Wine. The wine making kit already has all the ingredients that are called for in the wine recipe.
As for any additional wine making products or wine making materials you might need, wine bottles is a fairly obvious one. The reason these are not included with the kit is because so many of our customers already have used bottles piling up from their commercial wine purchases.
The sanitizer you asked about is included in the beginner wine making kit. It’s called Basic A. It work great on all kinds of surfaces: glass, plastic, metal, etc.
If you think you’ll want your wines to be sweet, you may want to purchase a bottle of Wine Conditioner. You will add this to your strawberry wine to bring the sweetness up to the desire level. Just add to taste before bottling the wine.
Some people do like to add a second plastic fermenter, but it certainly is not necessary. During the wine making process you will need to move the wine off the sediment a couple of times. This is a process called racking. Having a second fermenter makes the process a little easier. You can just go back-and-forth from one container and to the next as needed.
So as you can start to see the Your Fruit! beginner wine making kit is fairly inclusive, yet economical. While there may be an item or two you may want to add, for the most part this wine kit is complete.
Best Wishes,
Ed Kraus
—–
Ed Kraus is a 3rd generation home brewer/winemaker and has been an owner of E. C. Kraus since 1999. He has been helping individuals make better wine and beer for over 25 years.
Homebrewing: By the Numbers
 Home brewing doesn’t require you to take a whole lot of measurement or to know a whole lot about the science side of the hobby. After all, people have been making beer for thousands of years, and it wasn’t until relatively recently that anyone really understood the role yeast played in the brewing process. But in order to make good beer predictably and consistently, knowing how to control the numbers is critical.
Below, find a breakdown of the most common home brewing measurements and figures used when making beer. Learn how to work these numbers, and your homemade beer will be all the better!
Common Home Brewing Measurements:
- Volume – One of the most basic calculations you’ll need to keep track of is volume – the amount of space your beer takes up. Overshooting or undershooting your volume measurements can have a huge impact on beer color, flavor, alcohol content, mouthfeel, and more.
- Weight – Homebrew ingredients are typically measured out by weight. A digital scale is an important tool for your home brewery.
- Temperature – Measuring temperature comes into play in several parts of homebrewing. We often try to hit a specific temperature when steeping or mashing grains. Having good control over fermentation temperature can “make or break” your beer.

- Gravity – Specific gravity is a measurement of the density of a liquid. Pure water has a specific gravity of 1.000. In brewing, gravity tells us how much dissolved solids there are in wort and in finished beer. We usually measure gravity with a hydrometer. By taking the original or starting gravity and subtracting the finished gravity, we can figure out how much sugar was consumed during the fermentation process and calculate the alcohol content of the finished beer. You’ll often hear beers called “high-gravity” or “low-gravity” (As in, “Man, I had way too many high-gravity beers last night!”). This refers to the original gravity of the beer, and by extension, the alcohol content.
- ABV – “Alcohol by volume.” Using the gravity measurements from above, we can figure out the alcohol content of beer. Take the original gravity (let’s say 1.050) and subtract the final gravity (1.010). Take that number (0.040) and multiply by 131.25 to get the alcohol content (5.25%). There are ABV calculators that can help with the math, but I find it’s easy enough just to plug the numbers into my phone.
- IBUs – “International Bittering Units.” In Europe, these may be listed as EBUs – they’re the same thing. IBUs are a figure that relates how much bitterness is contributed to a beer by hops. You can do IBU calculations by hand, but for these I usually use an IBU calculator. But in general, know that the more hops you use, the higher the alpha acid content of the hops, and the longer they are boiled in the wort, the higher the IBUs.
- Alpha Acids
 – Alpha acids, which are found in hops, are what make beer bitter. They’re expressed as a percentage of the total weight of the hops. For example, Cascade hops are typically 4.5-6% AA. You’ll often see recipes that call for a specific number of AAUs or HBUs. These stand for alpha acid units or homebrew bittering units. These are an easy way to develop consistency when alpha acids may change from batch to batch. To calculate AAUs or HBUs, take the weight of the hops (say, 1.5 oz.) and multiply by the alpha acid content of the hops (5%). That adds up to 7.5 AAUs.
- SRM – SRM stands for standard reference method and is a measurement of beer color. The palest beers, like wits and pale lagers, are in the 2-5 SRM range. Anything over about 35-40 is a very dark beer. (In Europe they use the EBC scale – it’s roughly double SRM.)
- Lovibond – Lovibond is a measurement of malt color, the main contributor to beer color. Very pale pilsner or pale ale malt is usually below 5 degrees Lovibond. Some of the mid-range malts that give beer an amber or copper range from about 20 to 100˚L. The darkest malts – the chocolate malts and heavily roasted malts – tend to be in the 300-500 range. A good recipe builder will help you with the math of predicting beer color.
Other Home Brewing Measurements and Calculations
These are just some of the primary figures used in homebrewing. As you advance in the hobby, you’ll also start paying more and more attention to things like efficiency, pH, pitching rates, and attenuation. But if you have firm control over the numbers above, you’re well on your well to brewing some excellent beer!
—–
David Ackley is a writer, brewer, and craft beer marketing consultant. He holds a General Certificate in Brewing from the Institute of Brewing and Distilling and is founder of the Local Beer Blog.
What's The Difference Between Muscadine And Scuppernong Grapes?
 I was wondering what the difference was between muscadine and scuppernong grapes? I hear people talk about both as if they were the same thing. Are they? Or are they different?
Thanks
Justin S.,
—–
Hello Justin,
Both Muscadine and Scuppernong grapes are indigenous to the Southeast region of the U.S. They grow both wild and domestically in backyards and on farms from Arkansas to the Carolina’s and everywhere South of there.
Muscadine and Scuppernong are a couple of names that are sometimes used loosely to mean the same grape, but in reality, a Scuppernong is a particular variety of Muscadine. So, technically you could call any Scuppernong grape a Muscadine, but you couldn’t call any Muscadine grape a Scuppernong.
Over the decades Muscadines have been domesticated and grafted into varying sizes and color. Today, there are an endless list of Muscadine varieties. While Scuppernong is a variety of Muscadine it is not considered a hybrid or cultivar. It has been know to be in existence since at least the 1600’s and has been domesticated in its own right. This is how some of the confusion comes about.
Today in spite of the facts, most people refer to the red varieties as Muscadines and to the white varieties as Scuppernongs.
I say, regardless of what you call them, these grapes make wonderful country wines. Using Scuppernongs is even a great way to learn how to make white wines for the first time.
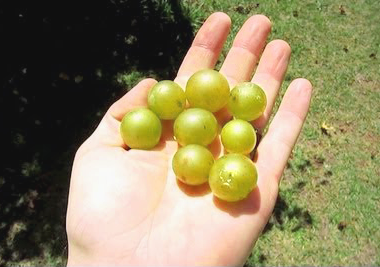
 Preparing these grapes my take some effort though. Because of their incredibly thick skins, running them through a grape crusher may be necessary as opposed to simply crushing them by hand.
An alternative to getting a grape crusher would be to use a steam juicer to extract the juice. The steam juicer bursts the skins with steamed heat. The juice then falls out the colander of steamed grapes and runs out into a collector. Once cooled, the juice is ready to go straight into the fermenter.
I hope this information helps you understand a little better about the difference between Muscadines and Scuppernongs.
Happy Wine Making,
Ed Kraus
—————
Ed Kraus is a 3rd generation home brewer/winemaker and has been an owner of E. C. Kraus since 1999. He has been helping individuals make better wine and beer for over 25 years.
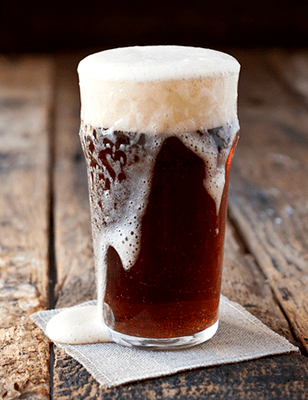
Two Homemade Root Beer Recipes ("Soda" and "Hard")
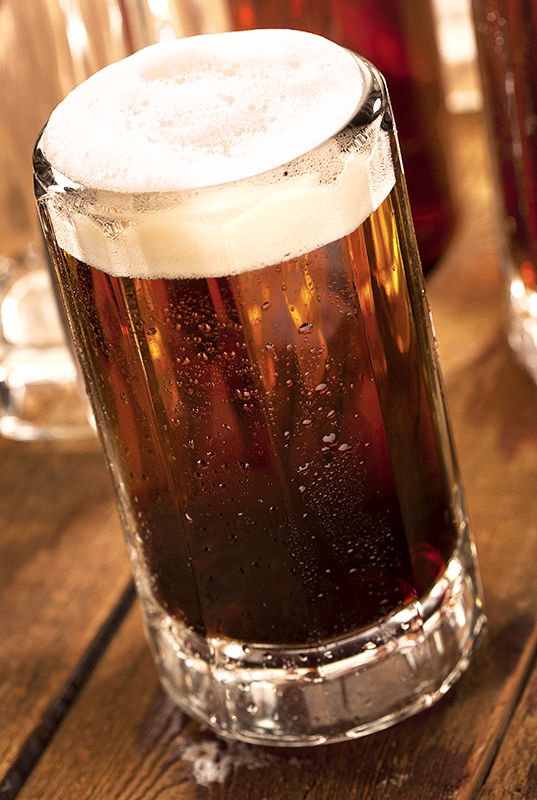 If you grew up in the US, chances are you have fond memories of A&W and Barq’s – there’s just nothing like the woody, spicy taste of root beer.
Think of the name “root” beer – traditionally it is actually made with a variety of roots, herbs, and spices that contribute flavor and color to the concoction. Among the common ones are wintergreen, vanilla, ginger, licorice, anise, birch, burdock, and sarsaparilla, to name a few.
When making your own root beer, trial and error will help you figure out what methods and ingredients you like best.
How to Make Homemade Root Beer
This version of root beer is a soda. Due to the fact that the root beer is bottle conditioned, there’s a small amount (less than 0.5% ABV) of alcohol present in the beer, but not enough to get much of a buzz.
The flavoring in this root beer recipe comes from Zatarain’s Root Beer Extract and makes the brewing process very simple. The most important thing is to halt the fermentation when the carbonation is correct by refrigerating the root beer. Otherwise, bottles could explode.
Feel free to scale this root beer recipe for a larger or smaller batch.
Zatarain’s Root Beer Recipe
(5-gallon batch)
Ingredients
1, four-ounce bottle Root Beer Extract
5 gallons of warm, filtered water
3-4 lbs. sugar
5 grams dried beer yeast dissolved in warm water
Directions
Fill a bottling bucket with five gallons of warm (not hot), filtered water. Dissolve sugar in water, then add root beer extract and hydrated beer yeast. Mix well, then bottle in about 53 cleaned and sanitized 12-oz. beer bottles. Cap securely and age bottles at room temperature for 24 hours. Open a bottle and check for appropriate carbonation. If more time is needed, check again every 8-12 hours until desired carbonation is achieved. When desired carbonation is reached, store bottles in a refrigerator to prevent further fermentation.
How to Make Alcoholic Root Beer
For those who want to make a “grown-up” or more traditional version of root beer, the technique gets a little more interesting. Instead of a root beer extract, this recipe uses a mix of herbs and spices to achieve the right blend of flavors. Many of them can be found at natural or health food stores in the bulk section. And instead of large amounts of sugar remaining in the root beer, we’ll use malt extract and brew like we would a normal beer. Just keep in mind that because we’re allowing the beer to ferment, hard root beer won’t taste as sweet as what you buy from the store. However, lactose sugar, caramel malt, and Carapils malt help keep the residual sweetness on the higher end.
“Hard” Root Beer Recipe
(5-gallon batch, partial mash)
Specs
OG: 1.068
FG: 1.023
ABV: 5.9%
SRM: 28
Ingredients
6.6 lbs. dark LME
1 lb. dark DME
1 lb. caramel 90 malt
1 lb. Carapils malt
1 lb. lactose sugar
4 oz. dried sarsaparilla root
2 oz. dried burdock root
2 oz. dried spikenard root
1 oz. dried wintergreen leaves
1 oz. vanilla extract
0.5 oz. dried licorice root
1 oz. hops (any variety)
1 pack ale yeast
Directions
Steep crushed grains in one gallon of water at 155˚F for one hour. Strain out from wort, then mix in malt extract and enough water to make 2.5 to 5 gallons of wort, depending on the size of your brew kettle. Add herbs, spices, and hops and boil for 30 minutes. Strain out herbs and spices and mix in lactose sugar. If needed, top off with enough clean, filtered water to make five gallons. Cool and transfer to a clean, sanitized fermenter and ferment until complete. Bottle or keg as you would otherwise.
That’s how you make your own root beer. As you can see either of these recipes are not all that difficult, and the first recipe would be great to do with the kids.
—–
David Ackley is a beer writer, homebrewer, and self-described “craft beer crusader.” He holds a General Certificate in Brewing from the Institute of Brewing and Distilling and is founder of the Local Beer Blog.