
 One of a wine’s primary flavor elements is acidity. Wines that are high in acid will taste sharp or sour, while wines low in acid will taste lifeless or flabby. Without a doubt, having the proper amount of acid is crucial to the flavor of your wine.
In many fruit wine recipes, the amount of acid or acid blend that should be added to the wine must is listed right along with the other wine making ingredients. By adding the acid blend called for, you are bringing the acid level of the wine up to a normal flavor range.
The reason you are able to get your wine into a proper range using these wine recipes with no issue is primarily because they are made up of a significant amount of water. This makes the amount of acid blend needed very predictable since a only a fraction of the total acidity is coming from the fruit itself.
But there are situations where acidity is not so predicable and acid readings need to be taken to know how much acid blend, if any, needs to be added. Such is usually the case when making wine from actual wine grapes, where the wine is made up of 100% grape juice with no water. If the acidity of the grapes are unusually high or low in a particular year, the flavor of the resulting wine will be negatively affected. In this scenario, taking an acid reading with an acid testing kit can be just as critical as taking a sugar level reading with a wine hydrometer.
Acid readings are normally taken right before fermentation, or right after the grapes have been ran through the grape crusher. Adjustments may be made at this time based on the reading given.
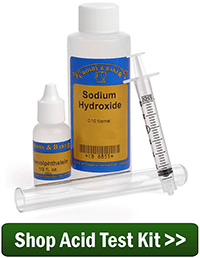 Taking readings with an acid testing kit is very straight-forward. Essentially, what you are doing is preforming a titration. A drop or two of activator is added to a measured sample of the wine. Then measured amounts of a reagent are added to the wine until you detect a permanent color change in the wine sample. By knowing how much reagent it took to change the wine’s color, you can accurately calculate the wine’s acid level. You can read more about this in the blog post Use an Acid Test Kit.
If the acidity is too low you add acid blend; if the acidity is too high you can dilute with water. We also have wine making products such as acid reducing crystals that are designed to reduce the acidity of the wine. The acid reducing crystals come with directions that will tell you how much to add to reduce the acidity by a specific amount.
—————
Ed Kraus is a 3rd generation home brewer/winemaker and has been an owner of E. C. Kraus since 1999. He has been helping individuals make better wine and beer for over 25 years.
Category Archives: Wine
3 Refreshing Wine Cooler Recipes that Will Get You Excited for Summer
 Summer is right around the corner and there is nothing sweeter, or more refreshing, than a nice homemade wine cooler during the scorching months of the year. Here is a recipe that is quick and tasteful for any wine lover. This recipe can also be interchangeable with any of our wine recipes to add more flavor to your cooler.
Whether its laying by the pool or enjoying a drink with some friends in the evening- here are three wine cooler recipes that will have your taste buds thanking you:
Tropical Pineapple Twist Cooler
Ingredients:
- 4 oz. of wine (Recommended: Our Pineapple Wine Recipe)
- 1 oz. pineapple or cranberry juice
- 2 oz. club soda
- Slice of lime
Directions:
Combine the wine, juice, and club soda. Fill a tall glass with ice and a lime wedge and then pour the contents of your drink and enjoy. The serving size is for a single glass but can be modified with a higher quantity of ingredients for a larger serving size.
This recipe is simple and takes little to no time unless you decide to chill the finished product for a few hours. Club soda will add a nice carbonated fizz to your cooler and our pineapple wine recipe will enhance the fruit flavor and give a more distinct taste. Other wine suggestions include a dry Riesling or pinot grigio. If you decide to use the pineapple wine recipe, cranberry juice can offset the pineapple but boost the citrus taste.
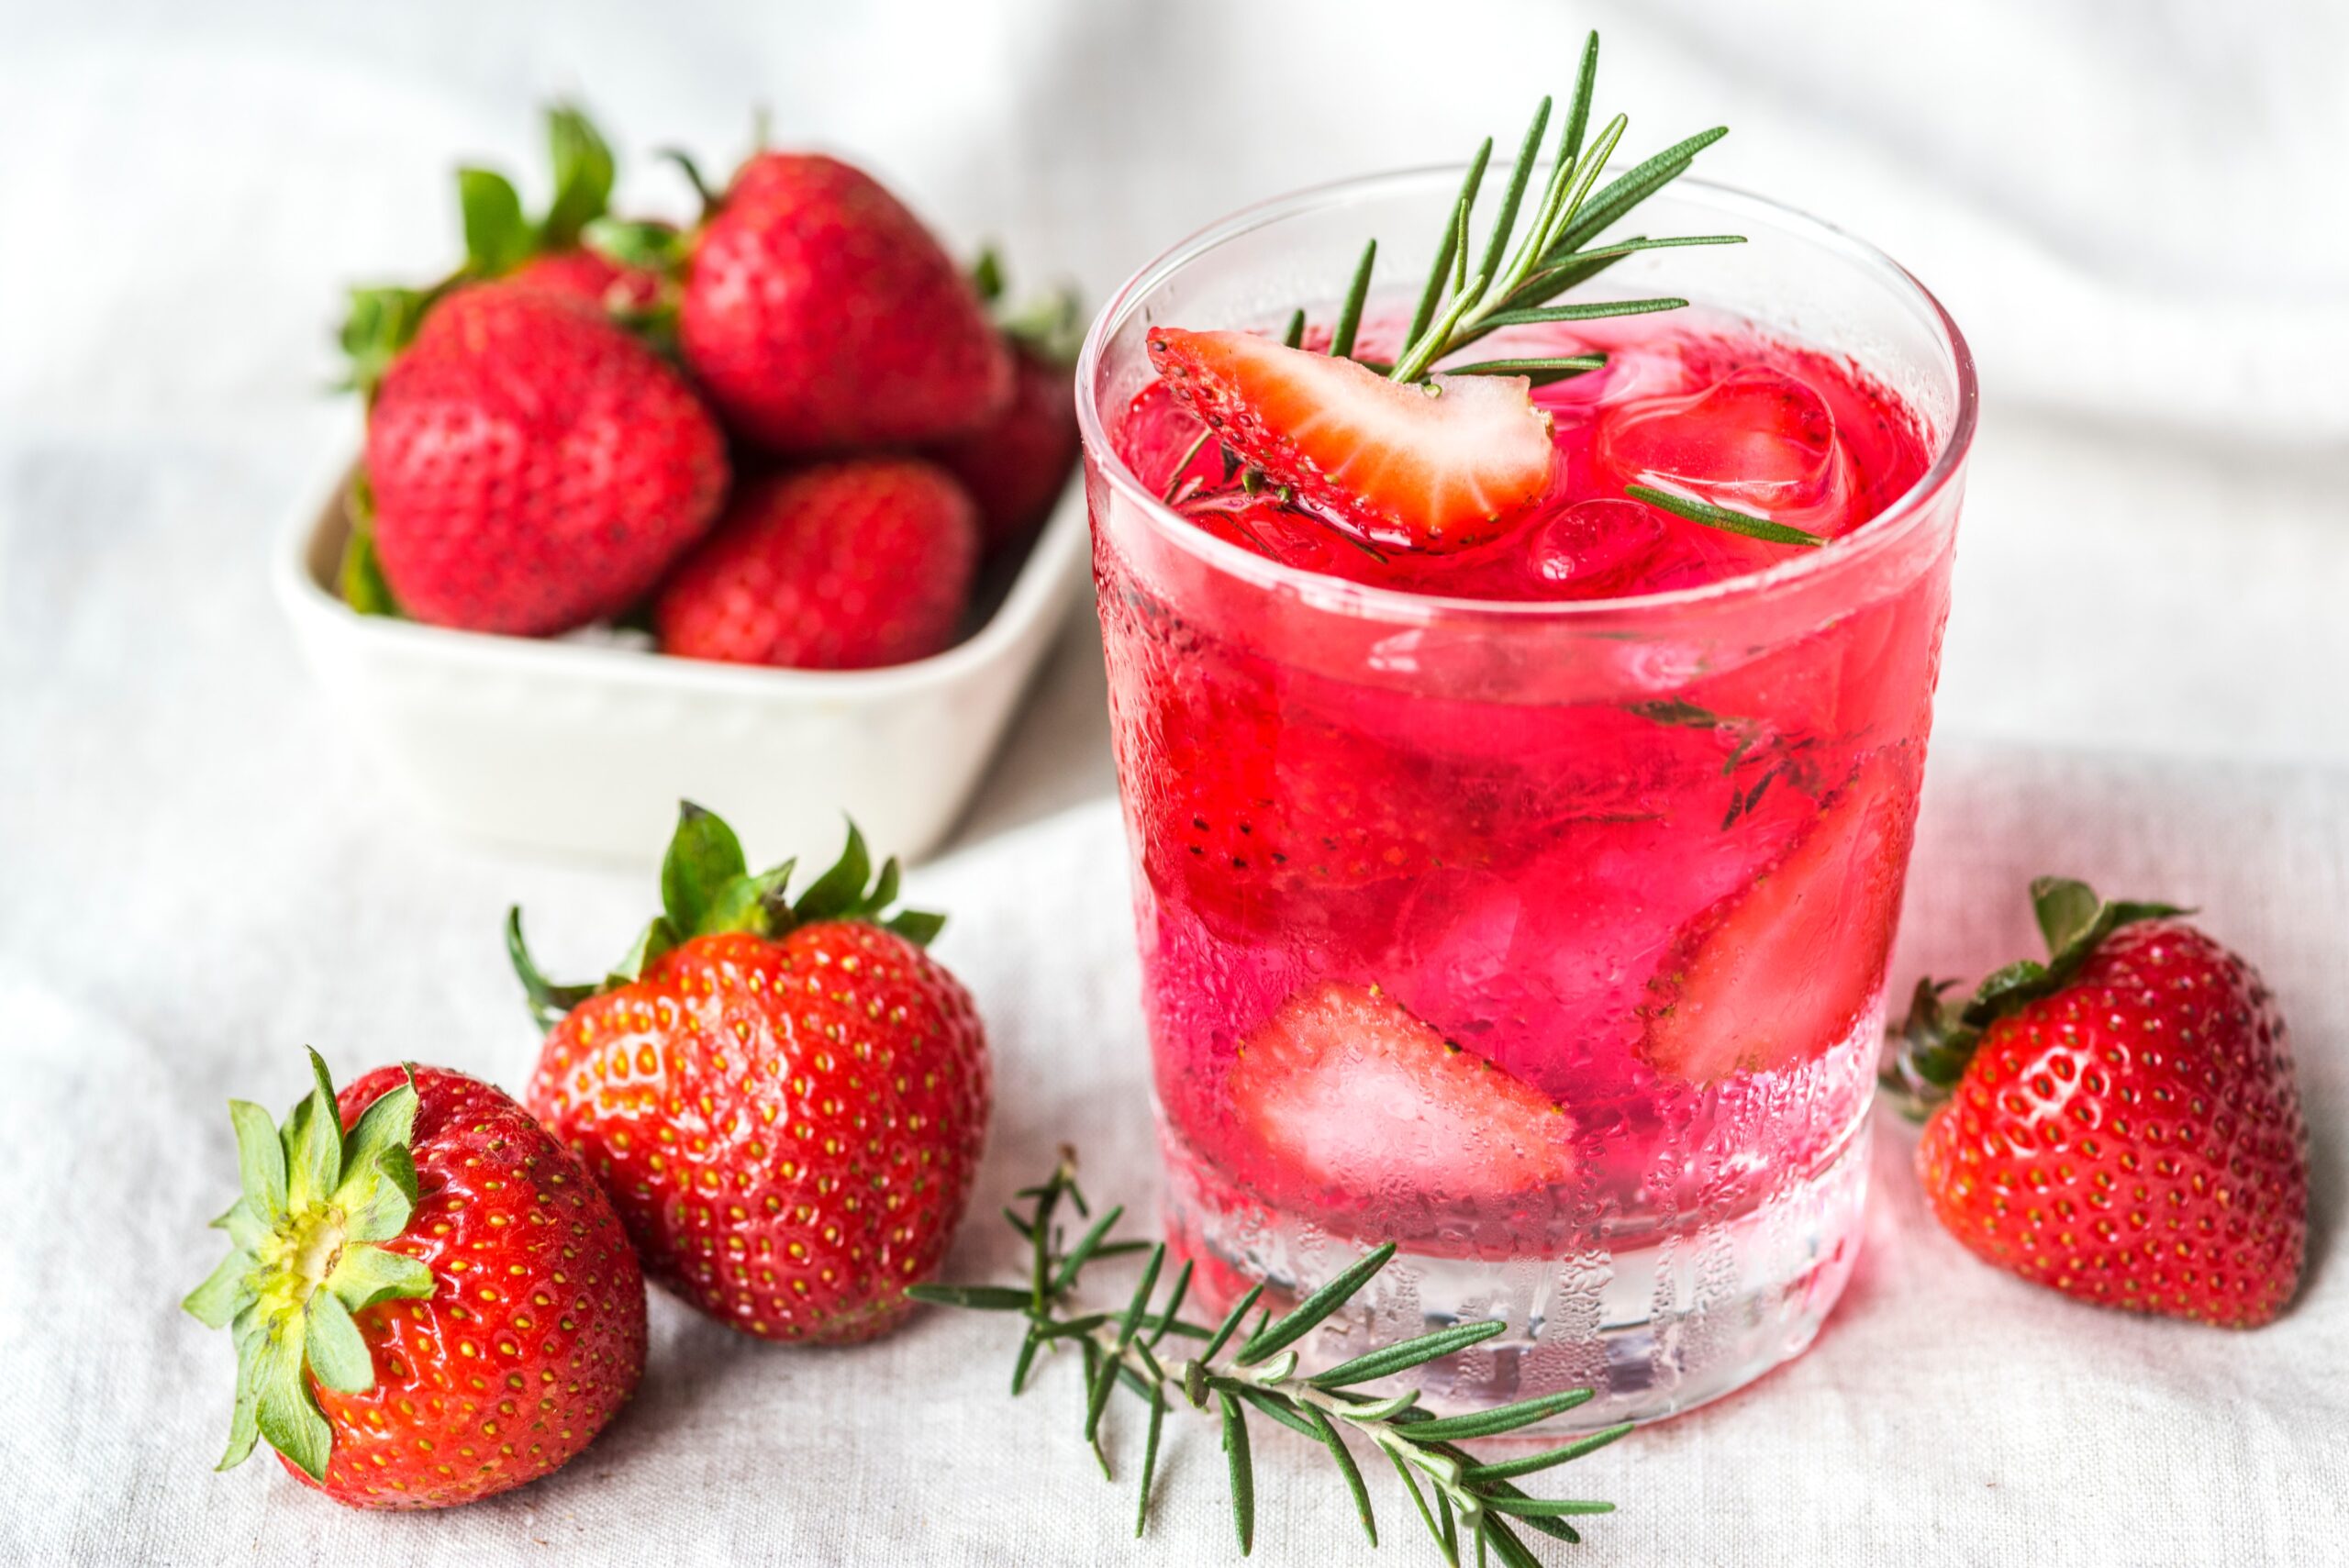
Strawberry Banana Refresher
Ingredients:
- 2 cups strawberries
- 750 ml. bottle of wine (Recommended- banana wine recipe or sauvignon blanc)
- 1/3 cup sugar
Directions:
Mix together the strawberries and sugar and let them sit for 10-15 minutes. In a blender, puree the strawberries until smooth and add the bottle of wine. Once the mixture is smooth and well blended pour contents into a large glass and serve chilled over ice. You can also add cut up strawberries or blueberries to enrich the flavor and the appearance. These ingredients make up to 4 servings.
Adding the banana wine recipe to this Strawberry Banana Refresher adds to the bare strawberry puree and combines the flavors to have you going back for more. Strawberry Banana is a classic combo and trying out this homemade recipe will have you feeling rejuvenated and confident to test out new recipes on your own.
Ginger Lime Cooler
Ingredients:
- 4 oz. wine (Recommend Ginger Root Wine or White Wine)
- 1-part lemon-lime soda
- 1-part Ginger ale
Directions:
Mix all three ingredients and let chill in refrigerator. Once mixture is cool, serve over ice and enjoy. Ingredients yield 1 serving.
This quick fixture is a take on the modern Moscow Mule (without the vodka, obviously). Our ginger root wine recipe adds tang to the creation and is balanced with the combination of ginger ale and sprite. This option is not as sweet as the Tropical Pineapple or Strawberry Banana, so it aids as a nice refreshing drink for those who enjoy a less fruity cocktail.
These fresh wine cooler recipes are great cocktails to serve when friends and family are over and will save you from the summer heat. If you are new to wine making or want to branch out from the recipes provided, check out our homemade wine options for a larger variety to include in your wine coolers.
Are there any wine cooler recipes that you recommend? Please share in the comments below!
Wine Recipe Idea: Bananaberry Wine
 You can never have too many fruit wine recipes, so here’s one I thought you might like to try.
Part of the fun of making your own wine comes from the fact that you get be a little creative when making them – to let your experimental-side flourish a little. That’s exactly how this particular wine recipe came into being.
Last year I was thinking about different fruits and how their flavors differ and how some attack the palate in completely different ways than other. After thinking through the different fruit wines I have made and tasted, I came up with this fruit wine recipe.
My goal was to end up with a fruit wine with an array of flavors that complimented one another… a homemade wine that was pleasant and well balanced.
Bananaberry Wine Recipe
- 6 lbs. Peeled & Sliced Bananas
- 3 lbs. Crushed Blackberries
- 6 lbs. Chopped Strawberries
- 10-1/2 lbs. Cane Sugar
- 3/4 teaspoon Pectic Enzyme
- 5 teaspoon Yeast Nutrient
- 2-1/2 tablespoon Acid Blend
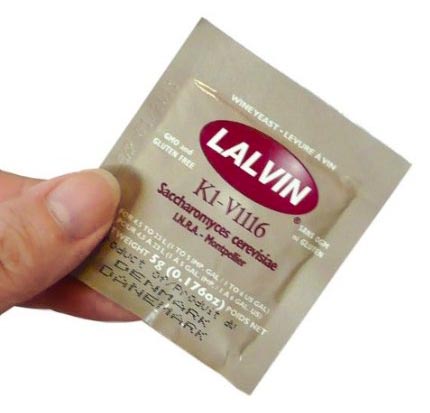
- 1 Pkg. Wine Yeast: Lalvin D-47 (recommended)
- Water to total batch to 5 gallons

Making this wine off-dry, with a little bit of sweetness with bring out its fruitiness much more clearly. Essentially, you can do this by adding sugar and potassium sorbate at bottling time to taste. You can find more details about making the wine sweeter by taking a look at Making Sweet Wines listed on our website. You don’t necessarily need to make the wine sweet — unless you want to — but taking it away from being completely dry will open up the fruit flavors, significantly.
For the basic directions on how to make this wine, follow the 7 Easy Steps To Making Wine at the following link to our web site:
Happy Wine Making,
Ed Kraus
—–
Ed Kraus is a 3rd generation home brewer/winemaker and has been an owner of E. C. Kraus since 1999. He has been helping individuals make better wine and beer for over 25 years.
How Much Wine Yeast Do I Use?
 I completed a wine recipe for 1 gal of Dandelion Wine. My Question is: The packet of wine yeast I received was enough for 5 gals of wine. In my logic I decided to just use on 1/5 of the yeast. I poured all the yeast out on a dish and divided it into 5 equal portions. Then I used just 1/5 of the yeast for my 1 gal of wine. Was this correct? I don’t know how much wine yeast to use.
Thanks,
Bill
—–
Dear Bill,
Thank you for this great question on how much wine yeast to use. You’ve done what many home winemakers have done. It make perfect sense and is very logical. However, the amount of wine yeast you should use is one whole packet, even if you are just making 1 gallon of wine. There are a couple of reasons for this:
What you are adding to the wine is not an amount of wine yeast as much as you are adding a starting colony of yeast. The wine yeast in the packet represents the minimum number of yeast cells recommend to start a viable, active fermentation, regardless of batch size. When adding a packet of yeast to 5 or 6 gallons of wine, the yeast will typically multiply to around 100 to 150 times what you start with.
 In the case of a one gallon batch of wine, the yeast will multiply to many times its original size, but not quite as many times as it does when pitched into a larger batch. The yeast will reproduce itself into great enough numbers to complete the job at hand.
So, when you add a whole packet of wine yeast to 1 gallon of wine, you are not adding too much yeast. You are simply adding the minimum amount required to support a healthy, active fermentation. Adding less then a packet could result in a slow starting fermentation that will take extra time to finish the job. It may also over-work the yeast which can result in off-flavors.
There is also the issue of what to do with the rest of the wine yeast anyway. These packets of yeast are packaged under sterile – not food-grade – conditions. They are sealed with nitrogen gas to maintain this sterile level of freshness while in the package.
Once they are opened, they are no longer sterile. The seal has been compromised. So, storing an opened package of wine yeast for any length of time is really not a good idea, particularly when you weigh it against how much a packet of wine yeast costs.
So the answer to the question: “how much wine yeast to use?”, is very simple. Always use the whole packet up to 5 or 6 gallons. If you are making more wine than this, add a second packet.
Happy Wine Making,
Ed Kraus
—–
Ed Kraus is a 3rd generation home brewer/winemaker and has been an owner of E. C. Kraus since 1999. He has been helping individuals make better wine and beer for over 25 years.
Springtime Is A Great Time For A Cherry Wine Recipe
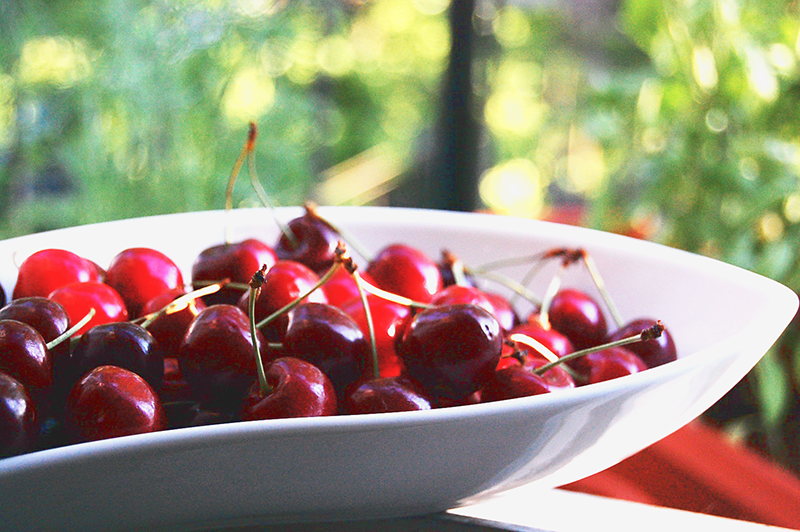 One of the most rewarding wines I’ve ever made was a sweet cherry wine. In general, cherry wine tends to be rich and robust in its overall character. The tartness is mellow from the malic acid that dominates the cherry family. The tannins are firm giving the wines made with it a wonderful structure and body.
The one I made a couple of years ago from the sweet cherry wine recipe below turned out exceptional. It took a few months to age, but once it came around, turns out, it was well worth the wait.
The cherry flavor came through nice and fruity and lingered into a rich, earthy aftertaste. It had layers of flavor that you do not always expect in a fruit wine. Some of this I attribute to the brown sugar called for in this wine recipe. Some of it I attribute to the fruit acids. The Lalvin RC-212 that was used in this cherry wine recipe could have helped out in this department, as well.
 Since spring is here it won’t be long before cherries will be in full-swing, so I thought this would be a great time to share it on the blog. The cherries you use can make a difference. As its name implies, you want to be sure to use sweet cherries as opposed to sour cherries. According to my notes, I used a mix of Bing and Lambert cherries, but there are many other varieties of cherries that I’m sure would work.
Sweet Cherry Wine Recipe
(Makes 5 Gallons)
18 lbs. Sweet Cherries (pitted)
9 lbs. Cane Sugar
3 lbs. Brown Sugar
1 tbsp. Yeast Energizer
Pectic Enzyme (as directed on the package) 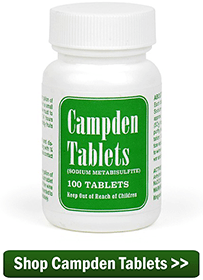
2-1/2 tsp. Tartaric Acid
2-1/2 tsp. Citric Acid
1 Packet Lalvin RC-212 Wine Yeast
10 Campden Tablets (5 before fermentation, 5 before bottling)
This is a fairly straightforward sweet cherry wine recipe, so for the most part all you need to do is following the basic 7 wine making steps on our website. The only thing different that you should take note of is that the cherries need to be pitted. You do not want the pits in with the fermentation. Also, you do not want to over process the cherries. This can cause the wine to be too bitter. Cutting the cherries in half as you pit them is sufficient. If you are using a cherry pitter, all you need to do is lightly crush the cherries after they are pitted.
I also like to pre-dissolve the brown sugar whenever it’s called for in any wine recipe. This can easily be done by taking 2-parts water and 1-part brown sugar and heating it on the stove until liquid. You will need to stir continuously at first so that the sugar does not burn on the bottom of the pan.
Even if you only make 2 or 3 batches of wine each year, I would urge you to give the sweet cherry wine recipe a go. It makes a remarkable wine that it hard not to like. It’s also pretty easy to make. And as always, you can make it as sweet or as dry as you like, by back-sweetening the wine to taste.
Happy Wine Making,
Ed Kraus
—–
Ed Kraus is a 3rd generation home brewer/winemaker and has been an owner of E. C. Kraus since 1999. He has been helping individuals make better wine and beer for over 25 years.
Dandelion Wine Recipe: Take Back Your Yard!
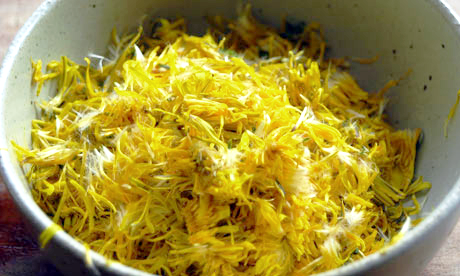 How about making some dandelion wine with the dandelion wine recipe below?
Most of the changes that spring brings are well received, like: warmth, sunshine, longer days, but there are a few changes that are not as welcomed. For most, the dreaded dandelion falls into this latter category. That’s why for some, making a bit of dandelion wine might strangely feel like a bit of revenge. Below is a dandelion wine recipe to help exact your revenge.
Dandelion wine is one of those traditional wines that has long served as a symbol of country winemaking – that classic wine creation that comes from the little ol’ winemaker everybody knows. Even though dandelion wine has a deep-rooted past in American culture, there are plenty of home winemakers still making it today and enjoying every bit of it.
So, what does dandelion wine taste like, you ask? This dandelion wine recipe makes a light-bodied wine with a beautiful yellow color. It’s flavors are herbal and muddled with an incredible bouquet that is bright and full of herbs and flowers.
The trick to making a good dandelion wine is to use the dandelion petals, only. Stay away from any of the green. The greens will add a vegetable-like character to the wine that will seem foreign and out of place.
Spring is the perfect time to make some dandelion wine, so here’s a 5 gallon dandelion wine recipe to get you going. It’s not that different from other country wine recipes. The types of ingredients are basically the same. A double-shot of nutrient is needed to make up for the lack of nutrients that you would normal get when making a wine from fruit. Plenty of acid blend is need as well for the same reason. Dandelions are not high in nutrients or acid.
You can vary the amount of dandelion petals quite a bit without affecting the rest of the dandelion wine recipe, but as a warning, adding to many petals could give you a wine the has a very hard time aging out into something you’d really want to drink. More petals is not necessarily better. While the wine recipe asks for 6 quarts, you could reasonably go up to 10 quarts.
Dandelion Wine Recipe
(Makes 5 Gallons)
- 6 qts. Dandelion Petals
- 11 lbs. Cane Sugar
- 1 tbsp. Yeast Nutrient
- 2 tsp. Yeast Energizer
- 3 tbsp. Acid Blend
- 1/2 tsp. Wine Tannin
- 1 pkt. Wine Yeast (Lalvin: K1V-1116)
- 10 Campden Tablets (5 before fermentation / 5 at bottling)
Making this dandelion wine is pretty straight-forward. You will want to be sure that the dandelions are herbicide and pesticide free. For this reason it is best to pick them from an area you are familiar with. Once you have petals together, you will want to wash them in cold water – remove any ants or other insects – then blanch them by pouring boiling water over them and letting them steep in the water for 5 minutes. Don’t use any more boiling water then necessary. Be sure to use all the water from the blanching in the dandelion wine recipe, itself, as part of the 5 gallons.
Once you’ve gotten this far you can use the 7 Easy Steps To Making Wine as the instructions for making this dandelion wine recipe.
Anyone else have a dandelion wine recipe they’d like to share? Just leave it in the comments below!
—–
Ed Kraus is a 3rd generation home brewer/winemaker and has been an owner of E. C. Kraus since 1999. He has been helping individuals make better wine and beer for over 25 years.
Using A Hydrometer To Adjust Wine Sweetness
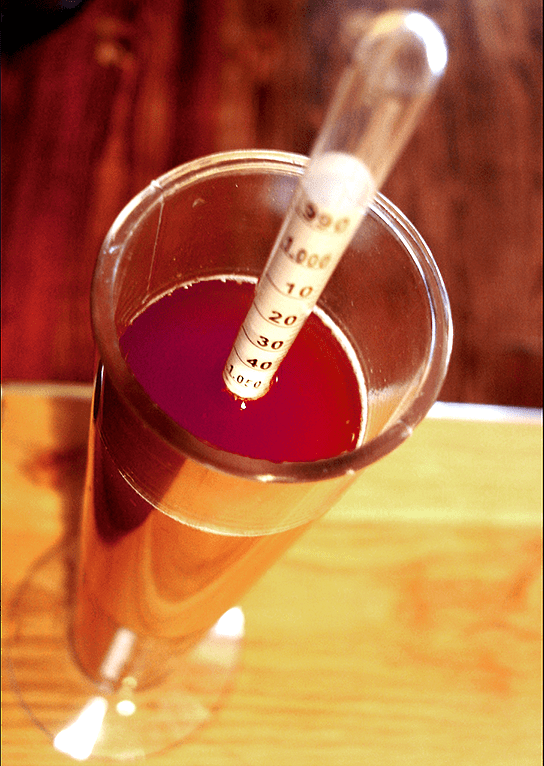 Most wine recipes give a SG [specific gravity] for starting fermentation and at the completion of fermentation. My wine usually ends up dry, so when I bottle it I usually stabilize it and back-sweeten most of it. I’ve been just adding sweetener a little at a time and tasting until I think it is about right, but that’s a little hard to hit and very unscientific.
What about using a hydrometer to adjust wine sweetness and is there an approximate hydrometer reading for what they call dry, semi-dry and sweet?
What about white table wines, red table wines, sweet table wines, dessert wines etc do all of these different wines fall under the same category of dry, semi-dry or sweet?
Thanks
Glen L. – IA
—–
Hello Glen,
While there are certain ranges on the specific gravity scale that one could consider sweet verses dry, these ranges are so narrow on the typical wine hydrometer that it would be very hard to accurately apply them to sweetening a wine. In fact, I could not really tell you what the ranges would be because I have never paid that much attention to them.
There are also a couple of other reasons why using a hydrometer to adjust wine sweetness is not all that practical:
 You could have two different wines sweetened to the same specific gravity reading and they could have very different impression of sweetness. What is coming into play is how the other flavor components of the wine work with the sugar to form the wine’s character. As an example, if the wine is rich and earthy as opposed to crisp and fruity, then more sugar may be needed in the former case than in the later wine to achieve the same impression of sweetness. This is all subjective, of course, but the principle rings true.
- A wine’s body or lack of body could cause two wines that taste equally dry to have two different readings on the wine hydrometer. Body raises the specific gravity without raising sweetness. In this case, if you have a full-bodied wine and a thin, crisp wine and you sweeten them both to the same reading on the specific gravity scale the hydrometer, the full-bodied will have less residual sugar than the thin crisp wine. Part of the SG reading is being made up with body, not sugar.
So as you can start to see, depending on hydrometer readings to adjust your wine’s sweetness may not be as accurate as just tasting the wine. After all it is how the wine tastes to us humans – and more specifically, you – that matters most, not what the hydrometer says.
 The wine industry does use a sweetness scale to give customers a clue as to how sweet a wine might be before they purchase it. The scale goes from 1-9 with 1 being the driest, and it is based on percentage of sugar by weight in the wine. While this scale may be used as a marketing tool, I find it hard to imagine any commercial winemaker setting out to target a particular number, rather they would do just as you are doing – going by how the wine tastes and how sweetness is working in concert with the wine’ other characters.
Happy Wine Making,
Ed Kraus
—–
Ed Kraus is a 3rd generation home brewer/winemaker and has been an owner of E. C. Kraus since 1999. He has been helping individuals make better wine and beer for over 25 years.
2 Great Questions About Bottling Homemade Wine
 1. Are the mushroom cork or t-corks easy to install, or do you need special equipment. Do they seal as well as regular wine corks, (over time)?
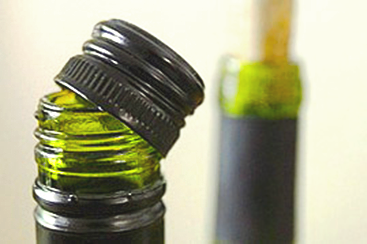
2. Wine bottles that have a screw top, can you reuse them with a wine cork?
Name: Tom H.
State: Davison, MI
—–
Hello Tom,
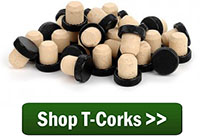
The T-corks (mushroom corks) are very easy to install. This is the biggest advantage to using them over traditional wine bottle corks. You do not need a wine bottle corker or any mechanism of any kind. You simply put T-corks in by hand. Every now and then you may get a stubborn one, but that can easy be remedied by tapping on it with a rubber mallet or similar.
The biggest disadvantage with T-corks is that they are not meant for long-term storage. Some wines made from fresh grapes or maybe elderberries may require several years of aging. These are not the corks to use for that situation. We recommend using T-corks for wines that you intend to drink within a one to two years.
 As to your second question about using wine bottle corks on a screw-cap wine bottle, the answer is “not advisable”. This is for two reasons. The first is that the size of the opening of the wine bottle is critical to the success of the wine bottle cork. The wine bottling opening needs to be 3/4″. This is not the case with most screw-cap wine bottles. They are all close, but usually off a bit.
The second reason, and the one that is most important, is the shape of some screw-cap wine bottles are not correct to accept a wine bottle cork. The opening of the wine bottle needs to be a straight barrel. With some screw-cap wine bottles the barrel is not straight. The shoulder of the wine bottle rises too high to accommodate a straight barrel opening that a wine bottle cork needs, so what you end up with is a slightly-flared barrel opening.
Without this straight-barrel opening two things can happen:
- The
 cork does not seal tightly enough along the whole length of its side. As the barrel opening flares out, the resistance against the side of the cork becomes less and less.
- Because of this flaring and uneven resistance, it can actually entice the wine cork stopper to pull down into the bottle. I’ve seen this happen more than once. Think of squeezing a marble between your fingers. If you don’t squeeze it evenly or to one side, it pops out. This is the same effect that can happen when corking a screw-cap bottle that has a flared barrel.
Thanks for the great questions, Tom.
Happy Winemaking,
Ed Kraus
—–
Ed Kraus is a 3rd generation home brewer/winemaker and has been an owner of E. C. Kraus since 1999. He has been helping individuals make better wine and beer for over 25 years.
Try This Amazing Blueberry Wine Recipe
 If you’ve never made wine before, I would submit to you that making a blueberry wine is a perfect place to start.
For one, blueberry wine is any easy wine to make. And, it only requires the most elementary pieces of wine making equipment. Secondly, it makes an INCREDIBLE wine. Blueberries, quite frankly, are well suited to making wine. The flavors come through fruity and bright.
Secondly, it’s springtime and blueberry season is just around the corner, so what better time to get your ducks-in-a-row and everything squared-away, so that when they do come in you’ll have exactly what you need and know what to do.
The blueberry wine recipe below is very simple to use. All you need are the ingredients listed and to follow the basic wine making directions that’s are on our website. The blueberries can be fresh or frozen. Either way will work equally well in the recipe.
To prepare the blueberries all that is required is that the berries be lightly crush. You can do this by hand, or you could use something like a potato masher. You do not want to crush the berries too much, and you definitely do not want to break any seeds. This could unnecessarily add a bitterness to the wine.
Ed’s Blueberry Wine Recipe
(Makes 5 Gallons)
13 lbs. Blueberries (lightly crushed)
11 lbs. Cane Sugar (table sugar)
1 tbsp. Yeast Energizer
Pectic Enzyme (as directed on its package)
2 tbsp. Acid Blend
Red Star Montrachet Wine Yeast
10 Campden Tablets (5 before to fermentation, 5 before bottling)
One of the fun thing about making your own wine is that you get to make it as sweet or as dry as you like. If you do nothing more than follow the directions, you will end up with a dry blueberry wine. But if you want to make a sweet wine, you can sweeten the blueberry wine to taste just before bottling. Just remember, if doing so, to also add potassium sorbate along with the Campden tablets called for in the blueberry wine recipe.
Now, doesn’t that sound simple? I imagine the hardest part is keeping your patience in tact. Be sure the fermentation has completed and give it plenty of time to clear up before bottling. Once in the bottle, realize that aging the wine will dramatically improve its quality over the first couple of 3 months. After that drink up.
If you need wine making equipment to make the wine, the “Your Fruit!” wine making kit is taylor-made for making this blueberry wine recipe. Not only does it have the equipment you’ll need, but it also has plenty of the basic wine making ingredients for making many different kinds of wine – all at a discounted price.
My Favorite Strawberry Wine Recipe
 If you could take springtime and put it into a bottle you would most likely end up with something close to a strawberry wine. For me, strawberry wine is the very essence of spring. Its flavor is bright and fresh. Its aroma is floral and sweet. As far as I’m concerned strawberry wine represents all things spring quite well.
If fresh strawberries are not already available in your area, they will be soon. With that in mind here is a strawberry wine recipe that you can use to get your springtime groove on. It’s a wine recipe I have used several times with great results. I couldn’t think of a better time to share it than right now!
Strawberry Wine Recipe
(5 Gallons)
19 lbs. Strawberries
10 lbs. Cane Sugar (1.090)
4 Tsp. Acid Blend
5 Tsp. Yeast Nutrient
1/2 Tsp. Wine Tannin
Pectic Enzyme (as directed on package)
1/4 Tsp. Potassium Metabisulfite (or 5 Campden Tablets)
Wine Yeast (recommend Lalvin 71B-1122)
10 Campden Tablets (5 before fermentation, 5 before bottling)
You can use the basic wine making directions that are on our website for making this strawberry wine recipe. Just be sure to remove any stem or green parts of the strawberry before using. You do not need to crush the strawberries. Just give them a coarse chopping. The strawberries will breakdown and release all their goodness during the fermentation.
One variation I have done a couple of time when making this is to exchange 2 pounds of the sugar for 3 pounds of raspberry spun honey. This exchange will keep your starting specific gravity about the same. The raspberry honey will intensify the sweet, perfume-y bouquet this wine likes to give. Essentially, it’s giving you more of one of the features that makes strawberry wine so great.
Another great thing about making this strawberry wine recipe is that it does not need much aging. So many wines are consumed before they reach their best simply because they need so much aging. Fortunately, that’s not the case with making strawberry wine.
I would not attempt to bulk-age the wine for any length of time, at all. Give it plenty of time to clear, but after that go straight into the wine bottles. Once in the bottles, give your strawberry wine at least one month to develop its bouquet. It will taste its best at around 4 to 6 months. Don’t let it sit around for any more than 1 year. Drink up!
Do you have a strawberry wine recipe you’d like to share with other home winemakers? Just leave it in the comments below. We’d love to see what you’ve got cookin’!
Happy Wine Making,
Ed Kraus
—–
Ed Kraus is a 3rd generation home brewer/winemaker and has been an owner of E. C. Kraus since 1999. He has been helping individuals make better wine and beer for over 25 years.