A Quick Wine Guide To Taking Hydrometer Readings

Taking Hydrometer ReadingsI have been making wine for a number of years and I’ve always had trouble taking hydrometer readings. When using the tube the wine hydrometer came in, the foam on the top of the must or wort and the moisture on the sides causes the hydrometer to stick to the plastic. When that happens, it raises the level of the liquid on the sides of the tube making a hydrometer reading pretty inaccurate. The obvious solution would be to use a larger container but I hate to waste that much material. I’ve tried to make sure the tube is level but the hydrometer always migrates to the side. Any suggestions?

Name: Rick S.
State: Michigan
—–
Hello Rick,

From what you are describing, the plastic storage tube is what’s causing a lot of your problems with taking hydrometer readings. We always recommend to customers that they use something other than the storage tube to take readings. It’s really not what it’s designed to do. Some of them will even leak.

You will be much better off with an actual glass hydrometer jar that is designed specifically for taking hydrometer readings. The diameter of the tube is larger than storage container. The sides are smoother, and the line of sight is clearer. All these things add up to you being able to take hydrometer readings with much more accuracy and less problem.

The glass hydrometer jar can also be quickly sanitized along with the wine hydrometer before taking readings. You can do this by using a sanitizer such as Basic A. By sanitizing your equipment you don’t have to waste any of your wine. Just take the reading and pour the sample wine directly back in the batch. There’s absolutely nothing wrong with doing this.Shop Hydrometer Jars

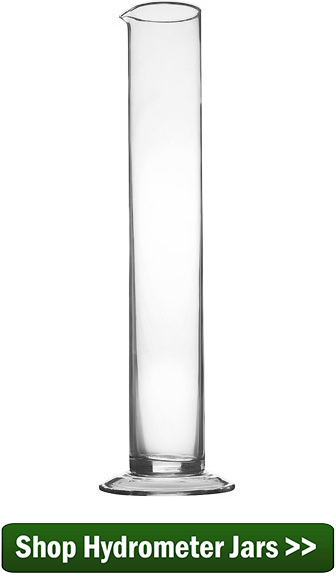
As for the foaming, there is not much you can do about it. Some of the foam is caused by the natural surface tension of the wine. The agitation causes the bubbles just as if you were pouring a finished wine into a wine glass. Some of the bubbles come from CO2 gas that was made, or is being made, by the fermentation. You can wait a few minutes to see if some of the bubbles settle down enough for you to get a clean reading, but beyond that, I know of nothing practical you can do to rid yourself of all the bubbles.

Also, when you’re taking a hydrometer reading during fermentation, you can have problems with CO2 bubbles clinging to the side of the wine hydrometer. This is when bubbles form from the wine being disturbed and then attach themselves all the way up and down the wine hydrometer.

These bubbles can throw the hydrometer reading off by artificially raising it in the wine sample. One way to avoid this issue is to give the hydrometer a quick spin before taking a reading. This is to dislodge any bubble away from the hydrometer.

Shop Basic A
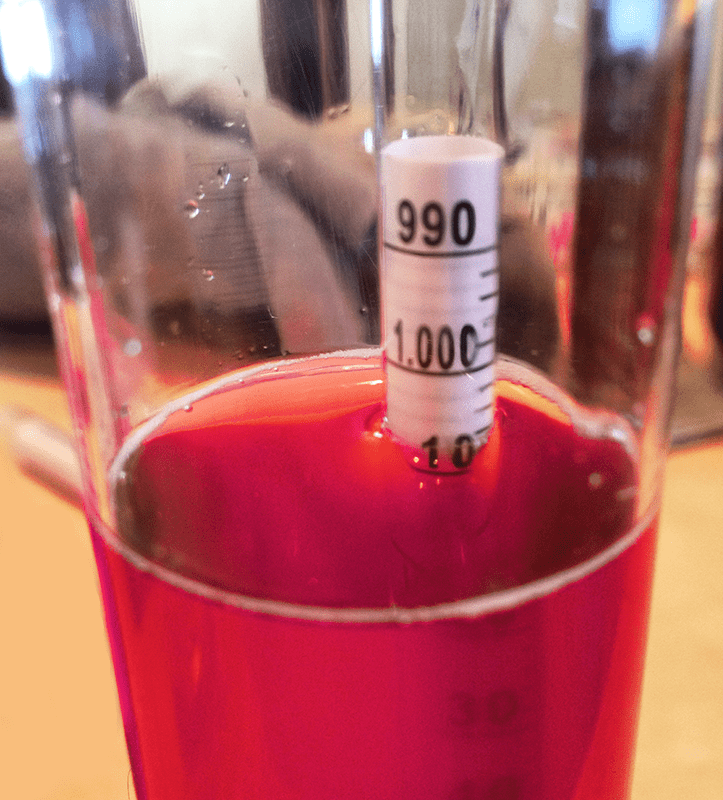
One other thing I would like to point out is that when you are actually taking the hydrometer reading, you would like you eye to be level with the surface of the wine in the hydrometer jar. This will allow you to obtain the most accurate reading. If you are taking your hydrometer reading from an upward angle, the surface tension of the wine will cause it to curve a little against the hydrometer, giving a bit of an optical illusion.

Rick, I hope this information about taking hydrometer readings helps you out. It’s just a few of the things I’ve learned along the way while taking my own readings.

Happy Wine Making,
Ed Kraus
—–
Ed Kraus is a 3rd generation home brewer/winemaker and has been an owner of E. C. Kraus since 1999. He has been helping individuals make better wine and beer for over 25 years.

Which Is Better: Fresh Wine Making Juice vs Concentrate?

Wine Making Juice ConcentrateHow does the flavor of a wine made from fresh wine making juice compare concentrate? I know this is a broad question but are there any drastic differences?

-Matt W.
—–
Hello Matt,

Thanks for the great question.

The advancement of concentrating wine making juices has jumped by leaps and bounds over the last few decades. It has finally gotten to the point that it is indistinguishable when comparing fresh wine making juice vs concentrate.

Today, the concentrating process is done by taking nothing more than water out of the fresh juice. This is accomplished by boiling the juice and causing the water to steam off the juice. Basically it’s distilling.

But here’s the twist: they are doing it at a very low temperature. In other words, they steam the water off of the fresh juice at room temperature. You may be asking yourself, how’s that even possible? And the answer is very simple. It’s done with air pressure… or lack of it.

You may remember from your high school science class that water boils at 212°F. But this is the boiling point for water at sea level, only. As you go up in altitude the boiling point becomes lower and lower. For example, water boils at 187°F on top of Pike’s Peak. This is because there is less air-pressure to hold the steam into a liquid as you go up in altitude.Shop Fermenters

The wine concentrate producers use this fact to their advantage. The juice is placed in a vacuum that is so strong that it begins to boil at ~76°F. The water literally steams off of the juice at this temperature keeping it fresh and free from the effects of heat.

Any aroma or other volatile elements that escape during this process along with the steam are later extracted from the steamed-off water and put back into the wine concentrate as an essence.

This is the real secret behind why there is no difference between wine making juice and concentrate. There is nothing done to the wine concentrate that is negative or harmful.

A second consideration as to why you may want to consider using wine making concentrate is the fact that the grapes used to make these grape concentrates are usually superior to what you have available to you otherwise. What’s available to most home wine makers is usually very limited compared to what wine making concentrate producers have to offer. Which brings me to the last point I’d like to make…

shop_wine_making_kitsYou have an incredible variety of wine making concentrates available to you. When comparing fresh wine making juice vs concentrate, it’s not eve close. For example, we carry over 200 different kinds of grape juices collected from all over the world. These concentrates afford you the opportunity to make wines from grapes grown as far away as Italy and New Zealand.

Matt, I hope this clears things up for you. One common saying among winemakers is that, “you can not make a wine that is better than you grapes used to make it.”. That is why this subject is so important. You have to start off with a good foundation of produce to end up with a stellar wine.

Happy Winemaking,
Ed Kraus
—–
Ed Kraus is a 3rd generation home brewer/winemaker and has been an owner of E. C. Kraus since 1999. He has been helping individuals make better wine and beer for over 25 years.

5 Things You Should Know About Acid Blend

Acid Blend For Wine MakingAcid Blend is a granulated blend of the three most commonly found fruit acids: citric acid, malic acid, and tartaric acid. It is added directly to a wine or must to raise its acidity level when necessary. The acidity of a wine is the tart or sharp taste. Wines that are too low in acid are flat or flabby tasting. Wines that are too high in acid are tart or sharp tasting.

Here are 5 helpful things you should know about Acid Blend.

  1. Always Know How Much Acid Blend To Add:
    Never guess at how much Acid Blend you should be using. Either have a wine recipe that tells you how much Acid Blend to add, or use and Acid Testing Kit to determine how much Acid Blend is needed to bring the wine into a respectable range.
  1. One Teaspoon Of Acid Blend Will Raise One Gallon By .15%:
    An Acid Testing Kit will measure acidity in terms of percentage by weight. With most wines you will want an acidity level in the .55% to .70% range. Once you know your wine’s current acidity level, you can use the .15%, per teaspoon, per gallon, rule to know how much Acid Blend you need to add.
  1. Acid Blend Is Easy To Add But Very Difficult To Take Out:
    If there is ever any question as to how much Acid Blend you should be adding, always error to the low side. You can easily add more later. It’s effects are instant. But if you add too much, the process for getting it out is, quite frankly, a big pain.
  1. The Acid Level Of A Wine Can Change During A Fermentation:
    It’s not unusual for some acid to drop out of the wine during a fermentation. Conversely, the fermentation can make acid to replace what is lost. Shop Acid Test KitWith these two things in mind it is possible for the acidity level to slightly rise or fall during a fermentation. For this reason you may need to do a second adjustment to the wine just before bottling.
  1. Wine Ingredient Kits Do Not Call For Acid Blend At All:
    If you are using wine making juices in the form of box ingredient kits to make your wine, you do not need to add Acid Blend to your wine. You do not need to worry about taking acid level readings. This is because the producers of these kits have already tested and adjusted the acidity level for you. They have it corrected perfectly for the type of wine you are making.

—–
Ed Kraus is a 3rd generation home brewer/winemaker and has been an owner of E. C. Kraus since 1999. He has been helping individuals make better wine and beer for over 25 years.

There’s A Bad Odor During Fermentation In My Wine…

Removing Bad Odors From FermentationI made the County Fair peach wine and the whole time it fermented it had a bad odor. It’s done now and it tastes fine but still has the bad odor. Is there something I can do now?

Thank you,
Ron
_____
Dear Ron,

When a wine has a bad odor during fermentation, it is usually because excessive amounts of gaseous compounds such as hydrogen sulfide where produced by the wine yeast during the fermentation.

All wine yeast produce some of these unwanted compounds during fermentation — some strains of yeast are more prone to over producing them than others — but any yeast can over produce hydrogen sulfide and others if put in a stressful situation.

  • Lack of nitrogen is one reason why yeasts will over produce these off-odors. This is why it is important that yeast nutrient or yeast energizer is used in sufficient quantities in any fermentation you create. Both of these products are designed specifically to increase the amount of nitrogen that is available to the wine yeast.
  • Fermenting your wine at too warm of a temperature can cause these bad odors to occur in a wine. The warmest temperature we recommend fermenting at is 75° F. Temperatures 80° F. and above will not only induce the production of smelly compounds, but will also help to induce the growth of unwanted micro-organisms such as bacteria and mold.
  • The wine yeast is being over-worked is another major reason for having bad odors during fermentation in your wine. This usually happens when the wine yeast does not multiply properly during the first 3 to 5 days of fermentation. During the first few days of fermentation the wine yeast will typically reproduce itself to about 100 to 200 times the amount normally put in at the beginning. If this multiplying phase does not go well then you have too little yeast trying to do too much work. This type of stress causes the yeast to produce more of these compounds than it normally would. This is why it is important to have the juice exposed to air during these first few days. Air allows for the healthy reproduction of yeast cells.

The odors that these different compounds produce vary:

  • Hydrogen sulfide is described by most to reek of rotten eggs.
  • Diacetyl, another common compound, produces an odor of hot butter to butterscotch.
  • Dimethyl sulfide smells of vegetable soup to band aids. Others will smell it as rotting cabbage or wet leather.

Mild off-odors in a newly finished wine is okay. These weaker odors will usually reduce in strength to an unnoticeable level when given a little time. But there are more severe situations where action may be required.

Aeration of the wine seems to work well in most cases. By siphoning the wine into another container in a splashing manner you can cause many of these bad odors to leave the wine at an accelerated pace. In the case of hydrogen sulfide, pouring the wine across sanitized copper or through a copper wool pad can increase its release. Both of these processes may need to be repeated more than once in order to gain sufficient improvement.

Shop Potassium BisulfiteAfter you are finished applying either of the above treatments, it is important to add a dose of sodium metabisulfite or Campden tablets to the wine. This does two things: 1) it helps to drive out the oxygen that was just introduced during splashing or racking (transferring) of the wine, 2) it helps to drive out any bad odors that still might remain.

Something else to note here. These processes should only be applied to finished wines. Wine musts that are still fermenting should be left alone to finish their due course before proceeding with any of these treatments.

If you believe there is a bad odor during you wine’s fermentation, the best thing you can do is:

  • If you did not add either yeast nutrient or yeast energizer to the wine must at the beginning of fermentation, do so now. If you already have added it, you can add another 1/2 dose of either. The container they come in should have the dosages.
  • Use Shop Thermometers a thermometer to make sure that the fermentation temperature has not exceeded 75°F. If it has, you should cool it down to between 70° and 75°F. as soon as you can.
  • You should also verify that the fermentation is moving along at a normal rate. You can track the progress of a fermentation by taking readings with a hydrometer every couple of days. If the fermentation seems slow, this could be signs of an over-worked yeast. If that’s the case, you may want to add a second packet of wine yeast.

Realize that any fermentation has smells. There are odors of alcohol, fruit, CO2 gas (carbonation) and even sulfur (lit matches). Don’t get these normal smells confused with the bad odors discussed above. These are all aromas of a healthy, vigorous fermentation.

I hope this helps you out. Bad odors coming from a fermentation is something that even the larger wineries have to address from time to time. It’s knowing how to prevent them and deal with them when they do occur that will help you progress and improve as a home winemaker.

Happy Wine Making,
Ed Kraus
—–
Ed Kraus is a 3rd generation home brewer/winemaker and has been an owner of E. C. Kraus since 1999. He has been helping individuals make better wine and beer for over 25 years.

What’s The Best Temperature For Clearing Wine?

Clearing Wine TemperatureI keep my wine at 72-75 when fermenting. Do I need to keep it at those temps when clearing?

Name: Ron M.
State: MI
—–
Hello Ron,

Great question! What is the best temperature for clearing wine?

Keeping your wine must at 70°F to 75°F is perfect for maintaining a vigorous fermentation. The wine yeast is very comfortable at this temperature range. However, once the fermentation has completed there is no reason to maintain this particular temperature range. The only reason for doing so is to keep the yeast happy so that they can do their job.

In fact, right after the fermentation the ideal temperature would be just above freezing. A range of 32°F to 35°F would be most beneficial to the wine for a number of reason:

  • It would allow proteins such as yeast, tannin, etc. to drop out of the wine efficiently and thoroughly, leaving behind a crispy clear wine.
  • It would cold stabilize the wine, meaning that any excess tartaric acid that may be in the wine would precipitate out of the wine as little flaky crystals. By enticing the wine to do this now, you won’t have to worry about these flakes forming later, after the wine has been bottled.
  • It would also keep the potential for any spoilage of the wine down to an bare minimum. Various little nasties like mold and bacteria will not thrive at such an inhospitable temperature.

While just above freezing my be the best temperature for clearing wine, there are two major downfalls with this Utopian temperature:Shop Bentonite

  1. It’s not very practical. This would usually mean dedicating an entire refrigerator to age the wine, and for winemakers producing 10, 20, 50 gallons, it would be almost impossible.
  1. The wine won’t age. Such a cool temperature would not allow the wine to age properly. Actually, it would suspend any aging activity to a undetectable minimum. Basically, your wine would never mature at this temperature. Most wine professionals agree that the optimal temperature for aging is 55°F.

So to answer your question, you do not need to keep your wine at 70°F to 75°F after the fermentation, but you do want to keep it cooler, not warmer. How cool is another question. The optimal thing would be to bring it down to above freezing for a few days, to cold stabilize it. Then bring the temperature up to 55°F for aging and wine bottle storage.

Shop SparkolloidIt’s completely understandable if you – as a home winemaker – are not able to do such a feat. Some things are just not practical. To that I say, do the best you can. Don’t store your wine in the hot closet. Think of a cooler place to keep it, like in a basement floor, etc. Just keep the wine out of the heat.

I hope this information helps you out. Now that you know the best temperature for clearing wine, realize that if all you can do is keep the wine in the 70°’s all the time, it wouldn’t ruin the wine or anything like that. I’m just giving you the optimal situation, so you can know what to strive for within the constraints of your situation.

Happy Winemaking,
Ed Kraus
—–
Ed Kraus is a 3rd generation home brewer/winemaker and has been an owner of E. C. Kraus since 1999. He has been helping individuals make better wine and beer for over 25 years.

Making Wine Without Sulfites

A Wine Made Without SulfitesI have a sister who has a serious bronchial reaction to drinking wine made with sulfite. I have a neighbor who’s making wine without sulfites to kill the yeast at the end. He simply waits until it dies of starvation. My sister has no reaction to his wine. I have discovered that boiling the must before starting the yeast without using sulfite is sufficient to start the process. Now I would like to find a method of killing the yeast when I want to stop the process. I thought perhaps I could use a high temperature to kill the yeast at the end, but I don’t know how high that temperature would have to be. Can you help me?

Name: Frits D.
State: Arkansas
—–
Hello Frits,

There seems to be a little bit of confusion. The reason that sulfites are added to any wine after the fermentation is to keep the wine from spoiling – to keep it fresh – not stop a fermentation. A fermentation should run its course until the sugars are all gone, starvation as you say. Sulfites can slow a domesticated wine yeast, but it can not consistently stop it completely, and therefor is not dependable for this purpose.

With that being said, making wine without sulfites is simple. The hard part is keeping the wine from degrading or spoiling after it has been made.

To start off the fermentation, I do not recommend boiling the juice or wine must. When you heat a juice you are promoting oxidation. This can cause the wine to turn color, usually orange or brown. It can also affect the wine’s flavor by adding a caramel to raisin note to it.

The one time I think you should add sulfites is before the fermentation — even if you are making wine without sulfites. Any free sulfite that is in the wine at this point will be long gone by the time the fermentation has completed. The sulfite will readily dissipate as a gas. Why not take advantage of that fact?Shop Wine Kits

This applies to making wine from fresh fruits and juices. If you are making wine from a juice concentrate, then no treatment or sulfite is required at all. For this reason, you may want to consider taking this avenue. Currently, we have over 200 different juice concentrates to choose from.

As for keeping the wine from spoiling after the fermentation, one solution is to always keep the wine refrigerated. It’s simple and effective. The bad part is you need to dedicate most, or all, of a refrigerator to this method. This is one reason why hardly anyone is making wine without sulfites.

A second option that will significantly reduce the risk of spoilage is filtering the wine with ultra-fine filtration. This mean filtering down to 0.5 microns. This is a lot finer than letting the wine drip through a coffee filter. That would only be 20 to 25 microns. Filtering down to 0.5 microns requires the use of an actual wine filter, one that can force the wine under pressure through extremely fine pads. You are literally filtering out over 99% of the wine yeast along with mold spores and bacteria.

The Mini Jet wine filter would be the way to go for this purpose. It is important to realize that before using any wine filter, the wine should be finished dropping out sediment, naturally. It should look visually clear before filtering.

Shop Mini Jet Wine FilterAlso, keep in mind that you will want to be vigilant towards keeping the winemaking area sanitary. All the equipment and anything else that comes into contact with the wine needs to be as clean and sterile as possible. There are a whole host of cleansers and sanitizers you can use to do this safely. This is a critical part to making wine without sulfites.

As a final note, there is no such thing as making a wine without any sulfites at all. In part, because sulfite is actually produced during the fermentation. It’s a natural byproduct of the fermentation. The best you can do is to keep the sulfites to a level low. You can expect to see a fermentation produce a wine with 10 to 15 PPM (parts-per-million). When adding sulfites as normally directed the wine will end up with 50 to 75 PPM.

As you can see, making wine wine without sulfites can be easily done. It’s the extra care that needs to be taken to keep the wine fresh and free from spoilage that makes it difficult. But, if you are willing to be sanitary, filter the wine and/or store the wine under refrigeration… it can be done!

I hope this information helps you out.

Happy Winemaking,
Ed Kraus
—–
Ed Kraus is a 3rd generation home brewer/winemaker and has been an owner of E. C. Kraus since 1999. He has been helping individuals make better wine and beer for over 25 years.

Basic Wine Making Equipment List For Beginners

Connoisseur Wine Making KitIf you want to jump right into making wine without using a pre-made wine making kit, it can be done just fine. But there are certain pieces of fermentation equipment that you should have. With that in mind I’ve put together a basic wine making equipment list for beginners.

  • Primary & Secondary Fermenters/Carboys:  These can be made of plastic or glass, with both having pros and cons to using either one, and are used for the fermentation of your wine. A primary fermenter is used for the first 5 to 7 days of fermentation. The secondary fermenter is used to finish the fermentation.
  • Air Lock & Rubber Stopper:  The rubber stopper is used to attach the air-lock to the top of the secondary fermenter. The rubber stopper has a hole in the center to which the air lock is placed. The air-lock allows gases to escape from the secondary fermentation without allowing: air, bugs, mold, bacteria and other little nasties from getting in.
  • Spoon: You need a long stirring spoon so that you can reach in the fermenters and stir the wine.  May not seem all that important now, but once you get in the middle of making your wine having a long-handled spoon will be one piece of wine making equipment you’ll be glad you got. Stirring allows you to mix the wine making ingredients and break up any pulp that may rise to the top during the primary fermentation.
  • Siphon Hose and Racking Cane:  These are pieces of equipment that are needed for the transfer of your wine from one fermentation vessel to another, and also from carboy to bottle.  The siphon hose ensures a smooth transfer from one vessel to the next, while the racking cane allows you to point where you are drawing the wine from.Shop Wine Bottle Corkers
  • Wine Thief:  The wine thief is great for taking small samples of wine out of your fermenter in order to test for various things like pH, specific gravity, or to just give the wine a little taste! If your fermenters happen to have a spigot on them, this will be one of wine making equipment you can scratch off your list. Just take your samples for testing from the spigot.
  • Wine Hydrometer:  Once you take a sample of wine out from the fermentation, you can test the specific gravity of the wine in order to determine if the fermentation is complete, or if you need to make a few adjustments before moving on.  The wine hydrometer will help you measure specific gravity with ease, and is a piece of equipment you really can’t go without.
  • Acid Test Kit:  Using a sample of wine, you can test its acid level with an acid test kit to determine if it’s where you want it to be, or if you need to make a few adjustments. Wines too high in acid taste sharp or tart. Wines too low in acid taste flat and insipid. If you have a reliable wine recipe you are following or are making wine from a wine ingredient kit this may not be necessary, but otherwise, you should absolutely have this on your wine making equipment list.
  • Wine Bottles and Corks:  Shop FermentersYou’ll need lots of clean wine bottles and wine bottle corks so you can put your finished wine into bottles and seal them for storage and later consumption! You can get by with using mushroom corks, but if you want to use a standard wine bottle cork you will need a wine bottle corker to press them into the wine bottle.
  • Cleaners/Sanitizers:  Keeping your wine making equipment free of contaminants is important. Residual amounts of mold or bacteria can potentially grow and spoil a wine. This is why you should sanitize any equipment that come into contact with the wine. Cleaners such as Basic A work will for this purpose.

There are plenty of pieces of home winemaking equipment that we didn’t mention that could also help you in your craft, though acquiring what’s on the list above will allow you to get off on the right foot and create a fantastic homemade wine!

Don’t Be Passing Out The Heartburn, When You’re Passing Out The Wine!

Courteney Cox Try To Get HeartburnI made wine from muscadines and gave a bottle to a friend they said that it gave them heartburn. Can you tell me what is in wine that would do that and can I make the next batch better..??

Thank you
Chuck
—–
Hello Chuck,

That’s a heck of a note. You give a friend a nice bottle of your own personal stock. You probably had put customized wine bottle labels on the bottles to make them look nice, only to have your friend belch and say, “Your homemade wine gave me heartburn.

Seriously, we don’t know for sure that your friend’s heartburn was caused by the wine or not. They may not have realized that it was something they ate, or it could have been the fact that they decided to guzzle the whole bottle during a single episode of Modern Family. We just don’t know. I’m also noting here that you did not say it gives you heartburn.

For some folks, alcohol can give them heartburn. There’s nothing we can do about that. However, another trigger is acid. All wines have acid. It comes from the fruit, such as your muscadines, and possibly from acid you added to the wine in the form of acid blend. The wine needs a certain level of acid to taste correct – to keep it from tasting flat – but too much acid can cause the wine to taste too tart and to burn a little more than necessary while going down. Too much acid in your homemade wine can give someone heartburn.

The only thing you can really do to help your wines – and your friend – is to take complete control of your wine’s acidity. This can easily be done with an acid testing kit. Simply put, this kit will tell you how much acid is in your wine; how much acid your wine should have; and how much acid blend you’ll need to add to the wine, if any, for a properly balanced wine.

shop_acid_test_kitHow it works is you take a reading with the acid testing kit before the fermentation to get the wine must into the proper range. Then you also take another reading before bottling to see if a final adjustment is needed.

The acid testing kit is particularly important when learning how to make white wines. By tradition white wines are typically higher in acid than reds. One has to be careful not to go over the edge, so to speak, when getting these white wines into a proper acidity range.

In short, take control of the wines’ acidity. Start using an acid testing kit, and the next time you pass out your homemade wine, you won’t here the cries of, “your homemade wine gave me heartburn.”

Happy Wine Making,
Ed Kraus
—–
Ed Kraus is a 3rd generation home brewer/winemaker and has been an owner of E. C. Kraus since 1999. He has been helping individuals make better wine and beer for over 25 years.

How to Make Mulled Wine this Holiday Season

The holidays are here! mulled wine

That means cold weather, cozy nights, and non-stop festivities until the new year. If you’re looking for a recipe to show off and impress guests, we have the perfect wine for you.

Start the season by making a batch of mulled wine. It’ll warm your fingers, toes and the hearts of others – ‘tis the season after all.

What is Mulled Wine and How Do I Make It?

Historically, mulled wine has been used to repurpose harvest leftovers, warm the body during the cold months, and “heal” with its spices. The holiday drink we know and love today is really a product of Victorian England, with authors like Charles Dickens writing about mulled wine in “A Christmas Carol”. 

As a time-honored tradition, mulled wine will keep guests warm and satisfied throughout the holidays. It may sound complex, but it’s surprisingly easy to make, and a guaranteed crowd-pleasing cocktail. 

First things first. Make sure your pantry is stocked with these items: 

  • Your favorite wine – this is also a great time to show off your skills with your own handcrafted wine!
  • Mulling spices (details on these later)
  • A large pot or slow cooker 
  • Something to serve your drinks in
  • Optional: A snack pairing
  • Optional: Mulled wine pairs well with a partner – feel free to add extra booze. 
    • Spirits like brandy, cognac and gin will spice things up!

WARNING: Mull with caution 

  • Do NOT BOIL your mixture. This can spoil your drink. 
  • Whether you are buying or making your wine, make sure it’s not too heavily oaked to avoid bitterness.

What Type of Wine Should I Use?

As you’re getting your list together you may be wondering what type of wine is the best to use. Thankfully, almost any variety will do. The only catch is that some mulling spices pair better with certain wines than others. 

Tip: if you’re purchasing wine from a store, it’s perfectly fine (and encouraged) to use cheaper wines for mulling. More expensive, complex wines often lose their intricate notes in the mulling process.

What Spices Should I Use?

If you’ve taken a look at a few recipes, you’ve probably noticed some common spices:

  • Cinnamon
  • Oranges
  • Star Anise 
  • Honey 
  • Some sort of extra liquor

All of these are staples, but they are not set in stone. Have fun with your recipes and explore adding different fruits and spices to your wine. And if you’re short on time, some retailers sell premade mulling spice mixes like this one

Mulled Red Wine 

The classic mulled wine is a dry, red variety- Syrah, Merlot, Cabernet, pick your preference. You can make mulled red wine as simple or complicated as you’d like (though we prefer simple so you have time to prep other things). 

Spices:

  • Cinnamon
  • Cloves
  • Oranges
  • Honey
  • Star Anise

Here’s an easy mulled wine recipe to get you started!

Mulled White Wine 

While using white wine isn’t as common, some lean towards a lighter taste (think Viognier, Chardonnay or Pinot Grigio depending on the recipe). With this variation of mulled wine, winter fruits such as pomegranate, cranberries and oranges stand out in flavor and presentation.

Spices:

  • Cinnamon
  • Oranges
  • Honey
  • Star Anise
  • Lemons
  • Cranberries
  • Pomegranates 

For an extra kick, try spicing things up with this Apple Mulled White Wine recipe.

How to Serve Mulled Wine

You’ve made your very first batch of mulled wine. Congrats! Now, let’s find something to serve it in and with.

Mugs vs Glasses

Since mulled wine is mostly served warm, many opt for serving in mugs because they keep it warmer longer. However, if you’re focused on a nice presentation use glass mugs, double-wall glasses or special mulled wine glasses. Add a little flare by topping it off with a fresh piece of fruit used in your recipe, or a cinnamon stick. Going the extra mile here will make a lasting impression on your guests and elevate your drink.

Mulled Wine Pairings

Looking for the perfect dish or appetizer to serve with your impressive creation? Here are some ideas to pair with your mulled wine.

  • Cheese board 
    • If you are pairing with something sweet, consider Roquefort, Bleu Cheese, Gorgonzola, or Comté – they’ll bring out the cinnamon and clove notes!
  • Spiced nuts
  • Fondue 
  • Mince pies  – if you’re feeling fancy!

It’s official. You are now a mulled wine connoisseur! We hope you enjoy sipping your cocktail as you share your recipe with friends and family. 

Cheers!

How Do I Know When A Wine Fermentation Is Done?

Listening To See If Fermentaiton Is DoneI started a batch of Merlot, it has been in the secondary fermenter under airlock for the last month. It is clearing very nice. How do I determine when the fermentation is done?

Thanks,
Brandon
—–
Hello Brandon,

Thanks for the great question.

Knowing that your fermentation is done before moving forward in the winemaking process is important. If the wine gets all the way to the point of bottling, and the fermentation has not finished, one of two things can potentially happen: either the wine corks will begin to pop out of the wine bottles; or worse yet, if the corks are very snug, you could have bottles exploding.

During a fermentation sugar is being metabolized into both alcohol and CO2 gas. This gas is the same stuff that puts the fizzy in beer, soda pop and champagne, and it’s also the stuff that comes through the airlock and creates the bubbling action.

A lot of beginning winemakers will use the airlock to make a determination. They see that the airlock is not longer bubbling and figure this is when the fermentation is done. In reality, the fact that the bubbling stopped is only an indication that the fermentation may be done, but is is not an absolute indicator. It does not necessarily mean that all the sugars are gone from the wine must, and it definitely doesn’t mean that the fermentation can’t start up again. It just may be dormant at the moment.

Shop FermentersIt is very possible for a fermentation to stop and start back up again sometime later. This is known as a stuck fermentation. It is usually caused by some environmental change that the wine yeast does not like – temperature being the most common factor. The important thing to know is that it is possible to bottle a wine that has stopped bubbling and have it start fermenting again after bottling – in the bottle! This CO2 has no place to go and builds up pressure in the wine bottle and well… there’s-your-trouble.

This begs the question, if the bubbling action through the airlock is not a solid indicator as to when a wine fermentation is done, then what is? The key to all of this is knowing if there’s still sugar in the wine must. If there is then there’s still a potential for more fermentation. Fortunately for us winemakers, there is an easy solution. Use a wine hydrometer.

A wine hydrometer is what can tell you if there’s still sugar in the wine must. It’s very simple to use and gives a reading instantaneously.

A wine hydrometer is a long, closed, glass cylinder.  It has a weight in one end and scales to read along its side. The readings are taken by seeing how high or low it floats in the wine. By observing where the surface of the wine crosses the scale on the wine hydrometer you can get your actual reading.

Shop HydrometersBy learning how to use a wine hydrometer, you can assure yourself that you will never bottle a wine too soon. You will be able to determine in moments where your fermentation stands.

You may be asking yourself at this point, “What if I want sugar in my wine”? If you like your wine with some sweetness to it, not a problem. Learn about making sweet wines on our website. It’s simple enough to do. You just have to know how to do it properly.

Brandon, hope this information helps you out. The hydrometer is the answer to the question: when is a fermentation done?

Happy Winemaking,
Ed Kraus
—–
Ed Kraus is a 3rd generation home brewer/winemaker and has been an owner of E. C. Kraus since 1999. He has been helping individuals make better wine and beer for over 25 years.