 I have been making wine for a number of years and I’ve always had trouble taking hydrometer readings. When using the tube the wine hydrometer came in, the foam on the top of the must or wort and the moisture on the sides causes the hydrometer to stick to the plastic. When that happens, it raises the level of the liquid on the sides of the tube making a hydrometer reading pretty inaccurate. The obvious solution would be to use a larger container but I hate to waste that much material. I’ve tried to make sure the tube is level but the hydrometer always migrates to the side. Any suggestions?
Name: Rick S.
State: Michigan
—–
Hello Rick,
From what you are describing, the plastic storage tube is what’s causing a lot of your problems with taking hydrometer readings. We always recommend to customers that they use something other than the storage tube to take readings. It’s really not what it’s designed to do. Some of them will even leak.
You will be much better off with an actual glass hydrometer jar that is designed specifically for taking hydrometer readings. The diameter of the tube is larger than storage container. The sides are smoother, and the line of sight is clearer. All these things add up to you being able to take hydrometer readings with much more accuracy and less problem.
The glass hydrometer jar can also be quickly sanitized along with the wine hydrometer before taking readings. You can do this by using a sanitizer such as Basic A. By sanitizing your equipment you don’t have to waste any of your wine. Just take the reading and pour the sample wine directly back in the batch. There’s absolutely nothing wrong with doing this.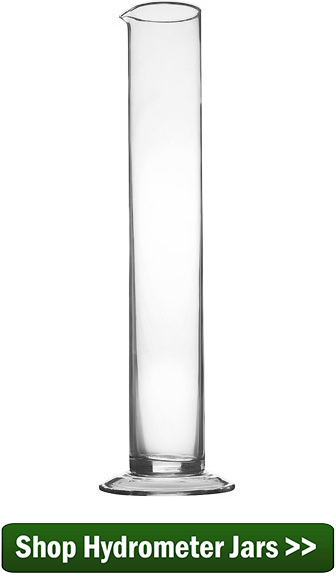
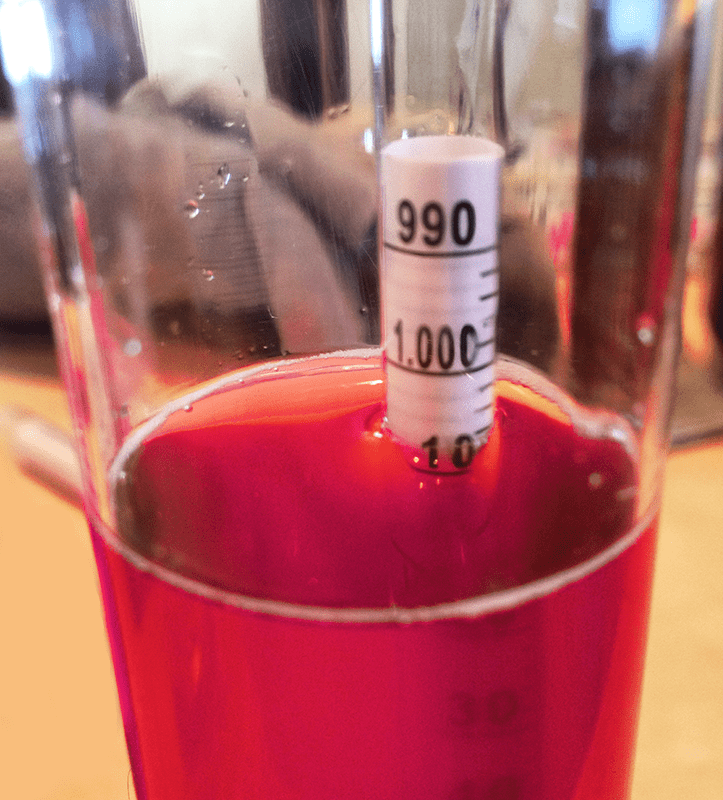
As for the foaming, there is not much you can do about it. Some of the foam is caused by the natural surface tension of the wine. The agitation causes the bubbles just as if you were pouring a finished wine into a wine glass. Some of the bubbles come from CO2 gas that was made, or is being made, by the fermentation. You can wait a few minutes to see if some of the bubbles settle down enough for you to get a clean reading, but beyond that, I know of nothing practical you can do to rid yourself of all the bubbles.
Also, when you’re taking a hydrometer reading during fermentation, you can have problems with CO2 bubbles clinging to the side of the wine hydrometer. This is when bubbles form from the wine being disturbed and then attach themselves all the way up and down the wine hydrometer.
These bubbles can throw the hydrometer reading off by artificially raising it in the wine sample. One way to avoid this issue is to give the hydrometer a quick spin before taking a reading. This is to dislodge any bubble away from the hydrometer.
 One other thing I would like to point out is that when you are actually taking the hydrometer reading, you would like you eye to be level with the surface of the wine in the hydrometer jar. This will allow you to obtain the most accurate reading. If you are taking your hydrometer reading from an upward angle, the surface tension of the wine will cause it to curve a little against the hydrometer, giving a bit of an optical illusion.
Rick, I hope this information about taking hydrometer readings helps you out. It’s just a few of the things I’ve learned along the way while taking my own readings.
Happy Wine Making,
Ed Kraus
—–
Ed Kraus is a 3rd generation home brewer/winemaker and has been an owner of E. C. Kraus since 1999. He has been helping individuals make better wine and beer for over 25 years.
William, unfortunately both readings can not be correct. This is because you can mathematically convert SG into Brix. An SG of .990 is a Brix of -.8. And a Brix of 7° is an SG of 1.028. I would test both instruments in water to make sure they read SG 1.000 and Brix 0°.
From my home grown grape vines I want to make a dry wine this year.At the first racking the SG was .996 so I thought all the sugar is gone. At the second racking the SG was .990. I then decided to check the sugar with the refractometer thinking it would read 0, but it read 7. Does this mean there is still sugar in the wine?
William. A refractometer doesnt work when there is alcohol in The wine.
Some people make this measurement task more difficult by putting a dry hydrometer into the must. Bubbles will attach very quickly to a dry hydrometer. On the other hand, if you dip the hydrometer in water first, then insert it wet into the must, you will have about three seconds before bubbles start to attach — enough to get a reliable reading … if you hurry.
I have a turkey baster just for taking samples. Three bulbs of wine fills the test jar almost to the top, then I quickly suck the foam back off. A fast twist on the hydrometer as I insert it usually keeps it away from the side, but occasionally it needs to be pushed away with my finger. Some batches can be pretty stubborn, I think it has something to do with static electrical charge. Make sure you get a temperature reading to make proper adjustment (Usually up).
The only time I’ve sterilized them is when they were new; a thorough rinsing and air dry then storing the baster in the testing tube and I’ve never contaminated a batch in 40 years of wine making (over 125 batches). Oh, and I NEVER throw out the test wine it is a perfect sample! I take a sip before testing and try to guess the SG. I’ve gotten pretty good at being within a point or two.
1st – Make no EXTRA bubbles. Slowly our the wine down the side on the “graduated cylinder,” or if using a wine thief or et cetera, discharge it at the bottom or nearly so. Keep the end of the thief a little below the meniscus (surface) as it moves upward.
2nd – If the hydrometer has bubbles, (whether from those created by mechanical action or from a champagne effect,) take an inch or so of the hydrometer between both palms and rotate it a LITTLE rapidly, a couple turns, once or twice. Too hard and you break the hydrometer or make more bubbles. It may take 2-4 tries. Don’t spin it merrily with thumb and forefinger… Don’t spin it and let go suddenly. Less is more.
Nice also if your glassware & tools match the wine’s temperature. Still, I prefer the extra minor expense of one with a thermometer, as much as I love charts. You can forget to add this compensation when you are new and excited.
I have had two ECKraus hydrometers the past several years. One developed a leak, you could see the moisture inside, the other one (I think they were both off calibration) was off by .002 to .003 determined from using distilled water and an accurate thermometer (I didn’t discover this problem until I got some new hydrometers and was checking some of my older wines, a few of which had refermented). That small amount of inaccuracy caused lots of problems. I would bottle wine at SG of .995, .996. .997 etc and they would sometimes referment. Little did I know that they were actually .002 or .003 higher, ie sweeter. I know, potassium sorbate might eliminate that problem, but I shouldn’t need it, as I prefer dryer wines, and try to make or blend wine that has a specific gravity of .995. But I don’t like wine that is very much dryer than .994
Another method that can be used to eliminate bubbles is to slowly pour the material through a fine wire colander. This tends to break the surface tension of the liquid. Works for me.
I rarely ever use a tube or storage tube to test SG. rather I’m testing the first time or the last. Because I don’t make my wine in car boys or gallon jugs. I make my wine in 6 gallon fermenters so bubbles are rarely a problem, I just wait for them to clear themselves out from the top, and take a reading. But if you have to use a tube or storage tube to get a reading? Fill it up over a sink so when you put your wine in it, let it bleed just over the top edges. The bubbles will go with it if you give them a second or two. Wet your meter and slide it in slowly with out let it plunge down in. You should have no bubbles and your reading will be right up at the top where you can see it clearly with out having to look through the sides of the tubes.
If your wine is still fermenting you ll need to take the reading as fast as you can before too many bubbles collect on the hydrometer.
I use my bottling tube to fill my hydrometer jar after I fill a bottle or two. Since it fills from the bottom I don’t have any bubbles