
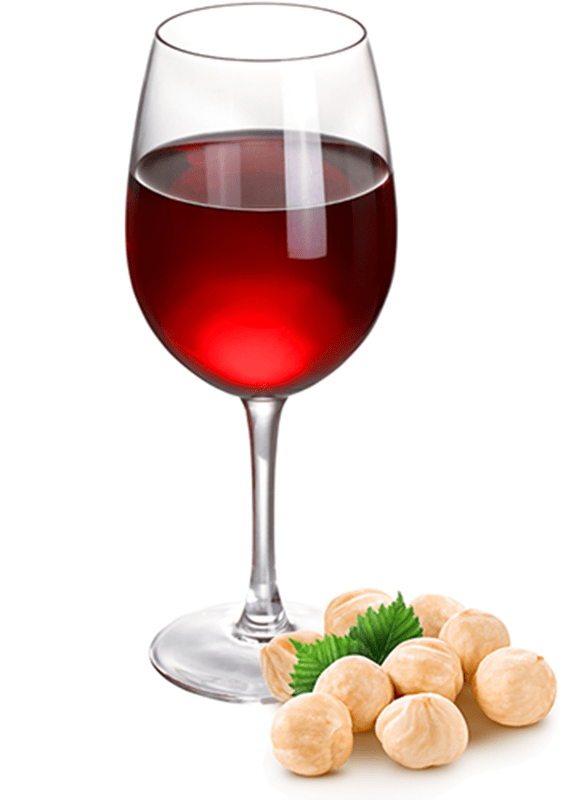
 My red wine harvested this year is currently going through a malolactic fermentation, but it has a nutty flavor that has persisted for a month or so. I have never tasted this particular flavor in a wine undergoing malolactic fermentation before. What causes a nutty flavor in wine?
Jack W. – TX
—–
Hello Jack,
A malolactic fermentation can have a light, nutty influence on a wine, but it is typically not noticeable in reds. It is more likely to be a characteristic experienced in whites, more specifically, Chardonnay.
If the your homemade wine has a nutty flavor or taste that is more like hazelnut, I would not be concerned about it too much. It is most likely coming from the malolactic culture. But, if your homemade wine has more of a bitter nut flavor, giving almost a metallic impression, then it could be something called autolysis.
Autolysis is a process that can happen as a fermentation runs out of sugars. The active yeast cell – still looking for food – will begin to consume the dead and inactive yeast cells that lay at the bottom of the fermenter. In doing so, the yeast produce an enzyme that puts off a bitter-nut to metallic flavor. This is the more common reason for having a nutty flavor in wine – particularly, such a young wine.
 The one sure way to keep autolysis from occurring in any wine is by not allowing it to sit on any dead yeast cells for extended periods of time. A few days, or even a couple of weeks is fine in some cases, but neglecting the wine further than this can result in the autolysis process occurring enough to put a nutty flavor in wine.
If you have been keeping up with your rackings, then I doubt autolysis is something that should have even brought up here. In this situation the nutty taste is most likely to be all caused by the malolactic fermentation, but if you still have the wine on the sediment from the primary fermentation, then autolysis is a very real possibility.
If after reading this you feel that the nutty flavor or taste in your homemade wine is coming from the MLF, you have a choice. You can allow the MLF to continue, or if you do not like the flavor, you can permanently stop the MLF by adding a dose of sulfite to the wine. A teaspoon of potassium metabisulfite for every 16 gallons will be sufficient. This will keep it from getting any more intense. If you feel the nutty flavor is coming from autolysis, then you will need to rack the wine into a clean vessel, away from the sediment.
Regardless of why there’s a nutty flavor in wine, it is irreversible. I have seen situations where the nuttiness has reduced or mellowed with aging,  but I would not count on it happening. As a benefit, the nuttiness could end up working out to compliment other characters that develop as the wine ages. This would help by promoting the wine’s complexity.
Jack, I hope this clears up what’s happening to your wine for you. If it is a light hazelnut type flavor I would not consider it a defect at all. Consider embracing it. But if it’s a flavor you just can’t stand, hit the wine with sulfites and see what develops with a little aging.
Happy Winemaking,
Ed Kraus
—–
Ed Kraus is a 3rd generation home brewer/winemaker and has been an owner of E. C. Kraus since 1999. He has been helping individuals make better wine and beer for over 25 years.
Category Archives: Q&A
Sparkolloid: When Do You Add It To Wine?
 At what point do I add the Sparkolloid to my wine?
Jerre M. — TN
—–
Hello Jerre,
Thank you for the great question about when to add Sparkolloid to a wine.
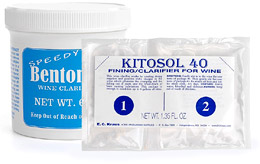
Technically, Sparkolloid fining can be added anytime after the wine has stopped fermenting. However, normally it is added after the wine has been treated with bentonite fining. Sparkolloid powder is kind of the left-hook to the bentonite’s right-jab. One works to take out what the other can’t. You will find all the instructions for its use on the side of the container we offer.
Bentonite takes the most particulate out of the wine, so it is typically used first. Once the fermentation stops, a winery will add a dose of bentonite to drop out the the bulk of the proteins. This is mostly made up of yeast cells and tannin. Most would drop out on its own, but the bentonite helps it drop out more quickly.
While bentonite is the best at dropping out large amounts, what it is not particularly the best at is adding a polish to the wine, or getting out that final, last bit of particles. While the wine will look somewhat clear after a bentonite treatment, there are fining agents that can add more polish to the wine. This is where Sparkolloid finings come in. Sparkolloid powder is able to take out finer particles by neutralizing their electrical charge and allowing them to collect and drop out. This increases the luster or brilliance of the wine. For this reason, after a bentonite treatment is when to add Sparkolloid finings to a wine.
Sparkolloid powder is not good at taking out large volumes of particulate matter. For this reason, if you are only using Sparkolloid to fine your wine, then I would wait a month or two after the fermentation, to make sure that what can drop out on its own does so. Once the wine quits improving in clarity on its own, rack it off the sediment and add the Sparkolloid finings.
So, when to add Sparkolloid powder to a wine really depends on whether or not bentonite is being used beforehand. If so, wait about a week and then add it. If you are not using bentonite, then you may need to wait several weeks before the wine has cleared enough for Sparkolloid to be effective.
Happy Winemaking.
Is Feeding Sugar During The Fermentation Necessary?
 I am making two recipes of Peach wine now and want to know why they call for feeding sugar during the fermentation instead of adding it all at once? Adding the initial amount I get a reading of 1.055. What is the reason for adding of the sugar this way?…
Mark M. – GA
—–
Hello Mark,
It is the thinking of some home winemakers that by feeding sugar during the fermentation you are making it easier for the wine yeast to ferment. If you add the sugar incrementally, you are less likely to have a stuck fermentation.
The reason for this is because you are not ever letting the sugar concentration of the wine must get too high with this method: you put some sugar in the wine must; the yeast ferments it into alcohol; and then you add some more.
There is some valid reasoning behind this, but it sounds like the wine recipe you are looking at is taking it a little too far.
Too much sugar in any liquid can act as a preservative. As the sugar concentration goes higher, yeast, bacteria, molds, all have a more difficult time fermenting. The is why sugar syrups do not spoil at all. The sugar concentration is so extreme that nothing can touch it.
This is true for a wine must, as well. Sugar acts as a preservative on the wine must. As the sugar concentration goes up in a wine must, it becomes increasingly difficult for the wine yeast to ferment. However, if you are targeting an alcohol level of 14% or lower, you should not have any issues in this regard. The yeast can easily ferment the amount of sugar required to make 14% or less all at once. In these situations feeding the sugar to the fermentation is nothing but needless, extra work. You can go ahead and put all the sugar in at the same time.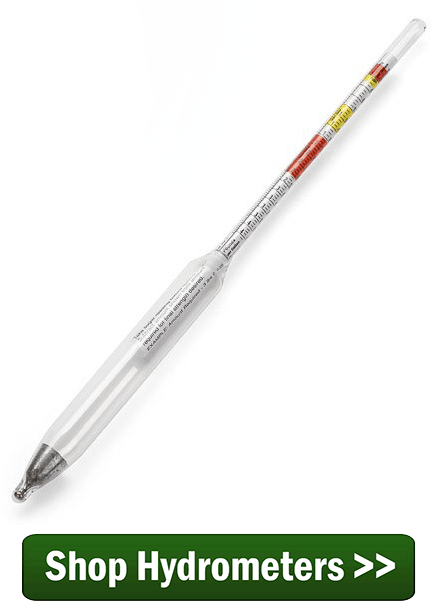
The winemakers that like feeding sugar during the fermentation are typically the winemakers who are trying to drive the alcohol up as much as they can in their homemade wine. The process of feeding sugar during the fermentation becomes necessary if you are trying to produce all the alcohol you can with the wine yeast.
The winemaker would start out by adding enough sugar to ferment 13% – 14% alcohol. As the fermentation began to run out of sugar and slow down, they would then add a little more to extend the fermentation. They would continue to add sugar in increasingly smaller amounts until the wine yeast couldn’t ferment anymore.
In this situation you are fighting two elements: the preservative effects of sugar and the preservative effects of alcohol. Just like when the sugar levels go up, the yeast have a harder time fermenting, the wine yeast have a harder time fermenting when the alcohol level goes up. This means that later in the fermentation things keep getting tougher and tougher to accomplish. The increased alcohol starts to preserve the wine, making the fermentation all that more sensitive to the sugar concentration levels.
I for one do not recommend driving the alcohol up with sugar for the simple reason that the wine will taste watery and out of balance. This is because of the numbing effects of alcohol on the tongue. We can no longer taste the fruit of the wine, only the hot of the alcohol.
Mark, if I were in your shoes, I would forget about feeding sugar during the fermentation regardless of what the wine recipe directions say. Instead, I would simply use my hydrometer to determine how much sugar to add to end up with a wine that’s 12% or 13%. Just keep adding sugar until the potential alcohol scale on the hydrometer reads somewhere in this area.
Happy Winemaking,
Ed Kraus
—–
Ed Kraus is a 3rd generation home brewer/winemaker and has been an owner of E. C. Kraus since 1999. He has been helping individuals make better wine and beer for over 25 years.
Adding Wine Clarifiers Before The Fermentation
 I purchased three cans of Alexander’s Pinot Noir concentrate and the recipe on the label calls for 4 tsp. Bentonite and the other ingredients to be put in the fermenter before the wine yeast. The people at our local brewing store said to use Super Kleer instead and that it was better than Bentonite. I understood that both Bentonite and Super Kleer to be for clarifying before you bottle and not to be put in prior to the yeast? Am I confused?
Name: Debbie C.
State: Missouri
—–
Hello Debbie,
You are right to have some concern.
Bentonite is a fining agent (clarifier) that can either be added in moderate amounts before the fermentation or in larger amounts after the fermentation. It is a clay that is very unique because of the fact that it has a static charge that is stronger than usual. It is this property that makes Bentonite valuable as a fining agent.
Bentonite is able to collect dead yeast cells and drag them to the bottom of the fermentation vessel, leaving a clear wine. Being continually suspended throughout the wine is one of the key factors of how well the Bentonite will work. If it is added and just sits at the bottom of the fermenter, it will do very little in the way of clearing a wine.
When added before the fermentation, not as much Bentonite is needed because it is relying on the fermentation activity to keep it stirred up. It is constantly being churned up by the rise of CO2 gas bubbles that are being created by the wine yeast. This is why your wine recipe only calls for 4 teaspoons. If added after the fermentation, more is needed to be effective, and several periodic stirring sessions are required by the wine maker, as well.
Super Kleer is actually a combination of two different fining agents. Both are liquids: Chitosan and Kiesolsol. We sell something just like it called Kitosol 40. The Chitosan has a positive charge and the Kiesolsol has a negative charge. Each come in their own little pouch, and each are stirred into the wine separately.
I have never added Super Kleer or Kitosol 40 to a wine before the fermentation, so I can’t tell you what it will do to the fermentation with any certainty, but my best guess is that it would slow the fermentation down to a painful crawl. This is because the amounts that are prepared in these pouches are dosed for a finished wine — way more than you would ever want to add to a fermentation.
The presumed effect is that Super Kleer would interfere with the majority of the active wine yeast by continuously trying to collect them and drag them to the bottom in small clumps. This clumping would severely affect the wine yeasts’ ability to ferment.
Happy Winemaking,
Ed Kraus
—–
Ed Kraus is a 3rd generation home brewer/winemaker and has been an owner of E. C. Kraus since 1999. He has been helping individuals make better wine and beer for over 25 years.
Tips for Brewing A Lambic Beer Recipe At Home
 I love lambics. I don’t have much of a sweet tooth for anything except alcohol, but a good lambic seems out of my reach if for no other reason than I don’t have a building with louvred vents like they do in Belgium to capture wild yeasts. I’ve done a little searching online for lambics, but the process seems to be: “make a good ale, then add a bushel or two of apples and let ferment for another 2 years and bottle.” There has to be more to it than that. What do you recommend?
Name: Justin V.
State: Pennsylvania
—–
Hi Justin, thanks for your great question!
I can tell you right now that brewing a lambic beer recipe at home will be a labor of love. First, let me cover some of the elements that make a traditional lambic a lambic, and then I’ll share a couple lambic beer recipes.
As you probably know, lambics were developed around Belgium, specifically in the area of Brussels and the nearby town of Lembeek. Lambic can be traced back hundreds of years and is a very distinctive brew.
One of the main characteristics of lambic is that it is fermented with a variety of wild yeasts, particularly Brettanomyces. These wild yeasts and bacteria gave the beer a dry, unique flavor profile, a combination of tart, earthy, leather, fruity, and even “horse blanket.” As you mentioned, Belgian brewers would traditionally move their wort to a “cool ship,” a large, rectangular vessel with an open top, then leave the wort in the open to collect wild yeasts and bacteria through windows or vents. Some brewers would even refuse to clean those rooms for fear of disturbing the precious microbes!
Lambics can be characterized as pale and moderate in gravity. It’s traditional to have about 30% unmalted wheat in the grain bill. You might try using torrified wheat.
It’s also traditional to use aged hops when brewing a lambic beer recipe, which were used for their preservative value more than their bittering, flavoring, or aroma characteristics. The aged hops would produce a negligible bitterness that wouldn’t interfere with the sour, earthy, and complex wine-like flavors of the lambic. If you don’t have any aged hops on hand, try asking around your homebrewer friends – someone will likely have some lying around.
After the mash and boil, the beer would be moved to the cool ship, and then fermented in barrels. Sometimes fruit was added, especially cherries and raspberries, for added flavor and fermentability. Here is where the tough part comes in – lambic is usually aged one to three years or longer!
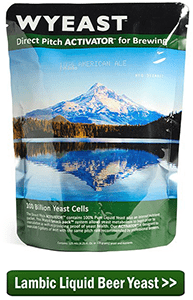 As a beginning lambic brewer, I would recommend using a premixed lambic culture, such as the one offered by Wyeast . This blend contains the appropriate combination of yeast and bacteria to make a lambic. Some brewers will recommend that you use a dedicated set of equipment for your lambic and other “funky” beers so as to avoid cross contamination with your other brews.
With all the information above, I believe you have some good hints as to what to do when you brew a lambic beer recipe at home. Below are two beer recipes. The first is for a lambic-esque beer, made sour with cranberries rather than funky microbes. The second beer lambic recipe is for a more traditional lambic, and comes from the book Brewing Classic Styles by Jamil Zainasheff.
Good luck!
Cranberry “Lambic”, from A Year of Beer
(5-gallon batch, all-grain recipe)
Specs
OG: 1.053
FG: 1.018
ABV: 4.6%
Ingredients
6 lbs. Wheat malt
3.5 lbs. Pilsner malt
1 oz. Hallertau hops at :60 (2.8 AAUs)
.25 oz. Hallertau hops at :15 (.7 AAUs)
.5 oz. orange peel (5 minutes)
5/8 cup priming sugar
1 can cranberry juice concentrate added to secondary
Bavarian Wheat ale yeast
Directions
Mash crushed grains at 124˚F for 30 minutes, then raise temperature to 153˚F for 60 minutes. Raise to 168˚F for mash out. Boil wort for 75 minutes, adding hops according to schedule above. Ferment at 65˚F for 10 days, then move to secondary for 14 days. Glass carboys are recommended for fermentation.
Lambicus Piatzii, from Brewing Classic Styles
(5-gallon batch, extract recipe)
Specs
OG: 1.053
FG: 1.006
ABV: 6.2%
IBUs: 5
SRM: 4
Ingredients
5 lbs. Wheat LME
4.1 lbs. Pilsner LME
3 oz. aged hops (any European low-alpha variety) at :90 minutes
Safale US-05
Directions
Mix LME with enough hot water to make 7.7 gallons and bring to a boil. Add hops and boil for 90 minutes. Chill wort to 68˚F and pitch ale yeast (use half a packet of dry yeast or a full packet of liquid yeast without a starter). After a week, add the lambic blend. Ferment at 68˚F for six months to a year. A layer will form on the top of the beer called a pellicle. This is caused by the lambic culure and it is normal. The pellicle will often fall to the bottom of the fermenter when the beer is ready to be bottled. Bottle for 1 to 1.5 vols CO2.
Justin, this should be enough information to get you on your way to brewing a lambic beer. There are two beer recipes that you can brew at home and some insight and tips on how to get either of them brewed.
—–
David Ackley is a beer writer, brewer, and self-described “craft beer crusader.” He holds a General Certificate in Brewing from the Institute of Brewing and Distilling and is founder and editor of the Local Beer Blog.
Do Your SunCal Concentrates Make Sweet Wines?
 I was looking at your homemade wine kits and was wondering about using the SunCal concentrates to make a Chianti. I saw in the directions that for all the SunCal kits call for 6.5 pounds of sugar. Does this mean that these wine recipes are going to make a sweet wine? I have made wines in the past from buckets of juice and other wine making materials from a local supplier and never had to add sugar.
Barry H.
———-
Hello Barry,
This is a great question about an area of wine making that seems to cause a lot of confusion for some winemakers.
Alcohol is made when yeast consume sugar and turn it into alcohol. If the fermentation is successful there be no more than a residual amount of sugar left in the resulting wine – nothing that would make the wine sweet. All the sugar you add in the beginning is meant to be turned into alcohol leaving the wine dry.
With most homemade wine kits all the original sugars that the grapes provide are still in the concentrate. You are simply adding water to bring the concentrate back to a juice so that you can make wine with it. With the buckets of juice you got locally, all the original sugars were in them, as well, so no additional sugar was needed to achieve a reasonable alcohol level.
But in the case of SunCal Concentrates, not only is water taken out during the concentration process but some of the sugar is removed as well. This is why you need to add the 6-1/2 pounds of sugar. Without doing so you will not get enough alcohol from the fermentation.
 But what if you want a sweet wine, you say. This is something that is controlled after the fermentation has completed. It has nothing to do with the sugar added in the beginning; it as to do with the sugar added after the fermentation. If the fermentation goes as planned, you wine should always turn out dry.
If you want to sweeten your wine, the time to do it is right before you bottle. Just sweeten it to taste and then add a wine stabilizer (potassium sorbate) to eliminate any chance of re-fermentation, or you can use Wine Conditioner which has sweetener and wine stabilizer mixed together.
With this basic understanding of the role sugar plays in a wine you can make any of our wine recipes or homemade wine kits as sweet or as dry as you like. Make the wine the way you like!
Happy Wine Making,
Ed Kraus
—————
Ed Kraus is a 3rd generation home brewer/winemaker and has been an owner of E. C. Kraus since 1999. He has been helping individuals make better wine and beer for over 25 years.
What Size Rubber Stopper Fits What?
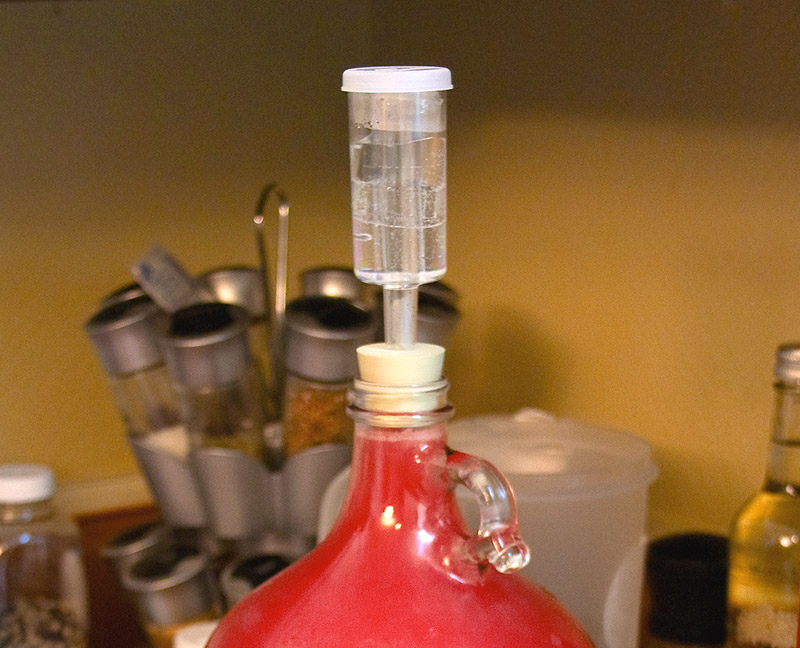 One of things that almost every home winemaker uses is a rubber stopper. It’s used to attach an airlock to a plastic fermenter or wine carboy. The rubber stopper is tapered in shape, has a whole in it for the airlock, and comes in various sizes.
Knowing what size of rubber stopper to purchase can be of some issue. Whether you are using a gallon glass carboy or plastic fermenter makes a difference as to the size rubber stopper you need. I thought it would be nice to go over, “what size rubber stopper fits what”, since we offer 25 different sizes to choose from.
I should start of by saying that any bucket fermenter we offer takes a size #2 rubber stopper. This may not be the case with a fermenter purchased elsewhere. It depends on the size of whole the supplier decides to put into the plastic fermenter.
Glass carboys come in an array of sizes and take a different sized rubber stopper as the size changes. There are 6.5 , 6 , 5 and 3 gallon sizes. The rubber stopper size for each is as follows:
6.5 Gal. Glass Carboys (Size #6.5) 
6.0 Gal. Glass Carboys (Size #6.5)
5.0 Gal. Glass Carboys (Size #7)
3.0 Gal. Glass Carboys (Size #7)
7.0 Gal. Large-Mouth (Size #10)
6.0 Gal. Large-Mouth (Size #10)
You may need to size a plastic wine carboy with a rubber stopper as these have become more popular over time. A plastic carboy takes a size #10.0 rubber stopper regardless of its size.
Other sizes of rubber stopper you may need to know is are:
Wine Bottle Opening (Size #2.0)
Beer Bottle Opening (Size #2.0)
Large-Mouth Gallon Glass Jugs, Quick Quarter Turn Lid (Size #8.0)
Small-Mouth Gallon Glass Jugs, Thread-Down Lid (Size #6.0) 
Visit our website. It lists all of these rubber stoppers and more along with their dimensions.
———————————–
Ed Kraus is a 3rd generation home brewer/winemaker and has been an owner of E. C. Kraus since 1999. He has been helping individuals make better wine and beer for over 25 years.
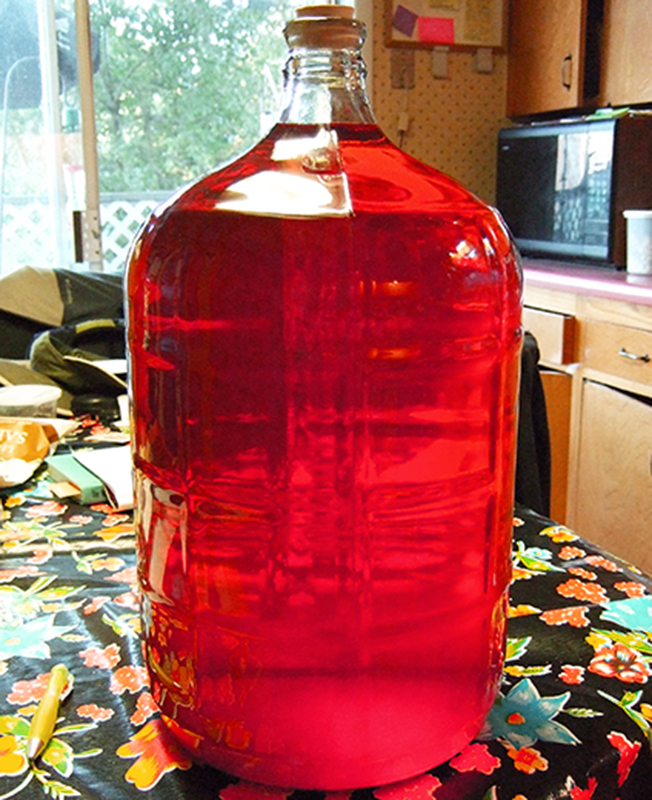
My Homemade Wine Has Bubbles And Sediment. What Should I Do?
 I made 36 gallons of wine last year, a Alicante and Zinfandel mix. This was my first attempt at winemaking. I followed the instructions from a winemaking book. I racked the wine three times put in the proper extra ingredients then bottled it over the correct period of time. The wine turned out terrible. There is still sediment and it must have not fermented properly because the wine still has bubbles. Is there anything that I can do? I’m thinking of emptying all the bottles into my 35 gallon container. Maybe letting it set and rack it again. I don’t know what to do because it really doesn’t taste good at all. Any suggestions would be really appreciated. Even throw it all out!
Thanks Frank
Name: Frank S.
State: Colorado
—–
Hello Frank,
Most of the time when I hear about bubbles and sediment in the wine it’s because the wine is still fermenting in the bottle. The fermentation causes CO2 (carbonation) to form in the wine and sediment to drop out (dead yeast cells). But, in this cause I am also concerned about the wine having spoiled, as well.
 Spoilage is best determined by the wine’s smell. Does it have a fingernail polish or paint thinner odor? Does it have a cooked cabbage or rotten food odor? Do you smell something like rubber or band-aids in the wine? Any of these would indicate potential spoilage. The only smell that would be acceptable, other than the fresh bouquet of the wine, would be a sulfur or yeasty smell. This would be expected from a freshly fermented wine and will lessen with time.
If it seems that the wine has spoiled, there is little you can do about it other than to discard it. There is nothing you can do to reverse such a wine fault. But, if the wine is not giving off any of these off-odors, then there is hope.
From you description you gave of bubbles and sediment in the wine, it may be very likely that your wine is still slightly fermenting or has fermented in the bottles. If this is the case – then just as you have suggested – decanting all the bottles of wine back into a fermenter would be the first plan of action. Try not to splash the wine anymore than necessary. This can cause the wine to oxidize.
The whole idea behind putting the wine back into a fermenter is to allow it time to finish fermenting, if necessary, and/or to clear up. Take a hydrometer reading of the wine. If the Specific Gravity is above .998, then some fermentation time is needed.
Once any fermentation is done, you will want to degas the wine. This is done simply by agitating the wine so as to release all the CO2 gas from the wine. You can use a tool call degassing paddle to help degas your wine as well.
The wine will need some time to clear. This is something that can only begin to happen after any fermenting has completed. A fining agent such as bentonite may be added to help speed up the settling process. Being patient with this step will be in the wines favor. Just keep it under air-lock and give it plenty of time, even months. There is nothing wrong with bulk aging a wine. If you do plan on waiting more than a couple of weeks to bottle the wine, you should add a half-dose of potassium metabisulfite to the wine. (1 teaspoon to every 32 gallons).
When the wine is ready to be bottled, you will want to siphon it off the sediment, first. You will also want to add another full-dose of potassium metabisulfite right before bottling.
Happy Wine Making
Ed Kraus
———————————–
Ed Kraus is a 3rd generation home brewer/winemaker and has been an owner of E. C. Kraus since 1999. He has been helping individuals make better wine and beer for over 25 years.
What Equipment Do I Need To Make Grape Wine?
 This time of the year we receive a lot of various questions about making wine from the different fruits that are coming into season. One particular question we get quite often has to do with making homemade grape wine:
What equipment do I need to make grape wine?
Well… it depends. I know what your thinking, why can’t this guy give us a straight answer? I want to, but that would not do you or the question any justice.
The answer depends on the amount of grapes you need for your wine recipe. And, that is based on the kind of grapes we are talking about and the size of the batch you intend to make. If you are making wine from wild grapes such as mustang, muscadine, scuppernong, fox, etc., you’ll only need to prepare 20 to 40 pounds of grapes to make a 5 gallon batch. This is certainly manageable by hand and no exclusive equipment will be needed to make the grape wine.
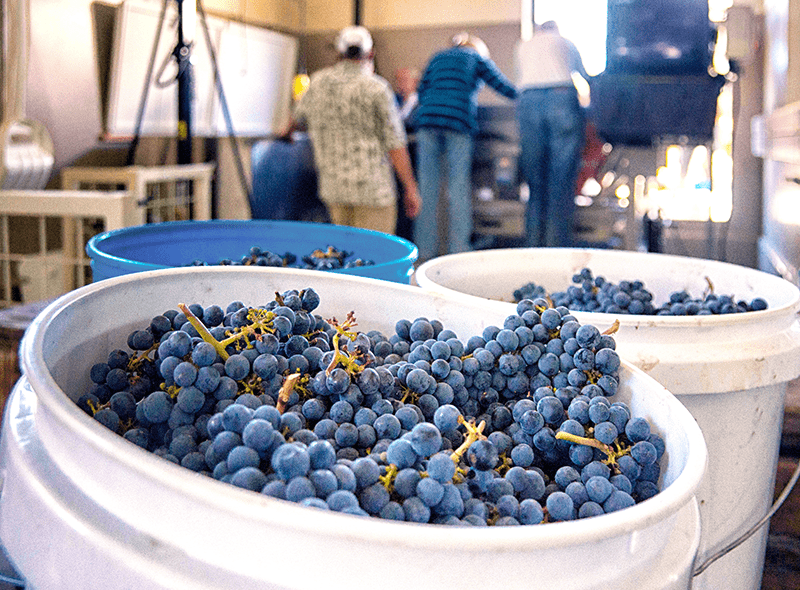
But, if you plan on making 10 gallons of wine using actual wine grapes such as Cabernet Sauvignon, Merlot, or even Foch, now you are dealing with about 160 pounds of grapes… this is when you need some equipment to make your grape wine.
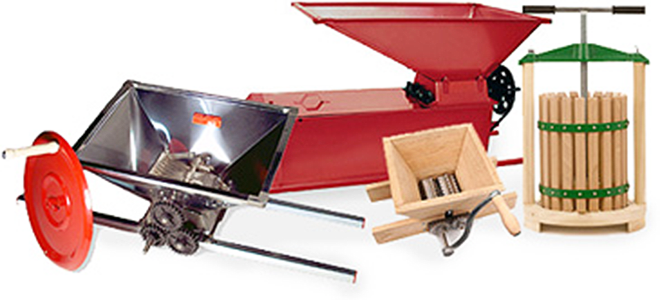
Before any grape can be fermented it needs to be crushed with a grape crusher. A grape crusher is different from the grape press. A grape crusher only bursts the grape skins open. You can certainly crush the grapes by-hand, depending on the amount needed to be crushed, but the grapes definitely need to be crushed before they can be pressed.
At some point in the wine making process you will need to squeeze the pulp to get all the liquid out of it. For white wines this pressing is done right after the grapes are crushed. For red wines the grapes are pressed after the must has fermented with the crushed grapes for about 3 to 7 days.
You can squeeze the pulp by-hand, just be aware that this will lead to a wine with less body and color. Also, you won’t be getting all of the juice. You will not be able to press the pulp nearly as well as an actual wine press can. Unless you are dealing with a very small amount of grape – say, 20 or 30 pounds – shopping for a grape press is probably in your future.
For larger volumes of grapes, say 500 pounds or more, another piece of equipment you will need to make grape wine is a grape crusher/destemmer combo. When you make wine from grapes a majority of the stems need to be removed. If this does not happen, a ropy bitterness can be present in the finished product. Doing this by-hand is not so bad if dealing with a few hundred pounds, especially if you get the kids involved, but for larger amounts you will probably want to invest in a crusher/destemmer.
In general, the grapes need to be crushed, destemmed and pressed to make it through the wine making process. Any of this can be done by hand, but if you are dealing with 50 or 100 pounds or more, you will want to use some equipment to make your grape wine.
———————————–
Ed Kraus is a 3rd generation home brewer/winemaker and has been an owner of E. C. Kraus since 1999. He has been helping individuals make better wine and beer for over 25 years.
Homebrew FAQ: Top 5 Beginner Questions- Answered
 Spend any amount of time on homebrewing forums, and you’re bound to see several of the same questions come up again and again. Don’t feel bad – it’s just part of the learning process. To simplify that process, I’ve compiled answers to the top 5 most common home brewing questions beginners have about home brewing. But remember, there’s more than one way to open a bottle of beer – ultimately, you will brew the way that makes the most sense for you.
So without further ado: 5 Most Common Home Brewing Questions – Answered!
- Is my beer infected?
If you have to ask, then something may very well be amiss. But if it’s your first batch, don’t freak out just yet. Just follow the instructions that came with your beer recipe kit to the end, and then taste the beer. Does it taste good? If so, you’re in good shape. If not, something went wrong. It might be an infection, or it could be a number of other issues. Consult the BJCP Fault List to try to figure out what might have happened and consider doing some Off-Flavor Training to hone your palate so you can identify potential missteps. Even if you do discover a likely infection, use it as a learning experience – your next batch is bound to be that much better.
- Do I have to rehydrate dry yeast?
Absolutely not. I’ve brewed many batches of beer just sprinkling the yeast over the wort. It works just fine, and it’s certainly easy. But is it the best way to pitch dry yeast? That’s up for debate. Many experts agree that yeast should be rehydrated in a small amount of water before pitching. Their reasoning is certainly sound, but when in doubt, follow the directions on the yeast packet or visit the manufacturer website for more information.
- How come I missed my starting gravity (SG)?
For beginning homebrewers, a starting gravity that’s significantly off is due to one of these reasons:- Hydrometer reading off – Keep in mind that a hydrometer is calibrated to a certain temperature, usually 60 or 68˚F. For best results, chill the sample to the appropriate temperature and/or use a hydrometer temperature correction calculator to make adjustments. Read How to Take a Hydrometer Gravity Sample for more tips on working with hydrometers.
 Added water to fermenter without regards to gravity – Many homebrew recipe kits instruct the brewer to top off to five gallons, but if for some reason you didn’t get all the malt extract out of the can or lost some volume in the process, adding this much water may dilute your beer below the target starting gravity. For best results, take a gravity sample before diluting and use a dilution calculator to figure out exactly how much water to add in order to hit your target SG.
- It’s been two weeks – why aren’t my bottles carbonated?
When bottling homebrew, carbonation occurs by giving the yeast a small amount of extra priming sugar to consume. After capping, the yeast will eat the sugar and produce CO2, but since the bottle is sealed the carbonation will have nowhere to go but into solution in the beer. In order for the yeast to do their job, they have to have ideal conditions, in particular, a temperature range that’s warm enough for them to work. This usually means about 70˚F. If the beer is stored in a cold basement or refrigerator during this phase, the yeast won’t carbonate the beer or may do so very slowly. Make sure the bottles are in a warm room and give them some more time. Only in rare cases will additional action need to be taken in order to carbonate your beer.
- Do I have to do a secondary fermentation?
Absolutely not. Though secondary fermentation is often used as a way to improve beer clarity, many beers will turn out fine with just a primary fermentation of two to three weeks. Secondary fermentation is only required (I use that term loosely), when aging the beer for an extended amount of time (months). Check out The Pro & Cons of Secondary Fermentation for more reasons why, or why not, to do a two-stage fermentation.
There you have it – simple answers to some of the most common beginner home brewing questions.
What other home brewing questions belong on this list?
———————————–
David Ackley is a beer writer, brewer, and self-described “craft beer crusader.” He holds a General Certificate in Brewing from the Institute of Brewing and Distilling and is founder and editor of the Local Beer Blog.