6 Ways to Recharge Your Homebrewing Mojo

Homebrewer With Mojo2I get it – we all get bogged down by the rhythms of modern life. Sometimes, it’s hard to make time for homebrewing, and before long, it’s been months since your last brew day.
That’s when you remember, “but I love brewing!” and ask yourself, “how do I get back into it?” Well, here are six ideas to get back into the swing of homebrewing:

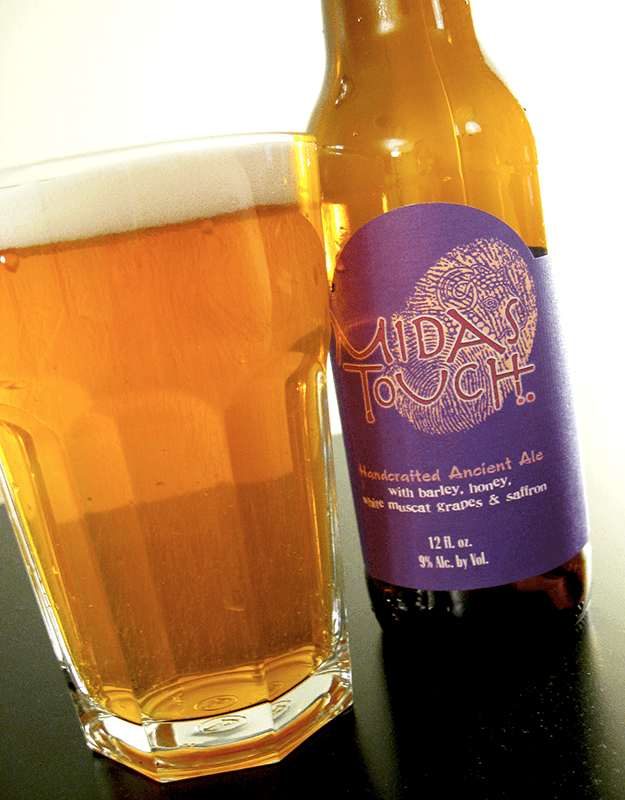
  1. Brew your favorite beer – What’s the best beer you’ve ever tasted? How would you like to have five gallons of that beer on hand? Whether it’s a commercial beer or a homebrew, chances are you can make a clone. Create your own clone recipe or choose from some of these clone recipe homebrew kits.
  1. Make it social – Brewing’s more fun with others. Invite some homebrewers you know over for a brew day, or maybe introduce one of your friends to the hobby. Make a party of it. Serve some food, some beer, watch the big game. More hands on deck means less work and more fun.
    Shop Steam Freak Kits
  1. Go to an AHA Rally – The American Homebrewers Association has been hosting homebrew rallies at craft breweries all over the country. Take a little road trip, try some homebrews, make some friends. Want to take it a step further? Go to the National Homebrewers Conference.
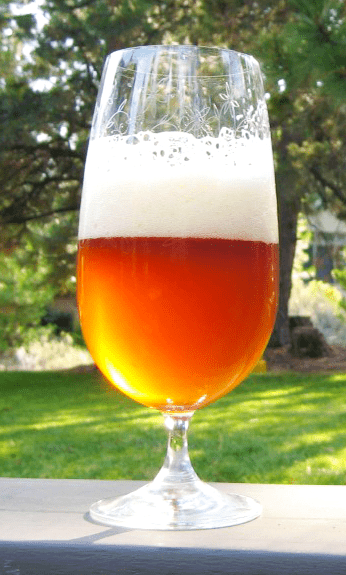
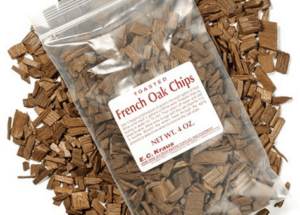
  1. Try something different – If you’ve been stuck in a homebrewing rut, maybe it’s time to mix things up. If you’re an extract brewer, maybe it’s time to give all-grain a try. Or maybe experiment with brewing a lager, mead, sour beer – maybe even give winemaking a try. Try something different and you may revive that curiosity that got you into homebrewing in the first place.
  1. Get a new toy – Nothing inspires quite like a new homebrewing gadget. Maybe it’s time you got yourself a propane burner, a stir plate, or a pH meter.
  1. Enter a competition – Sometimes, the best motivation is a deadline.Shop Temp Controller Search for homebrew competitions in your area and sign up. Plan out how much time you’ll need to brew, ferment, and age the beer before sending it in. Read these tips for succeeding in homebrew competitions and put that brew date on the calendar!

Have you ever found yourself in a homebrew funk? What did you do to get out of it?
—–
David Ackley is a beer writer, brewer, and self-described “craft beer crusader.” He holds a General Certificate in Brewing from the Institute of Brewing and Distilling and is founder and editor of the Local Beer Blog.

Midas Touch: Is It Beer, Wine, or Mead? How About All 3!

Dogfish Head Midas Touch Clone Beer RecipeIf you haven’t figured it out yet, we’re talking about Dogfish Head’s Midas Touch. First a little back-story on how this beer came into being:
Maybe it’s human nature, but for some reason we always seem to have a way of trying to put things into neat little categories. Is it a West Coast IPA or an East Coast IPA? A Belgian ale or a Belgian-style ale? Is it craft beer or crafty beer?
We even try to establish clear definitions of beer itself. What is beer? Is it limited to just water, barley, hops, and yeast, in accordance to the German Reinheitsgebot? Or are other ingredients permitted, like wheat and rice? What about beers with no malt or no hops at all?
This obsession with categorizing beer could be a modern affliction. When we look at ancient recipes, the lines between beer, wine, and mead were often quite blurry.
That’s exactly what was discovered when archeologists uncovered the remains of over 150 vessels in what could be the tomb of the fabled King Midas – who actually ruled in Turkey some 2700 years ago. Biomolecular archaeologist Patrick McGovern, who specializes in ancient ales and wines, discovered through rigorous testing of the vessels that the beverage they once contained was actually a combination of beer, wine, and mead. He was able to isolate specific compounds that indicated that barley, grapes, and honey were all likely combined into a single beverage.
Like any good biomolecular archeological zymologist, McGovern set about to recreate this ancient beverage. He solicited the help of a number of craft brewers to develop the recipe, ultimately choosing Sam Calagione’s recipe as the best. This beer was eventually released by Dogfish Head as Midas Touch, and has since won a number of awards at major beer competitions.
The staff at Brew Your Own Magazine were generous to share a clone recipe in the November 2002 issue. Enjoy the recipe below for a taste of ancient ale!

Dogfish Head Midas Touch Clone (via BYO Magazine)
(5-gallon batch, extract)


Specs
OG: 1.078
FG: 1.010
IBUs: 10
ABV: 9%
Ingredients
3.3 lbs. Briess light LME
1.5 lbs. Briess light DME
3 lbs. honey
Shop Steam Freak Beer Recipe Kits2 lbs. SunCal Chablis grape concentrate
0.5 oz. Willamette hops (5% AA) at :60
1 tsp. Irish moss at :60
0.5 oz. Willamette hops (5% AA) at :15
1/2 teaspoon dry saffron at :15
Wyeast 3787: Trappist High Gravity ale yeast
3/4 cup priming sugar
Directions: At least 24 hours prior to brewing, prepare a yeast starter. On brew day, heat 2.5 gallons of clean, chlorine-free water and mix in the malt extract. Bring to a boil, and add the bittering hops and the Irish moss and boil for one hour. In the last 15 minutes of the boil, at the flavoring hops and the saffron. At the end of the boil, mix in the honey and let stand for 5 minutes. Chill wort and strain into a fermenter with about two gallons of clean, pre-boiled, pre-chilled water. Use a sanitizer stirring spoon to mix in the grape concentrate, then top off to 5.5 gallons. Aerate the wort, pitch yeast, and ferment at 68-70˚F until complete. Bottle or keg and allow the beer to condition for 3-4 weeks.
Do you have a Dogfish Head Midas Touch Clone Beer Recipe? Looking for more Dogfish Head clone recipes? Check out this Dogfish Head 90-Minute IPA Clone!
—–
David Ackley is a writer, brewer, and craft beer marketing consultant. He holds a General Certificate in Brewing from the Institute of Brewing and Distilling and is founder of the Local Beer Blog.

How Do I Increase the Alcohol Content of Homebrew?

High Gravity Beer Over FlowingWhen making beer at home, yeast turns fermentable sugar into alcohol and CO2. Increase the fermentable sugar, and you increase the potential alcohol content. These higher-alcohol brews are often referred to as “high gravity”.

Why increase the alcohol content of a beer?
You may be interested in “upgrading” a beer recipe to a double or imperial version. Say you have a great stout recipe, but want to bump it up to an imperial stout. Add more fermentable sugar, and the potential alcohol goes up.
You may also want to increase the alcohol content of a beer to make it better for aging. Higher alcohol content helps prevent contamination and encourages flavors to develop over time. “Winter warmers” – higher gravity beer, often brewed with spices and other flavorings – make great holiday gifts. Brew a high-gravity spiced ale for New Year’s Eve, and let it age so you can pull it out for future New Year’s Eves and see how the “vintage” changes over time. (Hint: these 1-Liter amber bottles can give your beer an elegant look.)

By how much can you increase the content of a homebrew?
Most beer yeast will stall out at 12-15% alcohol by volume, some even way before that, depending on the strain. Some are more alcohol tolerant than others. Beyond a certain point, adding more fermentable sugar than the beer yeast can handle will only make the beer sweeter, not increase its alcohol.

Sources of fermentable sugar
There are several ways to add more fermentable sugars to your beer. This increases the original gravity of the beer, which is measured with a hydrometer.

  • Malt – If brewing all-grain or partial mash, adding more malt will increase the gravity. Most of your gravity will come from an increase in base malt, but you may also increase the specialty malts to keep the flavors in balance.
  • Malt extractShop Liquid Malt Extract – Adding malt extract to your recipe is an easy way to add more fermentables for both all-grain and extract brewers. Just mix it right in the kettle as usual.
  • Sugar – Adjunct sugars offer yet another way to raise the gravity of a beer, but don’t limit yourself to plain old white table sugar. There are several types of sugar, from cane sugar and brown sugar to more exotic sugars like candi sugar and panela. Maple syrup and honey are also interesting sugar sources. Keep in mind that nearly 100% of the sugar will be fermented into alcohol. Generally speaking, the darker the sugar, the more color and flavor will be contributed to the beer.

Another option: add alcohol directly to the beer
If you want to make something along the lines of a bourbon barrel stout or a wine barrel saison, you can add liquor directly to the beer after fermentation. Flavored liqueurs can also be used to add fruit, chocolate, or coffee flavor to beer. This is a great option if you want to take a five-gallon batch and divide it into different experiments after fermentation.
Though there’s a time and a place for lower-alcohol, session beers, there are times when raising the alcohol content of a homebrew gives it an added level of sophistication. What are some of your favorite high-gravity beers?
—–
David Ackley is a writer, brewer, and craft beer marketing consultant. He holds a General Certificate in Brewing from the Institute of Brewing and Distilling and is founder of the Local Beer Blog.

6 Ways To Avoid A Homebrew Hangover

HangoverOne homebrewing topic that doesn’t get enough attention is over-consumption. Sure, we like to savor our beer, but having five gallons worth of it on hand makes it pretty tempting to imbibe more than we should. If for no other reason, avoiding a toxic hangover is reason enough to moderate how much beer we drink.
Without getting preachy, if you’re someone who wants to reduce your alcohol intake – and avoid the homebrew hangover that comes with it – you might consider some of these options:

  1. Brew lower gravity beers – “Session” beers – those with 4.5-5% or less alcohol by volume – are all the rage these days. It seems that consumers are more interested in enjoying a refreshing beverage over the course of a few hours, as opposed to getting the most ABV bang for your buck. You might consider keeping at least one session beer in the rotation on a regular basis. Some good options include a mild, summer ale, or English bitter.
  1. Drink from a keg – One of the advantages of a draft system is that you can pour as much or as little as you’d like. Want more than one beer but less than two? Easy! Draft systems are great for limiting your daily consumption (but it’s just as tempting to overdo it, so be careful!). Buy Home Brew Starter Kit
  1. Mix a shandy – Planning a long drinking session? Stretch your beer out further by blending it with something non-alcoholic, like ginger beer or soda. It sounds weird, I know, but they can actually be really refreshing and be an enjoyable way to avoid the homebrew hangover. Check out Shandy is Dandy for some shandy mixing recommendations.
  1. Avoid fusel alcohols – This point has more to do with the quality of the alcohol than the quantity. Fusel alcohols, or higher alcohols as they’re sometimes called, are often responsible for splitting headaches. By keeping your fermentation temperature under control, you can limit fusel alcohol production and at least some of the headache that comes with a hangover. Reducing fusel alcohols will have the adding benefit of reducing solvent-like off-flavors in your beer.
  1. Drink with food and water – Keeping hydrated is key to avoiding a homebrew hangover. If drinking at a hot homebrew festival or similar event, aim for a 1:1 ratio of beer to water (for every beer you try, drink an equal amount of water). And be sure to get some food in your stomach – just the break from drinking can be enough to keep things under control.
  1. Eat yogurt and dry yeast? You might have seen a recent news article about Jim Koch of Boston Beer Co. having a “secret remedy” that allows him to drink all day without getting drunk. I’m not sure about the validity of this method, but it’s worth a try, right?Buy Steam Freak Kits

What strategies do you use to keep from avoiding a homebrew hangover? Share in the comments below…
—–
David Ackley is a writer, brewer, and craft beer marketing consultant. He holds a General Certificate in Brewing from the Institute of Brewing and Distilling and is founder of the Local Beer Blog.

Oak Aged Imperial IPA: No Barrel Needed!

Imperial IPA made from a homebrew beer recipeWe Americans tend to like everything bigger and better – even our beer. For those of us who enjoy big hop bombs, a regular India Pale Ale doesn’t always cut it. Let’s take it to the next level with an IMPERIAL IPA.
Imperial IPAs are sometimes known as Double IPAs. All the word “imperial” or “double” means is that they have more of everything: more hops, more malt, and more alcohol. The color remains in the light amber to copper color range. Malt flavor should be present, but hops are the main event, usually American hop varieties. Most Imperial IPA beer recipes will have a substantial amount of late addition flavor and aroma hops, often with a decent to aggressive amount of dry hops for even more hop aroma. Alcohol content typically ranges from about 7.5-10% ABV.
The Imperial IPA beer recipe below goes one step further by incorporating oak flavor. In no way should the oak dominate the flavor of the beer. It should just be a subtle note that supports all of the other flavor elements.
In the event that you don’t have your own barrel, have no fear. Oak chips added to your beer during secondary fermentation can provide the same effect. I’d suggest tasting the beer while it ages on the oak chips to determine the level of oak flavor you’d like in your beer. If you’d like to add yet another dimension to your Oak Aged Imperial IPA, consider soaking the oak chips in whiskey for a couple days.
Ready to brew? Let’s do it!

Oak Aged Imperial IPA Beer Recipe (Partial Mash)
(5-gallon batch)Shop Dried Malt Extract
Specs
OG: 1.081
FG: 1.020
ABV: 8%
IBUs: 90
SRM: 11
Ingredients
1 lb. Weyerman Pale Ale Malt
1 lb. Briess Caramel 60 Malt
.5 lb. Briess Red Wheat Malt
9 lbs. Light Dry Malt Extract
1 oz. Northern Brewer hops at :90
1 oz. Northern Brewer hops at :30
1 oz. Cascade hops at :10
1 oz. Centennial hops at :10
1 oz. Cascade hops dry hopped for 7-10 days
1 oz. Centennial hops dry hopped for 7-10 days oak chips
2 packs Wyeast 1028: London Ale yeast
1 oz. Toasted American oak chips
Directions
The night before brewing, pitch the Wyeast 1028 into a 2L yeast starter. On brew day, mix the crushed malts with 3 quarts of water at 160˚F in a large stockpot. Hold temperature at 152-155˚F for 45 minutes. Raise temperature to 170˚F and strain through a colander into your brew kettle. Rinse grains with 3 qts. water at 170˚F. Add enough water to make 3 gallons of wort and bring to boil. Total boil time will be 90 minutes. Add hops according to schedule above. During the last 20 minutes of the boil, stir in the dry malt extract. At the end of boil, chill wort with an ice bath or immersion wort chiller. Pour wort into a sanitized fermenter and top off with enough cool, clean, chlorine-free water to make 5.5 gallons. When wort is 70˚F or below, pitch yeast starter into the wort. Ferment at 68˚F for 7 days, then transfer to a secondary fermenter for 10-14 days or longer. Add dry hops with about 7 days left in secondary fermentation. Add toasted oak chips with 2-3 days left in secondary. Bottle or keg for about 2.2 vols CO2. This beer may benefit from some aging.
Do you like big, oak-aged beers? What are some of your favorite? So you have an Imperial IPA beer recipe you’d like to share with us? Comment Below…
—–
David Ackley is a beer writer, brewer, and self-described “craft beer crusader.” He holds a General Certificate in Brewing from the Institute of Brewing and Distilling and is founder of the Local Beer Blog.

Homebrewing: By the Numbers

The 411 on home brewing measurements.Home brewing doesn’t require you to take a whole lot of measurement or to know a whole lot about the science side of the hobby. After all, people have been making beer for thousands of years, and it wasn’t until relatively recently that anyone really understood the role yeast played in the brewing process. But in order to make good beer predictably and consistently, knowing how to control the numbers is critical.
Below, find a breakdown of the most common home brewing measurements and figures used when making beer. Learn how to work these numbers, and your homemade beer will be all the better!
 
Common Home Brewing Measurements:

  • Volume – One of the most basic calculations you’ll need to keep track of is volume – the amount of space your beer takes up. Overshooting or undershooting your volume measurements can have a huge impact on beer color, flavor, alcohol content, mouthfeel, and more.
  • Weight – Homebrew ingredients are typically measured out by weight. A digital scale is an important tool for your home brewery.
  • Temperature – Measuring temperature comes into play in several parts of homebrewing. We often try to hit a specific temperature when steeping or mashing grains. Having good control over fermentation temperature can “make or break” your beer.Shop Accurate Scales
  • Gravity – Specific gravity is a measurement of the density of a liquid. Pure water has a specific gravity of 1.000. In brewing, gravity tells us how much dissolved solids there are in wort and in finished beer. We usually measure gravity with a hydrometer. By taking the original or starting gravity and subtracting the finished gravity, we can figure out how much sugar was consumed during the fermentation process and calculate the alcohol content of the finished beer. You’ll often hear beers called “high-gravity” or “low-gravity” (As in, “Man, I had way too many high-gravity beers last night!”). This refers to the original gravity of the beer, and by extension, the alcohol content.
  • ABV – “Alcohol by volume.” Using the gravity measurements from above, we can figure out the alcohol content of beer. Take the original gravity (let’s say 1.050) and subtract the final gravity (1.010). Take that number (0.040) and multiply by 131.25 to get the alcohol content (5.25%). There are ABV calculators that can help with the math, but I find it’s easy enough just to plug the numbers into my phone.
  • IBUs – “International Bittering Units.” In Europe, these may be listed as EBUs – they’re the same thing. IBUs are a figure that relates how much bitterness is contributed to a beer by hops. You can do IBU calculations by hand, but for these I usually use an IBU calculator. But in general, know that the more hops you use, the higher the alpha acid content of the hops, and the longer they are boiled in the wort, the higher the IBUs.
  • Alpha AcidsShop Temp Controller – Alpha acids, which are found in hops, are what make beer bitter. They’re expressed as a percentage of the total weight of the hops. For example, Cascade hops are typically 4.5-6% AA. You’ll often see recipes that call for a specific number of AAUs or HBUs. These stand for alpha acid units or homebrew bittering units. These are an easy way to develop consistency when alpha acids may change from batch to batch. To calculate AAUs or HBUs, take the weight of the hops (say, 1.5 oz.) and multiply by the alpha acid content of the hops (5%). That adds up to 7.5 AAUs.
  • SRM – SRM stands for standard reference method and is a measurement of beer color. The palest beers, like wits and pale lagers, are in the 2-5 SRM range. Anything over about 35-40 is a very dark beer. (In Europe they use the EBC scale – it’s roughly double SRM.)
  • Lovibond – Lovibond is a measurement of malt color, the main contributor to beer color. Very pale pilsner or pale ale malt is usually below 5 degrees Lovibond. Some of the mid-range malts that give beer an amber or copper range from about 20 to 100˚L. The darkest malts – the chocolate malts and heavily roasted malts – tend to be in the 300-500 range. A good recipe builder will help you with the math of predicting beer color.

 
Other Home Brewing Measurements and Calculations
These are just some of the primary figures used in homebrewing. As you advance in the hobby, you’ll also start paying more and more attention to things like efficiency, pH, pitching rates, and attenuation. But if you have firm control over the numbers above, you’re well on your well to brewing some excellent beer!
—–
David Ackley is a writer, brewer, and craft beer marketing consultant. He holds a General Certificate in Brewing from the Institute of Brewing and Distilling and is founder of the Local Beer Blog.

Two Homemade Root Beer Recipes ("Soda" and "Hard")


Mug Of Homemade Root BeerIf you grew up in the US, chances are you have fond memories of A&W and Barq’s – there’s just nothing like the woody, spicy taste of root beer.
Think of the name “root” beer – traditionally it is actually made with a variety of roots, herbs, and spices that contribute flavor and color to the concoction. Among the common ones are wintergreen, vanilla, ginger, licorice, anise, birch, burdock, and sarsaparilla, to name a few.
When making your own root beer, trial and error will help you figure out what methods and ingredients you like best.

How to Make Homemade Root Beer

This version of root beer is a soda. Due to the fact that the root beer is bottle conditioned, there’s a small amount (less than 0.5% ABV) of alcohol present in the beer, but not enough to get much of a buzz.
The flavoring in this root beer recipe comes from Zatarain’s Root Beer Extract and makes the brewing process very simple. The most important thing is to halt the fermentation when the carbonation is correct by refrigerating the root beer. Otherwise, bottles could explode.
Feel free to scale this root beer recipe for a larger or smaller batch.

Zatarain’s Root Beer Recipe
(5-gallon batch)
Ingredients
1, four-ounce bottle Root Beer Extract
5 gallons of warm, filtered water
3-4 lbs. sugar
5 grams dried beer yeast dissolved in warm water
Directions
Fill a bottling bucket with five gallons of warm (not hot), filtered water. Dissolve sugar in water, then add root beer extract and hydrated beer yeast. Mix well, then bottle in about 53 cleaned and sanitized 12-oz. beer bottles. Cap securely and age bottles at room temperature for 24 hours. Open a bottle and check for appropriate carbonation. If more time is needed, check again every 8-12 hours until desired carbonation is achieved. When desired carbonation is reached, store bottles in a refrigerator to prevent further fermentation.
 
How to Make Alcoholic Root BeerShop Root Beer Extract

For those who want to make a “grown-up” or more traditional version of root beer, the technique gets a little more interesting. Instead of a root beer extract, this recipe uses a mix of herbs and spices to achieve the right blend of flavors. Many of them can be found at natural or health food stores in the bulk section. And instead of large amounts of sugar remaining in the root beer, we’ll use malt extract and brew like we would a normal beer. Just keep in mind that because we’re allowing the beer to ferment, hard root beer won’t taste as sweet as what you buy from the store. However, lactose sugar, caramel malt, and Carapils malt help keep the residual sweetness on the higher end.

“Hard” Root Beer Recipe
(5-gallon batch, partial mash)
Specs
OG: 1.068
FG: 1.023
ABV: 5.9%
SRM: 28
Ingredients
6.6 lbs. dark LME
1 lb. dark DME
1 lb. caramel 90 malt
1 lb. Carapils malt
1 lb. lactose sugar
4 oz. dried sarsaparilla root
2 oz. dried burdock root
2 oz. dried spikenard root
1 oz. dried wintergreen leaves
1 oz. vanilla extract
0.5 oz. dried licorice root
1 oz. hops (any variety)
1 pack ale yeast

Directions
Steep crushed grains in one gallon of water at 155˚F for one hour. Strain out from wort, then mix in malt extract and enough water to make 2.5 to 5 gallons of wort, depending on the size of your brew kettle. Add herbs, spices, and hops and boil for 30 minutes. Strain out herbs and spices and mix in lactose sugar. If needed, top off with enough clean, filtered water to make five gallons. Cool and transfer to a clean, sanitized fermenter and ferment until complete. Bottle or keg as you would otherwise.
That’s how you make your own root beer. As you can see either of these recipes are not all that difficult, and the first recipe would be great to do with the kids.
—–
David Ackley is a beer writer, homebrewer, and self-described “craft beer crusader.” He holds a General Certificate in Brewing from the Institute of Brewing and Distilling and is founder of the Local Beer Blog.

6 Tips For Making Your Beer Sweeter

3 Sweeter Craft BeersThough in some instances you might appreciate a dry beer, it’s nice to mix things up once in a while and have a sweeter beer on hand. Or, when trying to dial in a beer recipe, you may find yourself wanting to increase the sweetness of the beer in order to balance out the bitterness of the hops. But you can’t just add simple sugar to a beer to make it sweet – the yeast will just consume the sugar and turn it into alcohol. So what are some ways that homebrewers can make their beer sweeter?

6 Tips for Making Your Beer Sweeter

  1. Mash at a higher temperature – For all-grain and partial mash homebrewers, it’s possible to control beer sweetness by adjusting the mash temperature. Generally, mashes at the lower range of the acceptable range (144-148˚F) allow the enzymes to break up more of the starches into fermentable sugars, making them easier for the yeast to consume, thereby resulting in a drier beer. Conversely, a mash at the higher end of the range (152-160˚F) does not break up as many of the starches, so those sugar chains are harder for the yeast to consume and they remain in the finished beer. Mashing high also increases body and head retention.
  1. Use more caramel malt – Caramel malts are excellent for making beer sweeter. Caramel 20L and 40L offer a malty/caramel/toffee character, whereas darker caramel malts bring in flavors of raisins and burnt sugar. Caramel malts should be used sparingly to avoid over-sweetening the beer. Usually 1-2 lbs. at the most is sufficient.
  1. Boil longer – A longer boil promotes the Maillard reaction, a chemical reaction often confused with caramelization. Though the Maillard reaction will primarily promote color formation and bready, toasty flavors, an especially intense boil can produce some sweeter caramel flavors.
  1. Add unfermentable sugar – Unfermentable sugars can also be used for making your beer sweeter. Lactose sugar is one of the most popular, and it’s a key ingredient in milk stout. Use up to a pound for a milky smooth stout, or in smaller amounts to lend your beer a little extra sweetness.
  1. Use calcium chloride Shop Barley Grains– For all-grain brewers working with soft water, increasing the amount of chloride in brewing water can enhance the maltiness of a beer. As an experiment, try mixing a solution of calcium chloride in water and using a dropper to dose small amounts into a finished beer. This will give you an indication of how it affect beer flavor and mouthfeel.
  1. Use a less attenuative yeast strain – In brewing, attenuation is the degree to which yeast convert sugar into alcohol and carbon dioxide. A highly attenuative yeast strain will consume a large proportion of available sugar, whereas a less attenuative strain will leave some sugars in the beer. Examples of less attenuative yeast strains include many of the English strains, for example Wyeast 1084: Irish Ale, Wyeast 1099: Whitbread Ale, Wyeast 1187: Ringwood Ale, and Wyeast 1968: London ESB. That said, remember that yeast selection is only one factor that affects attenuation. Yeast health, pitch rate, mash characteristics, and fermentation temperature all come into play.

Do you have any tips for making a beer sweeter? Have you tried any of the above methods?
—–
David Ackley is a writer, brewer, and craft beer marketing consultant. He holds a General Certificate in Brewing from the Institute of Brewing and Distilling and is founder of the Local Beer Blog.

Homebrewing: So Easy a Kid Could Do It

Child Proving How Simping Homebrewing Is.
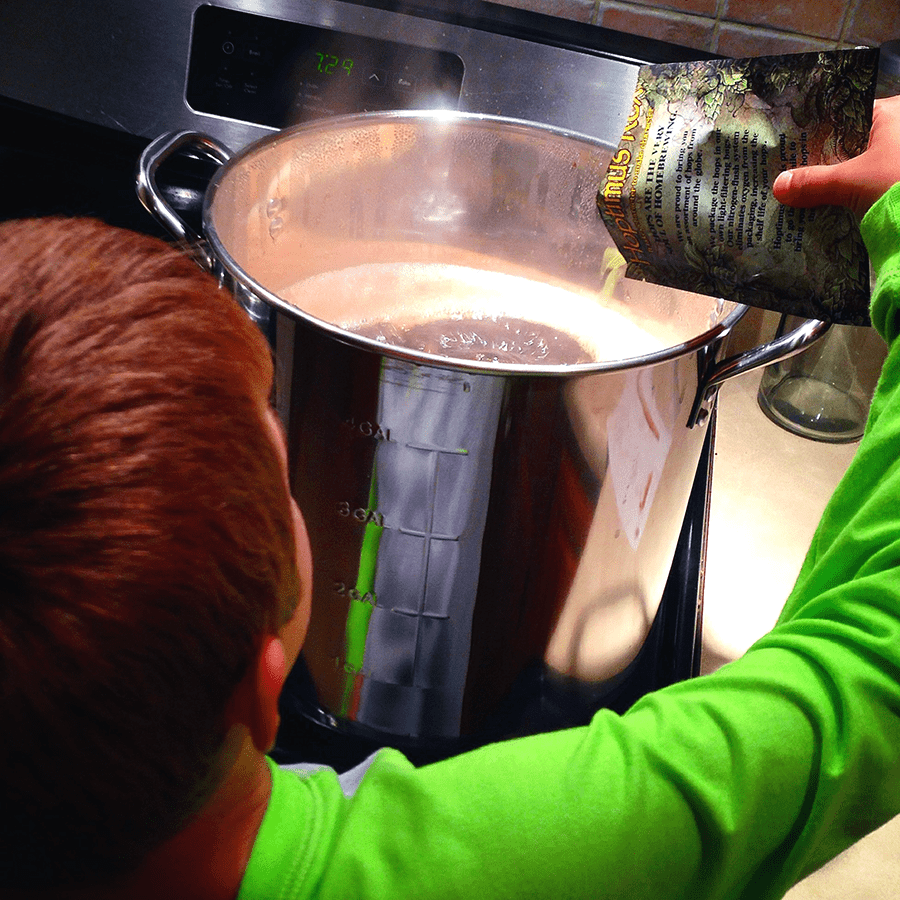
I’ll be the first to admit that I like to get technical here on the homebrew blog. I’m a bit of a perfectionist and I enjoy being able to control every aspect of the homebrew process. But homebrewing does not have to be a complicated science. Parts of it, in fact, are so easy a kid could do it!
Not that we’d actually advocate kids making beer without adult supervision (there are some safety factors that have to be addressed), but homebrewing in a basic sense is a very simple process:

  1. Fill a pot with hot water
  2. Mix in malt extract
  3. Boil with hops
  4. Allow to cool and add yeast

Would your kid be able to handle those four steps? Then an adult should certainly be able to, right?! These 4 steps illustrate how simple homebrewing can be if you let it.

Why Homebrew?
People make beer at home for many different reasons. Some enjoy the challenge of learning a new skill. Some enjoy the creative experience of developing a recipe and making something with your hands. Other find that it’s a good way to become more self-sufficient.
Whatever got you interested in homebrewing, here’s my advice: just try it! Jump in and see if the hobby is for you. Imagine the feeling you get when you share your homebrew with friends, their faces light up and they ask, “you made this?”

How to Start Simple Homebrewing
To get started with homebrewing, all it takes is an equipment kit and beer recipe kit. Both are included in our Steam Freak Beermaking Starter Kit. You can choose any recipe from the Steam Freak lineup of recipe kits, whether it’s a brown ale, a stout, an IPA, or any of the other 20+ kits. Each beer recipe kit comes with clear, easy to read, step-by-step instructions that will guide you through brewing your first batch.
shop_home_brew_starter_kitAfter brewing your first batch or two, there are several resources that can help you make your homemade beer even better. Previously on the E. C. Kraus Homebrewing Blog, we’ve listed 10 Homebrewing Tips for the Beginner and the 10 Best Homebrewing Resources.

Stepping Up Your Homebrewing Skills
Once you’ve got the basics under your belt, there are many ways to continue your exploration of homebrewing. If you’re a hop head, you might be interested in experimenting with different hop varieties. Or you might want to learn how to make mead. Many homebrewers enjoy taking their tasting skills to a new level by becoming a beer judge.
Whatever path you take, it will surely be an adventure!
So, what’s holding you back from starting out with some simple homebrewing? Share in the comments below!
—–
David Ackley is a beer writer, homebrewer, and self-described “craft beer crusader.” He holds a General Certificate in Brewing from the Institute of Brewing and Distilling and is founder of the Local Beer Blog.

How and Why to Brew With Yeast Nutrient

Glass Of Homebrew Sitting In GrainsIf you’ve ever thought about using yeast nutrient in your beers but haven’t, then you may want to reconsider. There is little-to-no downfall in doing so and the additional costs are minuscule.
Yeast is the magical microorganism responsible for turning sugar into alcohol. Without yeast, we would have no beer, wine, or cider. And in order to do their jobs well, those billions of yeast cells have certain requirements. They’re not about to do all the hard work of fermenting your beer without a little something in return!
Though yeast are happy to eat up a bunch of sugar in just about any situation, there are some conditions that affect just how well they thrive. Temperature, for one, is important. Yeast can be killed when either too cold or too hot. When it comes to beer yeast, they tend to do best within a relatively narrow temperature range. Luckily for homebrewers, the ideal temperature for ale yeast is right around room temperature.
Another important factor in yeast performance is yeast nutrition. Since malt provides most of the nutrients yeast needs to ferment a batch of beer, yeast nutrition is usually covered when homebrewers progress beyond the basics.
In order to thrive, yeast need not just sugar, but also elements like nitrogen, fatty acids and sterols, amino acids, and vitamins. When yeast lack these ingredients, such as when brewing with large amount of adjunct grains and sugar, we begin to think about using yeast nutrients in the beer. Personally, I’ve found that yeast nutrient is a worthwhile addition to every batch of beer I brew.Shop Yeast Nutrient

Types of Yeast Nutrient and How to Use Them

  • Brewer’s Yeast Nutrient – One of the chief contributors to a healthy fermentation is nitrogen. It is most often lacking when brewing a beer with a high proportion (more than 10%) of sugar or rice. Nitrogen-based yeast nutrients are usually added to a beer before fermentation, though they may also be helpful in resolving stuck fermentations. Typical dosage for beer is 1 tsp. per three gallons.
  • Yeast Energizer – Yeast energizer is specifically designed for enhancing and speeding up fermentation. It has a slightly different mix of ingredients than yeast nutrient, providing what yeast needs a little later in the fermentation process. So, it is often added part way through fermentation and is especially useful in a stuck fermentation situation. Typical dosage is 1/2 tsp. per gallon.

Shop Yeast EnergizerProperly using yeast nutrients when brewing beer will frequently reduce fermentation time and produce cleaner tasting brews. Many brewers are in the habit of adding yeast nutrient to every batch.

Are you in a habit of using yeast nutrient in your beers? Why or why not?
—–
David Ackley is a writer, brewer, and craft beer marketing consultant. He holds a General Certificate in Brewing from the Institute of Brewing and Distilling and is founder of the Local Beer Blog.