5 Beer Recipes for Brewing This Fall

A Flight Of Fall BeersIt’s time to start thinking ahead to what you might want to drink and share with your friends this fall. Are you a fan of pumpkin beer? Oktoberfest? Consider these suggestions as you’re figuring out fall beer recipes are going to be on your homebrewing calendar!

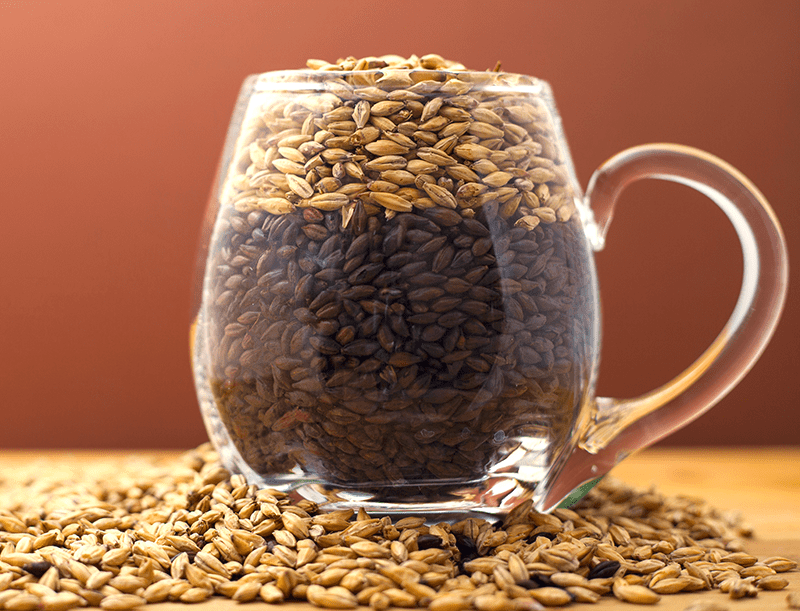
  • Oktoberfest – Oktoberfest traditionally kicks off at the end of September, though the beer may be consumed throughout the following months. Oktoberfestbier is a lager, meaning you’ll have to start brewing it several weeks ahead of when you plan to drink it. Be sure to use plenty of Vienna and/or Munich malt if you brew all-grain or choose a German Oktoberfest Recipe Kit if you brew extract or partial mash. Ferment the beer cold using a Bavarian Lager Yeast for best results.
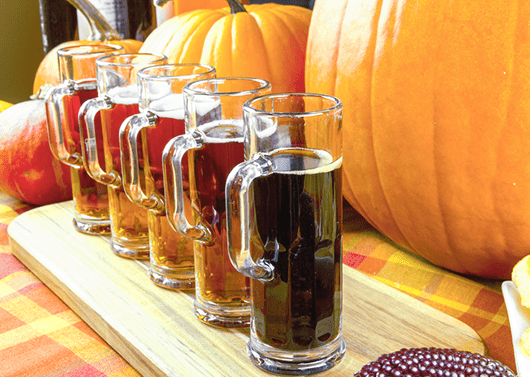
  • Pumpkin Ale – With a flavor like pumpkin pie, pumpkin ale seems to be more and more popular every year. Brew a pumpkin ale recipe now and plan to enjoy it from Halloween through Thanksgiving. You can use fresh pumpkin from the pumpkin patch, which will actually contribute fermentable sugar to your homebrew. Consider increasing the grain bill to make an imperial pumpkin ale.
  • Hard Apple Cider – Nothing says fall quite like fresh apples. If you live in an area that grows apples, keep an eye out at the farmers market for cider apples or fresh pressed, unpasteurized apple juice. Follow this recipe for a basic cider, but consider adding some herbs or spices to mix it up. Ginger is a flavorful choice.
  • Shop Beer Recipe Kits
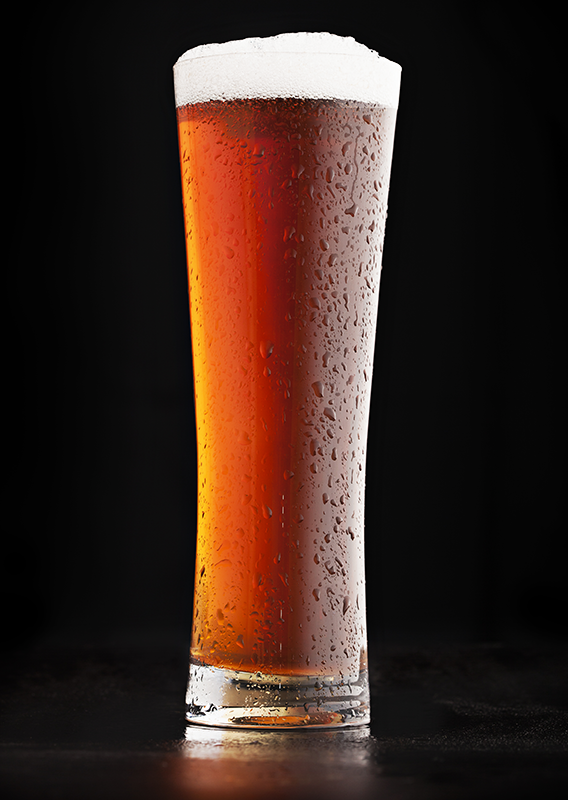
American Amber Ale – With a maltier backbone than a pale ale or IPA , a good amber ale is a fantastic choice for a fall beer recipe. It provides a nice transition into the colder months that favor darker, heavier beers. Amber Ales can be either hoppy or malt forward – the balance is up to you. Consider brewing the Phat Tyre Recipe Kit – it’s a clone of New Belgium’s Fat Tire, a malty, biscuity ale with just a hint of Belgian malt for a balanced, nutty flavor and full-bodied mouthfeel.
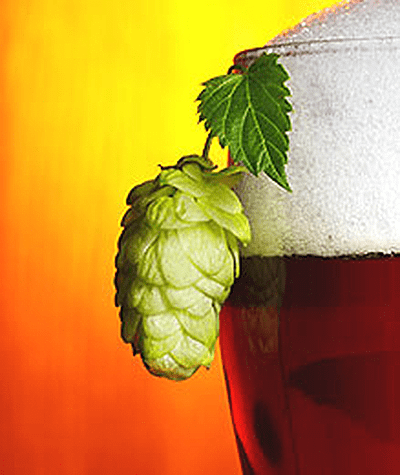
  • Fresh Hop AleAmerican hop growers harvest their hops in the late summer and early fall. If you have any growers in your area – or if you grew some hops yourself – try to get your hands on some hops straight from the field. Use them towards the end of the boil to maximize the flavor and aroma you get from those fresh-picked hops. Because fresh or “wet” hops weigh more, you’ll need six to eight times as much as you would using dried hops in pellet form. Try using your wet hops to dry hop a pale ale, IPA, or Black IPA this fall.

Do you have a favorite fall beer recipes? What are some of your favorite fall beers?

6 Tips For Fixing Your Home Brew Beer

Two Men Fixing Home BrewIf you spend a significant amount of time homebrewing, you’re bound to come across a batch or two that just didn’t turn out as good as you’d hoped. Maybe the flavor is off or your bottles aren’t carbonated enough. Before you throw in the towel and call it quits, there may be something you can do to fix your home brew beer.

Read these tips below for some ideas on how to fix the occasional “off” home brew batch:

  1. Beer too flat? If you’ve bottled a batch of homebrew and found it’s too flat, you have several options to add more bubbles to your brew. First, move the bottles into a warmer area and give them some extra time to carbonate. If after a month or so they’re still not where you want them to be, you may be able to add some extra sugar to the bottles. Use your judgment to estimate how much additional priming sugar you need to add. Hopefully, you took notes on how you primed and can make an adjustment for next time.
  1. Beer too carbonated? Beer that gushes when you open it can be a nuisance – and it can be pretty embarrassing if you’re trying to impress some friends! The best way to try to fix this home brew problem is to try is to get the bottles extra cold before opening. Either stick them in the freezer for a few minutes or put them in an ice bath. Once they’re ice cold, carefully open the bottles over the sink. If you still get a gusher, you can pour the beer into a pitcher to allow the foam to settle down.
  1. Beer too bitter? If you’ve brewed a beer that’s too bitter, it may just need some time to age. Set it aside for a month or so. The extra time can go a long ways towards getting rid of the green beer taste. As a last resort, you can blend the beer with something less bitter to bring it into balance.
  1. Buy FermenterBeer too sour? Unless you’ve deliberately brewed a sour beer, there’s not much you can do to “fix” a home brew beer that’s gone sour from infection. If you catch it early enough though, you may be able to save it. If you catch it before bottling, you can easily dose the beer with Campden tablets. Otherwise cold crash the beer to slow any microbial growth and drink quickly. Or maybe just embrace the fact that you’ve brewed your first sour beer!
  1. Beer too sweet? First we need to identify why the beer is too sweet. Was it a stuck fermentation? Maybe you can add more yeast. Or was it a problem with recipe formulation? Maybe the beer has too much lactose or caramel malt? Blending the beer with a drier batch could help balance it out. Either brew a new batch of the same beer, or try blending the beer in the glass with a complementary beer style. (Black and tan, anyone?)
  1. If at first you don’t succeed… If after doing everything you can to save an “off” batch, the beer still doesn’t stack up to your expectations, it may just be time to scrap the batch and try a new one. Remember that each batch is a learning experience. You’re unlikely to repeat the same mistake again, so keep calm and brew on!

The point here is not to get too bent out of shape if your home brew doesn’t come out as planned. Take a deep breath is see if there is any way of fixing your home brew beer.

—–
David Ackley is a writer, brewer, and craft beer marketing consultant. He holds a General Certificate in Brewing from the Institute of Brewing and Distilling.

A Quick Guide To Dry Hopping Your Beers

Dry Hopping A BeerDry hopping is a popular technique for adding a burst of hop aroma to beer. Basically, all you do is add hops during the secondary fermentation. Because the hops aren’t boiled, they won’t contribute much bitterness (IBUs) to your beer. Dry hopping your beer can lend desirable pine, grapefruit, citrus, or floral aromas, depending on the hop variety you use.

Many popular American craft beers are dry hopped, especially pale ales and IPAs. Sierra Nevada’s Torpedo Extra IPA, makes use of a hop back, or torpedo as they call it, which circulates conditioning beer through a stainless steel vessel packed with whole cone hops.

But don’t let complicated brewing equipment intimidate you — dry hopping your beer at home is easy!

When should I add the dry hops?
The most convenient time to dry hop is when transferring from primary to secondary fermentation. Hops can be added at any time during the secondary fermentation, but for best results, they should have at least a few days to work their magic.

What variety of hops should I use for dry hopping?
Hops with low alpha-acids, usually referred to as “aroma hops”, are best suited for dry hopping. Examples of aroma hops include:

Shop HopsShould I use pellets, plugs or whole leaf for dry hopping?
It is best to do your dry hopping with pellets as opposed to whole leaf hops. Due to the processing involved in producing hop pellets, the aromatic oils are more accessible. They’re also a little easier to separate from the beer than whole leaf hops.

How much hops should I use?
A good range to stick with is 1/4 to 2 ounces of hops for a 5 gallon batch, though I think some hop aficionados are prone to adding more.

Will adding hops contaminate my brew?
If you’re worried about contamination you could briefly steam the hops before adding them to the fermenter, but most will agree that the alcohol present in your beer after primary fermentation will protect it against bacteria.

What about straining the hops?
Regardless of how you go about dry hopping your beer, the hops will need to be strained from the beer one way or another

  • DIY screen – You can try attaching a sanitized screen to the bottom of your racking cane when siphoning the beer from the secondary fermenter. An auto-siphon, which makes life much easier for the homebrewer, has a tip that won’t let much through, you could tie a sanitized hops bag around the bottom for some added filtering.
  • Put the hops in small mesh hop bagShop Wort Chillers – Placing the hops in a hop bag before even adding them to the beer is probably the easiest option. A brewer in this forum recommends tying dental floss to the bag for easy removal – you’ll probably want to use unflavored floss, unless you’d like a little mint or cinnamon flavor in your brew!
  • Cold crashing – Dropping the temperature on your secondary fermentation will help the hops settle out to the bottom of the fermenter, making it easier to siphon beer into a bottling bucket or keg without pulling along a lot of hops material.

Hopefully, this information will help you out. Just remember that the best way to go about dry hopping is to use hop pellets in the secondary fermentation. Use somewhere around 1/4 to 2 ounces, and stick with a variety of hops that is big on aroma and low in bitterness.

Have you tried dry hopping your beer? How did it turn out?
—–
David Ackley is a beer writer, brewer, and self-described “craft beer crusader.” He holds a General Certificate in Brewing from the Institute of Brewing and Distilling.

Simple Style Guide: Oatmeal Stout

Oatmeal StoutIn the world of stouts, Irish stouts are dry and milk stouts are sweet, but oatmeal stouts fall somewhere in the middle. The use of a small amount of oats in the grist give this roasty brew a smooth, somewhat creamy mouthfeel. This is, in essence, what you are looking for when making an oatmeal stout.

Topping Serious Eats’ list of Top 5 Oatmeal Stouts, Samuel Smith’s Oatmeal Stout is a classic. Rich and luscious, flavors of toasted malt and chocolate combine with oats for a smooth finish. A similar beer is made by Highland Brewing Company in Asheville, NC, – an excellent oatmeal porter. Flaked oats give the beer a smooth, silky character. 5.9% ABV, 35 IBUs using American hops, Chinook, Willamette, and Cascade. These are two great examples to seek out when crafting your oatmeal stout recipe.

Brewing an Oatmeal Dry Stout

The key question when making an oatmeal stout is how to add the oats. Oats contribute a little extra body to the beer, but if overused can make the beer seem oily. 5-15% oats is ample for an oatmeal stout, but some grists may include up to 25% in the most extreme cases. As for the oats themselves, flaked oats will contribute the most fermentable sugar and can be added directly to the mash, while raw, steel-cut oats from the store must be cooked, boiled separately before being added to the mash. Some brewers even use a pack of oatmeal from the grocery store – just be sure to avoid those with flavorings – unless you’re going for a cinnamon oatmeal stout, of course!

Grain Bill and Fermentables

An oatmeal stout gets its dark color from specialty grains like chocolate malt and roasted barley. Roasted barley helps to impart the dry, bitter flavor of coffee that stouts are known for, but it must be used sparingly (a maximum of 5-7% of the grist). Reduce the roasted barley in favor of chocolate malt to avoid overly burnt or charcoal flavors.

To accentuate the oatmeal character, Jamil Zainasheff and John Palmer John recommend, “Toasting the oats in the oven at around 300°F (149°C) until they begin to slightly color up and give off a nutty oatmeal cookie character.”

These ingredients can be combined with a standard base malt or light malt extract to form of your grain bill. Your original gravity shouldn’t exceed about 1.065.Shop Dried Malt Extract

Hops

An oatmeal stout is an English creation, so English hops work best when making this beer style. Examples include Kent Goldings, Fuggles, and Target. Shoot for 25-40 IBUs. Hop aroma is low to none, so use restraint in the late hop additions.

Yeast

Oatmeal stouts typically have some mild fruity aromas, which are best delivered by the use of English ale yeast. Safale S-04 is a good dry yeast option. It’s generally recommended to rehydrate dry yeast, and if using liquid yeast, to prepare a yeast starter.

Now you’re ready to make your own oatmeal stout!

Do you have an excellent recipe for making oatmeal stout? Share it in the comments below. What kind of oats do you use, and for what percentage of the grain bill?

Sources: Brewing Classic Styles: 80 Winning Recipes Anyone Can Brew (p. 168). Brewers Association.

—–
David Ackley is a beer writer, brewer, and self-described “craft beer crusader.” He holds a General Certificate in Brewing from the Institute of Brewing and Distilling.

The Pros & Cons Of Using A Secondary Fermentation For Your Beer

Adding Beer To Secondary FermenterMany homebrewers like to take advantage of a process called “secondary fermentation,” and claim that it improves the quality of their homebrew beer. Secondary fermentation, also known as two-stage fermentation, is simply transferring (“racking”) your homebrew from one fermenter to another. The optimal timing as to when to start the secondary fermentation is up for some debate, but it is about midway through the fermentation process. But why go through the trouble? Is putting your beer through a secondary fermentation really necessary. What are the benefits?
The Pros of Secondary Fermentation for your Beer

Here are a few of the benefits of secondary fermentation:

  • It gets the beer off spent yeast sediment. After two or three weeks, yeast starts to break down and contribute off flavors to your beer. Most homebrewers don’t ferment their beer long enough to cause any noticeably problems, but for those who choose to do a longer fermentation, racking the beer into a secondary fermenter or carboy is highly recommended.
  • It allows the beer to mature. Time allows the malt, hops, and yeast flavors to blend together and balance.
  • It improves clarity by reducing the amount of sediment in the finished beer. Putting your beer through a secondary fermentation allows time for more yeast, hop trub, and protein to fall out of the beer. Adding a fining agent, such as gelatin, into the secondary fermenter can aid in this process significantly.
  • It gives the homebrewer an opportunity to “dry-hop” — or “dry-spice” — their beer. Dry-hopping is just adding hops to the secondary fermenter, which contributes hop aroma to the beer. You can also take this opportunity to add spices, flavorings, wood chips, or other additives to your brew.

The Cons of Secondary Fermentation for your Beer

There aren’t many disadvantages to using a secondary fermentation, but they’re worth considering:

  • It takes a more time and effort. Yes, it takes some time to transfer or rack your beer to a secondary fermenter. How long it takes varies depending upon your set-up, but usually the time it takes to transfer is much shorter than brew day or bottle day.
  • There’s a risk of contamination. By opening your fermenter and passing your beer through a siphoning hose, you risk bacteria or wild yeast getting into your beer. But, as long as you practice good sanitation, you should be fine.
  • Potential to lose hop flavor. Hop flavor degrades over time. In most cases, a few weeks won’t make a difference, but if you’re brewing a very hop-forward beer, the length of the fermentation period should be considered.

How to Transfer Your Beer for a Secondary Fermentation
To transfer your beer to a secondary fermenter, keep in eye on the bubbles coming out of the airlock and wait until the fermentation slows down (4-5 days). Clean and sanitize your secondary fermenter and transfer tubing, then add the beer to the secondary fermenter – usually a carboy – by siphoning. Re-seal with an airlock. In 7-14 days, bottle or keg your beer as you would normally.
Do you use a secondary fermentation when you homebrew? When do you start yours? How long do you leave it in the secondary? Leave a comment!
Til next time…Cheers!

—–
David Ackley is a beer writer, brewer, and self-described “craft beer crusader.” He holds a General Certificate in Brewing from the Institute of Brewing and Distilling and is founder of the Local Beer Blog.

Water Treatment For Brewing Beer

Beer In Brewing WaterBefore you use water straight from the tap for homebrewing, it’s important to understand exactly what you’re putting into your precious brew. After all, water makes up more than 90% of beer by weight. Water chemistry can get a bit technical, but don’t worry — you don’t need a degree in chemistry to make good beer. In the famous words of Charlie Papazian, “Relax, don’t worry, have a home brew.” In fact, if you’re brewing with extract, you don’t need to worry much about water treatment at all. However, if you are brewing all-grain, water treatment for brewing beer becomes a much more important subject.

Why is Water Treatment so Important in All-Grain Brewing?
Water contains much more than pure H2O. There is usually an assortment of minerals, salts, and chemicals in there as well. Some minerals and chemicals are beneficial to your brew. Some help yeast grow so that they can ferment your beer, while others help to extract fermentable sugars from barley malt. It’s important to be aware of sterilizers, such as chlorine, which may affect the flavor of your beer. Finally, if you’re trying to make a style of beer traditionally brewed in a certain part of the world, you may want to recreate the brewing water profile used to make that beer.
For the purposes of this article, we’re going to focus on water chemistry and treatment for mash conversion and for water profiles of traditional and regional beers. But first, which minerals and chemicals should homebrewers to consider?

  • Chlorine/Chloramine – Chlorine & chloramine are often used by municipal water facility to sterilize the water supply. You can remove these chemicals from your water by boiling it for 30 minutes, letting it sit overnight, or by adding Campden tablets to your brewing water.
  • Calcium – Lowers pH and helps with mash conversion.
  • Magnesium – Lowers pH and aids yeast growth (up to 20 parts per million)
  • Sodium – Low levels of sodium can help give beer a full flavor; too much might make beer salty.
  • Carbonate/BicarbonateShop Brew Kettles – Can impede the mashing process and extract harsh hops flavors.
  • Sulfate – When combined with sodium, may introduce harsh, dry flavors.
  • Chloride – Can make beer taste sweet.

Tip: If you want to use your city or municipal water, you may want to get a water analysis before you start brewing. Call your municipal water department for a report. Alternatively, you could brew with distilled or reverse osmosis water, which has had most of the mineral content removed, then add your desired minerals back into the water.

Water Treatment for Mash Conversion
If you’re a partial-mash or all-grain brewer, it is important to manage your water chemistry so that you can extract fermentable sugars from your malted grains. For an effective mash, a pH level (acidity or alkalinity) of 5.0-5.5 is recommended.
Homebrewers can check pH with either pH control papers or a digital pH meter and correct pH levels using one or more of the following:

Keep in mind that adding malted barley to your water will lower its pH, so you may want to start with brewing water with a pH above 5.5.

Brewing Water Profiles for Traditional and Regional Beers
Certain beer styles originated in parts of the world where the local water hardness had a significant effect on that style. You may wish to recreate the water profile of a particular region by altering your water’s mineral content:

  • Burton – Famous for its use in English Pale Ales, water from Burton-on-Trent is high in sulfate (800 ppm), calcium (294 ppm), and carbonate (200 ppm).
  • Munich – Water from Munich, used in the famous Munich Helles and Oktoberfest lagers, is high in carbonate (180 ppm) with some chloride (60 ppm) and very little sodium (2 ppm).
  • LondonEnglish Bitters made in London use water that is high in sodium (100 ppm), and fairly high in carbonate (160 ppm) and chloride (60 ppm).
  • Plzen – Plzen, home of the famous Bohemian Pilsner, has very soft water (low mineral content). It has some carbonate (15 ppm), but very little of the other brewing minerals.

What kind of water treatment do you use for brewing beer? What kind of brewing water adjustments do you make?
—–
Ed Kraus is a 3rd generation home brewer/winemaker and has been an owner of E. C. Kraus since 1999. He has been helping individuals make better wine and beer for over 25 years.

Robust Porter Beer Recipe – with Coconut! (Extract w/ Grains)

Robust Porter BeerRobust porter is a subset of porter and as you may imagine, it tends to be stronger and more flavorful than a standard brown porter. Still, it embodies the key aspects of porter: brown to dark brown, showcasing balanced malt flavors and aromas reminiscent of caramel, chocolate, and coffee. Though robust porter beer recipe may have a little more roasted malt than a regular porter, it falls short of being as roasty as a stout.
Based on the 2015 BJCP Style Guidelines, one might reclassify a robust porter as an American porter. Unlike English porters, American porters tend to be stronger in alcohol and hop character than their English counterparts. Alcohol content may be as high as 7% ABV, while hop bitterness can range from 25-50 IBUs. In terms of hop flavor and aroma, the American versions tend to exhibit more of both, often using American-grown hops. The hop flavor and aroma can range from fairly subtle to fairly aggressive – the level of hoppiness you want is up to you, but if you intend to enter the beer into competition be sure not to go overboard.
If you want to go to the next level, you can try what Charlotte’s NoDa Brewing Company does to their robust porter beer recipe. Their “Coco Loco” porter, brewed with toasted coconut, won a silver medal at the Great American Beer Festival in the Robust Porter category. Try putting 0.5 lb. toasted coconut in the secondary fermenter for a few days to a week. Use a straining bag and a sanitized shot glass or spoon to weigh the bag down.
Happy brewing!

Robust Porter Beer Recipe – with Coconut!
(5-gallon batch, extract with specialty grains)

Specs
OG: 1.055
FG: 1.017
ABV: 5%
IBUs: 40
SRM: 32

Ingredients
6.6 lbs. Briess dark liquid malt extract
0.75 lb. light dry malt extract
0.5 lb. caramel 60L malt
0.25 lb. chocolate malt
Shop Steam Freak Kits0.25 lb. black malt
1.5 oz. Kent Goldings hops at :60
1 oz. Fuggles hops at :20
1 packet Safebrew S-33
corn sugar for priming
.5 lb. Toasted Coconut (in secondary)
bottle caps

Directions
Heat 6 gallons of chlorine-free water to 150˚F. Place crushed specialty grains in a muslin grain bag and steep in the water for 30 minutes. Remove grains, allowing wort to drip back into the pot. Mix in malt extracts and bring wort to a boil. Boil for 60 minutes, adding hops according to schedule above. At the end of the boil, chill wort to about 70˚F and transfer to a clean, sanitized fermenter. Pitch yeast and ferment at 68˚F for seven to ten days. Transfer to a secondary fermenter and add the coconut. After a few days to a week, bottle and age at room temperature for 3-4 weeks and enjoy!
Do you have a robust porter beer recipe you’d like to share? Just add it to the comments below…
—–
David Ackley is a writer, brewer, and craft beer marketing consultant. He holds a General Certificate in Brewing from the Institute of Brewing and Distilling and is founder of the Local Beer Blog.

Reusing Beer Bottles For Homebrewing

Bottled BeerMany homebrewers like to save money. Who doesn’t? One of the first opportunities for saving a few bucks while homebrewing is to reuse beer bottles you buy from the store. Sure, it saves some cash, but it does take a little extra effort. (But at least you get bonus points for being eco-friendly!)
Here’s what you need to do to reuse beer bottles for homebrewing.

  1. Don’t save twist-offs. This type of beer bottle doesn’t work well for re-capping. Only save the pry-off style beer bottles for recycling.
  1. Brown is better. It’s ok to reuse green and clear glass bottles, but brown ones offer the best protection against UV light. (Light can make your beer taste “lightstruck” or “skunky”.)
  1. Love the larger beer bottles. The larger format 22-oz. and 25-oz. bottles are great – fewer bottles to clean and fill. Plus they make great gifts for the holidays!
  1. Covet the flip-top.shop_beer_growlers Euro-style bottles with the flip-top are just cool! Reusing these type of beer bottles for homebrewing are well worth the effort.
  1. Rinse them out first. Residual beer left at the bottom of a beer bottle is an ideal place for mold and other funky creatures to take hold. Save yourself the trouble of scrubbing out the beer bottles by rinsing them out as soon as you’re done with them. Three quick rinses usually gets the job done, but check inside for residual yeast at the bottom just to be sure.
  1. Remove the labels. Plan for this task to take some time. (It’s probably the least favorite part of bottling homebrew, so some homebrewers just leave the labels on.) The best way to remove commercial labels is to soak the bottles in a tub filled with hot water and One Step. In 15-20 minutes, most of the labels – the ones that use a glue adhesive – should slide right off. Others may be more difficult. Make note of the brands whose labels come off easily and those who don’t. Next time you’re looking for a 12-pack, choose accordingly.

With a decent amount of time and elbow-grease, you can soon have a healthy armada of beer bottles!
If you want to avoid some of the work involved in reusing beer bottles for your homebrewing, we carry new beer bottles by the case!

You can also use plastic beer bottles for bottling homebrew. Don’t forget the caps!
Are you reusing beer bottles for your homebrewing operation? How did you get the bottles?
—–
David Ackley is a writer, brewer, and craft beer marketing consultant. He holds a General Certificate in Brewing from the Institute of Brewing and Distilling and is founder of the Local Beer Blog.

An Introduction To Partial Mash Brewing

Mug Of Barley GrainSo, you’ve been brewing with malt extract and you’ve got your routine all figured out. The beer’s coming out pretty good, but you’re ready to take it to the next level. Enter: partial mash brewing. Partial mash brewing combines the simplicity of extract brewing with the slightly more advanced part of all-grain brewing called mashing.
The big advantage of partial mash brewing is that you get to learn how to mash without having to buy a lot of extra equipment. If you’re already brewing with malt extract, this is the only additional equipment you need to make the move to partial mash brewing:

shop_brew_kettlesUnlike steeping grains, as we sometimes do with extract brewing, what we’re going to do here is convert the starches in the grain into fermentable sugars. To do this, we’ll soak the grains in warm water for 30-60 minutes. Here’s the trick: for the naturally-occurring enzymes in the grain to break down the starches, we need to control two important factors: temperature and pH. To properly break down the starches, we want to hold the mash water at a temperature between 150-158F and a pH level between 5.0 and 5.5. That’s it!
Here’s are the basic partial mash brewing instructions. See how it compares with what you’re already doing:

  1. Clean and sanitize as you would normally. This something that should be followed, regardless of your brewing method.
  1. Add 1-1.5 quarts of water per pound of grain to your stock pot.
  1. Heat the water to about 170°F. Since the grain is at room temperature, we heat the water a little above the ideal mash temperature. When we add the grains, we should be right in range.
  1. Add the crushed grain to the stock pot. Stir well to avoid clumping.
  1. Check the pH of your mash. If it’s above 5.5, add 1/4 tsp. of gypsum and stir. If it’s below 5.0, add 1/4 tsp. calcium carbonate and stir. Adjust until you’re in the proper range.
  1. Check the temperature of your mash. Hold the temperature as close to 154°F as possible. If below 150°F, add heat and stir. If above 158°F, add a little cold water and stir.Shop Homebrew Starter Kit
  1. Mash for about 60 minutes, adjusting temperature as needed.
  1. At the end of your mash, pour the mash through a strainer into your brew kettle. Recirculate the wort through your grains as needed to clarify.
  1. Add water to reach your desired boil volume and proceed as if you were brewing with extract.

There you have it: basic partial mash brewing instructions. That’s not too hard, is it?
Partial mash brewing is an easy way for homebrewers to transition from extract brewing to all-grain. Once you master the mash technique, you’re ready to brew all-grain!
Questions? Feel free to ask in the comments section!
Til next time…Cheers!
—–
David Ackley is a beer writer, brewer, and self-described “craft beer crusader.” He holds a General Certificate in Brewing from the Institute of Brewing and Distilling and is founder of the Local Beer Blog.

German Altbier Beer Recipe (Partial Mash)

Altbier In GlassSimilar to Kölsch or steam beer, German altbier is something of a hybrid beer style. Though it’s generally considered to be an ale, it’s fermented on the cooler end of the temperature range and goes through a cold conditioning period, resulting in a smooth, clean brew with lager-like characteristics. If you’re looking for an easy-drinking, yet flavorful beer to add to your homebrew lineup, brewing a German altbier beer recipe is a great option!

History of the Style
In German, “alt” means old, referring to the habit of brewing with top-fermenting ale yeasts before bottom-fermenting lager yeasts came into practice. Most of the remaining authentic versions of altbier come from the German city of Düsseldorf.

Style Guidelines

  • Aroma – Clean with rich, bready malt character and spicy, German hop notes. Hop aromas range from low to moderate. Saaz hops are frequently encountered. Some mild esters may be present.
  • Appearance – A good German altbier beer recipe should produce a beer light amber to copper in color. Clear with a billowy, creamy, off-white head.
  • Flavor – Malt-forward with an assertive hop bitterness. Beer is relatively dry, but balanced by rich caramel malt flavors. Often has a complex, nutty finish with both hop bitterness and moderate noble hop flavor.
  • Mouthfeel – Smooth, medium-bodied, with moderate to moderate-high carbonation. Full of flavor yet easy drinking.

Due to the need for temperature-controlled fermentation, altbier can be a difficult style to brew. But it’s well worth the challenge and can be a delicious go-to option for your home brewery!

German Altbier Beer Recipe
(five-gallon batch, extract with grains)

Specs 
OG: 1.051
FG: 1.013
ABV: 5%
IBU: 38
SRM: 15 

Ingredients 
Shop Steam Freak Kits6.6 lbs. Munich LME
1 lb. Munich 20L malt
12 oz. Caramel 60° malt
2 oz. Chocolate malt
1.5 oz. Perle hops at :60
1 oz. Saaz hops at :15
1 tsp. Irish moss at :15
1 oz. Saaz hops at :5
2 packs Wyeast 1007: German Ale Yeast 

Directions 
Place crushed grains in a grain bag and steep in 3 gallons of water at 154˚F for 30 minutes. Remove grain bag and discard. Add liquid malt extract to brewing liquor and mix in thoroughly. Bring wort to a boil and add hops and Irish moss according to schedule above. At the end of the boil, chill wort and transfer to a clean, sanitized fermenter. Pitch yeast and ferment at 58-60˚F for about two weeks. Optionally, transfer to a secondary fermenter. Cold condition at 32-40˚F for about 1 month, then bottle or keg for about 2.5-2.8 vols CO2. Cheers!
Sound tasty? Also consider brewing the German Altbier beer recipe kit from Brewer’s Best!
—–
David Ackley is a writer, brewer, and craft beer marketing consultant. He holds a General Certificate in Brewing from the Institute of Brewing and Distilling and is founder of the Local Beer Blog.