How And Why To Chill Your Wort Quickly

Wort ChillerAfter boiling your homebrew beer for an hour, you may think that you’re done. Not quite. There are still a couple more steps that can go a long way towards improving the quality of your homebrew. One of these is chilling the wort after the boil, and there are several benefits for doing it quickly. Here’s some information on why you should chill your wort quickly and how to chill your wort quickly.

There are three main reasons why we chill the wort in the first place:

  1. To reach yeast pitching temperature – The ideal pitching temperature for your beer yeast will vary depending on the style of beer you’re brewing and the yeast strain itself, but in most cases it’s in the ballpark of 70°F. Pitching too warm could cause some strange off-flavors or even worse, kill the beer yeast. Just follow the instructions on the yeast package and you’ll be fine.
  1. To coagulate protein – This is an important reason as to why you should chill your wort – to produce a quick, sharp “cold break”. Chilling the wort quickly will help the protein in the wort clump together and settle out. This reduces the amount of protein in the final product and helps to achieve a clearer, better looking brew. The faster the change in the temperature, the better the cold break. The cold break can be aided by adding 1 teaspoon of Irish Moss during the last 10-15 minutes of the boil.
  1. To reduce the risk of contamination – Warm, sugary wort is the perfect place for wild bacteria and yeast to grow. The more quickly we can get the wort from the kettle to the fermenter, the better. But don’t let this make you panic! If you chill the wort quickly and do your best to reduce exposure to the air, your beer will turn out fine.

So, now that we’ve learned reasons why to chill a wort and why it helps to do it quickly, what’s the best way to accomplish this? How do we chill a wort quickly? Homebrewers have a couple of options:

  • The wort chiller – The fastest and most effective way to chill wort quickly is with a wort chiller. An wort chiller is basically a coil of copper with a couple of hoses attached. One hose is the cold water inlet and attaches to a faucet. The other is the hot water outlet. By putting the wort chiller directly into the wort and running cold water through it, the water will pick up the heat from the wort on its way through the coil and out the other hose. This method can bring the wort to pitching temperature in as little as 20Shop Brew Kettles minutes, saving a lot of time and achieving a really good protein break. You’re likely to use a few gallons of water as you do this, so see if you can recover the hot water coming out of the wort chiller and use it for cleaning later on. There are also plate wort chillers. With these, the beer is being ran through a cold plate that is being cooled with running water.
  • The ice batch – Chilling a wort with an ice bath works best for homebrewers boiling three gallons or less (otherwise it takes too long). Simply submerge the kettle in a sink filled with ice, then fill the sink with cold water. A deep sink works best – see if you can get the top of the ice bath to be even with the top of the wort. You may need to change the water a few times to get down to pitching temperature. You can also cock the drain plug so that water is slowly draining, while water is running at the same rate from the faucet.

Now, you know how and why to chill a wort quickly. So the next time you brew, focus on making sure you chill your wort quickly. You’re likely to notice a difference in both appearance and taste.

What method do you use to chill your wort?
—–
David Ackley is a beer writer, brewer, and self-described “craft beer crusader.” He holds a General Certificate in Brewing from the Institute of Brewing and Distilling and is founder of the Local Beer Blog.

Recipe of the Week: Amber Rye Ale

Glass Of Amber Rye Ale On Table
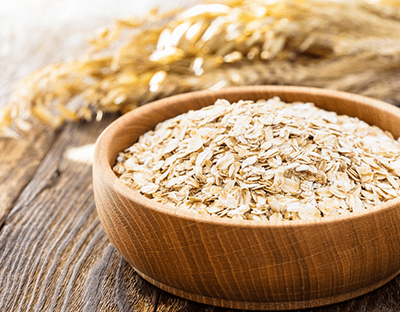
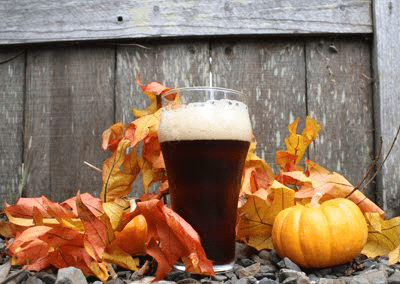
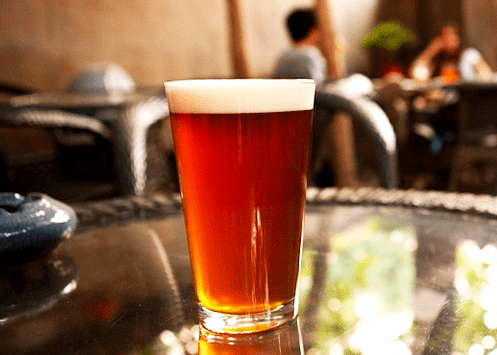
Sometimes a beer recipe can be better than the sum of its parts. This week’s amber rye ale beer recipe is a mash-up of two excellent beer styles that are great for fall brewing: amber ale and rye ale. The amber ale brings a malty flavor, medium to medium-full body, and a rich amber color, while the rye brings a distinctive spicy grain note. The hop flavor on this beer is noticeable with a spicy hop character, but the bitterness is balanced at just over 30 IBUs. It’s an American-style ale of moderate gravity that should make a balanced beer to enjoy throughout the fall season.

The beer recipe below uses a pound of rye malt combined with Munich malt, caramel, and chocolate malt for layers of malty flavor. Chinook hops provide the classic American citrus and pine hop profile that plays so nicely with the rye. A classic American ale yeast is used, Wyeast 1056: American Ale, sometimes referred to as the Chico strain. If you’d prefer to use dry yeast, try Safale US-05 or Mangrove Jack’s. There should be little to no yeast esters in this style, so do your best to keep fermentation temperatures in the recommended range for your selected yeast strain.

This amber rye ale beer recipe is a partial mash. It’s very similar to brewing extract with specialty grains, but you’re actually extracting some fermentable sugars from the “mini-mash.” Review partial mash brewing instructions for more information on how to brew this recipe.

Happy brewing!
Rye’s Guy Amber Ale beer Recipe (partial mash)
(5-gallon batch)

Specs
OG: 1.054
FG: 1.015
Shop Barley GrainsABV: 5%
IBUs: 32
SRM: 14

Ingredients 
3.3 lbs. Light Liquid Malt Extract
3.3 lbs. Amber Liquid Malt Extract
1 lb. Munich malt
1 lb. Rye malt
4 oz. Caramel 60L malt
3 oz. Chocolate malt
1 oz. Chinook hops at :45 (13 AAUs)
1 oz. Chinook hops at :5 (13 AAUs)
1 pack Wyeast 1056: American Ale yeast

Directions 
The night before brewing, pitch the Wyeast 1056 into a 2L yeast starter. On brew day, mix the crushed malts with 3 quarts of water at 160˚F in a large stockpot. Hold temperature at 152˚F for 60 minutes. Raise temperature to 170˚F and strain through a colander into your brew kettle. Rinse grains with 3 qts. water at 170˚F. Add malt extract and enough water to make 3 gallons of wort and bring to boil. After 15 minutes, add one ounce of Chinook hops. Boil for 40 minutes, then add another ounce of Chinook hops. Boil for five minutes and remove kettle from heat. Chill wort with an ice bath or immersion wort chiller. Pour wort into a sanitized fermenter and top off with enough cool, clean, chlorine-free water to make 5 gallons. When wort is 70˚F, pitch yeast starter into the wort. Ferment at 68˚F for 5-7 days, then transfer to a secondary fermenter for 10-14 days. Bottle or keg for 2.4 vols CO2.

Do you have a favorite amber rye ale beer recipe? Share in the comments below!
—–
David Ackley is a beer writer, brewer, and self-described “craft beer crusader.” He holds a General Certificate in Brewing from the Institute of Brewing and Distilling and is founder of the Local Beer Blog.

Fall Homebrew Recipe: Pumpkin Porter (Extract)

Pumpkin Porter RecipeWith fall already here, it’s time to get to work on some seasonal brews! And no other beer screams fall like a good pumpkin porter! Below you will find a pumpkin port recipe that’s simple and delicious!

Pumpkin beers are popular this time of year, but brewing one involves figuring out the answers to several questions:

  • What kind of pumpkin, fresh or canned?
  • How to prepare the pumpkin?
  • Should I mash the pumpkin?
  • What kind of spices to use?

As the brewer, it’s up to you to figure out the method that works for you, and it may just come down to how much time you have available. Fresh pumpkin can be used, but it takes time to peel the pumpkin, remove the seeds, chop it up, and bake. Some homebrewers recommend roasting the pumpkin for an hour at about 350˚F for flavor development. In terms of when to add the pumpkin, I suggest mashing it with the rest of the grains. Just be sure to use plenty of rice hulls to avoid a stuck mash.

As for spices, you’re certainly welcome to come up with your own spice blend, but a premixed pumpkin pie spice blend will already have a good balance between the different flavors. Whatever you do, use a light hand on the spices. Cinnamon is usually pretty safe, but it’s easy to go overboard with spices like cardamom, nutmeg, and clove. Start with just a pinch in a five-gallon batch, added at the very end of the boil. If using a pre-mixed spice blend, use half an ounce at the most.

For the pumpkin porter recipe below, I’ve gone with some of the easier methods. Canned pumpkin instead of fresh saves a lot of time and energy, and a premixed pumpkin pie spice blend takes some of the guesswork out of getting the balance right.

Pumpkin Porter Recipe (Extract)

Specs 
OG: 1.061
FG: 1.013
ABV: 6.3%
IBUs: 21
SRM: 22

Ingredients
2 lbs. canned organic pumpkin
0.25 lb rice hulls
6.6 lbs. Munich malt extract
1 lb. Caramel 40L malt
Shop Steam Freak Kits0.5 lb. Victory malt
0.5 lb. Chocolate malt
1 oz. Willamette hops at :60
1 oz. Willamette hops at :30
1 tsp. Irish moss at :10
0.25 oz. pumpkin pie spice (ginger, cinnamon, cloves, nutmeg) at :0
Wyeast 1056: American ale yeast

Directions
Put the canned pumpkin on a baking sheet lined with aluminum foil and bake at 350˚F for 60 minutes, then mash with the specialty grains and about 1.5 gallons water at 152˚F for one hour. Use a strainer to strain wort into the brew kettle, rinsing the grains and pumpkin with about 1/2 gallon of water at 170˚F. Add the liquid malt extract and enough water to make 3.5 gallons. Bring wort to a boil, then add hops, Irish moss, and spices according to schedule above. Whirlpool, chill, and transfer to a clean, sanitized fermenter. Top off with enough clean, chlorine-free water to make 5.5 gallons. Pitch yeast at 70˚F.

Ferment at 68-70˚F for one week, then transfer to secondary for two. Prime with corn sugar, then bottle.

Do you have a favorite pumpkin porter recipe? What’s your secret?

What Is Malted Barley?

Maltster making malted barley.Malted barley is one of the four essential building blocks of beer. (The other three are water, hops, and yeast.) Most commercial beer is made with malted barley, though some beers are made with wheat malt, rye malt, and other cereal grains. So, what is malted barley?

Barley is a grass that comes in a 2-row or 6-row variety, which corresponds to way the grains are arranged around the barley stem. Barley grains (also called corns) are the seeds of the plant that in optimal conditions will grow into a plant. The corns store energy in the form of starch, a complex sugar, so that the plant can grow.

These sugars are what brewers use to make beer. The grain provides the sugar that feeds the yeast, which in turn converts the sugar into alcohol and CO2. But before these sugars can be used, they must be made accessible through a process called malting.

The Malting Process
Malting the barley is a three-step process carried out by a professional maltster. Using a variety of barley grown specifically for making beer, the maltster creates conditions that encourage the barley corns to grow, then kilns the barley corns before they have a chance to grow into plants:

  1. Steeping – The maltster soaks the barley in large steeping tanks, aerating the malt and maintaining a constant, cool temperature that discourages microbial growth. The water is periodically replaced, which gives the barley a chance to breathe.
  1. GerminationShop Home Brew Starter Kit – The barley is then moved to the floor where it is allowed to sprout. During this phase, enzymes are activated in the barley. The enzymes begin to break down the cellular structure of the grain, which makes the starches accessible for conversion into fermentable sugars. The barley will typically be turned regularly to prevent the rootlets, or “chits,” from getting tangled. The degree to which the barley is allowed to grow is called “modification.”
  1. Kilning –  The final step in malting the barley is the kilning. The maltster kilns the grain to stop the growing process, which preserves the starches and the enzymes for use in brewing. Depending on the style of malt produced, grains are kilned between 175-400°F. This step introduces color and flavor to the malt as the proteins and sugars are heated in the kiln.

Common Types of Malted Barley

Malted barley is generally categorized by color and given a Lovibond number rating between 1 and 500 to rate the color (1 being pale; 500 being black). These are several of the most common malted barleys:

  • Pilsen Malt – This very lightly kilned malted barley is ideal for lagers, but can also be used as base grain for ales. (1° Lovibond)
  • 2-Row Malt – A very common base malt for ales and lagers. 2-Row malt typically contains more fermentable sugar and less protein than 6-Row malt. (1.8° Lovibond)
  • 6-Row Malt – 6-Row is often used for lagers for its grainy flavor. 6-Row barley is primarily grown in the US. (1.8° Lovibond)
  • Vienna Maltshop_malted_grains – Vienna malt is kilned slightly more than Pilsen and 2-Row malts, but it still works well as a base malt. It is recommended for use in Pilsners and Vienna-style lagers. (3.5° Lovibond)
  • Munich Malt – Munich malt is a well-modified malt that lends a sweeter, maltier flavor than the lighter malts. It is ideal for amber ales, Märzen lagers, and dark lagers. (10° Lovibond)
  • Crystal Malt – A wide range of malted barleys are kilned at higher temperatures and called crystal, or caramel malts. They range from 10 to 120 degrees Lovibond, contributing significant color and sweet caramel flavor. (10-120° Lovibond)
  • Chocolate Malt – Chocolate malt is often used (in moderation) for brown ales, porters, and stouts. It contributes a chocolate-like flavor and aroma to beer; it is not actually made with chocolate. (350° Lovibond)
  • Black Malt – Black malt has been kilned nearly to the point of burning. It provides roasty, astringent bitterness and very dark color to stouts and other dark beers. Very little needs to be used to get the desired effect. (500° Lovibond)

Want to learn more about malted barleys? This book is a great resource if you want to learn more about malts or homebrewing in general: Homebrewing for Dummies

Now that you know the answer to the question: “what is malted barley?”, what are some of your favorite malts for brewing beer at home? And, what brews do you use them in?
—–
Ed Kraus is a 3rd generation home brewer/winemaker and has been an owner of E. C. Kraus since 1999. He has been helping individuals make better wine and beer for over 25 years.

A Simple Guide To All-Grain Brewing Equipment

All-Grain Brewing
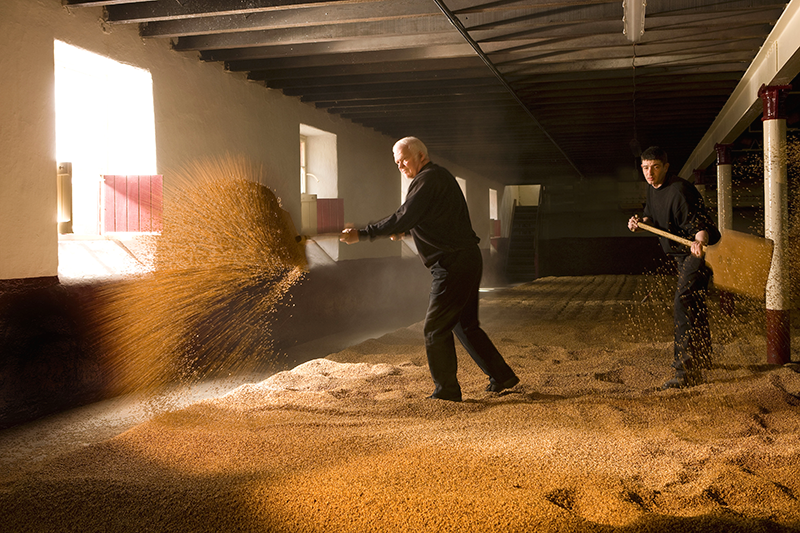
All-grain brewing is the closest thing to being a professional brewer. If you’re already brewing with malt extract, advancing to all-grain means that you need to learn how to mash, i.e. extract fermentable sugars from barley malt by mixing the grains with hot water. To do this effectively, you’ll need to add a few pieces to your existing home brewery:

• A large pot for heating water. Professional brewers call this a hot liquor tank. You will need to heat mash water, and then sparge water. Larger is better, so you can heat all the water you need at once. Also keep in mind that the larger the pot, the easier it is to brew larger batches later on. A 30 Qt. Brew Pot will work for a 5 gallon batch of brew.

• A mash tun – Mashing requires 1-1.5 qts of water per pound of grain. A typical 5 gallon batch of homebrew uses 10-12 lbs. of grain, plus you need to account for the grain itself. At the very least, you’ll need a 20 qt brewpot, but the larger the better. Some brewers like to build their own mash tuns from a large water cooler, but a Polar Ware Brew Pot with a false bottom, thermometer, and ball-valve is the way to go.

• A large kettle for boiling wort. If you play your cards right, you could move wort from the mash tun back to the hot liquor tank for the boil, but many brewers prefer to have three separate vessels. Keep in mind that over the course of a 60 minute boil, you’ll probably evaporate 20% or more of your volume. You also don’t want the wort to go all the way to the top of the kettle. If you want to end up with 5 gallons of wort, you need a brew kettle that holds 7 gallons or more.

• Wort chiller – Beginning homebrewers might get by with an ice bath in the kitchen sink, but if you need to cool 5 gallons of boiling wort, an Immersion Wort Chiller makes things much easier. Depending on the temperature of the cold water going through the chiller, these can chill wort to pitching temperature in 15-20 minutes.

• pH Testing EquipmentpH Test Strips are the most affordable option, but a Digital pH Meter is much more accurate and easier to use.

Thermometer – even if you have a thermometer built in to your mash tun, it help to have another one to measure the temperature of your sparge water.

Grain Mill – You can get by without one, but you will have to buy pre-crushed malt (or borrow a mill from a friend!).

Gypsum and Calcium Carbonate – These minerals will help you adjust mash pH.

Gas burner – Not essential, but if you have the space to safely use one, an outdoor gas burner will save a lot of time when heating water.

There are about as many different homebrew setups as there are homebrewers, but these are some of minimum requirements for all grain brewing. From there, you can easily customize your setup with countless doo-dads and gizmos. If you’re looking for ways to save a little money, consider the Brew-in-a-Bag (BIAB) technique, which we will cover in another post.

Want to learn more about all grain brewing? Stay tuned for more!

A Simple Guide To Brewing With Adjunct Grains

Rolled Brewing AdjunctsIn 1516, Reinheitsgebot, also known as the German Beer Purity Law, was put into effect. To alleviate competition between producers of barley, wheat, and rye, it limited beer ingredients to only barley, water, and hops (yeast hadn’t been discovered yet!). Though some brewers choose to brew within these strict guidelines, many prefer to experiment and use more than just barley in their brews.

There are many styles of beer that require grains other than malted barley, including certain styles of Belgian Ale, English Ale, and yes, even German beers. The grains used in these beers are often referred to as adjunct grains:

  • Wheat – Wheat is mandatory brewing adjunct if you want to brew your own Hefeweizen or American Wheat Beer. Adventures in Homebrewing carries Red Wheat Malt, White Wheat Malt, and Wheat Malt Extract to lend your homebrew wheat flavor and body. Use 50-75% wheat malt in your grain bill for Weizenbier, or 1-2% to help head retention in any beer style.
  • Rye – Want to brew your own Rye Pale Ale or German Roggenbier? Briess Rye Malt contributes a unique, spicy and grainy flavor reminiscent of bourbon. You’ll want to use this brewing adjunct grain sparingly, as rye has a tendency to stick together in the mash kettle. You’ll rarely see more than 10-20% of malted rye in a grain bill (3.7° Lovibond). Another option is Flaked Rye, which gives the crisp, dry rye flavor, but with more body and more extractable sugar than malted rye.
  • OatsShop Brewing Kettles –  If you want to brew an Oatmeal Porter or Oatmeal Stout, you have to use oats! Regular, unmalted, whole-grain oats contribute flavor and head retention to your brew, but not much fermentable sugar. Flaked Oats are pre-gelatinized to make their starches accessible as fermentable sugar, but they’ll also do wonders for head retention and body. Oats are often included in some Belgian beers, such as the ever popular Witbier.
  • Corn – Corn, or maize, when used as a brewing adjunct must be cooked, then mashed with barley malt to extract fermentable sugars. Flaked Corn is pre-gelatinized, making starches accessible, and can be added directly to the mash. Corn adds essentially no color to beer, but contributes some sweet, corn flavor. It’s primarily used in American Light Lagers, certain Pre-Prohibition style beers, and traditional South American chicha.
  • Rice – Rice, usually in the form of rice syrup, is often added to American Light Lagers in place of malted barley because it’s cheap and doesn’t contribute much flavor or color. Flaked Rice accomplishes the same task, resulting in a dry, crisp beer. Rice Hulls are often added to brews made with a lot of wheat or rye to avoid a stuck mash.

Certainly, there are other brewing adjunct grains that you could play around with and put in their beer, but this list comprises the majority of what you’ll find called for in home brewing recipes.

What is your favorite adjunct grain you like to use in your beers?
—–
Ed Kraus is a 3rd generation home brewer/winemaker and has been an owner of E. C. Kraus since 1999. He has been helping individuals make better wine and beer for over 25 years.

My Beer Is Flat And Won’t Carbonate

Flat Beer Top ViewI brewed a batch of beer as directed. It has set for 4 weeks bottled in a room of 60 to 65 degrees. When opened it had almost no carbonation.

Name: Don C.
State: Mo.
—–
Hi Don,

Sorry your beer is still flat. Let’s see if we can figure out why it won’t carbonate.

Beer carbonates when beer yeast consumes sugar and excretes CO2, and the CO2 has no where to go but into solution because the beer bottle or keg has been sealed. Let me share some theories with you about what’s going on and some possible fixes for your flat beer.

The problem you’re describing is probably caused by one of the following:

  • Not enough time/ the room’s not warm enough – I understand you’ve waited four weeks already, but if you did everything correctly, chances are very good that with more time and the beer bottles located in a slightly warmer room, your beer will carbonate. Some beer yeasts work more slowly than others, and high gravity beers generally take longer to carbonate. I know it’s tough with all that beer sitting there, but patience may be the answer to fixing you flat beer.
  • Not enough priming sugar – If you brewed the beer as instructed, this probably isn’t the case. However, did the priming sugar get well-mixed into the beer? I usually pour the sugar/water solution into the bottling bucket first, then siphon the beer into it. This usually mixes things up pretty well. I also recommend checking out this calculator, which shows the correct amount of priming sugar to use based on temperature, desired carbonation level (vols CO2), and type of sugar.
  • Non-fermentable or slowly fermenting priming sugar – If for some reason you used a non-fermentable sugar to prime your bottles, such as lactose sugar, it’s probably not going to give you any carbonation. Similarly, if you used a complex sugar to prime, it may just take longer for the yeast to ferment those complicated sugar molecules. Corn sugar, cane sugar, and dried malt extract work best for priming.
  • Bad seal on the bottlesShop Bottle Cappers – It’s possible that there isn’t a good seal on your beer bottles, allowing CO2 to escape. The result is a flat beer or a beer that won’t carbonate completely. This could be the case if you’re using a twist-off instead of pop-off style beer bottles. You could also just be getting a bad seal when you cap.
  • Yeast killed off – If there was sanitizer left in your bottles or bottling bucket, there’s a small chance that yeast got killed and whatever yeast that’s left is having a tough time carbonating your beer. If you use a “no-rinse” sanitizer on your bottling bucket and bottles, make sure the sanitizer dries completely before use. I usually rinse after sanitizing, even when using a no-rinse sanitizer.

How to fix a flat beer that won’t carbonate

So, what can be done to fix a flat beer? Here are a few possible ways to carbonate your beer, with the easiest and most likely solutions listed first:

  • Hurry up and wait…then wait some more – The first thing I would do is move the bottles to a room that’s a little warmer, consistently around 70°-75°F degrees, to try to “wake up” the yeast into carbonating your beer. 99% of the time, this will fix your problem. If it doesn’t fix the problem after 8 weeks or so, you’ll need to take more drastic action. Keep in mind that higher gravity beers may just take longer to carbonate than others.
  • Add more sugar – If you’ve already waited for eight or more weeks and know that you didn’t add enough priming sugar, you could open up each bottle and add a pinch more. It’s important to be very careful with this — if you add too much sugar, you could get some bottle bombs. It is possible to create so much carbonation pressure in the bottle that the glass will fail. Move the bottles somewhere safe where they won’t hurt anyone and won’t make too much of a mess if they explode.Shop Home Brew Starter Kit
  • Keg it – In theory, you could open up all the beer bottles and pour them into a keg, then prime or force carbonate with CO2. Then again, if you have a keg, you probably wouldn’t be bottling, would you?
  • Add more beer yeast – I’ve heard of homebrewers adding a few grains of dry yeast to each bottle of flat beer to help it to carbonate, but this sounds like a recipe for a bottle bomb, so I wouldn’t recommend it.

Again, if you did everything right, the best thing to do is just wait it out. I’m as guilty as anyone of opening up a homebrew before it’s ready, but in homebrewing, as in life, patience is a virtue. Give your flat beer some more time, and see if that doesn’t get it to carbonate.

Thanks again for your question and good luck,
David Ackley
—–
David Ackley is a beer writer, brewer, and self-described “craft beer crusader.” He holds a General Certificate in Brewing from the Institute of Brewing and Distilling.

10 Beer Recipes for Fall Brewing

Beer For FallSomething about the change of weather has a big impact on our taste buds. The pro brewers know this – seasonal beers are beginning to outpace IPAs as the most popular craft beer option. To brew your own fall seasonal beer, consider one (or more!) of these ten beer recipes for fall brewing.

Keep in mind some of these homebrew recipes take time – if you want them ready in time for a special occasion be sure to give yourself at least a month or two head start. Among the ten beers are some fall classics, some winter warmers, and of course, no such list would be complete without at least one IPA.

Classic Fall Beer Styles

  • Oktoberfest –Oktoberfest is traditionally brewed in the spring, but frankly it’s a tasty beer any time of year. This amber lager is malty, smooth, and refreshing. If time is an issue, you can always brew it as an ale to have it ready faster.
  • Amber Ale – Maybe it’s the color, but amber ale always strikes me as a good fall beer. This one features caramel malt flavors, medium hop bitterness, and 5% ABV.
  • Brown Ale – Brown ales showcase darker malt flavors, and are often describes as nutty with notes of chocolate. They’re smooth, easy drinking, and work great with grilled meat!
  • Pumpkin Ale – The quintessential beer recipe for fall, a good pumpkin ale tastes just like pumpkin pie! Be sure to brew it by mid-October to have it ready in time for Thanksgiving!

Fall Brewing for Winter Drinking

Fall’s a great time to get started on some of the higher gravity beers for the winter. Each of these tasty brews can be aged for several months or longer. Just for fun, save some for next winter to see how the flavor develops over time.

  • BarleywineBarleywine is like the port of the beer world, high alcohol with a complex range of rich caramel malt flavors. At about 10% ABV, this one’s a sipper!
  • Russian Imperial StoutSimilar to barleywine with a higher alcohol content, Russian Imperial Stout features darker malts, giving the beer deep flavors of dark fruity, chocolate, and coffee. This kit comes in at around 8% ABV.Shop Steam Freak Kits
  • Maple Scotch AleA good Scotch ale is rich, malty, and smooth. This one uses 1 lb. of maple syrup for an extra layer of deliciousness! What could be better in the fall.
  • Bock – German bock is a malt-forward lager with a somewhat higher than average alcohol content. Traditional bock is typically 6-7.5% ABV whereas dopplebock may get as high as 12%. This beer recipe kit makes a brown lager at around 7% ABV.
  • Winter Spiced Beer – Spiced beers offer a great opportunity to exercise some creativity, but sometimes it’s best to start with an established homebrew recipe to develop a sense of different spices and their flavor contribution. This recipe is an award winner, brewed with honey, cinnamon, allspice, cloves, ginger, and orange peel.

IPAs Are Always in Season

One of the few IPAs made specifically for the winter also happens to be one of my favorites:


What are some of your favorite beer recipes for fall brewing?

—–
David Ackley is a writer, brewer, and craft beer marketing consultant. He holds a General Certificate in Brewing from the Institute of Brewing and Distilling.

How to Know When to Bottle Your Homebrew Beer

Homebrewer who knows when to bottle his beer.You’ve been waiting patiently while your homebrew ferments away in the closet and you can’t wait to try the beer you’ve worked so hard to create. But how do you know when it’s ready to bottle? How do you know when to bottle your homebrew beer?

First of all, let’s talk about why it’s important to bottle your beer at the right time. The main concern is that if you bottle before it has completely fermented, you run the risk of having excessive carbon dioxide in the bottle. The result: bottle bombs! Not only is this a safety hazard, but if your bottles explode, you lose that precious beer!

The best way to figure out when to bottle your beer is to take hydrometer readings. In the final days of the fermentation period, take a hydrometer reading every 1-2 days until there is no change in the reading. That’s how you know when fermentation is complete. (Note: Most homebrews finish in the ballpark of 1.010-1.020.)

If you’re using a fermenting bucket, hydrometer readings are pretty easy. Just open up the bucket, drop your sanitized hydrometer in the beer, give it a spin to dislodge any bubbles, and take your reading. (Don’t forget to correct for temperature!) Another method is to use a sanitized measuring cup to pull a sample out of the bucket, which you can then pour into a hydrometer testing jar to conduct your reading. Of course, a bucket with a spigot makes pulling a sample even easier!Shope Hydrometers

If you’re fermenting in carboy, taking a hydrometer reading is a little more tricky. You could drop the hydrometer into the carboy, but then it would be a challenge getting it back out. The easiest way around this is to use a sanitized fermentation sampler, sometimes called a thief, to pull a sample from the carboy. All you have to do is dip the sampler in the beer and pull it out again. A one-way valve will automatically lock in a sample of beer, then you can do your reading right in the tube! That’s about as easy as it gets!

Sometimes it’s tempting to pour the beer sample back in the fermenter, but I don’t think it’s worth the risk of contaminating your beer. If you choose to pour the beer back into the fermenter, just make sure you use impeccable sanitation. I’ll usually just use the sample for a taste test — a preview of what’s to come!

So, after a couple identical hydrometer readings you know the fermentation is done, it’s time to bottle your beer! Learn all about bottling your own homebrew on our post Bottling Beer at Home.shop_beer_bottles

Many homebrewers guess, but using a hydrometer is, by far, the best way to know when to bottle your fermented beer after fermentation. So, take some readings and bottle your beer at the right time.

Til next time…Cheers!
—–
David Ackley is a beer writer, brewer, and self-described “craft beer crusader.” He holds a General Certificate in Brewing from the Institute of Brewing and Distilling and is founder of the Local Beer Blog.

Boost Your Beers With These Alternative Brewing Sugars

Alternative Brewing Sugars For BeerWhile barley malt is the preferred source of fermentable sugars in beer, other ingredients are often used to supplement the grains. Among these, sugar is one of the most common.

Sugars come in many different varieties, all of which affect flavor, gravity, and color in different ways. Brewing sugars may be added to simply increase the gravity of a beer. Try adding a pound of sugar to a standard beer recipe kit to make an “Imperial” version of whatever base beer you’re brewing.

Brewing sugars can also be added to obtain certain flavor characteristics. Alternative brewing sugars for beer such as: brown sugar, Belgian candi sugar, and molasses all have distinct flavors that can add a layer of complexity to brown ales, Belgian ales, and stouts. Simple sugars will often ferment out almost completely, so they can be used to achieve a dry finish in Belgian ales, pale ales, and darker beers.

Alternative Brewing Sugars For Beer:

  • White table sugar – While table sugar is fine for priming, it has been known to produce “cidery” flavors when used in any significant quantity. It’s been highly refined to remove color and “impurities”, so it will not affect the color of your beer.
  • Corn sugarCorn sugar is ideal for priming, its fine, powdery grind helping it dissolve easily. Corn sugar can be used to boost gravity and lighten flavor without contributing color, so it’s ideal in styles such as Light American Lagers.
  • Cane sugar – Cane sugar is derived from the sugar cane plant, usually through a pressing to extract the cane juice. Then an evaporation to concentrate the crystals. The minimal processing means that it still contains some color and molasses flavor, but not as much as some of the sugars listed below. Cane sugar can be used for priming, but can also increase gravity in a wide range of beer styles.Shop Candi Sugar
  • Brown sugar – Brown sugar is a great alternative brewing sugar. It tends to be darker than cane sugar, usually due to molasses being added back in to the refined sugar. Brown sugar can be light or dark and it contributes significantly more caramel and molasses flavor than cane sugar.
  • Panela/Picadillo/Jaggery – Panela, also known as picadillo or jaggery, is an unrefined dark brown cane sugar pressed into blocks or cones. It contains higher levels of molasses and natural minerals than more refined sugars. Since it’s pressed, it takes a bit longer to dissolve than granulated sugars, but the rich caramel flavor is worth the wait!
  • Molasses – Molasses is a byproduct of the sugar refining process. It’s a dark syrup which can contribute significant flavor and color to stouts and other dark beers.
  • Lactose sugar – Lactose sugar, or milk sugar, is a non-fermentable sugar and the key ingredient that contributes residual sweetness to milk stouts and sweet stouts.
  • Candi sugar – Belgian candi sugar is probably the most commonly used alternative brewing sugar used in beer. It is usually sold in large crystals, can be either light or dark. It’s a key ingredient in dubbels, tripels, and other high-gravity Belgian ales.
  • HoneyShop Steam Freak Kits – Honey contains significant amounts of simple and complex sugars, as well as a wide range of vitamins, minerals, and other nutrients. It will contribute wonderful flavors and aromas, which will vary with the type of honey. To preserve them, try adding the honey right at the end of the boil.
  • Maple syrup – Maple syrup is another alternative sugar source that will contribute unique flavors to a beer. It works great in brown ales.

When planning on using alternative brewing sugars in beer it is important to know that they have gravities in the ballpark of 1.036-1.046. Check out this table for more detailed gravity and color estimates.
—–
David Ackley is a beer writer, brewer, and self-described “craft beer crusader.” He holds a General Certificate in Brewing from the Institute of Brewing and Distilling and is founder of the Local Beer Blog.