Brewing A Coffee Stout Beer Kit – Part One

Coffee Stout Beer KitCoffee and beer have become a natural combination in the beer world. There are versions by Sam Adams, New Belgium, and nearly every other craft brewer out there. In the Sierra Nevada Beer Camp Across America 12-pack, a coffee milk stout was one of the most highly rated beers in the variety pack.
In brewing, coffee is most often paired with stout. It’s a style that’s robust enough for winter, and if you enjoy coffee as much as I do, it’s a beer you can drink again and again.
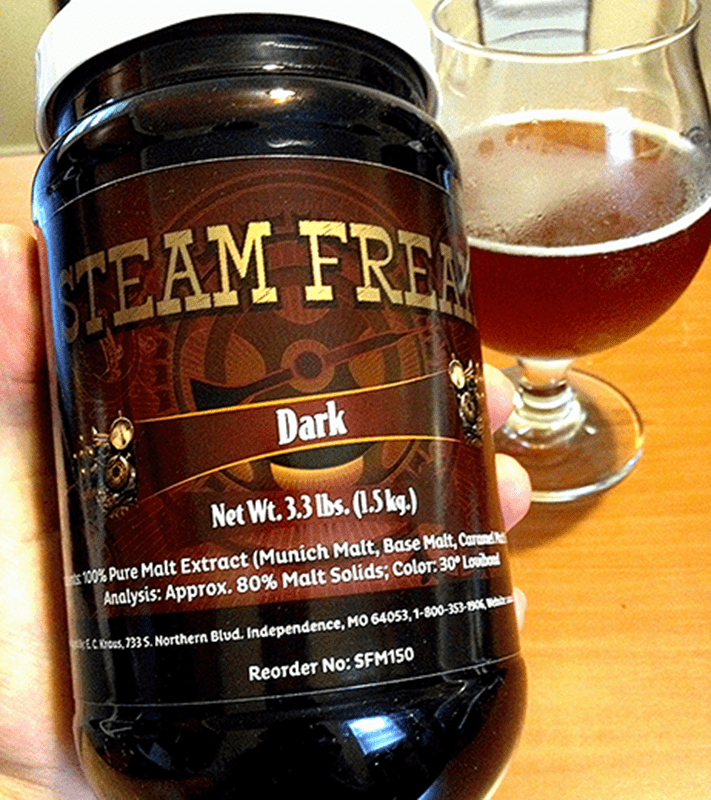
Which leads me to why my next brew is the Steam Freak’s Captain Cogsworth Coffee Stout Beer Kit. Here’s the recipe from the ingredient kit I’ll be brewing:

Steam Freak Captain Cogsworth Coffee Stout Beer Kit
(Extract with specialty grains, five-gallon batch)
Specifications
Style: American Stout with Coffee
Target OG: 1.060
Target FG: 1.016
Target ABV: 5.5%
IBUs (Bitterness): 46
SRM (Color): 36
Ingredients
6.6 lbs. Dark Liquid Malt Extract Shop Coffee Stout Beer Kit
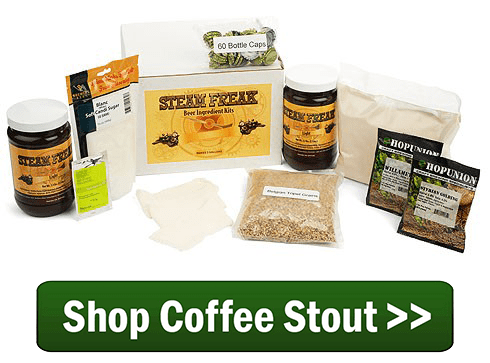
1.0 lbs. Dark Dried Malt Extract
4 oz. Caramel 60°L malt
4 oz. Roasted barley
8 oz. Chocolate malt
1 oz. Northern Brewer hops at :60
1 oz. Tettnanger hops at :30
1 packet Fermentis Safale US-05
Also included in this kit:

Planning How To Brew This Beer Ingredient Kit

You might be wondering how exactly the coffee should be added to this coffee stout beer kit recipe. Should it be added to the boil? To the fermenter? There are several ways to do it. Each will give the beer a different coffee character. I’d advise against adding the coffee to the boil, unless throwing it in at the very end. It probably won’t ruin the beer, but adding the coffee during the boil might give the beer too much of a bitter, astringent taste.
The E. C. Kraus kit directions recommends adding the coffee at bottling time. Though making hot coffee will be the quickest and easiest way, cold brewed coffee offers an opportunity for rich coffee flavor while minimizing added bitterness. To do this, I’ll need to prepare the coffee in advance.
To make cold brew coffee, mix the ground coffee with water about 24 hours in advance. You generally mix cold brew coffee with 1/2-1/3 less water than you would making a regular batch. I’ll plan on mixing the 3 oz. of coffee that comes with this coffee stout beer kit with about 18 oz. of pre-boiled, pre-chilled, filtered water.
Shop Fridge MonkeyI’m no barista, but I like to think I have a pretty good nose for coffee. I opened the bag of coffee to give it a whiff – boy am I excited to brew this batch! Stay tuned to see how this coffee stout beer recipe goes!

Part I – Brewing a Coffee Stout
Part II – Brew Day, Partial Mash
Part III – Adding Coffee, Priming
Part IV – Final Tasting Notes
———————————–
David Ackley is a beer writer, brewer, and self-described “craft beer crusader.” He holds a General Certificate in Brewing from the Institute of Brewing and Distilling and is founder and editor of the Local Beer Blog.

6 Brew Year’s Resolutions

2017The New Year is a great time to reflect on accomplishments from the past year and think ahead to the next twelve months. While contemplating your goals and objectives for 2017, don’t forget to consider your brewing habits!

Below are my six “Brew Year’s” Resolutions:

  1. Brew more – For starters I want to brew more beer. Not necessarily more frequently, but certainly more volume. Looking back on my homebrewing notes, I know that in 2016, I brewed 18 batches of beer, plus one batch of cider (two are still in progress). I do a lot of small batches: I yielded roughly 68 gallons of beer, for an average of about 3.75 gallons per batch. In 2017, I intend to brew more five-gallon batches and fewer small batches to make the most of my time and effort. At some point in the year, I plan to invest in a larger boil kettle and more fermenters to achieve this goal.
  1. Get a keg system – I’ve been bottling my homebrew for four years now. It’s time for an upgrade! A kegging system will help me save time, allow me to drink my beer sooner, and make it easier to transport my homebrew to festivals and events.Shop Draft System
  1. Get control over fermentation temperature – Looking back over 2016, there were one or two batches that could have benefited from stricter fermentation temperature control. In the coming year, I intend to monitor fermentation temperatures more closely and go the extra mile to make sure fermentations happen in the correct temperature range.
  1. Enter more homebrew competitions – I had a few batches that turned out very well (last spring’s Saison, for example). I’d like to submit more of my beers into homebrew competitions to get feedback and see if I can’t win a prize or two.
  1. Brew more classic styles – As a homebrewer, I love to experiment, brewing crazy batches with unusual ingredients. In 2017, I plan to brew more of the classic styles: pale ales, stouts, Belgian ales. The fewer unusual ingredients, the easier it will be to evaluate my homebrew and make the necessary changes and improvements.
  1. Shop Temp ControllerRepeat past brews – My final objective for next year is to redo a few of my beer recipes to see if I can improve them. I believe I’ve developed a good American pale ale recipe, it just needs some minor tweaking. With repetition, I’ll figure out how to make it turn out well on a consistent basis. This will ultimately be the best way for me to become a better brewer.

What changes do you want to make in 2017?
—————————————————–
David Ackley is a beer writer, homebrewer, and self-described “craft beer crusader.” He holds a General Certificate in Brewing from the Institute of Brewing and Distilling and is founder of the Local Beer Blog.

4 Killer Tips For Kegging Homebrew!

Kegging HomebrewToday’s guest post is from beer blogger Heather Erickson. Heather takes us through 4 tips that she has found to be important while transitioning from bottling to kegging homebrew.
—–
Let’s be honest beer lovers, there is just something about having a freshly poured pint of beer at your local watering hole. Don’t get me wrong, I love the portability of beer bottles and cans. However, beer from a keg just provides a little something more. If you homebrew and have a beer kegging system or a kegerator, it’s time to have that sought after fresh pint at home. Below are my four “must-do” tips for kegging homebrew:

  1. Beer choice is critical when kegging homebrew.
    Having your homebrew on tap at home will automatically make you popular with friends. That being said, choose a beer style that is a mix between a crowd-pleaser and a daily drinker for you. The first beer I kegged, a Honey Lemon Blonde, was a definite crowd-pleaser. Yet, I never reached for it. That keg took up precious kegerator real estate for far too long.
  1. Proper equipment is key when kegging homebrew.
    For homebrew, I like having a couple cornelius kegs on hand. These 1/6 barrel containers hold five gallons which is just the right amount for a homemade batch. If you already have a kegerator equipped Shop Homebew Kegging Systemwith a CO2 tank and regulator, you just need to add some vinyl gas and beer tubing, hose clamps in stainless steel, and two quick disconnects (one for gas and one for beer). Even if you don’t have a kegerator on hand, for under $300, you can score all of the equipment above plus a picnic squeeze faucet for pouring and have that draft brew in no time!
  1. Cleaning is important when kegging homebrew.
    Now that you have all your kegging equipment, it is time to start sanitizing. While you won’t be stuck with laborious task of soaking, sanitizing, and removing labels from dozens upon dozens of beer bottles, you still need to be conscious of the proper sanitation of your keg. I prefer using Five Star’s Star San Sanitizer. Be sure to include your vinyl hoses in the mix. You want everything that will come into contact with your brew to be bacteria free. Follow the instructions for cleaning a keg, don’t skip on any steps, and you will be guaranteed that keg is ready for beer.
  1. Be patient with carbonation when kegging homebrew.
    Much like sparging on a brew day, patience is needed to appropriately carbonate your brew. Rushing the process with a carbonating stone, while effective, doesn’t really give you that pub-like fresh pint. Not keeping track of the pressure you put on the keg can also alter the end result of your hard work. When kegging homebrew, I find that putting 30 lbs. of CO2 pressure on the keg and letting those little gas bubbles work their magic for three days is the way to a perfectly carbonated pint.Shop Temp Controller

There you have it, homebrewers! You too can have freshly poured draught beer at your fingertips from the comfort of your home. Why settle for a pint of someone else’s creation, when you can have one of your own? Get brewing, start kegging homebrew, and enjoy!
———————————–
Heather Erickson is a homebrewer with three years experience and has competed in the GABF Pro-Am Competition. She writes the blog This Girl Brews and is a regular contributor to homebrewing.com and kegerators.com. Find her on Twitter at @thisgirlbrews.

10 Home Brewing Gift Ideas For The Holidays!

Santa Bringing Home Brewing Gift IdeasIt’s that time of year to start thinking about home brewing gift ideas for your favorite homebrewer. With so much equipment and ingredients to choose from, where do you start?
The best way to figure out what to get a homebrewer is to simply ask them. Chances are, they already know exactly what they need to expand their home brewery. Maybe it’s time for a bigger brew kettle. Maybe what they really want is a keg. If you want to make sure they get what they really want, just ask discreetly – or not so discreetly!

If you’re still having trouble coming up with some home brewing gift ideas, here’s a home brewing gift guide. Consider one of these ten options!

  1. Homebrewing Equipment KitHome Brewing Kit 140 – Maybe your special someone has been talking about homebrewing, but hasn’t quite made the jump. Help them get started with a 1 Gallon or 5 Gallon Brew, Share, Enjoy Kit! Many of our homebrew starter kits come with a beer recipe kit, so they will have everything they need to make beer!
  1. Homebrew Recipe KitBeer Recipe Kit 140 If your homebrewer already has all the gear, help them get a new batch going with a recipe kit. We have dozens of kits to choose from, from stouts, to IPAs, to wheat beers, and more. (Maybe you can get them to brew your favorite style this time!)
  1. Brewing Classic StylesDesigning Great Beers 140 – For the brewer that wants to explore brewing different styles of beer!  There are over 80 winning recipes that anyone can brew.
  1. Adventures in Homebrewing Gift CardIf you still short on home brewing gift ideas, let them choose for themselves.  A gift card is one of the best gifts a home brewer can get, since there are many bits and bobs needed to brew great beer. A gift card guarantees that they’ll get something they want – and they’re easy to wrap, too!
  1. New Carboy/FermenterFermenter 140 – Once they get started, many brewers want to make as much beer as they can. One of the ways to do that is with additional fermentation space. A new homebrew fermenter will help them make more beer more often!
  1. Temperature ControllerTemperature Controller 140 – Speaking of fermentation, temperature control is one of the key elements of a successful fermentation. This temperature controller from Johnson Controls will help regulate the temperature of a dedicated fermentation fridge. Its “plug and play” design is easy to install.
  1. RefractometerRefractometer 140 – A refractometer measures the specific gravity of unfermented beer, making it easy to calculate the potential alcohol content of the beer. It’s a nice upgrade over a hydrometer because it requires only a few drops to take a reading – that means more beer for drinking!
  1. Keg & Carboy WasherMarks Keg Washer 140 – One of the more tedious tasks involved with homebrewing is clean-up. Help your homebrewer save some time and energy with a keg and carboy washer! It’s one of the better time-saving home brewing gift ideas.
  1. Stir PlateStir Plate 140 – A stir plate is one of those upgrade that can make a significant improvement in beer quality. It stirs the yeast prior to pitching, making sure the yeast is healthy and ready to go. It’s great for making yeast starters.
  1. A New Brew KettleBrew Kettle 140 – If your homebrewer has been brewing on the same equipment for a while, chances are they’ve thought about upgrading to a larger system. Brew kettles can be a big investment, so maybe you can help them out on their journey to bigger and better beer.

Are you a homebrewer? What do you really want this holiday season? Make life easier for others and pass along some home brewing gift ideas… at least give a hint!

Fixing A Leaky Keg: A Simple Guide

Fixing A Leaky KegWhile kegging your homebrew may be less time consuming than bottling, it offers its own set of challenges. In particular, it’s important to know how to go about fixing a leaky keg: how to locate and detect where it’s leaking gas: pressure relief valve, etc. Otherwise, you’ll have a very hard time carbonating your homebrew, and may well waste a good deal of money filling your CO2 tank.

The first step in fixing a leaky keg is to determine where the leak is. Follow the steps below to test your homebrew keg system for leaks:

  1. Assemble your home brew keg. Pull the lid into place by pulling up on the bail (clasp), but allow the CO2 pressure from step 2 to help you get a good seal.
  1. Connect your CO2 regulator to the CO2 tank and attach the gas-in hose to the gas-in post on the keg.
  1. Apply 10-20 psi of pressure to your keg. Seal the lid by pushing the bail into place.
  1. Listen for any sounds of gas escaping.
  1. Shop SanitizersUse a spray bottle filled with soapy water or a Star San solution to spray around some of the common leak points: the lid, the posts, the poppets, the pressure release valve, the quick disconnects, and the hose connection points. If you see bubbles, you have a leak.

If you can’t find any leaks in your homebrew keg system, congrats! You’re in good shape for the time being. If you do find a leak, it’s time to take action and fix it. Here some common steps for fixing a leaky keg.

  1. Turn off the gas at the regulator.
  1. Vent pressure from the keg by pulling up on the pressure release valve. Don’t skip this step!
  1. Take apart the keg or fitting at the source of the leak and inspect for damage or wear. Keep in mind that the posts and pressure relief valve can unscrew from their positions.
  1. Sometimes a part may just need to be cleaned. Clean the fitting and reassemble the keg, making sure all fittings are tight.Shop Faucet Tower

Repeat the test for leaks as described above.

  1. If you still have a leak, apply a thin layer of keg lube around the problem fitting to see if it fixes the leak.
  1. Reassemble the keg and repeat the test as described above.
  1. If you still have a leak, you probably need to replace the part, whether it be the o-rings, the post, the pressure relief valve, or the tubing. Replace the part and repeat the leak test to make sure your keg holds pressure.

Shop Keg SystemKeeping your homebrew keg system free of gas leaks is important, but it’s not difficult. Consider keeping a selection of spare keg parts on hand for fixing a leaky keg. You’ll be glad you did when an emergency arises.
Have you ever had trouble with a leaky keg? Share how you fixed leaks in your homebrew keg system in the comments below!
———————————–
David Ackley is a beer writer, brewer, and self-described “craft beer crusader.” He holds a General Certificate in Brewing from the Institute of Brewing and Distilling and is founder of the Local Beer Blog.

Quick Guide To Dry Hopping In A Keg

What You Need For Dry Hopping In A KegThough you can certainly dry hop during secondary fermentation, some homebrewers prefer dry hopping in a keg. This is similar to what British brewers do when they dry hop in the cask. Dry hopping can enhance the hop aromas in your beer, but how do you do it without clogging the keg? What is the most sanitary procedure for dry hopping in a keg of homebrew?
It’s really quite easy. First, gather the following:

  • Hops – Low alpha acid hops are popular for dry hopping, though some high alpha hops are suitable as well. You might consider matching whatever flavor and/or aroma hop addition you used in the beer. If you’ve never dry hopped before, an ounce of hops is a good place to start.
  • A small straining bag – This is to hold the hop material and keep it from spreading all throughout your keg of beer.
  • A small stainless steel or glass item to be used as a weight – A few marbles are perfect; a shot glass can work too.
  • Optional: A length of string or non-flavored dental floss – Some homebrewers like to keep the hops from sinking all the way to the bottom of the keg or like to remove them after a certain number of days.

Then just follow the steps below!

Steps For Dry Hopping In A Keg

  1. Sanitize everything (except the hops). I prefer to boil the bag, the weight, and the string for about twenty minutes. At this point, I’d rather get sterileShop Hop Bags water in the beer than sanitizer solution. Whether or not you should sanitize the hops is debatable. I choose not to because 1) Most hops you get will be nitrogen flushed and frozen, 2) hops have antimicrobial properties, and 3) beer has alcohol in it. If you feel your hops are suspect or you’re dry hopping a very low alcohol beer, you might consider gently steaming the hops for a few minutes before using them to dry hop your keg.
  1. Put the hops and the weight in the bag and tie it closed. Make sure to tie the bag well so the hops don’t come out and get everywhere.
  1. Optional: Tie the string to the bag and secure it to the keg. If you’d like, you can suspend the hop bag about halfway down the keg, tying the other end to the handle of the keg. The idea is that you can limit the amount of time the hops are in your beer. As you drink the beer and the level in the keg goes down, the hops will eventually be suspended from the string. Using something as thin as dental floss will allow you to seal the keg without any leaks.
  1. Drop the bags of hops in the keg. Turn off the CO2 at the regulator and fully vent the keg to release pressure. Open the lid and gently drop the bag in the beer.
  1. Shop Draft SystemApply pressure to the keg and proceed as normal! You may wish to vent the keg a couple times to eliminate any air that got in.

That’s it! That’s all there is to dry hopping in a keg. Now enjoy the delectable hop aromas in your homebrew!
————————————
David Ackley is a beer writer, brewer, and self-described “craft beer crusader.” He holds a General Certificate in Brewing from the Institute of Brewing and Distilling and is founder of the Local Beer Blog.

Home Brewing Made Easy With Kits!

Home Brewing Made EasyAre you overwhelmed by the idea of home brewing beer? Have you looked at all the tips and advice on the E. C. Kraus Home Brewing Blog and wondered whether brewing beer at home is something you can handle? You need home brewing made easy!
Though there is quite a bit of science behind brewing, making beer at home does not have to be complicated. Home brewing can be simple. In fact, simple home brewing is a goal for many homebrewers. Some find the hobby more enjoyable without all of the scientific measurements and calculations. Besides, if you think about the way people brewed hundreds of years ago, they didn’t have thermometers and hydrometers or even very specific volume measurements. But you better believe they still made beer!
In its simplest form, home brewing can be done in very few steps. I’ve gotten them down to four. Here are the 4 steps of home brewing made easy:

  1. Mix pre-hopped malt extract and water to make wort
  2. Add yeast
  3. Ferment in a fermenting bucket or carboy for about two weeks
  4. Bottle or keg the beer, and enjoy once it’s carbonated in about two weeks!

Here are five simple home brew kits that are very easy to brew. They’re called extract kits, because all you have to do is mix the malt extract with water. The hops are already in the malt and a packet of yeast is provided along with easy directions. These types of kits are perfect for simple beer brewing. They are easy and follow the basic 4 steps listed above.

  • Munton’s Nut Brown AleShop Malt Extract KitsThe Munton’s kit makes a malt-forward, exceptionally drinkable brown ale, full of caramel and nutty malt flavors. Makes 6 gallons.
  • Mountmellick Export – This pre-hopped extract kit makes an Irish-style amber ale. Each kit makes up to 5 gallons of beer. Optionally, add an ounce of hops (try Fuggles or Kent Goldings) during the last 10-15 minutes of the boil for more hop flavor and aroma.
  • Black Rock Whispering Wheat – Creates a crisp, dry beer with a slightly fruity, wheat flavor. Makes 6 gallons. All you need is 2.2 lbs. of corn sugar.
  • Mountmellick Famous Irish Stout – This kit makes a rich, full-bodied stout in the tradition of Guinness. It has a rich, malty flavor with  a touch of coffee. All you’ll need to do is mix the extract with water and corn sugar, then pitch the included yeast. Makes 5 gallons.

Once you master the basics of home brewing made easy, there are several easy steps you can add to the process, but they are entirely optional:

  • Use a hydrometer to measure the alcohol content of your beer
  • Steep specialty grains in hot water to add color or flavor
  • Add extra hops at different points in the brewing processShop Home Brew Starter Kit
  • Increase or decrease the amount of water in the beer to control alcohol content

Eventually, you may get to the point when you brew partial mash or all-grain. But for now, realize that simple beer brewing is possible. Home brewing doesn’t have to be complicated!
Still don’t know where to start? Another great resource that will give you a basic overview of home brewing is the New To Brewing Section of our website. It will help to point you in the right direction.
———————————–
David Ackley is a beer writer, brewer, and self-described “craft beer crusader.” He holds a General Certificate in Brewing from the Institute of Brewing and Distilling and is founder of the Local Beer Blog.

3 Methods For Carbonating A Homebrew Keg

Equipment For Carbonating A Homebrew KegOne of the best parts of kegging your homebrew is that you don’t have to bother with beer bottles and priming sugar. You can force carbonate the beer by pushing CO2 gas directly into it. This blog post will cover three methods for carbonating a homebrew keg.
Assuming that you’ve already cleaned, sanitized, and filled your homebrew keg, you are now ready to carbonate. Check out these carbonation methods that show you how to carbonate through both force carbonation, including shaking the keg, and through natural carbonation. Pick out the best way to carbonate for you and your situation.

Method #1: Steady as She Goes
This method of force carbonating a homebrew keg is the most hands-off. Expect your beer to be ready in about five days.

  1. Determine how much carbonation you want in your beer (refer to this carb calculator). When in doubt, aim for about 2.3-2.5 volumes of CO2.
  2. Figure out how much CO2 pressure is needed to reach your desired carbonation. This will depend on the temperature of your homebrew while it is carbonating. Refer to this carb calculator.
  3. With all valves closed, connect the CO2 tank to the regulator, and the regulator to the gas-in post on the keg.
  4. Open valves and set the regulator to the desired psi level.
  5. After four or five days, take a sample of beer. If the beer needs more carbonation, give it an extra day or two. If the beer is over carbonated, you can “bleed off” pressure by pulling on the pressure relief valve.
  6. Your beer is ready to drink! Reduce pressure to about 10 psi to serve.

Method #2: Shake and Bake
Shop Temperature ControllerThis is the accelerated way of force carbonate a homebrew keg. While faster, the results are more unpredictable.

  1. Determine how much carbonation you want in your beer (refer to carb calculator). When in doubt, aim for about 2.3-2.5 vols CO2.
  2. Figure out how much CO2 pressure is needed to reach your desired carbonation. This will depend on the temperature of your beer. Refer to this carb calculator.
  3. With all valves closed, connect the CO2 tank to the regulator, and the regulator to the beer-out post on the keg.
  4. Open valves and set regulator to 20-30 psi. You should hear CO2 bubble through the beer.
  5. Shake the keg for about five minutes.
  6. Remove the CO2 quick disconnect and vent the keg. Repeat this process several times over the course of a day.
  7. Reset the regulator to the psi level you found in step 2 and reconnect the CO2 quick disconnect to the gas-in post.
  8. Take a sample of the homebrew. If the beer needs more carbonation, continue to shake and bake. If the homebrew is over carbonated, you can “bleed off” pressure by pulling on the pressure relief valve.
  9. Your beer is ready to drink! Set the pressure to about 10 psi for serving. Depress fully on the tap to avoid foaming.

Method #3: The Old Fashioned
Man Working On Homebrew Keg
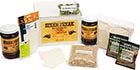
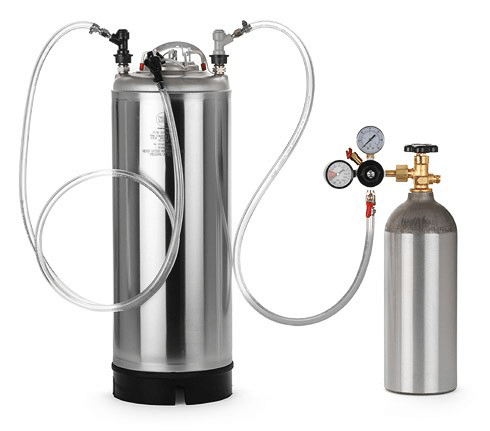
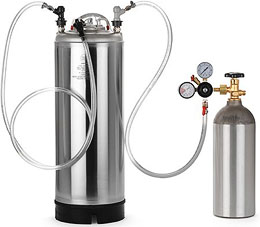
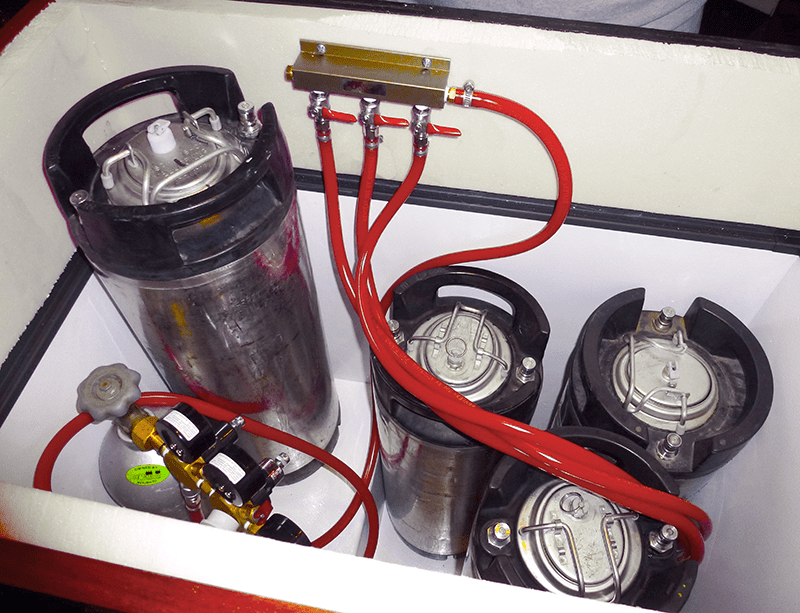
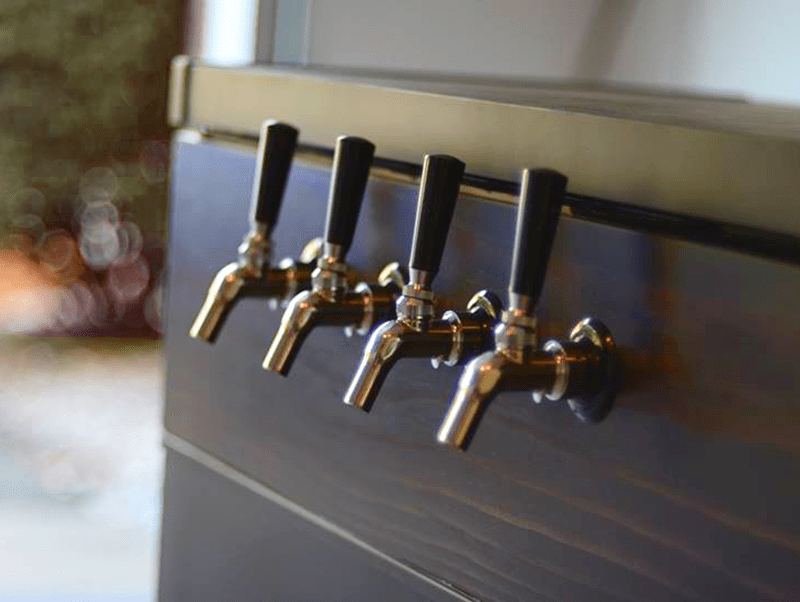
If you’re short on gas or you want your beer to be “cask style”, you can also carbonate your keg using priming sugar. When you are carbonating a homebrew keg with sugar, this is known as natural carbonation. It will take longer than force carbonation, but it’s relatively straightforward and predictable. In this case, you can mix in the priming sugar when you fill your homebrew keg with beer.

  1. Determine how much carbonation you want in your beer (refer to carb calculator). When in doubt, aim for about 2.3-2.5 vols CO2.
  2. Shop Faucet TowerUse a priming sugar calculator to determine how much corn sugar or DME you need.
  3. Heat about a pint of water in a saucepan and dissolve your priming sugar. Mix in your priming sugar and bring to a boil. Set aside to cool.
  4. Once cooled to room temperature, pour into your clean and sanitized homebrew keg.
  5. Rack your homebrew from the fermenter to the keg.
  6. Seal the keg. Take extra care to get a good seal on the lid and posts. Keg lube can help.
  7. Leave the keg in a room temperature environment at about 70˚F. After about two weeks, your beer will be ready to drink!
  8. You’ll still need CO2 to serve your beer. Set the regulator pressure to about 10 psi for serving.

What method do you use for carbonating a homebrew kegs? Which of the methods above do you think is the best way to carbonate.
———————————–
David Ackley is a beer writer, brewer, and self-described “craft beer crusader.” He holds a General Certificate in Brewing from the Institute of Brewing and Distilling and is founder and editor of the Local Beer Blog.

Instructions On How To Fill A Keg With Homebrew Beer

Homebrew Beer Kegging SystemAfter you have cleaned and sanitized your homebrew keg, you are now ready to put your own beer in it. These instructions below will show you how to fill a keg with homebrew beer. It will guide you step-by-step through the process of moving beer from your fermenter into a Cornelius style keg.
I’ll admit that the first time I used a homebrew keg system I was a little nervous. Something about all that pressurized CO2 gas made me feel uneasy. But it’s not as complicated as you might think. The main things to look out for are A) safety, and B) leaks. Any time you open the keg, vent it first through the pressure relief make sure the keg is not under any pressure. Whenever you are preparing to fill your keg and after you’ve filled it, check for leaks. CO2 can be costly. I’ll walk you through how to check for leaks in the instructions below.
Even though there are some mandatory steps you must take, the benefits of using a kegging system heavily outweigh any regiment you must endure.
Without further ado, how to fill a keg with homebrew!

  1. Kegging RegulatorAfter you have cleaned and sanitized your homebrew keg, reassemble it. To review how to clean and sanitize your a keg, visit our how-to instructions for cleaning and sanitizing your homebrew keg.
  1. Attach your CO2 tank and regulator to the keg by connecting the gas quick disconnect to the gas-in post.
  1. Use a sponge and soapy water to test for leaks by dabbing the sponge around all the CO2 connections, posts, and lid.
  1. Set the regulator pressure to a low setting, about 5-8 psi, and then open the regulator valve. Any leaks should produce bubbles where you dabbed the soapy water. If needed, tighten connections, replace o-rings, or use Teflon tape to ensure a tight seal. Keg lubricant can also be used around o-rings for a better seal.
  1. O-Ring Seal LubricantVent the keg through the pressure relief valve 3-5 times to expunge air from the keg. A 100% CO2 environment will improve the “shelf life” of your homebrew.
  1. Turn the valve on your regulator into the “off” position and vent all pressure from the keg. Double-check that you vented the keg completely.
  1. Remove the lid. Since CO2 is heavier than air, your keg should still be full of CO2.
  1. Auto SiphonUsing a sanitized siphon, transfer your homebrew into the keg. I highly recommend an auto-siphon if you don’t have one already. This will help you to get the siphon started without a lot of commotion.
  1. Replace the lid by pulling vertically on the lid and holding it in place, and then apply CO2 pressure. The CO2 pressure will push the lid into a good fit. Now clamp the lid into place.
  1. Switch your regulator to the “on” position and apply 5-10 psi of CO2 to the keg.
  1. Your homebrew is now ready to be carbonated! There is more than one way to go about carbonating a keg beer. Force carbonation is the most common method, but you can also carbonate a beer in a keg by conditioning. Here’s some information on how to carbonate your homebrew in a keg.

And that’s how how to fill a keg with homebrew. Do you keg your homebrew? What tips do you have to share about filling your homebrew keg?
———————————–
David Ackley is a beer writer, brewer, and self-described “craft beer crusader.” He holds a General Certificate in Brewing from the Institute of Brewing and Distilling and is founder and editor of the Local Beer Blog.

7 Fool-Proof Steps For Cleaning Corny Kegs

Clean Used Corny KegsThe last thing you want after waiting several weeks for your homebrew to ferment is to spoil your beer by putting it in a dirty corny keg. The easiest and most efficient way to clean your keg is with a Keg and Carboy Washer, which will spray the inside of your keg or carboy with a jet of cleaner or sanitizer solution. It’s an easy first-step to cleaning corny kegs.
For those of you without the Keg and Carboy Washer, read the steps below for cleaning and sanitizing your keg.
*Note: Whenever you finish off a keg of beer, rinse the corny keg well with hot water and soak in a brewing cleanser bath for up to 24 hours. This will make cleaning and sanitizing your keg much easier when it comes time to use it again.

How-To Instructions For Cleaning Corny Keg

  1. Vent pressure from the keg by pulling up on the pressure release valve on top of the keg. This is a safety precaution – don’t skip this step!
  1. Remove the lid from the corny keg by pulling up on the handle that holds the lid onto the keg. If needed, give it a 90º turn to remove it. Set the lid aside in a cleanser bath.
  1. Using a socket wrench or crescent wrench, remove the connect posts from the corny keg. Be careful not to strip the screws. Also, take care not to lose the poppets valves. These are the spring mechanisms inside the posts. Place these parts in the cleanser bath, as well.
  1. Shop Basic ARemove the dip tubes by pulling from the topside of the keg. There is a long one for beer and a short one for gas. Set the long one inside the keg (through the lid) and the short one in the cleanser bath.
  1. Inspect your corny keg O-rings (there are 5 total: 1 for the lid, 2 for the posts, 2 for the dip tubes). Clean them with a damp cloth or replace them if needed.
  1. Using a damp cloth, clean all keg parts. A line brush can be helpful for getting inside the dip tubes.
  1. Rinse and dry all parts according to the directions on your cleanser of choice.

If this is a used corny keg and it’s the first time you are using it, then these steps are a must. You should get in the habit of cleaning corny kegs inside and out before using it for the first time.

How-To Instructions For Sanitizing A Corny Keg:
Repeat all steps using your sanitizer of choice (Iodophor or Star San). When finished, reassemble your keg. Be sure to put the right dip tube with the right post. Check for leaks by applying soapy water to each of the posts, around the lid, and to all connections on your CO2 setupshop_draft_systems. Hook up the gas disconnect to the gas-in post, turn on gas at the tank, then turn on gas at the regulator. 10 psi should be ample pressure to check for leak, which will be indicated by bubbles at the various connections. You may need to tighten the connection or replace the O-ring.
There’s more than one way to go about cleaning corny kegs – how do you clean and sanitize yours? Any tips, tricks or secrets you’d like to share? Here’s some more of our kegging tips.
———————————–
David Ackley is a beer writer, brewer, and self-described “craft beer crusader.” He holds a General Certificate in Brewing from the Institute of Brewing and Distilling and is founder and editor of the Local Beer Blog.