How To Brew Witbier

Belgian Witbier
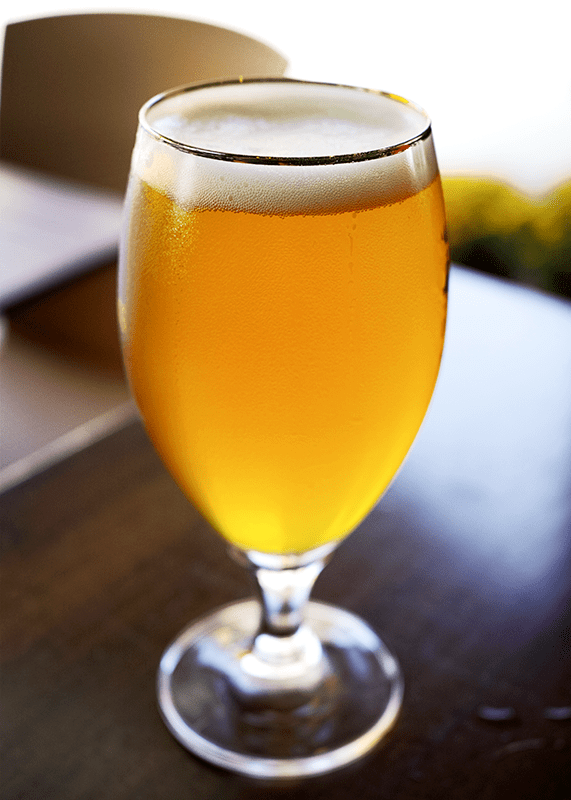
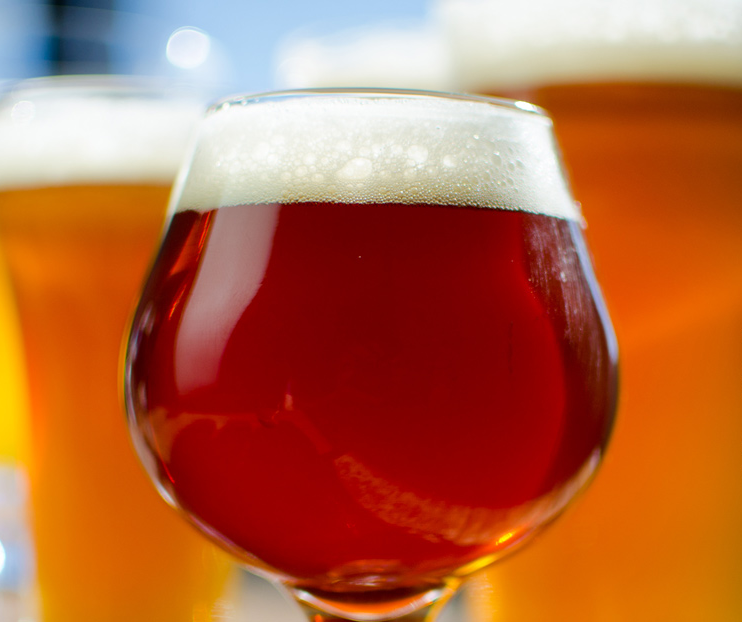
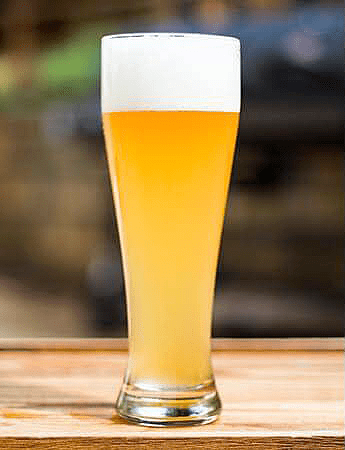
Witbier, or bière blanche, in French, is a style of wheat beer native to Belgium. Belgian “white” beer is characterized by its light color and cloudy appearance, usually from the use of unmalted wheat or oats. Moderately hopped, Belgians wits are commonly flavored with coriander, bitter orange peel, and possibly other spices as well. Given its light, fragrant, and refreshing qualities, belgian witbiers are perfect for brewing and drinking in warmer weather. (Can you tell I’m excited for summer?!) So, here’s some insights on how to brew Witbier.
Though once popular throughout Belgium, wits were nearly made extinct until Pierre Celis revived the style in the 1960s. Today, almost every beer drinker knows of Hoegaarden, named for the town where witbiers were made popular, and Blue Moon, the interpretation of the style made by Coors.
In doing some research for this post, I found an interesting tidbit from Michael Jackson, which explains how the Curaçao orange peel and other spices may have found their way into witbiers. In his Beer Companion, he points out that “Belgium was a part of the Netherlands when many spice islands, including the orange-growing territory of Curaçao, were colonized.” It stands to reason that the spice trade influenced what was used in the brewing of witbiers.
Modern interpretations of the style may include some interesting flavoring ingredients. Westbrook Brewing in South Carolina makes a wit called White Thai, which uses lemongrass and ginger root instead of orange peel and coriander.
How To Brew WitbierShop Steam Freak Kits
Witbiers are a fun style to brew and one that you and your non-beer geek friends will likely enjoy throughout the summer. Our Brewcraft Belgian Wit recipe kit includes everything you need to brew a Belgian white. You can also brew your own Blue Moon with Stream Freaks Blue Noon recipe kit. Both of these recipe kits are from extract. If you prefer to formulate your own witbier recipe, read on.

  • Grains – Extract brewers will want to use the lightest malt extract available, probably using a fair amount of wheat malt extract syrup, an extract made from both wheat and barley malt (65/35 wheat to barley malt). All-grain brewers should start with a light pilsner malt for the base of their grain bill. Both might consider using unmalted wheat or oats for added body and the notorious witbier cloudiness.
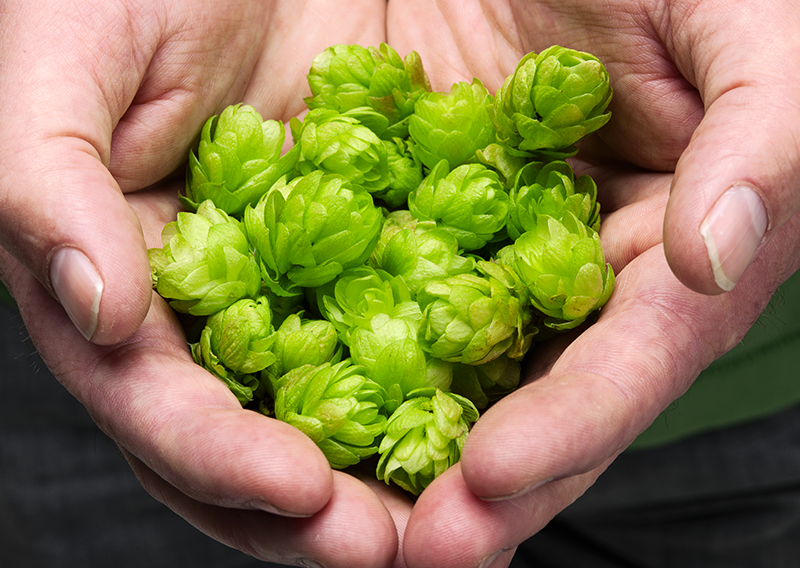
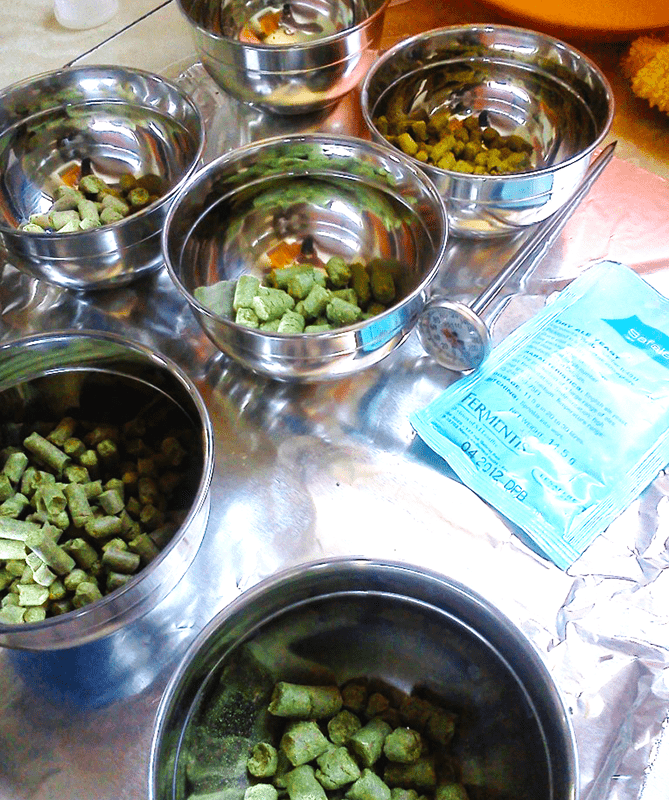
  • Hops – Traditional European varieties of hops should be used in an authentic Belgian witbier, but feel free to use some American hops if you’d like. According to Michael Jackson, the original Hoegaarden used East Kent Goldings and Saaz, though I’m not sure that’s still the case now that Hoegaarden is owned by AB-InBev. In any event, shoot for 10-20 IBUs.Shop Beer Flavorings
  • Herbs & spices – Coriander and bitter orange peel are the common additions in Belgian whites. Hoegaarden’s “secret” spice is believed to be grains of paradise. This is a good style though for thinking outside the box, so you may wish to throw in some lemon peel, lemongrass, ginger, or chamomile into your witbier depending on your tastes.
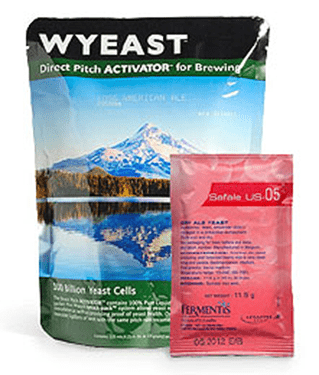
  • Yeast – Use a wit beer yeast or other Belgian yeast strain for your witbier.

That’s my take on how to brew Witbier. Are you a fan of Belgian wits? How do you like to brew your own Belgian white?
—–
David Ackley is a beer writer, brewer, and self-described “craft beer crusader.” He holds a General Certificate in Brewing from the Institute of Brewing and Distilling and is founder of the Local Beer Blog.

Storing Hops: What's The Best Way?

Homebrewer Storing HopsThe question often comes up: “I’ve had this bag of hops in the refrigerator for over a year…can I still use them?”
In short, yes! However, just storing hops in the refrigerator does not preserve their alpha acids very well, which makes it difficult to predict how they will affect a beer’s bitterness. Hops lose their potency and freshness over time, and only in the case of Lambics are aged hops considered desirable. Further, if not stored properly, hops can absorb some unpleasant odors wafting around your fridge, so it’s important to understand the proper method of storing hops in order to brew the freshest, best beer possible.

So, what’s the best way to store hops?
Learning how to store hops is a piece of cake:

  • Good – At a minimum, keep your hops in the refrigerator in an airtight container—like in a mason jar—and use them as soon as possible after purchasing.
  • Better – Even better, store hops in a vacuum-sealed package in the refrigerator. A consumer grade vacuum sealer can come in handy for this purpose.
  • Best – The best method for storing hops is to keep them in an air-flushed, vacuum-sealed package in the freezer. Most homebrewing hops these days are packaged  and stored this way. If it will be more than a few days before brewing with the hops, just toss them in the freezer until brew day.shop_hops

The same goes for storing hops after opening the package. If you have an unused portion of hops, storing the hops in the freezer in an airtight container is the best way to go. Try to use the hops as soon as possible.

What if my hops are old? Can I still use them? How does this affect IBUs?
If your have been storing hops in the freezer in an airtight container for less than a year, you should be able to use them without their age having a negative affect on your beer.
If the hops have been stored for longer than a year or just kept in a refrigerator, it might be a good idea to calculate the actual alpha acid content of the hops in order to accurately predict IBUs in the finished beer. All hops should be packaged with an alpha acid content expressed as a percentage. From there, it’s a simple matter of using an aged hop calculator to adjust the alpha acid content and the weight needed to achieve a desired bitterness level.Shop Accurate Scales
Keep in mind that there are many factors affecting bitterness in beer, so calculated IBUs are just an approximation. At the end of the day, it may be worth just buying some fresh hops from the homebrew shop so you can be sure you get the best qualities from your hops as possible.
—–
David Ackley is a beer writer, brewer, and self-described “craft beer crusader.” He holds a General Certificate in Brewing from the Institute of Brewing and Distilling and is founder and editor of the Local Beer Blog.

5 Tips for Clearing Beer (No Filter Required!)

Results of Clearing BeerA wise man once said that, beauty is in the glass of the beer holder. Cliché aside, wouldn’t your beer be even more beautiful if it was crystal clear? Clearing beer is not all that difficult. In fact, clearing beer is a matter of some simple steps.
While it is true that most haze-causing compounds have little effect on the flavor of our beers, the psychological effect of seeing a pristine, clear beer helps make for a more-enjoyable beer drinking experience. Additionally, clear beer tends to aid in product stability, giving your beer better shelf-life. With a little planning and patience, it is easy to get clear beer. With that said, here are some easy tips on clearing beer.

  1. Kettle Finings: Whirlfloc or Irish Moss
    Whirlfloc is a refined version Irish Moss, a carrageen seaweed. These products help protein coagulate in your kettle during the boil and eventually settle out of your beer. Adding a tablet of Whirlfloc or a tablespoon of Irish Moss 15 minutes before the end of boil can greatly reduce haze-causing proteins in your final beer. Using any of these is a great start to clarifying your beer.
  1. Proper Calcium Levels 
    Calcium aids in yeast health and their eventual flocculation of the yeast out of your beer. If you find your beers having significant yeast haze, it is worth checking your water report to ensure you have over 100 ppm of calcium in your brewing water. If you’re water is calcium deficient, adding small shop_gypsumamounts of calcium chloride, calcium carbonate, or gypsum to your beer can help the yeast flocculate out once fermentation is complete.
  1. Cold-Side Finings
    If you’re still having trouble with clearing your beer, adding fining products like gelatin or Polyclar to your beer while in secondary can aid in clarification. Different finings work on different types of haze, so be sure to read the manufacturer’s instructions and follow their directions.
  1. Cold Crash & Careful Racking 
    After putting your beer in secondary and before bottling, chilling the fermenter to near freezing temperatures will help the yeast and other particulate settle out. This allows you to carefully rack clear, bright beer off any trub cake and into your bottles or kegs.
  1. Cold Storage Shop Water Treatment
    Patience can go a long way when clearing beer. Once you beer is bottled and carbonated, storing it cold for a week or two will help chill-haze proteins form and settle out of solution, leaving you with bright beer. This is traditionally done with lager beers, but most ales can also benefit from cold storage.

Creating bright, clear beer is not rocket science. With solid brewing procedures and a few select ingredients such as clearing and fining agents, clearing beer is a very easy thing to accomplish.
—–
Nick Ladd is a homebrewer, beer enthusiast, and BJCP certified beer judge. He has won numerous beer competitions, has collaborated on multiple commercial beer projects, and writes frequently at his blog, ThePourReport.com.

Tips For Home Brewing A Saison Beer

Home Brewed Saison BeerThe Belgian Saison is a beer for warmer weather. Traditionally, brewers in southern Belgium would brew Saisons in the spring for consumption throughout the summer. Want to try home brewing a Saison beer for this summer? Then read on and you’ll be able to create your own extract or all-grain saison beer recipe!
Saisons, as with many Belgian beers, are difficult to place into strict style guidelines. They’re farmhouse ales, often made with adjunct grains, such as spelt, oats, and wheat, and a mix of herbs and spices — basically whatever can be found around the farmhouse. They’re a great beer for exercising creativity, and one of the few styles that lends itself to an “anything goes” approach.
Still, there are some general guidelines to keep in mind when brewing a Saison beer. According to Michael Jackson’s Beer Companion, Saisons range from “child strength” all the way up to “royal” strength, with the strongest version, la saison de mars, having an original gravity as high as 1.060. According to the BJCP Style Guidelines, a Saison should be “a refreshing, medium to strong fruity/spicy ale, with a distinctive yellow-orange color, highly carbonated, well hopped, and dry with a quenching acidity.” Further, according to the BJCP, Saisons should fit more or less within these guidelines:

  • IBUs: 20 – 35
  • Color (SRM): 5 – 14
  • OG: 1.048 – 1.065
  • FG: 1.002 – 1.012
  • ABV: 5 – 7%

Here are some suggestions for ingredients to use when brewing a Saison. Just keep in mind there are probably at least as many saison recipes as there are brewers, so don’t let this list restrain your creativity.

Water

  • Beer enthusiast author, Michael Jackson states that “local hard water may have helped provide the body, mouth-feel and extraction of flavors from the grains…” Consider using relatively hard water for increased body and flavor. Using Burton water salts may be appropriate. This is particularly important wine brewing a saison all-grain recipe

Grain BillShop Burton Water Salts

  • All-Grain: Start with a very light 2-Row Malt, such as Maris Otter or Belgian Pilsner malt. You may want to use a little Belgian Aromatic malt (20L) for color. Consider throwing in some Munich, Vienna, or Belgian Biscuit malt for added complexity. Small amounts of raw oats, spelt, or wheat can contribute additional complexity and body.

Sugar

  • Belgians are notorious for adding sugars to their beers. In the case of the saison, adding some light candi sugar or corn sugar can help achieve a dry finish.

Hops

  • Saisons are typically brewed with Belgian or UK hop varieties, with an emphasis on the early hop additions. Other European hops are sometimes used as well. When brewing a Saison beer consider using UK Kent Goldings, Fuggles, and Styrian Golding. Sometimes saisons are dry-hopped.

Herbs and SpicesShop Steam Freak Kits

  • Just about anything goes here. You might try orange peel, star anise, peppercorns, chamomile, but try not to go overboard: herbs and spices should enhance the characteristics of the yeast and hops, rather than dominate them. Herbs and spices may be added early in the boil for bittering or late in the boil for flavoring and aroma. Herbs and spices added during secondary fermentation will contribute to aroma. Usually an ounce or so is plenty for a 5 gallon batch, but it depends on the herb or spice in question. When in doubt, use a small amount, and if you want to use more in a future batch you can do that.

Yeast

  • Use a Belgian ale yeast, such as Wyeast’s #1388. To get a dry finish, we need a yeast that achieves a low FG.
  • Advanced: Some Saisons are made with a blend of yeasts. If you feel comfortable with it, you could try using a couple different Belgian yeasts. If you really want to go crazy, you could try an open fermentation, but chances of a contamination with this method are very high, and therefore not usually recommended.

What ingredients and techniques do you use when home brewing a Saison beer? Do you have a Saison beer recipe you’d like to share. Share in the comments below!
Til next time…Cheers!
—–
David Ackley is a beer writer, brewer, and self-described “craft beer crusader.” He holds a General Certificate in Brewing from the Institute of Brewing and Distilling and is founder of the Local Beer Blog.

Harvesting And Reusing Beer Yeast

Homebrewer Reusing Beer YeastLearning how to harvest, wash, and reuse your beer yeast is a neat skill that gets you one step closer to making beer the way the pros do. Besides, washing and reusing beer yeast can help you save a few bucks so you can get those homebrewing gadgets you’ve always wanted.

A few important things to consider before reusing your beer yeast:

  • When harvesting beer yeast, sanitation is very important! When you practice good sanitation, you can reuse yeast for ten generations or more!
  • Yeast should be harvested from a clean and healthy fermentation. Take notes on how your batch turns out. If the beer didn’t come out well, you probably don’t want to reuse the beer yeast.
  • Consider the color of the beer you’re harvesting yeast from. Yeast harvested from a dark beer and pitched into a lighter beer will likely affect the color of your beer, so try to pitch yeast from light beer to a dark one.
  • Just like with color, think about the hoppiness of the beer you’re harvesting yeast from. A yeast slurry from a very hoppy beer may affect the bitterness of your beer.

Now, here’s an easy step-by-step guide to harvesting and washing beer yeast. Follow these steps when reusing beer yeast and you’ll have not problems, whatsoever:shop_liquid_beer_yeast

  1. The night before transferring your beer from primary to secondary fermentation, boil a half gallon of water for 20 minutes to sterilize it. Carefully pour the water into a sanitized jar or growler, seal it with a sanitized lid, and place the growler in the refrigerator to cool overnight.
  1. The day of the transfer, clean and sanitize several (four or more) glass jars and lids. Remove the growler of cool water from the fridge.
  1. After transferring to secondary, pour half of the water from the growler onto the yeast cake left behind in the primary fermenter. Swirl the water around to stir up the beer yeast and let sit for several minutes. The slurry will stratify into three layers: watery beer mixture on top, dead yeast and trub on the bottom, and healthy yeast in the middle.
  1. Pour off and discard the watery top layer. Then pour the healthy beer yeast slurry into half of your glass jars, taking care to leave the darker yeast slurry at the bottom of the fermenter. Allow these jars to sit for several minutes.
  1. Shop Stir PlateIn ten minutes or so, the slurry will separate. Just like before, pour off and discard the watery stuff on top, then pour the white yeast slurry into the remaining jars, leaving behind the darkest part of the slurry.
  1. Place the lids on the jars of washed yeast and place in the refrigerator. Don’t forget to label the jars!
  1. Use the harvested beer yeast within a few months, the sooner the better, and prepare a yeast starter to ensure optimal viability for your next batch.

Have you ever tried reusing beer yeast from a slurry or cake? Did you end up with more beer yeast than you can use? Yes, you can make bread with it!
—–
David Ackley is a beer writer, brewer, and self-described “craft beer crusader.” He holds a General Certificate in Brewing from the Institute of Brewing and Distilling and is founder of the Local Beer Blog.

Alternative Techniques For Adding Hops To Beer

Hops – they’reHops Ready To Add To Beer the defining ingredient in many styles of both craft and homebrewed beer. From brown ales to stouts to IPAs, there’s hardly a beer out there that isn’t made with the addition of hops.
You may be aware that adding hops to beer at different points of the boil contribute different characteristics to the finished beer. Hops added early to the boiling wort are responsible for most of the bitterness in the beer, while hops added later to the boil contribute more of the floral, spicy, piney, or citrusy flavor and aroma qualities that hopheads know and love.
If you are following a beer recipe it is customary for it to state the boiling times for the various hop additions, whether it be: 60, 30, 15 or 5 minutes. Just following these times for standard hop additions.
But besides these standard hop additions through out the wort boil, there are a few alternative techniques for adding hops to beer that you may want to have in your homebrewing tool box:

  1. First wort hopsFirst wort hopping involves adding hops while collecting the runnings from an all-grain mash. Simply take the hops that you would add at the end of the boil and place them in the brew kettle as you collect the wort pre-boil. Some brewers believe that this technique results in “a more refined hop aroma, a more uniform bitterness, and a more harmonious beer overall.”
  1. Dry hopDry hopping is the practice of adding hops to the secondary fermenter while the beer is conditioning. This is another technique which adds additional aroma to the beer. As with first wort hopping, low alpha acid aroma hops are best suited for dry hopping. Use a screen, mesh hop bag, or cold crash your beer to separate the hops from the finished beer.
  1. Hop back – This is a method of adding hops to beer that is a little bit more involved. A hop back is a piece of equipment used to recirculate beer through the hops packed into it. For Sierra Nevada,Shop Hops it’s called a torpedo (hence “Torpedo” IPA), and for Dogfish Head it’s called Randal the Enamel Animal. If you’re a do-it-yourself-er, you can build your own hop back using a stainless steel container and standard hardware store fittings.
  1. Foosball table – If you’re a fan of the Dogfish Head IPAs, you’ve probably heard why they’re named 60-Minute, 90-Minute, and 120-Minute. Founder Sam Calagione originally used a jury-rigged foosball table for adding hops gradually throughout the 60-, 90-, or 120-minute boil. The idea is that this “continual hopping” results in a more rounded hop profile. While that may be true, this example highlights how creative ideas can be applied to the brewing process. Don’t be afraid to try out some techniques of your own!

What’s your “go-to” technique for adding hops to beer? Please share in the comments below!
—–
David Ackley is a beer writer, brewer, and self-described “craft beer crusader.” He holds a General Certificate in Brewing from the Institute of Brewing and Distilling and is founder and editor of the Local Beer Blog.

Yuengling Clone Beer Recipe (All Grain)

Yuengling BreweryAs you may know, Pennsylvania’s Yuengling is the oldest operating brewery in America. Founded in 1829, Dick Yuengling is the fifth generation to own and run this family business. As far as some of the lighter American lagers go, Yuengling Traditional Lager is one of the better ones (in my humble opinion). If you’re looking for a smooth lager that isn’t too heavy, this Yuengling clone may be a good option.

Building a Yuengling Clone Beer Recipe From All-Grain

Every good clone recipe requires some research. (Ideally, this includes some drinking!) From the brewery’s website, we learn that all Yuengling beers contain “a balance of American barley and imported two-row malt with choice Cluster and Cascade hops…”
Further, the description for the Traditional Lager tells us “roasted caramel malt” is included. Plus, as an amber lager, it’s similar to the Vienna lager, so we can refer to that style for some guidance. Vienna lagers feature Vienna malt, a grain that’s been kilned a little more than the typical two-row malt, so I’ve made sure to include a decent portion in this all-grain clone. The fermentable ingredients should yield a beer in the ballpark of 4.4% ABV, which is the alcohol content of Yuengling. Finally, a pound of caramel malt helps achieve that distinctive amber color.
Yuengling isn’t known as a hoppy beer, so I’ve kept the IBUs low at around 13. If you’d like some additional flavor and aroma, feel free to add an extra quarter ounce or so of Cascade hops during the last 10 minutes of the boil.

Shop Barley Grains
Yuengling Traditional Lager Clone Recipe
(All Grain, 5 Gallon Recipe)

*recipe assumes a mash efficiency of ~75%
5 lbs. Briess 2-Row Brewer’s Malt
2.5 lbs. Vienna Malt
1 lb. Caramel 60L
.25 oz. Cluster hops (6.5%) at :60
.25 oz. Cascade hops (7%) at :30
Wyeast Pilsen Lager 2007

Directions: Mash grains at 152°F for 60 minutes. Ferment 48°-56°F for two weeks. Condition at 40°F or below for at least four weeks before bottling or kegging.
Shop HopsThe most important thing with this clone recipe will be the fermentation temperature control. Yuengling doesn’t have much in the way of esters or aromas derived from the fermentation, so it’s important that this beer is fermented cool and cold conditioned to keep those yeast characteristics in check. Wyeast 2007 is a clean fermenting strain, so the beer yeast selection in this case should help.
As with all clone brews, it may take a little trial and error to get the beer recipe just the way you like it. Hopefully, this one will serve as a good starting point.
Have you tried a Yuengling clone beer recipe before? How did it go?
—–
David Ackley is a beer writer, brewer, and self-described “craft beer crusader.” He holds a General Certificate in Brewing from the Institute of Brewing and Distilling and is founder and editor of the Local Beer Blog.

Bottling Homebrew Beer For The First Time

Bottling Homebrew Beer At HomeHomebrewers have two choices: they can bottle their homebrew or they can keg it. Most start out by bottling homebrew beer because it’s less expensive and requires less specialized equipment. Bottling day takes a few hours, but with a beer in hand and a friend to help, it goes by in no time.
Here’s what you need for bottling homebrew beer at home:

Bottling Homebrew Beer:

  1. Thoroughly clean and sanitize everything that may come in contact with your beer: bottling bucket, racking cane, siphoning hose, bottling wand, bottles, caps. Be sure to check inside the spigot on your bottling bucket, as sediment tends to collect here!
  1. Take a hydrometer reading. This is to confirm that the fermentation has completed. Most beer recipes come with an expected final gravity hydrometer reading. You can also compare your final reading to your original gravity reading to calculate the alcohol content of your brew.
  1. Mix in your priming sugar. Boil two cups of water to sterilize and drive out any chlorine. Remove from heat, stir in priming sugar to dissolve. (Check your beer recipe for the exact amount of priming sugar, but usually it’s about 1 oz. corn sugar/gallon of beer.) Gently pour the mixture into your bottling bucket.
  1. Transfer your beer to the bottling bucket.Shop Bottle Cappers Using a sanitized racking cane and siphoning hose, transfer your beer from the fermenter into the bottling bucket. Leave behind as much yeast sediment as possible. Take care to avoid extra splashing. (Tip: Use an auto-siphon to get the beer flowing.)
  1. Get everything prepped for the actual bottling of the homebrew beer. Line up your clean, sanitized bottles on the floor, attach the siphoning hose to the spigot on the bottling bucket, and fix your bottling wand to the end of the hose.
  1. Fill your beer bottles. Insert the bottling wand into each beer bottle and press the tip firmly to the bottom to start filling. Lift the wand to stop the flow just before the beer reaches the top of the bottle. (I like to fill a few bottles, then place a sanitized cap over the top to reduce the chances of contamination.)
  1. Cap your beer bottles. After filling each of your bottles, cap them with a capper by pressing handles with firm, even pressure.
  1. Store beer for conditioning.shop_beer_bottles Place all the bottles back in a dark, temperature steady closet to carbonate and condition. In two weeks, they’ll be ready to drink!

Another blog post related to bottling homebrew beer, How to Inspect Your Bottles When Bottling Beer. This goes over the importance of sanitizing and inspection your beer bottles for any compromising damages such as chips and cracks.
Questions? Feel free to contact us with any questions you may have about bottling homebrew beer.
Happy Homebrewing,
Ed Kraus
—–
Ed Kraus is a 3rd generation home brewer/winemaker and has been an owner of E. C. Kraus since 1999. He has been helping individuals make better wine and beer for over 25 years.

Homebrew Recipe of the Day: Saison Rue Clone (All-Grain)

Glass of Saison RueThe Bruery in Placentia, CA, is one of the most respected Belgian-style breweries in the US. But instead of the standard lineup of saisons, dubbels, and trippels, this brewery makes a variety of inventive brews using unusual herbs, spices, and yeast strains. Many of their beers pack a punch in alcohol content, but all of them deliver a wallop of creative flavor.
For many years Saison Rue was considered the Bruery’s “flagship” beer. The beer is now exclusively produced by the Bruery’s wild and experimental side project known at Bruery Terreaux, and Saison Rue has been re-released under that name. It’s best described as an imperial rye saison with brett – in other words, a strong Belgian ale made with a significant amount of rye malt and finish with “wild” Brettanomyces yeast.
Brettanomyces yeast is often used by craft brewers to give beers a dry, somewhat funky, “barnyard” character. Brett takes a long time to develop, initially giving notes of pineapple, but delivering more of the funky notes after 3-6 months. It’s fun to see how these Brett beers change over time.
I recently brewed this Saison Rue clone for a homebrew festival. One professional brewer remarked that it was his favorite beer at the fest. If you like strong, complex Belgian ales, this one’s for you!
The Saison Rue clone beer recipe below comes from Michael Agnew’s excellent Craft Beer for the Homebrewer, a recipe book chock-full of homebrew clone recipes of commercial beers – I highly recommend it!

Saison Rue Clone Beer Recipe (via Craft Beer for the Homebrewer)
(5-gallon batch, all-grain)

Specs  
OG: 1.072
FG: 1.008
ABV: 8.5%
IBU: 30
SRM: 10

Ingredients  
9.25 lbs. two-row pale malt 
4.4 lbs. rye malt 
6 oz. brown malt  Shop Conical Fermenter
1 lb. rice hulls 
.55 oz. Magnum hops pellets – first wort hops
.15 oz. spearmint at :20
9 oz. corn sugar at :5
.5 oz. Sterling hops at :0
Wyeast 1388: Belgian Strong Ale yeast 
Wyeast 5112: Brettanomyces bruxellensis yeast (added at bottling)
Corn sugar for priming (use a priming calculator to determine how much sugar to use)
Directions
Prepare an appropriate starter using the Wyeast 1388, or plan on pitching two packs of yeast. Mash the crushed malt along with the rice hulls at 150˚F for one hour. Sparge with 170˚F water to collect 6 gallons of wort. Add the Magnum hops while collecting wort in the kettle, then bring wort to a boil. Boil for 40 minutes, then add the spearmint. After 15 minutes, add the corn sugar, stirring to avoid scorching at the bottom of the kettle. After five minutes, cut the heat and add the Sterling hops. Chill wort to 70˚F or below, then transfer to a clean, sanitized fermenter.
Ferment initially at 65˚F, but allow the temperature to slowly rise to 85˚F over the course of a week. At the end of primary fermentation, transfer to a secondary fermenter. After 5-7 days, transfer to a bottling bucket along with the Brettanomyces yeast and corn sugar and bottle. This Saison Rue clone beer will be ready to drink in 2-3 weeks, but the Brettanomyces character will develop over the course of several months, so be sure to save some bottles back for aging!
Are you a fan of Belgian ales? Also consider brewing this Rochefort 8 clone.  
—–
David Ackley is a beer writer, brewer, and self-described “craft beer crusader.” He holds a General Certificate in Brewing from the Institute of Brewing and Distilling and is founder and editor of the Local Beer Blog.

Liquid Beer Yeast vs Dry Beer Yeast For Homebrewing

Liquid Beer Yeast and Dry Beer YeastGuest beer blogger, Heather Erickson, shares some of her tips and insights about liquid and dry beer yeast.
————————————————-
When I first got into homebrewing, I was introduced to the Wyeast Smack Pack. This is a pouch of liquid yeast that has within it another pouch of activator that can be busted open by smacking it.
I can’t lie, it was kind of fun smacking that direct beer yeast activator and watching those little yeasties start working. Over the years, I have experimented with dry beer yeast and well, I’m torn between the results. Below are some of the pros and cons of liquid beer yeast vs dry beer yeast.

  • Pro: Liquid beer yeast offers variety
    With Wyeast offering over 50 different beer yeast strains for homebrewing, variety is quite possibly the spice of life with liquid yeasts. From a Belgian Strong Ale to a good ole American Ale, the variety of liquid beer yeast strains seem pretty endless. Besides the everyday ale/lager yeasts, liquid yeast varieties also include seasonal offerings.
  • Pro: Dry beer yeast keeps longer
    As a once a month home brewer, I find myself in two scenarios: either I am scrambling for brewing ingredients the day of, or I am crossing my fingers that my beer yeast is still healthy. The dry yeast alternative negates that second worry. Staying fresh for up to two years in the refrigerator, a dry yeast option like Fermentis Safale US-05 is a high-performing alternative to my usual go-to liquid beer yeast smack pack.
  • Con: Liquid yeast is more expensive
    If we are just looking at the numbers, on average, a liquid beer yeast pouch is about twice as much, if not more, than a packet of dry beer yeast. While cost might not be a concern if you prefer a certain type of flavor that a beer yeast provides, the economics are still worth noting.Shop Stir Plate
  • Con: You won’t know if your dry beer yeast is healthy unless you rehydrate
    Rehydrating dry beer yeast prior to pitching seems to be a point of contention among homebrewers. While some believe this step is necessary to ensure healthy yeast cells, others feel that it isn’t. Even dry yeast manufacturers are torn on the topic. A dry beer yeast packet boasts anywhere from 200-300 billion yeast cells, compared to 100 billion in liquid yeast. Pitching the dry yeast straight into your fermenter without rehydration could end up killing some of those cells, up to 50% or so. Taking that into account, the number of cells in both liquid beer yeast and dry beer yeast would end up being just about equal.

Besides water, yeast is arguably the most important ingredient in beer. Without it, you just have sugar water. That’s why there has always been such a big debate about using liquid beer yeast vs dry beer yeast for homebrewing your beer. It’s an important piece of the brewing puzzle.
My advice? Test out your tried and true Pale Ale recipe with a Wyeast 1056 and a Fermentis Safale US-05. Whichever pint you prefer is the yeast you should use.
Happy brewing!
—–
Heather Erickson is a homebrewer with three years experience and has competed in the GABF Pro-Am Competition. She writes the blog This Girl Brews and is a regular contributor to homebrewing sites. Find her on Twitter at @thisgirlbrews.