An All-Grain Brewer’s Worst Nightmare — How To Fix A Stuck Mash

Stuck Mash
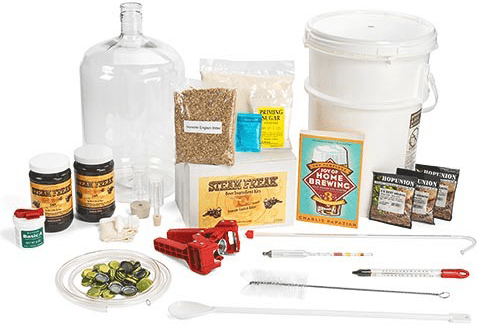
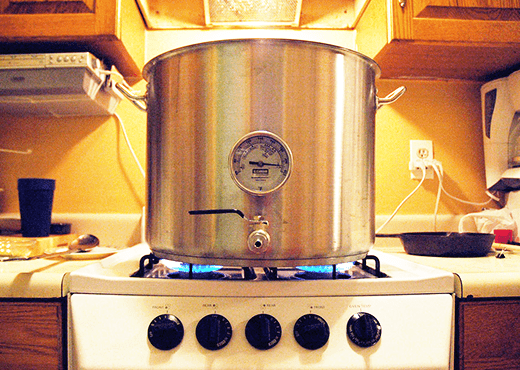
A stuck mash can really throw a wrench into your brew day. Things are going great: you planned your beer recipe, purchased all your homebrewing ingredients, mashed in, and pH and temperature are right where you want them. Then you start the sparge and collecting the wort from your mash tun, and all you get it a trickle – then it stops completely. What’s supposed to take an hour extends into two hours or more as you try to figure out how to separate the wort from the grain… what to do!

The best thing to do, of course, is everything in your power to avoid a stuck mash. No one wants a sparge that takes too long. In the event a stuck mash occurs, however, more drastic action is required. With that said, here are tips for preventing a stuck mash and tips to fix a stuck mash.

Tips for Preventing a Stuck Mash

  • Clean your mash tun between each use. This goes beyond just a soak in PBW. Take apart the various components of your mash tun and get in there to scrub ‘em out well.
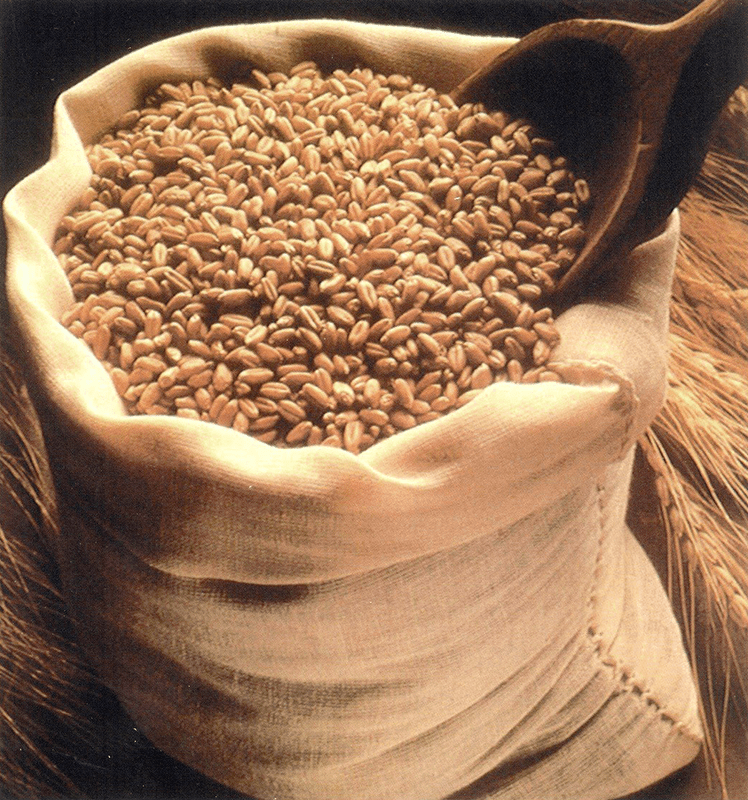
  • Don’t over-crush. When crushing the malted grains, make sure they aren’t crushed too finely. If there’s a lot of flour in the grist, it can really gunk up the wort outlets.
  • Some grains tend to get sticky, especially wheat, rye, and oats. Add rice hulls to your mash to make sure that wort can flow without getting clogged. The hulls won’t affect the flavor, color, or gravity of your beer.Shop One Step Cleanser
  • Watch you water-to-grain ratio. The recommended ratio is 1-1.5 quarts of water per pound of grain. Some all-grain beer recipes call for a thinner or thicker mash. If your equipment tends to give you a stuck mash, lean towards the higher end of the range. Take good notes so you can build upon your previous experiences!
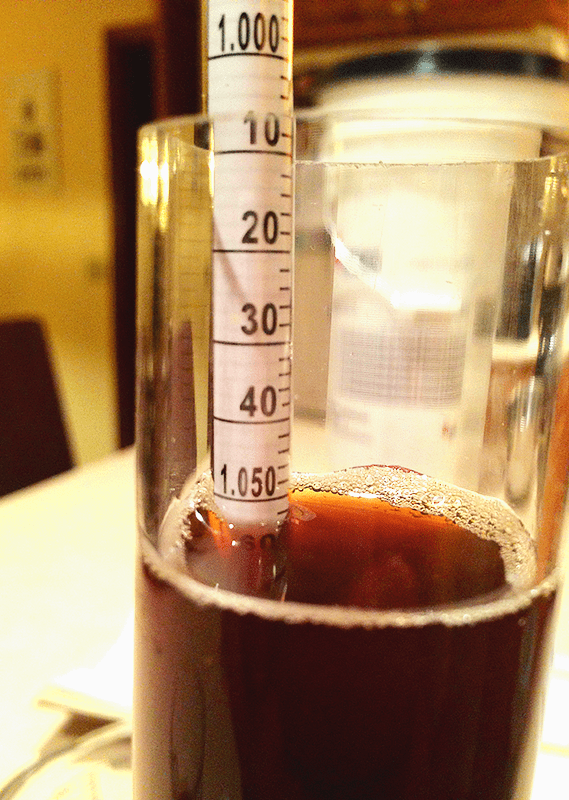
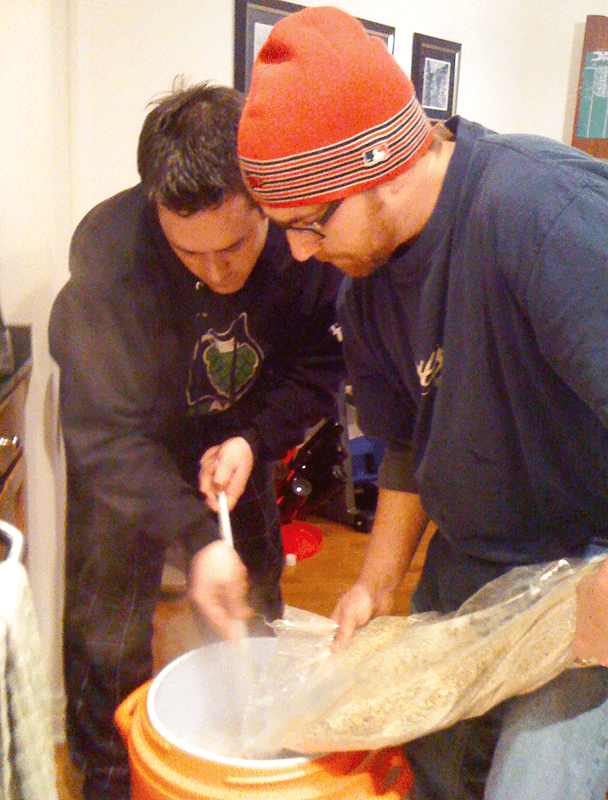
  • Take your time. When your mash is complete, draw off the first runnings slowly, allowing the grain bed to set. Draw off too fast and the grain bed can compact on itself, creating a stuck mash.

How to Fix a Stuck Mash

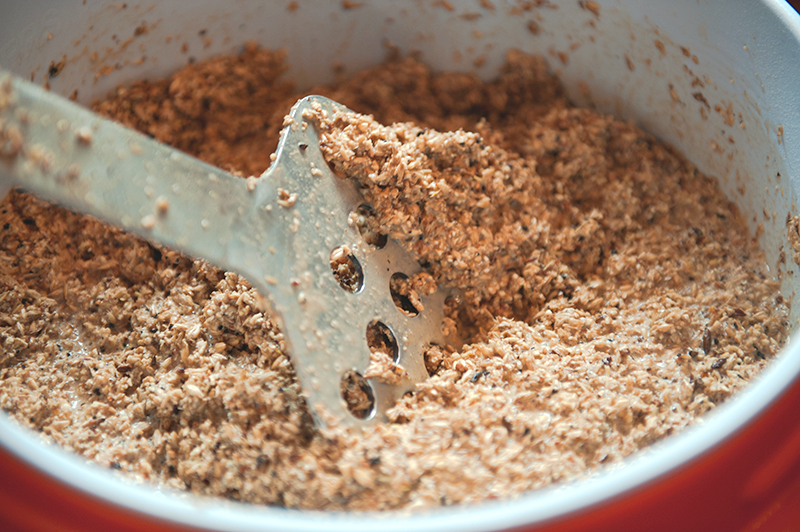
  • Stir it up. If you’re lucky, a quick, vigorous stir will be all it takes to fix your stuck mash. You’ll have to reset the grain bed, so draw off the wort slowly, gradually increasing the rate of flow.
  • Clear that clog. Shop FermentersIt the stir didn’t fix things, chances are good that there’s a clog in your mash tun. Dump the mash into a spare fermenting bucket. Since you will eventually boil the wort, the bucket doesn’t have to be sanitized, but it should be clean. Take apart your equipment, clear the clog if there is one, return the mash to the mash tun and start over.
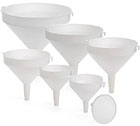
  • Use a colander. If you still can’t get your wort to flow, you probably need a new mash tun! To save your brew, pour the mash through a clean strainer and into your brew pot. The wort in the brew pot can be run through the strainer and the collected grains multiple times to improve clarity. This process is called a vorlauf.

To be sure, having a stuck mash can be a real pain. But don’t let them stop you from making great beer! If the sparge is taking too long you now know what to do to fix the stuck mash. Once it’s fixed, relax, have a homebrew, and take steps to prevent having stuck mashes in the future.

Do you have a stuck mash horror story? Share in the comments!

7 Homebrewing Tips That Will Save You Time!

Using Homebrewing Tip Number OneWhile many of us consider homebrewing a worthwhile expense, some people are just plain busy to brew. I don’t recommend cutting corners, but there are a few ways to make sure the hobby doesn’t take up a ridiculous amount of time. By cutting down on the time an labor, you are putting yourself in a position to brew more often. With that in mind, here are some homebrewing tips that are sure to save you time:

  1. Brew with a friend – This is my favorite homebrewing tip of all. That’s why it’s first. Enlist the help of a friend and share the workload with another pair of hands. This is especially helpful when it comes to cleaning and bottling. And, you’re introducing a new face to the hobby.
  1. Brew with extract – Eliminate the mash process, and you’ve just saved yourself an hour. Don’t let anyone tell you can’t make good beer with malt extract – the quality of malt extracts these days is very good. Many award-winning home brewers have won medals using malt extract – and so can you – so don’t take this homebrewing tip too lightly.
  1. Brew smaller batchesBrewing smaller batches will: A) Shorten the amount of time it takes for water to heat up, and B) Reduce the time it takes to bottle the beer. The trade-off, of course, is that you end up with less beer. This is a great idea if your time is booked up with no big breaks.
  1. Brew bigger batches – On the other hand, if you get a whole weekend off, brew a larger batch. You’ll end up with more beer and won’t have to brew as often! By going for volume, the time spent to produce a bottle of beer will be less.Shop Propane Burners
  1. Use a gas burner – This is a time-saving, homebrewing tip that many overlook. A gas or propane burner, whether on the kitchen stove or outdoors, will heat up water and wort much faster than an electric stove. A good gas burner can save an hour or more on brew day over an electric one!
  1. Prepare a yeast starter – Among its many benefits, a yeast starter will ensure that fermentation happens sooner and more rapidly. A faster fermentation means the beer gets in your glass that much more quickly!
  1. Rinse your bottles – This is one I think most homebrewers learn quickly, but I’ll mention it anyway. By rinsing your bottles when you’re done drinking from them, you reduce the likelihood of scum growing inside. This makes it much easier to clean your bottles, come bottling day. I will often just give them a quick soak in cleaner and then run them in the dishwasher on the sanitize cycle. The heat will sanitize the bottles and the dishwasher will allow you to do other things.

These are just 8 time-saving homebrewing tips. I’m sure there are many others. What methods have you figured out to save time when making your beer at home?
—–
David Ackley is a beer writer, brewer, and self-described “craft beer crusader.” He holds a General Certificate in Brewing from the Institute of Brewing and Distilling.

Tips For Brewing A Porter Beer Recipe

Porter Beer IngredientsHere’s a few insights and tips for brewing a porter beer recipe. There’s also a 5 gallon recipe for brewing an English-style porter from malt extract.

A porter beer is an ale featuring dark malts with a somewhat subdued hop flavor. Often chocolate and slightly roasty malt character is the primary flavor characteristic. A porter beer is traditionally an English beer, but American interpretations of porter might be a little more hop forward. Alcohol content ranges typically from 4.5-6% ABV, though “robust” porters can reach 6.5% or higher. It is believed that these stronger versions morphed into what we now know as stouts.

Building a Porter Beer Recipe

Malt
With all the malts available to homebrewers these days, there are many ways to get a deep brown color in the beer. Some prefer to use a pale ale malt as base, then add color and flavor with primarily chocolate and black malt. On the other hand, you can scale back on the darker malts and use some caramel malt to achieve the right color mix. The same goes for malt extracts. Use the porter beer recipe below as guidance, but by no means feel like you have to follow that grain bill!

Whatever combination of brewing grains you use, try to focus on the chocolate malt and crystal malts for your color. Roasted barley is more appropriate for stouts.

Hops
An English-style porter recipe should feature English hop varieties such as Goldings and Fuggles. American porters may use American varieties, like Cascade.

Mild porters may have as little as 18 IBUs, while the strong, robust porters could have up to 50 IBUs. In any case, remember that the main feature in the porter is the dark malts. Dry hopping is not unheard of, but try not to go overboard with the flavor and aroma hops if you want to brew a traditional porter beer.

YeastShop Steam Freak Kits
English ale yeast such as Wyeast 1098: British Ale will work well in an English porter recipe. I’m a big fan of the Safale-S04, great yeast in terms of quality, economy, and ease of use. For an American yeast, Safale-S05 and Wyeast 1272: American Ale II are two good options.

If you just want to hurry up and brew, check out our Babbage Brown Porter beer recipe kit. Otherwise, read on for some good porter beer recipe suggestions!

Brown Porter Beer Recipe (5 Gallons, Extract)
from the E. C. Kraus Beer Recipes

Style: Brown Porter:
Total Batch Size: 5 Gallons
Recipe Type: Partial Mash
Approx. Original Gravity: 1.052
Total Boil Time: 45 min.
Anticipated IBU: 28-32

Fermentables:
6.6 lbs. Briess: Sparkling Amber

Specialty Grains:
8 oz. Carapils® Malt
8 oz. Black Malt
4 oz. Chocolate Malt

Hops:
2 oz. Pelletized Willamette (45 min. Boil Time)
1 oz. Pelletized Fuggle (20 min. Boil Time)

Yeast:
Fermentis: Safale S-04

Bottling:
5 oz. Priming Sugar (Corn Sugar)
52 Bottle Caps

Shop Home Brew Starter KitDirections:
Steep grains in 152°F. water for 30 mins. Remove from heat, stir in malt extract and bring to a boil. Add Willamette hops and boil for 25 minutes. Add Fuggles hops and boil for 20 minutes. Cool the wort and pitch the beer yeast when the wort has reached 70°F. or lower. Ferment for 5-7 days at 60°F.-70°F., then rack to a secondary fermenter for 10-14 days. Bottle beer with priming sugar. Beer will be ready to drink in two weeks.

Do you have a good home brew porter beer recipe? What’s your secret?
—–
David Ackley is a beer writer, brewer, and self-described “craft beer crusader.” He holds a General Certificate in Brewing from the Institute of Brewing and Distilling and is founder and editor of the Local Beer Blog.

5 Home Brewing Gadgets That Won’t Break The Bank!

It doesn’t take much to start making your own beer at home: a large pot, some fermenting buckets, and you’re pretty much good to go. There are a few pieces of equipment though that make a world of difference in terms of ease and time. These are a few of the home brewing gadgets that I don’t brew without – each for $40 or less:

  • The Auto SiphonAuto Siphon – The standard racking cane/siphoning hose setup will get the job done, but it’s hard to get a good flow going – if you’ve used them you know what I’m talking about. But with a pretty minor investment, the auto siphon will make racking beer from primary to secondary a piece of cake. We carry the auto siphon in both 3/8” and 1/2” hose sizes. Either will allow you to start a siphon flow by slowly pumping the auto siphon one time. It’s a home brew gadget that I’ll keep at the top of my list!
  • Assorted Funnel SetThe Funnel Set – Sure, you can get by without a funnel, but anytime you’re pouring liquid or dry ingredients from one container to another, these handy gadgets help make sure that they don’t end up all over the floor. Our funnel set lets you fill containers large and small without a hassle, plus it comes with screens for straining. As you can see will have an assortment of sizes with strain screens that snap into the two largest sizes.
  • Escali Digital ScaleThe Digital Scale – If you like to tweak and develop your own beer recipes, a digital scale is a home brewing gadget that is a “must”. It’s perfect for weighing out hops, grains, sugars, and other additions, and it helps ensure consistancy from brew to brew. Our Escali digital scale measures in ounces, grams, and pounds, has a capacity of 11 pounds or 5 kilograms, is accurate to the .05 oz., and it gives the homebrewer much more control over their craft.
  • Assorted Brush SetThe Complete Brush Set – Sound cleaning and sanitation are key to making good beer. The complete brush set includes five different brushes so you can make sure your bottles, carboys, and even airlocks are free of debris that could contaminate your beer. This brush set includes two different sized bottle brushes, a gallon jug brush, a carboy brush, and a smaller brush that’s perfect for scrubbing on the inside of airlocks and spigots. Buying the whole set saves about 20% over buying each brush individually. Anything that makes cleaning and sanitizing easier is money well spent in my book.
  • Stainless Steel Carboy and Bottle WasherThe Carboy and Bottle Washer – Again: cleaning and sanitation is essential. This home brewing gadget makes rinsing carboys and bottles a breeze. Pressing the carboy or bottle down on the lever releases a jet of water, a high pressure blast that’s much more effective than a regular rinse. We carry the washer in both stainless steel and brass. The thread fits standard outdoor and utility faucets, so get the Kitchen Faucet Thread Adapter to make it work in the kitchen.

What home brewing gadgets do you find essential? Let us know in the comments section!

Til next time…Cheers!

—–
David Ackley is a beer writer, brewer, and self-described “craft beer crusader.” He holds a General Certificate in Brewing from the Institute of Brewing and Distilling and is founder of the Local Beer Blog.

What’s The Difference Between Ale And Lager Beers?

Assorted Beers In GlassesHow many times have you heard the question, “What’s the difference between ale and lager beers?” In fact, on a recent brewery tour, I overheard someone ask “What’s the difference between a lager and a pilsner?” A harmless question, but when the tour guide didn’t know the answer, it was all I could do not to smack myself in the forehead with the nearest five-gallon keg!

Now, naming conventions have changed over the years, so it’s easy to get confused. Let’s see if we can shed some light on the topic of ales vs lagers.

Ales vs. Lagers: What’s the Difference?

Let’s start top level. It’s generally agreed that there are two kinds of beer lagers and ales. (There are some hybrid styles that fall somewhere in the middle, but for now, let’s stick to the two main ones.) Within each broad category, there are dozens of different types of ales and lager beer styles. For example, pilsner is simply a style of lager, which can be further broken down into Czech-style or Bohemian pilsner, American-style pilsner, etc. One good way to get a sense of ale and lager beer styles is to look at a chart like this one.

When it comes to brewing, the difference between ale and lager beers becomes apparent. The two primary factors that make the difference are brewing yeast and fermentation practice.

Lagers are typically made using a bottom-fermenting beer yeast, which prefers cooler fermentation temperatures. As a result, lagers take more time to ferment and require homebrewers to have firm control over fermentation temperatures. Lager beer styles generally ferment at around 40°-50°F, which usually requires a dedicated room or refrigerator. For these reasons, most beginning homebrewers start with ales because they will ferment at room temperature.

Shop Steam Freak KitsAles are typically brewed using top-fermenting beer yeasts and slightly warmer temperatures. As a result ales ferment faster and are much easier to manage in terms of fermentation temperature.

Both ale and lager beer styles can run the gamut of color, gravity, and bitterness. Sometimes people think that ales are dark and heavy, while lagers are light in color and body. Don’t let the macro brand cheap lagers fool you! Lagers can be dark, hoppy, and high-gravity.

Here are some traditional lager beer styles that you may want to try to get a sense of the depth in the lager category:

  • Czech/Bohemian Pilsner – Compared to American light lagers, Czech pilsners have a much more assertive hop presence achieved through the use of noble hops. Steam Freak Pilsner Urkel is a clone of the classic Czech pilsner, Pilsner Urquell.
  • German Bock – A bock is a high-gravity lager (6-7% ABV) with a prominent malty character that’s both sweet and complex. Dopplebocks range from about 7-10% alcohol by volume. The Steam Freak Spring Loaded Bock features deep, rich malty flavors with subtle hop aroma.
  • SchwarzbierShop Home Brew Starter Kit – One of my all-time favorite beer styles, black lagers are chocolatey, roasty, and smooth. Here some more details on brewing a Schwarzbier.

As the craft beer movement continues to grow, many of the style guidelines get increasingly blurry. It could even get to the point where the difference ale and lager beer no longer even matters. Imperial pilsners and triple bocks may not fit perfectly into the BJCP guidelines, but they’re all the more reason to love lagers!

What are your favorite lager beer styles?
—–
David Ackley is a beer writer, brewer, and self-described “craft beer crusader.” He holds a General Certificate in Brewing from the Institute of Brewing and Distilling and is founder of the Local Beer Blog.

Rye Porter Beer Recipe (All-Grain)

All-Grain Brew Kettle On Stove Brewing Rye PorterSometimes it’s fun to brew outside of the BJCP style guidelines and to combine different beer styles to make something new and different – a hybrid beer style if you will. Today’s all-grain, rye porter beer recipe combines the roasted malt flavors of a porter with the spicy, tangy rye flavors of a rye pale ale.

First, let’s review some tips for brewing with rye:

  • Homebrewers can use either malted rye or rye flakes in a beer recipe, or both.
  • Rye contributes a distinctive flavor, but also body and mouthfeel.
  • Many American-style rye beers use 10-20% rye in the grain bill.
  • If using more than about 15-20% rye, consider using rice hulls to prevent a stuck mash.
  • Rye will sometime contribute haze to a beer. Review these tips for brewing a clear beer.

The rye porter beer recipe below is modeled after Sly Rye Porter from Yazoo Brewing Company (Nashville, TN), a beer the brewery describes as “a rich, chocolatey English Porter with a clean finish. Using only the finest malts, a portion of malted rye gives a spicy, slightly dry finish.”

Good luck!Shop Barely Grains

Rye Porter Beer Recipe (All-Grain)
(5.5-gallon batch)

Specs
OG: 1.057
FG: 1.014
ABV: 5.6%
IBUs: 31
SRM: 31

Ingredients
7.5 lbs. pale ale malt
1 lb. caramel 40L
1 lb. rye malt
Shop Hops1 lb. flaked rye
.75 lb. chocolate malt
.25 lb. carafa III malt .5 oz. Challenger hops at :60 (4 AAUs)
1 oz. Cascade hops at :15 (7 AAUs)
1 oz. Cascade hops at :5 (7 AAUs)
1 pack Safale US-05 American ale yeast or Wyeast 1272: American Ale II

Directions:
Optionally, start with a protein rest at 122˚F for 20 minutes. Raise mash temperature to 152˚F and hold for 60 minutes. Raise temperature to 168˚F for mash out. Sparge with enough water at 168˚F to collect about 6.5 gallons of wort. Bring wort to a boil and boil for 60 minutes, adding hops according to schedule above. Chill wort and transfer to a clean, sanitized fermenter. Pitch yeast when wort is at 70˚F or below. Ferment at 68˚F until complete.

This rye porter beer recipe has more of an American twist, using American ale beer yeast and Cascade finishing hops. It’s a tasty homebrew with a smooth body, a rich chocolate malt flavor, along with an intriguing hint of spicy, slightly tangy rye grain. This all-grain beer recipe has a touch more hop bitterness than the Sly Rye, with the Cascade finishing hops bringing in a spicy and citrusy hop character that work well with the rye.

Have you ever brewed a darker beer with rye? How did it go?
—–
David Ackley is a beer writer, brewer, and self-described “craft beer crusader.” He holds a General Certificate in Brewing from the IBD and is founder of the Local Beer Blog.

Getting Started: Essential Home Brewing Equipment List

Home Brewing EquipmentI’m frequently asked by craft beer fans what they need in order to start brewing their own beer. Is there a home brewing equipment list that one could follow? Luckily, Adventures in Homebrewing has taken the guess work out of this question by offering a Starter Home Brew Kit, which includes a bunch of equipment and one ingredient kit for the homebrewer’s first batch of beer. The only thing not included is a large kettle, which you may have on hand already. (If you don’t, we can hook you up with a brew kettle, too!)

Now, let’s take a closer look at the list of home brewing equipment included in the Steam Freak beer brewing kit:

  • Home Brewing Book:
    Before even getting to the actual equipment, every brewer needs some literature to guide them through their first batch. The Complete Joy of Home Brewing is the perfect accompaniment for the beginning brewer. After getting a batch or two of homemade beer under their belt, homebrewers can upgrade to more advanced books. I recommend Marty Nachel’s Homebrewing for Dummies and Ray Daniels’ Designing Great Beers. More >>
  • 6 Gallon Primary Fermenter (Comes with airlock, stopper, and faucet):
    A 6 Gallon Fermenter is ideal for primary fermentation. Even though you will be brewing a five-gallon batch, the extra space allows for krausen, or foam, to build during the height of fermentation. The airlock and stopper allow carbon dioxide – a byproduct of fermentation – to escape from the fermenter, while the faucet makes it easy to transfer to the carboy for secondary fermentation. More >>
  • 5 Gallon Plastic Carboy (Comes with airlock, stopper, and faucet):
    The carboy is where the beer sits for a 10-14 day conditioning phase, known as secondary fermentation. A curved racking cane will make it easier to transfer from the carboy back into the fermenter for bottling. More >>
  • Home Brew Hydrometer:Shop Brew Kettles
    This nifty tool should on any home brewing equipment list. It allows brewers at every level to determine the alcohol content of their beer. Carefully place the sanitized home brew hydrometer in the unfermented wort to take the first measurement – referred to as the original gravity (OG). After fermentation, take another – called the final gravity (FG). The difference between the two is used to calculate the alcohol by volume (ABV)! More >>
  • Thermometer:
    Your fermentation temperature matters. Too cool, and the yeast won’t ferment; too warm and you are promoting bacterial growth and possible death of the yeast. More >>
  • 6′ Length of 3/8″ Vinyl Hose:
    Any home brewing equipment list is going to have this. The heat resistant hose facilitates transferring from one fermenter to the other. More >>
  • Bottle Capper  
    When it’s time to bottle your brew, you’ll need something to cap the beer bottles. The double lever capper is easy to operate and ensures a firm seal on every bottle. More >>
  • Cleaner/Sanitizer:
    Brewing can get a little messy, but with several cases of beer at the end, it’s well worth the effort. A cleaner is ideal for cleaning your home brewing equipment before and after brewing a batch of beer. More >>
  • Beer Bottle Brush: Shop Steam Freak Kits
    Homebrewers typically save beer bottles for when their home brew is ready. The beer bottle brush helps to clean the insides of the bottles, helping to make sure nothing contaminates the beer you’ve worked so hard to make. More >>
  • Beer Ingredient Kit:
    Choose from over 30 beer ingredient kits for your making your first batch of beer. The Steam Freak Ingredient Kits include all home brewing ingredients for a five gallon batch, recipe instructions, and caps. More >>

So what are you waiting for? Order a kit already and start brewing! It has a home brewing equipment list that is perfect for the first-timer. And, it’s something you can easily build upon as you progress in this wonderful hobby.
—–
David Ackley is a beer writer, brewer, and self-described “craft beer crusader.” He is a graduate of the Siebel Institute of Technology’s “Start Your Own Brewery” program and the Oskar Blues Brew School in Brevard, NC.

Home Brewing With Wheat

Malted Wheat For Home BrewingWheat has been used in making beer for hundreds, probably thousands of years. In Germany, it was once such a popular ingredient that the government implemented Reinheitsgebot, which put a restriction on brewing with wheat to make sure there was enough wheat for making bread.

Modern home brewers have no such restriction. There are several styles of beer we enjoy today that call for the use of wheat:

  • American wheat beers, weizens, witbiers, and weissbiers are brewed with high proportions of wheat in the malt bill (sometimes 50 percent or more).
  • There are a number of other beer styles where we might see a smaller proportion (20 percent or less) of wheat used for body or flavor, such as in Belgian saisons.
  • Wheat may also be used in small amounts (up to 10 percent) to improve body or head stability in other styles, such as pale ales or stouts.
  • Lambics are often brewed with about 30% unmalted wheat.

Home brewing with wheat malt vs. barley malt

When home brewing with wheat, it’s important to think about some of the differences between wheat and barley:

  • Flavor – Compared to barley, wheat has a flavor that’s more, well, wheaty or bread-like. It’s often used to help make beers smoother in both flavor and mouthfeel. These characteristics often make wheat a good base malt for fruit beers.
  • No husk – Wheat also has no husk and a smaller kernel, which come into play when brewing all-grain beers. The lack of husk makes it a little more challenging when lautering, but on the other hand, no husk means less tannins.
  • Protein – Finally, wheat generally has a higher protein content than barley. This is why wheat is often used to improve head stability. The flip side is that the higher protein content can make the beer more hazy.

Different ways to go about home brewing with wheat:

  • Wheat extractShop Liquid Malt Extract – The easiest way to start home brewing with wheat is to us wheat malt extract. Use it in the same way you would any other dry or liquid malt extracts. Steam Freak Wheat LME is typically 65 percent wheat and 35 percent barley, whereas the Munton’s Wheat DME is 55 percent wheat and 45 percent barley. These ratios are important to keep in mind in terms of flavor and when converting an extract recipe to all grain.
  • Malted Wheat – Malted wheat needs to be mashed. Since wheat has no husk, it’s often recommended to us rice hulls along with it to improve filterability through the grain bed. We carry both Red Wheat Malt, which has an assertive wheat flavor, and White Wheat Malt, which is a little more subtle.
  • Flaked Wheat – Flaked wheat is unmalted wheat which has been processed through hot rollers. This process gelatinizes the starches so you don’t have to worry about converting sugars in the mash.
  • Torrified WheatTorrified wheat has been ruptured (sort of like popcorn) to make the starches in the grain more accessible. It should be mashed with a standard base malt for conversion to take place.
  • Unmalted Wheat – Raw, unmalted wheat is sometimes used for flavor, body, and head stability, but won’t contribute much in the way of fermentable sugars unless it is cooked in the brewhouse.

Do you like to home brew with wheat? What are your favorite styles of wheat beer?

—–
David Ackley is a beer writer, brewer, and self-described “craft beer crusader.” He holds a General Certificate in Brewing from the Institute of Brewing and Distilling and is founder of the Local Beer Blog.

What’s A Stuck Beer Fermentation, And How To Avoid It!

Stuck Beer Fermentation Hydrometer ReadingSo you’re sitting there with your beer in the secondary fermenter and expecting to bottle when what do you know – that beer you expected to finish around 1.010 on the hydrometer is still hanging out at 1.050. The beer yeast brought the gravity down by a mere ten points! What we have here is a stuck beer fermentation.

This is where meticulous note taking comes in handy. When things don’t go the way you want them to, your notes can point you towards the source of the problem.

Let’s see if we can figure out what went wrong.

What Is a Stuck Beer Fermentation and Why Does It Happen?

Fermentation is a process conducted by beer yeast, a living organism. Yeast requires certain conditions for the fermentation to take place, and if those conditions aren’t met, the fermentation can stop well before it should. Most beers will finish at 1.020 or lower, so if your beer stops fermenting at 1.030 or higher, you may have a stuck beer fermentation.

Here are a few of the reasons why your beer is not fermenting:

  • Not enough yeast – The yeast was under-pitched, so that is there weren’t enough yeast cells to fully ferment the wort.
  • Wort too hot when yeast was pitched – If the wort was too hot, it could have shocked or killed the beer yeast.
  • Wort in wrong temperature range – If your fermenter is too hot or too cold, it could kill the yeast or put them in a dormant state.
  • Under-aerated wort – Yeast needs oxygen in order to reproduce to a level where there are enough healthy cells to ferment the wort.
  • Old beer yeast (not viable) – If your beer yeast sat on the shelf for too long or was stored improperly, the yeast could have deteriorated. Check the dates on the yeast packets when you buy them and make sure they are stored in the refrigerator.
  • Yeast quit due to alcohol content – This could happen if brewing a very high gravity beer. Beer yeast commonly have a certain alcohol tolerance based on the strain. If you’ve exceeded the tolerance, then this could cause a stuck beer fermentation.
  • Lack of nutrition – Malt provides nutrition for yeast growth, so a stuck beer fermentation sometimes happens when brewing beers with lots of simple sugar adjuncts.Shop Beer Yeast Culturing

How to Prevent a Stuck Beer Fermentation

The first step towards fixing a stuck fermentation is prevention. These are three of the best ways to prevent a stuck fermentation:

  1. Use only fresh, healthy beer yeast – When buying yeast, check the date on the yeast packet to make sure it’s fresh.
  1. Prepare a yeast starter – Yeast starters are highly recommend when using liquid yeasts. (Check out our step-by-step guide to Yeast Starters.)
  1. Chill your wort to the appropriate pitching temperature – This will prevent any temperature shock. Check the yeast package for appropriate pitching temperature and allow the yeast to come to room temperature before pitching. (Read our post Why and How to Chill Your Wort for more information.)
  1. Thoroughly aerate your wort – Pour the wort vigorously into the fermenter and/or stir well with a sanitized stirring spoon.
  1. Use yeast nutrient – If brewing a high gravity beer or a beer with high amounts of simple sugars, yeast nutrient can give the yeast an extra boost.

How to Fix a Stuck Beer Fermentation

This is the hard part. It’s very difficult to revive yeast that isn’t doing its job, and it may take some detective work to figure out the best course of action. These are a few of the approaches one could take to fix a stuck beer fermentation:

  1. Check that the fermentation temperature is correct – Consult the yeast package for the optimal temperature range.Shop Liquid Beer Yeast
  1. Stir – Using a sanitized spoon, give the wort a good stir to see if you can revive the yeast that has settled out and get it back in to suspension.
  1. Pitch more yeast – You may want to pitch more yeast. (This is when having an extra packet of dry yeast in the refrigerator comes in handy!) It may help to try a different strain of yeast, especially for brewing high gravity beers.
  1. Pour your wort onto a yeast cake from another (recent) brew – This is a little unconventional, but it should do the trick. Pour your stuck wort over a yeast cake from a beer that you just racked to secondary. Just make sure what you’re mixing is relatively similar, if not identical. For instance, pouring a saison onto a witbier yeast cake will probably work out fine, but pouring a hefeweizen onto a Irish stout yeast cake will majorly affect your brew.

Now that you are familiar with a stuck beer fermentation and understand better the potential reasons why your beer is not fermenting, hopefully, you’ll never have to deal with one.

Have you ever had a stuck beer fermentation? Were you able to fix it? How did you do it?
—–
David Ackley is a beer writer, brewer, and self-described “craft beer crusader.” He holds a General Certificate in Brewing from the Institute of Brewing and Distilling and is founder of the Local Beer Blog.

Style Guide For Brewing Brown Ales

Home Brewed Brown AleGenerally speaking, brown ales are relatively mild and malt-forward beers that pair well with many different foods. Sometimes brown ales are nutty. This is from the character of the malted barley being used. Whether you prefer the classic, English version or the slightly more hoppy and robust American-style, brown ales make for good drinking. And without a doubt, brewing brown ales is well worth the effort.

You could try brewing an English brown ale from a kit, or follow a brown ale beer recipe, but sometimes it’s fun to develop your own beer recipe. Here are some guidelines and suggestions for brewing your own brown ale:

Style Guidelines For Brewing Brown Ales

  • ABV: Brown ales tend to be fairly sessionable, usually 4.2 – 5.4% alcohol by volume. American brown ales go as high as 6.2% ABV.
  • IBUs: English brown ales range from 20-30 IBUs. Again, American versions tend to push the envelope a bit, reaching 40 IBUs or higher.
  • Color: Northern English versions are copper to light brown in color, 12-22 degrees on the SRM color scale. Southern English and American brown ales reach as high as 35 SRM.

Water Treatment For Brewing Brown Ales

If brewing English brown Ale, try to recreate the hard water of the UK. To simulate a beer from Burton-on-Trent, use some gypsum and calcium carbonate, or Burton water salts. A brew from London will be high in sodium (100 ppm) and fairly high in carbonate (160 ppm). Note: You should know the mineral content of the water you’re brewing with before you start amending it.

Typical Grain Bill For Brewing Brown Ales

  • All-Grain: As with many beers, a standard 2-row malt will be the foundation (70% or more) of your brew’s grain bill. A US 2-Row Malt will work, or try using Maris Otter for an English Brown. Chocolate Malt is the next most important component of the grain bill and will lend the beer a somewhat roasty, slightly bitter chocolate flavor. You don’t need a lot: 4-8 oz. for a 5 gallon batch should be sufficient (less if using other kilned malts). You may also wish to use up to 1 lb. of Crystal Malt, and maybe a pinch (2 oz. or less) of Roasted Barley if you’d like a more roasty beer.Shop Steam Freak Kits
  • Extract: If brewing with extract, use a combination of light and dark malt extracts or 100% Amber Extract. Definitely consider steeping a little chocolate malt with some lightly kilned crystal malt. Note: Steeping even a little chocolate malt will add a lot of color. To keep your beer brown and not black, steep at most about 4 oz. of chocolate malt.

Adjuncts For Brewing Brown Ales

You may want to consider using a pound or so of brown sugar or a ½ pound of molasses for color and complexity.

Hops For Brewing Brown Ales

If brewing an English brown ale, stick with the classics: East Kent Goldings or Fuggles. For American brown ales, use primarily US-grown varieties. Consider finishing with Cascade, America’s most popular hop.

Yeast For Brewing Brown AlesShop Liquid Malt Extract

For an English Brown Ale, consider using Wyeast’s #1098 British Ale or #1028 London Ale. Nottingham is a good dry beer yeast. If brewing an American brown ale, try Safale US-05 or Wyeast’s #1056 American Ale. Or, if you want to get really creative, use a Belgian Ale Yeast to make it a Belgian brown ale!

So do you have a good Brown Ale recipe? What flavors do you look for when brewing brown ales?
—–
Ed Kraus is a 3rd generation home brewer/winemaker and has been an owner of E. C. Kraus since 1999. He has been helping individuals make better wine and beer for over 25 years.