Style Guide: Brewing An American IPA

American IPA
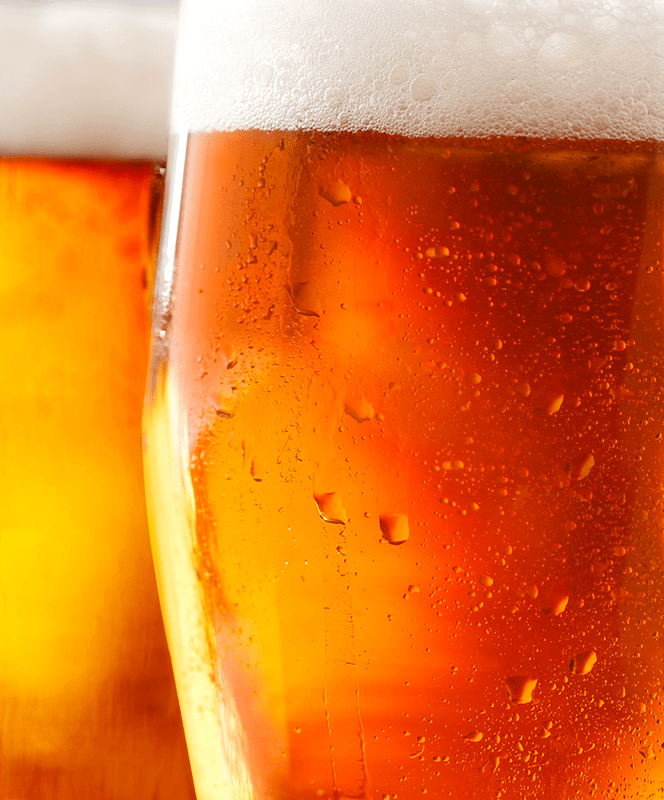
Many craft beer aficionados have heard the story about where the name “India Pale Ale” (or IPA’s) comes from. In short, to supply the colony in India, British breweries made ales with increased amounts of hops, taking advantage of the plant’s antimicrobial properties to ensure that the beer would survive the long trip. The American version of the IPA is more robust than the English version and also uses American-grown ingredients. But before I get into to brewing an American IPA, I’d like to share a little more about some of the history behind the style.
I recently picked up Ray Daniels’ book, Designing Great Beers, and learned a couple interesting tidbits about pale ales and IPAs. First, that pale ales were a product of the Industrial Revolution. The advent of steel allowed British maltsters to build better kilns, which gave them increased control over their product, which in turn made pale malts possible. Secondly, that these pale ales were considered beers for high society, while the lower classes stuck with the dark beers, like stouts and porters.
I found this quote, from 1934, to give an interesting perspective on the popularity of the style:
“[The India Pale Ale] is carefully fermented so as to be devoid of all sweetness, or in other words to be dry; and it contains double the usual quantity of hops; it therefore, forms a most valuable restorative beverage for invalids and convalescents.”
I don’t know about you, but I always feel better after an IPA! Now, back to brewing!
The BJCP Style Guidelines give us some parameters for brewing the American IPA (style 14B). The overall impression of the beer should be “an American version of the historical English style, brewed using American ingredients and attitude.” Whatever you do, don’t forget the attitude!
Here are the more easily measurable characteristics for an American IPA:

  • IBUs: 40-70
  • Color (SRM): 6-15
  • OG: 1.056-1.075
  • FG: 1.010-1.018
  • ABV: 5.5-7.5%

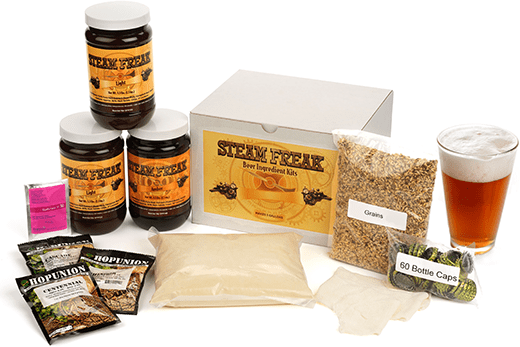
Now, let’s look at some of the specific ingredients you might use for brewing your own American IPA:
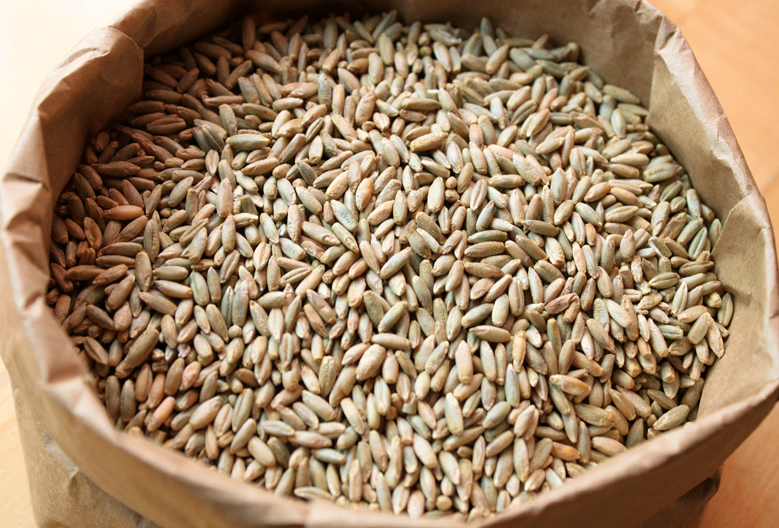
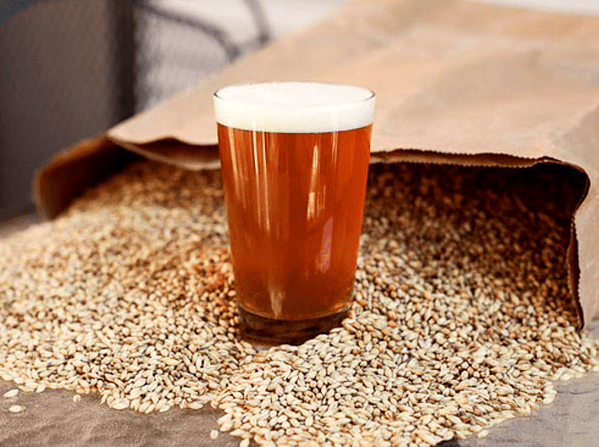
Grain Bill

  • All-Grain: Start with a well-modified US 2-Row Malt for the base of your grain bill (70% or so). Then use 1-2 pounds of Crystal Malt (20-40L) for color and caramel malt flavor. If you want, try a little (up to 5%) of Munich, Vienna, or Biscuit Malt for added complexity.
  • Extract: If brewing with extract, use light or pale malt extracts and consider steeping some crystal malt for flavor and color. Consider the Muntons Connoisseur Kit Type India Pale Ale kit, which contains malt extract that has already been hopped.Shop Home Brew Starter Kit

Hops

  • An American IPA should be brewed with US-grown hop varieties. Consider using Cascade, Centennial, Columbus, Chinook, and/or Willamette. Use 1-2 ounces during the boil for each of your bittering, flavor, and aroma additions. For increased hop aroma, dry-hop your beer by adding an ounce or two of hop pellets to the secondary fermenter.

Yeast

  • Use a classic American ale yeast, such as Safale US-05 or Wyeast’s #1056 American Ale. American IPAs should have a “neutral” fermentation character, so be sure to keep the fermentation temperatures within the acceptable range for your chosen yeast strain.

Follow the above guidelines and profiles for brewing an American IPA, and you’ll have a beer that is tasty and to style. What’s your favorite IPA? Do you have an American IPA recipe you’d like to share in the comments below?
Til next time…Cheers!
—–
David Ackley is a beer writer, brewer, and self-described “craft beer crusader.” He holds a General Certificate in Brewing from the Institute of Brewing and Distilling and is founder of the Local Beer Blog.

7 Tips For Clearing A Homebrew Beer!

Clear homebrew BeerFor some styles of beer, such as the Bavarian hefeweizen and the Belgian witbier, cloudiness is to be expected. The average consumer, however, has come to expect beer to be crystal clear — or “bright” as it’s known among beer geeks and professional brewers. Clarity has more influence on aesthetics than flavor, but since the appearance of a beer is the drinker’s first impression, it’s an important factor in assessing beer quality. To avoid your friends raising their eyes at your cloudy homebrew — and to achieve better scores at homebrew competitions — it’s important to know how to clarify your homebrew beer.

What Makes Beer Cloudy in the First Place?
Before we can talk about clarifying or clearing your homebrew beer, it would help to understand a little bit about what’s making the beer cloudy. Cloudiness in homebrew can come from a few different sources:

  • Malt can contribute proteins, fatty compounds (lipids), and tannins to your beer. Excessive protein can result in “protein haze” or “chill haze”, which happens when beer is clear at room temperature, but becomes cloudy when chilled.
  • After being boiled in the kettle, hops can break down and leave behind debris.
  • Yeast, as it multiplies and feeds on the sugar in your wort, it becomes suspended in the beer.

All of these a common sources for potentially keep a homebrew beer from becoming its clearest.

Common Ways to Clarify Your Homebrew Beer

There are several different ways to clarify or clear a homebrew beer. Here are the most common:

  1. Whirlpool – At the end of the boil, and before transferring wort to the fermenter, give the wort a strong stir. Proteins, lipids, and hop compounds will collect at the bottom of the kettle and form a pile of “trub” in the middle, making it easier to draw off beer and leave behind most of the protein and hops.Shop Irish Moss
  1. Kettle finings – Clarifying a beer with clearing agents is very effective. Irish moss (a.k.a. “carrageenan”) is a type of seaweed that works as a coagulant. It’s added in the last 10-15 minutes of the boil and helps make the whirlpool more effective by aiding in the coagulation of proteins.
  1. Cold break – Rapidly cooling the wort, such as with an immersion wort chiller, helps proteins settle out after the boil.
  1. Secondary fermentation – Transferring your beer from a primary fermenter to secondary fermenter is an opportunity to leave behind trub and yeast that has settled to the bottom. The length of the secondary fermentation is also a factor – the longer the fermentation, the more settling will occur. Fourteen days is usually enough for ales; lagers tend to take longer.
  1. Fermenter finingsShop Wort Chillers – Some beer finings are added to the secondary fermenter. Gelatin is a popular one. It’s derived from animal collagen, so beer made with it technically isn’t vegetarian. Clearing a homebrew beer with gelatin is quick and easy.
  1. Cold crash – Dropping the temperature on the secondary fermentation helps yeast and other particulates settle out.
  1. Filter – Many commercial breweries filter their beer, and while there are some filters available to homebrewers, in most cases the above techniques will result in sufficiently bright, clear beer.

What methods do you use to clarify your homebrew beers? Have you ever used gelatin or other fining or clear agents? Let us know about your experience!
—–
David Ackley is a beer writer, brewer, and self-described “craft beer crusader.” He holds a General Certificate in Brewing from the Institute of Brewing and Distilling and is founder of the Local Beer Blog.

Rinsing Beer Yeast For Reuse

Rinsing Beer YeastWhile it’s possible to pitch wort directly onto an old yeast cake, a better method of reusing yeast is called yeast rinsing. It’s a simple technique that can help make the most of your raw ingredients and keep your yeast cost down. And if you ever decide to take your homebrewing hobby to the pro level, rinsing your beer yeast will become part of your fermentation and yeast handling routine.

What is yeast rinsing?

Yeast rinsing is a method of taking a yeast slurry from a fermenting beer and separating the healthy, viable yeast from the dead yeast cells and trub. It’s always best to pitch as pure a yeast culture as possible, and rinsing removes much of the other particulate from the yeast slurry. This yeast can then be reused in another batch of beer. It’s best to reuse yeast from a low to moderate gravity beer after fermentation has started to slow. Yeast used in a high-gravity beer is more likely to be stressed and to produce off-flavors.

Directions For Rinsing Beer Yeast

  1. At the end of primary fermentation, boil 2-3 cups of water and chill it to room temperature.
  1. After transferring the beer into secondary, pour the pre-boiled, pre-chilled water into the primary fermenter. Swirl the fermenter to stir up the yeast at the bottom.
  1. Pour the slurry into a sanitized quart-size or larger glass container. A mason jar works well for this. **Remember – everything that touches the yeast at this point should be thoroughly clean and sanitized: the glass jar, the lid, and funnel (if used).
  1. Place the jar in the refrigerator for several hours or overnight.
  1. The slurry will stratify into three layers: a liquid beer layer on top, a dark layer of trub on the bottom, and a whitish layer of healthy yeast in the middle. That middle layer is what we’re after.
  1. Prepare another sanitized container. Pour off (decant) most of the top layer and discard, then transfer the white yeast layer into the container, leaving behind the darker trub.
  1. Keep refrigerated and use within a week (the sooner the better).Shop Beer Yeast Culturing

That’s it! Now you can try rinsing your own beer yeast. Then you’ll be able to reuse it in a new batch of beer! I recommend using a yeast pitch calculator to estimate how much of the yeast slurry to use in your next batch.

Some pointers:

  • Though professional brewers may reuse yeast for ten or more generations, I wouldn’t recommend reusing the same yeast more than 2-3 times. You can aim for more if your sanitation practices are spot on, but as soon as you notice fermentation problems, start with a fresh batch of beer yeast.
  • Reusing yeast will take some foresight and planning. Chances are you won’t want to brew the exact same beer back to back, so keep the beers at least similar stylistically. That said, rinsing your beer yeast can open up some interesting cross-over experiments. For example, reuse your English ale yeast in an American IPA, or reuse your Kölsch yeast for an American cream ale.


Have you ever tried rinsing beer yeast? Why or why not?

—–
David Ackley is a writer, brewer, and craft beer marketing consultant. He holds a General Certificate in Brewing from the Institute of Brewing and Distilling and is founder of the Local Beer Blog.

Tips for Brewing with Rye

Sack Of Rye For Brewing BeerHave you ever wanted to brew a Rye IPA or a Rye Saison? Though rye beers are easy to brew, it just helps to know a few techniques before you get started. Here’s some tips for brewing with rye.

How is rye different from other brewing grains?

While most beer is made primarily from barley, other grains can be used to add complexity of flavor or to affect the mouthfeel of the beer. Rye, like wheat, is higher in protein than barley so it helps to give beer a smooth, chewy, filling mouthfeel. It does not have a husk, so sometimes rice hulls are used to help with lautering. Rye also has a unique flavor, one that some describe as spicy, tangy, or rustic. It seems to pair well with spicy hops and phenolic yeast strains.

How to Add Rye to Your Homebrew
Brewers have a few choices when adding rye to their brew. Rye malt is the standard ingredient for brewing with rye. It can be crushed just like other malted grains, though rye tends to have a smaller grain size, so it may be necessary to mill the rye separately on a smaller setting to get a good crush.
Flaked rye has been heated and pressed through rollers. Flaked grains don’t need to be milled, so they can be added directly to the mash or steeping bag.
Chocolate rye malt is a specialty grain that combines the roasty, chocolatey flavors of a darker specialty malt with the spicy notes of rye. It’s a fun way to add some complexity to darker beers! Use up to about a half-pound or so in a five-gallon batch.Buy Barley Grains
Similar to chocolate rye malt, Cararye malt is a rye malt that’s been kilned just enough to develop some amber color and sweet caramel flavor. Recommended usage is up to 15% of the grain bill.
When brewing with rye it is important to understand that it has a higher protein content than other grains and no husk. Because of this rice hulls are recommended when brewing with more than about a pound of rye. This will improve filtering ability of the grain bed and will help reduce the likelihood of a stuck mash. Rice hulls will not affect flavor or color, but they will greatly improve the filtering ability of the grain bed. For an all-grain batch of homebrew with more than 10% rye, 0.5-1 pound of rice hulls are recommended. They do not need to be milled.

Rye Homebrew Recipes
Ready to make some rye beers of your own? Here’s some beer recipes to help you start brewing with rye…

Have you ever tried brewing with rye? What’s your favorite style of rye beer? 
—–
David Ackley is a writer, brewer, and craft beer marketing consultant. He holds a General Certificate in Brewing from the Institute of Brewing and Distilling and is founder of the Local Beer Blog.

Why Didn’t I Start Reusing Yeast a Long Time Ago?

Yeast From Primary FermenterOne thing that has constantly surprised me about homebrewing is that once you peel back the mystery on a particular method or aspect of brewing, pretty much everything turns out to be pretty easy. Which is part of the reason it’s such a rewarding hobby.
My latest discovery is reusing homebrew yeast. I’ve known since I started homebrewing that people would reuse and even “wash” yeast cake, but after reading about it and watching videos, it seemed like a process, which was difficult and was prone to introducing infection.
In addition, when you have racked your fermenter into a bottling bucket or keg, let’s face it, the stuff that’s left over is pretty nasty.
Well, a few weeks ago, I realized I had quite a few partial bags of hop pellets leftover from previous brews, so I decided to make a “kitchen-sink” beer to use up as much of those as I could. As chance would have it, the ideal day for brewing that was the day after I was going to be bottling a different batch of beer in which had used US-05 yeast. So, I decided that as long as I wasn’t going to spend money on hops and this was a largely experimental beer, I might as well try reusing the yeast from the primary fermenter.
I had read about an experiment where the brewer had used a pint or so of the yeast slurry at the bottom of a primary fermenter, along with new homebrew yeast which had been made into a starter. He brewed a batch, and split it into two fermenters, pitching the different yeasts. To make a long story short, there wasn’t much noticeable difference in the finished beers.
Well, that was enough for me, so in this latest batch, I just grabbed a little over a pint of the yeast cake from the primary fermenter. I put it in a mason jar in the fridge over night. The next day I took it out of the fridge in the morning, and when ready to pitch, I decanted off the liquid on top and pitched the sludge into my experimental beer.
Shop Liquid Beer YeastThe reused homebrew yeast took off pretty fast, and within four hours, it was bubbling away in the airlock. A little faster starting, but otherwise really nothing different than usual. I will say I noticed a larger krausen ring than I normally see. I cleared with gelatin, bottled, and waited.
I’ve been drinking this batch for about a week now. It’s not a heavy beer, but was meant to be a lighter beer. Not hoppy, but very well balanced. Very enjoyable, and in fact, as much as I hate to admit, it’s a little better than the previous batch which is a beer I’ve brewed quite a few times.
I am very happy with my decision to reuse the homebrew yeast cake from the primary fermenter, and I would encourage everyone to give it a try.

Do you ever reuse homebrew yeast? Why or why not?
—–
John Torrance is a database developer, gadget lover, and avid home brewer living in Lafayette, Colorado. When he’s not actively brewing, he’s generally daydreaming about what he’s going to brew for his next batch.

10 Refreshing Wheat Beer Recipe Kits

One Of The Wheat Beer Recipe KitsWheat – it’s good in bread, but even better in beer! Here’s an overview of a variety of wheat beer recipe kits. Take a look, and see which one you want to try…
Wheat beers offer a refreshing alternative to some of the all-barley ales and lagers out there. Wheat beers often deliver a tasty counterpoint between malty sweetness and tart acidity from style-specific yeast strains, making wheat beers excellent thirst quenchers. Though brewing with wheat can sometimes be tricky for all-grain brewers, extract and partial mash wheat beer recipe kits eliminate those challenges.
Consider the options below to easily brew your own wheat beer at home! (Bonus – some of these kits ship for free!)

German Wheat Beer Recipe Kits

  • Brewer’s Best Weizenbier – Weizenbier is a style of wheat beer from southern Germany, characterized by a high proportion of wheat and a banana/clove flavor derived from the yeast. A hefeweizen is a weizenbier served with yeast; a single-stage fermentation should keep some haze in the bottle.Steam Freak Wheat Beer Recipe Kit
  • Steam Freak High-Flyin’ Derwitzer Wheat – The Steam Freak line also offers a Bavarian-style wheat beer recipe kit. It’s a beginner level kit with 6.6 lbs. of wheat liquid malt extract, 8 oz. of steeping grains, 2 oz. of German hops, and an authentic weizen ale yeast. Expect a golden yellow brew at about 4% ABV with the classic banana/clove yeast profile.
  • Brewer’s Best Kölsch – Though maybe not the first style that comes to mind when thinking of German wheat beers, Kölsch is often brewed with a portion of wheat, usually about 10-20% of the grain bill. This beer Ingredient kit uses Pilsner LME, wheat DME, and German hops to yield a pale, dry, refreshing beer with a moderate hoppy bitterness.

American Wheat Beer Recipe Kits

  • Brewcraft American Wheat AleBrewcraft wheat beer ingredient kit – American wheat ale offers the light, flavorful, refreshing qualities of wheat, but taste of American hops and yeast. This Brewcraft Premium wheat beer ingredient kit makes a beer reminiscent of Bell’s Oberon.
  • Brewer’s Best American Pale Wheat – The Brewer’s Best American Pale Wheat beer recipe kit yields a stronger, more robust version of wheat ale. A partial mash of pale malt and flaked wheat gives additional flavor, mouthfeel, and gravity to the brew, bringing it up to about 6.5% ABV. Hop bitterness is also more assertive at about 31-35 IBUs.
  • Brewcraft Apricot Wheat Ale – If you’re a fan of Magic Hat #9, this is for you! This wheat beer ingredient kit in the Brewcraft Ultimate series uses apricot puree and natural apricot flavor to bring a refreshing apricot flavor to the beer. A great introduction to brewing fruit beers.

Belgian Witbier Beer Recipe Kit

  • Brewcraft Premium Belgian WitbierThe Belgian’s take on wheat beer is called witbier, or white beer, and is commonly flavored with spices like orange peel and coriander. The Brewcraft Belgian Wit kit uses a partial mash of two-row malt, unmalted wheat, flaked oats, and a touch of acidulated malt for an authentic body, flavor, and mouthfeel with just a touch of acidity. Orange peel, coriander, and grains of paradise complete the spicy, fruity complexity in this delicious brew.
  • Brewer’s Best WitbierBrewers Best Wheat Beer Recipe KitBrewer’s Best Witbier ingredient kit uses a partial mash of wheat and oats along with a classic witbier spice pack to craft a flavorful witbier of moderate gravity, about 4.5% ABV. Feel free to serve with a lemon or orange wedge!
  • Steam Freak Blue Noon Belgian WhiteJust like you would suspect, this is an American version of a Belgian wheat. It has a beautiful balance of zest and hops that is set off by just the right amount of orange peel. Its calm demeanor make it a great session beer for this category.

Have you already tried some of the wheat beer recipe kits? Do you have a wheat beer recipe you’d like to share? Go right ahead in the comments section below…
—–
David Ackley is a beer writer, brewer, and self-described “craft beer crusader.” He holds a General Certificate in Brewing from the Institute of Brewing and Distilling and is founder and editor of the Local Beer Blog.

Barrel-Aging Your Homebrew – Without a Barrel!

Barrel-Aged BeerAs with wine, beer will often benefit from barrel-aging. Depending on the type of wood used to make the barrel and whether the barrel was previously used or not, barrel-aging homebrew offers an additional realm of complexity, with flavors ranging from oak, vanilla, and toast, not to mention the characteristics of the wine or spirits that previously occupied the barrel.
Though homebrewers can certainly obtain barrels for aging their beer, an easier and more cost effective method is to let the beer age on wood chips. Oak is the wood of choice, and brewers can get French or American white oak, each of which offer a slightly different flavor profile. Additionally, these oak chips may be toasted, which will lend the beer notes of coconut or vanilla. Plain, or non-toasted oak offers more of a “raw” wood flavor. The oak should be sap clear. This is typically done by allowing it to sun-dry for 18 months to 3 years.

So what types of beers work best for oak-aging?
Generally, the best beers for oak-aging are more robust beer styles. Imperial and barleywines are good choices, as the higher gravity lends itself to longer aging. The intensity of the flavor in more robust beers can also more easily stand up to the oak flavor without getting covered up. Some of these stronger styles may be aged for months before developing the appropriate balance. That’s not to say I haven’t had great oak-aged saisons and IPAs. It can be done, but achieving the right balance is a more delicate operation.
To avoid over-oaking your homebrew, you might try one of two different strategies:

  • Option 1: Add 1-2 ounces of oak chips to your beer in the secondary fermenter. Taste the beer periodically, every week or so, and rack the beer off the oak chips when the taste is to your liking.
  • Option 2: Remove 1 gallon of beer by racking it into a 1-gallon glass jug with 2-4 ounces of oak chips. This will result in strongly oaked beer, which can then be blended back into the main batch at the ratio that tastes good to you.

What about mixing in wine or spirits when barrel-aging homebrew?shop_toasted_oak_chips

If you’re into craft beer, you’ve probably come across beer aged in all kinds of different barrels: red wine, white wine, bourbon, tequila, brandy. If you’d like to add the flavor of a wine or spirit to your wood-aged beer, simply soak the oak chips in about a cup of your wine or spirit of choice for a week or more. Then strain out the oak chips and place them in your secondary fermenter. If desired, you can blend in some of the reserved wine or spirit to taste. The best way to do this is to pull out a small sample of beer and then dosing it with small amounts of the wine or spirit. Then you can calculate how much to blend back in to the larger batch. Err on the side of caution – you can always add more, but you can’t take it out.
Barrel-aging homebrew – with or without wine and spirits – introduces a new skill set to the brewer’s palette: tasting and blending. Barrel-aging may be more of an art than a science, so for best results, taste your beer as it ages on the oak and if needed, blend together multiple oaked and un-oaked batches to get the flavor your want.
Do you barrel-age your homebrew? What are some of your favorite beer styles for barrel-aging?
—–
David Ackley is a writer, brewer, and craft beer marketing consultant. He holds a General Certificate in Brewing from the Institute of Brewing and Distilling and is founder of the Local Beer Blog.

How and Why to Brew With Yeast Nutrient

Glass Of Homebrew Sitting In GrainsIf you’ve ever thought about using yeast nutrient in your beers but haven’t, then you may want to reconsider. There is little-to-no downfall in doing so and the additional costs are minuscule.
Yeast is the magical microorganism responsible for turning sugar into alcohol. Without yeast, we would have no beer, wine, or cider. And in order to do their jobs well, those billions of yeast cells have certain requirements. They’re not about to do all the hard work of fermenting your beer without a little something in return!
Though yeast are happy to eat up a bunch of sugar in just about any situation, there are some conditions that affect just how well they thrive. Temperature, for one, is important. Yeast can be killed when either too cold or too hot. When it comes to beer yeast, they tend to do best within a relatively narrow temperature range. Luckily for homebrewers, the ideal temperature for ale yeast is right around room temperature.
Another important factor in yeast performance is yeast nutrition. Since malt provides most of the nutrients yeast needs to ferment a batch of beer, yeast nutrition is usually covered when homebrewers progress beyond the basics.
In order to thrive, yeast need not just sugar, but also elements like nitrogen, fatty acids and sterols, amino acids, and vitamins. When yeast lack these ingredients, such as when brewing with large amount of adjunct grains and sugar, we begin to think about using yeast nutrients in the beer. Personally, I’ve found that yeast nutrient is a worthwhile addition to every batch of beer I brew.Shop Yeast Nutrient

Types of Yeast Nutrient and How to Use Them

  • Brewer’s Yeast Nutrient – One of the chief contributors to a healthy fermentation is nitrogen. It is most often lacking when brewing a beer with a high proportion (more than 10%) of sugar or rice. Nitrogen-based yeast nutrients are usually added to a beer before fermentation, though they may also be helpful in resolving stuck fermentations. Typical dosage for beer is 1 tsp. per three gallons.
  • Yeast Energizer – Yeast energizer is specifically designed for enhancing and speeding up fermentation. It has a slightly different mix of ingredients than yeast nutrient, providing what yeast needs a little later in the fermentation process. So, it is often added part way through fermentation and is especially useful in a stuck fermentation situation. Typical dosage is 1/2 tsp. per gallon.

Shop Yeast EnergizerProperly using yeast nutrients when brewing beer will frequently reduce fermentation time and produce cleaner tasting brews. Many brewers are in the habit of adding yeast nutrient to every batch.

Are you in a habit of using yeast nutrient in your beers? Why or why not?
—–
David Ackley is a writer, brewer, and craft beer marketing consultant. He holds a General Certificate in Brewing from the Institute of Brewing and Distilling and is founder of the Local Beer Blog.

The Essentials Of Adding Fruit To Beer

Results of adding fruit to beerWith the spring and summer seasons come the harvest of strawberries, peaches, blueberries, and more. Why not experiment a bit and make something a little different – your own seasonal brew? These warmer months are ideal for adding fruit to beer.
Before you start throwing apples and oranges in the brew kettle through, it’s a good idea to think about how much fruit to use and where to add it in the brewing process.
Here are some suggestions for adding fruit to beer:
First, try a few commercial fruit beers and think about how much fruit flavor you want in yours. Several craft beers on the market are made with fruit, with flavors intensities ranging from barely noticeable to a full-frontal assault. An example is 21st Amendment’s Hell or High Watermelon.
So do you want just a hint of fruit flavor, or something more dominating? Think about where you want to be on that range for your batch of fruit beer. Depending on the fruit in question, you may want to start with half a pound or so of fruit per gallon and work your way up from there.
Next, pick your beer recipe as your base style. Fruit beers work well with pale ales and wheat beers, but also dark beers in some cases. Raspberry works well in stouts, especially when combined with chocolate. Pick out a recipe kit that you think might fit with your fruit of choice, or develop your own recipe.

Peel, puree, or juice?
Next, think about how you want to add fruit to beer. In some cases, such as when brewing a Belgian Wit, a little citrus peel is enough to impact the flavor of the brew. Orange is the most common, but why not experiment with lemon, lime, or grapefruit? Adding peel will likely contribute more bitterness than fruit flavor.
In my experience, adding fruit to beer in secondary fermentation is an effective way to get fruit flavor into a beer. The exact method for preparing the fruit will vary depending on the fruit in question and whether it’s fresh or frozen fruit you are adding to the beer. Fresh fruit should be peeled, frozen, and thawed, while frozen fruit should just be thawed to avoid shocking the yeast in the fermenter.
You could also add fruit juice or puree to the secondary fermenter. I suggest using 100% juice without preservatives or artificial colors and flavorings. Start with a cup or so of fruit juice or puree in a 5 gallon batch for a subtle flavor, or more for something more intense.
Shop FerMonsterWhether you add whole fruit, pureed fruit, or fruit juice to your beer, keep in mind that some of the sugars in the fruit will ferment, raising the alcohol content of your homebrew and possibly adding fermentation time to the process.

Fruit Extract
Another way of adding fruit to beer is to use fruit extract and add a few drops to each beer bottle on bottling day. You may want to take a sample of beer and play with ratios to figure out how many drops each bottle should get.

Fruit Liqueurs
Fruit liqueur can be used as both a flavoring and a priming agent. Instead of priming with corn sugar, the sugar found in liqueurs is enoughShop Liqueur Flavorings to carbonate your beer. Marty Nachel points out that “One 750ml bottle contains just about enough sugar to prime a 5-gallon batch of beer. Because the actual sugar contents of any liqueur depends on the company that made it (although it more likely has too little sugar than too much), you may want to add another ounce or two of dextrose to be sure.”
Have you every tried adding fruit to beer? How did it turn out? Share in the comments below!

Where Do Brewing Hops Come From?

Hops Being HarvestedHops are the flowers from the plant known as humulus lupulus. The hops plant sends up vines (technically “bines”) in the spring, which may climb as high as 20 feet or more. Since only the flowers are used in the brewing process, only the female hops plants have commercial value for brewers.

Where Do Brewing Hops Grow

Brewing hops grow best between the latitudes of about 35 and 55 degrees. This translates to a strip ranging across roughly the northern two-thirds of the US and most of continental Europe. If you live in this zone, you may be able to grow hops yourself.
Many traditional beer styles are characterized by the variety of hops that grow in a given region. For example, American ales, such as American IPAs, typically exhibit characteristics of hops grown in the Pacific Northwest – notes of citrus and pine are common. The majority of brewing hops grown in the US come from Washington, Oregon, and Idaho. Examples of American hops include Cascade, Centennial, Columbus, and Willamette.
There are a number of hop varieties specific to continental Europe. The noble hop varieties (Hallertau, Tettnang, Saaz, Spalt) all come from Germany and the Czech Republic, and are most often found in traditional European styles like German ales, German lagers, and Czech lagers. Many Belgian beers feature these same hops, as well as Styrian Goldings from the region of the former Yugoslavia.
The UK is another popular hop growing region. Fuggles, East Kent Golding, and Bramling Cross are natural choices if brewing English bitters, porters, barleywines, or stouts.
In recent years, brewing hop production has increased in the southern hemisphere. Hops grown in places you might not expect have started to hit the market: Chile, Argentina, New Zealand. Sierra Nevada pays tribute to some of these distant hop growers with their Southern Hemisphere Harvest IPA.

From the Growing Fields to Your Home BreweryShop Brewing Hops
At the end of the growing season, hops are harvested by machine or by hand, then processed either into pellets or packed in whole cone form. They’re usually pressed into bales for easy shipping and storage.
At some point in this process, the hops may go to a broker who effectively buys the hops from farmers and then distributes them to the various buyers: breweries, homebrew shops, and other hop suppliers.
Throughout this process, hops must be stored cold in order to preserve their flavor and bittering characteristics. This makes sure that by the time the hops hit your brew kettle, they’re just as fresh as they were when they left the field!
Have you ever grown your own hops? What are some of your favorite hop varieties?
—–
David Ackley is a writer, brewer, and craft beer marketing consultant. He holds a General Certificate in Brewing from the Institute of Brewing and Distilling and is founder of the Local Beer Blog.