Having Fun Using Honey In Your Wine Making

Using Honey In Wine MakingI want to start using honey instead of sugar in my wine making so I have a few questions: do i put the honey in the must to start with, or, to sweeten after the wine is done fermenting? Also one pound of sugar equals how much honey?

Tom – NC
—-
Hello Tom,

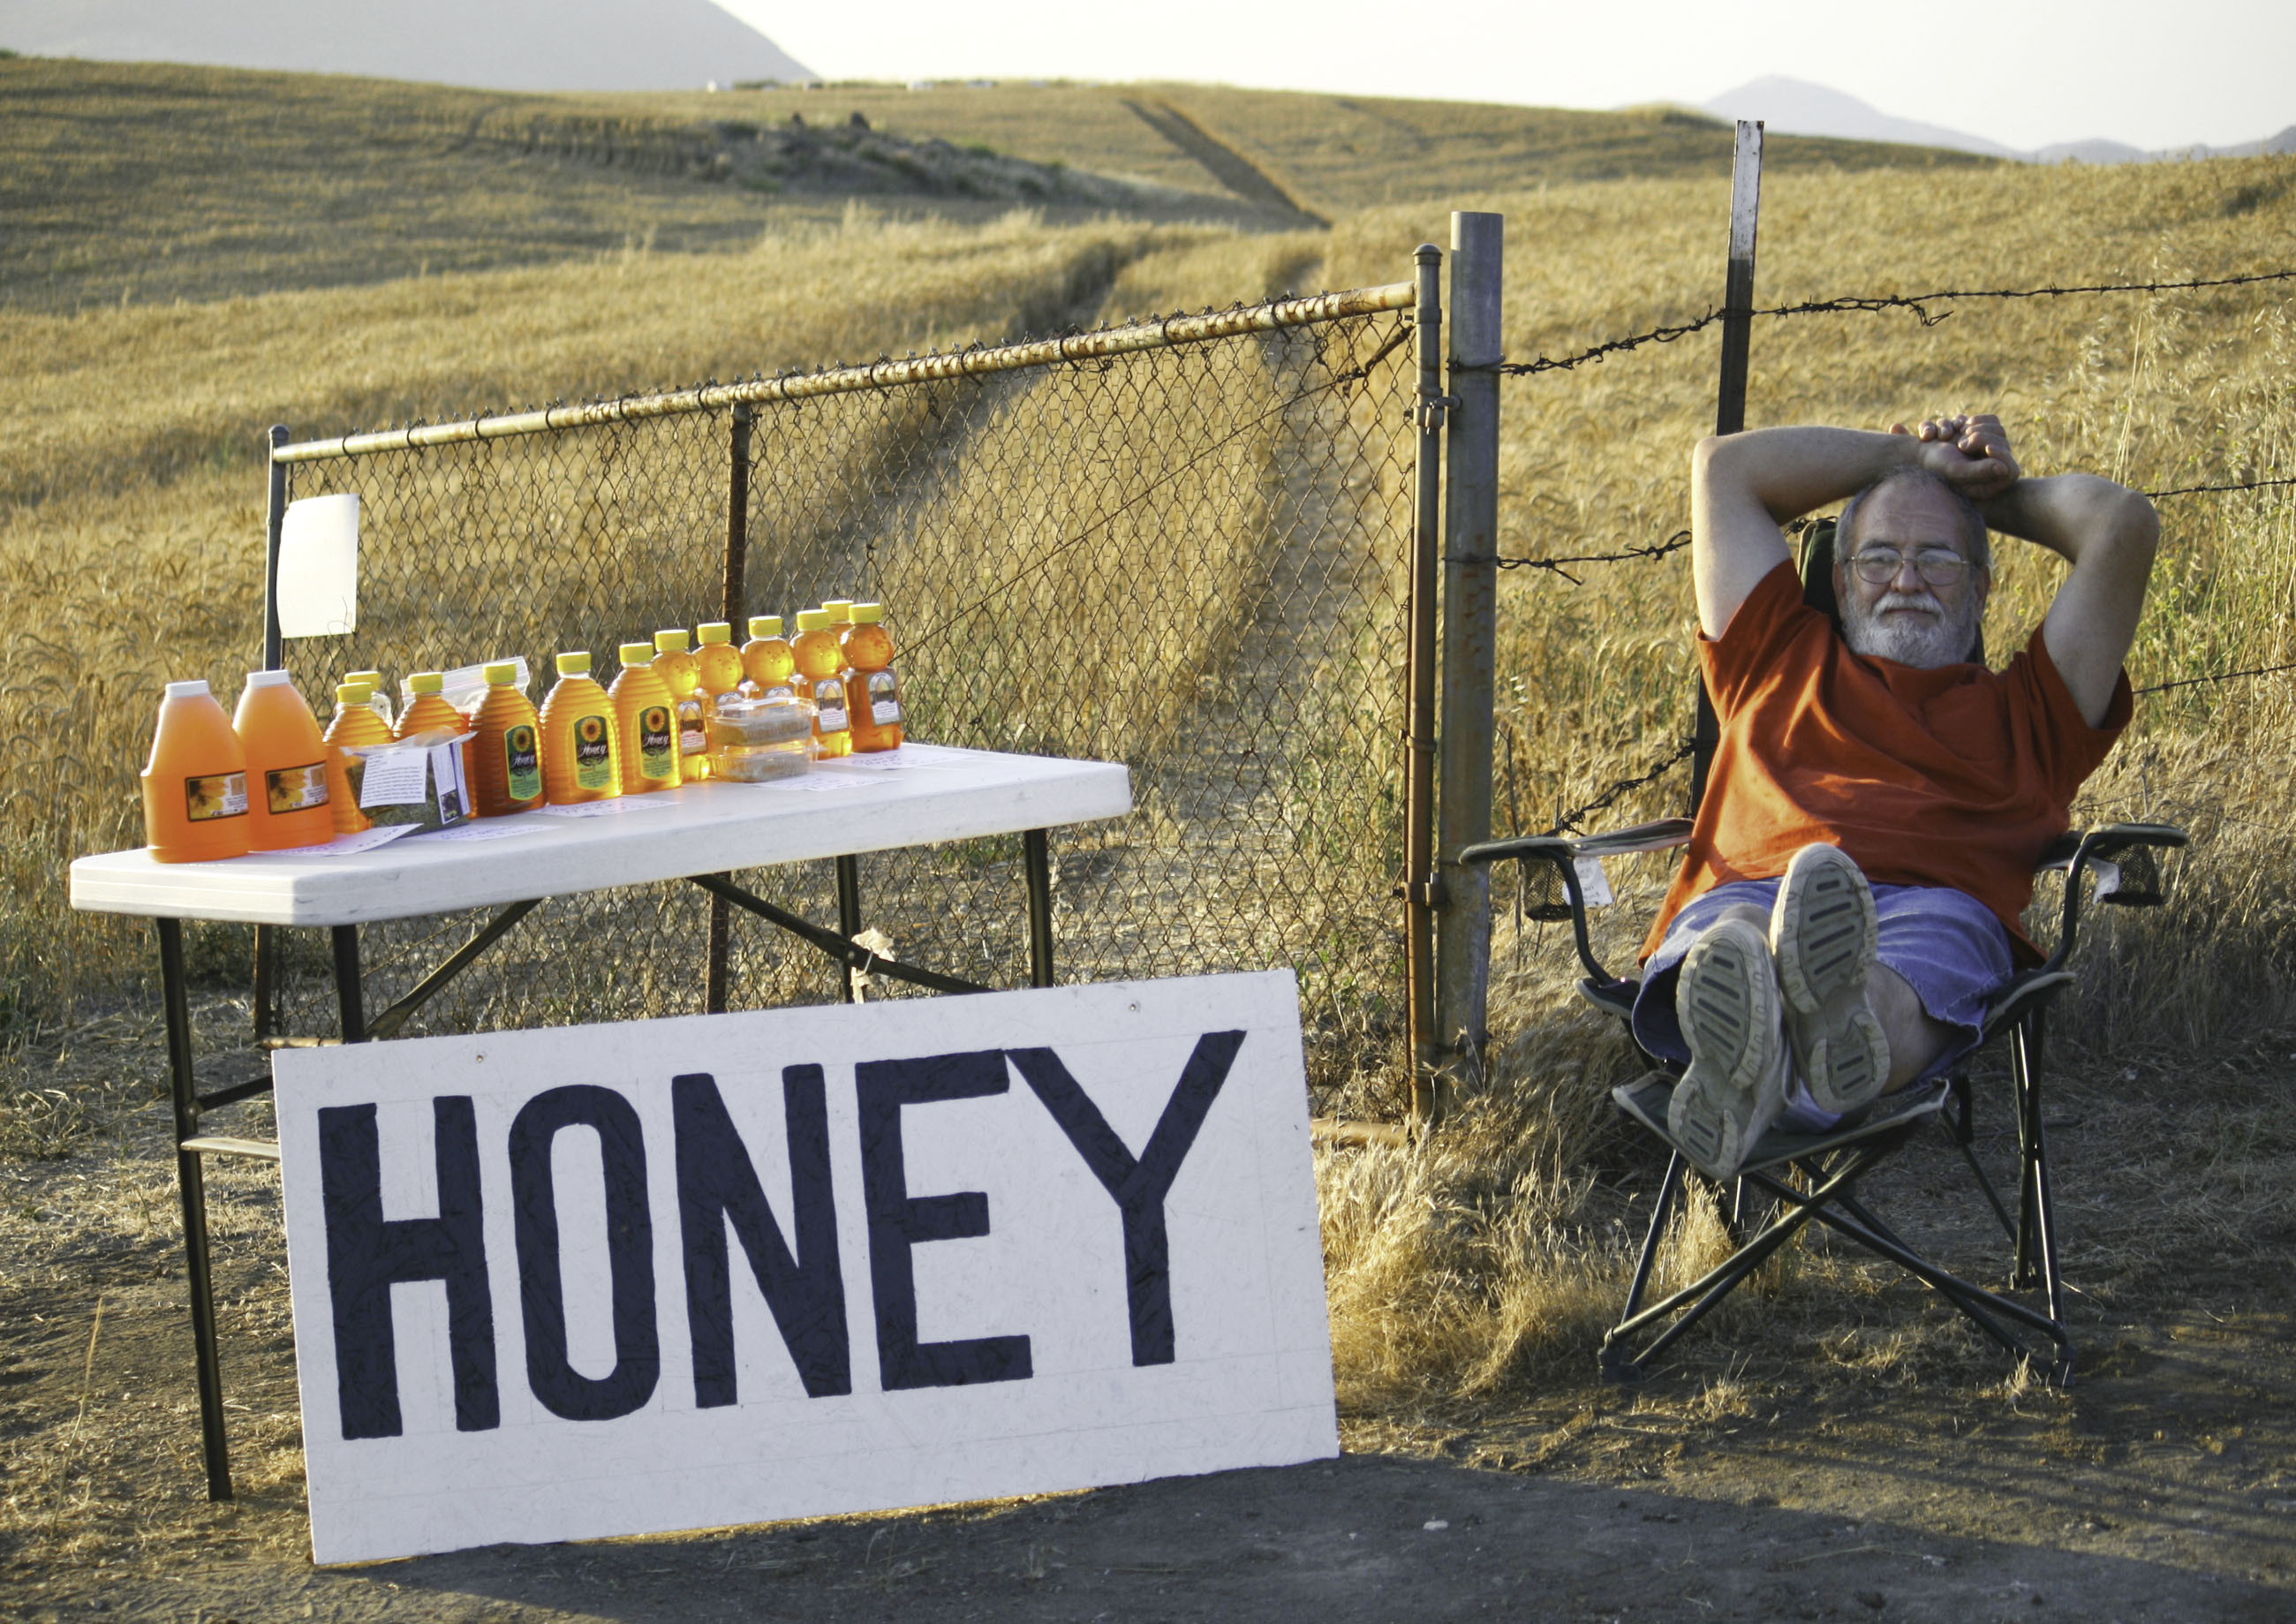
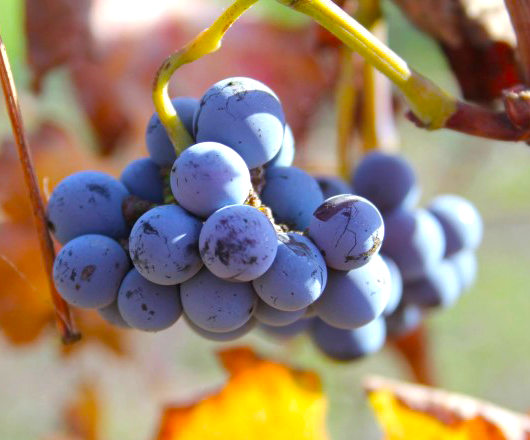
Using honey in wine making is something you can have a lot of fun with. One of the favorite wines I made was a Raspberry Honey Zinfandel. Nobody could keep their hands off of it, and it was soon gone.

There are different ways honey can be used in wine making. You can add it to the wine must, before fermentation, and have its sugars ferment into alcohol, or you can add the honey after the fermentation and have its sugars contribute to the sweetness of the wine.

Using Honey Instead Of Sugar Before The Fermentation

When you add honey before a fermentation, what will be left when the fermentation is complete is the herbal character of the honey. No sweetness will remain. For example, if the honey was spun off of wild flowers then a wild flower character will be added to the wine during the wine making process. If the honey was spun off of strawberry blossoms then you will have a note of herbal-strawberry character in the wine, and so forth.Shop Hydrometers

What this means is you can alter any fruit wine making recipe you find by replacing some or all of the sugar called for with honey. Using honey in your wine making in this way will add a layer of depth to the wine’s over all character. You can compliment the wine’s character, such as adding raspberry-blossom honey to a raspberry wine recipe, or you can contrast the wine’s character, such as adding apple-blossom honey to a cherry wine recipe.

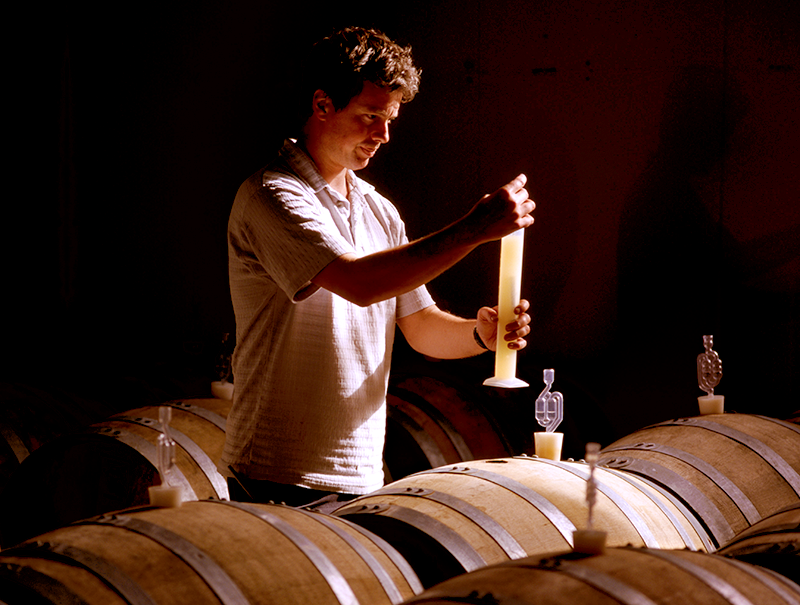
When using honey in wine making before the fermentation, you want to use it in-place-of or instead-of the sugar called for in the wine recipe you are using. As a general rule-of-thumb you can replace 1 pound of sugar with 1.2 to 1.3 pounds of honey. You can also use a wine hydrometer to determine how much honey to add. Keep adding the honey until you get to the appropriate reading on the wine hydrometer’s specific gravity scale – usually between 1.070 and 1.090.

Using Honey Instead Of Sugar After The Fermentation

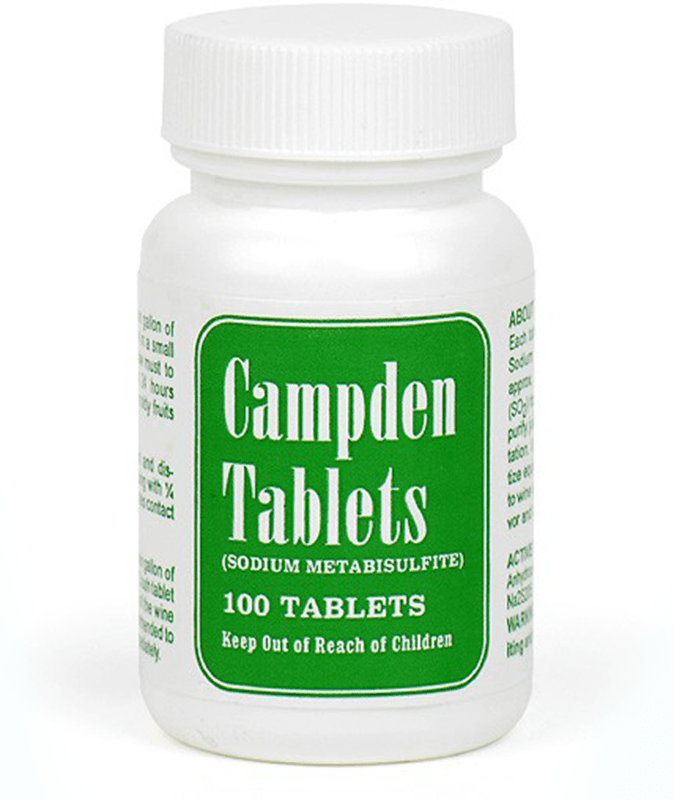
If you add the honey at bottling time or anytime after the fermentation, you are contributing to the sweetness of the wine instead of the alcohol. Shop Potassium SorbateThe herbal characters of the honey are still being added but along with its sweetness. It is important to note that any time you add a sugar to a wine at bottling time – whether it be honey, cane sugar or grape concentrate – you must also add potassium sorbate (wine stabilizer) to eliminate any chance of re-fermentation later on in the wine bottle. The is in addition to the Campden tablets that we recommend at bottling time for any wine. Here’s more information on sweetening a wine with honey.

Should I Use Raw Or Pasteurized Honey?

I recommend using pasteurized, filtered honey – the kind you typically find on the grocery shelf. This type of honey has been cleared of wild microbes and various solids that you do not want in your wine. If you do plan on using raw honey in your wine recipe, you will need to heat it up to 170°F. for a full 30 minutes along with some water. During this time you will also want to skim off the top whatever rises.

More Information On Using Honey In Wine MakingShop Campden Tablets

You can find more information on our website in the article, Wine Making With Honey. It gives a basic run-down of how honey has been used in wine over the years along with some basic honey recipes.

Using honey instead of sugar in your wine making is a fun way to add more interest depth, not only to your wines, but your wine making. It’s one more way to be creative in the enjoyable and rewarding hobby.

Happy Winemaking,
Ed Kraus
—–
Ed Kraus is a 3rd generation home brewer/winemaker and has been an owner of E. C. Kraus since 1999. He has been helping individuals make better wine and beer for over 25 years.

Oak Wine Barrel Preparation And Maintenance For Longer Life!

Using Oak Wine BarrelI have a Shiraz that I want to age in a an oak wine barrel. It will be a new barrel. Do I need to do something to prepare the new barrel? How about for each follow-up use of that same barrel? Is there some type of maintenance on the oak barrel that needs to be done? When will I know can no longer be used anymore? As always, thank you.
Rick

Name: Rick R.
State: Colorado
—–
Hello Rick,

Oak wine barrel preparation is very important. The last thing you want to do is get a new wine barrel and dump your wine directly into it. The barrel needs to be treated first. There will also be some maintenance that will need to be done between uses.

Oak Wine Barrel Preparation
The first thing you will want to do to prepare a new wine barrel for wine is to swell the wood. This is done by filling the barrel with water. As the wine barrel sits, the wood will swell, tightening all the joints. The barrel could actually leak for a day or two during this process, so be prepared for the potential of water leaking onto the floor. Also, be aware that you may have to add more water along the way as it soaks into the wood and possibly leaks out.

A secondary reason to soak the wine barrel with water is to remove the harshest of tannins. Some tannin is good for the wine. These tannins being removed are sort of over-the-top tannins in the oak wood that are too extreme in their effect on the wine to be of benefit.

Shop Wine BarrelsOnce you are done treating the oak wine barrel and its wood is saturated, there is a second part to oak wine barrel preparation. Now it’s time to sanitize it. To do this you will want to dump the tannic water out and refill the barrel with fresh water. To actually sanitize the wine barrel you will want to treat it with sodium metabisulfite and citric acid.

As for the dosage, you will want to use about 1/4 cup of sodium metabisulfite and 3 or 4 tablespoons of citric acid for every 10 gallons of the wine barrel’s volume. Dissolve the dosage in a gallon of water first. Then add to a half full barrel; agitate to mix everything well. Add the rest of the water and allow to sit for at least a few hours. Overnight or 24 hours would be much better. Dump the sanitizing water out of the barrel. And, that’s how you prepare a new oak wine barrel for wine.

Oak Wine Barrel Maintenance
After you are done aging the wine in the barrel, you will want to treat it with BarrolKleen as directed on its package. BarrolKleen is a blend of alkalies that will neutralize leftover acid deposits from the wine as well as help sanitize it.

Shop Sodium MetabisulfiteAs for storage between uses, you will want to keep a mixture of water / sodium metabisulfite / citric acid in the wine barrel as before when you were sanitizing. You will want to keep the oak wine barrel full this way until it is ready for its next use. Sodium metabisulfite will need to be replenished every six month, along with some topping-up water to make up for evaporation.

How Many Uses Can You Get From An Oak Wine Barrel?
In theory a wine barrel can be used for generations – as long as it will hold wine – but I believe your question was referring to its usefulness for actually aging a wine.

Most wineries will employ a wine barrel somewhere in the neighborhood of 10 uses. In a typical ongoing operation what this means is that every year the oldest 10% of the barrels are replaced. The winery then blend all the wine from all oak wine barrels before bottling. This is done to even the qualities of the wine across the entire season’s batch.

What this means for you as a home winemaker is that you can realistically get 10 or 15 uses from the wine barrel, but the effects of the barrel will take longer to come into fruition with each successive use. Your first batch may need to be in the barrel for only 3 weeks, while your 15 batch may need to be in the barrel for 3 years. Shop Citric AcidBut beyond this, the barrel should last you for decades in terms of just storage. And lets face it. Barrels are really a cool looking item to have sitting around!

So, there you have it. That’s all there is to oak wine barrel preparation and maintenance. These are fairly simple treatments. Follow these steps above an you’ll have a oak wine barrel that will last you a lifetime.

Happy Winemaking,
Ed Kraus
—–
Ed Kraus is a 3rd generation home brewer/winemaker and has been an owner of E. C. Kraus since 1999. He has been helping individuals make better wine and beer for over 25 years.

9 Wine Cork DIYs: Decorations, Projects, and Everyday Use

wine corks in a vase
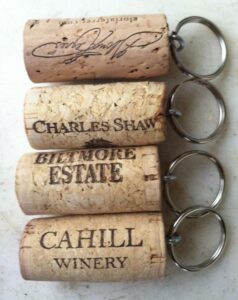
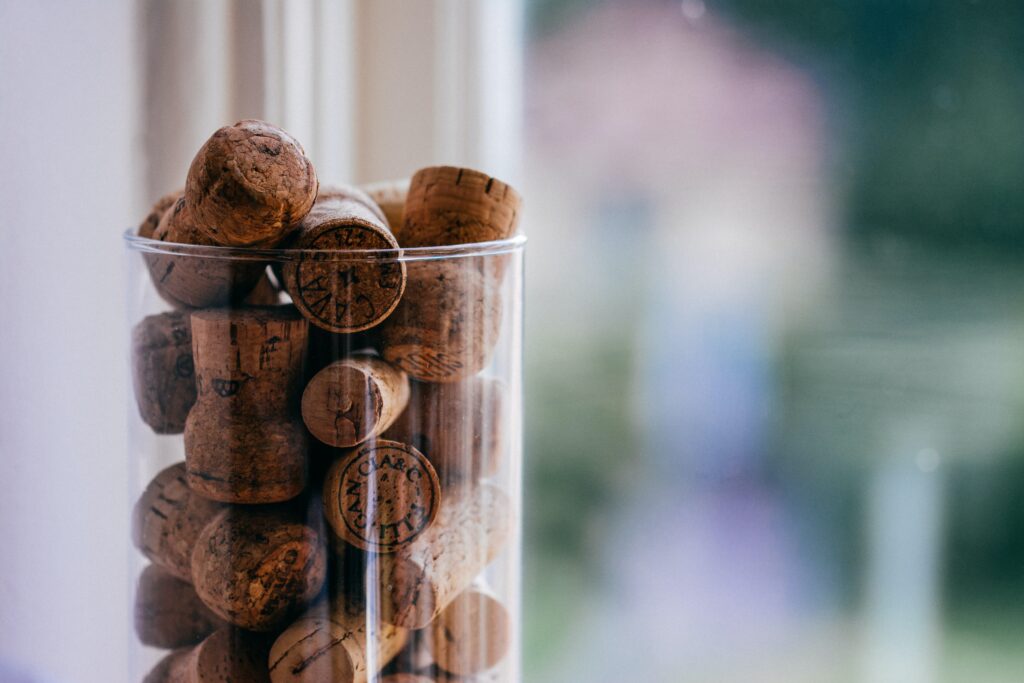
Do you collect your wine corks? Have you thought about doing something more with them? 

Whether you collect for sentimental reasons or just love a wine cork aesthetic, there are a ton of DIY projects they can be used for!

We’ve put together some of our favorite ways to turn wine corks into functional and fun projects.

1. Wine Cork Game Pieces

Wine corks can make cute, unique additions to any game board. Wine cork Tic-Tac-Toe is a fun, easy game to incorporate in your next game night. 

Paint 10 corks, split into 2 groups, different colors. Use these to play 3D Tic-Tac-Toe, instead of using pen and paper. 

Looking to play chess instead? Simply carve your corks and paint!

2. Wine Cork Corkboard

Why buy a corkboard when you can buy wine?! Using a simple piece of plywood and a hot glue gun, glue wine corks to the board. Let it dry for 30 minutes, and start pinning your favorite photos.

3. Wine Cork Planters

These miniature wine cork planters make for a delightful accent to any desk, table, window sill. Drill a hole into your wine cork and plant your new little friend. 

*This can be tedious, but don’t get discouraged! You’ll have the most unique decor pieces.

wine corks used for planting

Image from Pinterest

4. Wine Cork Wreath DIY

Get started early this holiday season by making your own wine cork wreaths. 

Take a circular base, such as a cardboard or styrofoam cut out, and hot glue the wine corks onto it. Stack them on top of each other until it covers the entire base. 

Once dried, it’s time to decorate! Try incorporating plastic grapes and leaves to give it some holiday flare. 

5. Wine Cork Ornaments DIY

Transform wine corks into mini christmas tree ornaments! Use the cork as the base of the tree, drill a tiny hole, and insert a mini pine piece. 

You could also use the corks to build mini reindeers, or angels. There is a variety of ornaments you can make and hook on your Christmas tree. 

6. Wine Cork Tray DIY

Why buy a tray when you can make them with your wine corks! 

Simply slice your corks into thin pieces, and hot glue them together side by side. You can make them as big or as small as you want and in whatever pattern you want. 

Feeling extra creative? Paint a few (or all) of the corks fun colors and/or add decorations to them!

7. DIY Wine Cork Coasters

Similar to wine cork trays, just smaller. Slice wine corks into thin pieces and create your own designs for your wine cork coasters.

8. Jewelry Organizer

Have you been looking for a jewelry organizer? Look no further than your kitchen!

First, screw a tiny hook into the bottom of your wine corks. Then, hot glue them together in a row. Finally, add a string that connects at both ends so you can hang on the wall. 

If you’re not looking to hang it, try hot glueing it to your corkboard you just made!

9. Wine Cork Keychains

Wine cork keychains are simple to make, cute, and pretty handy.

Drill a hole into the bottom and add a hook. Loop the keyring in the hook and voila! 

wine corks used as keychains

Image from Pinterest

Congrats on making your wine cork DIY project!

Wine corks are super easy to repurpose and incorporate into your everyday life instead tossing in the trash can. 

If you feel like you might not have enough wine corks for your creation, don’t worry, you can buy a bag of wine corks here.

Happy DIYing! 

Campden Tablets: What They Can And Can’t Do.

Campden Tablets In JarOne of the most commonly used ingredients in home wine making are Campden tablets. You will find them in almost any of the wine making recipes you will use; talked about in almost any of the wine making books you will read; and called into action by just about any of the homemade wine instructions you will follow.

What Do Campden Tablets Do?
The original reason Campden tablets were used in wine making was to keep the wine from spoiling after it had been bottled. By adding these tablets at bottling time, you could virtually eliminate any chance of your wine falling victim to mold, bacteria and other foreign enemies.

Since their introduction into wine making, Campden tablets have also become routinely used for sterilizing the juice prior to fermentation. By adding Campden tablets a day before adding your wine yeast, you can start your fermentation with a clean slate, so to speak. All the unwanted micro organisms will be gone.

Some home winemakers also use Campden tablets with water to create a sanitizing solution. This solution will safely sanitize fermenters, air-lock, stirring spoons, hoses and all the other pieces of equipment that may come into contact with the wine must.Shop Wine Yeast

What Campden Tablets Don’t Do?
Many beginning winemakers believe that Campden tablets are a magic pill of sorts. One that can instantaneously stop a wine fermentation dead in its tracks. While it is true that Campden tablets can bring a fermentation to its knees for a period of time, it is also true that these fermentations will usually gather themselves back up and eventually overcome the effects of the tablets. The result is a continued fermentation – sometimes after the wine has been bottled.

Truth is, Campden tablets are not designed to stop a fermentation and never have been. Using them for that purpose can get you into all kinds of trouble. There is really no ingredient that can be safely used by itself to assuredly stop a fermentation.

What Are Campden Tablets?
Simply put, Campden tablets are metabisulfite. When you add a tablet to the wine you are adding sulfites to the wine. Most Campden tablets consist of potassium metabisulfite, but some are made with sodium metabisulfite.

How Are Campden Tablets Used?
Their use is fairly straight-forward. You add one tablet to each gallon of wine must 24 hour prior to adding the wine yeast – before the fermentation. Then you add one table per gallon just before bottling.

The Campden tablets must first be crushed and dissolved in a small amount of the wine or water. This mix is then stirred thoroughly into the rest of the batch.

You can use the Campden tablets to create a sanitizing solution by crushing up 4 tablets into a quart of water. This can be used as a sanitizing rinse, or you can pour it into a fermentation container and allow the fumes to sanitize the entire insides.Shop Potassium Bisulfite

As An Alternative To The Campden Tablet…
You can use potassium metabisulfite or sodium metabisulfite in the form of a granulated powder. The advantages are: you don’t have to crush it up; and it is cheaper. The disadvantage is you have to measure out the dosage, which is 1/16 teaspoon per tablet.

—–

Ed Kraus is a 3rd generation home brewer/winemaker and has been an owner of E. C. Kraus since 1999. He has been helping individuals make better wine and beer for over 25 years.

How To Make Homemade Concord Wine

Concord For Making Homemade WineI have about 2 gallons of homemade Concord grape juice in canning jars. This juice isn’t clear and contains pulp but doesn’t contain any preservatives. Can I make wine with this and if so how??

Name: Cindy
State: GA
—–
Hello Cindy,

Absolutely, you can make homemade concord wine with your canning jars of concord juice. I also wanted to take the time to provide an easy and delicious recipe for this wine below.

The first thing to understand is that in the case of making wine with concord as the fruit, you will want to use 100% juice to make the wine. No water will be added. So the most homemade wine you will be making with the concord wine recipe below is 2 gallons.

The second thing to understand is that the fact the juice is cloudy or has pulp in it is not a problem at all. In fact, it could be considered a good thing, as the pulp will allow you to get more body from the concord juice and into the wine. The cloudiness and pulp will clear just fine through the fermentation process.

How To Making Homemade Concord Wine
You will want to add to your 2 gallons of concord juice the following:

CONCORD WINE RECIPE:
1 Cup Cane Sugar
2 Tsps. Yeast Nutrient
1/4 Tsps. Pectic Enzyme
1/4 Tsp. Grape Tannin
2 Campden Tablets (crushed up)

Shop Wine Making KitsWait 24 hours. During this time keep your container of wine must covered with no more than a thin towel. On the next day you will add the wine yeast:

Wine Yeast Lalvin RC 212 (to be added 24 hours later)

The above is based on a 5 gallon concord wine recipe listed on our website:

Homemade Concord Wine Recipe (5 Gallons)

This above information on how to make homemade concord wine is enough to get you started, but to continue on you will want to follow the home wine making procedures at the following link, below. These directions assume you are dealing with fresh fruit, but that’s okay. You can still follow them for making your wine with just the concord juice:

How To Make Homemade Wine

Hope this information on making homemade concord wine helps you out. If you need more help, please contact us. And when it’s done, please let us know how your concord wine turns out!

Happy Winemaking,
Ed Kraus
—–
Ed Kraus is a 3rd generation home brewer/winemaker and has been an owner of E. C. Kraus since 1999. He has been helping individuals make better wine and beer for over 25 years.

Adding More Color To Wine

Results when adding more color to wine.
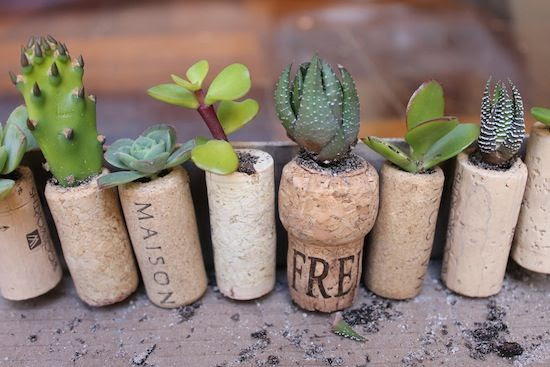
How can I give my red wine more color? I’m new at wine making.
Jerre M. — TN
—–
Hello Jerre,

Adding more color to your wine is something that is easy to do when you are making it. The color pigmentation mostly comes from the skin of the grape. To add more color you leave the skins in the fermentation longer. This can be done for up to 7 days for maximum color.

Time plays a dramatic role in the color of the wine. If the skins are not in the fermentation at all, you will get a pink or blush-colored wine. This small amount of color is from what is released into the juice while crushing the grapes. Leave the skins in the fermentation for three days, you might get a ruby-colored wine. Seven days, you could end up with a wine that has an inky-dark color.

Results will very as to the hue of the wine (red brick to purple), but this should give you some idea as to the role time and grape skins play in adding more color to a wine.

So far we have been talking about grapes, but the same can be applied to many fruits: blackberries, raspberries, blueberries, even strawberries, and others. All will contribute more color to the wine when left in the fermentation longer.

There is a tradeoff. Along with the color comes more tannin. This is the stuff that adds body and structure to the wine. For most wine drinkers this is considered to be a good thing. The wine will be bigger, bolder, more aromatic and typically more layered in its flavor profile.

Shop Wine KitsThe tradeoff comes in the amount of aging the wine will need before it starts to taste pleasant. In short, the more time the skin is in the fermentation, the more time the wine will need to age before its harshness starts to subside. Exactly how much time is something that will vary from one wine to the next, but suffice it to say that it may be several years for the darkest of wines while maybe only three to six months for a blush wine.

If you are referring to adding more color to a wine that has already been made, there’s not much you can do. You can try making another batch of the same wine, only with more color, and then blending the two before bottling. The second wine could even be made with next year’s grapes. Just let your first wine bulk age for a while.

If you ultimately like your wines sweet, you can experiment with adding Welch’s grape concentrate to sweeten the wine. This will also add more color to the wine. It will also add more fruit acid to the wine. You will need to be careful not to make the wine too acidic. It would not be a bad idea to use an acid test kit to keep track of how much acid is being added to the wine by the Welch’s grape concentrate. You will also need to add potassium sorbate to the wine, just like any other time you would sweeten the wine. This is to keep the wine from starting a renewed fermentation with the new sugars from the concentrate.

As you can start to see, adding more color to a wine is not all that cut and dry. There are other considerations that need to made as well. Do you really want to make a big wine that might not be drinkable until next year? Do you really want to make your wine sweet by adding Welch’s grape concentrate for color? There are always tradeoffs.

The only thing I can really say is color does not make the wine. It is only visual cue as to what to expect. There are excellent wines of all colors: light and dark.

Best Wishes,
Ed Kraus

—–
Ed Kraus is a 3rd generation home brewer/winemaker and has been an owner of E. C. Kraus since 1999. He has been helping individuals make better wine and beer for over 25 years.

My Wine’s Fermenting Without Adding Any Yeast

Wild Yeast On GrapesWhy is my grape juice bubbling and I have not added my yeast yet.

Name: Jerry R.
State: PA
—–
Hello Jerry,

The simple answer is your juice is naturally fermenting because of wild yeast. This is why a wine will ferment without adding yeast, at all.

Yeast is everywhere: floating in the air, landing on plants and animals. It is ubiquitous to the nature in which we live. Your grape juice either picked up some wild yeast somewhere, or it started naturally fermenting from yeast that were on the grapes themselves.

Most of the time, vineyards selling fresh grape juice to home winemakers will treat it with sulfites such as potassium metabisulfite to destroy any of the wild yeast and to temporarily protect if from fermentation and spoilage. This would eliminate any chance of a wine fermentation occurring from the natural yeast that was on the grapes.

But there is still the issue of the wild yeast that is floating around. From the oranges sitting on the kitchen counter to the cat who just came inside for a little nap, the sources of yeast are many and unstoppable.

Once a few cells of the wild yeast make it to your wine juice, then it becomes party time. A wine fermentation will ignite with the natural yeast. Slowly, the yeast will start to consume the sugars and use that for energy to multiply themselves into a larger colony. As the colony becomes larger the growth will slow down and the focus will turn to the productions of alcohol. This is how a wine ferments without adding yeast.Shop Wine Yeast

What is described above is no different than what happens when you add a domesticated wine yeast. This begs the question, “why add yeast at all?” The answer is simple, with wild or natural yeast you never know what you are getting. Yeast is not just yeast. There are thousands of yeast strains, and with each strain are an endless number of varying mutations.

With a domesticated wine yeast: 1) you know what you are getting, 2) the strain is kept consistent, and 3) the strain has been bred for a specific characteristic, such as alcohol tolerance, flavor profile and such. Domesticated wine yeast pack more firmly on the bottom of the fermentation vessel as sediment so you can more easily rack the wine off of it. You may want to take a look at a wonderful article we have on the reasons you should use a domesticated wine yeast.

Now that you know your wine fermentation is from natural yeast. What should you do?

Fortunately, there is a simple remedy for such a situation. Wild or natural yeast are not very resilient to sulfites, and sulfite is the active ingredient in Campden tablets, potassium metabisulfite and sodium metabisulfite. All you need to do is add a dose of any one of the above, and the wild yeast will easily be destroyed and no more natural fermentation. Wait 24 hours, then add a domesticated wine yeast to the juice. During this 24 hour period you should leave the grape juice uncovered, or at most, covered with no more than a thin towel. Shop Potassium BisulfiteThis will allow the sulfur to release as a gas and dissipate. Once the domesticated wine yeast has been added, you should see a renewed fermentation start within 24 to 36 hours.

Having a wine ferment from natural yeast is not a horrible thing but it is something you’d prefer not to have. It’s like rolling the dice with Mother Nature. The important thing to understand is that a wine fermentation can occur without adding yeast, but there is something you can easily do about it.

Happy Winemaking,
Ed Kraus

—–
Ed Kraus is a 3rd generation home brewer/winemaker and has been an owner of E. C. Kraus since 1999. He has been helping individuals make better wine and beer for over 25 years.

When To Move Your Wine To A Secondary Fermenter

Showing When To Move Wine To Secondary FermenterI have a couple of questions about using the hydrometer and when to move your wine to a secondary fermenter from primary fermentation and once the wine fermenting is done. As I take readings I am a little confused about when to move wine to secondary fermenter. How long? Is it a certain number of days or are we measuring for a specific reading on the wine hydrometer? On the secondary fermentation, I know you are looking for a reading a specific of 0.995. Is that true?

Terry
_____

Hello Terry,

These are great questions. I’m glad you brought this issue up. It seems like the more you read about when to move wine to a secondary fermenter, the more answers you will find. Everyone seems to have an opinion on how long the fermentation time should be in the primary fermenter and the secondary fermenter, so let’s see if I can solidify an answer to your question. What you are essentially asking is:

How do I know when it’s time to move my fermentation into a secondary fermenter, and how do I know when the wine’s done fermenting?

A short answer to your question is: you should be following the number of days that are called for in any wine making instructions that you have. Simple as that! If your wine making instructions say to move the fermentation into a secondary fermenter like a wine carboy, etc., then do that. This is your best course of action.Shop Wine Carboys

But what if I don’t have instructions to tell me when to move wine to secondary?

Typically, the fermentation will need to be transferred into the secondary fermenter around the 5th day of fermentation. But, not all fermentations are the same. Some ferment so hard and fast, that by the fifth day, the fermentation is completely done. On occasion, others will take much, much longer.

What you are basically doing is transferring the fermentation into secondary when it has slowed down enough so that it won’t foam up and out of the secondary fermenter. This is usually around day 5, or when the wine hydrometer reads 1.030 to 1.020 on the specific gravity scale. This is when to move wine to a secondary fermenter when everything runs normal.

However, there are times when the fermentation is still foaming too much to go into a secondary fermenter, such as a carboy. In these instances you should wait until the foaming lowers enough that it can safely go into the carboy without making a big foamy mess through the air-lock.

Conversely, there are also times when the fermentation is going so slow that it might be 2 or more weeks before the fermentation will reach 1.030 on the hydrometer. In these instances, you must figure out why the fermentation is going so slow. The article,Shop Auto Siphon Top 10 Reasons For Fermentation Failure, that is listed on our website should give you some insight into this.

If after a couple of days you’re attempts to re-invigorating the fermentation are unsuccessful, go ahead and put the fermentation in the secondary fermenter anyway, and let it finish out it’s long, slow journey to becoming wine.

To answer the second half of your question…

The only real way to know if a fermentation is complete is to take a reading with wine hydrometer. You are looking for a reading of .998 or less on the specific gravity scale. I’ve seen fermentations end as low as .988, but this is rare.

Most importantly remember, just because the fermentation has stopped bubbling does not necessarily mean the fermentation has completed. All you know for sure is it has stopped, so be sure to have a hydrometer reading to depend on for verification of a complete fermentation.

Shop Transfer PumpsWith all this said, knowing when to move wine into a secondary fermenter is not super-critical to the process. Wine will be made, regardless. The only thing you don’t want to do is to completely forget to move the wine into a secondary at all. You want to keep the wine off of excessive amounts of sediment for extended periods of time. That is the most important aspect of when to move wine to secondary fermentation.

Happy Wine Making,
Ed Kraus
—–
Ed Kraus is a 3rd generation home brewer/winemaker and has been an owner of E. C. Kraus since 1999. He has been helping individuals make better wine and beer for over 25 years.

Starting And Final Specific Gravity Readings For Wine

Taking Final Specific Gravity ReadingI am in the process of making my first batch of Scuppernong Wine. The SG [specific gravity] at the beginning was 1.116… The process has been going on for about 8 weeks now. The SG now is 1.030… I still see activity. What should the final specific gravity reading be when the wine is complete?

Name: Charles P.
State: South Carolina
—–
Hello Charles,

To answer your question, you should expect a final specific gravity for wine somewhere between .992 and .996 on your hydrometer.

Your starting specific gravity reading was a little high, so your wine yeast has a lot of work to do. Normally you would want a starting specific gravity between 1.070 and 1.100 for wine. Yours was 1.116. This may be more than the wine yeast can handle.

There are two reasons for this:

  1. Shop HydrometersSugar acts as a preservative. If the concentrate of sugar becomes too high, it can actually interfere with the wine yeast from even starting. Your fermentation started, so obviously this is not an issue for this fermentation.
  1. Wine yeast has a limited tolerance to alcohol. As the alcohol level rises in the wine must, the wine yeast finds it harder and harder to ferment, sometimes to the point of not being able to ferment at all. This would be known as a stuck fermentation.

Your starting potential alcohol level was between 15% and 16%. A majority of wine yeast will have a hard time fermenting to this level of alcohol.

My guess is that your fermentation will become very slow as it ferments the last few percentage points of sugar. If this is the case, just be patient and give it plenty of time to do its thing. As long as you can see some slight progress, you are okay.

However, depending on the wine yeast you used, the fermentation may not be able to finish at all – a stuck fermentation. If this is the case, you may be forced into a situation to where you need to dilute the wine must with water to cut its alcohol level. This will help the yeast to start up again and finish the fermentation.

Since the starting specific gravity for your wine was so high, I would recommend that you also take a look at the Top 10 Reasons For Fermentation Failure. By doing this you may discover other things that can be done to help the fermentation along and get the final specific gravity for your wine where it needs to be.

Happy Winemaking,
Ed Kraus

—–
Ed Kraus is a 3rd generation home brewer/winemaker and has been an owner of E. C. Kraus since 1999. He has been helping individuals make better wine and beer for over 25 years.

Is Older Wine Better?… Not Necessarily!

Buy Couple Shopping For WineFrom the incredible prices being cried out at a Sotherby’s wine auction, to the fluffy articles that float around in today’s life-styles magazines, people are continuously being fed the notion that the older the wine is, the better it will be.

But is older wine better? Unfortunately, the answer is maybe – maybe not! The ol’ mantra: “the older the wine the better”, is just that – a mantra. It’s a generalization that is just as likely to be false as it is true. The reality with any wine is that there will always come a time when it would be best to drink up!

Wines don’t endlessly increase in quality like an investment fund or like a home increases in value. They have a life cycle, a beginning and an end, much like any living thing. At first, there is a steady rise in quality; then a flattening out, or plateauing; and eventually a long, slow decline.

The aging cycle of a today’s commercial wines are fairly well mapped and predictable. Some wines have very long life-cycles, involving many years, even decades. Then there’s other wines who’s aging potential is not so long. Based on the type of wine, how it was made, combined with an observation Buy Wine Ingredient Kitsof its character at bottling, a timeline can be laid out by the winery that shows the optimum time to drink that particular wine. Once this theoretical point is reached, any additional aging is futile. In fact, too much aging beyond that point will result in a very slow decrease of the wine’s quality.

The very same holds true for homemade wines. There will come a point in each wine’s life when more aging will not be a good thing. Holding on to it will only provide you with less and less quality as time goes on – a direct mocking of the phrase, “the older the wine the better”.

The whole point of bringing this to light is that some home winemakers get into the game of saving their wines instead of drinking them, putting bottles away like heirlooms, thinking they’re going to become more exceptional as time goes by, saving them for their granddaughter’s wedding and all, but in reality this is little more than a waste of good wine.

By all means let the wine age. It my take 3 months. It might take 3 years. Every so often pull a bottle out and see how it is doing. Is it becoming more mellow? Is it developing any complexities or layers of flavors? If yes, then great, let the wine age a little longer. But when no improvement can be detected between samplings, then simply put, it’s time to start drinking.
—–
Ed Kraus is a 3rd generation home brewer/winemaker and has been an owner of E. C. Kraus since 1999. He has been helping individuals make better wine and beer for over 25 years.