
 May I know what causes a fresh fruit wine to taste too sour? I’ve tasted a homemade fresh fruit wine that is sooo sour, and what is the remedy to remove the taste?
Thanks very much!
Shirley S.
—–
Hello Shirley,
In almost all cases, the reason for a homemade wine tasting too sour is because it has too much fruit acid it it.
All fruits have various acids in them that contribute to a tart/sharp/sour taste. If the fruit is too acidic, or too much of the fruit is used in the wine recipe, you can end up with a wine like you are describing.
This type of wine fault is also enhanced by the fact that during a fermentation almost all of the the sugars are fermented into alcohol. This doesn’t make the wine more acidic, but it does allow the sour flavor to stand out much more.
Acidity can be a problematic area if you are just leaning how to make your own wine. With your future batches I would suggest that check the acidity level both before and after the fermentation.
If the wine is flat tasting this means there is not enough acid. You may need to add more acid to bring the wine back into balance. This is normally done with the addition of acid blend.
If the wine is too acidic, there are a few ways you can go about reducing it, including dilution. A very good article on the subject is Getting A Handle On Wine Acidity. It has some wine making tips for reducing the acidity of a finished homemade wine that is too sour, as well as other information.
 Following trusted wine recipes will normally keep you out of trouble. A further step you can take is to get an acid testing kit. It will come with directions that will tell you what reading to shoot for and what to do to get it there – even before the fermentation starts.
Acidity is one of the fundamental flavor components of any wine. It has to be right before even having a chance of the wine tasting any good. If there’s not enough acid in the wine it will taste flat and lifeless; and if there’s too much you end up with a homemade wine that too sour.
Best Wishes,
Customer Service
———————————–
Ed Kraus is a 3rd generation home brewer/winemaker and has been an owner of E. C. Kraus since 1999. He has been helping individuals make better wine and beer for over 25 years.
Winemaking: A Homebrewer’s Perspective – Pt. 1: What’s in the Box
Part 1 | Part 2 | Part 3 | Part 4 | Part 5
 Though I’ve been a homebrewer for six years, I haven’t done much in the world of winemaking – until now. Having recently made a mead, I discovered that the process was much less time consuming than homebrewing. With no mash, the “brewing” process was shortened dramatically. So I’ve decided to take things a step further and make my first red wine: a California Connoisseur Shiraz kit from E. C. Kraus.
What’s in the Box
The first noticeable difference between this winemaking kit and homebrew recipe kits I’ve made is the sheer weight of the kit. I was surprised to pick it up from my doorstep and discover considerably more heft than a typical beer recipe box kit. Makes sense – almost two gallons of juice weighs some twenty pounds. Compared to about two quarts of malt extract syrup, that extra liquid makes a difference. I should note that the winemaking kit makes six gallons of wine, compared to about five gallons for a typical homebrewing kit.
Opening the Shiraz kit, I discovered some new ingredients I’d never used before. In addition to the grape juice concentrate, the kit also included:
- Wine Yeast – I’m familiar with different types of beer yeast, but I have a lot to learn about wine yeast. This Shiraz kit comes with one packet of Lalvin EC-1118, a French dry yeast recommended for a wide range of wine styles.
- Bentonite – Bentonite is a wine clarifier made from clay. It works by attracting particles with static electricity and when they’re bound together, they settle to the bottom of the fermenter. Bentonite can also reduce off-flavors and oxidation. In this kit, the bentonite is added before fermentation.
- Potassium metabisulfite – Potassium metabisulfite is used to prevent oxidation and increase the shelf life of wine.
- Potassium sorbate – This ingredient helps prevent re-fermentation in the bottle.
- Kieselsol & Chitosan – These are clarifiers, both added after fermentation and before bottling. Just like bentonite, they work by using electric charges to attract oppositely charged particles and help them settle out. Kieselsol is negatively charged, chitosan is positively charged, so when used together they’re like a 1-2 punch to help yeast, protein, and tannin settle out, leaving behind a clear wine.
 The kit also came with pretty extensive instructions (in both English and French).
One thing I noticed was that the kit did not include corks. Not to worry. Since I don’t have a corker, a pack of these mushroom corks should do the trick.
Other than that, I have everything else I need to make wine from my homebrewing equipment – the fermenting bucket, carboy, auto-siphon, tubing, airlock, hydrometer, and bung. Plus, I’ve been stocking wine bottles for several months, so I should be all ready to go once it’s time to put this Shiraz in the bottle.
Stay tuned as I compare the winemaking process to homebrewing – this should be interesting!
Part 1 | Part 2 | Part 3 | Part 4 | Part 5
———————————–
David Ackley is a writer, brewer, and craft beer marketing consultant. He holds a General Certificate in Brewing from the Institute of Brewing and Distilling and is founder of the Local Beer Blog.
Leigh Erwin: Can I Use Tap Water For Winemaking?
 Hi everyone!
I wanted to take a moment to chat with you all about water in home winemaking. What I mean is basically what kind of water is best to use in home winemaking. The instructions on some of the wine kits that I have been using have said that if you’re using tap water to draw it off the day before you actually want to use it, to give the chlorine a chance to “burn off”. However, other instructions I’ve used have not said anything like that at all.
It made me wonder: is my tap water OK for winemaking?
I actually had been delaying the start of my most recent batch of wine because I had kept forgetting to draw off some tap water the night before. One day, however, I found a short article that said if you can drink the water from your tap and you don’t notice any chlorine or other off-flavors or aromas, it’s probably just fine to use for home winemaking.
If you get your water from your city or municipality, they most likely treat the water with chlorine to get rid of bacteria that might be present. This same chlorine, however, is bad news bears for your wine if it’s at levels high enough to smell it in the water, so if you can smell chlorine, you probably want to go elsewhere for your water or boil it, draw it off the day before, or treat it with activated charcoal.
If you get your water from a well, there could be all sorts of bacteria or other harmful things in there since it has not been treated like city water has. It’s probably a good idea in general for you to have your water tested anyway, so now might be a good time to do that if you haven’t done so already. Once you know what’s in your water, you can go ahead and start determining how to treat it.
Distilled water is often not recommended for winemaking, as the distillation process basically removes everything from the water, including minerals that yeasts like to use as nutrition.
 Spring water is usually the best way to go, in place of tap water as it’s typically very clean and has enough trace minerals to keep the yeasts happy. You can find spring water bottled in grocery stores. In general, any bottled water you find at the grocery store for drinking will be just fine to use, as long as it’s not distilled.
For me this time around, I decided to play my cards a little bit a use the water from my tap for making my next batch of wine. My husband and I drink it on a regular basis and I do not smell any chlorine or anything else in the water. Now that I think about it, I did make at least one batch early on with tap water not drawn off the night before, and the wine turned out just fine. We’ll see if I made the right decision this time.
———————————–
 My name is Leigh Erwin, and I am a brand-spankin’ new home winemaker! E. C. Kraus has asked me to share with you my journey from a first-time dabbler to an accomplished home winemaker. From time to time I’ll be checking in with this blog and reporting my experience with you: the good, bad – and the ugly.
Ginger Berry Mead Recipe
 After the success of my first mead, a traditional mead with no herbs or spices, I’m ready now to mix things up and try something a little different.
I just so happened to meet a gentleman at the farmer’s market this morning who had some very nice things to say about a mead recipe in Charlie Papazian’s book, The Complete Joy of Homebrewing. Papazian’s Barkshack Gingermead is a dry, sparkling mead, similar to champagne, made with the pungent spiciness of ginger and flavored with a “brewer’s choice” assortment of fruits and spices. Papazian personally prefers raspberries as the fruit.
The gentleman at the farmer’s market said that it was easy to overdo it on the spice level, so much so that he felt compelled to blend the gingermead down with an unspiced mead. If you choose to use aggressive spices like nutmeg and cloves, take it easy. If this is your first time trying a spiced mead, you might want to scale the mead recipe down to a one-gallon batch until you develop a comfort level with the spices.
Remember that mead takes a long time to make – at least six months. To accelerate the process, you might try the staggered nutrient additions recommended by Michael Fairbrother – but don’t forget to be patient. Many things – especially mead – get better with age.
Barkshack Gingermead (via the Complete Joy of Homebrewing)
(5-gallon batch)
Ingredients
7 lbs. light honey
1.5 lbs. corn sugar
1-6 oz. freshly grated ginger root
1.5 tsp. gypsum
1 tsp. citric acid
3 tsp. yeast nutrient
1/4 tsp. Irish moss
 Optional: 1-6 lbs. your choice of crushed fruit (e.g. sour cherries, blackberries, raspberries, blueberries, rhubarb, grapes, grape concentrate, cranberries, chokeberries, etc.)
Optional: 3 oz. lemongrass or other spice or herb (be careful with cloves, cinnamon, mint, hops – they can easily overpower the mead)
1-2 packs champagne yeast
3/4 cup corn sugar (for bottling)
Directions
- Boil the first seven ingredients for 15 minutes in 1.5 gallons water.
- Turn off the heat, and use a small strainer to remove as many pieces of ginger root as you can without going crazy.
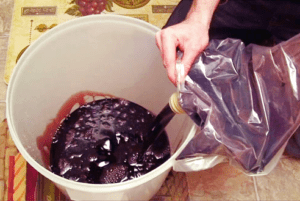
- Add the crushed fruit to the hot wort and let it steep for 10-15 minutes. This will help pasteurize the fruit.
- Pour all of the “wort” into a clean, sanitized fermenter containing 3 gallons of cool, chlorine-free water and mix well.
- When wort reaches 78˚F or below, pitch yeast. Ferment at about 70˚F for seven days, then rack to a secondary fermenter. Take care not to transfer any fruit into secondary. Allow for 1-1.5 months in secondary.
- Bottle with the 3/4 cup corn sugar. If desired, prepare a strong tea using the herb/spice of your choice and mix it into the bottling bucket prior to bottling. You can easily bottle only part of the batch with the tea be adding it part way through the bottling process.
- Age for six months to a year and enjoy!
Do you have a favorite Mead recipe you’d like to share? Put it in the comments below…
———————————–
David Ackley is a writer, brewer, and craft beer marketing consultant. He holds a General Certificate in Brewing from the Institute of Brewing and Distilling and is founder of the Local Beer Blog.
Leigh Erwin: Starting A Wine Making Ingredient Kit
 Hi everyone!
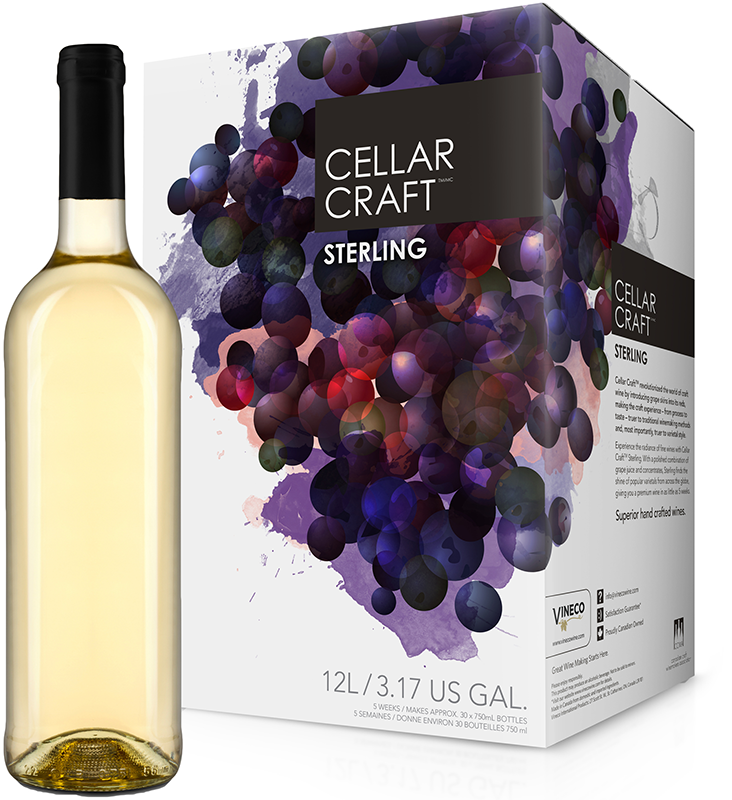
I’m so excited I’m finally giving that Cellar Craft Sterling California Chardonnay another go! If you recall, the last time I started this wine making ingredient kit I totally screwed up with the fermentation temperature. It was too cool. I didn’t really catch the error until it was too late. I tried to resurrect it, but alas, it was not to be.
This time I came prepared with my fermenter heating pad and barring any long-term power outages here in Colorado (knock on wood), I shouldn’t run into that problem again!
I find it so funny that I need to use a heating element when it’s been about 90 degrees outside for the past two weeks, but at least I know that my basement is a great place to hang out if I get too warm! I keep the air conditioning running but even though I have the vents closed to the wine room, it’s still a lot cooler down there than the rest of the house, necessitating the use of the heating pad basically all year round. That’s OK with me though – whatever keeps the temperature steady makes me happy!
Anyway, I decided today’s the day I’ll be starting a wine making ingredient kit. So I pulled out the directions that came with the wine kit and got to work. I mixed together some hot water and the bentonite packets. Gotta love that clay smell! Then, I added in the wine base (love the smell of the juice!) and enough water to bring the total volume up to 23L/6gallons.
At this point, I checked the specific gravity with my wine hydrometer, and it was 1.100 at about 74°F. Running that through an online temperature corrector for the calibration temperature of my hydrometer, the specific gravity was about 1.101. At this little of a difference, I wonder if it really matters if I even do the correction. I suppose if it were borderline and I had to decide whether or not to move forward based on that value, I’d certainly want to do it. But for calculating the alcohol content at the end, I don’t think it’ll matter too much, especially since I’m not selling this to anyone!
After the specific gravity reading, I added the oak shavings, gave it a stir, then sprinkled the wine yeast on the top.
I plugged in the heating pad, covered the primary fermenter, and said a silent prayer that this batch wouldn’t turn out the way the first one did! I have a better feeling about this one, so fingers crossed it all comes out the way it is supposed to!
That’s really all there is to starting a wine making ingredient kit. Now I just sit and wait for 6-8 days before checking the specific gravity again to determine if the wine is ready to move on to secondary fermentation. I have learned my lesson from last time, however, and I will be at least poking my head in daily to make sure the yeasts are doing their thing and fermenting!
———————————–
My name is Leigh Erwin, and I am a brand-spankin’ new home winemaker! E. C. Kraus has asked me to share with you my journey from a first-time dabbler to an accomplished home winemaker. From time to time I’ll be checking in with this blog and reporting my experience with you: the good, bad – and the ugly.
Seeking “Apple Pie in a Glass” – A Homemade Graff Recipe
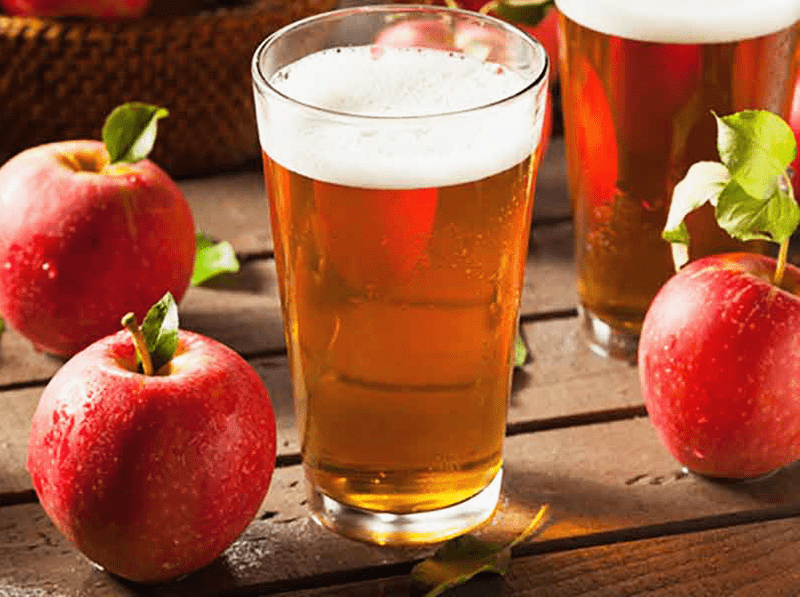 Back in August of last year, you may have caught this post about my love for experimenting with homebrew. I’m here to remind you that it’s all true. So much so, I’ve taken it one step further…
Friends really enjoyed one of my recipes introduced in that post – a beer/cider hybrid called “graff.” Essentially a malted cider, the brew combines the best of both drinks. You get aromas of apple sweetness as well as some hoppy flavor. A friend and I recently decided to tweak the original graff recipe to test our ability to create something akin to apple pie in a glass.
The results were decidedly tasty!
For reference, here’s the original graff recipe, which has you steep some grains in two gallons of water for 30 minutes at 155°F before an hour-long boil with liquid malt extract and hops:
Basic Graff Recipe
(5 gallons)
3 lbs. extra pale liquid malt extract
1 lb. honey malt
2 oz. Cluster hops at :60
By topping off with pasteurized apple juice or cider to make five gallons and fermenting with Wyeast 1056, you’ll get an ideal blend of beer and cider. I even added about a quarter-pound of honey with five minutes left in the boil to give it a sweet tinge.
While this graff recipe is great year-round, I started thinking about how to make it even more appropriate for fall. A discussion with my homebrewer friend led us to yet another experiment: this time trying to combine more aspects of a stout with the apple base.
Here’s the mad scientist graff recipe we decided to use:
“Apple Pie” Graff Recipe
(partial-mash, 5 gallons)
.25 lb. black patent malt
.5 lb. flaked oats
.5 lb. two-row pale malt
1 lb. extra dark crystal malt
3 lb. amber liquid malt extract
1 oz. Challenger hops at :60
.5 oz. Kent Goldings hops at :30
.5 oz. Kent Goldings hops at :15
Directions: Steep all the grains in two gallons of 155°F water for 30 minutes. Bring to a boil and add the extract and hops, according to schedule. Top the wort off with three gallons of pasteurized cider or juice, adding a little water if necessary to make five gallons. Use Wyeast 1968, which is a perfect complement for the sweet juice used in this beer.
If you want to add an additional layer to this brew, add one cinnamon stick to your priming sugar boil on bottling day.
The result – at least what we found – was a homebrew that nearly resembled a baked apple pie. The apple flavor was unmistakable, but the combination of grains provided both roasted and sweet flavors amounting to a baked pastry.
But most of all, it was a fun excuse to experiment again. Don’t be afraid to try variations of your own when taking on the graff recipe, including different hops to see how those flavors play to your tastes!
———————————–
Bryan Roth is a beer nerd and homebrewer living in Durham, North Carolina. You can read his thoughts on beer and the beer industry on his award-winning blog, This Is Why I’m Drunk, and send him suggestions on how to get his wife to drink craft beer via Twitter at @bryandroth.
Leigh Erwin: Making Wine From Scratch
 Hi all!
Even though I’ve been continuing to order wine ingredient kits, I’ve been thinking a lot about making my own wine from scratch. Something about making wine from scratch makes me feel like I am in complete control over how the wine comes out, while when I make wine from a kit, it’s kind of like I’m just going through the motions and my wine will taste almost exactly the same as someone else’s wine who made the same kit and followed the instructions to the letter just like I did.
Don’t get me wrong – I love how easy the wine ingredient kits are to use and how great the wines taste when they are finished (as long as I haven’t done something stupid along the way…), but part of me doesn’t really feel like a “real” winemaker if I didn’t make the wine all from scratch using ingredients I have already in stock in my little winery shelves.
At the same time, I am terrified of going about it on my own. What if I’m not ready to make wine without a kit and I end up wasting ingredients and my time? How am I supposed to just whip up a batch of wine without any pre-organized kit?
Well, that’s where wine making sites like E. C. Kraus can really come in handy. There are so many great resources for making wine online and folks like E. C. Kraus do a great job of answering common questions that plague home winemakers both new and seasoned.
Additionally, there are a ton of great wine making books out there that can help with making wine from scratch. I have a couple of books myself, so other than stocking up on “raw” ingredients, I really have all the resources I need to be able to set out and make a batch.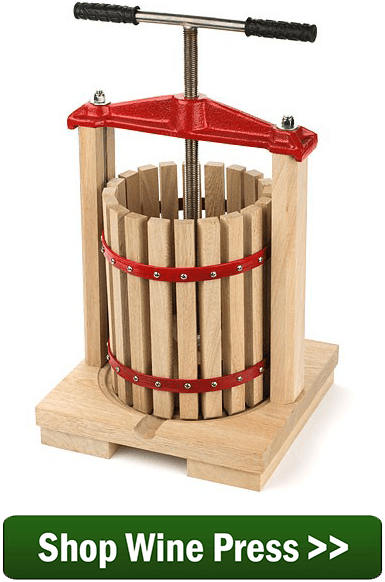
I feel as though the only way I’m really going to learn how to be a real winemaker is to do it myself from start to finish without having it all set out nicely for me ahead of time. I need to be able to think on my feet and one day know “oh, right, I need to add this ingredient now if I want the wine to do such and such”, instead of just checking off the boxes as I go.
In reality, I’m definitely going to continue using wine ingredient kits as they are pretty great and get you nice wines every time (if you follow the instructions and keep things clean and sanitized anyway), but I think from now on, in addition to making one wine from a kit, I’ll simultaneously make a wine from scratch on my own from “raw” ingredients to see if I really understand winemaking or if I’m just really good at ready directions and checking off boxes.
———————————–
My name is Leigh Erwin, and I am a brand-spankin’ new home winemaker! E. C. Kraus has asked me to share with you my journey from a first-time dabbler to an accomplished home winemaker. From time to time I’ll be checking in with this blog and reporting my experience with you: the good, bad – and the ugly.
Starting a Homebrew Club
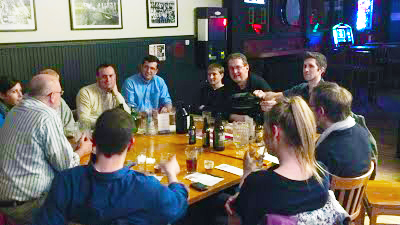 The comedian George Carlin once jokingly told people rather than waiting for someone else to make a path, you should go out and make one of your own. I think the same concept applies to starting a homebrew club. If there isn’t one in your area, don’t wait for someone else to do it, get out there and start one!
I had been brewing for a couple of years before someone started a homebrew club in my town. I wondered why I hadn’t thought of it. Nothing has advanced my brewing, and my love of brewing, more than our club’s monthly get-togethers. In our very first meeting, I asked about the off-flavors that I seemed to be encountering, convinced that it was from the local water. Based on my description, other members told me that it likely wasn’t the water, but temperature control was the culprit. Sure enough, when I got better control over my fermenting temperatures, with a temperature controller and a small fridge, my beer drastically improved.
As to what a homebrew club does, well that should be fairly obvious: we gather at a local micro- or nano-brewery and we drink and talk about making beer. People often bring one of their latest creations so we can all try it. Sometimes, people bring a beer they don’t like for us in order to see if we can agree on what went wrong.
In addition to the “mundane” things your club can do, our club has had a few special events, such as homebrew swaps, an experiment where we all brewed the same single-hop IPA each using a different hop (and then comparing), and a few tours of the local breweries.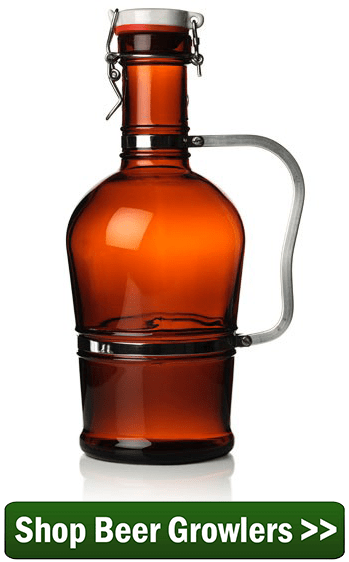
The thing about starting a homebrew club is that it doesn’t take much effort at all. Surprisingly little, in fact. Our club was set up by someone simply creating a Facebook page, confirming with a local nano-brewery that we could meet there, checking with the brewery and the local police as to whether it was OK for us to bring our own beer (thankfully, it was OK in both cases), and then putting up a sign and sign-up form in the local homebrew shop.
We don’t charge any dues, although we do charge if there will be something that someone has bought. For instance, one of our members gave a presentation on lager styles and brought quite a few samples of the various lagers, and we each chipped in $5 to pay him back.
So, if you’re interested in meeting like-minded brewers, and having a blast while learning about all things related to brewing beer, starting a homebrew club will definitely be a rewarding endeavor.
———————————–
John Torrance is a database developer, gadget lover, and avid home brewer living in Lafayette, Colorado. When he’s not actively brewing, he’s generally daydreaming about what he’s going to brew for his next batch. John also makes and sells brewing-related items, which are available at Fermentropy.com.
What Equipment Do I Need To Make Grape Wine?
 This time of the year we receive a lot of various questions about making wine from the different fruits that are coming into season. One particular question we get quite often has to do with making homemade grape wine:
What equipment do I need to make grape wine?
Well… it depends. I know what your thinking, why can’t this guy give us a straight answer? I want to, but that would not do you or the question any justice.
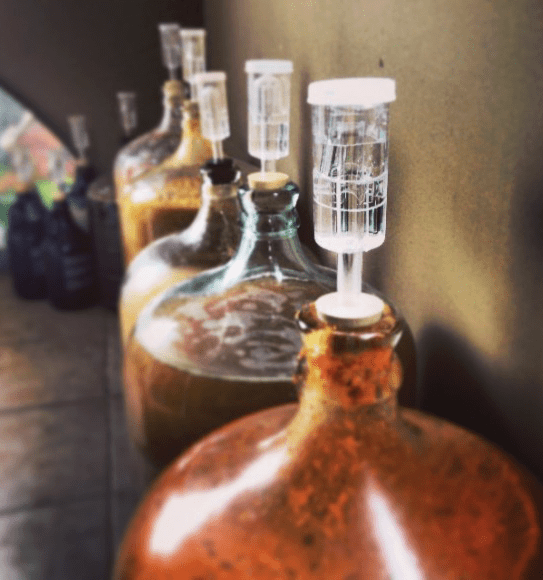
The answer depends on the amount of grapes you need for your wine recipe. And, that is based on the kind of grapes we are talking about and the size of the batch you intend to make. If you are making wine from wild grapes such as mustang, muscadine, scuppernong, fox, etc., you’ll only need to prepare 20 to 40 pounds of grapes to make a 5 gallon batch. This is certainly manageable by hand and no exclusive equipment will be needed to make the grape wine.
But, if you plan on making 10 gallons of wine using actual wine grapes such as Cabernet Sauvignon, Merlot, or even Foch, now you are dealing with about 160 pounds of grapes… this is when you need some equipment to make your grape wine.
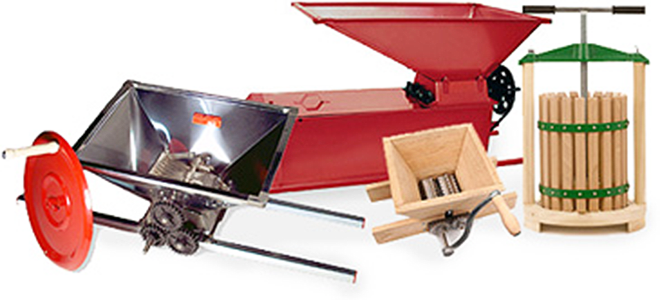
Before any grape can be fermented it needs to be crushed with a grape crusher. A grape crusher is different from the grape press. A grape crusher only bursts the grape skins open. You can certainly crush the grapes by-hand, depending on the amount needed to be crushed, but the grapes definitely need to be crushed before they can be pressed.
At some point in the wine making process you will need to squeeze the pulp to get all the liquid out of it. For white wines this pressing is done right after the grapes are crushed. For red wines the grapes are pressed after the must has fermented with the crushed grapes for about 3 to 7 days.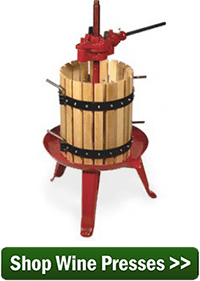
You can squeeze the pulp by-hand, just be aware that this will lead to a wine with less body and color. Also, you won’t be getting all of the juice. You will not be able to press the pulp nearly as well as an actual wine press can. Unless you are dealing with a very small amount of grape – say, 20 or 30 pounds – shopping for a grape press is probably in your future.
For larger volumes of grapes, say 500 pounds or more, another piece of equipment you will need to make grape wine is a grape crusher/destemmer combo. When you make wine from grapes a majority of the stems need to be removed. If this does not happen, a ropy bitterness can be present in the finished product. Doing this by-hand is not so bad if dealing with a few hundred pounds, especially if you get the kids involved, but for larger amounts you will probably want to invest in a crusher/destemmer.
In general, the grapes need to be crushed, destemmed and pressed to make it through the wine making process. Any of this can be done by hand, but if you are dealing with 50 or 100 pounds or more, you will want to use some equipment to make your grape wine.
———————————–
Ed Kraus is a 3rd generation home brewer/winemaker and has been an owner of E. C. Kraus since 1999. He has been helping individuals make better wine and beer for over 25 years.
Is It OK to Bottle Condition Beer in Growlers?
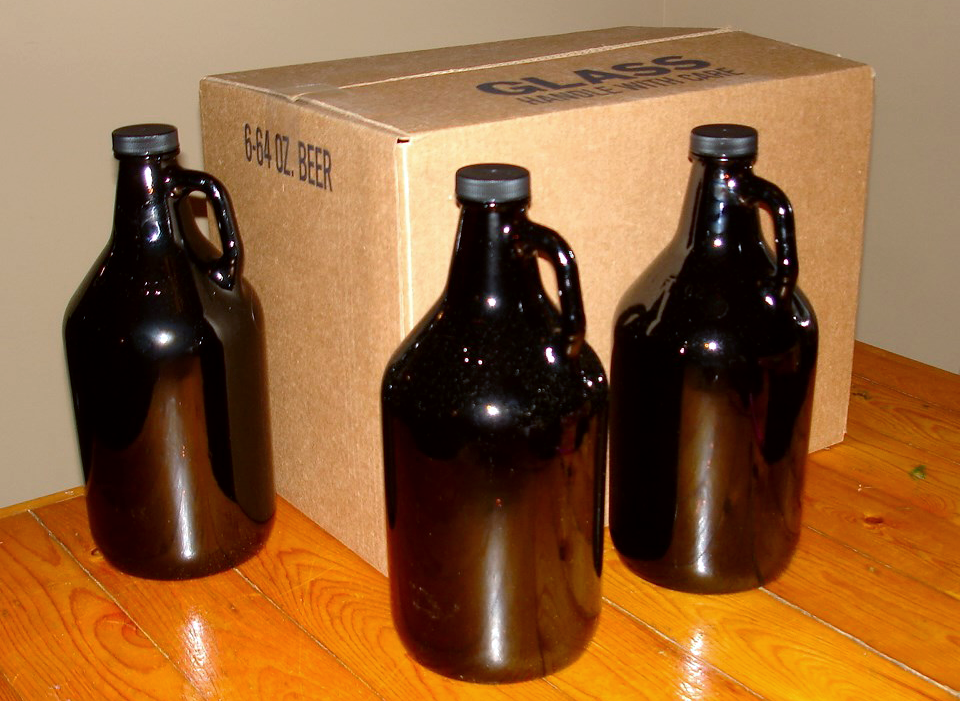 Most homebrewers that bottle their beer have probably figured out that the bigger the bottle, the fewer bottles you’ll have to fill. That’s why I like to hoard 22 oz. and 750mL beer bottles. It only takes about thirty 22 oz. bottles to bottle a five-gallon batch, compared to about fifty 12 oz. bottles. By extension, bottling beer in growlers should make things even easier, right?
Not so fast. Bottle your beer in growlers, and you run the risk of one exploding!
Bottle conditioning works because yeast consumes priming sugar to create CO2. Since the bottle is capped, the CO2 has nowhere to go but into suspension, thereby carbonating the beer.
This CO2 creates pressure inside the bottle. Regular beer bottles are designed to withstand that pressure, but most growlers are not. Just take a look at a growler and you can see that the glass is relatively thin compared to a normal beer bottle. Growlers are made for transporting beer that has already been carbonated. While there is some pressure in growlers fill with draft beer, it’s nothing compared to the 30 or 35 pounds of pressure that is typically created during bottle conditioning. Bottle been in growlers, and they could explode on you.
I’m sad to say it’s happened to me twice, and I haven’t bottled in a growler since. If it’s happened to you, you’ll agree that it’s worth spending a few extra minutes cleaning and sanitizing a few extra bottles to avoid losing a half-gallon of beer. Cleaning up that much beer is not fun – especially when you could be drinking it instead!
 This isn’t to say that no one has ever successfully bottle conditioned their beer in a growler. I’m sure there are homebrewers out there who take the risk, and make sure to keep the temperature of the growler in check so it doesn’t go out of control. But for me, I’d rather just not deal with a stress of wondering, “Is today the day? Is that growler going to blow in my sleep?”
If you’ve reached the point where bottling is too tedious, I highly recommend investing in a homebrew keg system. Sure, the up front investment is higher than it is for bottling, but the saved labor is significant. Plus, you get to really dial in the carbonation of your beer by adjusting the pressure on the CO2 regulator.
Have you ever tried bottling beer in growlers? Were you successful? Or do you have a broken glass horror story to share?
———————————–
David Ackley is a writer, brewer, and craft beer marketing consultant. He holds a General Certificate in Brewing from the Institute of Brewing and Distilling and is founder of the Local Beer Blog.