 Part 1 | Part 2 | Part 3 | Part 4 | Part 5
Well, I’m a homebrewer, but just started my first batch of red wine! It’s a Shiraz winemaking kit from E. C. Kraus. As a homebrewer, I was curious to see how it would go compared to a standard brew day. Long story short – it was much faster and easier than I anticipated! Read on for the details.
Well that was fast…
Mixing up the wine kit took just over an hour, and most of that time was spent cleaning and sanitizing a fermenter, airlock, and stirring spoon. Compare that to all the steps involved in brewing a batch of beer, starting this batch of wine was pretty quick! Just consider the time-saving opportunities for making wine vs. beer:
- No mash (60+ minutes saved)
- No boil (60+ minutes saved)
- No chill-down (30-60 minutes saved)
There’s also a significant amount of energy and water saved wine making wine as compared to beer, since there is no heating involved and no water used to chill the batch.
No new investment in equipment
Since I’ve been homebrewing for several years, I already had pretty much all of the equipment needed to make the wine. My fermenter didn’t leave a ton of headspace for the six-gallon kit, so I may not have reached a full six-gallons. But I can always top off with extra water for secondary fermentation.
Labor? What labor?
Though the usual effort was involved in cleaning and sanitizing the equipment, starting a batch of wine required no more work than what goes into brewing a batch of beer. If anything, it was a little less! There were however a couple of unique tricks that I had to get used to, but after figuring it out it will be that much easier the next time around.
 The hardest part of the whole procedure was getting the cap off the bag of juice concentrate! But with a quick search on E. C. Kraus’ website I discovered that they have a cap removing tool that you can purchase for taking the cap off the bag. Problem solved!
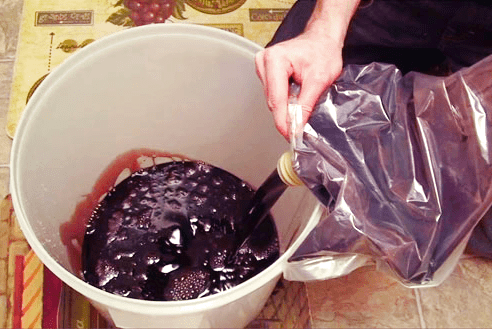
The next tricky part was pouring the contents of the bag – almost two gallons of juice – into the fermenter. Not that it was especially challenging – I just had a vision of spilling all that red juice all over the kitchen floor! Luckily, I managed to avoid making a huge mess.
From there the rest was easy. The winemaking kit instructed me to top off with water to make six gallons (I used reverse osmosis water) and add a packet of bentonite. After taking a gravity reading with a sanitized hydrometer (OG: 1.084), I stirred it all together to mix it well and pitched the yeast. And that was that!
Compared to a six-hour brew day, starting a batch of wine is a breeze! Of course it ain’t over til it’s over, so we’ll see how it turns out. But for now, the fermenter’s sitting comfortably at about 70˚F. We’ll check it out in about a week!
Part 1 | Part 2 | Part 3 | Part 4 | Part 5
———————————–
David Ackley is a writer, brewer, and craft beer marketing consultant. He holds a General Certificate in Brewing from the Institute of Brewing and Distilling and is founder of the Local Beer Blog.

For opening the bag of juice that comes with most wine kits I use what I know as a church key. These were used to open beer bottles and cans before twist off caps and pop top cans were invented. One end is pointed to pierce a can and the other end is rounded to pry off bottle tops. The rounded end works well to pry off the plastic top on the juice bag.