Darn It! My Wine Smells Like Rotten Eggs

Homemade Wine
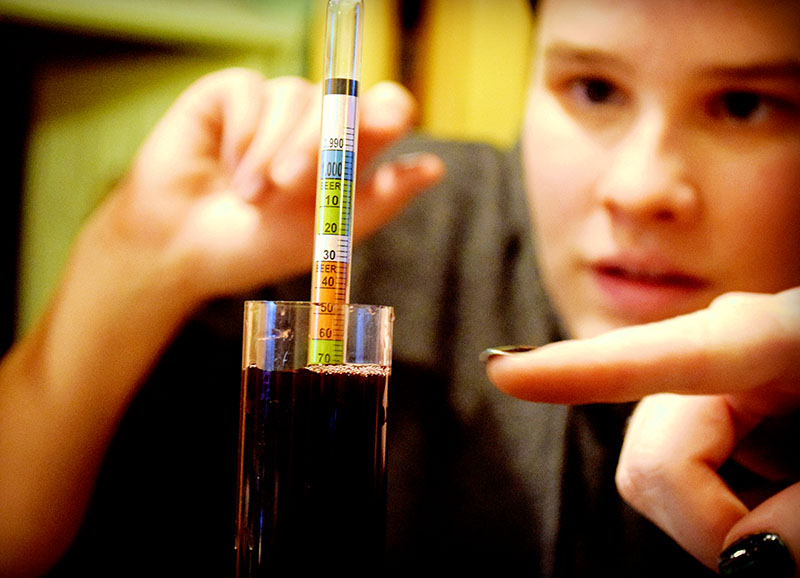
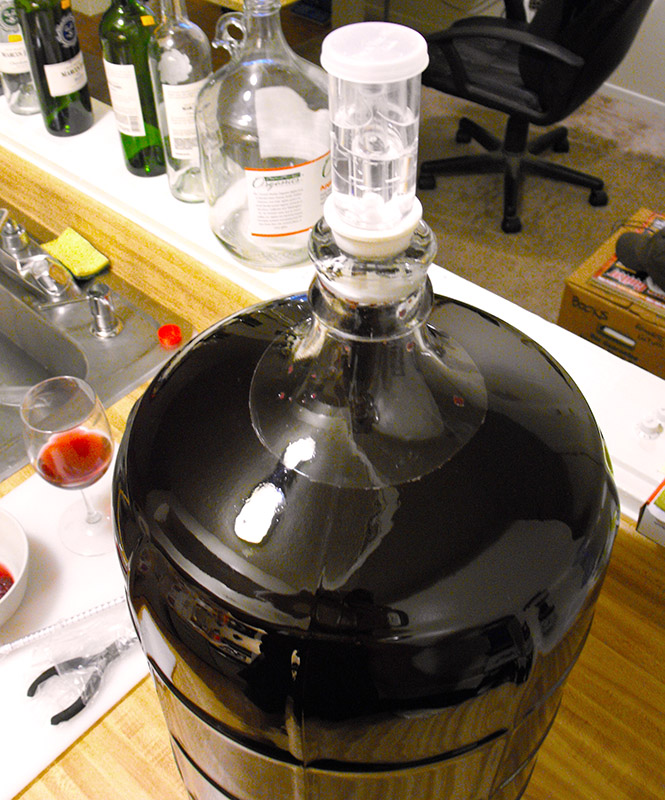
For the first time ever I ordered juice concentrate, your merlot and blackberry, to try making a large batch of my favorite flavors. Well, I followed the directions to the letter and it all fermented nicely in the primary. After 5 days racked it to the secondary, 6 gallon glass carboy but for the first time left a little head space of a couple inches figuring that it would be ok since it it was still bubbling a little. It has been two weeks and I racked it again to get it off the sediment and OMG it smells of sulfur, or rotten eggs! Once the wine was in my plastic bucket the smell dissipated and the wine tasted ok but today I checked it and there is still a smell. What did I do wrong? I’ve heard of adding egg white to try to take away the smell…. what can I do? I really hope I don’t have to dump it. HELP!

Name: JoAnn S.
State: WI
—–
Hello JoAnn,

All fermentations put off some sulfur or rotten egg smells. Some much more than others. When a wine smells like rotten eggs, what you are actually smelling is hydrogen sulfide. There are many of reasons why one fermentation might produce more hydrogen sulfite than others, but here are the big four:

  1. Fermenting With Wild Yeast: Shop Wine Yeast
    In your case, we can rule this out because you are using a wine ingredient kit that comes with a domesticated wine yeast. But if you were relying on wild yeast to do your bidding, this would most likely be the reason why your wine smells like rotten eggs. Some wild yeast can produce tremendous amounts of hydrogen sulfide.
  1. Lack Of Nutrients:
    Not having enough nutrients in the fermentation is another cause of high hydrogen sulfide output. But again, you are using a wine ingredient kit that has been nutritionally balanced. The yeast nutrient is at its ideal level in the wine concentrate, so we can also rule this out for your particular situation.
  1. Fermenting At Too Warm Of Temperature:
    Fermenting your wine too warm is another common reason for a fermentation to produce and abundance of hydrogen sulfide. Temperatures that are above 75°F. are suspect, and anything over 80°F. are likely to be problematic to some degree.
  1. Overworked Yeast: Shop Yeast Nutrients
    This happens when there is too little wine yeast to do too much job. There have been many times when a winemaker will accidentally kill a significant portion of the wine yeast when rehydrating it in warm water. If the wine yeast is put in rehydrating water that is too hot, or the yeast is left in the water for too long, more yeast cells will be killed than anticipated by the wine yeast producer. This sets the stage for a fermentation with too little yeast, and in turn, produces too much hydrogen sulfide.

The Overall Theme:
It is important to point out that all the above reasons relate to allowing the yeast to ferment under stress. When a wine smells like rotten eggs, start look at thing that might be putting fermentation in a stressful situation.

Having a wild yeast that is fermenting out of its normal element is stressful; having any yeast ferment with a shortage of nutrients, or ferment in a temperature range that is uncomfortable to it is stressful; and having a little bit of wine yeastShop Potassium Bisulfite doing a lot of work are all stressful things that will lead to high hydrogen sulfide production. Having said this, the whole idea is to keep the wine yeast happy and you will keep the hydrogen sulfide production down.

What To Do Now:

— Give It Time: A lot of the hydrogen sulfide will release and dissipate on its own. It sounds like this may be the case with your wine currently. And, more will dissipate when you bottle the wine.

— Add Sufites: Also, adding a dose of sulfite to the wine will help to drive out the hydrogen sulfide. You can add the sulfite in the form of Campden tablets, sodium metabisulfite or potassium metabisulfite. Just following the directions that are on the package and let the wine sit for a few days.

— Use Copper: If the wine still smells like rotten eggs, you can pour the wine through a copper scouring pad. When the wine comes into contact with copper a reaction will occur the encourages the hydrogen sulfide to release as fumes. The reaction will cause the copper to corrode, so your may need to use more than on copper pad.

Happy Winemaking,
Ed Kraus

—–
Ed Kraus is a 3rd generation home brewer/winemaker and has been an owner of E. C. Kraus since 1999. He has been helping individuals make better wine and beer for over 25 years.

My Homemade Wine Has A Sour-Bitter Taste

Wine Is Sour BitterI have made two batches of wine from wild grapes here in WI. The first one was harsh at first but aged about a year and it turned out very good and smooth. The second batch has been bottled now for about a year and is still sour, bitter and hard to drink. Wondering what I could do with it besides just sweetening it – don’t care much for sweet wine. I am about ready to pick some for the next vintage and am trying to figure out what I can do ahead of time to get it to turn out better. I read some in the blogs about adding acid blend before you bottle if it is too blah but what can be done if I sample before I bottle and it is way too harsh?

Name: Mike S.
State: Wisconsin
—–
Hello Mike,

There are two major reasons a homemade wine will have a sour or bitter taste:

  • There is too much acid in the wine Shop Potassium Bisulfite
    If your homemade wine has a sour taste it could simply be from the fact that the fruit used to make the wine was too tart. In other words, the wine has too much fruit acid from the fruit, itself. Also, a homemade wine can have a sour taste if too much fruit acid was added to the wine must by way of acid blend. Regardless, if your wine has a sour taste for this reason there are corrective steps you can take to make sure that this does not happen with the batch of wine your are getting ready to make.  I would suggest taking a look at the article on our website, Getting A Handle On Wine Acidity. This will fill you in on what to do. As for your current batch of wine, there are some things your can do to lower the acidity level.
  • The wine is turning to vinegar
    If your homemade wine has a sour taste it could also be caused by vinegar bacteria (acetobacter). The bacteria infects the wine an slowly begins to turn it to vinegar. There are two ways to distinguish vinegar sour from just plain too tart. The first being, the wine will become more sour as time goes buy. Shop Acid Reducing CrystalsThe second way is by smell. Having a homemade wine with a sour taste from fruit acid will have no smell from this, but a wine with a bacterial infection will also have a sour smell. The number one reason for a wine to be infected with acetobacter is sanitation. If you are not using sanitizers to clean your wine making equipment and wine bottles, then this could definitely be the cause. If you are not using sulfites such as either: sodium metabisulfite, potassium metabisulfite or Campden tablets directly in the wine, then this could be the cause. An article on our web site that will put you on the right track is The Many Uses Of Sodium Bisulfite.

Bitter is caused by having too much tannin in the wine. Tannin is the dry, woody tasting stuff that can be experience when chewing on a grape skin. If the grapes are over processed or chopped, such as using a blender, etc., too much tannin may be coming out of the grapes and into the wine must. This will give your homemade wine a bitter taste. It is important that you only crush the grapes. All you are looking to do is burst the grape skins. Anything more than this is overkill.

It is possible to reduce the bitterness of a wine. Treating the wineShop Bentonite with bentonite will help to drop out some of the tannin as a sediment.

How long you keep the skins in the fermentation can make a difference in bitterness, also. A reasonable amount of time would be 3 to 5 days. If you left the skins in the fermentation longer than this, than you may want to adjust what you do this season.

Mike, I hope this info helps you out for this year.

Happy Winemaking,
Ed Kraus
—–
Ed Kraus is a 3rd generation home brewer/winemaker and has been an owner of E. C. Kraus since 1999. He has been helping individuals make better wine and beer for over 25 years.

How To Use Bottle Sealing Wax

Man Using Sealing WaxDear Mr. Kraus,

Did not receive any instructions on how to use the bottle sealing wax beads I ordered . What is the best method to melt the wax beads. Have never used this wax before. Do you sell some type of melter. If you would please let me know how to use.

Thanks,
Sammy L.
—–
Hello Sammy,

How you use the bottle sealing wax can vary somewhat. There is not a specific way it has to be used.

We recommend melting the sealing wax in a tin of the appropriate size. This can be something as small as a soup can if you are only doing 5 bottles. If you are doing 50 bottles you may want to use something as large as an old 2 pound coffee can tin. Sit the tin in a pan of water to make a double boiler on the stove. This will help the wax to heat more evenly over a period of time.

Once the sealing wax is melted you will want it to stay in that tin, permanently. The wax if very hard to remove once in a container, so don’t actually put the bottle sealing wax in any good pots or pans, themselves.

How to use the bottle sealing wax is something that can be approached from a couple of different angles:Shop Sealing Wax

  • Dip the whole neck of the wine bottle into the sealing wax.
    Not only will the wax be sealing the wine bottle air-tight, but it will also become part of the wine bottle’s decorative decor. The colors look incredible against the glass and can work together with the wine label to a bottle of wine worth sharing.The downside is that this method can use up quite a bit of bottle sealing wax. One pound of wax will do about 40 to 80 bottles depending on how far you dip the neck into the wax. You may also need more sealing wax than this to create a reservoir deep enough to coat the amount of the bottle neck you want. This is dependent on the profile of the tin you select.
  • Pour the sealing wax directly onto the cork itself.
    The second way to use the sealing wax is more efficient but not as decorative. Inset the cork by an eighth to a quarter of an inch into the neck of the wine bottle. Then pour a disk of wax into the inset. You will want to pinch a spout onto the tin you are using. Heat protective gloves will be needed for this method, as well. Just like dipping the bottle into the wax, the cork is sealed air-tight, but will use much less sealing wax per wine bottle. You will usually get about 150 bottles per pound done with this method.Shop Heat Shrink Capsules

As you can see, how to use bottle sealing wax beads is open to some interpretation. If you are looking for full decorative value, dip the bottle neck into the sealing wax. If you are only wanting to make a better seal then use the second method and add a layer of sealing wax on top of the cork, itself.

Happy Wine Making,
Ed Kraus
—–
Ed Kraus is a 3rd generation home brewer/winemaker and has been an owner of E. C. Kraus since 1999. He has been helping individuals make better wine and beer for over 25 years.

Aging Your Homemade Wine In A Refrigerator

Aging Wine Under RefrigerationI hope this finds you well and prospering. Is aging homemade wine in a refrigerator OK, say for several months? Also, what temperatures would be best for storing the wines long term? Would long, cool storage affect the aging of the wine? Thanks, and keep up the good work, we sure appreciate your help in many areas.

Name: N. Gerchak
State: Oregon
—–
Hello Mr. Gerchak,

Thanks for the kind words. We try very hard to answer your questions to the best of our ability.

It is perfectly fine, and preferable, that you age your wines for a few months. The need for aging your homemade wine is a given. I have found that with white wines 6 months will get the majority of the aging done. The typical white you find on the store shelf has been aged for about 18 months. Red wines could be aged anywhere from 2 to 5 years before they are sold.

Of coarse, the type of wine grape we are talking about enters into this equation, as well. For example, a Gamay will need much less aging than a Cabernet even though both are red grapes. This is because the make-up of each of these grapes are very different. Most notably, their tannin structure are on opposite ends of the scale – Gamay being low tannin, Cabernet being high tannin. This plays into how much aging is required for a wine to fully maturate and exude the maximum pleasantries that it can.

Just as the type of grape can affect the aging life of a wine, so can temperature, and this leads us back to answering your question about aging homemade wine in a refrigerator. Very simply: the cooler the storage temperature, the slower the wine will age. Although this is the general relationship between temperature and aging wines, there is still a optimal temperature range at which you would like to store your wines. This would be somewhere between 45°F. and 65°F. If you can’t store your homemade wine in this temperature range, then you want to get as close as you can.

Shop Wine Bottle CorkersSlow, cold aging can be either a good thing or a bad thing depending on your perspective. As home winemakers we tend to want our wines to age quickly. We want the time between bottling and consumption to be very short. We want them to be at their best in a matter of weeks, not months or years, for no other reason than we are impatient. On the other hand, aging the wine too quickly could leave you with a rack of wine that has all passed its prime. Wines do not continue to improve indefinitely with more aging.

With that being said, the temperature at which you age your homemade wine should be taken into consideration. partially based on your consumption habits. Your adjustment could be something as simple as storing the wine upstairs instead of downstairs, in the cooler basement or vise versa. Or as you have mentioned, moving the wine from the basement into a refrigerator.

As you may have gathered by now, aging homemade wine in a refrigerator is okay to do, just expect it to take longer to fully mature. If you do not have a problem with this, no worries, however if you are wanting you wines to age as quickly as possible, this may not be the route you want to go.

There are a couple of suggestions I could make that would help improve upon your desire to refrigerate your wine. One is to age the wine at more-convenient, warmer temperatures for a few month – say, 3 to 6 months. Then store the wine in the refrigerator at its maximum setting (usually around 45°F). This will suspend the life of the wine for many years.

You could also go a whole different route. You could purchase a external, power interrupt temperature controller thermostat. This would allow you to set the refrigerator at any cooler temperature you would like, even 55°F. You do this by setting the refrigerator to its coldest setting. Then use the temperature controller to run the refrigerator as needed. It acts as an external thermostat that turns the power to the refrigerator on and off as need to maintain the temperature you select.

Happy Winemaking,
Ed Kraus
—–
Ed Kraus is a 3rd generation home brewer/winemaker and has been an owner of E. C. Kraus since 1999. He has been helping individuals make better wine and beer for over 25 years.

Cotton Candy Wine

Glass of Cotton Candy WineWhat’s pink, sugary and fluffy all over?…

You guessed it. Cotton candy!

This classic carnival sweet-treat is now available in WINE (yes, you read that right). And while it sounds too sweet to be true, we’re sharing some of our favorite cotton candy wines in this post.

What is Cotton Candy Wine? 

Turns out, cotton candy wine isn’t actually made from cotton candy. (WHAT?)

Yep, it’s all in the grapes.

This wine comes from Italian grapes called “Schiava” – an extremely sweet grape with a flavor usually associated with cotton candy.

Best Cotton Candy Wines

We’ve put together a list of cotton candy wines, using a sweetness scale of 1-6.

Purple Toad Winery – Cotton Candy

Sweetness Level: 4

This cotton candy wine has a bit more sweetness than you might be used to, but we recommend pairing with a creamy pasta dinner for the full effect.

St. Julian – Cotton Candy Wine

Sweetness Level: 5

St. Julian Cotton Candy Wine is like a carnival in a bottle, filled with aromas and flavors of bubble gum and strawberry. 

Schiava

Sweetness Level: 6

Try out the original cotton candy wine. This wine carries the aroma of roses and hints of strawberry shortcake. 

Urban Vines – Carnival Candy 

Sweetness Level: 5

This wine is made from grapes grown in the Great Lakes region. Vintners slowly ferment the wine to capture the cotton candy taste. 

We hope you enjoy these whimsical drinks! 

And check out other trends on our blog

Cheers!

10 Random Wine Making Tips And Tricks

Learning Wine Making TipsHere is a collection of wine making tips and tricks for beginners and more-seasoned home winemakers. This is advice that has been published throughout our various newsletters over the years. They are just bits and pieces of information that have proven to be useful to home winemakers and help keep them from making mistakes.

  1. I’ll put the most important of wine making tips, first. Control your fermentation temperatures. The number one reason for a failed fermentation is temperature. The ideal temperatures for a healthy fermentation is between 70° and 75°F. If the fermentation is cooler than this, the wine yeast will start to go dormant and become inactive. If the fermentation becomes warmer than this, you will be increasing the ability of mold and bacteria to take over the wine.
  1. It is possible to temporarily cut back the amount of water called for in a wine recipe in order to accommodate a fermenter that’s not quite large enough. For example, if you have a wine making kit that makes 6 gallons, Shop Wine Kit Tips Bookbut your primary fermenter will only hold 6 gallons to the brim, you can cut back on the water called for by 1/2 gallon to allow for the foaming until it is time to transfer it to your secondary fermenter. At that time the shorted water can be added to the batch. The water should be distilled water when added at this point. The maximum amount I recommend shorting the water in a given batch is 1 gallon to every 5 or 6 gallons. This is assuming that the shortage will be promptly made up when the wine is transferred to a secondary container.
  1. Don’t have time to make wine when your fruits are ready? That’s okay. Just put your wine making fruits in the freezer. Fruits that have been frozen tend to break down more readily when fermented anyway. This will allow more of the fruits character to be release into your wine must. Of all the wine making tips, I particularly like this one the best. It has afforded me ability to have time to make more wine throughout the year.
  1. If you have ever picked elderberries before you know that it can be a very time consuming task. Not only are the number of berries required to make a batch of homemade wine quite high, the amount of stems that are involve are just as bad. You can categorize this one under time saving wine making tips… Shop Wine YeastWhen collecting the elderberries simply cut them off in clusters, stems and all. A tile knife works great for this. Put them all in a plastic trash bag or similar and freeze them for at least 2 days. Once the elderberry clusters have been frozen, inflate the trash bag with air, tie off its opening. Then violently shake or beat the bag against the ground. This will break most of the elderberries lose from the stems. Once this has been done sufficiently, clip a bottom corner of the plastic bag and the elderberries will come rolling out. You won’t get 100% of the berries out, so there will be some waste in the process. But, it is well worth the time that you will save.
  1. By storing your packets of fresh wine yeast in the refrigerator, you can double their shelf-life. Yeast stored in this way will always be good for at least two years after purchasing. If yeast is just stored at room temperature it is usually only good for about a year. It is important to note here that you never want to freeze yeast. Freezing yeast damages their cell walls making budding or reproducing very difficult during the fermentation.
  1. One easy way to warm up your fermenters during the cooler months is to use an old lamp with an old style 100 watt light bulb. If you place the bulb 12 inches off to the side of a 5 gallon batch, it will warm the liquid’s temperature by about 8 to 10 degrees. Wrap the vessel in a dark trash bag to protect the wine from the excessive light the bulb causes. If 8 or 10 degrees is too much of an increase, just back off the bulb another 1 or 2 inches away from your fermentation vessel. Use a stick-on thermometer on the opposite side the the fermenter to track the temperature.
  1. When taking a hydrometer reading, give the hydrometer a quick spin in the liquid to be tested, first. This is to dislodge any air bubbles that may be clinging to the side of the wine hydrometer. These bubbles can slightly throw off your reading.
  1. To increase the body of a finished wine without making it sweeter, add 2 to 4 ounces of glycerine to each 5 gallon batch. Glycerine is a natural byproduct of a fermentation. It increases the viscosity or mouth-feel of a wine. Heavier red wines such as Cabernet Sauvignon and Pinot Noir are known for their body. With these wines the fuller body helps their flavor to linger on the taste buds a bit longer while also helping to reduce the wines rough edges.
  1. Of all the wine making tips I’ve seen or heard of, I believe this one has saved more wine than any other: When doing your first one or two rackings, Shop Potassium Sorbatedon’t leave any wine behind – get it all. Even if it comes along with some of the sediment. With the earlier rackings all you need to be concerned about is getting rid of “most” of the sediment, not “all” of it. And particularly, not at the expense of loosing your precious wine. It is when you get down to the final racking, that it becomes important to leave all of the sediment behind – even at the expense of loosing a little wine. The last racking is the one that really counts. Heeding this wine making tip has saved me more wine than you’ll ever know.
  1. Instead of using cane sugar to sweeten your wines, try sweetening your wine with honey. Honey will enhance the complexity of the wine’s finish (aftertaste) and sweeten it at the same time. Remember to always add a wine stabilizer such as potassium sorbate when sweetening your wine with any type of sugar.

There you have it: 10 wine making tips to help your wine making efforts go a little smoother. I’ll go through the files and see if I can come up with any more. When I do, I’ll be sure to post them here.

—–
Ed Kraus is a 3rd generation home brewer/winemaker and has been an owner of E. C. Kraus since 1999. He has been helping individuals make better wine and beer for over 25 years.

photo credit: MTSOfan wine making 01 via photopin.com (license)

What Size Corks Should I Get For Bottling My Wine?

Different Size Corks For Bottling WineIf you’re getting ready to buy corks to bottle your wine you may be wondering which size corks you should get. We offer four different sizes of wine cork stopper. They are sizes: #7, #8, #9 and #10. These numbers refer to the diameter of the cork. The higher the number, the larger the diameter of the cork.

The opening of a standard, 750 ml wine bottle is 3/4 of an inch. If you have a wine bottle corker you will want to purchase either the size #8 or size #9 corks. The diameter of these corks are 7/8″ and 15/16″, respectively. Size #9 corks is what the commercial wineries use. Either will require a wine bottle corker to press them into the bottle.

Which size cork you get depends on the type of wine bottle corker you have. Any wine bottle corker on the market can put in the size #8 wine cork, however some wine bottle corkers have trouble putting in a full-size #9 cork.Shop Wine Corks

If the corker was purchased from E. C. Kraus, you will be able to put in a size #9 or #8 cork just fine. If your corker was purchased from somewhere else then some caution will be required.

Some wine bottle corks on the market use a funnel-design to compress the cork. The wine cork is shoved through a funnel into the opening of the wine bottle. For the most part, this design of corker will work okay for a size #8 cork, but if you want to put in a full-size #9 wine cork and get a tighter seal, using a funnel-style corker can be a problem. The larger cork can get pinched and frayed as it goes through the funnel.

All the wine bottle corkers we offer compresses the cork evenly, from Shop Wine Bottle Corkersall sides then plunges the cork into the barrel opening of the wine bottle. With this method of corking no damage will come to the cork, as it is not be contorted through a funnel opening.

We do not recommend using size #7 cork, but we do offer them for individuals who want to put their corks in by hand. This size wine cork is small enough in diameter to be put in without a wine bottle corker. The downside is that they do not seal the wine bottle very well. In fact, if you lay the wine bottle on its side, there is a fair change that the #7 wine cork will seep some wine. For this reason you should store wine bottle upright if using this size of wine cork.

Size #10 corks are for larger size bottles. While many larger bottle still have the same 3/4 inch opening that the 750 ml have, some larger size wine bottles have larger openings that will require this larger size cork.
—–
Ed Kraus is a 3rd generation home brewer/winemaker and has been an owner of E. C. Kraus since 1999. He has been helping individuals make better wine and beer for over 25 years.

Making Sulfite-Free Wine To Reduce Headaches

Making Sulfite Free WineThis is a subject I get about at least once a week. People are desperately interested in making sulfite free wine.  Usually it is because they are suffering from headaches that they are attributing to sulfite allergies. For this reason they want to make their homemade wine without sulfites.

The major foil to making sulfite free wine is that sulfites are a natural byproduct of fermentation. In winemaking we talk about sulfites in terms of ppm (parts per million). Wine fermentations will naturally produce sulfites somewhere on the order of 10 to 20 ppm.

This amount may seem small, but compare it against the fact that the average bottle of wine on the market only contains about 65 ppm or the fact that any wine in the U.S. that has more than 10 ppm must have on its label, “Contains Sulfites,” then it starts to become clear that the amount of sulfites made by a fermentation is, in fact, significant to the wine’s total content.Shop Campden Tablets

So the answer is, “no.” You can not make sulfite free wine. There will always be some sulfite in your homemade wine. Now lets move on to the next logical question…

Can I make wines without adding sulfites?

The answer is: certainly you can. But, you should also be asking the question: do you want too? Sulfites such as Campden tablets or potassium metabisulfite are added to a wine for a reason: to keep the color and flavor fresh over time, and to keep it from outright spoiling. If the level of sulfites are too low, then it is susceptible to being overcome with bacteria, mold and other detrimental spoilers. Making sulfite free wine does not come without its own risk.

Because wine has alcohol, and alcohol is a preservative, the amount of sulfites needed to keep it from spoiling is very small as compared to amounts we find in the foods we eat everyday. Fruit juices, for example, can have on the order of 200 to 300 ppm; dehydrated fruits, conservatively around 1,000 ppm; and salsa around 1,000 to 2,000 ppm. These amounts are much higher than the 45 to 85 ppm you will typically find in wine.

With this in mind, to me it doesn’t make sense to short your wine the minuscule amount of sulfites it needs to help protect it from spoilage. And, it doesn’t make sense to blame such small amounts of sulfites on headaches when so much of it is in the foods we consume everyday. That brings us to the next logical question…

So Why Do Some People Get Headaches From Wine?

There are a certain number of people who do get headaches from drinking wine – even as little as one glass – but as explained above, automatically blaming this on sulfites is not reasonable.

Besides the fact that there is not that much sulfite in wine to begin with, there are a couple of other reasons why this doesn’t add up, as well:Shop Wine Filters

  • Sulfite allergies are much more rare than there are people having headaches from wine. According to medical industry reports, there are somewhere between 500 thousand to 1 million sulfite allergy sufferers in the U.S. This equals only about 1 in 300 to 600 people.
  • A headache is not the primary symptom of a sulfite allergy. Asthma or having trouble breathing is the very first problem to show up.

So, What Should I do?

If you are still not convinced that sulfites are completely innocent of all charges, then you might want to consider taking better control of the sulfites. Don’t completely eliminate additions of sulfite to the wine, but lower the level of sulfites. Don’t worry about making sulfite free wine but maybe try adding less sulfites, instead.

For example, right before bottling the wine, instead of targeting a sulfite level of 55 ppm for red and 70 ppm for whites, maybe shoot for 35 ppm in reds and 50 ppm for whites. Reduce the amount of sulfites in your homemade wines. Don’t necessarily eliminate additions to your wine.

You can take readings with a Titrettor Hand Tool and Titret Test Vials. By taking control of your sulfite levels in this way, you can be certain that no more sulfites are in the wine than absolutely necessary to keep it fresh.
—–
Ed Kraus is a 3rd generation home brewer/winemaker and has been an owner of E. C. Kraus since 1999. He has been helping individuals make better wine and beer for over 25 years.

Making Your Own Toasted Oak For Wine

Toasted Oak For WineI have tried oaking wine to my satisfaction with oak chips. Now I want to make my own toasted oak strips. I purchased some white oak that I sawed into yard stick width and thickness.  I noticed in the wine supplies different types of flavors for oaking. I was told it was like flavored coffee. What should I do to the oak strips so as I can oak wine?

Thanks,
Marvin F.
—–
Hello Marvin,

First, I want to commend you on your DIY spirit. It’s fun hearing about people tryin’ to get it done on their own.

This is a project that is a little more involved than one might first suspect. Toasting oak to be used in wine is a very delicate process. I for one would suggest that you are probably better off by leaving this one to the experts. But I understand your drive to try doing this yourself.

Shop Toasted Oak ChipsFirst, it is important that you use a white oak as opposed to red oak. You seem to be okay in that department based on you question, above. Red oak is a completely different family of wood. The only thing they have in common is the word “oak”.

The oak then needs to be dried to what cooperages refer to as sap clear. They typically do this by letting the slats or staves of wood dry cross-stacked in the sun for 1 to 3 years. The oak strips are rotated and rearranged periodically to allow for even drying. Someone trying this at home could get around this if they happen to have a kiln of some sort to dry the slats out, or maybe they have a source of white oak that has already been sitting around for a few years.

Once the white oak is sap clear it then needs to be toasted. This is typically done over a flame of burning white oak wood. Oak is used for the fire for toasting as opposed to another wood or fuel to keep foreign residues to a minimum. Try not to let the smoke from the fire directly hit the wood. Rely more on the fire’s radiating heat by keeping the wood adjacent to the fire instead of over the fire.

There is some art and some science to toasting oak for wine. Not only do you need to be concerned about how toasted the oak wood is becoming, you also need to be concerned about the temperature being used to do the toasting. Both how much you toast the oak and how fast it toasts plays into the flavor the wood will contribute to the wine.

If the wood is toasted too fast there is not enough time for all the caramelized sugars in the wood to raise to the surface. The heat doesn’t penetrate the wood deep enough. Toast the wood too long and you will raise too much tannin with the sugar which will bring too much bitterness to the wine. The right temperature a length of time is beyond my experience and most cooperages keep this info as a trade secret, but you can get a sense of what to do by seeing how a wine barrel (not whiskey barrel) is toasted.

Because of the complexity involved, I would suggest that you do not try this yourself and purchase some oak that has been professionally prepared. It is not something I would try, especially when an entire batch of wine may be on the line, and the toasted oak is relatively inexpensive.

Happy Wine Making,
Ed Kraus
—–
Ed Kraus is a 3rd generation home brewer/winemaker and has been an owner of E. C. Kraus since 1999. He has been helping individuals make better wine and beer for over 25 years.

There’s A Yeasty Smell In My Wine. Should I Dump It!?

Noticing Yeasty Smell In WineI’m still learning this process but haven’t had this happen. Got 3 gallons of Muscadine wine I was gonna bottle up. When opened up it has a very strong “yeasty” smell in the wine. Made this a couple times and never had this happen. Only thing I did different was use a different wine yeast. (Montrachet instead of lavlin 71b 1122.) I may have forgotten to rack the wine after it had been placed in the secondary fermenter. Either forgot to write it in log or didn’t do it. Seems I read somewhere that could cause this issue. Anyway, should I bottle this or dump it and start a new batch when the Muscadines ripen this summer. Thanks for the advice……..

Name: Bill B
State: SC
—–
Hello Bill,

There is absolutely no reason to dump any wine because it has a yeasty smell. This is an issue that comes about from time to time that is easily overcome.Shop Wine Yeast

It is true that different wine yeast have different amounts of yeast odors, but the yeast smell also increases the more the yeast become stressed. If the fermentation is done in an environment that does not make the wine yeast happy, you will get more of this odor.

Examples causing stress are:

  • Fermenting at too warm of a temperature
  • Fermenting with not enough nutrients in the wine must
  • Fermenting with too little yeast to perform the job at hand

The last one typically happens with old wine yeast is used, or a significant portion of the yeast cells are killed in the rehydration process.

Most of the time this odor will go away on it’s own throughout the natural course of the winemaking process. Racking the wine is one of the times that this odor is able to release from the wine and dissipate. You stated that you are not sure if you racked the wine, so this could be all that’s wrong with the wine.

Shop Potassium BisulfiteAnother normal activity in the winemaking process that releases this odor is adding sulfites. This would either be Campden tablets, potassium metabisulfite or sodium metabisulfite. If you do not ever add any of these then this can contribute to the yeasty smell in the wine.

A sulfite should always be added to a wine anyway to protect it from spoilage and oxidation, but doing so also drives out unwanted volatile gases that are in the wine from the fermentation – such as the ones you are smelling. If you haven’t done so already, the simple task of adding a standard dose of sulfites and waiting a few days may be all that is needed.

Since you are not sure if you racked your wine or not, I’m guess that all you need to do is rack the wine and add sulfites. Hope this should get rid of the yeasty smell in your wine. In not, repeat the process. Rack the wine in a splashing manner and then add sulfites again.

If you find that the yeast smell in the wine is not leaving that you may want to take a look at what to do about treating wine with a hydrogen sulfite issue.Shop Mini Jet Wine Filter

Just remember next time to keep your wine yeast happy, regardless of the type used; rack your wine sufficiently; and always use sulfites in your wine. Do these things and you should not have this problem again.

Happy Winemaking,
Ed Kraus
—–
Ed Kraus is a 3rd generation home brewer/winemaker and has been an owner of E. C. Kraus since 1999. He has been helping individuals make better wine and beer for over 25 years.