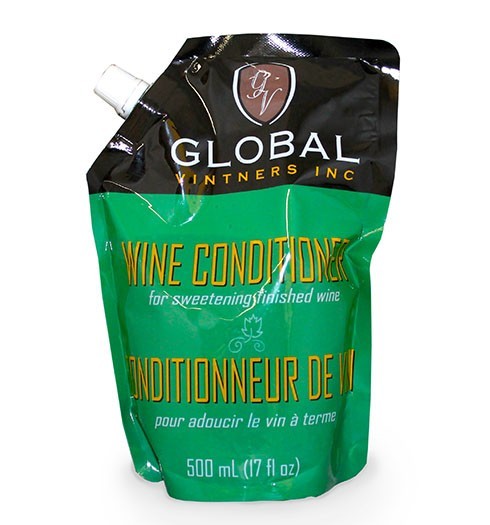
 …I bought your wine conditioner for a light sweet taste. For a 3 gallon batch of red wine how much of the 16oz bottle would you use. I don’t want it as sweet as the store bought Manischewitz.
Byron J.— FL
—–
Hello Byron,
Thank you for your question. How much wine conditioner to add to a wine is a question that comes up often, so I’m glad to be able to clear things up.
There is no way anyone could answer this question with accuracy. This is because you can take two different dry wines and add the same amount of wine conditioner to each and come up with different intensities of sweetness.
This is because different wines handle sweetness differently. Some of it is due to the structure of the wine: body, tannin, acidity… Some of it has to do with how much residual sweetness is in the wine, already. So, it is almost impossible for anyone to tell you how much wine conditioner to add to your wine.
Tasting wine is a subjective venture, as well. This complicates matters even further. What one person might perceive as a sweet wine, another might perceive as not being sweet at all. This is why I think it is so important for the home winemaker to learn how to make any flavor adjustments based on their own taste. It is much more valuable and practical for you to add wine conditioner based on what you think is good, than me throwing some kind of number at you. How much wine conditioner to add should be dependent upon you, not anybody else.
For this reason, I never make recommendations on how much sweetening to add anyone’s wine. Instead, I recommend that you experiment a bit. You can do this by taking a one gallon sample of the wine and adding measured amounts of wine conditioner until you arrive at a sweetness you like best. This will establish a dosage that can then be use on your other two gallons. The best part is, if you accidentally add too much wine conditioner to the gallon sample, you can blend it with the other two, and start all over. This is by far the safest and best way to add wine conditioner to a wine. It also gives you a chance to discover the amount of sweetness you think is right, for you personally.
Just so you don’t think that I’m completely blowing-off you question, I will give you some general numbers. It’s not unusual for a winemaker to use the whole pint wine conditioner to 5 gallons. I’ve also seen winemakers use 2 pints to 5 gallons, and I’ve seen many winemakers only use 1/2 a pint to 5 gallons. As you can see, how much wine conditioner one adds can vary greatly.
Also, just as a reminder, if you add any wine conditioner at all, it needs to be at least 2 oz. per gallon. Potassium sorbate is blended into the wine conditioner as a stabilizer. This helps to eliminate a chance of a re-fermentation. If you use less than the 2 ozs. of wine conditioner per gallon there will not be enough potassium sorbate in the wine to guarantee that a re-fermentation does not occur with the newly added conditioner.
In your case with 3 gallons, that means you will need to add at least 6 ozs. or none at all. If you want to add less than 2 ounce per gallon, you can do so, but you will also need to add a separate dose of potassium sorbate along with it.
Hopefully, this has given you a little better idea of how much wine conditioner to add. I’d start out by adding 6 ounce of wine conditioner to the whole batch, then do same taste on a gallon of if from there.
Happy Winemaking,
Ed Kraus
—–
Ed Kraus is a 3rd generation home brewer/winemaker and has been an owner of E. C. Kraus since 1999. He has been helping individuals make better wine and beer for over 25 years.
Racking Beer Into A Secondary Fermenter? Doesn't Hurt!
 This past month, I bought my brother, who just started homebrewing, a red ale beer recipe kit. Checking in on his progress, he asked me this question:
“My beer is in the process of fermenting. We started fermenting it in the bottling bucket because we plan on racking the beer into a secondary fermenter to do a secondary fermentation on the beer, but we never got around to racking it, so the beer is approaching three weeks of primary fermentation. Do you think it would be worth it to try a secondary fermentation for a week, or do you think we should just go straight to bottling the beer at this point?”
After three weeks in primary, it’s highly likely that your beer is done fermenting, and it’s probably safe to go ahead and bottle your beer. But you can’t just bottle straight from your primary fermenter: it’s full of yeast and other trub that you should try to keep out of your finished beer.
Here’s what I would do:
 Rack the beer to your other (sanitized!) secondary fermenter and take a gravity reading with your hydrometer to see whether the fermentation is complete. It most likely will be at this point, but you want to be sure. Remember, if you take a reading directly in the bucket, your hydrometer should be sanitized beforehand.
- You probably won’t need to plan for an extended secondary fermentation period, but in any case, go ahead and rack your beer from the primary to the secondary fermenter. This will give you the opportunity to free up your bottling bucket and discard the trub. Go ahead and clean out the bottling bucket so it will be ready for brew day.
- After 2-3 days in secondary, you can go ahead and bottle, provided that you’ve reached somewhat close to your anticipated final gravity. Bottle as you would normally. You can mix in the priming sugar as it fills back into your bottling bucket.
Though the beer’s secondary fermentation probably won’t affect your gravity at this point, I’d recommend at least 2-3 days to allow the yeast, which will get stirred up when you’re racking, to settle again. This may also be a good time to add gelatin or isinglass if you find that your beer is especially cloudy. Racking beer into a secondary fermenter is never a bad thing.
Tip: Many aspects of homebrewing are made easier by thinking through the process in advance. Think backwards from the end of the brewing process to figure out your brew day or bottling day sequence so that racking and bottling, etc. are more convenient to your schedule. Good luck!
—–
David Ackley is a beer writer, brewer, and self-described “craft beer crusader.” He holds a General Certificate in Brewing from the Institute of Brewing and Distilling and is founder and editor of the Local Beer Blog.
3 Reasons Why You Should Be Making Wine!
 What motivates you to make your own homemade wine? Is it for that feeling of knowing you’re participating in an ancient art that has been practiced for thousands of years? Is it so you can control the aromas and flavors of your wine and not worry about whether or not you’ll like the wine when you pop that cork? Or maybe you’re just trying to save a little money by making it yourself? Whatever your motivation, making your own homemade wine is a time-honored hobby that is beneficial on so many levels!
Here’s three reasons why you should be making your own wine. These are the reasons that seem to stand out to most people.
- First, it’s cheaper to make your own wine than to continually have to restock your wine cellar through regular visits to the wine shop. You can find inexpensive bottles of wine in the store, but their quality is hit or miss, and by making your own wine, you’ll know it’s good once you’ve got your rhythm down. On average, actually good bottles of wine in the store are going to cost you between $15 and $30. Again, you can get good wine for less than that, but it’s not as common and you really have to know your brands at that point.
If you add up the cost of the wine making ingredients for your homemade wine and divide it up by the number of wine bottles it produces, you’re paying significantly less per bottle and per sip than you are the majority of the inexpensive good bottles of wine at the store. So, you should be making your own wine from a standpoint of cost, alone.
- The second reason as to why you should be making wine, you have total control over what the finished product becomes. You have carte blanche over what your finished wine will taste like and over the style of wine it will become.
And realize, commercial wines are not immune to possessing faults, so even if you make a mistake, be comforted in the fact that it is very possible you could have just as easily purchased a bad bottle from the store. Once you get your winemaking technique down and you have all the right wine making ingredients, you can create a wine that you know you’ll enjoy every time you pop that cork.
 Finally, making homemade wine can be really easy! Sure, it’s scary to think about it if you’ve never done it before, but there are many great resources available to you for free.
One great starting place is our How To Make Wine page. This page puts the whole wine making process in a nutshell. There’s also some great wine making recipes available to you. And, as if one couldn’t make it even easier, taking advantage of all the great winemaking kits out there will help making your own homemade wine a piece of cake! Currently, there are over 160 grape juice to choose from, collected from all over the world.
So as you can see there are many great reasons why you should be making wine. Not to mentions that your own homemade wine is a great thing to share with family and friends.
Do you make wine already? Share with others why you make wine in the comment section below!
—–
Ed Kraus is a 3rd generation home brewer/winemaker and has been an owner of E. C. Kraus since 1999. He has been helping individuals make better wine and beer for over 25 years.
A Beginner's Guide To Home Brewing German Beer
 Today we will explore the beers from one of the world’s top brewing regions: Germany. Many of the world’s popular styles of beer are derived from classic German styles. Home brewing German beer is no harder or easier than brewing other types of beer, and the array of flavors is nothing short of fulfilling.
- Bamberg Smoked Beers
Bamberg, in the central region of Germany called Franconia, is the home of rauchbier (rauch = smoke in German). The smoked beers of Bamberg are mostly lagers, ranging from pale in color to amber or brown. The smokiness can be anywhere from mild to very assertive. Brew your own smoked beer using Briess Smoked Malt. As little as a pound will add noticeable smoke flavor to any beer style. A classic rauchbier should be similar to Märzen in appearance, and may use as much as 100% smoked malt.
- Bavarian Wheat Beers (Weizen)
The southern region of Germany is known as Bavaria, with Munich being the capital as far as brewing is concerned. Bavaria is home to weissbier (white beer), also known as weizenbier (wheat beer), to great German beer styles. Variations on the style include dunkelweizen (dark wheat beer) and hefeweizen, a wheat beer served cloudy with its own yeast (hefe = yeast). Some of the popular German brands include Erdinger, Schneider, and Paulaner. Bready, effervescent, with a hint of banana and clove, weizenbier is especially refreshing during the summer months. If this is your first time home brewing German beer, than this is a good style to start with.
- Oktoberfest/Märzen Lagers
These amber lagers have been made popular by the annual Oktoberfest celebrations in Bavaria. Only breweries within the Munich city limits are allowed to serve their beer at the main Oktoberfest festival. These include Spaten, Augustiner, Hacker-Pschorr, Löwenbräu, Paulaner, and Staatliches Hofbräu-München. Check out our Oktoberfest blog post for more information and beer recipes for home brewing an Oktoberfest/Märzen lager. Anyone interested in home brewing German beer might best be served by giving this one a go.
- Kölsch
Born in the Western city of Cologne (Köln in German), the Kölsch is a very pale lager/ale hybrid. Though fermented with top-fermenting ale yeast, this beer is conditioned at colder lager temperatures, which helps give it a clean, crisp character. In fact, lager is a German word meaning “to keep” or “to lay down.” Read our Tips on How to Brew a Kölsch and check out the Brewers Best Kölsch Recipe Kit to brew your own Kölsch!
- Roggenbier
Roggen is the German word for rye. Roggenbier is native to Regensberg, in Bavaria. It is similar to the German Dunkelweizen (dark wheat beer) except that malted rye is used in place of malted wheat. Rye can get sticky in a mash; rice hulls can help avoid a stuck mash. A classic roggenbier may use as much as 50-65% rye malt, with the rest of the grain bill coming from pale malt, Munich malt, wheat malt, and/or crystal malt. The weizen ale yeast should be used to achieve the banana/clove characteristics of this style.
- Altbier
Altbier literally means “old beer.” Not that the beer is especially old! The name just means that the beer is brewed in the old style. Northern German Altbier is defined as a moderately bitter brown lager. It’s a great beer to start with for someone thinking about home brewing German beer styles. Though they may be made with ale yeast, they should be fermented cool and lagered. Altbier is also popular in the German city of Düsseldorf. Düsseldorf Altbier differs from Northern German Altbier in that it tends to have a more robust (but not roasty) malt flavor and more assertive noble hop bitterness.
- German Light Lagers
Lumped together in this broad category are a number of notable styles, including Munich Helles, Dortmunder Export, and Pilsner. Helles means “light” in German, in reference to the color of these beers. These pale lagers are relatively new styles, since pale malts weren’t made until advances in technology during the Industrial Revolution. Each of these lagers are very clean and pale in color. The dominant flavor in the Munich Helles should be the light grain, often Pilsner malt. German Pilsner tends to feature more noble hop bitterness and flavor. The Dortmunder Export is a slightly stronger lager than the Helles or Pilsner, featuring more substantial body and a good balance between malt and hops.
- German Dark Lagers
Prior to the mid-1800s, all German lagers were dark. Munich Dunkel (dunkel = dark) is a classic lager, featuring loads of rich Munich malt, as much as 100% of the grain bill. The color of a Munich Dunkel ranges from copper to dark brown. Even darker than the Dunkel is the Schwarzbier (Schwarz = black). Though it tends to be more brown than black, schwarzbier is chocolaty and full-bodied, often with a dry, tangy finish. Contrary to what a drinker might suspect, schwarzbier is exceptionally smooth and sessionable. For this reason, it is one of the better German beer styles for home brewing. Intrigued? Brew a schwarzbier with this malt extract schwarzbier recipe.
- Berliner Weisse
This is a very pale style of beer usually brewed with 30-50% malted wheat. The defining characteristic however is that the beer is fermented with a lactobacillus bacteria culture, which gives the beer a tart, sour acidity that’s actually quite refreshing. There was a time in Germany when Berliner Weisse was extremely popular and referred to as “the Champagne of the North.” Though it is not as popular today as it once was, the style has made a resurgence among craft brewers in the United States. This recipe for a Cranberry “Lambic” allows the homebrewer to replicate the tartness of the Berliner Weisse without the bacteria culture.
- Bocks
Bockbier was developed in Northern Germany. The name likely comes from the town of Einbeck, where bocks were first made as early as the 14th and 15th centuries. German bocks are very strong lagers, ideal for consumption during the colder months of winter and early spring. Bocks tend to be smooth and malty sweet. Doppelbocks are even stronger versions, usually at least 6.8% ABV, and often with the suffix –ator in the name. Paulaner Salvator is the classic example. Maibock or Helles Bock is lighter in color, though just as potent as a traditional bock.
Home brewing German beer recipes is an excellent way to get you brewing “chops”. We have several beer recipe kits featuring German style beers. All the way from Kölsch to Bock, there is a favorite German beer style waiting for you. Which one will you brew first?
—–
David Ackley is a beer writer, brewer, and self-described “craft beer crusader.” He holds a General Certificate in Brewing from the Institute of Brewing and Distilling and is founder and editor of the Local Beer Blog.
3 Homebrew Beer Recipes You'll Want To Brew Again!
 As a homebrewer, I love to experiment with a wide varieties of homebrew beer recipes: ginger beer, various SMaSH beer recipes, attempts at gluten-free beer for my girlfriend. Experimentation is a great way to learn about homebrewing ingredients and the processes, but it’s also important to make beer that is guaranteed you’ll like to drink. If all you do is experiment all the time, chances are that you’ll have to stomach your way through some very.…interesting beers.
There are thousands upon thousands of homebrew beer recipes that you could make: clone recipes, SMaSH recipes, extract recipes, all-grain recipes, IPA’s, double IPA’s, dark beers, light beers, hard recipes, recipes for beginners. It is truly and endless list. With all the chatter it’s hard to choose.
With that in mind, here are three homebrew beer recipes that I would recommend for the regular rotation.
Homebrew Beer Recipe #1
AMARILLO PALE ALE
(five-gallon batch, extract partial mash recipe)
This recipe produces a solid American pale ale. Malted wheat and carapils give this beer some body and a solid white head, while the Amarillo hops give it a bright citrus character.
Specs
OG: 1.059
FG: 1.016
ABV: 5.5%
IBUs: 31
SRM: 6
Ingredients
1 lb. Carapils malt
1 lb. White wheat malt
6.6 lbs. Light Malt Extract
4 oz. light brown sugar (late addition)
1 oz. Amarillo hops at 60 mins (8.6 AAUs)
.5 oz. Amarillo hops at 20 mins (4.3 AAUs)
1 tsp. Irish moss at 15 mins
.5 oz. Amarillo hops at 5 mins (4.3 AAUs)
Wyeast 1056: American Ale Yeast or Fermentis Safale US-05
Directions
If using liquid yeast, prepare a yeast starter the day before brewing. On brew day, steep crushed grains in three quarts of water at 152˚F for 60 minutes. Strain out grains and rinse with hot water at 170˚F. Add liquid malt extract and enough water to make three gallons of wort and bring to a boil. Add hops and Irish moss according to schedule above. At end of boil, mix in brown sugar. Chill wort to 70˚F or below and mix in enough cool, clean water to make 5 gallons. Pitch yeast and ferment at 65-70˚F. Bottle or force carbonate for ~2.5 vols CO2.
Homebrew Beer Recipe #2
BIG MIKE’S BIG BROWN ALE
(five-gallon batch, all-grain recipe)
This beer recipe makes a fairly stout American brown ale with a heavy dose of hops.
Specs
OG: 1.062
FG: 1.017
ABV: 5.8%
IBUs: 62
SRM: 30
Ingredients
9.5 lbs. Two-row brewer’s malt
1.5 lbs. Caramel 60L malt
.75 lbs. Chocolate malt
.5 lb. Belgian aromatic malt
1.5 oz. Kent Goldings hops at 60 mins (7.5 AAUs)
1 oz. Willamette hops at 30 mins (4.5 AAUs)
1 tsp. Irish moss at 15 mins
1.5 oz. Kent Goldings hops at 10 mins (7.5 AAUs)
1 oz. Willamette hops at flameout (4.5 AAUs)
Fermentis Safale US-05 Ale Yeast
Directions
Mash crushed grains at 152˚F for 60 minutes. Sparge to collect seven gallons of wort in the brew kettle. Bring to a boil and add hops according to schedule. Chill wort to 70˚F or below and ferment at 65-70˚F. Bottle or force carbonate for ~2.4 vols CO2.
Homebrew Beer Recipe #3
SUMMER SAISON
(five-gallon batch, all-grain recipe)
When temperatures start to rise, it’s time for saison. Not only can the saison yeast handle the higher temps, the citrus flavor and dry finish on this beer are very refreshing. This is a wonderful homebrew beer recipe that I’d wish every brewer would try.
Specs
OG: 1.061
FG: 1.012
ABV: 6.4%
IBUs: 31
SRM: 6
Ingredients
8 lbs. Two-row brewer’s malt
1 lb. Caramel 20L malt
4 oz. Flaked oats
1.5 lbs. cane sugar (late addition)
.5 oz. Northern Brewer hops at 60 mins (3.9 AAUs)
.5 oz. Kent Goldings hops at :30 (2.5 AAUs)
3 grams fresh ground coriander at :20
.5 oz. Kent Goldings hops at :15 (2.5 AAUs)
1 tsp. Irish moss at :15
3 grams fresh ground coriander at :10
1 oz. Kent Goldings hops (dry hop)
Danstar Saison Yeast
Directions
Use relatively hard water for the mash. Mash grains in about 11 qts. of clean water at 148-150˚F for 60 minutes. Sparge to collect 7 gallons in the brew kettle. Bring to a boil. Add hops, spices, and Irish moss according to schedule. At end of boil, mix in cane sugar. Chill wort to 70˚F and transfer to fermenter. Pitch yeast and ferment at 70-75˚F. Dry hop for five days at 68˚F. Bottle or force carbonate for ~2.4 vols CO2.
These are a few of my favorite go-to homebrew beer recipes that I brew on a regular basis. Which beer styles are part of your regular rotation? Feel free to share the recipe in the comments below!
—–
David Ackley is a beer writer, brewer, and self-described “craft beer crusader.” He holds a General Certificate in Brewing from the Institute of Brewing and Distilling and is founder and editor of the Local Beer Blog.
2 Sparging Techniques: Batch & Fly
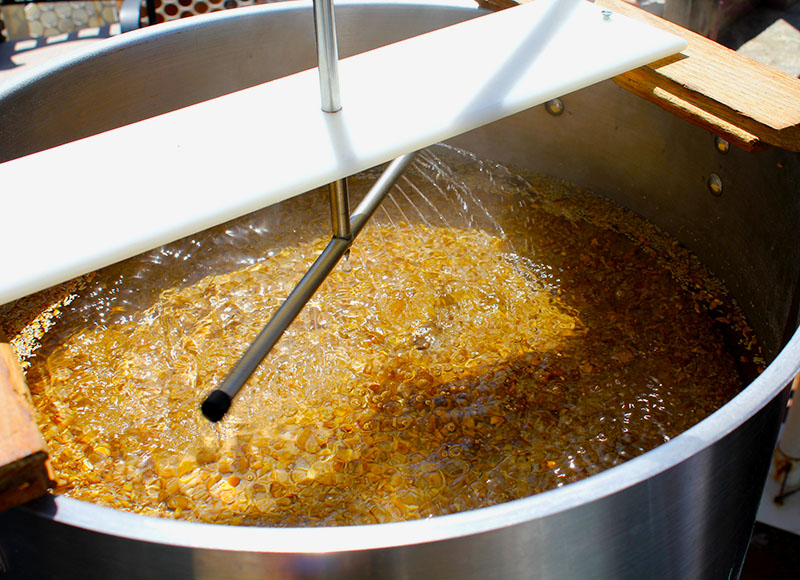 For all-grain brewers, sparging is the final step of the mash process when the grains are rinsed with hot water to remove the last remaining sugars from the mash. There are two sparging techniques: batch sparging and fly sparging. This article will explore the two methods and help you decide whether you should do a batch sparge or a fly sparge when homebrewing.
What is Fly Sparging?
Fly sparging is a sparging technique that is typical of the way many professional brewers rinse their grains. A rotating sparge arm or similar instrument delivers a shower of sparge water over the grain bed as wort is drawn from the bottom of the mash tun. The trick is to draw wort from the mash tun at the appropriate speed to “set” the grain bed so it can be used as a filter, and then start the flow of water from the sparge arm at a rate that does not flood the mash tun. Essentially, the liquid level inside the mash tun remains the same, with wort running out of the mash tun and water coming in through the sparge arm at roughly the same speed.
When trying to remember the difference between the two sparging techniques, I think of the sparge arm “flying” above the mash. If you’re into do-it-yourself projects, you may be interested in constructing your own rotating sparge arm. You can also simulate the fly sparging method by pouring your sparge water through a colander or screen over the mash. Though the fly sparge method is an efficient way of sparging your grains, a true fly sparge requires some additional equipment, time, and effort.
What is Batch Sparging?
By comparison, batch sparging is a sparging technique that is faster and simpler process. Instead of a constant rain of water over the grain bed, a batch sparge involves adding all of the sparge water at once – in one batch.
Typically, the homebrewer will first drain all of the wort from the mash into the brew kettle. These may be called the “first runnings”. Depending on your beer recipe, this may yield 50-70% of the total wort needed for the boil. Then the remaining volume of sparge water is added to the mash tun (some brewers will stir the grains) and drained into the brew kettle. If more wort is needed, you can always do another batch sparging.
For example, let’s say you’re brewing a five-gallon batch. You know that you want 5.5 gallons in the fermenter (the extra half-gallon to account for trub). From experience, you know that you boil off 1.5 gallons of wort during a sixty-minute boil, so you need to start with 7 gallons of wort in the brew kettle. After your mash, you’ve collected 3.5 gallons of wort in your brew kettle. Batch sparge with an additional 3.5 gallons of water (usually with the temperature in the ballpark of 165-170˚F) to reach your desired pre-boil volume.
So which sparging technique is better?
Neither the batch sparging method nor fly sparging method is inherently better than the other. It all comes down to what you prefer as a homebrewer. Fly sparging tends to get a slightly better brewhouse efficiency, but it requires extra time and equipment. Batch sparging is faster, but there’s a higher risk of losing efficiency.
Both of these sparging techniques will ultimately get the job done. Try them both and choose for yourself the method that works best for you.
Are you an all-grain homebrewer? Do you prefer a batch sparge or fly sparge?
—–
David Ackley is a beer writer, brewer, and self-described “craft beer crusader.” He holds a General Certificate in Brewing from the Institute of Brewing and Distilling and is founder and editor of the Local Beer Blog.
Dried Malt Extract vs Liquid: Which is Better?
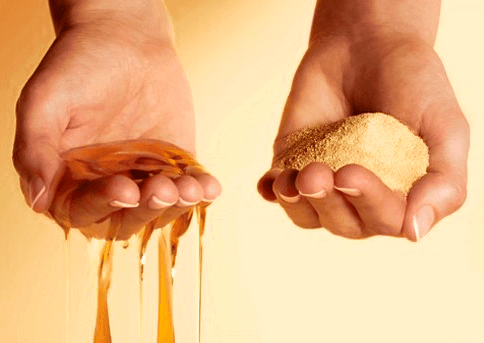 There are a number of “this vs. that” debates in homebrewing: dry vs. liquid yeast, single vs. two-stage fermentation, extract vs. all-grain brewing. On both sides of the argument you will hear supporters of their chosen method insist that theirs is better. But often times the answer depends on the brewer, their equipment, their skill level, their time availability, and a number of other factors. It all boils down to personal preference.
The same can be said for dried malt extract vs liquid malt extract. Neither is necessarily better than the other. Both forms of malt extract have their merit, and both have their drawbacks. Let’s break down the difference between both types of malts to determine when you might prefer dried malt extract or liquid syrup in your homebrew.
Continue reading
Brooklyn Brewery Summer Ale Clone Recipe (Extract & All-Grain)
 A classic summer seasonal beer is the Brooklyn Brewery Summer Ale. At 4.8% ABV and 26 IBUs, it’s a lighter ale that will pair well with burgers, outdoor activities, warm sun, and good friends.
Grain Bill
Harkening back to its English heritage, this clone recipe uses Crisp’s Best Ale Malt as the base. A smaller amount of pilsner malt keeps the color and flavor light. A mid-range mash temperature of 152˚F results in a good balance of body and fermentability. If brewing the partial mash version of this recipe, add the LME at the end of the boil to increase hops utilization and reduce the likelihood of the LME contributing too much color to the beer.
Hopping
Cascade and Amarillo hops bring a signature American hop profile to this beer. Cascades contribute the classic citrus and spice, while Amarillo dry hops bring a pleasing tropical citrus aroma.
Yeast
For yeast, Nottingham dry yeast is recommended. It’s a classic English strain with a fairly neutral flavor profile. No yeast starter is necessary for this clone recipe, but you may wish to rehydrate the yeast before pitching.
Ready to give it a try? Here’s an all-grain Brooklyn Brewery Summer Ale recipe, with a partial mash recipe below! Happy brewing!
Brooklyn Brewery Summer Ale Clone Recipe (All-Grain)
(5-gallon batch, all-grain)
Specs
OG: 1.044
FG: 1.007
ABV: 4.8%
IBU: 26
SRM: 5
Ingredients
6 lb. 5 oz. Crip’s Best Ale Malt
2 lb. 11 oz. Pilsner malt
.75 oz. Cascade hops at 60 mins (3.8 AAUs)
.75 oz. Cascade hops at 30 mins (3.8 AAUs)
.75 oz. Cascade hops at flameout (3.8 AAUs)
.88 oz. Amarillo hops (dry hop)
1 pack Nottingham ale yeast
All-Grain Directions
Mash crushed grains in about 2.8 gallons of water at 122˚F for 30 minutes. Raise temperature to 152˚F and mash for one hour. Lauter and sparge to collect about six gallons of wort in the boil kettle. Boil for an hour, adding hops according to schedule. Chill wort and transfer to a clean, sanitized fermenter. Pitch yeast and ferment at 68˚F. Dry hop with Amarillo hops in the secondary fermenter. Bottle or keg with a target carbonation of 2.6 vols CO2.
Brooklyn Brewery Summer Ale Clone Recipe (Extract)
(5-gallon batch)
Specs
OG: 1.044
FG: 1.007
ABV: 4.8%
IBU: 26
SRM: 5
Ingredients
1 lb. 5 oz. Crip’s Best Ale Malt
11 oz. Pilsner malt
1 lb. 10 oz. light dried malt extract
3 lbs. light liquid malt extract (late boil addition)
.75 oz. Cascade hops at 60 mins (3.8 AAUs)
.75 oz. Cascade hops at 30 mins (3.8 AAUs)
.75 oz. Cascade hops at flameout (3.8 AAUs)
.88 oz. Amarillo hops (dry hop)
1 pack Nottingham ale yeast
Extract Directions
Mash crushed grains in a small stockpot in about 3 quarts of water for 45 minutes. Strain wort through a colander or strainer into your brew kettle, then rinse grains with about 1.5 quarts of water at 170˚F. Add 2 gallons of water and start to heat. Once the wort is hot (but not boiling), remove the kettle from the heat to stir in your dried malt extract. Bring wort to a boil and boil for 60 minutes. Add hops according to schedule above. Five minutes before the end of the boil, stir in the liquid malt extract. Transfer wort to a clean, sanitized fermenter and top up with clean water to make five gallons. Aerate, pitch yeast, and ferment at 68˚F. Dry hop with Amarillo hops in the secondary fermenter. Bottle or keg with a target carbonation of 2.6 vols CO2.
—–
David Ackley is a beer writer, brewer, and self-described “craft beer crusader.” He holds a General Certificate in Brewing from the Institute of Brewing and Distilling and is founder and editor of the Local Beer Blog.
Get Sweet On Your Beers: Start Brewing Beer With Honey!
 We put it in tea, we mix it into our lip balm and of course it’s good for baking, but for many homebrewers, honey is also a pivotal ingredient for brewing.
From the “ealu” of Great Britain’s Anglo-Saxons to President Obama’s White House Honey Ale, brewing beer with honey has been an important part of the craft. What makes honey so great is its flexibility for brewers, whether they simply want to use it as a fermentable sugar in their boil, as a source of sweet flavor or even as a priming ingredient.
Honey is great as a medium to connect all the aspects of your homebrew, from the sweet taste of wort to herbal aromas of hops and even yeast esters.
So how can you start brewing beer with honey? Here are three different ways:
Brewing With Honey In The Boil
For many, the high fermentability of honey provides an easy way to add extra gravity to a beer, since the sugar found in honey is almost entirely fermentable. Unless you’re making mead or braggot, you’ll want to make sure honey isn’t more than about 30 percent of all your fermentable sugars in a brew, depending on the level of honey flavor you seek. For best results, the National Honey Board recommends that when brewing with honey, not using more than 2.5 pounds of honey per five gallons.
A key trick is to know when to add honey. If you want to use it in the boil, consider adding it as a late addition. Due to its high fermentability, using honey early on in the boil can dilute the body of a beer and cause a drier finish when drinking your homebrew. Many beer recipes will call for a honey addition at the very end of a boil (in the last five minutes) or at flameout, which is best for retaining the honey’s aromas and flavors.
Brewing With Honey In The Secondary
If you want to avoid using honey on brew day, adding it during secondary fermentation is a good option. It allows you to keep the characteristics of the honey you’ll want to show up in your beer. To eliminate any wild yeasts and bacteria that may be in the honey, it’s important to pasteurize your honey first:
- Preheat an oven to 176°F.
- Pour honey into a sanitized, oven-proof saucepan.
- As the oven preheats, heat the honey on the stove top to 176°F., stirring occasionally.
- Once the honey is 176°F., cover it and put it in the oven for 2.5 hours.
- Place the saucepan in an ice bath to lower the honey’s temperature to match that of your beer and pour it into the secondary.
The reason we heat the honey to 176°F. is that this temperature is hot enough to kill off microorganisms, but not so hot that it drives off the honey’s valuable aromas and flavors.
Brewing Beer With Honey: As A Priming Sugar
While substituting honey for your normal priming sugar may not add a lot of unique flavor, priming with honey does have the potential to add a small layer of complexity to your beer. Just be sure you only adding the honey for priming, as combining it with any other priming sugar can have explosive results.
If priming beer with honey, the honey will need to be diluted with water before adding to your homebrew. Different honeys have different densities, so there’s no uniform amount of water that may be ideal. You may need a small digital scale to weigh out the honey. Most formulas suggest four to five cups of water should be sufficient to mix with the honey.
As a precaution, you can bring the water-honey mix to a boil to kill any potential bacteria, the same as you would when mixing any other priming sugar.
Now that you’re ready to start brewing beer with honey, what to make? If you’re feeling experimental, check out the available beer kits from E. C. Kraus and see which beers you may enjoy with a touch of honey!
—–
Bryan Roth is a beer nerd and homebrewer living in Durham, North Carolina. You can read his thoughts on beer and the beer industry on his blog, This Is Why I’m Drunk, and send him suggestions on how to get his wife to drink craft beer via Twitter at @bryandroth.
How To Test For Diacetyl In Your Beer
 You’re brewing a beer and it tastes just fine after primary fermentation. You move it to secondary, bottle it, and when you go to taste it…butter bomb! This sounds like a problem with diacetyl.
What is Diacetyl?
Diacetyl is a natural byproduct of fermentation. A small amount of diacetyl is acceptable in certain beer styles, most notably in a variety of ales and a handful of lager styles, but most lagers should not present any diacetyl. Excessive diacetyl in any beer can be a defect.
Causes of Diacetyl in Beer
Diacetyl is produced when beer is fermented. Diacetyl can be produced in excess when yeast is stressed, such as when fermentation temperature is too high or wort isn’t sufficiently aerated. Diacetyl can also be caused by bacterial infection.
Determination of Diacetyl in Beer
Diacetyl is detected as a butter taste in the beer’s flavor and aroma.
The challenge is that there may be a diacetyl precursor in a sample of beer that you can’t taste or smell: acetolactate. So how do you test for diacetyl when it isn’t actually present in your beer? How do you catch the diacetyl before it’s too late?
How to Test for Diacetyl in Beer
- Using cleaned and sanitized equipment, pull two small (~2 oz.) samples of wort from the primary fermenter and cover them with aluminum foil.
- Place one in the refrigerator and the other in a hot water bath. The heated sample should rest at 140-160˚F for 20 minutes.
- Place the heated sample in the refrigerator with the other sample (or in an ice bath).
- When both samples are chilled, take them out for a taste. If you can taste diacetyl in the unheated sample, there is diacetyl in your beer. If you can taste diacetyl in the heated sample but not the unheated sample, your beer has acetolactate, which was converted into diacetyl by the high temperature. In either case, do a diacetyl rest. For an ale, this may just be a couple extra days in the primary fermenter. For a lager, you should increase the temperature of the beer to about 60˚F, which will help the yeast “clean up” the diacetyl in your beer.
Tips for Preventing Diacetyl in Beer
- Clean and sanitize equipment thoroughly to prevent infection.
- Shop for beer yeast depending on diacetyl production – check the manufacturer’s website.
- If brewing with a high amount of adjuncts, consider using supplemental yeast nutrient.
- Aerate wort well, using pure oxygen if possible.
- Pitch an adequate amount of healthy, viable yeast.
- Keep fermentation temperature within the yeast manufacturer’s specifications.
- Perform a diacetyl rest after primary fermentation. In the case of lagers, raise the temperature to 60-68˚F for 2-3 days before transferring to secondary and cold conditioning.
Have you ever had issues with diacetyl or a butter taste in your beer? What have you done to remedy the situation?
—–
David Ackley is a beer writer, brewer, and self-described “craft beer crusader.” He holds a General Certificate in Brewing from the Institute of Brewing and Distilling and is founder and editor of the Local Beer Blog.