Yummy Chocolate Milk Stout Recipe (All-Grain & Partial Mash)

Chocolate Milk Stout Recipe
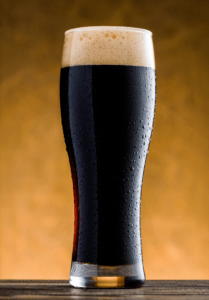
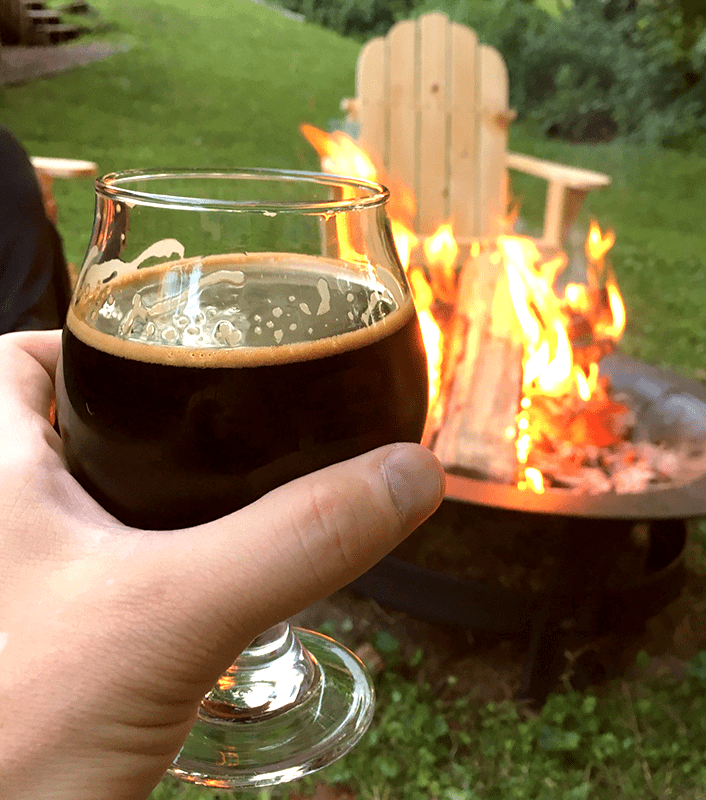
If you’re searching for a thick, luscious dessert beer, then look no further.
Milk stout (a.k.a. sweet stout) is a sub-style of stout noted for its creamy texture and residual sweetness. It’s not actually made with milk. Instead, many brewers choose to use unfermentable lactose sugar in order to achieve that creamy, sweet character.
This chocolate milk stout recipe starts with a basic sweet stout recipe and adds a pound of unfermentable lactose sugar to increase sweetness and body. A generous dose of chocolate malt, plus four ounces of cacoa nibs make for a big chocolate flavor that will remind you (and all your friends) of chocolate milk.

Chocolate Milk Stout Recipe
(5 Gallon Recipe, All-Grain & Partial Mash)
Specs
OG: 1.060
FG: 1.022
ABV: 5%
IBUs: 27
SRM: 36
Ingredients
8 lbs. 2-Row Brewer’s Malt Shop Steam Freak Kits
1 lb. Caramel 80L Malt
1 lb. Chocolate Malt
.25 lb. Roasted Barley
1 lb. Lactose Sugar
1.5 oz. Willamette hops (First Wort Hops)
.5 oz. Willamette hops at :60
1 tsp. Irish Moss at :15
Wyeast 1084: Irish Ale Yeast
4 oz. Cacao nibs (added in secondary)
5 oz. priming sugar (if bottling)
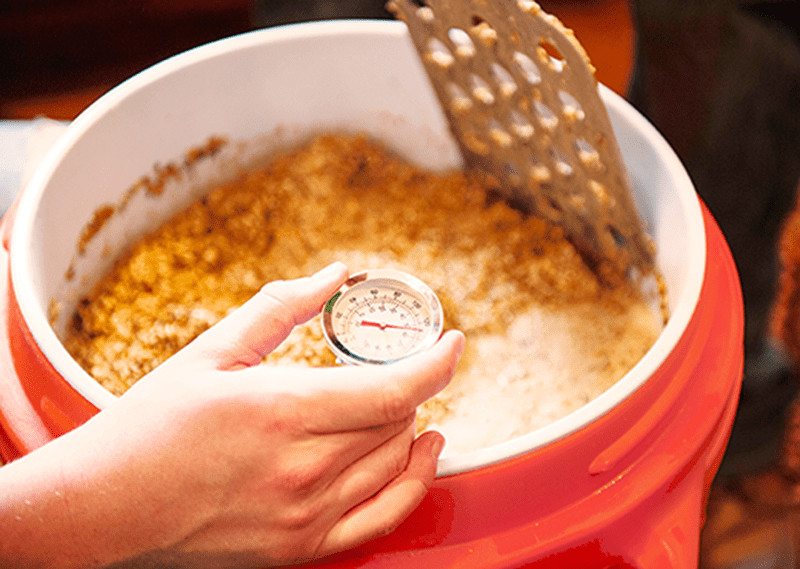
Directions for All-Grain: Prepare a 2L yeast starter. Single infusion mash at 150°F for 60 minutes. Add first wort hops when sparging into the brew kettle. Collect seven gallons of wort. Bring to a boil. Add .5 oz. of Willamette hops at beginning of 60-minute boil. Add 1 tsp. of Irish moss with 15 minutes left in the boil. At the end of the boil, mix in the lactose sugar. Chill wort and transfer to a clean, sanitized fermenter. Ferment at 68°F for seven days, then transfer to a secondary fermenter holding the cacao nibs. Ferment for ten days at 68°F. Bottle or keg as normal.
Directions for Partial Mash: Prepare a 2L yeast starter. Replace the 6 of the 8 lbs. of 2-Row malt with 4 lbs. Light DME. Mash the crushed grains with 1.5 gallons of water at 150°F for 60 minutes. Strain wort into brew kettle and rinse grains with one gallon of water at 170°F. Mix in the DME and top off with enough water to make four gallons. Add the first wort hops and bring wort to a boil. Shop Home Brew Starter KitProceed with recipe as above, topping off with enough clean, sanitized water to make five gallons in the fermenter. Primary fermentation for seven days at 68°F. Rack beer onto cacao nibs in a secondary fermenter and ferment for ten days at 68°F. Bottle or keg as normal.

This is a very easy chocolate milk stout recipe that make a tremendous brew. And, I can’t think of a better time to brew it up then right now! It’s very tasty after big meals making it an excellent choice to serve during the Holidays.
—–
David Ackley is a beer writer, brewer, and self-described “craft beer crusader.” He holds a General Certificate in Brewing from the Institute of Brewing and Distilling and is founder and editor of the Local Beer Blog.

Sparkolloid: When Do You Add It To Wine?

Sparkolloid Fining Powder Was Used On This WineAt what point do I add the Sparkolloid to my wine?
Jerre M. — TN
—–
Hello Jerre,
Thank you for the great question about when to add Sparkolloid to a wine.
Technically, Sparkolloid fining can be added anytime after the wine has stopped fermenting. However, normally it is added after the wine has been treated with bentonite fining. Sparkolloid powder is kind of the left-hook to the bentonite’s right-jab. One works to take out what the other can’t. You will find all the instructions for its use on the side of the container we offer.
Bentonite takes the most particulate out of the wine, so it is typically used first. Once the fermentation stops, a winery will add a dose of bentonite to drop out the the bulk of the proteins. This is mostly made up of yeast cells and tannin. Most would drop out on its own, but the bentonite helps it drop out more quickly.
While bentonite is the best at dropping out large amounts, what it is not particularly the best at is adding a polish to the wine, or getting out that final, last bit of particles. While the wine will look somewhat clear after a bentonite treatment, there are fining agents that can add more polish to the wine. This is where Sparkolloid finings come in. Sparkolloid powder is able to take out finerShop Sparkolloid particles by neutralizing their electrical charge and allowing them to collect and drop out. This increases the luster or brilliance of the wine. For this reason, after a bentonite treatment is when to add Sparkolloid finings to a wine.
Sparkolloid powder is not good at taking out large volumes of particulate matter. For this reason, if you are only using Sparkolloid to fine your wine, then I would wait a month or two after the fermentation, to make sure that what can drop out on its own does so. Once the wine quits improving in clarity on its own, rack it off the sediment and add the Sparkolloid finings.
So, when to add Sparkolloid powder to a wine really depends on whether or not bentonite is being used beforehand. If so, wait about a week and then add it. If you are not using bentonite, then you may need to wait several weeks before the wine has cleared enough for Sparkolloid to be effective.

Happy Winemaking.

Cleaning Your New Brew Kettle

Clean Brew Kettle PassivationYou’ve just purchased a new brew kettle for homebrewing and can’t wait to fire it up. But brewing right away with that new brew kettle may cause some issues with your beer. Before you make the first batch with your new gear, consider this two-step cleaning regimen to prepare your kettle for brewing.

1. Cleaning A New Brew Kettle.
A new brew kettle that just arrived on your doorstep needs to be thoroughly cleaned. Who knows where it’s been before you received it. If it was recently fabricated, there may be some machine oil residue on the kettle. A regular brewing grade cleaner will work well in most cases, but in a rare situation with stubborn residue, your standard kitchen dish soap may be needed. (Note: This is the only time I’ll recommend using dish soap on your brewing gear. The soap can harm the head retention properties of your beer.)
Wash your new brew kettle well. Rinse your kettle very well. Boil some water in the kettle for several minutes, and do a smell/taste test or the water to make sure it comes out clean without any oily or metallic tastes or aromas. Cleaning a new brew kettle is important to having a great-tasting, maiden-batch of homebrew.

2. Passivating A New Brew Kettle.
What? Never heard of passivating a brew kettle? Unfortunately, I didn’t know either until I experienced some strange off-flavors in a couple beers I brewed with a new stainless steel brew kettle. Shop Brew KettlesPassivation is a chemical process that forms a protective layer around the inside of the brew kettle. Stainless steel is primarily made of iron, and passivation is what makes the metal stainless. Iron, interestingly enough, can cause off-flavors, as well as contribute to haze. Passivating a new brew kettle is very necessary for brewing good homebrew beer.
If when you boil water (or beer) in your brew kettle and allow it to dry it out, then see black spots or rainbows, your kettle needs to be passivated. Luckily, this is a fairly straightforward process.
Bottom of brew kettle that needs to be cleaned and passivated.First, you need an acid. Star San is an acid anionic cleaner that’s great for stainless steel. The acid reacts with the metal to form the protective layer inside the brew kettle. Simply sprinkle the Barkeeper’s Friend into the kettle with just enough water to make a thin paste. Spread it around the kettle with a washcloth. After several minutes, rinse the brew kettle very well, and wipe dry with a towel. If the towel comes out clean, you’re in good shape. Allow the new brew kettle to air dry for a few days. The combination of the acid treatment and the air will continue to passivate the kettle.
Just remember, cleaning your new brew kettle and then passivating it are key treatments. Do these two things, and your kettle will reward you with many fine batches of homebrew!
—–
David Ackley is a beer writer, brewer, and self-described “craft beer crusader.” He holds a General Certificate in Brewing from the Institute of Brewing and Distilling and is founder of the Local Beer Blog.

Maple Scotch Ale Recipe (Partial Mash & All-Grain)


Beer Made With This Maple Scotch Ale RecipeIf you like Scotch ales, then here’s a Scotch ale recipe that you will love! It’s a classic brew with an eclectic, maple twist that will have you reaching for another.
There are few flavors that are as unique and delicious as maple syrup. Whether it was pancakes, waffles, or French toast, you probably grew up with maple syrup along with your favorite Sunday breakfast. Lucky for you, maple syrup can also be used in your homebrew!
The high fermentability and unique flavor of maple syrup make it work well with a number of beer styles, especially those that feature malt flavors. A maple brown ale is a popular combination, but today’s beer recipe pairs it with a Scottish ale.
Scotch ales are known for being malt forward with notes of caramel. Generally, they have low IBUs, though a small amount of roasted barley may enhance the perception of bitterness. Rather than deriving caramel flavor from caramel malt, all-grain Scotch ale recipes often involve taking a portion of the first runnings from the mash and boiling them down to develop caramelization. As one might imagine, these caramel flavors work well with the maple syrup.
Some brewers recommend using grade-B maple syrup, which has a stronger maple flavor, but typical grade-A syrup you might use on your pancakes will work too. Just be sure to use all-natural, 100% maple syrup if you want to avoid putting artificial colorings, flavors, and preservatives in your brew. Due to the high sugar content of maple syrup, it will ferment out almost completely, leaving behind a hint of that sweet maple flavor. Enjoy!

Maple Scotch Ale Recipe
(5.5-gallon batch, partial mash)

Specs 
OG: 1.046
FG: 1.010
ABV: 4.7%
IBUs: 15.5Shop Steam Freak Kits
SRM: 12
Ingredients 
7 oz. German Munich malt
4 oz. Caramel 20L malt
2 oz. Roasted barley
3.3 lbs. light LME
2 lbs. amber DME
.5 oz. Magnum pellet hops at :60 (6.1 AAUs)
3 cups maple syrup
1 pack Mangrove Jack’s US West Coast Yeast
Partial Mash Directions: 
In a small stockpot, mash crushed grains at 156°F. in 1.25 qts. of clean, chlorine-free water for 60 minutes. Strain mash through a colander into boil kettle to remove grains, then rinse them with 1 qt. water at 170˚F, collecting runoff in the kettle. Add malt extract and enough water to make three gallons. Bring to a boil. Add Magnum hops and boil for 60 minutes. At end of boil, turn off the heat, mix in maple syrup, then whirlpool and chill wort to 60˚F or below. Pour wort into a clean, sanitized fermenter with enough cool, clean, chlorine-free water to make 5.5 gallons. Stir well to aerate. Pitch yeast and ferment at 58˚F for at least two weeks. Bottle or keg and carbonate for about 2.5 volumes CO2.
All-grain option:   Shop Home Brew Starter Kit
Replace the malt extract with 7.2 lbs. pale ale malt. Mash grains at 156˚F for one hour. Halfway through the mash, remove two gallons of wort and boil it to condense into one gallon. This will develop caramelization. Sparge to collect a total of 7 gallons of wort, including the one gallon of caramelized wort. Boil for 30 minutes, then add Magnum hops. Boil for 60 minutes and proceed with recipe above.
Do you have a favorite Scotch ale recipe you’d like to share with us. We love to see what other homebrewer’s got cookin’.
—–
David Ackley is a beer writer, brewer, and self-described “craft beer crusader.” He holds a General Certificate in Brewing from the Institute of Brewing and Distilling and is founder of the Local Beer Blog.

Avoiding The Green Beer Taste: Conditioning & Aging

Conditioned Homebrew With No Green Beer TastePatience. It’s one of a homebrewer’s many virtues, and a necessity for avoiding a green beer taste.
After bottling or kegging a batch of homebrew, it’s very difficult to resist sampling the beer before it’s ready. But your patience will be rewarded by giving the beer the time it needs to improve before you drink it. This waiting period – usually two or three weeks at a minimum – is referred to as conditioning or maturation. Beer that is too young is called green beer because of the way it tastes.

What is green beer? What is the green beer taste?
Green beer is beer that isn’t ready to drink yet. Though beer almost always gets better with time, tasting the beer early can be a good exercise to learn just how drastically time can change the beer. If you’ve ever tasted your original gravity wort sample, that’s pretty close to the green beer taste. The bitterness is very strong. The flavors just don’t blend together very well. What may be perceived as a fault or an infection may just be an indicator that the beer needs more time to condition. Aging will help to make the beer taste better!

What happens during conditioning?
Conditioning is really just a fancy word for aging. What we call green beer needs time before it’s ready to drink. Some conditioning takes place during secondary fermentation. Yeast consumes some byproducts of fermentation (like diacetyl), which removes some undesirable flavors from the homebrew, making the beer taste better. The yeast and other particles settle out of suspension, resulting in a clearer beer. Other flavors from the malt, hops, and yeast have time to meld together.
Conditioning also takes place in the bottle or keg. The beer carbonates and flavors continue to develop. If you’ve used priming sugar, the yeast will float around eating it up and producing carbon dioxide. This carbon dioxide not only create bubbles in the beer, it helps to drive off oxygen, which has the potential of making your beer go stale. The yeast will settle out in time.

At what temperature should I condition my homebrew?Shop Conical Fermenter
Many beers go through a warm conditioning period and cold conditioning period. “Warm” or “cold” is relative to the beer style being made. Secondary fermentation, what might be considered a warm conditioning period, usually happens at or near the normal fermentation temperature for the homebrew. For lagers, a diacetyl rest (a couple days at about 55-60˚F) can be used to reduce buttery diacetyl flavors in the beer. After bottling, beer should be held at room temperature for about two to three weeks to allow the yeast the carbonate the beer.
The green beer taste is often improved by a cold conditioning period. During cold conditioning, flavor and clarity continues to get better. Cold conditioning can happen at temperatures as low as freezing, though I find that giving bottles several days in the refrigerator can make a big difference. Sometimes it’s easier said than done!

How long should beer be conditioned and aged?
That depends on the beer style. Most ales of moderate gravity only require a couple weeks of conditioning to remove the green beer taste. Hoppy beers are generally best consumed fresh. High gravity beers on the other hand tend to get better with some age. Barley wine, imperial stouts, doppelbocks, and other beers with high alcohol content may continue to improve over the course of a year or longer. Try saving a few bottles of each batch to sample three, six, or twelve months down the road to learn what time can do you your homebrew.

What’s the best environment for conditioning?
Shop Home Brew Starter KitThe keys to reducing the green beer taste in your homebrew are a steady, moderate temperature during warm conditioning (so the yeast can carbonate the beer) and steady, cold temperature for cold conditioning. It’s also important that it’s dark during the conditioning phase, otherwise beer can become light-struck or skunked.

Conclusion
Proper conditioning makes all the difference between delicious homebrew and one with an icky green beer taste. The next time you break into your batch early, remember, it will likely get better with age.
How do you condition your homebrew?
—–
David Ackley is a beer writer, brewer, and self-described “craft beer crusader.” He holds a General Certificate in Brewing from the Institute of Brewing and Distilling and is founder of the Local Beer Blog.

Some Hot Info For Brewing Beer With Coffee

Coffee Beans For BrewingI used to drink coffee, but haven’t had the stuff in years. I loved the aroma and flavor, but hated depending on it to function in the morning.
These days, the only time I drink coffee is when it’s in my beer.
Coffee porter, coffee stout … I’ve even had a coffee IPA. For fans of both beer and the caffeinated drink, there are lots of great options. So how can you mix the two for homebrewing? It’s easier than you think.

Choose a Style
The first step for brewing a beer with coffee is determining what kind of base style you’d like to use. These days, brewers are all over the map with what kind of beer they’ll add coffee to, but classic examples include Founder’s Breakfast Stout, brewed with Sumatra and Kona coffee, and Kona’s Pipeline Porter, which uses Kona coffee as well.
You’ll often see coffee beers use a malt-forward base, as coffee flavors match the profile of roasted barley and chocolate malt very nicely. There are a lot of great stout and porter kits you can use as your base, but consider an imperial stout or robust porter for ideal pairings.
That said, experimentation is the beauty of homebrewing, so maybe an American pale ale with coffee is more up your alley. When it comes to brewing beer with coffee everything is open to one’s own interpretation.

Pick a Coffee
Once you know the style of homebrew you’d like to use, you’ll want to pick a coffee that matches nicely. Not all coffee beans are the same.
Coffee PorterTechnically speaking, any style of coffee will work, but you may have specific tastes or even strength you prefer. Espresso will be much stronger in perceived coffee flavor than a “cinnamon roast” coffee bean, which might offer more nut-like flavor. The National Coffee Association has a great list of roasts – from light to dark – that may help you find the kind you want.
One thing to be aware of when brewing beer with coffee is the oil content of beans, as it may impact head retention and mouthfeel of your homebrew. Depending on the beer style you’re using, that may or may not be an issue. An imperial stout, for example, isn’t as reliant on a big stack of foam as a pale ale.

Adding Coffee To Beer

Depending on the intensity of coffee flavor you seek, you may be interested in adding coffee to your boil, but the best way to get that roasted taste is in secondary fermentation. To maximize flavor without too much astringency, try cold brewing coffee.
Making a cold brew coffee is easy. Take a cup of ground beans and mix with four cups of cold or room temperature water. Let it sit for 12 to 24 hours, strain the coffee grounds from the water and you’re set. You’re left with less acidic, more flavorful coffee.
Shop FermentersKeep in mind the risk for infection is fairly low as long as you properly sanitize whatever the cold brewed coffee touches.
As an alternative, you could also place ground coffee beans into a muslin bag and steep them like a tea for up to seven days in your secondary. Just make sure to sample your beer as the ground beans steep to make sure you achieve the right amount of flavor you’re looking for.
Ready to start brewing beer with coffee? Check out the Captain Cogsworth Coffee Stout, which has all the ingredients prepared for you.

Bryan Roth is a beer nerd and homebrewer living in Durham, North Carolina. You can read his thoughts on beer and the beer industry on his blog, 
This Is Why I’m Drunk, and send him suggestions on how to get his wife to drink craft beer via Twitter at @bryandroth.

How to Make Hard Cider

Hard CiderCompared to homebrewing beer, making hard cider at home is a much easier process. Since there’s no mash and no boil, it can be less labor intensive as well. Plus, you’ll be able to use the equipment you have on hand already, so why not give making hard cider a try? Read more to learn how to make hard cider at home with this 5-gallon recipe.
Hard cider used to be quite a popular beverage in the US. Remember Johnny Appleseed? All those apples weren’t just for apple pie! Up until prohibitionists and temperance unions started demonizing the consumption of alcohol, hard cider was about as popular as beer, if not more so. Everybody knew how to make hard cider.
Today, craft cider is riding on the heels of the craft beer movement, taking up more and more shelf space every year. Craft cideries are popping up all over the country. You’ve probably seen, and maybe even tried, ciders from Woodchuck and Crispin.
The most basic hard cider recipe requires just two main ingredients: apple juice, and yeast. There are a limitless number of variations on cider, plus some additional items that might come in handy for achieving certain characteristics. For now, let’s go over the basics of making apple cider.

Apples, Juice, or Cider?
Fall means apple season! If you’re lucky enough to live near some apple orchards, you have a fresh local ingredient in abundance right now. Ask your local apple farmer what varieties will work best for making hard cider. Cider makers often use blends of different varieties to produce a cider. Get yourself a fruit press or find some fresh, unpasteurized apple cider at your local farmers market.

Even if you don’t live near an apple orchard, chances are that your local grocery store carries soft (non-alcoholic) cider this time of year. Choose a cider that has no added flavorings or preservatives.

If you can’t find either of the above options, pure, 100% apple juice will work, too.

Yeast
Many of the yeasts used in brewing beer or making wine will work for making hard cider at home, too. Wine and champagne yeast have a higher alcohol tolerance and tend to finish dry. For a sweeter, fruitier cider, use an ale yeast, such as Nottingham. Wyeast 4766: Cider and Red Star Pasteur Blanc are both suitable for higher gravity ciders. Fermentis SafCider AB-1 yeast creates a balanced cider, you can create a crisp and aromatic drink with the AC-4 yeast, or go for a sweeter cider with the AS-2 yeast.

How To Make Hard Cider
Unless you want to take chances with a spontaneous fermentation of your hard cider, it’s important to stabilize your juice before pitching yeast.
If using filtered apple juice from the store, you will first heat the juice to stabilize it. Hold the juice at 180°F for 10-20 minutes. Let it cool, then pitch your yeast as directed on the package. Proceed as you would normally for a regular batch of homebrew, being sure to do a secondary fermentation.

If using fresh cider from the farmer’s market, use a crushed Campden tablet to stabilize the must. This will ensure that there aren’t any wild yeasts or bacteria interfering with your fermentation. Pitch your yeast as directed and proceed as above. That’s how to make hard cider. It’s really that simple.

Hard Cider Recipe (5 Gallons)
from Homebrewing for Dummies
5 gallons preservative-free apple juice
1 packet Nottingham ale yeast
2 oz. yeast nutrient Shop Fermenters
Primary fermentation: 8 days at 70°F
Secondary fermentation: 21 days as 70°F
If desired, add priming sugar at bottling time for a sparkling cider, however if you do this make sure you bottle in beer bottles or Champagne bottles. Regular wine bottles will not hold the pressure.

Have you ever tried making hard cider before? How did it turn out? Do you have any information you’d like to share on how to make hard cider?

—–
David Ackley is a beer writer, brewer, and self-described “craft beer crusader.” He holds a General Certificate in Brewing from the Institute of Brewing and Distilling and is founder and editor of the Local Beer Blog.

Protein Rest: How Long, Temperature, And Other Guidelines…

Taking Protein Rest TemperatureOn a basic level, mashing is a very straightforward part of homebrewing: simply soak the crushed grains in hot (146-160˚F) water for an hour to extract the fermentable sugars. Occasionally though, a homebrewer may want to employ a protein rest, a short mash step at a lower temperature before raising it to the normal range. Here is some additional information on this topic, including how to do a protein rest.

What is a protein rest? When and why should you do it?
A protein rest is a short mash at 113-131˚F used to activate certain enzymes in the malted grains that break down protein chains. The homebrewer will simply mash in at a lower temperature than usual do the protein rest. As to how long to do a protein rest, it’s usually only about 15-30 minutes. After that the temperature is then raised to the normal mash temperature (also known as the saccharification rest).
Why break down protein in the beer? Randy Mosher explains:

“At 113-131˚F, proteolytic enzymes chop up some of the long protein molecules into smaller chunks. The length of a protein (or fragment) determines whether it will contribute to the body of a beer, aid in head formation and head retention, or simply be a nuisance as a haze former when the beer is chilled.”

Mosher goes on to say that in most cases, modern malts do not need a protein rest. In fact, John Palmer points out that “using a protein rest on fully modified malts tends to remove most of the body of a beer, leaving it thin and watery.” But if you experience issues like chill haze, it may be worth doing.

Are there certain styles of beer that deserve a protein rest?
Shop Brew KettlesAs a matter of fact, yes. Most of your homebrews will probably not need a protein rest, but there are a few exceptions:

  • Those that use less-modified malt.
  • Traditional styles such as a traditional American lager or Munich Dunkel.
  • When decoction mashing.
  • When using a high proportion of unmalted grain. (25% or more)

Since most malts on the market these days are well-modified, you may never need to do a protein rest. But if attempting to brew a style authentically, a protein rest may be in order.

How to Do a Protein Rest
If you have a heated mash tun, doing a protein rest is easy. Simply raise the temperature mash from step to step. This is called a step mash.
If you use a mash tun cooler, a protein rest is a little more tricky. How to raise the mash temperature from the protein rest to the saccharification rest? The best way is to divide your mash water. Use about half of it for the protein rest, then heat the remaining water and add it in to raise the overall temperature of the mash to the target saccharification temperature. This is called a decoction mash.
Calculating the appropriate temperatures can be a challenge. I recommend using some brewing software to help with the calculations, but here’s an example from a batch I’m brewing this week. This should giving you a little better understanding of how to do a protein rest:
Target protein rest temp: 122˚F
Target saccharification rest temp: 154˚F
Pre-boil volume: 6.75 gallons
Mash procedure:

  1. Dough in using 11.5 qts water at 148˚F. Hold at 122˚F for 15 minutes.Shop All Grain System
  2. Add 10 qts. water at 190˚F to raise temperature to 154˚F. Hold for 60 minutes.
  3. Add 10 qts. water at 207.5˚F to raise temperature to 168˚F for mash out. Hold for 10 minutes.
  4. Sparge with approx. 5 qts. water at 170˚F to collect about 6.75 gallons of wort.

The exact numbers will depend on your equipment and your beer recipe, but this should give you a good idea of how to incorporate a protein rest into your homebrew procedure.
Whether you’re a homebrewer that uses a step mash or decoction mash, doing a protein rest can be a great way to add a different dimension to you brews. How long should the protein rest be? At what temperature should the protein rest be at? These are all questions for you to answer. Just take good notes and follow the guidelines laid out here and you’ll do fine.
—–
David Ackley is a beer writer, brewer, and self-described “craft beer crusader.” He holds a General Certificate in Brewing from the Institute of Brewing and Distilling and is founder of the Local Beer Blog.

The Power Of Taking Home Brewing Notes

Home Brewing PressFor beginning homebrewers and casual hobbyists, taking home brewing notes may not be much of a priority. The most important thing, after all, is that it should be fun, right? But most brewers will reach a point when they want to enhance their craft and take their homemade beer to the next level. Taking good home brewing notes is one of the best and easy ways to accomplish this.
Keeping a home brewing log of some sort has several advantages, just a few of which are listed below. Among other things, taking notes while brewing allows you to:

  • Record your beer recipes
  • Modify recipes for future batches
  • Recreate beers that came out well
  • Improve beers that didn’t
  • Track procedures, recording methods that work and those that don’t
  • Record tasting notes to help remember some of your favorite brews and identify potential problems

Taking home brewing notes allows you to look back on a brew that came out well and recreate it. On the other hand, when something goes wrong, having a beer brewing log of some sort can provide insight as to what might have gone wrong. Either way, taking good notes will help you make better beer in the long run.

Tips for Taking Good Home Brewing Notes

  • Take notes while you brew, or immediately afterwards. I know that if I wait until the next day to take notes, I’ll without a doubt forget some details. (Was that 1 teaspoon or 1 tablespoon of gypsum I added to the mash?) The sooner you log these details the better.
  • Keep a notebook for writing down home brewing notes, then transfer to a spreadsheet or home brewing template with all your other beer recipes and notes. Having consistency in the way you log your home brew will make it easier and more routine for you with each passing brew.Shop Beer Recipe Kits

What to Record in Your Home Brewing Notes
Beginning brewers might want to start by recording the following basics:

  • Record the recipe and ingredients, including the weight and type of all the ingredients, the time of each hop addition, and the strain of beer yeast used.
  • Include dates for brew day, transfer to secondary (if applicable), and bottling/kegging date.
  • Record both original gravity and final gravity so you can calculate alcohol content.
  • Amount and type of priming sugar used for bottling.
  • Tasting notes – Record the date of the tasting and common characteristics: aroma, appearance, flavor, mouthfeel, and overall impression. (Tip: Save a bottle or two of your brew for a tasting at a later date. You might be surprised how beers can change over time!)

Partial mash and intermediate brewers may want to log a few more details in their notebook:

  • Specialty grains used, if applicable
  • Water to grain ratio if doing a partial mash
  • Temperature of mini-mash, if applicable
  • Water amendments, if applicable
  • Fermentation notes, including duration of fermentation and changes in the fermentation temperature
  • If kegging and force carbonating your beer, record the amount of CO2 used or amount of pressure, the temperature of the beer in the keg, and the length of time under pressure

Shop Homebrew BooksFinally, all-grain brewers should keep the most detailed home brewing notes of all. In addition to the items above, they may want to record the following:

  • Gravity of first wort runnings
  • Extract efficiency
  • Pre-boil gravity
  • Post-boil gravity
  • IBUs
  • Size and type of yeast starter

Do you take good home brewing notes? Do you keep a beer log of some sort? What items do you record that aren’t listed above? Do you have a home brewing note template you like to use? Share in the comments below!
—–
David Ackley is a beer writer, brewer, and self-described “craft beer crusader.” He holds a General Certificate in Brewing from the Institute of Brewing and Distilling and is founder of the Local Beer Blog.

5 Easy Beer Recipes for Beginners

Making Beer Recipes For BeginnersSo you’ve just started homebrewing. Congrats! Now, what should you brew? With a seemingly endless list of possible beers to brew, where do you start? What homebrewing ingredients should you get?
Here are some easy beer recipes for beginners. These are some of the best, basic homebrewing recipes:

  1. HefeweizenThe German-style wheat beer is often a “gateway beer” for beginning brewers. The traditional weizen yeast strain produces flavors of banana and clove. Want more clove? Keep the fermentation on the cool side. More banana? Let the fermentation temperature push to the upper end of the acceptable range, about 64-75˚F. Either way, this is a beer style that’s a great companion to warm weather, goat cheese, and citrus-flavored foods.
  1. Brown AleBrown ale can be a great middle-of-the-road homebrew to enjoy year-round. It’s a malty brew, but the hop character can Shop Steam Freak Kitsvary depending on your taste. American brown ales tend to have more hop flavor and aroma than English brown ales. Try a nut brown ale to highlight the nutty flavors of some specialty malts. Of these beer recipes for beginners, this one is my favorite.
  1. StoutStout may be the most forgiving of beer styles, due in part to the roasty malt flavors and dark color that come the use of from chocolate malt, black malt, and roasted barley. This means most stouts are easy beer recipes for beginners. These attributes can also come from dark liquid malt extract or dark dry malt extract. Depending on your tastes, you can brew a dry stout, sweet stout, imperial stout, tropical stout, or even a chocolate milk stout. Whatever you do, be sure to have some Irish stout on hand for St. Patty’s Day!
  1. KölschKölsch is a great option for the homebrewer who enjoys a lighter, more delicate beer. It’s about the closest thing to a light lager while still being an ale, featuring a clear, golden color, a respectably prominent hop flavor, and a crisp, dry finish.  When brewing a German Kölsch, just make sure you can maintain control of fermentation temperatures from about 60˚F on down to about 40˚F for an authentic character. Here’s some more tips on brewing a Kölsch.
  1. Chipotle PorterAll beginning brewers reach a point Shop Home Brew Starter Kitwhere they want to branch out and experiment. If you like spicy foods, then this beer recipe is a great option. Just take a smoked porter recipe kit and add a small can of rinsed chipotle peppers to the boil. If the beer turns out too hot, just give it some time to age.

If you’re still not sure what to make, on our website we have a list of some of the best basic beer recipes for beginners. They list all the homebrewing ingredients.
Do you have an easy beer recipe that would be good for first-timers? Please share it below.
—–
David Ackley is a beer writer, brewer, and self-described “craft beer crusader.” He holds a General Certificate in Brewing from the Institute of Brewing and Distilling and is founder of the Local Beer Blog.