Sweet! Home Brewing With Chocolate

Home Brewing With Chocolate
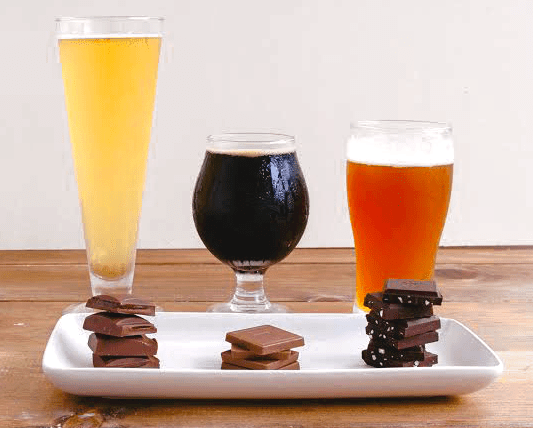
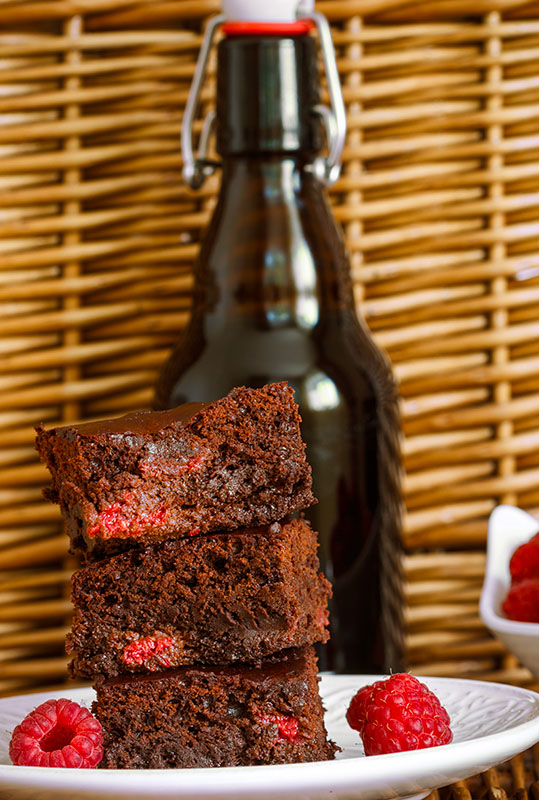
Among the many different herbs, spices, and flavor additives that can be used to make creative and intriguing homebrews, chocolate is one of the most tantalizing. Is it chocolate’s antioxidant power? Its aphrodisiac properties? Whatever the reason, millions of people around the world find chocolate irresistible, so why not put it in beer?
When home brewing with chocolate, it’s important to consider the balance between the chocolate and flavors of the base beer style. You would probably use a light hand if adding a note of chocolate to a pale ale, for example, but for a porter or a stout, you can be more liberal, as the chocolate will blend into the dark roasted flavors of the darker beer. Most people eat chocolate that has been sweetened, so you also consider supporting the chocolate flavors with some sweet caramel malt, unfermentable lactose sugar, or residual malt sugars derived from a higher mash temperature.
It’s also a good idea to think about the color impact of home brewing with chocolate. “Dry-hopping” your beer with cacao nibs will impart less color than boiling cocoa powder or baker’s chocolate. Again, brewing a chocolate porter or stout will leave more room for error than a paler beer style.

Below, find six of the best ways for home brewing with chocolate:Shop Beer Flavorings

  1. Chocolate malt – Before experimenting with adding actual chocolate to your beer, be sure to consider the possibilities of achieving the flavor your want with chocolate malt. No, chocolate malt isn’t made with chocolate. A skilled maltster is able to manipulate roasting temperatures to bring out chocolate flavors, yet keep the malted barley from tasting too burnt or bitter. Chocolate malt is roasted beyond the sweeter caramel malts, but shy of the more heavily roasted black patent malt or roasted barley. Use chocolate malt for as much as 10% of the grist in porter and stouts. In smaller amounts, it’s also an effective way to adjust beer color. Also consider experimenting with chocolate wheat and chocolate rye.
  1. Chocolate syrup – Chocolate syrup is a convenient and effective means of adding chocolate flavor to your homebrew. It can be adding directly to the boil or during secondary fermentation. Due to its sugar content, it can even be used for priming (1 cup per five-gallon batch). For best results, make sure the syrup is fat-free.
  1. Cocoa powder – Cocoa powder is the finely Shop Malted Grainsground, unsweetened beans of the cacao plant. Cocoa powder can be added to the mash or the boil, but contributes a fairly subtle flavor and may have problems dissolving. Double check to make sure your powder is made from pure cocoa, and start by using two to four ounces in a five-gallon batch.
  1. Chocolate bars/baker’s chocolate – Chocolate bars can also be added to the boil, but be careful what kind you use. Many of these bars have high fat content or other additives that can negatively affect your beer. For best results, melt the bars before mixing into the kettle. Use 2 oz. of baker’s chocolate as a starting point for a stout.
  1. Chocolate liqueur – Chocolate liqueur, often sold as crème de cacao, is a great way of adding chocolate to your homebrew. It’s sterile, and it offers the ability to add measured doses of chocolate flavor post fermentation. Read more about Bottling Homebrewing with Flavored Liqueur.
  1. Cocoa nibsCocoa nibs are roughly crushed cocoa beans. They’re great for “dry-hopping” your beer to give it a subtle, nutty chocolate flavor. Shop Steam Freak KitsWhen used this way, they impart little color to your beer. Three or four ounces of cocoa nibs is a good starting point for a five-gallon batch.

Interested in trying your hand a home brewing with chocolate? Try this Chocolate Milk Stout!
—–
David Ackley is a beer writer, brewer, and self-described “craft beer crusader.” He holds a General Certificate in Brewing from the Institute of Brewing and Distilling and is founder and editor of the Local Beer Blog.

Hennepin Clone by Brewery Ommegang

Hennepin BeerAmong the best Belgian-style brewers in America, Brewery Ommegang stands out as one of the first breweries of the modern craft beer movement to specialize in brewing Belgian beer. Founded in 1997 in Cooperstown, NY, it produces such amazing beers as Rare Vos and Three Philosophers, as well as a series of beers inspired by the hit HBO show Game of Thrones.
Named for the first European to “discover” Niagara Falls, Hennepin is a farmhouse saison, bright gold, dry, and spicy, with an alcohol content of 7.7% ABV. It uses Belgian candi sugar to increase the alcohol content while maintaining a dry finish, and exotic spices like ginger and orange peel to create a complexity that might cause one to compare it to a dry, floral, white wine.
If this sounds like something you’d like to brew, read on for a recipe!

Hennepin Clone Beer Recipe
(5-gallon batch, extract)
OG: 1.070
FG: 1.008
ABV: 8.0%
IBUs: 24
Ingredients
6.6 lbs. Muntons light malt extract syrup (use two 3.3 lb. cans)
0.5 lb. light malt extract powder
2 lbs. light candi sugar (use two 16 oz. packages)
1.25 oz. Styrian Gold hops at :60
1 tsp. Irish moss at :15
1 oz. dried ginger root at :15
1 oz. bitter orange peel at :15Shop Beer Flavorings
0.5 oz Saaz hops at :2
Wyeast 1762: Belgian Abbey ale yeast or Mangrove Jack’s Belgian ale yeast
0.75 cups priming sugar

Directions
Dissolve the malt extract and candi sugar in three gallons of hot (not boiling) water. Bring to a boil, then add the Styrian Gold hops and Irish moss. Boil for 45 minutes, then add the ginger root and orange peel. Boil for 15 more minutes, adding the Saaz hops during the last two minutes of the boil.
Cool wort to 80˚F or below and transfer to a clean, sanitized fermenter. Add enough clean, filtered water to make 5.5 gallons. Stir well to mix and aerate, then pitch yeast when wort is about 70-75˚F. Ferment at 68-70˚F until complete. Optionally, transfer to a secondary fermenter after about 5-7 days.
On bottling day, dissolve priming sugar in two cups hot water, allow to cool to room temperature, and pour into a clean, sanitized bottling bucket. Transfer wort to bottling bucket, leaving behind any yeast sediment in the fermenter. Fill bottles and cap, then condition for 2-3 weeks. Serve in a stemmed goblet or chalice glass.

All-grain directions:
Substitute the malt extracts with 7 lbs. pilsner malt and 2 lbs. pale malt. When mashing, perform a step mash: 30 minutes at 122˚F and 60 minutes at 152˚F. Sparge and lauter, mixing candi sugar into the wort in the boil kettle. Reduce the first hop addition to one ounce, then proceed with recipe above.

What makes this Hennepin clone recipe so special is that it is a little off the beaten path. It a unique beer that is produced in a unique style. This makes it a fun brew to make. Oh, and did I mention it tastes outstanding!
—–
David Ackley is a beer writer, homebrewer, and self-described “craft beer crusader.” He holds a General Certificate in Brewing from the Institute of Brewing and Distilling and is founder of the Local Beer Blog.

Bottling Homebrew with Flavored Liqueurs

Beer With Flavored LiqueurDid you know that you can bottle your homebrew beer with flavored liqueurs?
Adding liqueur at bottling time is one way of adding more flavors to your homebrew, especially when making a fruit beer. Liqueurs are lower-alcohol spirits flavored with fruit, herbs, spices, or nuts, and then sweetened. These concoctions are normally used for flavoring cocktails or coffee, but flavored liqueurs can be used for homebrewing, too.
To help get your creative juices flowing, here are some of the common flavored liqueurs that have potential for adding to homebrew:

  • Amaro (herbal)
  • Amaretto (almond)
  • Chambord (raspberry)
  • Cointreau (orange)
  • Crème de cacao (chocolate)
  • Crème de menthe (mint)
  • Crème de mûre (blackberry)
  • Crème de cassis (black currant)
  • Curaçao/Triple Sec (bitter orange)
  • Fernet (herbal)
  • Frangelico (hazelnuts and herbs)
  • Grand Marnier (orange)

Try doing a taste test to see which flavors might work with different beer styles. In his book, Radical Brewing, Randy Mosher mentions having success with Triple Sec, crème de cacao, and Frangelico, among others.Shop Hydrometers

Tips for Adding Flavored Liqueurs to Homebrew

In Radical Brewing, Randy Mosher offers a number of tips for adding liqueur to homebrew:

  • Avoid creamy liqueurs – These will not have a good affect on your beer.
  • Add spices if desired – Optionally, add additional spice flavor by soaking the spices in the liqueur before mixing into the beer.
  • Do a taste test first – Measure out a small sample of beer and add the liqueur in .1 mL increments. Keep in mind that most of the sweetness in the liqueur will ferment out. Scale up when you find the right ratio. For example, if .1 mL liqueur per 1 ounce beer is the magic number, multiply by 128 (ounces in a gallon) then by 5 (gallons in a batch) to arrive at 64 mL of liqueur.
  • Plan for an increase in alcohol content – Two cups of a typical liqueur will add about 1% ABV to your five-gallon batch of homebrew. Plan your beer recipe accordingly.Shop Coffee Stout

How to Bottle Your Homebrew with Flavored Liqueurs
Since liqueurs are sweetened, we need to account for the added sugar. Mosher offers the following instructions for bottling homebrew with liqueur:

  1. Measure the specific gravity of the liqueur with your hydrometer and convert to degrees Plato (% sugar).
  1. Compensate for the specific gravity of the alcohol present, which is less than 1.000. Multiply the proof by .106 and add this to the specific gravity of the liqueur. This number will give the total percentage of sugar in the liqueur.
  1. Take the weight of the liqueur being added and multiply it by the sugar percentage from above. This will give you the weight in sugar being contributed by the liqueur.

Shop Root Beer Extract
Alternatively, you can take the weight needed for priming and divide by the sugar percentage (as a decimal) to arrive at how much liqueur to use for bottling. Just keep in mind that depending on the flavor of the liqueur, you may or may not want to use that much.
Let’s work through an example:
Say you’re brewing Captain Cogsworth Coffee Stout, but instead of priming with coffee and sugar, you use eight ounces (by weight) of a 40 proof coffee liqueur.

  1. Measuring the specific gravity of the liqueur, you get 20˚ Plato.
  2. Multiply the proof (40) by .106 = 4.24˚P
  3. 20 + 4.24 = 24.24˚P
  4. 8 (weight of liqueur in ounces) * .2424 (percent sugar in liqueur) = 1.94 oz. sugar

In this example, the 8 ounces (by weight) of coffee liqueur contributes the equivalent of 1.94 oz. of priming sugar. Adjust your priming sugar addition accordingly.
Alternatively, if you want to prime with just liqueur, take the total amount of priming sugar and divide by the total sugar percentage from above:
5 oz. priming sugar / .2424 = 20.63 oz. liqueur (by weight)shop_liqueur_flavorings
Add 20.63 ounces (by weight, not volume) of the liqueur at bottling time.
You can also experiment with soda pop flavorings if you don’t want to worry about a change in alcohol content or calculating sugar content. These extracts don’t contain sugar, so either add them during secondary fermentation or mix with your priming sugar solution at bottling time to contribute unique flavors to your homebrew.
You can also play around with liqueur flavorings. These are flavorings designed to be added to a spirit to make a flavored liqueur. Instead of bottling homebrew with flavored liqueurs, you can add just the concentrated liqueur flavoring instead.
—–
David Ackley is a beer writer, brewer, and self-described “craft beer crusader.” He holds a General Certificate in Brewing from the Institute of Brewing and Distilling and is founder of the Local Beer Blog.

7 Home Brewing Tips For Beginners

Beginning Home BrewerWith over a million homebrewers in the US, making beer at home is more popular than ever. Who wouldn’t want to make their own beer?
If you are considering getting started in this incredible hobby, check out these seven home brewing tips for beginners to help you get the most out of your new hobby:

  1. Start easy – Don’t make your first batch a barrel-aged, dry-hopped, sour triple bock. There are plenty of extra steps that can be incorporated into your home brewing process once you have a few batches under your belt. But, when you’re just starting out, I recommend you focus on the basics: cleaning and sanitation, avoiding a boil-over, chilling the wort, and regulating fermentation temperatures. It will probably take 2-3 batches just to get the fundamental procedures down and figure out the best way to home brew within your environment. Once the basics are ironed-out, then you can start experimenting with more adventurous beers.
  1. Brew the classics – As a novice homebrewer, you should start by brewing some of the classic beer styles that you know well. This will give you an easy frame of reference for evaluating your beer. Some good beers for your early batches are stouts, porters, and brown ales.
  1. Brew beers YOU like – This is my favorite of the home brewing tips for beginners, and I tell it to all the first time brewers I meet. Remember, homebrewing is supposed to be fun. Brew a beer that you will enjoy drinking, not something just because it sounds wild and crazy. Love Sierra Nevada Pale Ale? Try our Sahara Nevada Pale Ale kit and you’ll have a supply that will last for weeks.
  1. Be extra clean – I can’t stress enough how important it is to be clean with your homebrewing, but that doesn’t mean it has to be difficult. Before brewing, clean all of your equipment with a brewing cleaner, then sanitize everything that will touch the wort after the boil, especially the fermenter and any transfer tubing. To make cleaning for your next batch even easier, clean your equipment again as soon as you’re done with it.
  1. Read a homebrew book – Books are a great investment forShop Homebrew Books someone who’s a beginning homebrewer. While there is a ton of information about homebrewing on the Internet, I find it’s easier to find what you’re looking for in a good homebrewing book. Homebrewing for Dummies is a great book for beginners. Also check out our free ebook, the Ultimate Jumpstart Guide to Homebrewing.
  1. Take notes – You might be surprised how easy it is to forget details from brew day. Just to be safe, write everything down. This will make it easy to repeat successful batches, and in the event that something goes wrong, will help you identify where you need to improve. I like to keep my notes in a spreadsheet, but a good old-fashioned notebook can be just as valuable. Taking notes is one of the easiest ways to make yourself a better home brewer more quickly.
  1. Brew with a friend – There’s a lot to juggle around on brew day, so it can really help to have an extra pair of hands available. Even better, brewingShop Home Brew Starter Kits with friends makes it more fun! Crack open a beer and learn about homebrewing together!

Are you a seasoned homebrewer? What home brewing tips for beginners would you add to the list?
—–
David Ackley is a beer writer, brewer, and self-described “craft beer crusader.” He holds a General Certificate in Brewing from the Institute of Brewing and Distilling and is founder and editor of the Local Beer Blog.

Bell’s Two Hearted IPA Clone Recipe

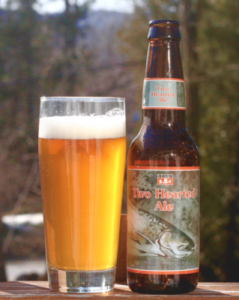
One of the most popular IPAs on the market is Bell’s Two-Hearted Ale, brewed by Bell’s Brewery of Comstock, MI. The beer scores a 95 on Beer Advocate, and if you’ve had it, you know the score is well deserved. In 2011, the American Homebrewers Association ranked Bell’s Two-Hearted IPA the second best beer in the country, second only to Pliny the Elder. All this makes this Bell’s Two Hearted IPA clone recipe a must-brew.
Two-Hearted is hopped with exclusively Centennial hops, an American hop variety that provides a piney, citrusy, and floral character, and is often called a “Super Cascade”. The Centennial hops are added both to the boil kettle and to the fermenter. Bell’s uses a house ale yeast, but California Ale Yeast will work just fine.
The extract beer recipe below comes from the American Homebrewers Association, originally publishing the AHA’s magazine, Zymurgy. I always enjoy seeing proof that simple clone recipes can make beautiful beer.
To brew this Bell’s Two Hearted IPA Clone recipe, you’ll need to review dry hopping techniques (don’t worry – it’s easy!). A full 3.5 oz. of Centennial hops are added to the fermenter for about a week, giving this Two-Hearted clone that spicy, citrusy, super-addictive hop aroma that makes the beer so popular. Give this partial mash clone recipe a try, or see the all-grain recipe below it.
Good luck!

Bell’s Two Hearted IPA Clone Recipe
(five-gallon batch, partial mash)Shop Steam Freak Kits
Specs
OG: 1.063
FG: 1.012
ABV: 6.7%
IBUs: 55
SRM: 10
Ingredients
6.6 lbs. Steam Freak Light Malt
2.5 lbs. Light DME
8 oz. Briess Caramel 40L malt
2 grams gypsum
1.2 oz. Centennial hops at :45
1.2 oz. Centennial hops at :30
3.5 oz. Centennial hops dry-hopped Shop Grain Mills
Wyeast 1056: American Ale Yeast

Directions:
Steep the crushed caramel malt in one gallon of water at 150˚F. After 20 minutes, strain grains from the wort, pouring the wort into a boil kettle. Add enough filtered water to make 6.6 gallons. Mix in malt extracts and gypsum and bring wort to a boil. Boil for 75 minutes, adding hops according to schedule above. At the end of the boil, cool wort, transfer to a clean and sanitized fermenter, and pitch yeast.
Ferment at 66-70˚F. until fermentation slows. Dry hop the beer for one week, then rack to another fermenter and cold age for one week. Bottle or keg as you would normally.

All-Grain Version:

Replace the malt extracts with 10 lbs. two-row brewers malt and 2.83 lbs. pale ale malt. Increase the gypsum addition to 4 grams. Use a step mash procedure,Shop Home Brew Starter Kit starting with 4.5 gallons and holding at 150˚F for 45 minutes, then increasing to 170˚F by adding 2.5 gallons boiling water. Hold for 25 minutes, then mash out and sparge to collect 6.6 gallons of wort. Proceed with recipe as above.
If you’re in love with IPA’s, then this Bell’s Two Hearted IPA clone recipe should be your next brew. It’s an inviting brew with a judicial balance of malt and hops that make it pleasing to the palate.
—————
David Ackley is a beer writer, homebrewer, and self-described “craft beer crusader.” He holds a General Certificate in Brewing from the Institute of Brewing and Distilling and is founder of the Local Beer Blog.

How Long Does It Take To Make Wine?

Woman Wondering How Long Does It Take To Make WineOne of the more common questions we get asked by beginning winemakers is, how long does it take to make wine? And most often they begin to show signs of excitement after we explain to them that it does not take nearly as long to make as they think to make a good batch of wine. In fact, it is very possible to have a wine bottled within a month from the time you begin the wine making process.
Once the wine has been bottled there are some benefits to aging, but a remarkable amount of the improvement can be obtained within the first 30 to 60 days of bottle aging, so it is possible for you to have a very delectable wine within 2 to 3 months from the time you start making wine.
How long it actually takes to make wine depends on what you are using to make the wine. Are you making your wine from grapes? Are you making you wine from fruits? Are you making your wine from wine ingredient kits?
Packaged wine making juices tend to make wines faster than making wine Shop Wine Ingredient Kitsusing fresh fruits. This is primarily because there is no pulp or skins involved. The concentrated juices clear up much faster, allowing the wine to be bottled much sooner. Wine ingredient kit have there own wine making recipes included with them, so it makes it a good option for the first-time winemaker.

So, How Long Does It Take To Make Wine?
Here is an overview of what to expect based on what is being used to make the wine:

  • Winemaking Ingredient Kits:
    Shop Wine PressIf you are making a wine from one of our winemaking ingredient kits you will be bottling your wine in about 4 to 6 weeks, depending on which brand of wine making kit you are using.
  • Winemaking Caon Concentrates:
    When using winemaking can concentrates such as SunCal, Alexander or Country Fair,  you will be bottling your wine in 6 to 10 weeks.
  • Fresh Fruits:
    Because of the pulp involved, it takes longer to make wine using fresh fruits or grapes than it does using packaged juices. Aging can take a little more time as well because of the higher level of tannins and other proteins that are typically in the wine must from the fresh fruit. You can expect to be bottling your wine in about 8 to 12 weeks from the time you started the batch, and also anticipate needing to bottle age the wine at least 3 to 4 months, and sometimes up to a year, depending on the fruit.Shop Wine Making Kits

The amount of time it takes to make a batch of wine can vary somewhat based on the scenario, but all in all, the time needed is usually less than expected. Start off with one our California Connoisseur ingredient kits, and you’ll be drinking wine in 28 days. Or, maybe you have some fresh fruit growing out back. In that case you may want to get our Your Fruit! Necessities Box. Wine making recipes are included.
—–
Ed Kraus is a 3rd generation home brewer/winemaker and has been an owner of E. C. Kraus since 1999. He has been helping individuals make better wine and beer for over 25 years.

What's The Best Mash Tun Design For Homebrewing?

Grains Into Coller Mash TunMaking the switch to all-grain homebrewing involves making some important decisions around equipment. In particular, what kind of mash tun should you get? Which mash tun design is the best? In this blog post, I’ll walk you through the options, but first, what is a mash tun?
A mash tun is simply a vessel where crushed grains are mixed with hot water. During the mashing process, sugars are extracted from the grains and into the liquid, which is called wort. At the end of the mash, the wort is drawn out of the mash tun and into a boiling kettle. A perforated false bottom holds behind all of the spent grain.
Now let’s cover the options when deciding what kind of mash tun design to buy.

3 Basic Mash Tun Designs from Which to Choose: 

1. Brew in a Bag (BIAB)
OK, the first option isn’t exactly a mash tun, but for many homebrewers, it’s the easiest and most economical way to get into all-grain brewing.
The way it works is that a mesh straining bag (grain bag) is fitted into a brew kettle filled with water, then the crushed grains are added to the bag. After the mash (usually 60 minutes), just pull out the bag of grains.
For best results, the water in the brew kettle should be pre-heated before setting up the bag. You want to avoid the possibility of the grain bag coming in direct contact with the heat source, so some bungee cords might come in handy.Brew in a Bag
The bottom line: Brew in a Bag is an economical mash tun design for homebrewing, but requires some effort to keep the grain bag away from the kettle.

2. The Mash Tun Cooler
The mash tun cooler is a great option for all-grain home brewers. Mash tun design is still affordable, yet offers a setup that closely mimics the multi-vessel system used by professional brewers.
The ability to lauter, or shower the grain bed with hot water as you draw off the wort, can help improve mash efficiency over the BIAB method. The mash tun cooler setup also tends to be very efficient at holding heat.
There are just a couple drawbacks with the mash tun cooler system. For one, they’re easily scratched. As a result, they can be hard to clean. These issuesMash Tun can be remedied by being mindful of what you use to clean the mash tun (something non-abrasive – a cloth or rag is best. The other issue with this mash tun design is that you can’t apply direct heat to the plastic mash tun, making it a challenge to do step mashes. To raise the temperature of the mash, you have to add hot water. Dialing this in can be a challenge, but luckily there are online calculators and brewing software available to help you through the process.
The bottom line: A mash tun cooler system is a great middle-of-the-road option for all-grain homebrewing.

2. Stainless Steel Mash Tun
Not only does the stainless steel mash tun look cool, it’s also extremely durable and easy to clean. Most come with a build in thermometer.
The main advantage of the stainless steel mash tun is that you can apply heat directly to the kettle, making it easier to dial in your mash temperature to the degree.
The main drawback of a stainless steel mash tun is the price. But with that price tag you get quality construction that will last a lifetime. A stainless steel mash tun is an Stainless Steel Mash Tuninvestment for the long term, and if you ever want to sell it, you can probably get back most of what you paid for it.
The bottom line: A stainless steel mash tun design is the best option for serious brewers – if you can afford it. 

So what kind of mash tun design do you use? Is it working for you, or do you plan to upgrade?

—–
David Ackley is a beer writer, homebrewer, and self-described “craft beer crusader.” He holds a General Certificate in Brewing from the Institute of Brewing and Distilling and is founder of the Local Beer Blog.

8 Killer Tips For Bottling Beer

Capper For Bottling BeerOf all the processes involved in making beer at home, the one that most often gets in people’s way of enjoying the hobby is bottling process. Why is this?
Maybe it’s the sheer number of beer bottles that have to be cleaned and sanitized. Maybe it’s all the labels that have to come off the beer bottles. Whatever the reason, chances are someone has come up with a way to make it less of a chore. Here are some tips that will help make bottling beer easier.

Tips for Bottling Beer

  1. Start with clean beer bottles without labels – This might not make financial sense for some people, but I believe that a lot of the frustration of bottling beer comes from having to remove labels from the beer bottles you recycle. If you dread the idea of peeling labels from 50+ beer bottles, just go ahead and buy a couple boxes of new beer bottles and save yourself the headache.
  1. Rinse beer bottles as soon as they’re empty – You’ll thank yourself later. This will prevent funk from growing inside the beer bottle, making it much easier to prep the beer bottles for filling. Soak them once in cleanser, soak again in sanitizer such as Basic A, and you’re ready to go. This is my favorite tip for bottling beer. It can save a lot of time!
  1. Use a bottle washer – For the bottles you forgot to rinse out, take advantage of the strong blast of water from a carboy and bottle washer. One oShop Bottle Washerf these will let you rapidly clean a batch of beer bottles in no time flat. Also works great for cleaning out your siphon tubing!
  1. Sanitize bottles in the dishwasher – This is my second favorite tip for bottling beer. Sanitizing your glass beer bottles in the dishwasher can save you a lot of work. Just load them in and set the dishwasher to the “sanitize” or “high heat” cycle. You’ll need to start them well in advance of when you plan to bottle, but at least you can do other tasks in the meantime. This works best if the labels are already removed.
  1. Clear your space ahead of time – This is a good tip for any stage of the homebrewing process, not just bottling beer. Keeping your workspace from getting cluttered will go a long way towards preventing mishaps and making things run smoothly. Take a few extra minutes before bottling to put everything in its place.
  1. Sit down while bottling your beer – I like to hook up my bottle filler to the bottling bucket with a 2-inch section of transfer tubing. Then I can have a seat while filling the beer bottles. It definitely helps to save the back! Also make it easier to grab a swig or two from previously bottled beer.
  1. Enlist a friend – Get a friend or significant other to help and cutShop Bottle Cappers your bottling time commitment in half. One person fills the beer bottles, the other caps the beer bottles. Just be sure to repay them with some homebrew!
  1. Switch to kegging! – OK, this tip for bottling beer is a bit of a cop-out, but if bottling really gets on your nerves, why not get yourself a homebrew draft system? Not only do you avoid bottling beer altogether, you get to drink your beer in three or four days instead of 14!

What tips to you have for bottling beer?
—–
David Ackley is a beer writer, homebrewer, and self-described “craft beer crusader.” He holds a General Certificate in Brewing from the Institute of Brewing and Distilling and is founder of the Local Beer Blog.

My Top 10 Favorite Winemaking Posts

Top 10Another year has passed, and the rear-view mirror is full! I always use this time as an opportunity to reflect on what’s happened. In doing so I have come up with a list of my top 10 favorite wine making posts.
These are wine making post that I feel have been helpful, entertaining and interesting. They are listed in no particular order. You might want to give them a once-over and see if there’s anything that piques your interest:

  1. Keeping Fruit Wines In Fruity Balance
    Learn how: sugar, fruit and alcohol level all come together to create balance in a homemade wine.
  1. 7 Random Winemaking Facts…
    A listing of winemaking trivia that my surprise you. Take a look and see how many of the 7 you already know.
  1. In Plain English: The Difference Between pH And Titratable Acidity In Wine
    Understanding pH and titratable acid is the key to having a wine that tastes great and is stable. This post takes a complicated topic and distilled it down to something that’s easy to understand.
  1. A Simple Guide To Metabisulfites
    Covers the differences among Sodium Metabisulfite, Potassium Metabisulfite and Campden Tablets and how much this difference really matters.
  1. What’s The Difference Between Crushing And Pressing Grapes?
    The blog post clears up some of the confusion surround crushing and pressing. How are they different, and what are their purposes.
  1. How To Handle That Last Bit Of Sediment
    A handy little article the gives some quick pointers about racking your wine — how to do it more efficiently so as to lose less wine with less work.
  1. Is Oxygen Good Or Bad For Wine?Shop Wine Making Kits
    Knowing how to leverage air exposure to your advantage can go a long ways in producing a healthy, stable wine. See how easy it is.
  1. Picking When To Pick
    This is actually a 4 part series of posts that contain some solid information on how to determine the optimal time to harvest your grapes.
  1. What On Earth Is Bottle Shock?
    Learn how bottle shock affect both commercial and homemade wines, particularly after bottling, and how manage this phenomenon.
  1. 5 Myths About Homemade Wine
    Here are the top 5 myths that many non-home-winemakers believe. These are misconceptions that keep many from enjoying this rewarding hobby.

—–
Ed Kraus is a 3rd generation home brewer/winemaker and has been an owner of E. C. Kraus since 1999. He has been helping individuals make better wine and beer for over 25 years.

Try This Trick When You Back Sweeten Wine

Funny Way To Back Sweeten WineI am making European Select Chardonnay. I will be ready to bottle in a week or so. I have not done the stabilization & clarification step yet, which is when I would normally back sweeten wine. Can I complete all the steps, bottle half of it, and THEN sweeten the other half? Will the potassium sorbate added at step 4 or adding some potassium metabisulfite hinder refermentation from adding wine conditioner for sweetness? Or is the your wine sweetener non-fermentable?
Betsy L.
Wisconsin (Go Pack, Go)
—–
Hello Betsy,
Thank you for your questions about how to back sweeten wine.
Your idea of – bottling half; then sweetening half; then bottling – is a great one.Shop Wine Conditioner I have done this more than once. I’ve even divided one of my homemade wines into dry/semi-dry/medium. I think this is a great way to back sweeten wine because if gives you so many more options.
And it’s simple to do. You should have no problems pulling it off. With your 30 wine bottles in play, there’s nothing wrong with giving them some variety by way of sweetness. As you have suggested you are bottling some of the wine, sweetening what’s in bulk than bottling that.
This method of back sweetening a wine works particularly well when you plan on gifting it or sharing it with friends. It gives you a way to tailor the gift to the person you are giving it to. Quite often we want to share our wine with family and friends who are not wine drinkers. Giving them a bottle of wine that is not bone-dry makes good sense.
As for your second question on the potassium sorbate: as long as theShop Potassium Sorbate fermentation has completed and the wine has completely cleared, the potassium sorbate or potassium bisulfite will stop a re-fermentation from occurring in your wine bottles when back sweetening wine, but it is important that the wine be clear first, regardless of what day in the steps you are on. Wait an extra day or two if necessary. It won’t compromise your homemade wine in any way.
I would also suggest using our Wine Conditioner for the purpose of back sweetening the wine, just as you were planning. Wine conditioner is easy to use and has additional sorbate to help stabilize the wine. It will not adversely affect the wine in any way and will help to assure that your homemade wine does not experience a re-fermentation.
You can also back sweeten wine just by adding plain ole sugar. But if Shop Wine Bottle Corkersyou decide to do this, I would highly recommend that you also add another 1/2 dose of potassium sorbate to the wine (1/4 teaspoon per gallon) in addition to what was with your wine ingredient kit. For others reading this, if you have not added any potassium sorbate from a kit or what-have-you, then add a full dose of potassium sorbate (1/2 teaspoon per gallon) when you back sweeten wine.
Happy Winemaking,
Ed Kraus
—–
Ed Kraus is a 3rd generation home brewer/winemaker and has been an owner of E. C. Kraus since 1999. He has been helping individuals make better wine and beer for over 25 years.