Can You Increase The Alcohol In A Wine Kit?

Person who increased alcohol in his wine kitMost red wine kits give a finished wine with 12.0% to 12.5% alcohol. Is it harmful to add additional sugar to the wine kits (with Sp. Gr. control) to increase the alcohol to about 13.5%?
Thanks,

Name: H. Dalesponaugle MD
State: VA
—–
Hello Dr. Dalesponaugle,

By all means, you can increase the alcohol in a wine kit. It will not harm the wine in anyway.

All you need to do is add sugar to the wine during the fermentation. Make sure it gets dissolved completely and does not end up hanging at the bottom of the fermenter. For each pound of sugar you add to a 6 gallon wine kit, you are increasing the potential alcohol by about 8 tenths of a percent (0.8%).

But before you get all excited and run to the store to buy a few sacks of sugar, there are a couple of things you should know:

  1. There are limits to how much alcohol a wine yeast can ferment. Which means there are limits to how much you can increase the alcohol in a wine kit. As the alcohol level of a wine increases, the more the ability of the yeast to ferment is diminished. The ability of the yeast to ferment at higher alcohol levels is is known as the wine yeasts’ alcohol tolerance. Different wine yeast have different tolerances, so it is important that you do not shoot for an alcohol level that is higher than the wine yeasts’ tolerance. There are yeast profile charts are our website that will list the alcohol tolerance.
     
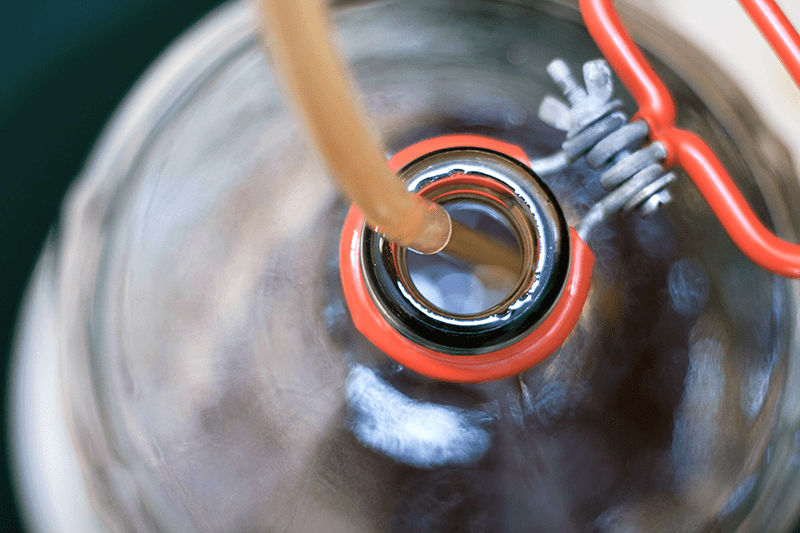
    With this in mind, you should have a specific target alcohol level for your wine kit in mind. Definitely use your wine hydrometer to help you do this. Hopefully, the hydrometer has a potential alcohol scale on it. This hydrometer scale will make it easy. You should also be using a wine yeast that can reach that target alcohol level without stalling out. If the wine yeast stalls out you could end up with a finished wine that is too sweet to drink.
  1. Increasing the alcohol in a wine kit will take its flavor out of balance. These winemaking kits are flavor balanced. They are tested and re-tested before ever going to market. One major component of any wine’s flavor balance is its alcohol. If you increase the alcohol in the wine kit by too much, the wine will taste hot and watery. The extra burn from the alcohol Shop Wine Kitswill reduce the tongue’s ability to taste, giving the wine this watery impression. It will also have less body. There’s another blog post that goes into the subject more thoroughly, Keeping Fruit Wines In Fruity Balance, but for now just understand that more alcohol means less flavor.
     
    Something you could do to experience this for yourself is to take a bottle of wine that you currently have to drink and slowly add measured amounts of grain alcohol to it as you drink it. This should illustrate more clearly what I’m talking about.

So, it is very possible to increase the alcohol in a wine kit. It’s simply a matter of adding sugar to the kit. The bigger question is do you really want to? These win kits are carefully balance. Increasing the alcohol will take it out of balance.

Happy Winemaking,
Ed Kraus
—–
Ed Kraus is a 3rd generation home brewer/winemaker and has been an owner of E. C. Kraus since 1999. He has been helping individuals make better wine and beer for over 25 years.

Simple Style Guide: Oatmeal Stout

Oatmeal StoutIn the world of stouts, Irish stouts are dry and milk stouts are sweet, but oatmeal stouts fall somewhere in the middle. The use of a small amount of oats in the grist give this roasty brew a smooth, somewhat creamy mouthfeel. This is, in essence, what you are looking for when making an oatmeal stout.

Topping Serious Eats’ list of Top 5 Oatmeal Stouts, Samuel Smith’s Oatmeal Stout is a classic. Rich and luscious, flavors of toasted malt and chocolate combine with oats for a smooth finish. A similar beer is made by Highland Brewing Company in Asheville, NC, – an excellent oatmeal porter. Flaked oats give the beer a smooth, silky character. 5.9% ABV, 35 IBUs using American hops, Chinook, Willamette, and Cascade. These are two great examples to seek out when crafting your oatmeal stout recipe.

Brewing an Oatmeal Dry Stout

The key question when making an oatmeal stout is how to add the oats. Oats contribute a little extra body to the beer, but if overused can make the beer seem oily. 5-15% oats is ample for an oatmeal stout, but some grists may include up to 25% in the most extreme cases. As for the oats themselves, flaked oats will contribute the most fermentable sugar and can be added directly to the mash, while raw, steel-cut oats from the store must be cooked, boiled separately before being added to the mash. Some brewers even use a pack of oatmeal from the grocery store – just be sure to avoid those with flavorings – unless you’re going for a cinnamon oatmeal stout, of course!

Grain Bill and Fermentables

An oatmeal stout gets its dark color from specialty grains like chocolate malt and roasted barley. Roasted barley helps to impart the dry, bitter flavor of coffee that stouts are known for, but it must be used sparingly (a maximum of 5-7% of the grist). Reduce the roasted barley in favor of chocolate malt to avoid overly burnt or charcoal flavors.

To accentuate the oatmeal character, Jamil Zainasheff and John Palmer John recommend, “Toasting the oats in the oven at around 300°F (149°C) until they begin to slightly color up and give off a nutty oatmeal cookie character.”

These ingredients can be combined with a standard base malt or light malt extract to form of your grain bill. Your original gravity shouldn’t exceed about 1.065.Shop Dried Malt Extract

Hops

An oatmeal stout is an English creation, so English hops work best when making this beer style. Examples include Kent Goldings, Fuggles, and Target. Shoot for 25-40 IBUs. Hop aroma is low to none, so use restraint in the late hop additions.

Yeast

Oatmeal stouts typically have some mild fruity aromas, which are best delivered by the use of English ale yeast. Safale S-04 is a good dry yeast option. It’s generally recommended to rehydrate dry yeast, and if using liquid yeast, to prepare a yeast starter.

Now you’re ready to make your own oatmeal stout!

Do you have an excellent recipe for making oatmeal stout? Share it in the comments below. What kind of oats do you use, and for what percentage of the grain bill?

Sources: Brewing Classic Styles: 80 Winning Recipes Anyone Can Brew (p. 168). Brewers Association.

—–
David Ackley is a beer writer, brewer, and self-described “craft beer crusader.” He holds a General Certificate in Brewing from the Institute of Brewing and Distilling.

Darn It! My Mead Won’t Ferment!

This is the mead that won't ferment.
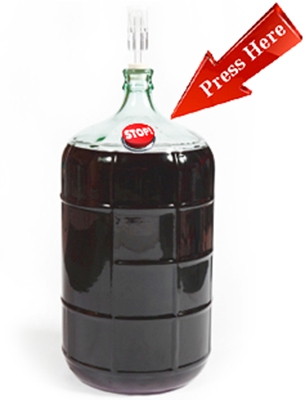
I seem to have a problem making mead. It starts off with an SG [specific gravity] of 1.100 and over a period of 3 days, during primary fermentation it drops to 1.060 and seems to stop. I think that the fermentation has just slowed down and rack it into a secondary fermenter and install an air lock. I rack it a month later and the SG is 1.040. Now it has been three months and the SG is 1.030. Is this normal? Why is it my mead will not ferment?

Thanks Sam
—–
Hello Sam,

Turning honey into alcohol can sometimes be a difficult task for a wine yeast. This is due mostly to the complexity of some of the sugars contained within the honey, but some of it is also due to the set of nutrients that the honey provides to the wine yeast. Both are issues as to why your mead will not ferment, and both need to be addressed.

Honey has simple sugars as well as complex sugars and everything in between. This is true with all fruits as well, but typically not to the degree as with honey. Simple sugars are easily metabolized by the yeast into alcohol, but complex sugars are not so easily fermented. A complex sugar is a chain of simple sugars that are bound together on a molecular level. These long chains must first be broken apart before they can be metabolized into alcohol by the wine yeast.

Enzymes are produced by the yeast during a fermentation that will help to break down the complex sugars, but often in the case of honey, it is not enough enzyme to keep the fermentation going in a timely manner.

Shop Yeast EnergizerHoney has all different lengths (complexities) of sugar chains. So what happens as the fermentation begins, the wine yeast start off by consuming the simplest sugars first — the lowest hanging fruit — so to speak. As the simple sugars are depleted the yeast move on to the next easiest sugars and so on until there is nothing left but the most complex, longest chains of sugars.

This is what has happened with your fermentation. It started off just fine as it began its way metabolizing the simplest sugars, but when the remaining sugars became nothing but the most complex it became too much of a burden for the wine yeast. The enzymes that the yeast were able to produce were not enough to keep the fermentation going at a reasonable rate. All the yeast was able to do was nibble at the remaining long chains of sugar as it slowly produced the enzymes.

So what can you do? Your only defense is to make sure your yeast stays as healthy as possible by providing it with all the nutrients it needs. This will help the yeast to more readily produce enzymes. Many mead recipes will call for nutrients at the beginning of the fermentation. The trouble is that these nutrients will have long been consumed by the time the yeast get to the difficult part of the fermentation.Shop Magnesium Sulfate

At this point, I would recommend adding 1/2 teaspoon of Yeast Energizer for each gallon of mead. This should give the yeast a kick-start. If magnesium sulfate was not called for by the mead recipe, then I would recommend adding it as well at the rate of 1/4 teaspoon per 5 gallons.

Sam, in the future I would make sure that you add both of these at the beginning of the fermentation – regardless of what the recipes says. And if the fermentation starts to slow down at some point, be prepared to add a second dose of yeast energizer.

I hope this have given you some insight as to why sometimes a mead will not ferment. If you would like more information about making mead, you may want to take a look at the article, Making Wine With Honey that is listed on our website. It has some more insights to fermenting honey along with a few mead recipes.Shop Wine Making Kits

Best Wishes,
Ed Kraus
—–
Ed Kraus is a 3rd generation home brewer/winemaker and has been an owner of E. C. Kraus since 1999. He has been helping individuals make better wine and beer for over 25 years.

The Pros & Cons Of Using A Secondary Fermentation For Your Beer

Adding Beer To Secondary FermenterMany homebrewers like to take advantage of a process called “secondary fermentation,” and claim that it improves the quality of their homebrew beer. Secondary fermentation, also known as two-stage fermentation, is simply transferring (“racking”) your homebrew from one fermenter to another. The optimal timing as to when to start the secondary fermentation is up for some debate, but it is about midway through the fermentation process. But why go through the trouble? Is putting your beer through a secondary fermentation really necessary. What are the benefits?
The Pros of Secondary Fermentation for your Beer

Here are a few of the benefits of secondary fermentation:

  • It gets the beer off spent yeast sediment. After two or three weeks, yeast starts to break down and contribute off flavors to your beer. Most homebrewers don’t ferment their beer long enough to cause any noticeably problems, but for those who choose to do a longer fermentation, racking the beer into a secondary fermenter or carboy is highly recommended.
  • It allows the beer to mature. Time allows the malt, hops, and yeast flavors to blend together and balance.
  • It improves clarity by reducing the amount of sediment in the finished beer. Putting your beer through a secondary fermentation allows time for more yeast, hop trub, and protein to fall out of the beer. Adding a fining agent, such as gelatin, into the secondary fermenter can aid in this process significantly.
  • It gives the homebrewer an opportunity to “dry-hop” — or “dry-spice” — their beer. Dry-hopping is just adding hops to the secondary fermenter, which contributes hop aroma to the beer. You can also take this opportunity to add spices, flavorings, wood chips, or other additives to your brew.

The Cons of Secondary Fermentation for your Beer

There aren’t many disadvantages to using a secondary fermentation, but they’re worth considering:

  • It takes a more time and effort. Yes, it takes some time to transfer or rack your beer to a secondary fermenter. How long it takes varies depending upon your set-up, but usually the time it takes to transfer is much shorter than brew day or bottle day.
  • There’s a risk of contamination. By opening your fermenter and passing your beer through a siphoning hose, you risk bacteria or wild yeast getting into your beer. But, as long as you practice good sanitation, you should be fine.
  • Potential to lose hop flavor. Hop flavor degrades over time. In most cases, a few weeks won’t make a difference, but if you’re brewing a very hop-forward beer, the length of the fermentation period should be considered.

How to Transfer Your Beer for a Secondary Fermentation
To transfer your beer to a secondary fermenter, keep in eye on the bubbles coming out of the airlock and wait until the fermentation slows down (4-5 days). Clean and sanitize your secondary fermenter and transfer tubing, then add the beer to the secondary fermenter – usually a carboy – by siphoning. Re-seal with an airlock. In 7-14 days, bottle or keg your beer as you would normally.
Do you use a secondary fermentation when you homebrew? When do you start yours? How long do you leave it in the secondary? Leave a comment!
Til next time…Cheers!

—–
David Ackley is a beer writer, brewer, and self-described “craft beer crusader.” He holds a General Certificate in Brewing from the Institute of Brewing and Distilling and is founder of the Local Beer Blog.

Does Wine Conditioner Stop A Fermentation?

Wine Conditioner Stopping FermentationIs there a wine product that you sell that sweetens the wine in the end and also stops the fermentation process.  I thought it was the wine conditioner, but I don’t see where it says it stops the fermentation process.
Thanks,
Jen
—–
Hello Jen,
One of the most difficult things a home winemaker can try to do is stop an active fermentation. It’s not practical, nor can it be done with any guaranteed success. This holds true for wine conditioner, as well.
There are several wine making products you can use that may inhibit or temporarily slow-down a fermentation, such a Campden tablets or sodium metabisulfite, but these wine making products will not normally bring an active fermentation to a full stop. Their primary purpose is to destroy wild molds and bacteria. Their effect on the domesticated wine yeast doing the fermenting is only minor.
The most important thing to understand about a wine making conditioner is that it should not be added to the wine must while it is still fermenting. It is a wine sweetener that should only be added once the fermentation has completed and the wine has had plenty of time to clear. If the wine conditioner is added during the fermentation or while the wine is still cloudy with yeast, all the sugars that are in the wine conditioner could potentially start a renewed fermentation and turn the sugars from the wine conditioner into alcohol.Shop Wine Conditioner
With that being said, the best time to add wine conditioner to a wine is right before you are ready to bottle the wine – add to taste, then bottle.
Wine conditioner does have a wine stabilizer (potassium sorbate) in it that, will help to eliminate the chance of a re-fermenting occurring. It does this by inhibiting the residual yeast cells are still left in the wine from multiplying into a larger colony that can sustain a fermentation.
But again, the stabilizer in the wine conditioner will not stop a fermentation. There are no wine making products you can use that will safely do so. The wine stabilizer in the wine conditioner will only stop a fermentation from re-occurring.
Happy Wine Making,
Ed Kraus
—–
Ed Kraus is a 3rd generation home brewer/winemaker and has been an owner of E. C. Kraus since 1999. He has been helping individuals make better wine and beer for over 25 years.

Water Treatment For Brewing Beer

Beer In Brewing WaterBefore you use water straight from the tap for homebrewing, it’s important to understand exactly what you’re putting into your precious brew. After all, water makes up more than 90% of beer by weight. Water chemistry can get a bit technical, but don’t worry — you don’t need a degree in chemistry to make good beer. In the famous words of Charlie Papazian, “Relax, don’t worry, have a home brew.” In fact, if you’re brewing with extract, you don’t need to worry much about water treatment at all. However, if you are brewing all-grain, water treatment for brewing beer becomes a much more important subject.

Why is Water Treatment so Important in All-Grain Brewing?
Water contains much more than pure H2O. There is usually an assortment of minerals, salts, and chemicals in there as well. Some minerals and chemicals are beneficial to your brew. Some help yeast grow so that they can ferment your beer, while others help to extract fermentable sugars from barley malt. It’s important to be aware of sterilizers, such as chlorine, which may affect the flavor of your beer. Finally, if you’re trying to make a style of beer traditionally brewed in a certain part of the world, you may want to recreate the brewing water profile used to make that beer.
For the purposes of this article, we’re going to focus on water chemistry and treatment for mash conversion and for water profiles of traditional and regional beers. But first, which minerals and chemicals should homebrewers to consider?

  • Chlorine/Chloramine – Chlorine & chloramine are often used by municipal water facility to sterilize the water supply. You can remove these chemicals from your water by boiling it for 30 minutes, letting it sit overnight, or by adding Campden tablets to your brewing water.
  • Calcium – Lowers pH and helps with mash conversion.
  • Magnesium – Lowers pH and aids yeast growth (up to 20 parts per million)
  • Sodium – Low levels of sodium can help give beer a full flavor; too much might make beer salty.
  • Carbonate/BicarbonateShop Brew Kettles – Can impede the mashing process and extract harsh hops flavors.
  • Sulfate – When combined with sodium, may introduce harsh, dry flavors.
  • Chloride – Can make beer taste sweet.

Tip: If you want to use your city or municipal water, you may want to get a water analysis before you start brewing. Call your municipal water department for a report. Alternatively, you could brew with distilled or reverse osmosis water, which has had most of the mineral content removed, then add your desired minerals back into the water.

Water Treatment for Mash Conversion
If you’re a partial-mash or all-grain brewer, it is important to manage your water chemistry so that you can extract fermentable sugars from your malted grains. For an effective mash, a pH level (acidity or alkalinity) of 5.0-5.5 is recommended.
Homebrewers can check pH with either pH control papers or a digital pH meter and correct pH levels using one or more of the following:

Keep in mind that adding malted barley to your water will lower its pH, so you may want to start with brewing water with a pH above 5.5.

Brewing Water Profiles for Traditional and Regional Beers
Certain beer styles originated in parts of the world where the local water hardness had a significant effect on that style. You may wish to recreate the water profile of a particular region by altering your water’s mineral content:

  • Burton – Famous for its use in English Pale Ales, water from Burton-on-Trent is high in sulfate (800 ppm), calcium (294 ppm), and carbonate (200 ppm).
  • Munich – Water from Munich, used in the famous Munich Helles and Oktoberfest lagers, is high in carbonate (180 ppm) with some chloride (60 ppm) and very little sodium (2 ppm).
  • LondonEnglish Bitters made in London use water that is high in sodium (100 ppm), and fairly high in carbonate (160 ppm) and chloride (60 ppm).
  • Plzen – Plzen, home of the famous Bohemian Pilsner, has very soft water (low mineral content). It has some carbonate (15 ppm), but very little of the other brewing minerals.

What kind of water treatment do you use for brewing beer? What kind of brewing water adjustments do you make?
—–
Ed Kraus is a 3rd generation home brewer/winemaker and has been an owner of E. C. Kraus since 1999. He has been helping individuals make better wine and beer for over 25 years.

A Simple Guide To Metabisulfites & Wine Making

Sodium Metabisulfite, Potassium Metabisulfite and Campden TabletsI have a quick question that I can’t find the answer to. I’m hoping you can help me out. Which is better, campden tablets, sodium metabisulfite or potassium metabisulfite? I’ve looked in several places but don’t understand why you need all 3 to make wine.
Shaun
—–
Hello Shaun,
Thanks for the great question. This is an issue that perplexes many wine making hobbyist, so I’m glad you brought it up. To answer it, I have put together a simple guide to metabisulfites below.
The first thing to understand is that all three of these wine making ingredients do the same thing: Campden tablets, sodium metabisulfite and potassium metabisulfite, they all add sulfites to a solution. Whether it be wine or water the result is the same. Regardless of which of the three you use, the result is the same. Sulfites are being added to the liquid.
So what’s the difference? Honestly, not much. The main difference between sodium metabisulfite and potassium metabisulfite is that one will leave residual amounts of sodium in the wine and the other will leave some potassium.
Many home winemakers will lean towards using potassium metabisulfite instead of sodium metabisulfite in their wines as a means of avoiding more sodium intake in their diet. But in reality, this is somewhat futile.
If the normal recommended dose of sodium metabisulfite is used—1/16 teaspoon per gallon—the residual sodium being added is equivalent to one slice of pickle per case of wine. Not enough to affect the flavor and certainly not enough to affect your diet.
Potassium metabisulfite is slightly stronger than sodium metabisulfite by volume—17% stronger—but this is not enough to be taken into account if you are only making 5 or 10 gallons of wine at a time. With either we recommend the same dosage.Buy Campden Tablets
Now that we have cleared that up, what makes Campden tablets different from potassium and sodium metabisulfite? Again, not much. Campden tablets are nothing more than potassium metabisulfite in tablet form. The tablets are measured in a dose for one gallon of wine. You simply use one tablet per gallon.
So in the case of tablets, it’s a matter of convenience. If a home winemaker is only making a gallon or two of wine at a time, they may want to use Campden tablets instead of having to measure out a 1/16 teaspoon dose for each gallon. They are just a way to keep things simple.
As to your question as to which one is best to use, in reality, it just doesn’t matter. I say, ‘pick one and go with it’. Many home wine makers will use sodium metabisulfite for sanitizing their equipment and wine bottles and then use the potassium metabisulfite to go directly into the wine for preservation. But in reality, if you don’t want to buy both… not a big deal.
Happy Wine Making,
Ed Kraus
—–
Ed Kraus is a 3rd generation home brewer/winemaker and has been an owner of E. C. Kraus since 1999. He has been helping individuals make better wine and beer for over 25 years.

Robust Porter Beer Recipe – with Coconut! (Extract w/ Grains)

Robust Porter BeerRobust porter is a subset of porter and as you may imagine, it tends to be stronger and more flavorful than a standard brown porter. Still, it embodies the key aspects of porter: brown to dark brown, showcasing balanced malt flavors and aromas reminiscent of caramel, chocolate, and coffee. Though robust porter beer recipe may have a little more roasted malt than a regular porter, it falls short of being as roasty as a stout.
Based on the 2015 BJCP Style Guidelines, one might reclassify a robust porter as an American porter. Unlike English porters, American porters tend to be stronger in alcohol and hop character than their English counterparts. Alcohol content may be as high as 7% ABV, while hop bitterness can range from 25-50 IBUs. In terms of hop flavor and aroma, the American versions tend to exhibit more of both, often using American-grown hops. The hop flavor and aroma can range from fairly subtle to fairly aggressive – the level of hoppiness you want is up to you, but if you intend to enter the beer into competition be sure not to go overboard.
If you want to go to the next level, you can try what Charlotte’s NoDa Brewing Company does to their robust porter beer recipe. Their “Coco Loco” porter, brewed with toasted coconut, won a silver medal at the Great American Beer Festival in the Robust Porter category. Try putting 0.5 lb. toasted coconut in the secondary fermenter for a few days to a week. Use a straining bag and a sanitized shot glass or spoon to weigh the bag down.
Happy brewing!

Robust Porter Beer Recipe – with Coconut!
(5-gallon batch, extract with specialty grains)

Specs
OG: 1.055
FG: 1.017
ABV: 5%
IBUs: 40
SRM: 32

Ingredients
6.6 lbs. Briess dark liquid malt extract
0.75 lb. light dry malt extract
0.5 lb. caramel 60L malt
0.25 lb. chocolate malt
Shop Steam Freak Kits0.25 lb. black malt
1.5 oz. Kent Goldings hops at :60
1 oz. Fuggles hops at :20
1 packet Safebrew S-33
corn sugar for priming
.5 lb. Toasted Coconut (in secondary)
bottle caps

Directions
Heat 6 gallons of chlorine-free water to 150˚F. Place crushed specialty grains in a muslin grain bag and steep in the water for 30 minutes. Remove grains, allowing wort to drip back into the pot. Mix in malt extracts and bring wort to a boil. Boil for 60 minutes, adding hops according to schedule above. At the end of the boil, chill wort to about 70˚F and transfer to a clean, sanitized fermenter. Pitch yeast and ferment at 68˚F for seven to ten days. Transfer to a secondary fermenter and add the coconut. After a few days to a week, bottle and age at room temperature for 3-4 weeks and enjoy!
Do you have a robust porter beer recipe you’d like to share? Just add it to the comments below…
—–
David Ackley is a writer, brewer, and craft beer marketing consultant. He holds a General Certificate in Brewing from the Institute of Brewing and Distilling and is founder of the Local Beer Blog.

I Have Apples! Now What?

Basket Of Apples For Making WineDear E. C. Kraus
I just picked some apples from our trees and they are so sweet. I would love to try making some apple wine with them, I don’t know what to do can you help me out on this at all.
Thanks,
Midge
—–
Dear Midge,
All the information you need to make apple wine can be found at the following links on our website:

  • Apple Wine Recipe: This link has all kinds of wine recipes, including one for your apple wine that you are needing. All of the recipes list the ingredients you will need to make the wine.
  • 7 Easy Steps To Making Wine: This link goes over the basic steps of making wine: when to put in the yeast; when to siphon; when to bottle, etc. It’s laid out in plain English and very easy to understand. These are the directions you should be following with the apple wine recipe.
  • Home Wine Making With Fruits: This article has some further information that you may be interested in taking a look at. It gives a little more detail as to the “in’s-and-out’s” of wine making. It’s a great overview of the entire wine making process whether you are making apple wine or blackberry wine.
  • Your Fruit! Necessities Box:Shop Wine Making Kits This is a starter kit that we offer for the beginning winemaker. It has all the wine making materials you will need to get started, including the ingredients listed in your apple wine recipe. It’s an easy, straight-forward way to get started.

I hope this information helps you out. Our website has much, much more information for the first-time wine maker, lots of articles and detailed information about the products we offer. Feel free to visit our site to learn more.
Best Wishes,
Ed Kraus
—–
Ed Kraus is a 3rd generation home brewer/winemaker and has been an owner of E. C. Kraus since 1999. He has been helping individuals make better wine and beer for over 25 years.

Reusing Beer Bottles For Homebrewing

Bottled BeerMany homebrewers like to save money. Who doesn’t? One of the first opportunities for saving a few bucks while homebrewing is to reuse beer bottles you buy from the store. Sure, it saves some cash, but it does take a little extra effort. (But at least you get bonus points for being eco-friendly!)
Here’s what you need to do to reuse beer bottles for homebrewing.

  1. Don’t save twist-offs. This type of beer bottle doesn’t work well for re-capping. Only save the pry-off style beer bottles for recycling.
  1. Brown is better. It’s ok to reuse green and clear glass bottles, but brown ones offer the best protection against UV light. (Light can make your beer taste “lightstruck” or “skunky”.)
  1. Love the larger beer bottles. The larger format 22-oz. and 25-oz. bottles are great – fewer bottles to clean and fill. Plus they make great gifts for the holidays!
  1. Covet the flip-top.shop_beer_growlers Euro-style bottles with the flip-top are just cool! Reusing these type of beer bottles for homebrewing are well worth the effort.
  1. Rinse them out first. Residual beer left at the bottom of a beer bottle is an ideal place for mold and other funky creatures to take hold. Save yourself the trouble of scrubbing out the beer bottles by rinsing them out as soon as you’re done with them. Three quick rinses usually gets the job done, but check inside for residual yeast at the bottom just to be sure.
  1. Remove the labels. Plan for this task to take some time. (It’s probably the least favorite part of bottling homebrew, so some homebrewers just leave the labels on.) The best way to remove commercial labels is to soak the bottles in a tub filled with hot water and One Step. In 15-20 minutes, most of the labels – the ones that use a glue adhesive – should slide right off. Others may be more difficult. Make note of the brands whose labels come off easily and those who don’t. Next time you’re looking for a 12-pack, choose accordingly.

With a decent amount of time and elbow-grease, you can soon have a healthy armada of beer bottles!
If you want to avoid some of the work involved in reusing beer bottles for your homebrewing, we carry new beer bottles by the case!

You can also use plastic beer bottles for bottling homebrew. Don’t forget the caps!
Are you reusing beer bottles for your homebrewing operation? How did you get the bottles?
—–
David Ackley is a writer, brewer, and craft beer marketing consultant. He holds a General Certificate in Brewing from the Institute of Brewing and Distilling and is founder of the Local Beer Blog.