Raising the Specific Gravity of a Wine With Sugar Syrup

Sugar syrup for raising specific gravityI have a question! After making a sugar-syrup, how much of it do I use to raise 5 gallons of wine? I mean how much does the S.G. [Specific Gravity, hydrometer reading] go up say per cup added? Thanks for any help.

Name: Thomas R.
State: New York (Long Island)
—–
Hello Thomas,

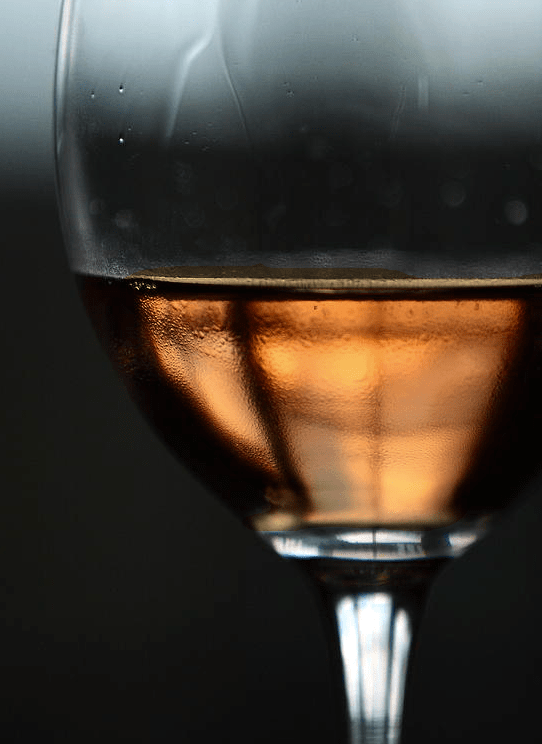
Raising the specific gravity of a wine with sugar syrup is perfectly fine. It’s a great way to get the S.G. up to where you need it to be when making a fruit wine or even a grape wine the just needs a little boost.

Knowing how much sugar syrup add to the wine to get from point A to point B on a hydrometer scale would be great to know ahead of time, but to do this you need to know the specific gravity of the sugar syrup. Not a sugar syrups are the same.

You can use a wine hydrometer to determine the specific gravity of the sugar syrup you’ve made. Just put the hydrometer in a sample of the syrup, just like you would when testing your wine. If the reading goes off the scale, you can still get a reading. Just add an equal amounts of water and sugar syrup in a sample. Then take a gravity reading and times it by two.

As an example, let’s say after you added equal parts of water and sugar syrup, you get a reading of 1.150. That would mean that the sugar syrup’s “actual” S.G. is 1.300. You double the “gravity” part of your reading, because you cut the sugar syrup by half.Shop Hydrometers

Once you know the S.G. of the sugar syrup, raising the specific gravity of your wine with sugar syrup is easy. It’s all just math.

Let’s say you want to add 6 ounce of sugar syrup that has an specific gravity of 1.300 to a gallon of wine:

A gallon of wine has 128 fluid ounces in it. You want to add 6 more fluid ounces of sugar syrup for a new total of 134 ounces. Now you need to spread the gravity of (300 times 6) over the 134 ounces (128 + 6). So it is (300 X 6) divided by 134. That equals 13.44. Let me shorten it up:

(Gravity of Syrup * Ounces of Syrup Per Gallon)/(128 + Ounces of Syrup Per Gallon) = Rise in S.G.
or
(300 * 6)/(128 + 6) = 13.44

What this means is that if you are raising the specific gravity of a wine with a sugar syrup that has a specific gravity reading of 1.300, and you add 6 fluid ounces of that syrup to each gallon of homemade wine, then the specific gravity of that homemade wine would be raised by 13.44 points on the gravity scale. For example, if the wine has a specific gravity of 1.060, the new reading would be 1.07344. You could round it to 1.073.Buy Hydrometer Jars

Hope this helps you out. Just plug the numbers into the equation as needed and you’ll know ahead the results with raising the specific gravity of a wine with sugar syrup.

There is also another blog post that is somewhat related to this subject that I’d thought you might be interested in: “Controlling Your Wine’s Alcohol“.

Happy Winemaking,
Ed Kraus
—–
Ed Kraus is a 3rd generation home brewer/winemaker and has been an owner of E. C. Kraus since 1999. He has been helping individuals make better wine and beer for over 25 years.

What Is Malted Barley?

Maltster making malted barley.Malted barley is one of the four essential building blocks of beer. (The other three are water, hops, and yeast.) Most commercial beer is made with malted barley, though some beers are made with wheat malt, rye malt, and other cereal grains. So, what is malted barley?

Barley is a grass that comes in a 2-row or 6-row variety, which corresponds to way the grains are arranged around the barley stem. Barley grains (also called corns) are the seeds of the plant that in optimal conditions will grow into a plant. The corns store energy in the form of starch, a complex sugar, so that the plant can grow.

These sugars are what brewers use to make beer. The grain provides the sugar that feeds the yeast, which in turn converts the sugar into alcohol and CO2. But before these sugars can be used, they must be made accessible through a process called malting.

The Malting Process
Malting the barley is a three-step process carried out by a professional maltster. Using a variety of barley grown specifically for making beer, the maltster creates conditions that encourage the barley corns to grow, then kilns the barley corns before they have a chance to grow into plants:

  1. Steeping – The maltster soaks the barley in large steeping tanks, aerating the malt and maintaining a constant, cool temperature that discourages microbial growth. The water is periodically replaced, which gives the barley a chance to breathe.
  1. GerminationShop Home Brew Starter Kit – The barley is then moved to the floor where it is allowed to sprout. During this phase, enzymes are activated in the barley. The enzymes begin to break down the cellular structure of the grain, which makes the starches accessible for conversion into fermentable sugars. The barley will typically be turned regularly to prevent the rootlets, or “chits,” from getting tangled. The degree to which the barley is allowed to grow is called “modification.”
  1. Kilning –  The final step in malting the barley is the kilning. The maltster kilns the grain to stop the growing process, which preserves the starches and the enzymes for use in brewing. Depending on the style of malt produced, grains are kilned between 175-400°F. This step introduces color and flavor to the malt as the proteins and sugars are heated in the kiln.

Common Types of Malted Barley

Malted barley is generally categorized by color and given a Lovibond number rating between 1 and 500 to rate the color (1 being pale; 500 being black). These are several of the most common malted barleys:

  • Pilsen Malt – This very lightly kilned malted barley is ideal for lagers, but can also be used as base grain for ales. (1° Lovibond)
  • 2-Row Malt – A very common base malt for ales and lagers. 2-Row malt typically contains more fermentable sugar and less protein than 6-Row malt. (1.8° Lovibond)
  • 6-Row Malt – 6-Row is often used for lagers for its grainy flavor. 6-Row barley is primarily grown in the US. (1.8° Lovibond)
  • Vienna Maltshop_malted_grains – Vienna malt is kilned slightly more than Pilsen and 2-Row malts, but it still works well as a base malt. It is recommended for use in Pilsners and Vienna-style lagers. (3.5° Lovibond)
  • Munich Malt – Munich malt is a well-modified malt that lends a sweeter, maltier flavor than the lighter malts. It is ideal for amber ales, Märzen lagers, and dark lagers. (10° Lovibond)
  • Crystal Malt – A wide range of malted barleys are kilned at higher temperatures and called crystal, or caramel malts. They range from 10 to 120 degrees Lovibond, contributing significant color and sweet caramel flavor. (10-120° Lovibond)
  • Chocolate Malt – Chocolate malt is often used (in moderation) for brown ales, porters, and stouts. It contributes a chocolate-like flavor and aroma to beer; it is not actually made with chocolate. (350° Lovibond)
  • Black Malt – Black malt has been kilned nearly to the point of burning. It provides roasty, astringent bitterness and very dark color to stouts and other dark beers. Very little needs to be used to get the desired effect. (500° Lovibond)

Want to learn more about malted barleys? This book is a great resource if you want to learn more about malts or homebrewing in general: Homebrewing for Dummies

Now that you know the answer to the question: “what is malted barley?”, what are some of your favorite malts for brewing beer at home? And, what brews do you use them in?
—–
Ed Kraus is a 3rd generation home brewer/winemaker and has been an owner of E. C. Kraus since 1999. He has been helping individuals make better wine and beer for over 25 years.

Did Using Distilled Water In My Wine Ruin It?

Distilled WaterI just started my first batch of home made wine. I didn’t use my tap water because it’s salt water from water softener. I used distilled water in this wine, instead. After coming to your site I found out that it’s not good to use distilled water in wine making. Is there anything I can do to save my homemade wine? Or would I be better of starting over?

Name: Rory
State: Michigan
—–
Hello Rory,

Let me start off by saying that using distilled water in a wine does not mean the wine is ruined. We do not recommend using distilled water because it may cause problems with the fermentation.

Distilled water is water that has been ran through a still, or rather, steamed from one vessel to the next. This process drives out all the free oxygen and leaves the trace minerals behind. This is significant to a fermentation.

The one thing that wine yeast needs is oxygen, particularly in the first stages of the fermentation. Oxygen is what helps wine yeast to multiply into a larger colony. Without a larger colony, you will have a sluggish, drawn-out fermentation.

The little packet of wine yeast that is typically added to a fermentation needs to multiply itself between 100 to 150 times to sustain a vigorous fermentation. Most of the sediment you will see at the bottom of the fermenter are all these yeast cells that were created during the fermentation.Shop Yeast Nutrients

If you’ve used distilled water in your wine, we recommend adding yeast nutrient, if you haven’t done so already. Yeast nutrient is a singular form of nitrogen – diammonium phosphate. The recommended dosage for this is 1 teaspoon per gallon of wine. This yeast nutrient will work in place of free oxygen to help start the wine yeast to multiply successfully.

In rare and extreme cases, it may also be necessary for you to aerate the wine. This can be done by splashing the wine to allow air to saturate into the wine must, or you can siphon the wine must from one vessel to the next, holding the siphon hose back so the the wine splashes.

Minerals make up part of the nutritional meal that wine yeast need to ferment sugar into alcohol. Minerals are needed for yeast to metabolize these sugars freely. Without minerals, wine yeast have a difficult time consuming the sugar that is right in front of them. For this reason, if you use distilled water in your wine making we recommend adding a little magnesium sulfate to your wine — 1/2 teaspoon per 5 gallons is more than enough.Shop Magnesium Sulfate

I would like to mention again that using distilled water in your wine making does not mean you have ruined your wine, but what it does mean is that you need to take some simple actions to mitigate the effects of the distilled water. By adding yeast nutrient and magnesium sulfate you can go on to have a great tasting wine.

Happy Winemaking,
Ed Kraus
—–
Ed Kraus is a 3rd generation home brewer/winemaker and has been an owner of E. C. Kraus since 1999. He has been helping individuals make better wine and beer for over 25 years.

A Simple Guide To All-Grain Brewing Equipment

All-Grain BrewingAll-grain brewing is the closest thing to being a professional brewer. If you’re already brewing with malt extract, advancing to all-grain means that you need to learn how to mash, i.e. extract fermentable sugars from barley malt by mixing the grains with hot water. To do this effectively, you’ll need to add a few pieces to your existing home brewery:

• A large pot for heating water. Professional brewers call this a hot liquor tank. You will need to heat mash water, and then sparge water. Larger is better, so you can heat all the water you need at once. Also keep in mind that the larger the pot, the easier it is to brew larger batches later on. A 30 Qt. Brew Pot will work for a 5 gallon batch of brew.

• A mash tun – Mashing requires 1-1.5 qts of water per pound of grain. A typical 5 gallon batch of homebrew uses 10-12 lbs. of grain, plus you need to account for the grain itself. At the very least, you’ll need a 20 qt brewpot, but the larger the better. Some brewers like to build their own mash tuns from a large water cooler, but a Polar Ware Brew Pot with a false bottom, thermometer, and ball-valve is the way to go.

• A large kettle for boiling wort. If you play your cards right, you could move wort from the mash tun back to the hot liquor tank for the boil, but many brewers prefer to have three separate vessels. Keep in mind that over the course of a 60 minute boil, you’ll probably evaporate 20% or more of your volume. You also don’t want the wort to go all the way to the top of the kettle. If you want to end up with 5 gallons of wort, you need a brew kettle that holds 7 gallons or more.

• Wort chiller – Beginning homebrewers might get by with an ice bath in the kitchen sink, but if you need to cool 5 gallons of boiling wort, an Immersion Wort Chiller makes things much easier. Depending on the temperature of the cold water going through the chiller, these can chill wort to pitching temperature in 15-20 minutes.

• pH Testing EquipmentpH Test Strips are the most affordable option, but a Digital pH Meter is much more accurate and easier to use.

Thermometer – even if you have a thermometer built in to your mash tun, it help to have another one to measure the temperature of your sparge water.

Grain Mill – You can get by without one, but you will have to buy pre-crushed malt (or borrow a mill from a friend!).

Gypsum and Calcium Carbonate – These minerals will help you adjust mash pH.

Gas burner – Not essential, but if you have the space to safely use one, an outdoor gas burner will save a lot of time when heating water.

There are about as many different homebrew setups as there are homebrewers, but these are some of minimum requirements for all grain brewing. From there, you can easily customize your setup with countless doo-dads and gizmos. If you’re looking for ways to save a little money, consider the Brew-in-a-Bag (BIAB) technique, which we will cover in another post.

Want to learn more about all grain brewing? Stay tuned for more!

Controlling Oxidation When Making Wine

Homemade Wine That Turned BrownLast fall I acquired some good wine grapes.. red and white not enough of either for 5 gals.. thought I could make a blush, so I added them together.. it turned a reddish color but cloudy. So I added bentonite three weeks later i have clear brown color,  what happened?

Thanks Art
—–
Hello Art,

It sounds like your homemade wine has oxidized from excessive air exposure. Just like when an apple starts to turn brown after being bitten into, a wine can turn brown when it is exposed to too much air. This is called oxidation.

It was not necessarily caused by letting the wine be in touch with the open air, but in your case, probably had more to do with excessive splashing of the wine when you where using the bentonite. When you splash a wine air can saturate into it much more quickly than if the wine was just sitting still.

Unfortunately, there is no real effective way to reverse this browning effect of oxidation on a homemade wine. However, there are things you can do in the future to reduce its chances of happening again:

  • Keep Splashing To A Minimum: When stirring the wine, stir it in a way that blends the wine but does not splash it. When siphoning or racking the wine, have the end of the hose down into the wine in the fermenter you are filling up. Fill the vessel from the bottom up, so to speak.
  • Add Sulfites To The Wine After Racking: This should only be done to a wine that has completed its fermentation. You can use either Campden tablets or sodium metabisulfite to add sulfites to the wine. The sulfites will help to drive out any saturated oxygen that is in the wine before it has time to negatively affect the wine. You only need to add around 1/2 a standard dose. That would be either 2-1/2 Campden Tablets or one heaping 1/8 teaspoon to 5 gallons of wine.Shop Sodium Metabisulfite
  • Keep Out Of The Heat And Light: Both heat and light will increase a wines susceptibility to oxidation. By keeping the wine in a dark, cool place you are helping to protect the wine from the effects of oxidation.

Now that you are aware that a homemade wine can turn brown from oxidation, I think you can understand that controlling oxidation when making wine is important. Do the three simple thing above, and you will go a long ways oxidation to an unnoticeable level

Best Wishes,
Customer Service at E. C. Kraus
—–
Ed Kraus is a 3rd generation home brewer/winemaker and has been an owner of E. C. Kraus since 1999. He has been helping individuals make better wine and beer for over 25 years.

A Simple Guide To Brewing With Adjunct Grains

Rolled Brewing AdjunctsIn 1516, Reinheitsgebot, also known as the German Beer Purity Law, was put into effect. To alleviate competition between producers of barley, wheat, and rye, it limited beer ingredients to only barley, water, and hops (yeast hadn’t been discovered yet!). Though some brewers choose to brew within these strict guidelines, many prefer to experiment and use more than just barley in their brews.

There are many styles of beer that require grains other than malted barley, including certain styles of Belgian Ale, English Ale, and yes, even German beers. The grains used in these beers are often referred to as adjunct grains:

  • Wheat – Wheat is mandatory brewing adjunct if you want to brew your own Hefeweizen or American Wheat Beer. Adventures in Homebrewing carries Red Wheat Malt, White Wheat Malt, and Wheat Malt Extract to lend your homebrew wheat flavor and body. Use 50-75% wheat malt in your grain bill for Weizenbier, or 1-2% to help head retention in any beer style.
  • Rye – Want to brew your own Rye Pale Ale or German Roggenbier? Briess Rye Malt contributes a unique, spicy and grainy flavor reminiscent of bourbon. You’ll want to use this brewing adjunct grain sparingly, as rye has a tendency to stick together in the mash kettle. You’ll rarely see more than 10-20% of malted rye in a grain bill (3.7° Lovibond). Another option is Flaked Rye, which gives the crisp, dry rye flavor, but with more body and more extractable sugar than malted rye.
  • OatsShop Brewing Kettles –  If you want to brew an Oatmeal Porter or Oatmeal Stout, you have to use oats! Regular, unmalted, whole-grain oats contribute flavor and head retention to your brew, but not much fermentable sugar. Flaked Oats are pre-gelatinized to make their starches accessible as fermentable sugar, but they’ll also do wonders for head retention and body. Oats are often included in some Belgian beers, such as the ever popular Witbier.
  • Corn – Corn, or maize, when used as a brewing adjunct must be cooked, then mashed with barley malt to extract fermentable sugars. Flaked Corn is pre-gelatinized, making starches accessible, and can be added directly to the mash. Corn adds essentially no color to beer, but contributes some sweet, corn flavor. It’s primarily used in American Light Lagers, certain Pre-Prohibition style beers, and traditional South American chicha.
  • Rice – Rice, usually in the form of rice syrup, is often added to American Light Lagers in place of malted barley because it’s cheap and doesn’t contribute much flavor or color. Flaked Rice accomplishes the same task, resulting in a dry, crisp beer. Rice Hulls are often added to brews made with a lot of wheat or rye to avoid a stuck mash.

Certainly, there are other brewing adjunct grains that you could play around with and put in their beer, but this list comprises the majority of what you’ll find called for in home brewing recipes.

What is your favorite adjunct grain you like to use in your beers?
—–
Ed Kraus is a 3rd generation home brewer/winemaker and has been an owner of E. C. Kraus since 1999. He has been helping individuals make better wine and beer for over 25 years.

Restarting A Stuck Mead Fermentation

Stuck Mead FermentationI just started my first batch of Mead. I followed your recipe to the tee. Now after 4 days my SG is 1.062. The Mead is fermenting slow or may have stopped fermenting completely. When will it drop to 1.030-1.040.?

Name: Tony A.
State: SD
—–
Hello Tony,

What you may be experiencing is a stuck mead fermentation. This is something that is not all uncommon when fermenting honey, so don’t feel like you’ve done anything wrong or that the mead is doomed to failure. A slow or stuck mead fermentation is a simple issue with a simple fix. I’m confident you will be successful in restarting the fermentation.

The reason this is happening is because there is an array of varying sugars in honey, each with its own molecular makeup. Some of the sugars have a very complex cell structures. Others are not so complex. These are called complex sugars and simple sugars.

When a mead fermentation starts off, the simplest of the sugars are consumed first. This is because these are the sugars that are easiest for the wine yeast to consume. The yeast grab on to the lowest hanging fruit, first, so to speak. But as the fermentation continues there slowly becomes a point when all that’s left are the more complex sugars.

These sugars have large cell structures that can not be readily consumed by the wine yeast in their current state. The wine yeast must first break down the complex sugars into a simpler form. This is done with enzymes. The wine yeast will naturally excrete enzymes through out the fermentation and even more so when simple sugars are less available. The enzymes break down the complex chains of molecules into something smaller, simpler and easier for the yeast to digest.

Tony, this is where your mead fermentation stands, currently. This is why you have a stuck mead fermentation. It has seemingly hit a brick wall because the wine yeast have ran out of simple sugars to consume. What’s happening now is that they are nibbling away the best they can at the more complex sugars as the yeasts’ enzymes slowly break them down. This equates to a slow fermentation or on that stops, too early.

If you do nothing, the mead fermentation will more than likely finish on its own… eventually. But this is something that could take months to run its course. Fortunately, there are some things you can do to help restart the stuck mead fermentation:Shop Yeast Nutrients

  • Add magnesium sulfate to the mead. Another struggle for the wine yeast is that a honey fermentation is low in pH. By adding a small amount of magnesium sulfate to the must (1/2 teaspoon to 5 gallons) you can put the wine yeast in the proper playing field for a healthier fermentation.
  • Add a 1/2 dose of yeast nutrient to the mead. This would be 3/4 tablespoon to 5 gallons.

By doing the above three procedures, restarting a slow or stuck mead fermentation should come about very easily.

Happy Winemaking,
Ed Kraus
—–
Ed Kraus is a 3rd generation home brewer/winemaker and has been an owner of E. C. Kraus since 1999. He has been helping individuals make better wine and beer for over 25 years.

My Beer Is Flat And Won’t Carbonate

Flat Beer Top ViewI brewed a batch of beer as directed. It has set for 4 weeks bottled in a room of 60 to 65 degrees. When opened it had almost no carbonation.

Name: Don C.
State: Mo.
—–
Hi Don,

Sorry your beer is still flat. Let’s see if we can figure out why it won’t carbonate.

Beer carbonates when beer yeast consumes sugar and excretes CO2, and the CO2 has no where to go but into solution because the beer bottle or keg has been sealed. Let me share some theories with you about what’s going on and some possible fixes for your flat beer.

The problem you’re describing is probably caused by one of the following:

  • Not enough time/ the room’s not warm enough – I understand you’ve waited four weeks already, but if you did everything correctly, chances are very good that with more time and the beer bottles located in a slightly warmer room, your beer will carbonate. Some beer yeasts work more slowly than others, and high gravity beers generally take longer to carbonate. I know it’s tough with all that beer sitting there, but patience may be the answer to fixing you flat beer.
  • Not enough priming sugar – If you brewed the beer as instructed, this probably isn’t the case. However, did the priming sugar get well-mixed into the beer? I usually pour the sugar/water solution into the bottling bucket first, then siphon the beer into it. This usually mixes things up pretty well. I also recommend checking out this calculator, which shows the correct amount of priming sugar to use based on temperature, desired carbonation level (vols CO2), and type of sugar.
  • Non-fermentable or slowly fermenting priming sugar – If for some reason you used a non-fermentable sugar to prime your bottles, such as lactose sugar, it’s probably not going to give you any carbonation. Similarly, if you used a complex sugar to prime, it may just take longer for the yeast to ferment those complicated sugar molecules. Corn sugar, cane sugar, and dried malt extract work best for priming.
  • Bad seal on the bottlesShop Bottle Cappers – It’s possible that there isn’t a good seal on your beer bottles, allowing CO2 to escape. The result is a flat beer or a beer that won’t carbonate completely. This could be the case if you’re using a twist-off instead of pop-off style beer bottles. You could also just be getting a bad seal when you cap.
  • Yeast killed off – If there was sanitizer left in your bottles or bottling bucket, there’s a small chance that yeast got killed and whatever yeast that’s left is having a tough time carbonating your beer. If you use a “no-rinse” sanitizer on your bottling bucket and bottles, make sure the sanitizer dries completely before use. I usually rinse after sanitizing, even when using a no-rinse sanitizer.

How to fix a flat beer that won’t carbonate

So, what can be done to fix a flat beer? Here are a few possible ways to carbonate your beer, with the easiest and most likely solutions listed first:

  • Hurry up and wait…then wait some more – The first thing I would do is move the bottles to a room that’s a little warmer, consistently around 70°-75°F degrees, to try to “wake up” the yeast into carbonating your beer. 99% of the time, this will fix your problem. If it doesn’t fix the problem after 8 weeks or so, you’ll need to take more drastic action. Keep in mind that higher gravity beers may just take longer to carbonate than others.
  • Add more sugar – If you’ve already waited for eight or more weeks and know that you didn’t add enough priming sugar, you could open up each bottle and add a pinch more. It’s important to be very careful with this — if you add too much sugar, you could get some bottle bombs. It is possible to create so much carbonation pressure in the bottle that the glass will fail. Move the bottles somewhere safe where they won’t hurt anyone and won’t make too much of a mess if they explode.Shop Home Brew Starter Kit
  • Keg it – In theory, you could open up all the beer bottles and pour them into a keg, then prime or force carbonate with CO2. Then again, if you have a keg, you probably wouldn’t be bottling, would you?
  • Add more beer yeast – I’ve heard of homebrewers adding a few grains of dry yeast to each bottle of flat beer to help it to carbonate, but this sounds like a recipe for a bottle bomb, so I wouldn’t recommend it.

Again, if you did everything right, the best thing to do is just wait it out. I’m as guilty as anyone of opening up a homebrew before it’s ready, but in homebrewing, as in life, patience is a virtue. Give your flat beer some more time, and see if that doesn’t get it to carbonate.

Thanks again for your question and good luck,
David Ackley
—–
David Ackley is a beer writer, brewer, and self-described “craft beer crusader.” He holds a General Certificate in Brewing from the Institute of Brewing and Distilling.

Don’t Let Your Wine Fermentation Temperature Get Too Low!

Winemaker Punching Cold FermentationI am a newbie to wine making. I understand the primary fermentation temp should be 65-75? How about the secondary fermentation and subsequent processes? I am wanting to make my wine in my basement but it might be too cool.

Thanks.
Todd
—-
Hello Todd,

This is a great question. The answer to it is quite often what trips up many beginning home winemakers.

The effect that temperature has on a wine fermentation is enormous and greatly underestimated by many. This is particularly true for those new to wine making. As an example to the enormity of its effect, consider the 65°F. you mentioned above. This might allow a wine fermentation that is barely noticeable to occur, whereas the 75°F. you mentioned might end up producing a fermentation that results in a spewing volcano of foam. That’s how dynamic temperature can be to a wine fermentation.

The type of wine yeast you use, along with the wine you are fermenting and a whole host of other, more minor, variables also factor into how dramatic this comparison plays out, but without a doubt fermentation temperature is always vital enough to make your question an important one.

Whether or not your wine must is in a primary fermenter or secondary fermenter is not what matters to the temperature you maintain. What does matter are the readings you are getting with your wine hydrometer.

You will eventually want to keep your wine at a little cooler temperature than what you previously mentioned, but you also want the fermentation to be complete before moving the wine to these cooler temperatures. You determine if a fermentation is done by taking a hydrometer reading, not by whether or not it is in a primary or secondary fermenter.

Sometimes the fermentation finishes while it is still in the primary fermenter. Sometimes the fermentation carries on for a great deal of time while it is in the secondary fermenter. The reason for this inconsistency is because of all the variables mentioned before: yeast strain, type of wine, etc.

Shop Heating BeltYou can read more about checking the fermentation with a hydrometer in the article, Getting To Know Your Hydrometer, listed on our website. You may also want to check out, How To Know If Your Fermentation Is Done.

Even though you suggested wine fermentation temperatures between 65°F. and 75°F., we recommend between 70°F. and 75°F. Once you get below 70°F. some wine yeast strains have a tendency of dragging out the fermentation.

Once the fermentation has completed, and this has been verified with a wine hydrometer, you can maintain a lower temperature. An optimal temperature for storage would be 55°F., but it is not extremely critical. Just do the best you can to keep it out of warm temperatures once the fermentation has completed. What’s more important is that the temperature be even and not be all over the place while the wine is in storage.

Thank you for your great question on wine fermentation temperature. Just remember that you should have some type of control of the temperature. You do not want the fermentation to be too low or too high, but just right. I hope this information helps you out.

Best Wishes,
Ed Kraus
—–
Ed Kraus is a 3rd generation home brewer/winemaker and has been an owner of E. C. Kraus since 1999. He has been helping individuals make better wine and beer for over 25 years.

10 Beer Recipes for Fall Brewing

Beer For FallSomething about the change of weather has a big impact on our taste buds. The pro brewers know this – seasonal beers are beginning to outpace IPAs as the most popular craft beer option. To brew your own fall seasonal beer, consider one (or more!) of these ten beer recipes for fall brewing.

Keep in mind some of these homebrew recipes take time – if you want them ready in time for a special occasion be sure to give yourself at least a month or two head start. Among the ten beers are some fall classics, some winter warmers, and of course, no such list would be complete without at least one IPA.

Classic Fall Beer Styles

  • Oktoberfest –Oktoberfest is traditionally brewed in the spring, but frankly it’s a tasty beer any time of year. This amber lager is malty, smooth, and refreshing. If time is an issue, you can always brew it as an ale to have it ready faster.
  • Amber Ale – Maybe it’s the color, but amber ale always strikes me as a good fall beer. This one features caramel malt flavors, medium hop bitterness, and 5% ABV.
  • Brown Ale – Brown ales showcase darker malt flavors, and are often describes as nutty with notes of chocolate. They’re smooth, easy drinking, and work great with grilled meat!
  • Pumpkin Ale – The quintessential beer recipe for fall, a good pumpkin ale tastes just like pumpkin pie! Be sure to brew it by mid-October to have it ready in time for Thanksgiving!

Fall Brewing for Winter Drinking

Fall’s a great time to get started on some of the higher gravity beers for the winter. Each of these tasty brews can be aged for several months or longer. Just for fun, save some for next winter to see how the flavor develops over time.

  • BarleywineBarleywine is like the port of the beer world, high alcohol with a complex range of rich caramel malt flavors. At about 10% ABV, this one’s a sipper!
  • Russian Imperial StoutSimilar to barleywine with a higher alcohol content, Russian Imperial Stout features darker malts, giving the beer deep flavors of dark fruity, chocolate, and coffee. This kit comes in at around 8% ABV.Shop Steam Freak Kits
  • Maple Scotch AleA good Scotch ale is rich, malty, and smooth. This one uses 1 lb. of maple syrup for an extra layer of deliciousness! What could be better in the fall.
  • Bock – German bock is a malt-forward lager with a somewhat higher than average alcohol content. Traditional bock is typically 6-7.5% ABV whereas dopplebock may get as high as 12%. This beer recipe kit makes a brown lager at around 7% ABV.
  • Winter Spiced Beer – Spiced beers offer a great opportunity to exercise some creativity, but sometimes it’s best to start with an established homebrew recipe to develop a sense of different spices and their flavor contribution. This recipe is an award winner, brewed with honey, cinnamon, allspice, cloves, ginger, and orange peel.

IPAs Are Always in Season

One of the few IPAs made specifically for the winter also happens to be one of my favorites:


What are some of your favorite beer recipes for fall brewing?

—–
David Ackley is a writer, brewer, and craft beer marketing consultant. He holds a General Certificate in Brewing from the Institute of Brewing and Distilling.