Careful! Using Reverse Osmosis Water For Wine Making Can Be A Problem

Using Reverse Osmosis In Wine MakingYour newsletter states that using distilled water for making wine is not recommended but what about tap water filtered via reverse osmosis? Can I use reverse osmosis water for wine making?

Thank You
John
____
Hello John,

You are correct. We do not recommend using distilled water. Not only does the distilling process remove valuable, free oxygen from the water, but it also removes all the minerals. Both are much-needed commodities for the yeast during a fermentation. If either are missing, it can lead to a sluggish or stuck fermentation.

Likewise, we do not recommend using reverse osmosis water for wine making, either. While the free oxygen does remain in the water through osmosis filtering process, critical minerals are still being removed. Magnesium sulfate can be added back to the water in an attempt to restore it for fermentation, but this is more or less putting a band-aid on the issue.Shop Magnesium Sulfate

Your better option would be to purchase bottled drinking water. These bottled drinking water typically will either have the original, natural minerals in them, or the water has been completely purified and then had an optimal blend of minerals added back. Either way, this would be a better option than using distilled or reverse osmosis water in wine making.

It is also important to note that while free oxygen in the water is good for the fermentation, it is bad for the wine once the fermentation has completed. Having free oxygen in the wine after the fermentation can lead to oxidation or browning of the wine.

Fortunately, most all of the oxygen that is in the must before fermentation is either consumed by the yeast or quickly driven out by the CO2 gas from the fermentation. So, while we do recommend using water that isShop Aeration System saturated in oxygen before the fermentation, after the fermentation, we recommend using distilled water for making any necessary adjustments or for topping-up after the fermentation.

To sum it up, using reverse osmosis water for wine making is really not ideal, essentially because of that lack of trace minerals that are removed in the process. You would be better served in most cases by using tap water over reverse osmosis or maybe even bottle drinking water, if you are so inclined.

Happy Wine Making,
Ed Kraus
—–
Ed Kraus is a 3rd generation home brewer/winemaker and has been an owner of E. C. Kraus since 1999. He has been helping individuals make better wine and beer for over 25 years.

How To Fix Homemade Wine That Is Too Sweet

Homemade Wine Is Too SweetI need some help. My homemade wine is too sweet. I made 2 batches of wine one of Blackberry/Raspberry and the other Blueberry/Raspberry/Cranberry. Although they have a great flavor they are way to sweet, can I add some more yeast to get them to ferment some more of the sugar out?

Karey C. – OR
—–
Hello Karey,

Both of your wines sound like great fruit combinations. So sorry to hear they are causing you a little problem. Keep reading to learn how to fix homemade wine that is too sweet.

There are 2 possible reasons why a homemade wine is too sweet:

  1. Too Much Sugar Was Added To The Wine Recipe
    There is a limit to how much alcohol a yeast can tolerate. Once a fermentation produces alcohol to this level, the yeast will simply slow to a stop. If you know that your fermentation has already produced 13-14% alcohol, but the wine is still too sweet, then you’ve added too much sugar to the wine must. You can determine the wine’s alcohol level by taking beginning and current alcohol readings with a wine hydrometer and comparing the two. If this is the reason your homemade wine is too sweet, there is not a whole lot you can do to reduce the sweetness, or make it more dry, other than blend it with a dry wine. Shop HydrometersFor example, you can make blackberry/raspberry wine next year that comes out dry, and then blend this years wine with that. This year’s wine will store just fine in bulk. Just remember to add sulfite to the wine and to eliminate any head-space that may be in with the wine. Hopefully, this will help make your sweet wine taste better.
  1. The Fermentation Did Not Complete
    It very well could be that you added an appropriate amount of sugar to produce a reasonable amount of alcohol. It’s just that the fermentation did not fully ferment the sugar into alcohol as it should have. This is known as a stuck fermentation. This could happen for a number of reason. The most common one is temperature. The fermentation got to cool. Yeast are very sensitive to temperature. There are many other reasons as to why your fermentation may have stopped short of its full potential – too many to go over here. I would suggest going through the Top 10 Reasons For Fermentation Failure. This will help you to ferret out the exact cause of such a predicament. Once you know the reason, you can take corrective action to get the fermentation active, again.

Again, the key to knowing why your homemade wine is too sweet is the wine hydrometer. If you did not take a beginning hydrometer reading, you will not be able to tell whether you have 7% alcohol and a fermentation that needs fixing, or if you have 15% alcohol and have simply added too much sugar to your wine.

As to your suggestion of adding more wine yeast, this is rarely a solution to a problem. This is because there is still yeast in the wine. It’s just that it has gone dormant. It is more likely to be an issue of getting the wine yeast in a situation to where it will start fermenting again.

Best Wishes,
Ed Kraus
—–
Ed Kraus is a 3rd generation home brewer/winemaker and has been an owner of E. C. Kraus since 1999. He has been helping individuals make better wine and beer for over 25 years.

A Wine Hydrometer Isn’t Going To Bite You!

Wine Hydrometer In HandThe one piece of winemaking equipment most often missing in the beginning winemaker’s arsenal is the wine hydrometer. Yet, it is probably the most valuable piece of equipment they could have. A wine hydrometer can tell you:

  • How much sugar you need to add to your wine, if any
  • How much alcohol your wine will have when it’s done
  • How far along your wine’s fermentation has gotten
  • If your wine’s fermentation is progressing, or if it’s stuck
  • If your fermentation has finished or only looks like it has
  • And above all, a wine hydrometer can give you piece of mind

If you’re not sure what your wine’s doing, take a reading with a wine hydrometer, and you’ll know. To sum it up, the hydrometer is just as important to the winemaker as the compass is to the sea captain. Without it you’re just guessing as to where your fermentation’s at, and more importantly, you’re guessing as to where it’s going.

After helping countless home winemakers, we’ve found that the #1 reason that a beginning winemaker does not use a wine hydrometer is because it either looks too complicated, or it’s too intimidating.

Just like when some people’s eye glaze-over at the mere mentioning
of math, some beginning winemakers shudder at the
thought of using a wine hydrometer.

This is really a shame, and I’ll tell you why. A wine hydrometer is no more complicated to use than an everyday thermometer, and it’s even quicker. Shop Wine HydrometersWith a wine hydrometer, you can take a reading instantly by seeing how high or low it floats in your wine. That’s it! No waiting around for it to react or to come up with a reading. Wherever the surface of the wine crosses the scale on the gravity hydrometer is how you determine your reading. Here more on taking wine hydrometer readings.

I think if more beginning winemakers understood that that’s all there is to using a wine hydrometer, more of them would use one. With so much information to gain about a wine by its use, it almost seems silly not to use it.

If you would like to read a little more about the wine hydrometer there’s a short, straight-forward article on our website titled, “Getting To Know Your Hydrometer.” It covers the use of the wine hydrometer in a little more detail.
—–
Ed Kraus is a 3rd generation home brewer/winemaker and has been an owner of E. C. Kraus since 1999. He has been helping individuals make better wine and beer for over 25 years.

How Do You Make Brandy?

Still For Making BrandyMy name is Charles, I live in NC, I have been making wine for about 7 years and have made all kinds, by the way you all got a great website, what I would like to know is how do you make brandy. I looked for a brandy recipe but can’t find one. Can you help me?

Thank you
Charles
_____

Hi Charles,

Making brandy is more of a process than following a recipe, and it is certainly more involved than wine making, but if you’d really like to know how to make brandy…

Brandy is essentially a wine that has gone through a distillation process. Distilling is when the alcohol and certain essences are steamed off the wine and collected into a separate container. Alcohol will steam off at a lower temperature than water so by controlling the temperature it is possible to leave water behind. What you end up with is a liquid that has a much higher alcohol concentration.

This is obviously an over-simplification, but essentially this is the answer to your question: how do you make brandy? It is an additional step beyond making the wine.

The term brandy is normally related to a distilled grape wine. Cognac, for example, is a distilled grape wine. But you can also distill other types of wines to make other types of brandies. Common examples of this would be apple wine being distilled into apple brandy or peach wine being distilled into peach brandy.

Answers, how do you make brandy.Most people are surprised to know that the brandy is a clear liquid at this point. It taste a little harsh and can give off somewhat of an oily impression in the mouth. To bring the brandy to a form that you and I would recognize as brandy, it needs to be aged to some degree.

Depending on the quality and style of the brandy being made, it will need to be aged anywhere from 1 to 50 years in barrels. The toasting of the inner wall of the barrel is where the brandy will get its familiar color.

So as you can see making brandy takes some serious dedication, maybe even more so than wine making. I personally leave it to the Hennessy’s and Martell’s to bring brandy to my world.

It is important to note here that – unlike making wine – distilling an alcohol is illegal in the United States unless you have registered with the ATF. This means bringing your operation up to their rigorous code. It also involves a tremendous cash bond that basically makes it impossible to impractical for any individual to set up a operation for personal use. If you choose not follow the laws of the land then you are considered to be a moonshiner making moonshine.

If you would like to read more about distilling, including distilling brandy, we do have a book on the subject. The “Lore Of Still Building” has a lot of information about distilling principals as well as how to build various styles of stills.

Charles, I hope this answers your questions. You’re not the only person to ask, “how do you make brandy?” So, I thought this would be a good time to post this to the blog, as well.

Best Wishes,
Ed Kraus
—–
Ed Kraus is a 3rd generation home brewer/winemaker and has been an owner of E. C. Kraus since 1999. He has been helping individuals make better wine and beer for over 25 years.

Why Using Pectic Enzyme Gets You A Clear Wine

What Using Pectic Enzyme Does To WineI have made delicious peach wine in the past, but last year, the peaches were ripe when I was out of town. My son cleaned, sliced and froze them in freezer bags til I could get home. It’s been 10 mos. and the wine refuses to clear – I’ve tried everything. Was pretty sure I had read you could freeze fruit til ready to use, but maybe not? That’s the only thing I remember doing differently…”Blue Moon” Peach Wine anyone?

Name: Carol
State: Maryland
—–
Hello Carol,

Freezing the peaches would not have anything to do with the wine being cloudy. I think this has more to do with using pectic enzyme. Freezing the fruit will only help to break down the fiber allowing you to get more flavor from the peaches. Freezing the fruit is something we recommend doing all the time. So even though this is the only apparent difference from other times you’ve made this wine, this is not the cause of your peach wine being cloudy.

Assuming that the fermentation went along just fine, the number one reason for a peach wine to be cloudy is because of something called a pectin haze. Peaches have a considerable amount of pectin in them when compared to other winemaking fruit. Pectin is the gel that holds the fruit’s fiber together. It has a milky appearance to it when removed from the fruit.

With most fruit the pectin is broken down and cleared during the fermentation. The wine yeast produce enzymes that help to do this. Most fruit wine recipes will also call for pectic enzymes as additional insurance to see to it that all the pectin cells are broken down. You can read more about this in a previous blog post, Why Do Some Wine Recipes Call For Pectic Enzyme? When using pectic enzyme the pectin cells are broken down into a substance that is clear and watery.Shop Pectic Enzyme

If all the pectin cells are not broken down then they add to the cloudy appearance of the wine. In the case of peaches, sometimes not all the pectin gets broken down. Sometimes this is caused by a stressed wine yeast, but it can also be caused by using pectic enzyme that is old or not using enough pectic enzyme. If any fruit is gong to expose this error it would be the peach wine due to its abundance of pectin cells. Other fruits high in pectin are plums, strawberries and persimmons.

It is important to understand that a pectin haze can not be cleared out with fining agents such a bentonite, isinglass or Sparkolloid. This is because these types of clarifiers are primarily used to clear out particles. Pectin is not a particle, but rather, something that is molecularity bound to the liquid. No fining agent can touch it. It needs to be broken down through enzymatic activity. That is why using pectic enzyme is so important in these situations.

You can try adding more pectic enzyme to the wine, but it may take a while for the full reaction to take place. The enzymes work much more slowly after the fermentation when the activity is not present. Patience may be required on your part. It could even take several months.

Shop Mini Jet Wine FilterIf you would like to verify that it is a pectin haze you are dealing with you can take a small sample of the wine and add extreme doses of the pectic enzyme to it to see if it will clear the wine: say, a teaspoon to 4 oz. to 8 oz. of wine. You should see a reaction with in days, if not hours, at this dosage.

Hope this information about using pectic enzyme helps you out.

Happy Winemaking!

Making Muscadine Wine: On The Skins Or Just The Juice?

Muscadines For Making WineDo I need to leave on the skins with my gold muscadine must, as I do when I make purple scuppernong must? Or do I need to ferment without as most white wine recipes do when making muscadine wine. Love the advice we receive here. Always great. Thanks for your time and knowledge.

Frank V. – TX
—–
Hello Frank,

Thanks for the kind words and a great question about making muscadine wine.

It is possible to make a white homemade muscadine wine with or without the pulp and skins. It is mostly a matter of personal taste, but it is also an important decision because the resulting wine will be very different in each case.

If you use nothing but the juice from the muscadine grapes to make the wine you will produce a wine that is lighter-bodied, crisp, and refreshing. It will have a straw color. The wine will mature fairly quickly, meaning it will usually be drinkable in a matter of weeks.

One important consideration when making muscadine wine from juice only is that the white muscadines will need to be crush and then pressed with an actual wine press, otherwise you will be leaving a lot of grape juice behind in the pulp. The juice will need to be squeezed from the pulp to avoid this significant waste.

Shop Wine PressIf you leave the pulp in the fermentation, the body of the wine will be much fuller and heavier. The color of the muscadine wine will be more intense and closer to a gold color than a straw color. It will be less refreshing, but more rich and earthy. It will have wider array of flavors, adding complexity to the wine. Leaving the skins in the fermentation can make a considerable difference.

If making a white muscadine wine with the skin and pulp, there may be more care required to get the wine to clear. It will also take longer to age into something you’d want to drink. I could take the better part of a year for the wine to come around.

Once the pulp and skins are removed from the fermentation, it would be advisable to press them to maximize your output of wine. However, in this case it is not not as critical a before because the fermentation will have broken down the pulp to a point where a significant portion of the juice will have be extracted.

My personal opinion is that when you are making muscadine wine at home you should take a middle-of-the-road approach.

Most red wines are fermented on the pulp for around 5 to 7 days. The more days the pulp is in the fermentation, the fuller the body. Wineries use the numbers of days to partially control the body of the wine they are producing. In a sense, they are sculpting the character of the wine.

This sculpting is used occasionally when making white wines, too. One that comes to mind is Sauvignon Blanc. It is not unusual for the skins and pulp to be in with the juice for the first day, just to extract more of the grape’s body.

Shop Wine Making KitsThis approach can be used when making muscadine wine at home, only I would leave the pulp in for 2 or 3 days and then remove the skins and pulp and then press. Make it a short primary fermentation. By doing this you should end up with a white muscadine wine that won’t take a year or more to maturate, but will still have some nice flavor and body that will make the wine enjoyable and interesting.

Having said this, it is your wine. If you are look for a crisp and refreshing muscadine wine, leave the pulp and skins out of the equation altogether. If you’re looking for a big, full muscadine wine with lots of flavor, but may take a year or better to age out, keep the skins and pulp in the fermentation for 7 days.

Frank, I hope this is the information you was looking for. We also have a recipe for making muscadine wine, if you need one. It also has directions on how to make the muscadine wine. If you’re not sure what you want to do, just do something. You’ll end up with a wine regardless. And, you’ll have the experience of making a muscadine wine.

Happy Winemaking,
Ed Kraus
—–
Ed Kraus is a 3rd generation home brewer/winemaker and has been an owner of E. C. Kraus since 1999. He has been helping individuals make better wine and beer for over 25 years.

Increasing Your Wine’s Fruity Flavors

Increasing Wine FlavoringJust wondering if your liqueur flavorings could be added to a fruit wine as a wine flavoring additive… for a little stronger flavor… Our blackberry wine, from last year, is not real fruity…. and wondered if this would give it a flavor boost…

Thank you,
Sandy M.
—–
Hi Sandy,

To answer your question, yes, you can use these liqueur flavorings as wine flavoring additives to increase the flavor your wine. It is recommended that you do not add more than one bottle of flavoring to each five gallons. These extract flavorings are very strong, and should be used with care. Adding more than one or two bottles can bring a bitter aftertaste to the wine.

One of the wine making tips I tell people when using any kind of wine flavoring extract or additive, is that the full flavor impression does not usually take effect immediately. It takes a little time for the extracts flavoring to come together with the wine. Letting the wine sit a day to let the flavors mingle is recommended before making any decisions to add more flavoring.

Shop Liqueur FlavoringsBefore you decide to add liqueur flavorings to your wine, there is a point I’d like to bring up. One of the things that can throw you off as a home winemaker, particularly if you’re just beginning to learn how to make your own wine, is experiencing the flavors of a dry fruit wine. Dry means the wine has no taste-able sweetness to it, which is normally the case after fermentation, if the fermentation has completed successfully.

One of the effects that dryness has on a wine is that it reduces the fruity impression. When all the sugars have been fermented out of the fruit juice it takes on an entirely different character.

The reason I’m bringing this up is because, increasing the fruity flavors of the wine may be just a matter of adding some sweetness back to it, and bringing the wine back into better balance. This is simply done by adding a sugar/water syrup mixture to the wine until the desired effect has been achieved.

A wine stabilizer such as potassium sorbate will need to be added, as well, to keep the fermentation from starting up again. This is something that should be done at bottling time.Buy Wine Ingredient Kits

Even if you like your wines dry, adding some sugar to the wine to make it a little less puckering can bring out a substantial amount of fruitiness, so never rule out back sweetening a wine, regardless of your personal tastes.

Learning how to make adjustments to a wine before bottling is a big part of home winemaking. By utilizing tools such as wine flavoring additives you can increase the flavor and pleasure of your homemade wines.

Happy Wine Making,
Ed Kraus
—–
Ed Kraus is a 3rd generation home brewer/winemaker and has been an owner of E. C. Kraus since 1999. He has been helping individuals make better wine and beer for over 25 years.

Using Oak Chips To Barrel Age Your Wines

Toasted Oak ChipsI’ve started my first batch of wine using the toasted oak chips, added after the primary fermentation. I am wondering if during the racking process about to be done after the secondary fermentation, do I transfer the oak chips too?

Name: Debra M.
State: Tennessee

Hello Debra,

Adding oak chips, that have been sap cleared and toasted, directly to the wine has long been one of the tricks up the home winemaker’s sleeve. It allows you to enjoy all the advantages of barrel-aging your wine without the cost or work of using and actual wine barrel.

These toasted oak chips are made from white oak that has been kilned to sap clear and then toasted to raise the woods sweetness to the outer surface of the chip. This toasting is no different than what is done to the inside of a wine barrel.

Typically, we recommend adding oak chips after the fermentation has completed and the wine has cleared. The wine is bulk-aged in something like a carboy along with the oak chips for a matter of weeks to months. You can sample the wine along the way to determine when you would like to take the chips out.

Adding the oak chips during the primary fermentation is okay, however you do not have as much control over the flavor when using this method. It’s hard to know if the wine needs more time on the chips or not. This is because you do not know what the wine is going to taste like at that point in the process.

The only exception to this argument is when you are making wine with a wine ingredient kit. Normally, these kits will instruct you to put the oak chips in the primary fermentation, just as you have done, and then remove them when racking the wine into a secondary fermenter. This method is okay in thisBuy Oak Powder situation because the producers of these wine ingredient kits already know exactly how much oak chip is needed in the primary fermentation to end up with a wine in good balance. They have already determined this by bench-testing several batches with varying quantities of oak.

If you are not making a wine from a wine ingredient kit, then I would suggest taking the toasted oak chips out of the wine must at this point. You may already have more oak impression in the wine than you like. You have no way of knowing with a wine in progress. Once the fermentation has completed and the wine has cleared, then you can revisit the possibility of adding toasted oak chips at that time for further aging.

Happy Winemaking,
Ed Kraus
—–
Ed Kraus is a 3rd generation home brewer/winemaker and has been an owner of E. C. Kraus since 1999. He has been helping individuals make better wine and beer for over 25 years.

Summer Time Wine: The best way to enjoy wine in the summer

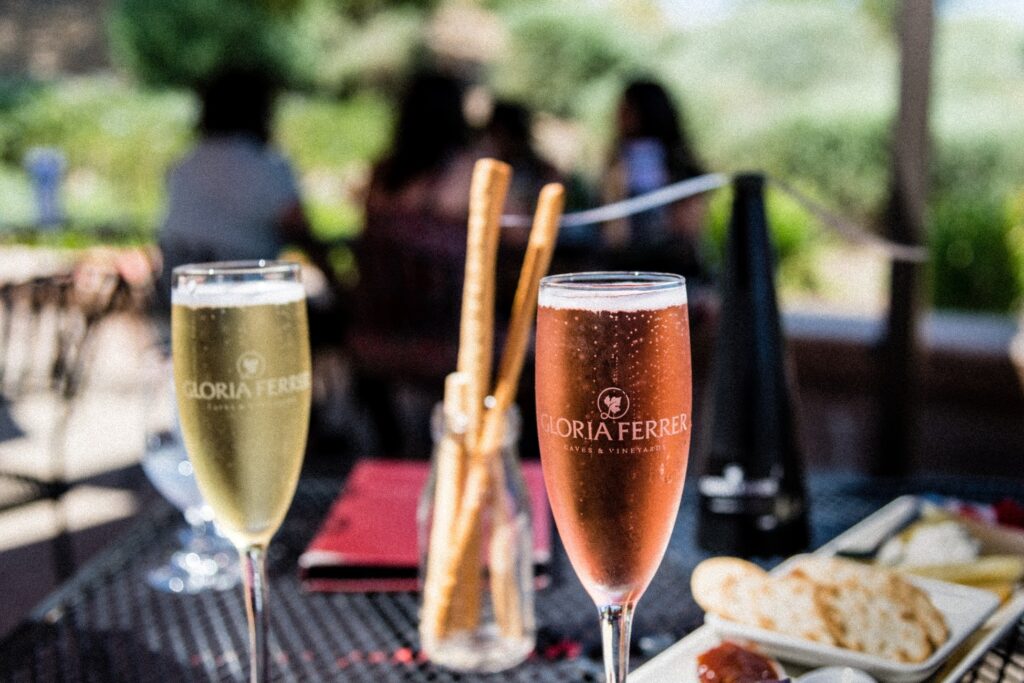
It’s summer time! What better way to celebrate warm weather than with a refreshing glass of wine?

This year has been pretty crazy, so kick off your shoes, lay back, and enjoy a heavy pour or two. (We don’t judge.)

Summer Wine Pairings

Wines are great by themselves, but can be even better when paired with the right food.

Food and wine go together like sand and the ocean. Let’s dive into the must have wines for this summer and their perfect pairings.

White Wines

White wine has a nice refreshing taste perfect for hot weather. Here are our favorites that are guaranteed to have your taste buds singing!

Pinot Grigio: This wine fluctuates in flavor depending on the region it’s fermented, but always pairs well with seafood. We recommend fresh boiled lobster or garlic lemon creole shrimp to compliment the wine.

Chardonnay: because this buttery wine is subtle in nature, it is important to pair it with mildly flavored food. Chardonnay is best paired with roasted chicken or a creamy alfredo.

Red Wines

Red wine is typically a bit more heavy than white, so people tend to shy away from it in the summer. However, there are great red wines that are just as refreshing in the hot weather.

Pinot Noir: This versatile wine is nice and light for a refreshing taste. It pairs great
with meats such as grilled pork chops.

Carménère: This is perfect for those red wine and steak lovers. The rich cherry flavors make it an absolute dream to sip on. Carménère is best served slightly chilled with a thick and juicy steak.

Rosé Wines

Rosé wine has the perfect pink color to really get you in the summer mood. With a variety to choose from, there’s always a delicious taste inside each bottle.

Grenache Rosé: This wine has a refreshing aftertaste for those extremely hot
summer days. Keep it light with a nice house salad or a caesar salad wrap.

Sangiovese Rosé: This bold wine is best served chilled to taste the layers of peach,
melon, and rose. It’s very versatile and can be paired with anything you want! We recommend orange chicken or even thai.

Summer Activities

Not only does wine pair well with food… it can taste that much better during one of your favorite summer activities.

Here are our favorite outdoor summer wine activities.

Backyard Picnic

If you’re still not ready to go out to a public restaurant, bring the restaurant to you! Set up a cute picnic in your backyard and order food from your favorite eatery.

Grab a picnic blanket, napkins, two glasses, and a bottle of wine. Even a boombox with some summer jams to set the mood.

Make sure you’re pairing the right food with the wine you choose. We suggest a rose wine to give you that summer feel and cool you down while you’re outside in the hot sun.

Wine Tasting

Another fun idea at home is a DIY wine tasting. Invite your friends over, and set up a nice wine tasting in your kitchen or outdoor space.

Grab a variety of red and white summer wines and try guessing the fruits and flavors that make up each wine. Make sure to have light snacks on the counter too for a proper tasting and pairing.

Beach Day

Sun, sand and six feet apart… the beach never sounded so good!

Grab your friends and your wine cooler. Sipping wine blissfully on the beach is hard to beat. After riding the waves, or building sand castles, make a toast to social distancing while having fun.

Don’t forget the sunscreen! Excessive UV rays are great for grapes, not necessarily you.
Whether you’re at home or outside, summer wines are the way to celebrate great weather, tasty food and fun activities.

Have a great summer!

When To Start The Secondary Fermentation

Starting Secondary FermentationHow long can I let the wine ferment before racking into a carboy and starting the secondary fermentation? My wine has been working vigorously for almost three weeks now.

Russ — NY
—–
Hello Russ,

When to start the secondary fermentation is a question we get from time to time. The quick answer is, “it depends”.

If you are fermenting on fruit pulp, you will want to move the wine into a secondary fermenter around the 4th to 7th day. Whether you rack on the 4th day or on the 7th day will make a noticeable difference in the body and color of the wine. The longer the pulp is in the primary fermentation, the more tannin and color pigmentation will be extracted from the fruit. So timing is important when there is fresh fruit involved.

If you are fermenting from a juice concentrate, where there is no pulp involved, when to start the secondary fermentation is still important but not nearly as critical. If you are fermenting an actual wine juice kit, then I strongly suggest that you follow the directions that came with it. It will specify a number of days before your first racking.

If you do not have an actual wine juice kit but are freestyling it with some juice concentrate you have, then I would take the following into consideration when determining when to start the secondary fermentation:

  • Shop CarboysYou will want the primary fermentation to be long enough to allow the yeast colony to grow into healthy numbers. The primary fermentation should be exposed to air. Don’t use an air-lock on it. Just cover it with a thin towel. Oxygen is what allows that little packet of wine yeast you added to flourish to about 100 to 200 times itself. If all goes well, this will happen in about 3 days.
  • The fermentation needs to have settled down enough so that it doesn’t foam out of the secondary fermenter. You do not want the secondary fermenter to have a lot of head-space, so there will be little room for foaming. Yes, you could employ a blow-off tube into a jug of water, but it is completely unnecessary to go through such measures when simply waiting longer will do. This is not an issue that will affect the wine. It’s more of a practicality issue.
  • You do not want the wine to be sitting on dead yeast cells for extended periods of time. You want to get the wine off the sediment in a timely manner. Not doing so can cause a condition known as autolysis. This is when the live yeast cells start feeding on dead yeast cells. This mostly happens the wine yeast run out of sugars to consume. This result is an off-taste in the wine that ranges from bitter-nut to metallic. For this reason the primary fermentation should last no longer than 2 weeks, and less than this if the fermentation has already stopped.

Shop Wine Making KitsRuss, all these things need to be considered when trying to figure out when to start the secondary fermentation. If you are making your wine from fresh fruit, the timing is fairly narrow 4 to 7 days. If you are making your wine from a wine juice kit, the answer’s simple: follow the directions. But if you on your own with some concentrate consider the three bullet-points above.

Happy Wine Making,
Customer Service at E. C. Kraus
—–
Ed Kraus is a 3rd generation home brewer/winemaker and has been an owner of E. C. Kraus since 1999. He has been helping individuals make better wine and beer for over 25 years.