In a world where you can DIY just about anything, why not try wine? There’s a good chance you already have some of the household items tucked away in your pantry. With the right tools, ingredients, and environment, you can bottle up a hefty batch of your favorite vino. Here’s how to get started:
Category Archives: Wine Making Kits
Leigh Erwin: Bottling My Homemade Chardonnay Wine
 Hi everyone!
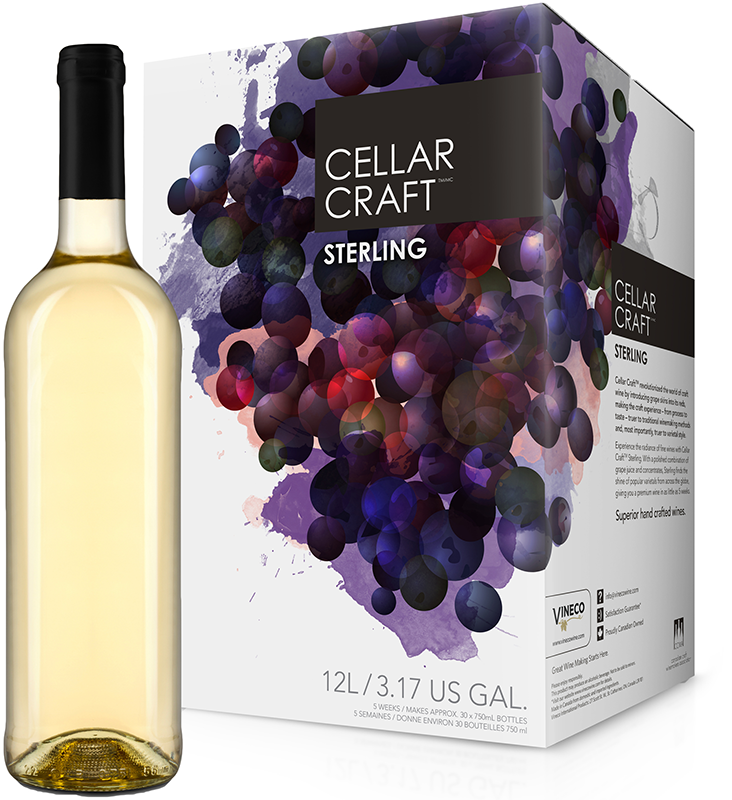
So, I finally finished my Cellar Craft Sterling California Chardonnay! I’m very happy it’s done, especially since it’s my second time attempting to make it, but I’m still not 100% convinced it’s going to turn out the best it can be. The specific gravity on my wine hydrometer never got exactly to where it was supposed to—it was very close though.
By the end, the specific gravity was supposed to be 0.998 or less, but as luck would have it, it ended up at 1.000. It’s strange because when I started the clearing stage it was at 0.998, but when I went to bottle the wine, it was back up to 1.000. I suppose maybe the temperatures weren’t exactly the same on those two days, but I foolishly did not check.
Anyway, bottling this homemade wine went very smoothly. I steamed the corks before putting them into the wine bottles as I have been doing, and cleaned and sterilized more bottles that I probably needed. I ended up only needing 23 wine bottles in the end, so I must have lost a little bit of wine at some point. I do remember that every time I racked the wine there was a little left over in the bottom of the carboy, so that’s probably where most of my losses occurred. I suppose the only other losses would be during evaporation over time, but that’s pretty much out of my control (other than topping off, but I didn’t do that).
One thing I should note is that I did deviate from the instructions a little bit in terms of when I did the actual bottling of the wine. Life kind of got in the way, and I did get a little lazy for a while there, so I ended up delaying the bottling process for a couple of weeks longer than usual. I figured since it was completely closed off from oxygen, I didn’t really have anything to worry about. Hopefully it sitting there in the carboy for longer only makes it better!
Since I am currently pregnant, I haven’t actually tasted the wine so I have no idea how it turned out! My husband sampled it and said he thinks it reminds him of the Gewurztraminer I made previously, but with less floral character. He also guessed that the alcohol content was on the relatively high side for a Chardonnay (as it was with my Gewurzt), though when I crunched the numbers, it turned out to be 13.13%. It’s not as high as the Gewurzt, so maybe it was the fact that he was tasting the wine pretty much immediately after bottling the wine that made it seem a little unbalanced.
I lovingly reminded my husband to save me at least half a case so that after the baby is born I can actually enjoy some of the wine myself!
All and all, bottling this homemade wine at home went pretty smooth. No surprises—and that’s a good thing. Now all we have to do is let the wine sit for a while and see how things turn out.
———————————–
 My name is Leigh Erwin, and I am a brand-spankin’ new home winemaker! E. C. Kraus has asked me to share with you my journey from a first-time dabbler to an accomplished home winemaker. From time to time I’ll be checking in with this blog and reporting my experience with you: the good, bad – and the ugly.
Leigh Erwin: Making A California Chardonnay Wine Kit
 Hi everyone!
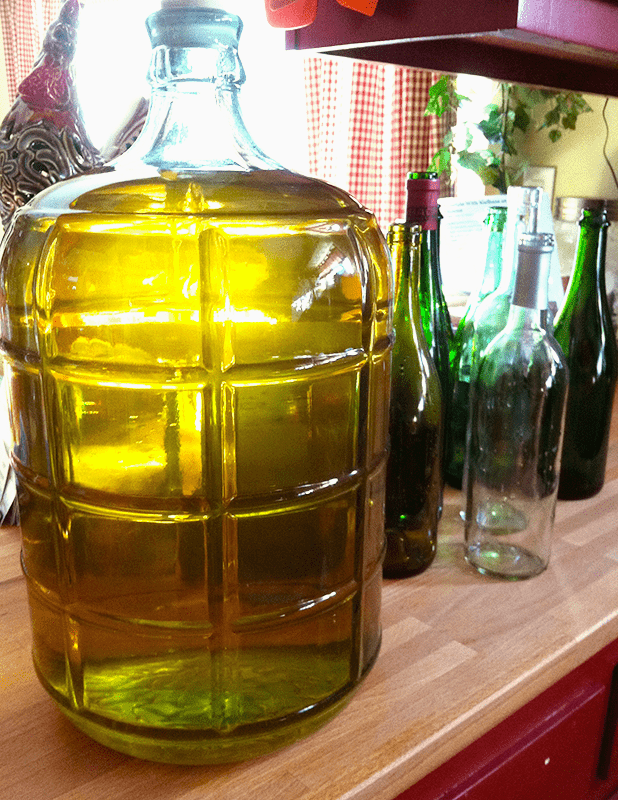
I’m excited to finally be making a new batch of wine after a couple of weeks hiatus. I’m partially nervous, though, because I’m making the Cellar Craft Sterling California Chardonnay wine kit again, and if you recall last time I tried to do that, I messed up big time in regards to the fermentation temperature.
This time, however, I am prepared! I have the heating pad all set up and am not going to touch it at all until fermentation is complete.
To start the Chardonnay wine kit off, I ended up using tap water as if you recall from an earlier post I wrote, the tap water here where I live doesn’t give off any sort of chlorine smell and I’m pretty positive it’s winemaking worthy. I remember making a red wine in the past with straight tap water and it came out just fine, so hopefully the same will be true for this white.
Primary fermentation for this Chardonnay wine kit went very smoothly. I followed all instructions that came with the wine kit to the letter and made sure the temperature of the wine was never too low.
Secondary fermentation came right on schedule for this Chardonnay (day 7), though I did notice it still smelled a bit yeasty. Cue flashbacks from the screwed up batch….
Anyway, since there is still yeast doing their thing in there, I was not at all concerned about the yeasty smell and crossed my fingers that it could complete secondary instead of getting stuck like it did last time. Actually, I don’t think it even made it out of primary fermentation last time, but I digress…
The end of secondary fermentation, however, did not come exactly on time as the instructions suggested it probably would. Instead of finishing up on Day 20 as the instructions indicated, I didn’t move on to the degassing stage until Day 24. I actually think I may have made a slight mistake at this point though, as I think I stopped secondary 0.002 specific gravity points too soon, according to my wine hydrometer.
See, the instructions said: “Targets: Sterling Reds, Showcase Reds & Whites: <0.998 or Sterling Whites: <0.996.” The specific gravity I noted on Day 24 was 0.998, so quickly looking at the Target values, I thought I had been working with the Showcase White and that 0.998 was correct. Well, turns out I read it a little too quickly and had forgotten that I was actually working with the Sterling White, so I shouldn’t have moved onto the next step until the specific gravity was 0.996. Oopsie. I hope that doesn’t come back to bite me.
The wine didn’t smell nearly as yeasty any more, though I thought I might still be able to smell a little bit. I should note: my sense of smell might be a little heightened right now since I am pregnant (surprise!), so I’m hoping it’s still going to be OK and whatever yeasts might still be in there will fall out during the clearing stage.
———————————–
 My name is Leigh Erwin, and I am a brand-spankin’ new home winemaker! E. C. Kraus has asked me to share with you my journey from a first-time dabbler to an accomplished home winemaker. From time to time I’ll be checking in with this blog and reporting my experience with you: the good, bad – and the ugly.
Leigh Erwin: Starting A Wine Making Ingredient Kit
 Hi everyone!
I’m so excited I’m finally giving that Cellar Craft Sterling California Chardonnay another go! If you recall, the last time I started this wine making ingredient kit I totally screwed up with the fermentation temperature. It was too cool. I didn’t really catch the error until it was too late. I tried to resurrect it, but alas, it was not to be.
This time I came prepared with my fermenter heating pad and barring any long-term power outages here in Colorado (knock on wood), I shouldn’t run into that problem again!
I find it so funny that I need to use a heating element when it’s been about 90 degrees outside for the past two weeks, but at least I know that my basement is a great place to hang out if I get too warm! I keep the air conditioning running but even though I have the vents closed to the wine room, it’s still a lot cooler down there than the rest of the house, necessitating the use of the heating pad basically all year round. That’s OK with me though – whatever keeps the temperature steady makes me happy!
Anyway, I decided today’s the day I’ll be starting a wine making ingredient kit. So I pulled out the directions that came with the wine kit and got to work. I mixed together some hot water and the bentonite packets. Gotta love that clay smell! Then, I added in the wine base (love the smell of the juice!) and enough water to bring the total volume up to 23L/6gallons.
At this point, I checked the specific gravity with my wine hydrometer, and it was 1.100 at about 74°F. Running that through an online temperature corrector for the calibration temperature of my hydrometer, the specific gravity was about 1.101. At this little of a difference, I wonder if it really matters if I even do the correction. I suppose if it were borderline and I had to decide whether or not to move forward based on that value, I’d certainly want to do it. But for calculating the alcohol content at the end, I don’t think it’ll matter too much, especially since I’m not selling this to anyone!
After the specific gravity reading, I added the oak shavings, gave it a stir, then sprinkled the wine yeast on the top.
I plugged in the heating pad, covered the primary fermenter, and said a silent prayer that this batch wouldn’t turn out the way the first one did! I have a better feeling about this one, so fingers crossed it all comes out the way it is supposed to!
That’s really all there is to starting a wine making ingredient kit. Now I just sit and wait for 6-8 days before checking the specific gravity again to determine if the wine is ready to move on to secondary fermentation. I have learned my lesson from last time, however, and I will be at least poking my head in daily to make sure the yeasts are doing their thing and fermenting!
———————————–
 My name is Leigh Erwin, and I am a brand-spankin’ new home winemaker! E. C. Kraus has asked me to share with you my journey from a first-time dabbler to an accomplished home winemaker. From time to time I’ll be checking in with this blog and reporting my experience with you: the good, bad – and the ugly.
Leigh Erwin: Bottling My Nebbiolo Wine
 Hi everyone!
Just as a refresher, last time we caught up my Ken Ridge Classic Nebbiolo was moving along quite nicely, other than the fact that I completely forgot to add the oak granules way back in the beginning of the process.
According to the instructions that came with the Nebbiolo wine kit, the stabilization and clarification stage is only 6 days and then it’s time to bottle, however, due to my travel and unpredictable-at-times work schedule, I wasn’t able to actually bottle the wine until 13 days later. I thought this would be perfectly acceptable, since all the wine was doing at this stage was continuing to clear and if history serves me correctly, the longer I wait, the more clear the wine will be.
Since I have been having so many problems with my filter system, I decided to forgo the filtering for this particular wine and just let gravity do its thing. I do plan on revisiting this filtering system issue at some point in the near future, however, at this particular time, I was not quite ready.
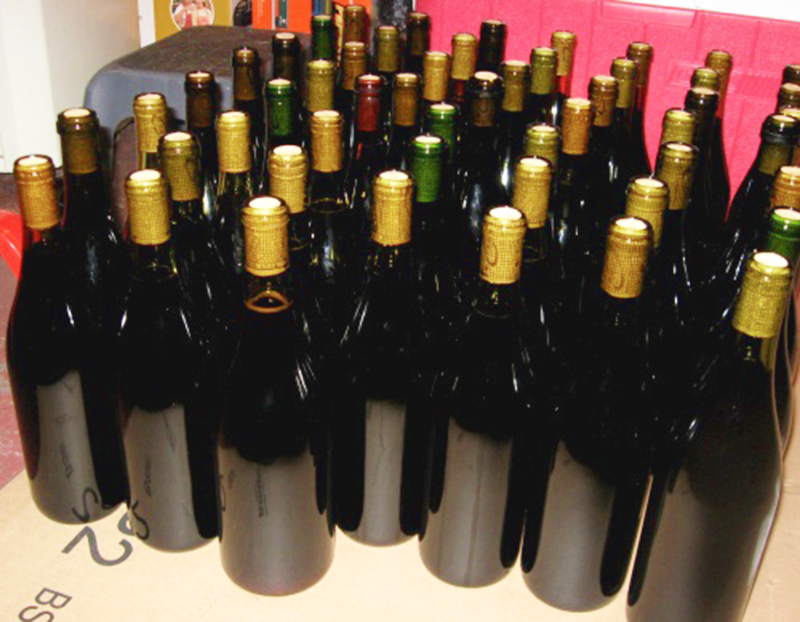
So, other than the delayed bottling date and the lack of filtering, bottling the wine itself, went pretty well. I ended up getting 25 bottles (well, 24 and then ¾ of a 25th bottle) of wine out of the batch, which is probably the best yield I’ve done to date. In the past, you might remember me spilling and otherwise losing some wine, but not this time!
Other than getting sprayed a little in the eye with wine when I over-enthusiastically filled the siphoning hose prior to bottling the wine (good thing I was wearing glasses!), I didn’t lose very much at all this time. I suppose I technically lost 5 bottles since the wine ingredient kit is designed to make 30 bottles, but all in all, I’m very pleased with the yield.
 I have to say though, my least favorite part about bottle the wine probably has to be removing labels off of old wine bottles prior to cleaning/sanitizing them for use. I know, I know, I don’t HAVE to remove the wine labels, but it just looks so much cleaner and is less confusing if all my bottles have the same (or no) label to begin with.
I put several wine bottles in a sink with piping hot water, and to my surprise all of the labels just sloughed right off without me doing anything. Unfortunately, as I put more wine bottles in, the harder it was to take the labels off and the more I had to scrap off the teeny tiny bits of glue with a knife. I don’t know if this is because the water was cooling down making the glue less likely to “let go” on its own, or if the labels are just all so different that some are easy to take off while others make you want to throw the bottle out the window.
I realize this complaint is extremely minor in the grand scheme of home winemaking, but I feel better now that I got it off my chest. Cheers!
———————————–
 My name is Leigh Erwin, and I am a brand-spankin’ new home winemaker! E. C. Kraus has asked me to share with you my journey from a first-time dabbler to an accomplished home winemaker. From time to time I’ll be checking in with this blog and reporting my experience with you: the good, bad – and the ugly.
Leigh Erwin: Making A Nebbiolo Wine Ingredient Kit
 Hi everyone!
If you recall from my last entry, I had just started making another wine ingredient kit – a Ken Ridge Classic Nebbiolo. The primary fermentation was just bubbling away and everything seemed to be going smoothly.
To prepare for secondary fermentation, I was a little curious how I was going to keep the elderberries that came with the kit and were now floating in the wine, from transferring through the tubing into my clean carboy. I suppose if I had used my racking cane with the little red cap on the bottom this wouldn’t have been an issue at all, but since my primary fermenter has a spigot on it, I decided to just hook up the siphoning hose directly to the spigot and transfer away with the flip of a switch.
Since I didn’t have any sort of filter in front of the spigot nor did I have the elderberries in any sort of cheesecloth or bag, I improvised by placing a piece of paper towel in front of the hole of the spigot to keep the large pieces of elderberries from transferring into my clean carboy for secondary fermentation. I don’t know if this was the smartest idea, but the towels were clean and as far as I could tell, sanitary. I think next time this happens when making a wine ingredient kit, I’ll just go ahead and use the racking cane, or maybe fish the elderberries out first prior to transferring the wine over.
 Other than this little improvisation, secondary fermentation went along just swimmingly. 12 days later, I performed the degassing stage which like secondary fermentation, went along just fine.
The only issue that came up here is that only now did I realize that I forgot to add the oak granulars way back in primary fermentation! I don’t know how I managed to do that, other than the fact that when I opened the drawer that the granulars were in, I noticed they were all the way in the back of the drawer so I had somehow missed them the first time around. Smooth.
While I was temporarily upset that I forgot to add the oak while making this wine ingredient kit, I decided that it didn’t really matter too much and that I would just be making a very fruit forward Nebbiolo instead of a more standard style. These little mistakes can come back to bite you sometimes, while other times, it doesn’t really matter too much if the wine is most likely only going to be consumed by you and your partner!
———————————–
 My name is Leigh Erwin, and I am a brand-spankin’ new home winemaker! E. C. Kraus has asked me to share with you my journey from a first-time dabbler to an accomplished home winemaker. From time to time I’ll be checking in with this blog and reporting my experience with you: the good, bad – and the ugly.
Leigh Erwin: Starting A Nebbiolo Wine Ingredient Kit
Hello everyone,
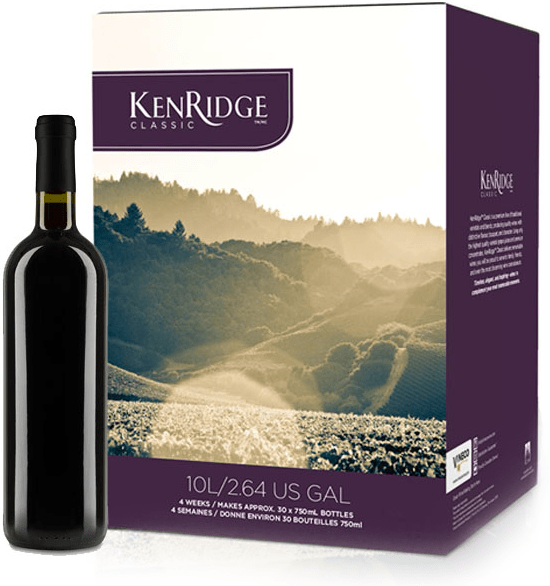
If you recall from before, at the same time I purchased my Chardonnay kit, I also purchased the Ken Ridge Classic Nebbiolo wine ingredient kit.
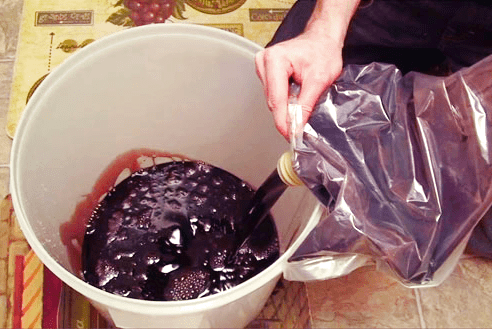
Just like all other times, I drew off tap water the day before to blow off any potential chlorine that might be in the water. Then, the next day, I poured the grape juice concentrate from the kit into my cleaned and sterilized primary fermenter and used the water to rinse the bag. The instructions that came with the wine ingredient kit said to use warm water but I used room temperature water instead. I don’t THINK that’ll make a difference, but I could be wrong.
At this point, I added the elderberry packet that was included in my wine kit and then added enough water to bring the whole thing up to 6 gallons. I think the elderberries will be a nice touch to the particular wine.
At this point, I took the temperature with my thermometer and the specific gravity measurement with my wine hydrometer, which came out to 64°F. and 1.092, respectively. Since the temperature was a little low to start the primary fermentation, I turned on the heating pad and left the whole thing overnight to heat up a bit before adding the yeast. The next day, the temperature was up to 74°F. which was perfect.
I then sprinkled in the wine yeast and left the cover loosely on the primary fermenter.
One thing I did differently this time to keep the wine nice and appropriately warm was to warm a towel around the fermenter. I noticed that based on the shape of the base and the material of the fermenter, it was taking a while to heat up, so I wrapped it in a towel to get it going faster.
I’ve been checking on the wine every day now, and it has been bubbling along quite nicely and it smells great. I did notice the temperature was starting to creep up to a little too high (it was 84°F. last I checked), so I removed the blanket so that hopefully the temperature will drop back down a couple of degrees. I remember reading somewhere that too warm of fermentation temperature can promote off-flavors in the wine, so we’ll have to watch that – 70°F. to 75°F. is what I’m shooting for.
I’m very excited about this wine ingredient kit. The Nebbiolo smells and looks great. I can’t wait for it to be done.
———————————–
 My name is Leigh Erwin, and I am a brand-spankin’ new home winemaker! E. C. Kraus has asked me to share with you my journey from a first-time dabbler to an accomplished home winemaker. From time to time I’ll be checking in with this blog and reporting my experience with you: the good, bad — and the ugly.
Leigh Erwin: Wine Fermentation Temperature
 Hi everyone!
I am very excited to finally be starting some new wines! I ended up purchasing two more wine making kits: the Cellar Craft Sterling California Chardonnay and the KenRidge Classic Nebbiolo. I chose the Cellar Craft Sterling Chardonnay because I have yet to make a white wine using oak chips and I wanted the opportunity to do so. As far as the red goes, I chose the Ken Ridge Classic Nebbiolo because it is a red that did not come with the skins, nor does it use oak. It does contain a packet of dried elderberries, which I thought was a fun change-up for a wine making kit.
I decided to start with the Chardonnay first for no reason in particular. Just like all the other times, I drew off water the night before, just in case there was chlorine in there so it could dissipate. The day of fermentation, I first prepared and added the bentonite solution, then added the wine base. Then, I used about 8 cups of warm water to rinse out the bag.
At this point, I checked the specific gravity with my hydrometer as well as the temperature, which came out to 1.100 and 69oF.
Feeling satisfied with these values, I then sprinkled the yeast onto the top of the juice and loosely placed the lid on top. I decided not to place the lid on tightly or use an air lock because from what I’ve read about primary fermentations, they actually like and need to have some oxygen in order to successfully proceed through the process.
According to the instructions that came with the wine making kit, I was to leave the wine fermenting until at least day 6. So, I did just that.
On day 6, I went to check in on the specific gravity and was surprised to find it had barely moved and was at 1.080. I had forgotten to check the temperature of the wine, but I could feel in the room it was somewhat cool.
See, previously the heat was switching on regularly, as it was late winter and that’s what happens! Around the time I started the Sterling Chardonnay, however, it had actually been very warm outside, so I wasn’t using the heat at all. There were actually a couple of days where it was so hot that I needed to switch on the air conditioning, but didn’t think about the fact that the vents were open in the winery room and while I was making things nice and comfortable in the upstairs living areas, I was inadvertently making things very cold in the basement where the winery room is located.
Beginning to wonder if that had something to do with my ridiculously slow fermentation; I decided to try a couple things to get this wine making kit fermenting while simultaneously reaching out to ECKraus for advice. My next post will follow up more on that.
———————————–
 My name is Leigh Erwin, and I am a brand-spankin’ new home winemaker! E. C. Kraus has asked me to share with you my journey from a first-time dabbler to an accomplished home winemaker. From time to time I’ll be checking in with this blog and reporting my experience with you: the good, bad — and the ugly.
Leigh Erwin: What To Make Next…
 Hi everyone!
Well, after the whole filtering debacle from last time (with my Rosso Fortissimo), I am more than ready to move on. I’m sure it’s just something I did—I probably just pushed on the pump on the wine filter too hard or tried to send the wine through when it wasn’t clear enough, but I’ve made my peace with it. After reading the reviews of the wine filter system, it sounds like everyone else is happy with it and I’m the only one putting up a stink about it. I’ve decided to give it another try (when the time comes) and next time really put more of an effort into making sure the wine is clear enough to begin with to function properly.
Even with all that hullaballoo, the wine from this wine ingredient kit turned out great! It’s not filtered, but it still tastes pretty nice! I don’t think it’s winning any medals, but then again, I have extremely high standards and it’ll probably take me years before I can make a wine that is THAT good.
Now that I’ve bottled both my Gewurztraminer and my Rosso Fortissimo, it’s time to think about making another wine(s)! What to do…what to do…..
I do eventually want to try making wine from fruit; however, it’s not exactly the season right now to get a bunch of fresh fruit. I suppose I could go to the grocery store and clean them out, but I never feel as though the fruit there is really fresh. It’s the local suppliers who will have the fruit I want, and it’ll still be at least another month before the local farmers market even opens to the public.
I am also looking forward to seeing how many apples I’ll actually get from the small tree that’s in the backyard of our new house! I don’t think it’s a very old tree, so it might not produce enough to make an entire batch of wine, but we’ll see. I suppose I could always supplement what I don’t get from my own tree with other apples from the local farmers market.
In the meantime, I will have to stick with wine ingredient kits for now!
Like last time, I will choose both a red and a white. I’ve been making a lot of California Connoisseur wines, which have been fantastic, but I do want to try some of the other brands E C Kraus sells just to see what those are like.
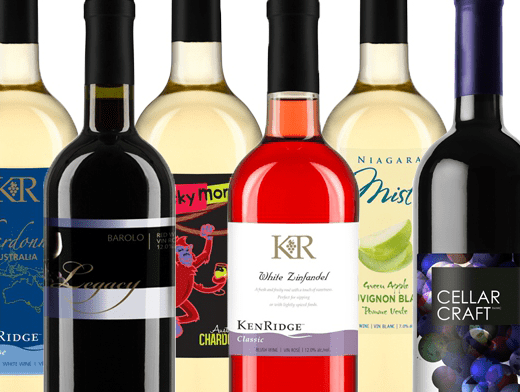
This time, to mix things up, I think I’ll go with the Chardonnay Reserve from Cellar Craft Sterling Collection since it uses oak and I’ve yet to make a white with oak, and then for the red, I might go with the Nebbiolo (Barolo) from KenRidge Classic because why not!
———————————–
 My name is Leigh Erwin, and I am a brand-spankin’ new home winemaker! E. C. Kraus has asked me to share with you my journey from a first-time dabbler to an accomplished home winemaker. From time to time I’ll be checking in with this blog and reporting my experience with you: the good, bad — and the ugly.
Leigh Erwin: Last Siphoning For My Wine Ingredient Kit
Last time, I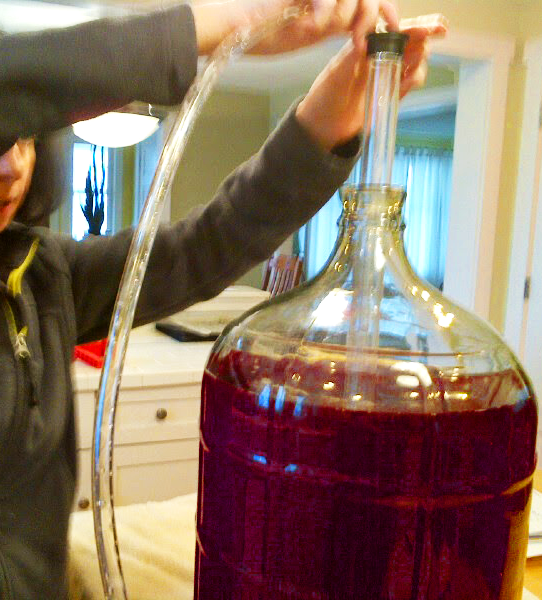 updated you all on the progress of the Rosso Fortissimo wine ingredient kit, I had just put it to bed for secondary fermentation. Things have been going well so far, and — fingers crossed — they continue to do so.
According to the instructions that came with this kit, I was supposed to leave the wine in secondary fermentation until at least day 20. Well, I ended up leaving it until day 22, basically because that’s how it worked out for my schedule. I figured leaving it an extra day or two wouldn’t hurt it at all — at the very least, I’d be ensuring that secondary fermentation was complete!
Checking the specific gravity with my hydrometer on day 22, it read 0.998. The instructions say secondary fermentation is complete and you’re ready to move on and siphon the wine into a clean carboy if the specific gravity is 0.998 or less, so I took that as the green light to go!
Next, I added the packet of potassium metabisulfite that came with the wine kit and stirred vigorously for two minutes per the instructions. I then realized that I actually wanted to rack the wine into a different vessel BEFORE this step, but it was too late at this point to do much about that. Technically, the suggestion to rack the wine wasn’t in the instructions until after the potassium metabisulfite addition, but I would have felt better anyway if I had done it first, just in case I accidentally left some behind in the original vessel. Maybe this doesn’t even matter — we’ll see.
Anyway, I then siphoned the wine immediately after the 2 minute stirring step for the potassium metabisulfite.
At this point, the instructions said that if gas was still being released to go ahead and stir the wine over the next day or two. Well, it was hard to say if it was, because I’ll be honest I didn’t pay too close attention to it, but I decided better safe than sorry and I would go ahead and stir the wine a few times over the next two days.
Two days later….
 I then added the potassium sorbate, and subsequently siphoned the wine again into a clean carboy so I could actually see if the wine was clearing or not. I know I know, I really should have racked the wine first prior to adding the potassium sorbate just in case I accidentally left some behind in the process, but like the last time, I just didn’t think about it. Here’s hoping I did it swiftly enough that none of it had a chance to settle.
After siphoning the wine into a carboy that I could actually see through, I added the packet of kieselsol and stirred gently for two minutes.
Then, I waited one hour.
Next, I added the packet of chitosan and stirred gently for one minute.
Then, I waited three hours.
Finally, I stirred the wine again for two minutes, re-fit the airlock, and said goodbye until day 42.
I realized I made a couple minor errors this time, but I’m hoping that this wine ingredient kit will be a little forgiving and it won’t really matter in the end. Here’s hoping for clear, tasty wine in the next couple weeks!
———————————–
 My name is Leigh Erwin, and I am a brand-spankin’ new home winemaker! E. C. Kraus has asked me to share with you my journey from a first-time dabbler to an accomplished home winemaker. From time to time I’ll be checking in with this blog and reporting my experience with you: the good, bad — and the ugly.
