 It’s bottling day for the Gewurztraminer wine kit! I’m so excited about this one because so far, it’s been tasting really nice!
One final specific gravity measurement with my hydrometer today and it looked to be somewhere between 0.994 and 0.995. I’ll just call it 0.995 to keep it simple.
I wanted to know what the final alcohol content was of my wine, so I looked up an online alcohol content calculator that used the beginning and ending specific gravity levels to calculate that. The original specific gravity reading was about 1.113 and the final reading was about 0.995. Plugging that into the online calculator, that gives me a percent alcohol value of 16 with this wine kit. I don’t think I’ve ever had a 16% alcohol by volume Gewurztraminer, but hey, there’s always a first time for everything!
Even though the alcohol seems kind of high, it still tastes pretty good if you ask me! In fact, I think this Gewurztraminer is probably the best wine I’ve made so far! I think part of it has to do with the fact that a good chunk of the time the wine was hanging out in glass instead of plastic, so it doesn’t have nearly as much (if any) of that plastic flavor that I kept getting on my first few wines.
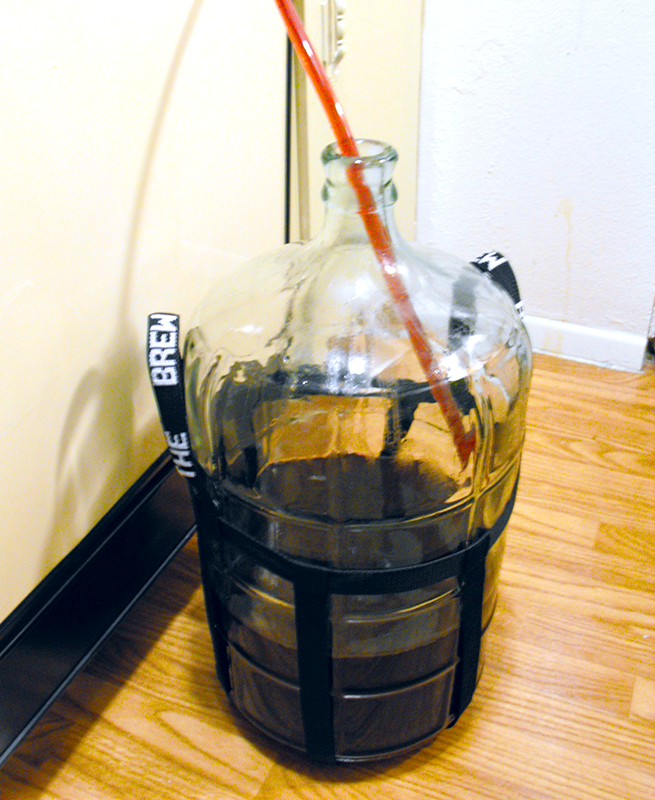
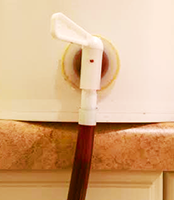
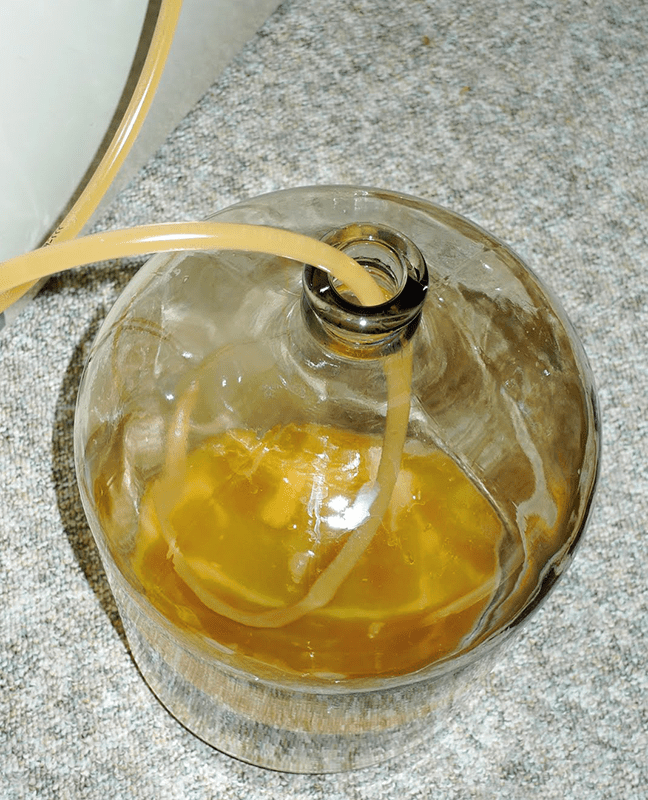
I ended up bottling this wine kit a little differently than in the past. First, I racked the wine into a clean and sterilized carboy that did not have a spigot on it. Then, instead of cleaning out the carboy that did have a spigot, I decided to just bottle the wine kit directly from the carboy without a spigot. That meant siphoning the wine directly into each wine bottle without the aid of an on/off “switch”, which at first I was kind of nervous about.
Turns out, it’s easier than I thought. No extra messes were made! Once the wine bottle got full enough, I just stood up to stop the flow and slowly lower the bottle to add a little bit more wine if needed. A couple of times I put a little bit too much in the bottle, so I just poured the extra back into the carboy. No problems!
Once I got down to the very bottom, I just poured the remaining wine into a bottle by lifting and dumping the entire carboy through a funnel. Since I had previously racked the wine into a clean carboy leaving all dregs behind, I wasn’t worried about pouring the remainder in like that. In fact, that’ll just be the first bottle we drink and we won’t give it to anyone else just in case.
I ended up filling 21 bottles with wine kit, with the 21st bottle only actually filling up about ¾ of the way. The kit was supposed to make 30 bottles ideally — I remember I spilled some of the juice on the floor in the very beginning, so that probably had something to do with it. Oh well, 21 bottles is better than 0 bottles!
All-and-all, bottling this wine kit went pretty well. The wine smells delicious and I can’t wait for it to age a little. But I have to be honest… right now it’s testing my patience!
—————————————————————–
 My name is Leigh Erwin, and I am a brand-spankin’ new home winemaker! E. C. Kraus has asked me to share with you my journey from a first-time dabbler to an accomplished home winemaker. From time to time I’ll be checking in with this blog and reporting my experience with you: the good, bad — and the ugly.
Category Archives: Wine Making Kits
Leigh Erwin: Clearing & Degassing My Gewurztraminer
 Hi there everyone!
As I mentioned last time, the Gewurztraminer I’m currently making from a wine ingredient kit was going a little bit slower than the instructions that came with it said, but then again I’m not surprised since primary & secondary fermentation was a little bit slower due to some room temperature issues. All that’s straightened out now, so I anticipate things should start moving along on a more normal schedule.
I ended up ending the fermentation and moving to the next step when the specific gravity on my hydrometer was holding steady between 0.995 and 0.996. I know the instructions said it should be less than 0.995, but it was hovering very closely to that value and not moving or showing any gas activity for two days straight. I made the call to move forward, as I didn’t think it was going to change any more.
So, instead of starting the degassing stage on day 20 as the wine kit instructions anticipated, I’m starting it on day 22. Not too delayed, so I’m still happy.
I ended up racking the wine twice — once to get it into a clean carboy, and then again to get it into the primary fermenter so that I could more easily stir the wine and get all the trapped CO2 gas out. The instructions mentioned to rack it once, but I’m thinking doing it a second time shouldn’t hurt it too much. We’ll see, I guess!
Per the instructions, I added the potassium metabisulphite and kieselsol and over the next two days ended up stirring the wine a total of 7 times (the instructions said to stir 6 to 8 times over the two days).
Prior to adding the stabilizing/clarifying ingredients that came with the wine ingredient kit, I moved the wine once more into another carboy. This time, moved it from the primary fermenter into a clear carboy so I could actually see when the wine was clear enough to move forward. The primary fermenter is opaque, so that would make it much more difficult to eyeball things and make a judgment call if need be.
I followed all instructions for the stabilizing/clarifying step, except for adding in the extra racking step at the beginning.
Also, for some reason, I seem to be missing an extra bung for the carboy, so I had to put some tinfoil over the opening and cover that with a measuring cup to try and keep the air out. Come to think of it, I seem to be missing my original primary fermenter that came with my first wine ingredient kit, so I’m thinking there is one box that didn’t quite make the 1600 mile move we recently made to our new home. Whoops! That’ll be in my next order from ECKraus for sure!
Now it’s a waiting game until bottling. By the way, I tasted the Gewurzt again and it tastes really nice. Hope it stays that way!
—————————————————————–
My name is Leigh Erwin, and I am a brand-spankin’ new home winemaker! E. C. Kraus has asked me to share with you my journey from a first-time dabbler to an accomplished home winemaker. From time to time I’ll be checking in with this blog and reporting my experience with you: the good, bad — and the ugly.
Leigh Erwin: Racking A Rosso Fortissimo
 Hey all!
Just a quick update in case you missed my last entry: my Gewurztraminer wine ingredient kit seems to be going along well, though it’s just a little bit slower coming out of secondary fermentation than the instructions that came with it predicted. It probably has another day or two to go, so I’ll just check the specific gravity every day. By the way, it tastes great for this stage…
On the other hand, the Rosso Fortissimo wine ingredient kit, had a specific gravity of 0.999 which is less than the 1.000 recommended in the instructions that came with it, so it is ready to move into secondary fermentation. This is a process winemakers call racking. That’s where I left off my last post, so I’ll pick up from there!
I gave the Rosso Fortissimo a little taste while I was checking the specific gravity, and I think it’s tasting pretty nice for this early stage. I got a lot of bright cherry character, while my husband made note of some good tannin structure. We’ll see how it develops — but I’m optimistic at this point.
The next step for this wine was to transfer or rack it from the primary fermentation vessel to the secondary fermentation carboy. I had cleaned and sterilized all equipment prior to getting started, so I was all ready to go after checking the specific gravity.
 I was debating whether or not to use the siphon tube and hosing for the racking, or if I should just hook the hose up directly to the spigot at the bottom of the fermentation vessel. At first I thought I’d use the siphon tube, and had it all clean and sterilized, but then I decided at the last minute it would be a heck of a lot easier, quicker, and probably less messy to just hook the hose up directly to the spigot. I mean, what else would there be a spigot there for, right!
 The racking went really well, and I stopped it right at the point where I could see all the lovely dead yeasts and other gunk at the bottom of the fermenter. I’m sure a little bit snuck in the secondary fermentation carboy, but I’m sure it was minimal based on the stuff that was leftover in the first tank! There an excellent post about racking wine on this blog that’s worth noting. It explains how to minimize wine loss during the procedure.
These wine ingredient kits didn’t come with any enzymes or anything, which normally one would add at this stage, so I just closed it up with a rubber bung and fermentation lock and said “nighty-night!”. There already seems to be some gentle bubbling activity in the fermentation lock, so things seem to be progressing nicely. Now it’s a waiting game — I’ll keep my eyes on it every day to make sure nothing starts growing on it, but theoretically I won’t have to do anything with it for at least 10 more days (Day 20). At that point, I’ll check the specific gravity to see if it’s ready to move on to the clearing stage.
Fingers crossed things continue to move along well!
—————————————————————–
My name is Leigh Erwin, and I am a brand-spankin’ new home winemaker! E. C. Kraus has asked me to share with you my journey from a first-time dabbler to an accomplished home winemaker. From time to time I’ll be checking in with this blog and reporting my experience with you: the good, bad — and the ugly.
Leigh Erwin: A Time To Rack…
 Hi, everyone!
I’m happy to report that both my white and red wines seem to be fermenting nicely! The Gewürztraminer has been happily milling about in secondary fermentation, while my Rosso Fortissimo has been plugging along in primary fermentation.
I left the fermentation lock securely on the Gewurzt during this whole process, despite my nagging curiosity to remove it and give the wine a sniff. It looked great, and nothing appeared to be growing on it, so that was good enough for me to assume all was going well.
In regards to the Rosso, I gave it a gentle stir throughout the primary fermentation in order to keep those grape skins wet and submerged. I did miss one day right at the very beginning, but I don’t think that really had any effect on the wine, because at the end of the primary fermentation it all seemed great to me.
Even though people have said you tend to get more extract from the grape skins if they are left loose in the carboy, I did really like the ease and convenience of keeping them in the cheesecloth pouch that was provided to me in the wine ingredient kit. I remember leaving them loose when I made the Carmenere, and that was such a pain in the butt to clean up. I just made sure I gave the bag a good stir every day and hopefully that’ll be enough to get a good enough extraction for my husbands and my standards. We’re not shooting for any award winners quite yet!
Both wines were scheduled to move onto their respective next steps on the same day, so it was going to be an extremely busy day for me if they were both ready! I measured the specific gravity of both with my wine hydrometer, and truth be told, they were both NOT ready to move on.
The instructions for the Gewurzt said in order to move on to the degassing stage, the specific gravity should be less than 0.995, and no bubbling seen. After measuring the specific gravity and converting the result to account for the calibration temperature of the hydrometer, the SG of the Gewurzt was 0.996. So close! But not close enough! I’m not surprised it wasn’t quite there yet. If you recall, there had been some delays early on in the process due to fluctuating temperatures during primary fermentation. Also, paying closer attention to the fermentation lock, I did notice that there was still a little bit of bubbling going on.
So, I decided to let the Gewurzt sit for another day, and I’ll just check it daily until it’s ready.
The Rosso, on the other hand, had a specific gravity of 0.999 after temperature correction, while it was less than the 1.000 recommended SG for this wine, so it was ready to move onto the secondary fermentation. I’ll fill you in on all that in my next post!…
—————————————————————–
My name is Leigh Erwin, and I am a brand-spankin’ new home winemaker! E. C. Kraus has asked me to share with you my journey from a first-time dabbler to an accomplished home winemaker. From time to time I’ll be checking in with this blog and reporting my experience with you: the good, bad — and the ugly.
Leigh Erwin: Making Russo Fortissimo
 Hi all!
I’m very excited today, as it’s the first time ever I’ve attempted to make two wine ingredient kits at the same time!
The other day, I tucked the Gewurztraminer in for it’s 12 days or so in secondary fermentation, and since I have the equipment, ingredients, and space, I figured why not start another wine!
For my second wine ingredient kit of 2015, I’m going to make the Cellar Craft Showcase Red Wine – Rosso Fortissimo. I had sterilized everything the night before, so I was pretty much all ready to go and get started today.
The one thing that I remembered being a pain in the butt last time was marking the 23L mark on the fermenter. I know I know, it’s not THAT big a deal, but when the biggest measuring device you have is only 2 cups (500mL), filling the fermenter up to 23L with water to mark it is kind of annoying.
After putting markings on my fermenter, I dumped out the water and then added back in 2L plus the bentonite package. I mixed that as well as I could, though there were a couple of small lumps remaining when I gave up on that part. I don’t think it’ll be a big deal. I’m sure they’ll all get mixed up well eventually!
Then came what I think is the hardest part of the whole process: adding the wine juice. I always feel so awkward during this stage, since the bag is so heavy and sloshes around like crazy. I wish they made something a little sturdier so I would feel a little more secure about pouring it in.
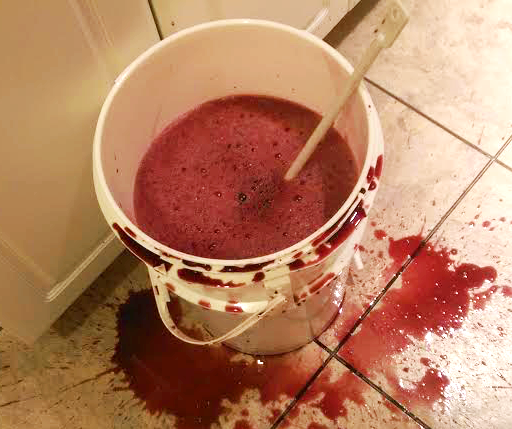 Well, of course while I was pouring the wine juice into the fermenter, my hands slipped and I spilled a bit on the floor. You can see from the picture that it’s really not that much, but at the time I was a little nervous that I was going to spill more. Thankfully, that didn’t happen.
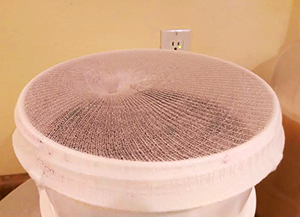 For the grape skins that came with this particular kit, I decided this time I would use the mesh bag that was supplied, since last time I remembered it was really a pain to get all the bits out of the wine when it was time to move on to secondary fermentation. I feel like I needed a third hand to do this, but I figured out a way to sort of secure the mesh to the top of the fermenter — at least in the beginning — to try and make the process a little easier.
Once the bag got too heavy, I had to apply some pressure to the bag with my elbows to keep it from falling in before I was finished squeezing all the grapes out of the pouch. Surprisingly, this went off pretty smoothly. I mixed everything together and then put on the lid. The instructions that came with this wine ingredient kit said the best time for checking specific gravity is between 12 and 24 hours after beginning, so that’s what I’m going to do before I move on any further.
After cleaning up the grape skin massacre on the floor with a mop and cleaning the spatter off the cupboards and doors, I felt like a little bit like a criminal cleaning up the scene of a crime. Hopefully in this case, I’ve already done my time and the rest will be smooth sailing.
I’m really hopeful for this wine ingredient kit. Despite any trials and tribulations, the Rosso Fortissimo smell incredible and can’t wait to see how it turns out.
—————————————————————–
My name is Leigh Erwin, and I am a brand-spankin’ new home winemaker! E. C. Kraus has asked me to share with you my journey from a first-time dabbler to an accomplished home winemaker. From time to time I’ll be checking in with this blog and reporting my experience with you: the good, bad — and the ugly.
Why The Big Difference In Price Between Wine Making Juices?
 There is a great spread of prices between our different brands of wine making juices. Some are in the $30 range while some are over $200. Many of our customers simply wonder why.
There are a couple of reasons for this:
- Level Of Concentration:
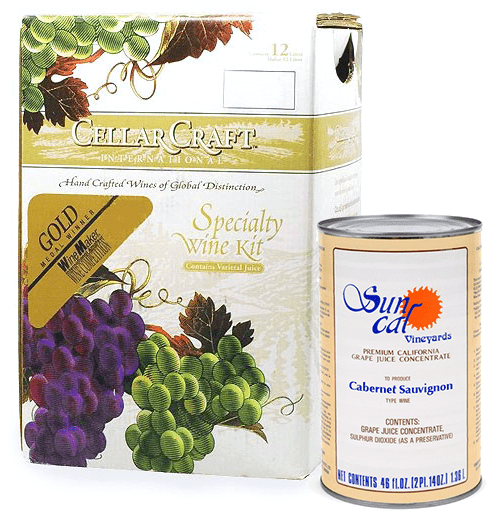
The first reason has to do with the how much these wine making juices are concentrated. At one end of the spectrum is our SunCal brand juice that comes in a 46 ounce can (about 1-1/2 quarts) for producing 5 gallons of wine. On the other end of the spectrum are our 18 liter wine ingredient kits (4.75 gallons) that is only slightly concentrated for making 6 gallons of wine. One is just much more concentrated than the other. Higher levels of concentration tend to take out some of the finer subtleties of a wine, making the wine more a everyday-drinker. Wine making juices that have been concentrated less or not at all will have flavors that can develop into something more complex or layered as it is aged. - The Selection Of Grape
Not all grapes are the same. Where and how they are grown can make a big difference. The soil, the climate, the age of the vines, all come into play when evaluating the grapes. Simply put, certain regions can command a higher price for there grapes because they make better wines. So, as you go up in price, you are going up in grape selection as well. This is no different than wines you buy commercially at the store. As a general rule-of-thumb, the better the selection of grape the more you will pay for the wine.
Having Said All This. . .
How much money you’ll want to put into the quality of a wine making juice may be different than the next winemaker. This has to do with how well you are able to discern the difference between various levels of quality. It makes no sense for you to buy a level of quality you are unable to taste, appreciate or even looking for.
Some of our customers are completely happy making wine from nothing but our SunCal selection. They use this brand over and over again and are completely satisfied with the quality. They can see no reason to spend anymore on wine making juices based on the quality they are already getting.
Other winemakers consider SunCal an everyday, common wine that they would not want to put their efforts into. These home winemakers would prefer to spend their time making more top-end wines.
The Bottom Line…
Figure out what level of quality suites your level of wine appreciation. Start out with maybe our California Connoisseur or European Select. These are mid-range wine making juices. After that maybe try a KenRidge Classic or a Cellar Craft Sterling and see what you think. By trying different levels you should be able to hone in on what is best for you.
—————————————————————–
Ed Kraus is a 3rd generation home brewer/winemaker and has been an owner of E. C. Kraus since 1999. He has been helping individuals make better wine and beer for over 25 years.
Leigh Erwin: Racking My Gewurztraminer to Secondary
 Hi everyone!
If you recall, Day 8 of the primary fermentation for my Gewurztraminer came and went with not much fanfare. According to the instructions, secondary fermentation should start on Day 8 IF the specific gravity was less than 1.010 on the wine hydrometer. Well, mine was not quite that low — almost, but not quite. It was 1.016 to be specific.
I waited one more day and checked the specific gravity again. This time, it was even closer at just over 1.010. I thought for a second if I should go ahead and move forward, but decided to turn off the heating pad and let it go one more day. It was SO close to 1.010 but since it was hovering just over that value, I decided killing the heat and let it slowly go for one more day would probably be the best thing to do.
So, Day 10 came and I checked the specific gravity on the hydrometer again. The temperature had dropped down to 64.5°F. since I didn’t have the heating pad on, and the specific gravity was….drum roll please….1.006! Perfect! That’s less than 1.010, so it was ready to move onto the secondary fermentation stage!
I had previously cleaned and sanitized all the wine making equipment I needed to prepare for secondary fermentation, so today’s step took hardly any time at all. I kept the tubing in the solution overnight just to make extra sure any travel dust or whatnot was gone and done for.
I hooked up the sterilized tubing to the spout on my primary fermenter, and let the wine flow into my glass carboy. I tipped the fermenter a little at the end to get as much wine transferred as possible without letting too much sediment in there. I think I did a fairly good job on that, because there was a nice amount of sediment left on the bottom of the fermenter when it was all said and done.
Finally, I cleaned and sterilized all the equipment I used and put them up to dry.
A couple of notes on this Gewurztraminer so far:
-
- It smells great! I didn’t taste it this time, as I was drinking some herbal tea and I knew I wouldn’t be able to taste the wine very well, but I did give it a nice sniff and it smelled wonderful. Smells like fermentation—a healthy fermentation!
- Remember how I said it was really cool in the finished basement where I am now making my wine? Well, turns out that in the haze that was unpacking the house and getting everything set up, I neglected to notice that every single vent was actually closed! No heat was even getting in there! No wonder it was so cool! I ended up opening up the vent in the small winery room, so if all goes well I won’t actually need the heating pad unless absolutely necessary! Score!
—————————————————————–
My name is Leigh Erwin, and I am a brand-spankin’ new home winemaker! E. C. Kraus has asked me to share with you my journey from a first-time dabbler to an accomplished home winemaker. From time to time I’ll be checking in with this blog and reporting my experience with you: the good, bad — and the ugly.
Leigh Erwin: 2015 Plans
 I hope everyone is having a great New Year so far! I’m looking forward to spending a lot more time improving my home winemaking technique in 2015, and hopefully cranking out some more quality wines!
I’m so excited to have my own room dedicated to winemaking. It’s a great upgrade from the teeny tiny space we had previously in our old condo.
In our new house, we also have a two car garage. While I probably can’t do too much with both of our vehicles in there, I am looking forward to using it as needed to do the more “messy” parts of home winemaking, including sorting and pressing fruit and the like. If I don’t have enough space when both cars are in there, I’ll just move one of them into the driveway for a day or so until I’m finished with whatever I’m doing related to home winemaking.
Once I’ve got everything completely unpacked, I’ll finally be able to start making wine again. So excited!
Here are my goals for this new chapter in my home winemaking adventures in 2015:
- Get set up in the new “winery” room in the new house.
- Start 2 wines at the same time instead of just working on one (maybe stagger the start time by a couple days or so).
- Attempt to make wine starting with whole fruit instead of concentrate.
- Make a rose style wine.
- Make a “weird” wine (i.e. something that someone wouldn’t associate with ever being a flavor of wine).
- Make another mead wine that actually tastes good (sigh).
The first goals that I plan to do are to set up the new winery room, and to start two wines around the same time. Which wines should I try? I think I’ll do both a white and a red to get things started.
Looking through the wide selection on the ECKraus website, for the red I’ve decided to order the Cellar Craft Showcase Collection: Rosso Fortissimo. The description listed sounds amazing: “Super-Tuscan styled wine vinted from Cabernet Sauvignon, Merlot, Sangiovese and other native Italian varieties. Fermented on Yakima crushed Merlot grapes. A big, full-bodied wine with solid structure and bold fruit notes. Complex cassis, plum and cherry notes balance the bold tannins. French and American oaks contribute toasty vanilla and greater depth in this intense wine.”
For the white, I’m going to try the California Connoisseur: Gewürztraminer. The description reads: “Its aroma is similar to that of raisins with some noticeable hits of anise and mint. Very spicy. Its flavors are intensely fruity and instantly bring to mind: apples, pears and grapefruit. Some cinnamon flavors as well.”
To get back into the swing of things, I’m going to do complete kits for both wines, since it’s been a little while since I’ve actually be able to make any wine. I hope I’m not too rusty!
————————————————————
My name is Leigh Erwin, and I am a brand-spankin’ new home winemaker! E. C. Kraus has asked me to share with you my journey from a first-time dabbler to an accomplished home winemaker. From time to time I’ll be checking in with this blog and reporting my experience with you: the good, bad — and the ugly.
For the Home Brew Beginner: Wine Ingredient Kits or Fresh Fruit
When you enter the world of home wine making, there are no limits as to the different types of wines you can make. You are free to combine ingredients, add flavors, use locally grown fresh fruit, or berries you grow in your own home garden. You can allow your personal tastes to dictate the dryness or sweetness of your wine, or determine whether you will use fresh fruit or go with commercially available wine ingredient kits for a more traditional wine.
Wine Making Kits and Wine Making Supplies
A wine making kit is a great way to start in the art of home wine making if you are a beginner, because it will introduce you to all the basics of wine making and provide you with the essential wine making supplies and ingredients you need to get started. Once you’re familiar with the process, you may want to make wine with whatever fresh fruits are available at different times of the year.
You will be able to use all of the equipment you got when you purchased any of the different wine kits available on homebrewing.org, and purchase whatever additional supplies you may need to use when making fruit wines. When making fruit wines, the added equipment you need will require additional space, so be sure you understand this before deciding to make fruit wines.
Wine Grape Ingredient Kits
Wine grape ingredient kits allow you to choose from wine grape varieties that come from all over the world. These grape varieties will allow you to make wines from the same grape varieties as the wines you’d typically purchase from wine retailers everywhere. These concentrates give you the ability to make wine from the same grapes that are used to make your favorite European, Californian, or other types of wines that are made elsewhere in the United States or other parts of the world.
The huge range of grape concentrates that are available, and the ease with which you can get them, and the obvious difficulty you’d have in getting comparable fresh grapes means that grape concentrates are probably the best option when it comes to making traditional wines from wine grapes.
Using Fresh Fruit to Make Wine
There is a huge variety of different types of fresh fruit you can use to make your own wine, and it isn’t more difficult to make fruit wine than it is to make wine with grape concentrate. Always make sure you are choosing fruits that are in season at the peak of their ripeness. Consider using strawberries or rhubarb in spring, blueberries, blackberries, apricots, peaches, nectarines or plums in summer, and apples in fall.
When you make wine from fresh fruit, you will have to test the acidity and amount of sugar in your liquid and make adjustments accordingly. You will also need to find out exactly how much fruit you need to use to make a gallon of wine. Home wine making recipes will instruct you as you go through each of the steps in the fruit wine making process.
The decision as to whether to use fresh fruit or wine concentrate is an entirely individual one. When you’re making your own wine you can add anything you want to it to alter the taste. You may want to add dried berries, herbs, or flowers to a grape wine to enhance its flavor, or you may want to use fresh berries to make a sweeter wine. If you are going to use fresh fruit, consider purchasing it from farmers markets because you’ll know that you’re getting it at the peak of freshness and ripeness. Enjoy this fun experience, and invite your family and friends over to savor the taste of your newest creations.
Best Way to Clean my Homebrew Kit and Other Equipment
Although a homebrew kit and other brewing equipment will have some basic instructions for sanitation, it is not always enough to simply clean off all of the minerals on the equipment. When minerals or organic materials used in brewing are left behind, the next batch of beer will not come out the way it is expected. Fortunately, cleaning the homebrew kit and equipment properly is not a hard process.
Scrub the Equipment
The best way to clean any kit and equipment used in brewing is by scrubbing away the visible dirt, debris, materials and stains. Start the process by rinsing off as much large debris or items as possible.
After rinsing, apply an appropriate cleaner to the equipment. The best cleaner is a powdered brewery wash, or PBW, which is designed specifically for cleaning the kit and equipment. If the brewery wash is not available, then a powdered oxy cleaner, liquid dish soap, or baking soda is also appropriate.
Remove any dirt, stains, or debris with a small amount of water with a cleaner and a scrub pad or brush. If the equipment is plastic, then use a terry cloth to avoid leaving behind scratches. Rinse the equipment until the cleaner is completely removed.
Sanitize the Equipment
Cleaning and sanitizing are not the same process. Sanitizing is only performed after the cleaning is complete because it is not possible to sanitize the debris left behind. Sanitation is the process of killing any microscopic organisms that are left behind after cleaning.
Sanitizing your homebrew equipment is a simple process. A sanitizing chemical, such as One Step No Rinse Cleanser or sodium metabisulphate, is dissolved in water and allowed to sit on the equipment and kit for the duration of time specified in the directions. In most cases, sanitizers will sit for roughly five minutes to bring the level of yeast, bacteria, and other microscopic concerns to a minimum. Don’t worry about knowing specifics; these sanitizers will have specific instructions on how to determine the amount of time and ingredients required.
Similar to wine, there are so many types of cleaners on the market you probably won’t know what is going to work best for you until you try them. If One Step and sodium metabisulphate don’t do the trick you can always try B-Bright Cleaner, Cleanpro SDH or campden tablets. Check out our full line of home wine making cleaning supplies and homebrew cleaning supplies for your system today. Cleaning is not only vital to getting the best taste; it is also a simple process.