Recipe Formulation: Brewing Dark Beers

Woman Drinking Dark BeerOne of the biggest challenges of homebrewing is recipe formulation. There are so many different ingredients available to the homebrewer, that it takes a lifetime of brewing to develop a solid understanding of how each one impacts beer flavor, aroma, color, and mouthfeel. That’s why I often recommend that new brewers try clone recipes. You have a good idea of how your homebrew is going to turn out, and you get learn about different brewing ingredients along the way.
But sure enough, coming up with your own beer recipes is one of the reasons people enjoy homebrewing. It’s a sudsy expression of creativity – that just happens to get you buzzed!
One of the more challenging aspects of beer recipe formulation is figuring out how different malts affect a beer. This post will cover some tips and tricks for developing dark beer recipes.

Tips for Brewing Dark Beers

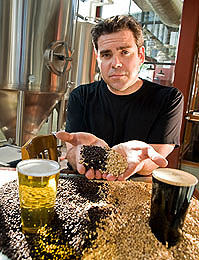
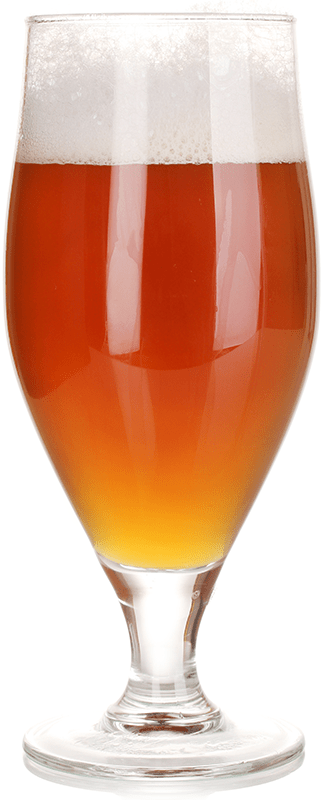
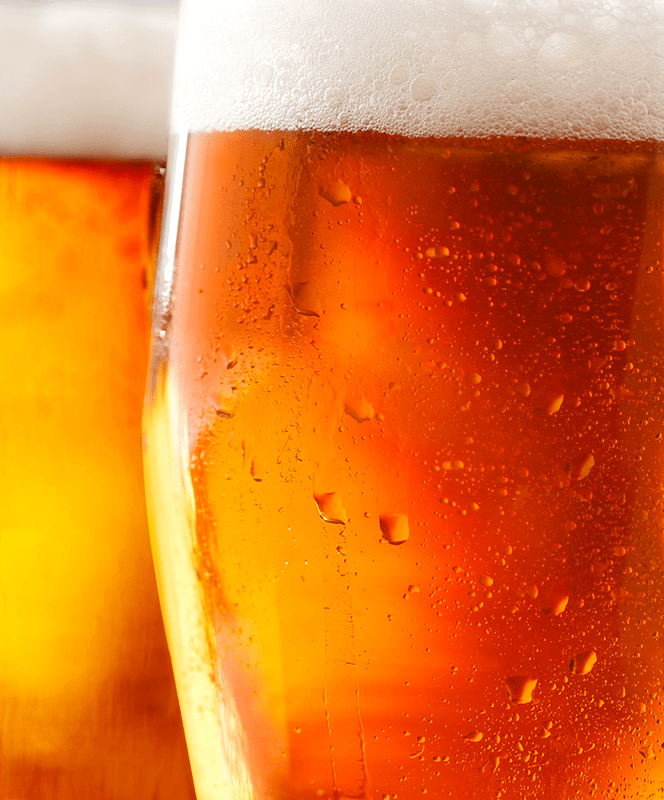
What makes a beer dark? Malt! In the third step of the malting process, a maltster heats the sprouted grain to dry it out and develop some flavor and color. This step is called kilning. Basically, the higher the heat and the longer the kiln, the darker color of the grain. Maltsters can used these variables to make malts that range from pale yellow in color to red, brown, or even black.shop_barley_grains
One thing to be aware of when brewing dark beer is, in general, it only takes a small amount of dark malt to affect beer color. But it’s not just about color – flavor is important too. It’s a balancing act between getting the flavor profile you want as well as the color.
When building a dark beer recipe, start by thinking about flavor. This clearly depends on the beer style, but also on your personal preference. Do you want a bready, almost chewy, sweet malt flavor? In this case the beer recipe might include decent amounts of lightly roasted Munich malts with just a touch of chocolate or Carafa to get the rest of the color. Or would you prefer a dry, bitter, roasty beer? In this case the beer recipe may include mostly regular pale malt with larger amounts of chocolate malt and roasted barley. Caramel malts can contribute complexity to beers, offering flavors of caramel, raisins, nuts, or dates. Think about the balance you want to achieve for your dark beer, then select the malts accordingly. Finally, small adjustments can be made to get the color where you want it.

What about using extract when brewing dark beers?
Dark malt extract works great for beginning homebrewers. It’s an easy way to brew a dark beer without having to figure out the right combination of malts to get the color you want. But a lot of homebrewers will agree that dark malt extract doesn’t give you a lot of flexibility when brewing dark beers. The dark malt extract was made with a specific blend of grains. You’re kind of stuck with the flavor profile you get.shop_liquid_malt_extract
An alternative way to do it is to use light malt extract and then use the darker specialty grains to get the color and flavor just the way you like it. You can certainly brew a stout using light malt extract! Just use 5-15% of the darker specialty grains to get the color and flavor you want. Explore some tried and true beer recipes to get a sense of what malts work well together and in what amounts.
With a little practice, you’ll soon get a feel for different specialty grains and how to go about brewing a delicious dark beer.
What’s your favorite dark beer style?
—–
David Ackley is a writer, brewer, and craft beer marketing consultant. He holds a General Certificate in Brewing from the Institute of Brewing and Distilling and is founder of the Local Beer Blog.

The Allure of All-Grain Brewing

All-Grain Brewer Holding GrainsMost beginning home brewers start out brewing with malt extract kits. This is simple, not very time consuming, and the results are fairly predictable.
As a home brewer progresses and becomes more accomplished, they then learn how to add some grains to their brewing process in a concoction know as a partial-mash. There are partial-mash ingredient kits for them to choose from as well. This is a little more involved but opens the homebrewer to a larger world of beer styles.
Then comes the ultimate level of homebrewing: ‘all-grain brewing‘. As the name sounds, it is brewing beer with the use of no malt extracts whatsoever. All the sugars for fermentation come from malted barley grains themselves.
The popularity of all-grain brewing has increased by leaps and bounds in the recent past. There are many reasons why this could be for any one individual, but it is my personal belief that it usually has something to do with: accomplishment or learning something; having better control over flavor; or just having the ability to be more creative and adventuresome.

  • Experience: The all-grain brewer gets to experience a brewing process that is much more closely related to the process commercial brewers use. We here at E. C. Kraus know of several home brewers that have gone on to work for commercial breweries.
  • Ultimate control: You may use any malted grain of your choice as this method gives you complete freedom. It lets you have full control over the brewing process, and this is one of the main reasons why this method is gradually becoming the leading choice of people worldwide.
  • Buy Grain MillsIncreased creativity: For people who love to experiment, all-grain brewing becomes a great experience. Most of us want to create our own homebrew recipes. There are virtually endless combinations of malts and you can try the various combinations with different beer yeast types, temperature, hops etc. to make your own brewing recipe masterpiece. This method will give wings to your imagination and boost your creativity.
  • Fun and adventure: If you want to learn the secrets of brewing, this method gives you a nice opportunity to do so. You get to learn many things from experience. Many individuals brew all-grain to hone their brewing skills. At the same time, it is a fun-filled way that helps you in making good quality beer.

Beyond all these points, the process in itself is quite relaxing and it is an awesome experience to brew all grain. Being able to share a brew with friends, family and neighbors that you can say you made completely from scratch is a great feeling. To get more details on the all-grain brewing process, see “The Basics Of All-Grain Brewing“. It spells out the process a little more clearly.
Happy Brewing,
Ed Kraus
—–
Ed Kraus is a 3rd generation home brewer/winemaker and has been an owner of E. C. Kraus since 1999. He has been helping individuals make better wine and beer for over 25 years.

I Am a Clarity Convert

Clear BeerWhen I first started home brewing several years ago, like most new brewers, I was only concerned with getting a beer that tasted good and that was something that I enjoyed drinking or sharing with friends and family. In reading various home brewing forums, I knew that there were a lot of people who went out of their way to get the clearest beer they could. It seemed to me that this quest for beer clarity verged on a waste of time.
However, as I grew in the hobby, I came to appreciate the desire for clarity. It started with just one off-hand comment from a relative…
Several years ago, I set out to copy one of my favorite beers from a local nano-brewery. They did not publish their beer recipe, but they did list the ingredients on their beer list. I tried my best to recreate the grain bill and hop schedule, but never quite could match the beer. But, to make a long story short, over time, this beer morphed into a substantially different brew, but one I liked a lot! During a family party, I offered this beer to some family and my brother-in-law, who is also a home brewer, mentioned almost out of earshot, “Look how clear it is!”
I hadn’t even been setting out to clear the beer to that degree, but I had been saving several bombers of this batch specifically for this party. Since they were in the fridge for about six weeks, they got pretty clear. I must admit, I enjoyed both the pride I felt in his comment, and I really did enjoy what the aesthetic of that clear beer added to my drinking experience.
A year later, my local homebrew shop was having a contest, and I decided to enter beer made with this beer recipe. Again, I left it in the fridge for six weeks, and the shop stored it in their fridge for about four more weeks before judging. The comments from the three judges all specifically remarked on how clear the beer looked, and it was one of the factors that led to this beer taking second place overall.
shop_beer_bottlesSo yes, now I am a clarity convert, and now I set out to clarify my beer. I started with Whirlfloc tablets. It works well, but I wanted more, so I turned to cold-crashing and fining with gelatin finings. The process of using gelatin to clarify your beer is fairly straightforward, but if you’ve never tried it, I’d place this technique high on your list of things to add to your brewing repertoire. It really doesn’t take a lot of work at all, and as far as bang-for-your-buck is concerned, I can’t think of anything that is so inexpensive, so relatively easy, which adds so much to enjoyment of beer.

How important is clarity to you? What techniques do you like to use to clarify your beer?
—–
John Torrance is a database developer, gadget lover, and avid home brewer living in Lafayette, Colorado. When he’s not actively brewing, he’s generally daydreaming about what he’s going to brew for his next batch.

Style Guide: Brewing An American IPA

American IPAMany craft beer aficionados have heard the story about where the name “India Pale Ale” (or IPA’s) comes from. In short, to supply the colony in India, British breweries made ales with increased amounts of hops, taking advantage of the plant’s antimicrobial properties to ensure that the beer would survive the long trip. The American version of the IPA is more robust than the English version and also uses American-grown ingredients. But before I get into to brewing an American IPA, I’d like to share a little more about some of the history behind the style.
I recently picked up Ray Daniels’ book, Designing Great Beers, and learned a couple interesting tidbits about pale ales and IPAs. First, that pale ales were a product of the Industrial Revolution. The advent of steel allowed British maltsters to build better kilns, which gave them increased control over their product, which in turn made pale malts possible. Secondly, that these pale ales were considered beers for high society, while the lower classes stuck with the dark beers, like stouts and porters.
I found this quote, from 1934, to give an interesting perspective on the popularity of the style:
“[The India Pale Ale] is carefully fermented so as to be devoid of all sweetness, or in other words to be dry; and it contains double the usual quantity of hops; it therefore, forms a most valuable restorative beverage for invalids and convalescents.”
I don’t know about you, but I always feel better after an IPA! Now, back to brewing!
The BJCP Style Guidelines give us some parameters for brewing the American IPA (style 14B). The overall impression of the beer should be “an American version of the historical English style, brewed using American ingredients and attitude.” Whatever you do, don’t forget the attitude!
Here are the more easily measurable characteristics for an American IPA:

  • IBUs: 40-70
  • Color (SRM): 6-15
  • OG: 1.056-1.075
  • FG: 1.010-1.018
  • ABV: 5.5-7.5%

Now, let’s look at some of the specific ingredients you might use for brewing your own American IPA:
Grain Bill

  • All-Grain: Start with a well-modified US 2-Row Malt for the base of your grain bill (70% or so). Then use 1-2 pounds of Crystal Malt (20-40L) for color and caramel malt flavor. If you want, try a little (up to 5%) of Munich, Vienna, or Biscuit Malt for added complexity.
  • Extract: If brewing with extract, use light or pale malt extracts and consider steeping some crystal malt for flavor and color. Consider the Muntons Connoisseur Kit Type India Pale Ale kit, which contains malt extract that has already been hopped.Shop Home Brew Starter Kit

Hops

  • An American IPA should be brewed with US-grown hop varieties. Consider using Cascade, Centennial, Columbus, Chinook, and/or Willamette. Use 1-2 ounces during the boil for each of your bittering, flavor, and aroma additions. For increased hop aroma, dry-hop your beer by adding an ounce or two of hop pellets to the secondary fermenter.

Yeast

  • Use a classic American ale yeast, such as Safale US-05 or Wyeast’s #1056 American Ale. American IPAs should have a “neutral” fermentation character, so be sure to keep the fermentation temperatures within the acceptable range for your chosen yeast strain.

Follow the above guidelines and profiles for brewing an American IPA, and you’ll have a beer that is tasty and to style. What’s your favorite IPA? Do you have an American IPA recipe you’d like to share in the comments below?
Til next time…Cheers!
—–
David Ackley is a beer writer, brewer, and self-described “craft beer crusader.” He holds a General Certificate in Brewing from the Institute of Brewing and Distilling and is founder of the Local Beer Blog.

7 Tips For Clearing A Homebrew Beer!

Clear homebrew BeerFor some styles of beer, such as the Bavarian hefeweizen and the Belgian witbier, cloudiness is to be expected. The average consumer, however, has come to expect beer to be crystal clear — or “bright” as it’s known among beer geeks and professional brewers. Clarity has more influence on aesthetics than flavor, but since the appearance of a beer is the drinker’s first impression, it’s an important factor in assessing beer quality. To avoid your friends raising their eyes at your cloudy homebrew — and to achieve better scores at homebrew competitions — it’s important to know how to clarify your homebrew beer.

What Makes Beer Cloudy in the First Place?
Before we can talk about clarifying or clearing your homebrew beer, it would help to understand a little bit about what’s making the beer cloudy. Cloudiness in homebrew can come from a few different sources:

  • Malt can contribute proteins, fatty compounds (lipids), and tannins to your beer. Excessive protein can result in “protein haze” or “chill haze”, which happens when beer is clear at room temperature, but becomes cloudy when chilled.
  • After being boiled in the kettle, hops can break down and leave behind debris.
  • Yeast, as it multiplies and feeds on the sugar in your wort, it becomes suspended in the beer.

All of these a common sources for potentially keep a homebrew beer from becoming its clearest.

Common Ways to Clarify Your Homebrew Beer

There are several different ways to clarify or clear a homebrew beer. Here are the most common:

  1. Whirlpool – At the end of the boil, and before transferring wort to the fermenter, give the wort a strong stir. Proteins, lipids, and hop compounds will collect at the bottom of the kettle and form a pile of “trub” in the middle, making it easier to draw off beer and leave behind most of the protein and hops.Shop Irish Moss
  1. Kettle finings – Clarifying a beer with clearing agents is very effective. Irish moss (a.k.a. “carrageenan”) is a type of seaweed that works as a coagulant. It’s added in the last 10-15 minutes of the boil and helps make the whirlpool more effective by aiding in the coagulation of proteins.
  1. Cold break – Rapidly cooling the wort, such as with an immersion wort chiller, helps proteins settle out after the boil.
  1. Secondary fermentation – Transferring your beer from a primary fermenter to secondary fermenter is an opportunity to leave behind trub and yeast that has settled to the bottom. The length of the secondary fermentation is also a factor – the longer the fermentation, the more settling will occur. Fourteen days is usually enough for ales; lagers tend to take longer.
  1. Fermenter finingsShop Wort Chillers – Some beer finings are added to the secondary fermenter. Gelatin is a popular one. It’s derived from animal collagen, so beer made with it technically isn’t vegetarian. Clearing a homebrew beer with gelatin is quick and easy.
  1. Cold crash – Dropping the temperature on the secondary fermentation helps yeast and other particulates settle out.
  1. Filter – Many commercial breweries filter their beer, and while there are some filters available to homebrewers, in most cases the above techniques will result in sufficiently bright, clear beer.

What methods do you use to clarify your homebrew beers? Have you ever used gelatin or other fining or clear agents? Let us know about your experience!
—–
David Ackley is a beer writer, brewer, and self-described “craft beer crusader.” He holds a General Certificate in Brewing from the Institute of Brewing and Distilling and is founder of the Local Beer Blog.

Rinsing Beer Yeast For Reuse

Rinsing Beer YeastWhile it’s possible to pitch wort directly onto an old yeast cake, a better method of reusing yeast is called yeast rinsing. It’s a simple technique that can help make the most of your raw ingredients and keep your yeast cost down. And if you ever decide to take your homebrewing hobby to the pro level, rinsing your beer yeast will become part of your fermentation and yeast handling routine.

What is yeast rinsing?

Yeast rinsing is a method of taking a yeast slurry from a fermenting beer and separating the healthy, viable yeast from the dead yeast cells and trub. It’s always best to pitch as pure a yeast culture as possible, and rinsing removes much of the other particulate from the yeast slurry. This yeast can then be reused in another batch of beer. It’s best to reuse yeast from a low to moderate gravity beer after fermentation has started to slow. Yeast used in a high-gravity beer is more likely to be stressed and to produce off-flavors.

Directions For Rinsing Beer Yeast

  1. At the end of primary fermentation, boil 2-3 cups of water and chill it to room temperature.
  1. After transferring the beer into secondary, pour the pre-boiled, pre-chilled water into the primary fermenter. Swirl the fermenter to stir up the yeast at the bottom.
  1. Pour the slurry into a sanitized quart-size or larger glass container. A mason jar works well for this. **Remember – everything that touches the yeast at this point should be thoroughly clean and sanitized: the glass jar, the lid, and funnel (if used).
  1. Place the jar in the refrigerator for several hours or overnight.
  1. The slurry will stratify into three layers: a liquid beer layer on top, a dark layer of trub on the bottom, and a whitish layer of healthy yeast in the middle. That middle layer is what we’re after.
  1. Prepare another sanitized container. Pour off (decant) most of the top layer and discard, then transfer the white yeast layer into the container, leaving behind the darker trub.
  1. Keep refrigerated and use within a week (the sooner the better).Shop Beer Yeast Culturing

That’s it! Now you can try rinsing your own beer yeast. Then you’ll be able to reuse it in a new batch of beer! I recommend using a yeast pitch calculator to estimate how much of the yeast slurry to use in your next batch.

Some pointers:

  • Though professional brewers may reuse yeast for ten or more generations, I wouldn’t recommend reusing the same yeast more than 2-3 times. You can aim for more if your sanitation practices are spot on, but as soon as you notice fermentation problems, start with a fresh batch of beer yeast.
  • Reusing yeast will take some foresight and planning. Chances are you won’t want to brew the exact same beer back to back, so keep the beers at least similar stylistically. That said, rinsing your beer yeast can open up some interesting cross-over experiments. For example, reuse your English ale yeast in an American IPA, or reuse your Kölsch yeast for an American cream ale.


Have you ever tried rinsing beer yeast? Why or why not?

—–
David Ackley is a writer, brewer, and craft beer marketing consultant. He holds a General Certificate in Brewing from the Institute of Brewing and Distilling and is founder of the Local Beer Blog.

Zen and the Art of Bottling Homebrew: 10 Tips for Bottling Day Success

Freshly Bottled HomebrewHave you ever put off bottling your homebrew because you dreaded the task?
Though many brewers bemoan the act of bottling homebrew, others find bottling their brews to be an opportunity to disconnect from the modern world, to clear the mind, and hey, why not have a homemade beer while you’re at it?
Bottling homebrew does not have to be difficult. But for some reason it can be tempting to put it off until the last minute. As Seneca once said, “We suffer more often in imagination than in reality.” Like many tasks, bottling homebrew is more stressful in our minds than it really is!
To help maintain the zen mindset while bottling your homebrew, consider these tips and make it as easy and painless as possible.

10 Tips for Bottling Homebrew

  1. Use label-free bottles. Removing labels from 50 bottles is no easy chore. Either buy some new ones, or see if you can get some from your local brewery.
  1. Set aside plenty of time for the task at hand. Rushing will only cause problems down the line. Two to three hours should be enough for bottling five gallons of homebrew (unless you have to remove labels from bottles – then plan on 3-4 hours).
  1. Clean your work area ahead of time. It’s much easier to cook in a clean kitchen. The same goes for when you’re bottling homebrew.
  1. Recruit a helper. Bottling homebrew is always more enjoyable with a friend. Dividing tasks also saves time and helps the time to go by faster. And who knows, you might end up inspiring a new homebrewer in the process.
  1. Start with clean beer bottles. This is my favorite tip for bottling homebrew. If you’re reusing beer bottles, rinse them out as soon as you’re done with them. When the bottles are already clean, all they need is a quick soak in sanitizer solution and you’re ready to go.
  1. Move the carboy into position early. Getting the carboy into position on the counter gives yeast and other sediment time to settle before racking to the bottling bucket.Shop Bottling Bucket for Bottling Homebrew
  1. Use a priming sugar calculator. Avoid bottle bombs and gushers. Use a priming calculator to pinpoint your target carbonation levels.
  1. Don’t forget the caps! This is a bottling tip I wish I could remember. More than once I’ve gotten halfway through bottling my beer, only to realize I hadn’t sanitized the bottle caps. Be sure to do this before pouring out your sanitizer solution!
  1. Reuse 6-pack carriers and case boxes. These make transport, organization, and storage easy.
  1. Keep beer bottles in a warm (room-temperature), dark area and patiently wait for 2-3 weeks. This may be the hardest tip for bottling homebrew to follow. To resist the temptation of cracking open a homebrew early, buy some nice, high-quality beer to enjoy in the interim.

What tips do you have for bottling homebrew?
—–
David Ackley is a writer, brewer, and craft beer marketing consultant. He holds a General Certificate in Brewing from the Institute of Brewing and Distilling and is founder of the Local Beer Blog.

“German” IPA Beer Recipe (All-Grain & Partial Mash)

German Beer In GlassesOne of the fun things about homebrewing is mashing together different beer styles and creating something altogether new. After trying a “German IPA” at a brewpub in Atlanta, I knew I had to give it a shot. The beer had the wonderful, malty backbone and the in-your-face hop flavor of an IPA, but the hops themselves were not what you’d usually expect to find in that kind of beer. Instead of piney, citrusy American hops, this beer showcased the more spicy and floral character of noble hops.

Developing a German IPA Beer Recipe
A number of clues came from the beer menu:
Grain bill: Munich, Vienna
Hops: Magnum, Perle, Northern Brewer, Hallertau, Tettnang
Yeast: German ale yeast
These were my tasting notes: Balanced bitterness, medium to medium-full bodied, spicy notes in the flavor, but with assertive noble hop aroma.
Based on this information, I took a couple of stabs at the beer recipe, and this is its current iteration. Feel free to use it as a starting point for your own German IPA, or modify it to suit your tastes.
Good luck!

German IPA Beer Recipe – All-Grain
(5-gallon batch)
Specs
OG: 1.064
FG: 1.016
ABV: 6.3%
IBUs: 64
SRM: 11
Ingredients
9 lbs. German Vienna malt
4 lbs. German Munich malt (dark)
0.5 oz. Magnum hops at :60
1 oz. Perle hops at :20
1 oz. Northern Brewer hops at :10
1 oz. Hallertau hops at :5
1 oz. Tettnang hops at :5
1 oz. Hallertau hops dry hopped for five days
1 oz. Tettnang hops dry hopped for five days
Wyeast 1007: German Ale Yeast
Directions
shop_barley_grainsThe day before brewing, prepare a 2L yeast starter. On brew day, mash grains at 154˚F for 60 minutes. Sparge and lauter to collect about 6.5 gallons of wort in the brew kettle. Boil for one hour, adding hops according to schedule above. Chill wort and transfer to a clean, sanitized fermenting bucket. Ferment at 66˚F for about a week, then transfer to a secondary fermenter. Dry hop for five days, then bottle or keg.

German IPA Beer Recipe – Partial Mash
(5-gallon batch)

Specs
OG: 1.064
FG: 1.016
ABV: 6.3%
IBUs: 64
SRM: 11
Ingredients
2 lbs. German Vienna malt
2.5 lb. German Munich malt (dark)
6.6 lbs. Munich LME
1.65 oz. Magnum hops at :60
1 oz. Perle hops at :20
1 oz. Northern Brewer hops at :10
1 oz. Hallertau hops at :5
1 oz. Tettnang hops at :5
1 oz. Hallertau hops dry hopped for five days
1 oz. Tettnang hops dry hopped for five daysshop_hops
Wyeast 1007: German Ale Yeast
Directions
The day before brewing, prepare a 2L yeast starter. On brew day, do a “mini-mash” of the Vienna and Munich malts in 6.75 qts. of clean water. Hold at 154˚F for 60 minutes, then strain wort into the brew kettle. Add the malt extracts and enough water to make 3 gallons. Boil for 60 minutes, adding hops according to schedule above. Chill wort and transfer to a clean, sanitized fermenting bucket, adding enough clean, chlorine-free water to make 5.5 gallons. Ferment at 66˚F for about a week, then transfer to a secondary fermenter. Dry hop for five days, then bottle or keg.

Have you ever brewed a “German” IPA before? What was your beer recipe like?
 —–
David Ackley is a beer writer, homebrewer, and self-described “craft beer crusader.” He holds a General Certificate in Brewing from the Institute of Brewing and Distilling and is founder of the Local Beer Blog.

Using a Brew-in-a-Bag (BIAB) System to Make Your Beers

Brew In A BagIf you are an extract or partial mash homebrewer trying to get started with all-grain brewing, the “Brew-in-a-Bag” (BIAB) method is a great way to make the switch. It’s a little easier than the standard infusion mash, but the big advantage is that you eliminate the need for a separate mash tun (tun is just brew-talk for kettle). Instead of mashing the grains in a mash tun, recirculating your wort, and boiling it in another kettle, the Brew-in-a-Bag method allows you to do everything in one vessel.
To set up your BIAB brewing system all you need is a mesh grain bag large enough to hold 10-12 lbs. of grain (for a 5 gallon batch). I also recommend a large strainer or colander that’s big enough to sit across the top of your kettle.
The main difference between BIAB and a standard all-grain brew is that the grains go in the bag and the bag comes out at the end of the mash. Removing the bag from the wort washes the grains and eliminates the need for a sparge.

How to “Brew-in-a-Bag” BIAB

  1. Clean & Sanitize. Just as you would otherwise, clean and sanitize all of your brewing equipment. I like to use One Step No Rinse Cleanser and Star San Sanitizer.
  1. Heat the mash water to 170°F. Start with your full boil volume. Knowing that some of your water will evaporate, use more water than however much beer you plan to make. For example, if making 5 gallons of beer, you might start with 6.5 gallons. Tip: If heating water on a kitchen stove, you may want to heat water in two pots to get up to temperature more quickly.
  1. Put your mesh brewing bag in the kettle and pour the crushed grains into the bag. Give the grains a good stir to avoid clumping. Hold the temperature between 150°F and 158°F to begin converting the starches in the grains into fermentable sugar. Tip: Use a bungie cord to hold the bag in place.Shop Brew Kettles
  1. Check the pH level. To convert the starches, your mash needs to be between 5.0 and 5.5 pH. If your pH is over 5.5, add a 1/4 teaspoon of gypsum to bring it down. If it’s under 5.0, add a 1/4 tsp. calcium carbonate. Adjust until you’re in range.
  1. Pull out the grain bag. This is the whole key to a brew in a bag system. After about 60 minutes, slowly pull out the bag and all the grains, taking care not to rip it. Set the bag over a strainer or colander so that the wort drains back into the pot, then discard the grains.
  1. Bring to a boil and add hops – Heat the wort to a roiling boil and start adding hops.
  1. From here, proceed as you would with any other method of brewing.

Have any questions about Brew in a Bag (BIAB) brewing system or homebrewing in general? Drop us a question in the comments!
Til next time…Cheers!
—–
David Ackley is a beer writer, brewer, and self-described “craft beer crusader.” He holds a General Certificate in Brewing from the Institute of Brewing and Distilling and is founder of the Local Beer Blog.

American Brown Ale Recipe (Extract & All-Grain)

Pouring A Brown Ale BeerToday I’d like to share with you a homebrew beer recipe I recently brewed with a friend. It’s a hoppy brown ale with deep chocolate malt flavors and a hint of spicy, citrusy hop flavor and aroma. We just doubled the ingredients for the five-gallon recipe (below) to make it a ten-gallon batch.
We modeled this American brown ale recipe after some of the popular American-style brown ales being made by our local craft breweries. It’s a little on the hoppy side for what some consider a brown ale, but for a lot of craft beer fans, that’s a good thing!
This beer recipe features some complex roasted malts to bring in a range of caramel, biscuit, and chocolate flavors along with some lower-alpha hops that work great as aroma hops and provide a clean bitterness. To further enhance the aroma and clean bitterness, we utilize a technique called “first wort hopping.” All that means is to add some of the hops before the wort comes to a boil, which helps keep more of the aromatic hop compounds in the beer.
We hope you’ll enjoy this American brown ale recipe! Both all-grain and extract versions are given below. Give it a try and let us know how it turns out!

American Brown Ale Recipe
(5-gallon batch, all-grain)

Specs 
OG: 1.058
FG: 1.011
ABV: 6.2%
IBUs: 42
SRM: 23

Ingredients  
10 lbs. two-row malt Shop Steam Freak Kits
1 lb. caramel 60L malt
0.5 lb. chocolate malt
0.5 lb. crystal 77L malt
1 oz. Willamette hops (FWH)
1 oz. Kent Goldings hops at :60
0.5 oz. Willamette hops at :30
1 oz. Kent Goldings hops at :10
1 tsp. Irish moss at :10
1 packet Safale US-05 ale yeast

Directions 
Mash crushed grains at 152˚F for one hour. Sparge to collect 7.5 gallons in the brew kettle. Add first wort hops (1 oz. Willamette) to the wort and bring to a boil. Boil for 60 minutes, adding hops and Irish moss according to schedule above. Chill wort and transfer to a clean, sanitized fermenter. Ferment at 68-70˚F.
 
American Brown Ale Recipe
(5-gallon batch, partial mash)
Specs 
OG: 1.058
FG: 1.011
ABV: 6.2%
IBUs: 42
SRM: 23

Ingredients 
6 lbs. light dry malt extract Shop Conical Fermenter
1 lb. six-row malt
1 lb. caramel 60L malt
0.5 lb. chocolate malt
0.5 lb. crystal 77L malt
1.5 oz. Willamette hops (FWH)
2 oz. Kent Goldings hops at :60
0.5 oz. Willamette hops at :30
1 oz. Kent Goldings hops at :10
1 tsp. Irish moss at :10
1 packet Safale US-05 ale yeast
Directions 
Steep crushed grains for 30 minutes at 152˚F in one gallon of water. Strain wort into brew kettle, then add enough water to make 3.5 gallons. Thoroughly mix in the dry malt extract, then add the first wort hops (1.5 oz. Willamette) to the wort and bring to a boil. Boil for 60 minutes, adding hops and Irish moss according to schedule above. Chill wort and transfer to a clean, sanitized fermenter. Ferment at 68-70˚F.
—–
David Ackley is a writer, brewer, and craft beer marketing consultant. He holds a General Certificate in Brewing from the Institute of Brewing and Distilling and is founder of the Local Beer Blog.