Is Brewing at Home Really that Much Cheaper?

Homebrew Beer Ingredient KitMost people know that whenever you can do something yourself at home rather than just go out and buy it, it’s probably going to be cheaper. But is homebrewing one of those things? And if so, just how much money will you save?
First, consider that if you were to purchase a case of beer from the store, it will probably cost you at least a dollar a bottle and up. If you purchase a smaller pack, the unit price will also go up because manufacturers will typically provide small discounts the more you purchase at once. Those smaller packs can cost anywhere up to $2.00 or $2.50 a bottle.
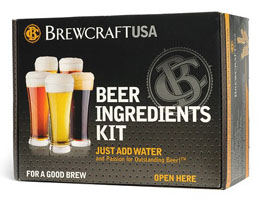
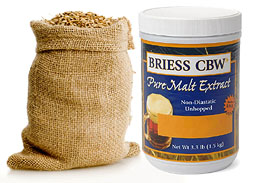
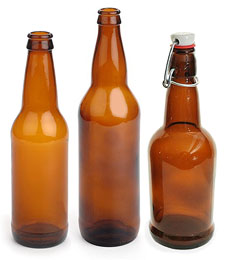
Typically when brewing at home, you will make about five gallons of beer at a time, which is 54 bottles of beer. The amount you spend on the actual homebrewing ingredients for the beer will vary depending on the kind of beer you want to make; but typically home beer kits can cost between $30 for making a light American-style Pilsner to $60 for your heaviest of Imperial IPA’s. That means that every bottle of beer you make yourself will cost anywhere from $0.56 to $1.12 per bottle. And for those that are keeping track, that’s half the cost of even the best-discounted cases of beer you’ll find in any store.
Making your own homebrew with a homebrew ingredient kit will always be a cheaper option than buying a comparable beers at the store, but there are much bigger advantages to brewing yours too. Namely, the sheer satisfaction you’ll feel the first time you crack open a bottle of your very own blend – and every time after that, too. While there are many cost-saving benefits to brewing your own, home brewers quickly forget them after realizing all the other benefits that go along with it! So if you want to save a buck, okay brew some beer, but if you want to have some great tasting beer and have some fun in the process, okay brew some beer!
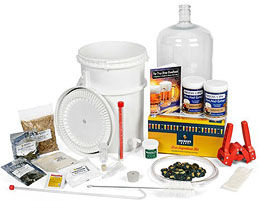
Here’s another blog post that will help you figure out how to get started: The Minimum Equipment You Will Need To Brew Beer Yourself. The post talks about the homebrewing equipment you will need to get you going.

________________________________________________________

Read More About Beer Ingredient Kits And Other Homebrewing Topics,
FREE  EMAIL NEWSLETTER:


________________________________________________________

What’s Better: All-Grain Brewing or Extract Brewing?

Malted Barley Grain Syrup
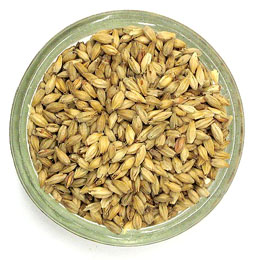
When it comes to brewing at home, you have two options: you can choose all-grain brewing, or you can choose extract brewing. If you’ve never done either before, you might be wondering which is the better of the two; and you might have already heard a number of arguments for each. So, which one is it?
The debate is a difficult one, as both methods are perfectly valid and both deliver perfectly good beer. Which one you choose will largely depend on how much time you want to put into your beer making, and what kind of beer you’re looking for.
With all-grain brewing you place cracked malted barley, with water and cook (mash) it a specific temperatures over a period of time. This is a delicate process that needs to been done with great care. The liquid is then removed from the barley grains and boiled with hops.
With malt extracts on the other hand, you are skipping the cooking (mashing) part of the process. All that is need is that you pour the malt syrup in with water into a kettle and boil the mix (wort) and boil the hops in as before. No critical temperatures need to be followed. No grains need to be dealt with.
So which one is better?
Some beer brewers simply prefer one method over the other, just as cooks do in their kitchen. Those who prefer that everything be made “from scratch” will probably find more satisfaction in working with all grains, while those who would prefer to use mixes and a more hands-off approach might find malt extracts more convenient.
If you’re really picky about the type of beer you’re striving for, you might want to choose all-grain when you want a light, amber-colored beer with an all-malt Pilsner. However when the mood strikes for a bold stout, using malt extracts could possibly give you better results.
Another related blog post that you may want to take a look at is, “The 3 Different Methods Of Homebrewing“. It goes over the different ways that you can approach brewing your own beer at home.
________________________________________________________

Read More About All-Grain Brewing And Other Homebrewing Topics,
FREE  EMAIL NEWSLETTER:

________________________________________________________

How to Clean Your Keg Tap

Keg TapIf you’re going to be kegging homebrew, you might think that the most difficult part is going to be installing the keg tap. Truthfully though, once you’ve done it once installing the tap is pretty easy. Cleaning it on the other hand, is something that you’ll need to master throughout the entire time you’re making homemade beer.
Start cleaning your tap by first finding the appropriate tap cleaner for it. The instructions will also be on this cleaner, but you’ll most likely have to combine it with water and then make sure it’s fully blended.
Then remove the knob from the tap’s faucet. This, along with the rest of the faucet and the beer hose, will then need to be placed inside a large bucket. Using a cleaning attachment, connect it to the faucet of the tap. Place the bucket underneath the main portion of the keg, placing the hose inside the bucket so that it will be able to steam everything inside.
Start pumping the cleaning solution into the bucket, but be sure to allow the cleaning detergent to sit inside the hose for some period of time before you add it to the bucket. This will help break down any bacteria that’s inside, and the instructions you receive with the cleaner will tell you how long the hose needs to soak with it inside. After that soaking time, the solution can then be poured into the bucket, where it will clean everything inside.
After everything has been thoroughly cleaned, you then just have to make sure no solution or detergent is left on any of the equipment. Otherwise, it will have an adverse effect on the beer you make afterwards. To rinse, fill the bottle used to pump the cleaner and ensure it’s cleaned properly. Fill it with clean, cold water and pump it the same way you did the solution. It will rinse everything off. When that is complete, make sure to also rinse all other pieces and parts used during the cleaning process.
Once you’ve fully cleaned and rinsed all of your kegging equipment, you just have to allow it to dry fully, and then store it for the next time you’re ready to have some friends over!
Another blog post you may want to look over is, “Some Tips For Kegging Homebrew“. This post has some ideas on kegging your own home brewed beer.

How to Inspect Your Bottles When Bottling Beer

Beer BottlesWhen you brew at home you’ll need to take a lot into consideration, from what malt products you’re going to use to bottling beer and how you’re going to do just that. Before you choose a method though, you’ll need to first choose your beer bottles – and make sure you inspect them properly before using them.
Over time, the bottles you use for storing your beer can become chipped, scratched, or otherwise damaged, especially if you’re using the same beer bottles over and over again. If the bottles are damaged in any way, they could potentially explode during the brewing process while they’re being sterilized or put under extreme pressure. Because those chips and scratches affect the pressure inside the bottle, it could end up ruining the entire bottle. To avoid that, inspect the beer bottles properly by using the method below.
First start by looking at the bottles the same you would look for clean drinking glasses – by holding them up to the light. It’s here that minor damages will be most apparent. Make sure you pay special attention to the mouth of the bottle for cracks, and the sides of the bottle for small cracks. Once you see that all parts of the bottle are smooth and damage-free, then check to make sure that they’re completely clean.
Small water spots aren’t such a big deal, but grime that gathers in the bottom of the bottle is. This is a common area for bacteria and mildew buildup and, because it’s at the very bottom and on the inside, it’s one of the most often overlooked. If there is mold or other dirt inside, another cleaning and sterilization may be required. If however the dirt cannot be removed, or you notice damage on the bottle, it must be thrown out.
Inspecting your beer bottles for damage or dirt may seem like a minor task when you first start bottling your own beer. But taking a few minutes to ensure your bottles are in good condition will save you a lot of time, and beer, in the end. Another blog post that may be of interest is, “How To Bottle Your Beer: Tips On Bottling Beer“.

The Minimum Equipment You Need to Brew Beer Yourself

Home Brewing KitLots of people love the idea of whipping up a batch of their own homebrew stuff, but think that it takes a great amount of cash and equipment in order to get just one bottle. This is a misconception, and one we’re knocking down with our own customers all the time. When you want to make a great-tasting beer, you can brew it yourself – and you don’t need a lot of home brewing equipment backing you up.
A very large cooking pot should be all you need in order to hold all of the home brewing ingredients that you’ll use during the brewing process. In addition to that you’ll need a primary fermenter and a secondary fermenter that are equipped with an air-lock attached in order to keep the integrity of the brew at its highest quality. A bottle capper is also necessary, to ensure that bottles are capped properly, and are air-tight; and a gravity hydrometer, which will let you know when it’s time to bottle the beer. You’ll also need a large spoon to stir, and a sanitizer to ensure that all equipment is properly cleaned and sterilized before use.
Even these few ingredients can seem overwhelming to someone who is just learning how to brew their own beer, and they can often wonder where exactly they can find them. Luckily, at Adventures in Homebrewing we’ve got you covered with our own Beermaker’s Necessities Box.
This box includes all of the minimum equipment you’ll need to start making your own home brew quickly and easily, and without running around for all the different pieces you’ll need. This box contains the same quality pieces of equipment you can buy individually, but at a special, reduced price as a kit.
Because we believe that the very best beer is the beer you make yourself, we think it should be practical and accessible for everyone. Order your Beermaker’s Necessities Box today, and start sipping your own brew tomorrow!
Want to learn more about what it takes to brew your own beer? Then you might want to take a look at this recent blog post, “The 3 Different Levels Of Brewing Beer At Home“. It goes into a little more detail about the home brewing process and what it’s all about.

________________________________________________________

Read More About Getting Started And Other Home Brewing Topics,
FREE  EMAIL NEWSLETTER:


________________________________________________________

A Simple Guide to Home Brewing Malt

Malt is one of the main ingredients found in beer; and it’s what provides beer with a distinct color, flavor and body. But while the concept of malt can be quite simple, one of the first questions any beer-maker asks when they first start out is, “What is malt?”
Malt, in its most basic form, is barley or other type of grain that has gone through a malting process. That process includes germinating the grain, soaking it, and drying it so that it can provide a superior flavor and important sugars to beer and other products. The entire process includes a variety of malting products from which you can typically choose to malt yourself, or purchase malt extract or dry malted grains.
However, no matter what type of products or process you’re using, you’ll still be able to choose from a huge variety of different types of malts.
Standard base malts include 2 row pale malts, 6 row, Pilsner, and wheat malts. Specialty malts are also available, and these malts typically add a stronger flavor, color, and body to the overall beer. These types of malts include Carapils, Honey malts, Munich, Rauch, Rye, special roast, Victory, and Vienna.
If none of these specialty malts can provide that rich, distinct flavor you’re looking for, crystal malts may be able to do the trick. And they’re a completely different type of malt altogether.
When crystal malts undergo their malting process, their starches are turned to a sugar; and that sugar then becomes caramelized. Once that has taken place, crystal malts provide a rich, sugary taste along with good head retention and a color that can be anywhere from light tan to deep mahogany.
The world of malts is just one that you need to understand when you set out to create your own special blend of home brew. The good news is that it’s a fun area to explore, and it helps you create your own uniquely flavored beer! To read more about the various malted barleys and the role the play in a beer recipe, you might want to take a look at another blog post: “What Are The Different Malts Used in Homebrew Recipes?

How To Sanitize Your Home Brewing Equipment For Fresh, Clean-Tasting Beer

Keeping your home brew stuff clean at all times and sanitizing it is essential for creating clean and fresh tasting beer. The beer brewing process encourages the growth of microbes to accommodate a yeast fermentation. Unwanted bacteria will have a chance to grow as well, so it is best to eliminate it up-front through sanitation.
Your home brewing equipment will come into contact with sugars, malt extract, malted grains, beer yeast, hops, and many other substances. Make sure that all the equipment is sanitized if you wish to brew healthy and delicious beer.
First clean all visible dirt, stains, and dust from your equipment. After this use a sanitizer to kill the invisible microbes. After you have made your wort from the partial mash, if any foreign substance comes into contact with it, your homebrew can become infected. Boiling will kill the bacteria, but after the boiling process has been completed, you need to be extra careful with the resultant beer wort.
Make sure that the brew kettle, beer fermenter, airlock, lauter tun, hoses, utensils, carboys, wort chillers, beer bottles, rubber stoppers, and all other home brewing equipment are properly sanitized. Anything, which is made from plastic, needs to be cleaned with special care. Do not use abrasives such as scouring pads on these product, or this will scratch the plastic – the perfect hideout for bacteria.
While cleaning your equipment make sure that the sanitizers you are using are made for the very purpose. There are many sanitizers on the market that are specifically designed for cleaning homebrew equipment. A few of the more popular ones are: Basic A, Iodophor, B-Brite and Star San. All of these will sanitize you equipment safely and effectively.

6 Benefits Of Using Cornelius Kegs For Kegging Your Homebrew

Cornelius Keg or Corney KegCornelius kegs, which are sometimes called “corney kegs”, are a boon for homebrew lovers. They have a wide array of advantages. The popularity of these kegs has increased simply because they have afforded the home brewer the ability to put their beer on tap. They have a multitude of benefits and here are some of the advantages of Cornelius kegs:
• Forced carbonation is the perhaps the biggest advantage that had made them popular among people owning home breweries. You don’t have to wait for bottle conditioning. Just fill the keg and charge with CO2.
• Kegging beer saves you from troubles of routine maintenance that are associated with bottling. No more cleaning, filling and capping beer bottles.
• Corney kegs have a small footprint. This is one of the prime reasons why people love to use them for kegging homebrew. You can typically fit up to 4 in a full size refrigerator.
• High reliability and easy availability of these kegs has made them famous among novice and pros alike. If a seal does eventually wear out, they are very easy and inexpensive to replace.
• Beer bottles tend to break while plastic kegs or king kegs may develop scratches. Glass bottles are fragile, and though they cost much less initially, they cost a lot in the long run. When you calculate the breakage associated with bottles and compare it with the onetime investment that is associated with Corney kegs, the results are just the same. Many people feel that kegs are costly but they ignore the damage that happens because of broken bottles.
• The corney keg makes it easy for you to rack beer and store it efficiently. Hence, it helps in converting your room into a brewery really easily.
Other than these points, kegs are a cool alternative. If you dislike washing beer bottles, kegs are the way to go. These kegs save a lot of space and are easier to handle. Save time and money, and get these kegs for your homebrew. To read more about kegging you homebrew, take a look at “Basic Homebrewing Tips For Kegging Your Beer“.

________________________________________________________

Read More About Corney Kegs And Other Homebrewing Topics,
FREE  EMAIL NEWSLETTER:


________________________________________________________

Home Brewing Beer: It's Not Rocket Science!

Beer Makers Hold Their Homebrew
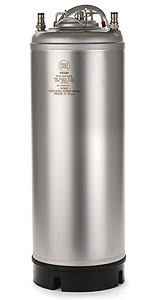
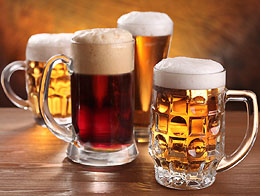
In a recent survey that was conducted at a university, it was stated that beer was the highest consumed hard drink among people of all ages, (we are talking about adults of course). Beer is an every-night-out’s staple drink. You might be going through dozens of bottles every month for your weekend parties, but did you ever stop to think how this amazing drink is brewed? It’s not really rocket science.
To brew it yourself, you need some very simple homebrew stuff that is generally present in a regular kitchen.  Beer generally takes approximately three weeks to brew.
To begin with, gather all the home brewing ingredients that is called for in your beer recipe. This usually consist of malt extract, specialty grains, beer hops and beer yeast. Make sure the home brewing equipment you use is sanitized.
Next step is to add the specialty grains to hot water, usually at about 160° F. After an hour or so, filter the barley.  Now add to this tea of sorts the malt extract and bring to a boil.
Add the beer hops into the wort. Hops are responsible for a lot of the flavor in a beer. Hops are bitter in taste, so you need to take care. Also, the more you boil hops, the more they will lose their bitter flavor, so it is important that you follow your beer recipe directions closely during this step.
Cool the wort and add water to it until the total volume reaches the intended batch size. Now you can add the beer yeast and let the fermentation begin. Once the beer yeast has completed the fermentation, usually about 5 days, it will produce what you’ve been craving for. Yes, alcohol and carbon dioxide. Alcohol adds an amazing taste to beer, and carbon dioxide takes the form of foam.
Now it’s up to you. You can put your homebrew on tap and keg the beer, or you can bottle it allow it to carbonate within the beer bottles, a process known as priming.
Now your down to the very last step — drinking. Having a world a beers available to you that you’ve made with your own efforts is a very exciting and fulfilling venture. And, it’s easier to make than it’s ever been. Beer ingredient kits have made the steps above easy to accomplish with there pre-measured ingredients and proven beer recipes. So why not give it a try.
To read more about how to make your own beer you might want to take a look at “5 Simple Steps To Making Beer“. This is another blog post the goes over the brewing process in a little more detail.

________________________________________________________

Read More About Home Brewing And Other Beer Topics,
FREE  EMAIL NEWSLETTER:


________________________________________________________

The 3 Different Methods Of Homebrewing

Malt Extract SyrupBeer brewing is not just a crude process of fermenting grains, it is an art and even minor changes in the brewing process can bring surprising results in the taste of the beer. The wort, for example, can be prepared using three different methods, each one becoming a little more involved than the one before.
Method #1: Wort From Malt Extract:
Making a wort from a prepare malt extract kit is the simplest processes for creating a beer wort. Boil at least two gallons of water and add flavored malt extract to it. That’s it! You have your wort and you can use this to make beer. The hops have already been incorporated into the malt extract as an oil. Each type of syrup is made from a specific blend of grains that produces the intended style of beer.
Method #2: Wort From Partial Mash:
This method is a little more involved but fun. Both malted barley and malt syrup are used. Fill a pot with at least two gallons of water and add the grains. Allow this mixture to steep. Usually at around 155° F. to 165° F. You can enclose the grains in a specially prepared steeping bag but this depends on your equipment. How long you steep the grains varies with the beer style. Now remove the grains from the liquid and add the malt syrup. What you have now is a wort.
Method #3: Wort From All-Grain:
This process is a bit different from the steeping grain one as it does not make use of malt extract. This method requires specialized equipment like mash tun, lauter tun, hot liquor tank, and a grain mill. You need to start by milling the grain. You want the grains to be cracked not ground. Now, add this grain to hot water and heat it to a temperature as required by your beer recipe. This process is known as mashing. Now separate the sweet wort from fine grain by using the lauter tun. This sweet wort is sparged to produce the required wort.
As you move on from beginner to expert levels in homebrewing, you will appreciate that this process, though time consuming, is one of the best to produce great wort and even finer beer. Plus you get to experiment and create your own beer according to your preferences.