 You made it through brew day.
You warded off infections and imperfections.
You want to show off your new homebrew. But how?
Sure, you can have friends over to your place or grab a six-pack for NFL Sunday at your in-laws, but what about your friends hundreds of miles away or that homebrew competition you’ve been itching to enter?
Sometimes getting your brew from point A to B can be something of a hassle, both logistically and legally. All hope is not lost, however.
Transporting Beer Yourself
Whether you keg or bottle your homebrew, two key elements come into play when moving your homemade beer:
1. Avoid intense heat swings.
2. Keep the beer as calm and settled as possible.
If you’re traveling across town, heat is the least of your problems. If you spend a day driving with a box of homebrew in your trunk or backseat – that’s a different story.
Remember that like you, the yeast in your keg or bottle are living organisms and prefer comfortable temperature ranges. As a beer’s temperature inches past 80 degrees, you may get bad-tasting esters from uncomfortable yeast, or the yeast my simply die out. As best you can, keep your homebrew close to fermenting temperature.
During any transport, you’ll want to make sure your beer doesn’t move around too much. The more bumps you hit, the more yeast sediment will get knocked around. The last thing you want is a cloudy, yeasty homebrew (unless it’s a hefeweizen!).
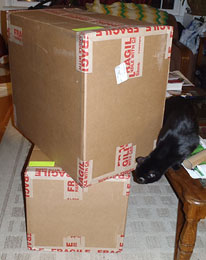
Like you do for conditioning, store the bottles or kegs upright and put them in a secure space – a box with cardboard protective pieces will do. You can always strap a seatbelt around a keg, too. Wrapping beer in towels prevents extra movement and breakage, so don’t feel nervous about protecting your babies.
Always make sure you know applicable laws when moving beer across state lines yourself. The Homebrewers Association has a list of laws for all 50 states.
Sending Beer via Mail
This is a bit tricky, as it’s currently illegal to ship beer through the United States Postal Service and UPS and FedEx will only ship beer between licensed companies and consumers. If you want to send your homebrew for judging, you may have to get inventive.
How to send your homebrew with parcel companies? If asked about what’s being shipped, homebrewers will often reply “yeast samples,” “collectable bottles” and the like. The Homebrewers Association received a record 7,823 entries for their 2012 National Homebrew Competition, so it’s clear that there are many out there who will ship their beer no matter what. After all, participating in competitions is the best way to test your mettle as a homebrewer and get insight into how to become better.
Before bringing your bottles to a UPS or FedEx facility, make sure they’re safe for transport. First wrap each in a plastic bag – in case of a break the beer won’t spill. Then, find a box that will fit the wrapped bottles and cushioning snuggly. Paper towels, crumpled newspapers and packing peanuts are all worthy choices to pack around the bottles and keep them safe during travel.
When dropping off your homebrew at a shipping facility, make sure everything is boxed up, ready to go and hand over your “yeast samples.”
With a little foresight and some careful packaging, your homebrew will arrive safe and sound at its final destination every time!
*It’s important to note the Homebrewers Association is working to rectify the issue of shipping beer and the Postal Service has discussed lifting its ban on alcoholic products.
————————————————————————————————————–
Bryan Roth is a beer nerd and homebrewer living in Durham, North Carolina. You can read his thoughts on beer and the beer industry on his blog, This Is Why I’m Drunk, and send him suggestions on how to get his wife to drink craft beer via Twitter at @bryandroth.
Experiment: Adding Fruit Juice to Beer
 This weekend I decided to experiment a bit with a beer recipe from Randy Mosher’s excellent book, Radical Brewing. The recipe is for a Spiced Cherry Dubbel, recommended as a higher-gravity holiday brew:
Start with a good rich dubbel, toss in an additional pound of piloncillo or turbinado sugar, and use a combination of sweet (black) and sour (Montmorency) cherries, which should ferment in the beer for a month or so. A pound per gallon is a minimum. Two is better. One teaspoon of ceylon (true) cinnamon added at the end of the boil will enhance the natural spiciness of the sour cherries. Add one drop (no more!) of almond extract for added depth. Gravity: 1.070 to 1.078 (17 to 18.5P). Color: deep ruby-amber.
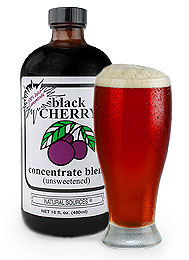
Earlier, I talked about some of the different ways of adding fruit to beer: whole fruit, fruit juice, fruit extract. In this case the beer recipe calls for 1-2 pounds of sweet and sour cherries per gallon of beer. But tart cherries are hard to find, and either way that will end up being a lot of fruit. I’ve heard of brewers using fruit concentrate, so I went to the local Whole Foods and found organic black cherry juice concentrate. I though maybe adding fruit juice to a beer would be the way to go. (This stuff would work well too.)
The bottle I bought showed the whole fruit equivalent, about three pounds. The tart cherry juice concentrate was a little expensive, so I went with the regular tart cherry juice, 32 ounces worth. Since the small jar of concentrate makes 32 ounces of juice and is equivalent to three pounds worth of fruit, I figured these two juices would have me covered for 6 pounds of sweet and sour cherries.
I was a little concerned about pectin, a complex carbohydrate that can cause haze, but I read that the processing of the fruit into concentrate breaks down the pectins, so I decided that wouldn’t be a problem.
After conducting a taste test, I determined that the combination of beer and juice would yield a fairly subtle cherry flavor, but very little fruit aroma. I read in Mosher’s book that sometimes adding at least a little whole fruit, even of a different kind, can contribute some extra pizzaz, so I decided to add twelve ounces of cranberries that had been in the freezer, crushing them well before adding them to the secondary fermenter. I then poured the concentrate and fruit juice into fermenter and siphoned the beer on top of it.
As I’m writing this, fermentation has picked up again, so clearly there were some additional sugars in the juices to be fermented. I’m going to give the batch a full four weeks in secondary (maybe transfer to a third fermenter depending on how much yeast collects at the bottom), bottle it up, and serve it at the annual Homebrew for Hunger event in Chapel Hill. This longer fermentation should allow sufficient time for the complex fruit sugars to break down and for the flavors to meld. Stay tuned — I’ll let you know how it turns out!
Have you made beer by adding fruit juice or concentrate? How did it go?
———————————————————————————————————
David Ackley is a beer writer, brewer, and self-described “craft beer crusader.” He holds a General Certificate in Brewing from the Institute of Brewing and Distilling and is founder and editor of the Local Beer Blog.
Wine Making Terms You should Know: Part 4
 In several earlier posts, we introduced a few home wine making terms that you may or may not be familiar with. There are many terms to learn in home winemaking, and this post, like all the previous posts, gives you a short introduction to a few of those terms to help you get started in home winemaking, or perhaps brush up on some of the terms you may not have seen in a while.
- PVPP: PVPP isn’t actually a word, but what it stands for certainly is! PVPP is short for polyvinylpolypyrrolidone (say that three times fast). PVPP is a common fining agent used in winemaking, and is specifically used in white winemaking for the removal of compounds that contribute to the premature browning of the white wine. Interestingly, the parent compound of PVPP (which is PVP; polyvinylpyrrolidone) has pharmaceutical drug applications in humans.
- Ullage: Ullage is a fancy term for “headspace” in winemaking that was originally derived from the French word “ouillage”. This headspace term applies to all situations in winemaking, including in the barrel, in the tank, or in the wine bottle. The term ‘ullage’ is also often used when describing the act of topping off a barrel with more wine in order to combat the damaging effects of oxidation caused by too much oxygen contact and headspace in the barrel.
- Chaptalization: Chaptalization in winemaking refers to the process of adding sugar to the wine must in order to increase the alcohol content of the finished wine. Since yeast consume sugar and convert that to alcohol (and carbon dioxide), the more sugar you start with, the greater the alcohol level in the finished wine has the potential to become. The Chaptalization process is actually illegal in some regions, so before you practice this method, take a look at the rules for your wine region if you plan on selling your product.
- Gelatin: Gelatin is used as a fining agent in winemaking. Specifically, gelatin acts to remove excess concentrations of tannins in the wine, as well as other negatively charged phenolic compounds that are in excess in your wine. Gelatin is derived from collagen obtained from animal by-products, so if you’re attempting to make vegan wine, you may wish to look for other fining agents that are plant in origin.
- Liqueur de tirage: This is probably a term you won’t run into too much as a home winemaker, but if you ever decide to make sparkling wine, you’ll need to become familiar with it quickly! Liqueur de tirage is defined as the solution containing yeasts and sugar that is used to start the secondary fermentation process of sparkling winemaking. Without liqueur de tirage, you’ll have a hard time getting bubbles!
———————————————————————————————————
Ed Kraus is a 3rd generation home brewer/winemaker and has been an owner of E. C. Kraus since 1999. He has been helping individuals make better wine and beer for over 25 years.
Judging a BJCP Homebrew Competition
 I recently had the pleasure of helping to judge the Blue Ridge Brew Off homebrew competition in Asheville, NC. Today, I’d like to share a bit about what it’s like to be a beer judge.
—————————————–
For those not familiar, the BJCP (Beer Judge Certification Program) helps regulate homebrew competitions across the country and even abroad. It also certifies and ranks beer judges, helping to standardize judging procedures at the dozens of competitions that happen every year.
To make sure that the format of different competitions is consistent, the BJCP establishes guidelines for both beer styles and the way that competitions are administered.
Though the preference is to have all competition judges be certified, for larger homebrew competitions this just isn’t practical. What usually happens is that experienced and inexperienced homebrew judges are matched together to collectively asses the individual entries.
On the day of the competition, judges are assigned to tables and beer styles. Typically, a group of 2-5 judges is assigned to judge the entries for a given style category. For categories with a large number of entries, multiple pairs or small groups will be assigned to a category, with each group sending their top beers to a “mini best of show” to pick the top three winners in the category.
My judging assignments for the day of the Blue Ridge Brew Off were Belgian and French Ale (Category 16) in the morning and Sour Ale (Category 17) in the afternoon. Starting around 9am, I paired up with another judge and we took one beer at a time and analyzed its aroma, appearance, flavor, mouthfeel, and overall appeal. In the process, we tasted Witbiers, Saisons, Belgian Pale Ales, and Belgian Specialty Ales. Several other sets of judges were doing the same, so the group as a whole could get through the 52 entries in the category. Each pair picked their one or two top scorers to compete in the mini best of show so that a few experienced beer judges could pick the top three in the Belgian and French Ale style category.
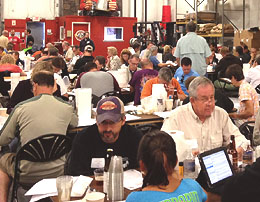
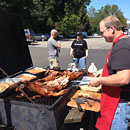 After judging 8-10 beers, it was time for lunch. Even though we were just tasting a few ounces of beer at a time, it certainly added up! Luckily, someone had cooked 100 lb. hog and brought in all the typical fixings — baked beans, coleslaw, sweet tea. All the beer judges were able to fortify a bit for the next round.
Next up were the sour beers. We had four judges and 10 entries, so we opted to judge all of the entries as a group. In the sour beer category, we rated Berliner Weisses, Flanders Red Ales, and Lambics. All had varying degrees of acidity and tartness, combined with malt complexity and in some cases, funky or fruity characteristics from wild yeasts and bacteria that are responsible for making sour beers sour. It wasn’t easy, but we eventually settled on our top three.
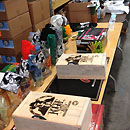 After all the tables of judges finished judging their respective categories, the top beer from each category went to compete for the Best of Show. Meanwhile, there was a raffle to raise money for the local homebrew club. Along with a number of breweries and other retailers, E. C. Kraus donated a handful of Steak Freak recipe kits for the contest.
Judging a homebrew competition is one of the best ways to improve your palate and gain an appreciation for the subtleties that differentiate a good beer from a great beer. Don’t be afraid if you’ve never judged before! Most BJCP competitions will be more than willing accept beginners to judge or steward — it’s all part of the learning experience that makes the hobby so special!
Want to judge, steward, or submit a beer to a BJCP homebrew competition? View the list of scheduled competitions on the BJCP website.
——————————————————————————————————-
David Ackley is a beer writer, brewer, and self-described “craft beer crusader.” He holds a General Certificate in Brewing from the Institute of Brewing and Distilling and is founder and editor of the Local Beer Blog.
3 Clone Lager Beer Recipes
 The colder months of winter and their lower temperatures lend themselves to lagering, the long cellaring process in which bottom-fermenting beer yeast work slowly but surely to create smooth and crisp traditional beer styles. Before the days of refrigeration, lagers were placed in cool caves for their fermentation, aging, and maturation. If you have a room or garage that stays a consistent 40-50 degrees Fahrenheit in the winter, you can lager your beer without any expensive refrigeration equipment.
Here are three clone beer recipes of popular lagers that are fun to brew, but beware…you may find that you prefer your clone over the original!
—–
Steam Freak Buddy Light
(Bud Light Clone Beer Recipe Kit)
There’s a time and a place for every beer. If you’re planning for a long day of drinking, be it during tailgating, at a cookout, or post-yardwork refreshment, this American light lager is a great mid-afternoon relaxer.
Our Steam Freak Buddy Light Beer Recipe Kit contains:
3.3 lbs. Light Liquid Malt Extract
1.0 lbs. Light Dried Malt Extract
8 oz. Carapils Malt
1 oz. Hallertau hops
1 packet Fermentis Safale US-05 Beer Yeast
Grain Bag
Bottle Caps
Priming Sugar
Directions: Heat three gallons of clean water in your brew kettle. Put the Carapils in the grain bag and steep at 150°F. for 30 minutes. Discard grain bag. Remove the kettle from heat and stir in the malt extracts. Bring to a boil. Boil the Hallertau hops for 60 minutes. Ferment for one week at 60F. Transfer to secondary for a two-week fermentation at 50F.
On bottling day, mix priming sugar with two cups of pre-boiled water and mix into the beer. Fill bottles and cap, then age beer for two weeks.
—–
Sam Adams Winter Lager Clone
(5 Gallon Recipe)
This partial mash recipe comes from Brew Your Own Magazine. A grain bill comprised of crystal malt, malted wheat, and Munich malt brings some body, color, and caramel flavor to the beer, while the orange peel, ginger, and cinnamon contribute some intriguing holiday flavors.
6.6 lbs. Briess wheat malt extract syrup
1.5 lbs. crystal malt (60° Lovibond)
1 lb. wheat malt
1.5 lbs. Munich malt
1 teaspoon Irish moss
1 oz. Curacáo orange peel (bitter orange peel)
0.5 oz. ginger root (freshly grated)
0.5 tsp. cinnamon (powdered)
9.5 AAU East Kent Goldings hops (2 oz. of 4.75% alpha acid)
4.5 AAU Tettnanger hops (1 oz. of 4.5% alpha acid)
4.7 AAU Hallertau hops (1 oz. of 4.7% alpha acid)
3/4 cup corn sugar to prime
Bavarian Lager yeast (Wyeast 2206)
Directions: Perform a “mini-mash” with the crushed grains. Strain and sparge into your brewpot, then mix in malt extract. Bring to a boil. Add the East Kent Golding hops and Irish moss and start the 60-minute boil. In the last 15 minutes, add the spices. With two minutes remaining, add the Tettnager and Hallertau hops.
Remove kettle from heat, cool, transfer wort to a fermenter. Use clean water to bring volume up to 5.5 gallons. Pitch yeast and ferment at 50-55F for 3 to 4 weeks. Prime, then bottle or keg. Lager for about 4 weeks prior to serving.
—–
Pilsner Urkel
(Pilsner Urquel Clone Beer Recipe Kit)
This Steam Freak beer recipe kit recreates the classic Bohemian lager. A touch of caramel and Munich malts contribute color and grainy flavor, while a solid dose of Czech Saaz hops provide the distinctive, noble hop bitterness of Pilsner Urquel.
6.6 lbs. Light Liquid Malt Extract
8 oz. Caramel 10°L malt
2 oz. Munich malt
4 oz. Czech Saaz hops
1 packet Fermentis Saflager S-23 beer yeast
Grain Bag
Bottle Caps
Priming Sugar
———————————–
David Ackley is a beer writer, brewer, and self-described “craft beer crusader.” He holds a General Certificate in Brewing from the Institute of Brewing and Distilling and is founder and editor of the Local Beer Blog.
Reusing Box Wine Container Bags For Homemade Wine
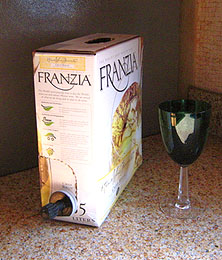 Is it ok to use boxed wine containers for my homemade wine, after removing spigot, and using Camden tabs to clean container? Spigot is easily removed and replaced. I make 15 gal every run, bottles get expensive. Thanks
Name: Dale
State: TN
—–
Hello Dale,
No one here has any specific experience with reusing box wine container bags for homemade wine. I haven’t heard of any of our customer doing this either, so I don’t have any direct experience with using them. But knowing what I do know about wine and storage, I see know reason why you couldn’t reuse the bag-in-a-box container.
The biggest concern is sanitation. If remnants of the original wine has been sitting in the bag for some time, weeks maybe, and has become dried, it could be hard to get the box wine container bag completely sanitized. But on the other hand, if you rinse the original wine out as soon as you empty the box bag, it should be fairly easy to sanitize.
As far as sanitizers go, I would suggest using CleanPro SDH in the bag. Realize that the only way you are going to get it completely sanitize is to fill the box bag completely up to maximum capacity. The sanitizing solution needs to come in contact with all surfaces. This will not happen unless the bag is fully expanded and wrinkles eliminated.
Also, you will want to add sulfites to the wine just before putting the homemade wine in the box wine bag. This can be in the form of either: Campden tablets, potassium metabisulfite or sodium metabisulfite. It doesn’t’ matter. This suggestion is no different than if you where putting your homemade wine up in wine bottles.
When actually sealing the wine bag shut, you will want to eliminate any air pockets in the wine bag. Any air in the bag will only contribute to oxidation.
My personal thought is that reusing box wine containers bags for homemade wine does have potential, but there may be some problems to look out for as well, particularly when it comes to long-term storage and aging. Will the wine age well? Will the bag’s plastic allow too much air to permeate and facilitate oxidation?
I would like to also point out that there is a similar product that can be used for this purpose. We have been selling Reliance containers for over 30 years for both fermenting and dispensing. Like the bag-in-a-box containers, they collapse as the wine is decanted.
Happy Winemaking,
Ed Kraus
———————————————————————————————————
Ed Kraus is a 3rd generation home brewer/winemaker and has been an owner of E. C. Kraus since 1999. He has been helping individuals make better wine and beer for over 25 years.
Bottoms Up! bottle & barter Brews Up New Website For Homebrewers To Connect
 Interested in trading your homebrew? Larry Galbraith, founder of bottle share site bottle & barter, shares a new way for you to share your homebrewed beer and get valuable feedback from other brewers…
———————————————————
Hey homebrewers! Now that you’ve found your one-stop shop for homebrew supplies (Adventures in Homebrewing, duh!), we think it’s time you start considering your next steps. You may be confused by this proposition, since for most of us “next steps” are usually distilled down to 1) brew, 2) wait, 3) bottle, 4) wait, and 5) drink (FINALLY!).
While these steps provide a high level of satisfaction (after all, what’s more gratifying than drinking something you’ve crafted yourself?), we think they neglect to mention a key aspect of the homebrewing experience…specifically, sharing your successful brews with others! Letting others try your homebrew can make the lengthy process of obtaining your final beverage completely worthwhile…especially when they tell you how much they like it! Plus, getting feedback from your peers is an important part of becoming a better brewer.
We know your friends, family, and brew buds are constantly singing your praises about how excellent your homebrew is, and it’s about time your best brews got some face time in front of the rest of the world, too. Thankfully, you now have the means to do just that! bottle & barter, a new website dedicated to everything homebrewed, would like to help you introduce your best brews to the entire US of A. It’s your time to become a “cele-brew-ty”!
bottle and barter is designed to enable homebrewers to connect with each other both locally and across the country by helping them show off their creations, improve their techniques, and share their best homebrewed beers, ciders, and meads. Membership is open to U.S. residents 21 and over and is completely free. Once registered, homebrewers have the ability to:
- Create their own profile and post homebrews
- Search for homebrews in their area and across the nation
- Exchange homebrews, where permissible by state law
- Connect with other members and make “Brew Buds”
- Review and rate the beers they have tried
- Stay up to date on the latest brew news via the b&b blog
b&b isn’t just a forum or a social network. It’s a community of people across the nation united by the common desire to brew, share, and (most importantly) drink their homebrews with others. Think of it as show-and-tell for grown-ups on a national scale…hopefully you brought enough for the whole class!
Head on over to Adventures inHomebrewing to get your supplies (don’t forget bottles and caps…we hate it when we do that!), and make sure to start showing off and trading your best brews on bottle & barter. It’s time your homebrews got the credit they deserve!
For more information or to register, visit www.bottleandbarter.com, and don’t forget to like the b&b Facebook page and follow b&b on Twitter: @bottleandbarter.
Thanks for reading and happy brewing!
-Larry Galbraith
Founder, bottle & barter
www.bottleandbarter.com
—————————————————————————————————————-
Larry Galbraith is a beer writer, homebrewer, and all around beer enthusiast. He is the founder of bottle & barter (www.bottleandbarter.com), a website designed to enable homebrewers to connect both locally and across the country.
Homebrewers Gone Pro: 4 Who Made It Big
 Many homebrewers love to make beer, but very few are able to take their hobby and make a living from it. Of those that do, however, several are now household names — at least among us beer geeks!
These homebrewers made the jump from bathtub brewer to pro. Will you do the same?
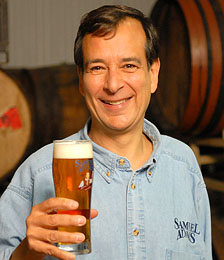
Jim Koch – Boston Beer Company
Jim Koch brewed his first batch of Boston Lager in his kitchen, using a recipe from his great-great grandfather, who was also a brewer. Samuel Adams Boston Lager launched as Boston Beer Company’s first beer in 1985, with Jim going door to door to local bars to sell it.
Today, the maker of Sam Adams is the largest craft brewer in the United States! Boston Beer Company is so big that the Brewers Association adjusted their definition of what constitutes a craft brewery from someone brewing less than 2 million barrels a year to less than 6 million barrels a year. Either way, that’s a big jump from the typical five-gallon batch of homebrew!
Ken Grossman – Sierra Nevada Brewing Company
Though he never graduated from college, Ken Grossman is behind one of the most successful craft breweries in the nation. Grossman ran a homebrew supply shop for a period in the 70s before meeting his future business partner. Grossman and fellow homebrewer Paul Camusi founded Sierra Nevada in 1980 and launched Sierra Nevada Pale Ale in 1981. Today, that beer defines the classic American pale ale, with its distinctive Cascade and Centennial hops. This year, Sierra Nevada will launch a second brewery in North Carolina.
The brewery is also known as a leader in sustainable brewing practices, with much of the power for the brewery provided by rooftop solar panels.
Steve Hindy – Brooklyn Brewery
Steve Hindy first started homebrewing while working as an Associated Press reporter in the Middle East. When he got back to the US, he expanded his homebrewing hobby and founded Brooklyn Brewery with his neighbor, Tom Potter.
Brooklyn Brewery is often credited for revitalizing the Williamsburg neighborhood of New York City, where it continues to brew its popular Brooklyn Lager. Read about Hindy and Potter’s experience in Beer School: Bottling Success at the Brooklyn Brewery.
Sam Calagione – Dogfish Head Craft Brewery
Sam Calagione started brewing creative beers while working at a bar in New York City. In 1995, he founded Delaware’s first brewpub in Rehoboth Beach. Sam provides inspiration for the many homebrewers out there who love to brew with herbs, spices, and other unusual ingredients. Meanwhile, the Dogfish line of 60-minute, 90-minute, and 120-minute IPAs are perennial favorites. A recent expansion has increased Dogfish Head’s capacity to 500,000 barrels!
Read more about Calgione’s journey from homebrewer to pro in his book, Brewing Up a Business.
What do you think? Are you prepared to take it to the next level?
——————————————————————————————————-
David Ackley is a beer writer, brewer, and self-described “craft beer crusader.” He holds a General Certificate in Brewing from the Institute of Brewing and Distilling and is founder and editor of the Local Beer Blog.
Using Bentonite In Winemaking
 The wine kits I use come with Bentonite. I am preparing to start my first batch of hard cider, from scratch. Should I use Bentonite in that also?
Name: Betsy L
State: WI
—–
Hello Betsy,
Thanks for the great question about using bentonite! Before I answer your question I would like to go over some things about how bentonite is used in winemaking.
The reason bentonite is used in the wine with the wine ingredient kits is so that the wine will clear up more quickly and be ready to bottle in the 28 days, as these kits promise. The bentonite is put in the wine at the beginning of fermentation.
This is somewhat unusual in winemaking since fining agents are typically added after the fermentation, not before. But you can get away with it if you know the dosage to add and have bench-tested this amount such as the wine ingredient kit producers have done.
The amount of bentonite used in a wine is critical when added before the fermentation. Use too much and you will drag out all the wine yeast and stop the fermentation; don’t use enough and there’s no early clearing of the wine/cider.
To answer your question, yes, go ahead and put bentonite in the wine, but do not use it before the fermentation, but rather, after the fermentation has completed. The dosage listed on the container will be intended for use at this time. It is a much larger dose than what would be used before the fermentation.
Also realize that if you didn’t use any bentonite in the wine at all, it would more than likely clear up on its own just fine anyway. Just not as quickly. Bentonite is generally used in wine right after to the fermentation to speed up the process and make it more stable sooner, not necessarily to make the wine better.
Thanks again for such a great question about bentonite and its use in winemaking. We have more information on using bentonite before the fermentation if you are interested.
Happy Winemaking,
Ed Kraus
———————————————————————————————————
Ed Kraus is a 3rd generation home brewer/winemaker and has been an owner of E. C. Kraus since 1999. He has been helping individuals make better wine and beer for over 25 years.
Winemaking Terms You Should Know: Part 3
 In some earlier posts, we introduced a few home winemaking terms that you may or may not be familiar with. There are many terms to learn in home winemaking, and this post, like the previous posts, will give you a short introduction to a few of those terms to help you get started in home winemaking, or perhaps brush up on some of the terms you may not have seen in a while.
- Anthocyanin: We’re coming out swinging with this winemaking term! Anthocyanin is the term for those chemical compounds that are responsible for the color of red wines. Specifically, depending upon the pH of the wine, anthocyanins appears to the naked eye as various shades of red, purple, or sometimes blue. Anthocyanins are from the parent family of Flavanoids, and are odorless and flavorless, though they often contribute a quality of astringency to a wine. Anthocyanins are frequently spotted in the research literature, as they have been linked to not only wine quality, but also have been shown to have positive health benefits for humans.
- First Press Juice: The first press or first pressing is the juice that comes out of the grapes from the (you guessed it) first time the grapes are pressed. This juice will be the clearest and have the lowest levels of debris or other contaminants than all subsequent presses. First press juice will have greater concentrations of polyphenols and skin/seed-related compounds than free-run juice (see below).
- Free-Run Juice: Elaborating a little more on juice from grapes, the winemaking term free-run juice is defined as the juice that comes from the grapes without any pressing. In other words, it’s the juice that comes out of the grapes on its own as they sit there in the press prior to any pressure being applied. Free-run juice is often kept separate from pressed juice, and sometimes mixed back together during blending to increase quality and complexity of the finished wine. It’s perfectly acceptable to make a wine completely from free-run juice (or pressed-juice only) and is sometimes as simply as personal preference.
- Must: This home winemaking term might be pretty easy for you, though if you’re completely new to winemaking, it may seem like an odd word to you. Must is actually a noun in winemaking, and not the auxiliary verb form that is often used in everyday language. The definition of must in winemaking is actually significantly different than the definition of must you may have run into throughout your education. Must in winemaking is a term for the unfermented grape juice, including the skins, seeds, and other plant debris left after pressing. Basically, the must is the stuff you have after pressing the grapes but before you have wine.
———————————————————————————————————
Ed Kraus is a 3rd generation home brewer/winemaker and has been an owner of E. C. Kraus since 1999. He has been helping individuals make better wine and beer for over 25 years.