
 Hi everyone!
Well, after the whole filtering debacle from last time (with my Rosso Fortissimo), I am more than ready to move on. I’m sure it’s just something I did—I probably just pushed on the pump on the wine filter too hard or tried to send the wine through when it wasn’t clear enough, but I’ve made my peace with it. After reading the reviews of the wine filter system, it sounds like everyone else is happy with it and I’m the only one putting up a stink about it. I’ve decided to give it another try (when the time comes) and next time really put more of an effort into making sure the wine is clear enough to begin with to function properly.
Even with all that hullaballoo, the wine from this wine ingredient kit turned out great! It’s not filtered, but it still tastes pretty nice! I don’t think it’s winning any medals, but then again, I have extremely high standards and it’ll probably take me years before I can make a wine that is THAT good.
Now that I’ve bottled both my Gewurztraminer and my Rosso Fortissimo, it’s time to think about making another wine(s)! What to do…what to do…..
I do eventually want to try making wine from fruit; however, it’s not exactly the season right now to get a bunch of fresh fruit. I suppose I could go to the grocery store and clean them out, but I never feel as though the fruit there is really fresh. It’s the local suppliers who will have the fruit I want, and it’ll still be at least another month before the local farmers market even opens to the public.
I am also looking forward to seeing how many apples I’ll actually get from the small tree that’s in the backyard of our new house! I don’t think it’s a very old tree, so it might not produce enough to make an entire batch of wine, but we’ll see. I suppose I could always supplement what I don’t get from my own tree with other apples from the local farmers market.
In the meantime, I will have to stick with wine ingredient kits for now!
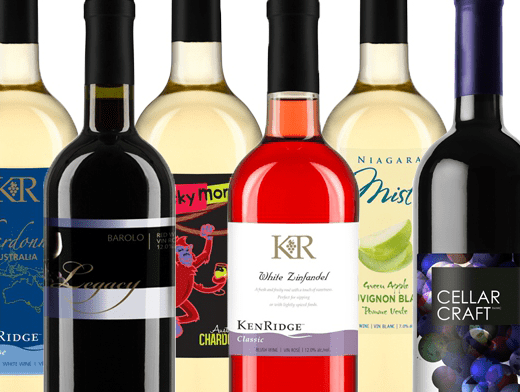
Like last time, I will choose both a red and a white. I’ve been making a lot of California Connoisseur wines, which have been fantastic, but I do want to try some of the other brands E C Kraus sells just to see what those are like.
This time, to mix things up, I think I’ll go with the Chardonnay Reserve from Cellar Craft Sterling Collection since it uses oak and I’ve yet to make a white with oak, and then for the red, I might go with the Nebbiolo (Barolo) from KenRidge Classic because why not!
———————————–
 My name is Leigh Erwin, and I am a brand-spankin’ new home winemaker! E. C. Kraus has asked me to share with you my journey from a first-time dabbler to an accomplished home winemaker. From time to time I’ll be checking in with this blog and reporting my experience with you: the good, bad — and the ugly.
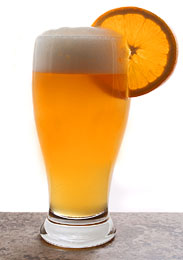
Introducing: Steam Freak Blue Noon (A Blue Moon Clone Recipe)
 Blue Moon is a very popular beer in the United States. Many consider it a “gateway beer” to other beer styles from around the world. Based on the Belgian witbier style, Blue Moon is a hazy, golden orange brew with pronounced orange flavors. As with traditional witbier, Blue Moon is brewed with orange and coriander and often served with a slice of orange. It’s a great beer for the summer!
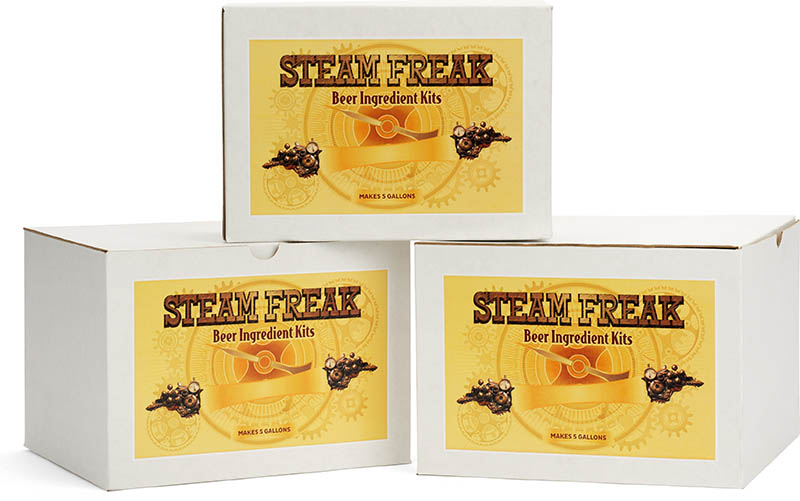
Our Steam Freak Blue Noon Recipe Kit uses two cans of Steam Freak light LME make for an easy brew day, while oats and white wheat contribute body and soft grain flavor. And of course, orange peel and coriander contribute enticing notes of citrus.
This is a partial mash recipe kit. In this recipe, partial mash brewing combines the brew in a bag (BIAB) technique with extract brewing. Using a grain bag (included in the kit) steep the 2.75 lbs of crushed grains in 150-160˚F water for 20-30 mins, then withdraw the bag and proceed with the recipe.
Consider saving 10% by buying two kits, which will also qualify for free shipping!
Steam Freak Blue Noon (Blue Moon Clone)
(Partial-mash recipe, five-gallon batch)
Specs
Style: Belgian Wit
OG: 1.055 – 1.060
FG: 1.0014 – 1.018
ABV: 5.5%
IBUs (Bitterness): 20
Ingredients
6.6 lbs. Light Liquid Malt Extract
1 lb. two-row malt
1 lb. white wheat malt
12 oz. flaked oats
2 oz. Hallertau hops
Orange peel
Ground coriander
Mangrove Jack’s M20: Bavarian Wheat Yeast
Also included in this kit:
Grain Bag
Bottle Caps
Priming Sugar
Directions:  Preboil and chill about 3 gallons of water. This will be used at the end of brew day. Clean and sanitize all equipment. Place crushed specialty grains in the included grain bag and steep in three gallons of clean water for 30 minutes at 155˚F. Remove grains and discard. Mix in malt extracts while stirring and bring wort to a boil. Add hops and spices according to recipe instructions. At the end of the boil, stir wort to create a whirlpool and chill to about 70°F. This can be done with an ice bath or a wort chiller. Pour wort into a sanitized fermenter, leaving sediment behind in the brew kettle. Mix in enough of the preboiled and chilled water to make five gallons and stir with a sanitized spoon. Pitch yeast by sprinkling directly into wort. Seal fermenter with a sanitized lid and airlock and ferment at about 70˚F for two weeks. Bottle and condition for at least two weeks.
———————————–
David Ackley is a beer writer, brewer, and self-described “craft beer crusader.” He holds a General Certificate in Brewing from the Institute of Brewing and Distilling and is founder and editor of the Local Beer Blog.
Leigh Erwin: Problems Filtering My Wine
 In my last post I promised you all a more detailed explanation of what went wrong when filtering my Rosso Fortissimo wine kit. There were definitely problems filtering this wine, so here it goes…
So far, I’m basically 0 for 2 when it comes to successfully filtering my wine using the wine filter system. I’m not happy with it and I’m debating whether or not I should just get rid of it all together and try something else. I’m sure it’s mostly something I’m doing wrong, however maybe I should just take it as a sign that this particular wine filtering system and I just don’t get along and that we weren’t meant to be. I’m getting a little stressed out just thinking about it again.
This time around, I KNOW that I put the filtering system together properly. I checked the instructions about a million times and followed them to the letter.
I filled up the pressure tank to the appropriate level with water, and pumped it through the filter so as to remove possible cardboard or other paper-like flavors. That all went great! Barely any leakage through the filter! All right! It’s all ready for the wine to go through now!
Or so I thought….
I transferred some of the wine from the carboy into the holding tank/vessel and started pumping it through the wine filter. All of a sudden a TON of wine comes pouring out the filter and NOT into the clean carboy that it was supposed to go into. Seriously, the amount of wine going into the carboy was on a 1-to-1 ratio with the amount of wine just happily flowing out of the wine filter onto my catch pan like a creek in a flood.
The amount of wine spilled in the tiny bit of pumping that I did was already markedly greater than the amount of water I lost TOTAL just previously.
 There was no way I was going to lose half of my precious, homemade wine just to get it cleared up, so I immediately decided to stop filtering it and poured all the unfiltered wine that was in the holding tank/vessel into the clean carboy. I then went ahead and racked the remaining wine from the old carboy into the new clean carboy, cursed the wine filter to hell and back, and moved forward with the bottling process.
What the heck just happened here? I never expected to have another problem filtering my wine. The water moved through the filter perfectly and I barely lost anything, but when I sent the wine through, most of it went spilling out onto the catch pan.
My only guess is that the filter size was too small for this particular wine. Perhaps the wine wasn’t clear enough after all and what I really needed was a filter with a much larger pore size. Maybe with the smaller pore size it got clogged up almost immediately (though after inspecting the filters they didn’t look clogged — but who knows) and the wine had no choice but to find its way out through any opening possible.
Anyway, now that I am reliving this story to you all, my frustration level with this wine filter has once again skyrocketed. I’m not sure what I’m going to do exactly — be it just buy larger filters and cross my fingers that that’s the issue, or throw the whole darn thing out the window and buy a completely different wine filtering system.
Sigh…
Any help any of you could provide about using this wine filter system— or have this problem filtering my wine — would be greatly appreciated.
———————————–
My name is Leigh Erwin, and I am a brand-spankin’ new home winemaker! E. C. Kraus has asked me to share with you my journey from a first-time dabbler to an accomplished home winemaker. From time to time I’ll be checking in with this blog and reporting my experience with you: the good, bad — and the ugly.
6 of the Strangest Beer Recipes You’ve Ever Seen
 Every homebrewer likes to experiment. That’s part of what draws us to the hobby. But sometimes that experimentation can get a little out of hand. Just how far is too far?
Personally, I feel that every batch of homebrew is an opportunity to learn something new about making beer at home. Whether the beer turns out great or you have to dump the batch, there’s always something to be learned about ingredients, techniques, and yes, maybe even yourself. So in that respect, it’s impossible to go to far or make a beer that’s too weird.
But if you want to brew a strange beer that’s actually drinkable, try a recipe that’s been tested before. Here are six strange beer recipes to get you started:
- Sweet Potato Buckwheat Ale – This is a gluten-free beer recipe I devised for my girlfriend. More than anything else, she misses hoppy beers, so the sweet potato and buckwheat in this recipe offer a gluten-free backdrop for some Willamette hops. I highly recommend roasting the sweet potatoes before mashing. This recipe also lets you take a shot at malting some buckwheat. If you’re not gluten-free, you might consider swapping the molasses for some light DME.
- Gruit (Partial Mash & All Grain) – Gruit is an ancient style of ale flavored with herbs and spices instead of hops (though hops can be used as well). Based on the number of herbs out there, there are an endless number of possible variations of gruit. This blog post features three gruit recipes for you to choose from.
- Pomegranate Wheat Dopplebock (Extract) – This strange — but intriguing — beer recipe that combines at least three different beer styles: fruit beer, wheat beer, German bock. It’s a relatively simple recipe, using 9 lbs. of wheat DME along with a small variety of specialty grains and 1.5 lbs. turbinado sugar. The trick here is extracting the juice from the pomegranate. You’ll find it easiest to just add pomegranate juice to the secondary fermenter.
- Hibiscus Mango Blonde Ale (Extract & All-Grain) – This recipe was crafted by Joe Stange (aka the Thirsty Pilgrim) and was featured in the Spring 2012 issue of Zymurgy Magazine. This tropical brew makes use of pureed mangos and dried hibiscus flowers to give it a fruity, floral, and slightly tart character with a pink hue
 .
.
- Wild Root Brown Ale (All-Grain) – The bulk of this brown ale recipe is normal enough: pale malt, roasted malts, and chocolate malts, Cascade hops, Galena hops, Nugget hops, American ale yeast. What’s really strange about this beer recipe is the pound of wild rice, mashed separately, then mixed with the other grains, and the use of roasted dandelion root, which contributes a roasty, nutty, slightly licorice flavor to the beer. Sounds pretty good!
- Smoked Pumpkin Seed Saison (Partial Mash & All-Grain) – This beer recipe requires the brewer to smoke some pumpkin and pumpkin seeds. These ingredients are simply mashed along with the grains in the mash. For additional complexity, the recipe adds cloves, cinnamon, and nutmeg, all towards the end of the boil. Keep this in mind for after you carve that Halloween pumpkin!
There are plenty more strange beer recipes out there – what are some of the weirdest beers you’ve ever made?
———————————–
David Ackley is a beer writer, homebrewer, and self-described “craft beer crusader.” He holds a General Certificate in Brewing from the Institute of Brewing and Distilling and is founder of the Local Beer Blog.
Leigh Erwin: Bottling My Rosso Fortissimo Wine Kit
 Hi everyone!
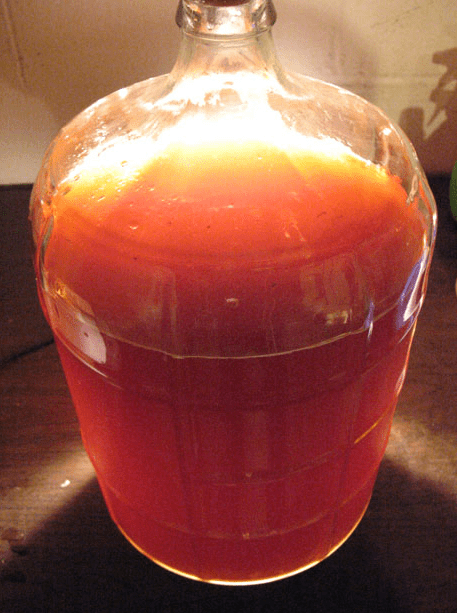
So, my Rosso Fortissimo wine kit is just going along doing it’s clearing thing, though honestly the wine is so dark it’s really hard to tell if it’s actually clearing or not! I’m somewhat worried that it’s not going to clear as well as it should since I did a couple of oddly timed rackings last time, but we’ll just have to wait and see.
According to the wine kit directions that came with it, I should be bottling the wine kit between day 42 and day 44. However, I did run into a scheduling conflict as one of my sisters was in town and I didn’t want to give up precious time visiting with her to bottle the wine. I figured extra days in the carboy wouldn’t hurt it, so I just waited until she left to get on with the bottling.
That being said, I didn’t get to bottle the wine until day 47.
I really couldn’t tell if the wine had cleared up completely, as it was very dark and the lighting in the room wasn’t actually the brightest. I did see a bunch of debris at the bottom of the carboy, so I know that SOME clearing had occurred, but whether or not it was enough wasn’t something I decided I wanted to consider. I decided to move full speed ahead and just bottle it already.
In retrospect, I really should have spent more time considering how clear the wine actually was and whether or not I should have let it sit, because I did put a lot of time and effort into making the wine up until now, so it would be silly and wasteful to just throw two sheets to the wind and plow forward with reckless abandon.
So, bottling day for the wine it is! I got everything all set up and sterilized, and was really looking forward to what would hopefully be a flawless bottling day.
HA! If only things were that easy…
The part that came as quite a challenge—again—was the filtering the wine. If you recall, I had some problems with filtering the last time I made a red wine, in that I didn’t quite read the instructions correctly for how to put the wine filter together. I ended up passing all the wine through the wine filter just fine, but turns out I didn’t put the filter pads in quite the correct position. I probably ended up only really filtering about half the wine, but that’s OK because it still tasted great in the end.
I’m going to save the horror filtering story for my next post, but for now I’ll let you know that I did end up bottling all the wine—23 bottles to be exact. That’s 7 bottles less than predicted by the instructions, but due to some filtering errors and expected “day to day” losses, that’s not so bad I think.
Final alcohol of my Rosso Fortissimo based on specific gravity readings from my hydrometer at the beginning and end of the process was 13.2%. Nice!
If you have any advice for me about bottling my wine, please leave them in the comments below…
———————————–
My name is Leigh Erwin, and I am a brand-spankin’ new home winemaker! E. C. Kraus has asked me to share with you my journey from a first-time dabbler to an accomplished home winemaker. From time to time I’ll be checking in with this blog and reporting my experience with you: the good, bad — and the ugly.
Black Lager Brewday: A Double Infusion Mash
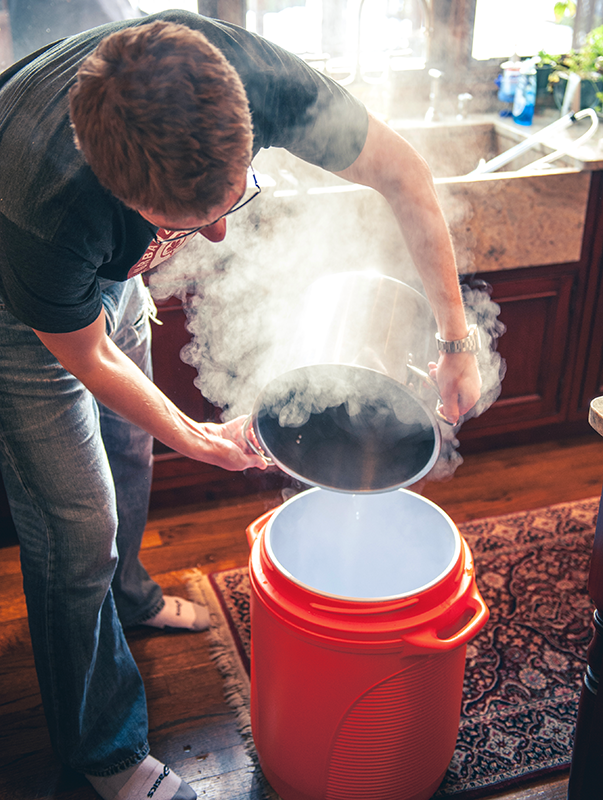 We recently had a question on the E. C. Kraus Homebrewing Blog about doing a double infusion mash in a mash tun cooler. Since I recently used this procedure for my black lager, I figured I’d walk you through the step-by-step of a double infusion mash.
The challenge when doing a double infusion mash in a cooler-style mash tun is that you can’t add heat directly to the mash tun. To raise the temperature of the mash, you have to add enough water of a certain temperature to raise the temperature of the mash to hit your target mash temperature. The math is a little complicated, so I prefer to use a software program to help me figure out the water additions. In this case, I’m using iBrewMaster.
The mash schedule as specified by my beer recipe calls for the following:
- 30 minutes at 95˚F (protein rest)
- 60 minutes at 153˚F (saccharification rest)
- 10 minutes at 170˚F (mash out)
The trick with using a software program is that it takes a few batches to calibrate the constant figures in the program. There are a number of factors that influence the calculations, including:
- Grain weight
- Grain temperature
- Mash tun temperature
- Mash tun volume loss
The mash tun volume loss should be a constant, but grain temperature and mash tun temperature may change with the season if you keep all of your brewing gear in a garage or basement. Ideally, you’ve already brewed a few times and you have a good idea of these numbers. I’ve filled them in to the iBrewMaster defaults under “Equipment Profiles.”
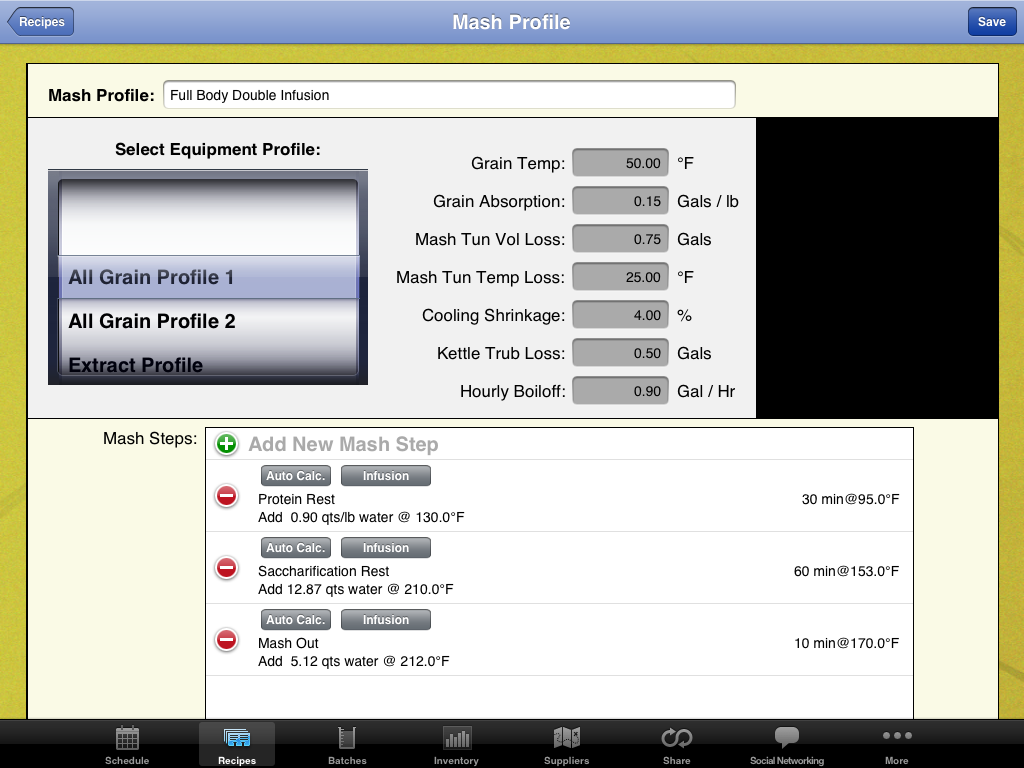
After entering these numbers, I can apply the equipment profile and mash profile to the recipe to calculate how much water I need for each step of the double infusion mash. Here’s what it gave me:
- 5 qts. of water at 129˚F to hit 95˚F
- 57 qts. of water at 212˚F to hit 153˚F
- 59 qts. of water at 212˚F to hit 170˚F
- 8 qts. of water for sparging
Now it takes a little common sense to look at these numbers. 28.8 qts. is more than enough sparge water for a five-gallon batch. In reality, it will only be 2-3 gallons, but it’s better to have too much than too little!
 From here on out, brew day is pretty simple. Follow the mash schedule for the double-infusion mash, simply mixing in the water into the cooler at the appropriate time. The only exception is the sparge water. To avoid diluting the wort, I recommend mixing in the sparge water gradually. Either do a fly sparge, in which the water trickles in over the grains at the same rate that it leaves the mash tun, or a batch sparge, where the mash tun is completely drained, then you calculate how much additional wort you need, then mix in that amount of sparge water into the mash tun and drain again. Read this post about homebrew sparging techniques to learn more about batch vs. fly sparging.
The beer recipe for this black lager is fairly simple, so I won’t walk through the remaining step of the brew day: boil, chill, pitch yeast!
Check back soon to see how this black lager turns out!
———————————–
David Ackley is a beer writer, homebrewer, and self-described “craft beer crusader.” He holds a General Certificate in Brewing from the Institute of Brewing and Distilling and is founder of the Local Beer Blog.
Leigh Erwin: Last Siphoning For My Wine Ingredient Kit
Last time, I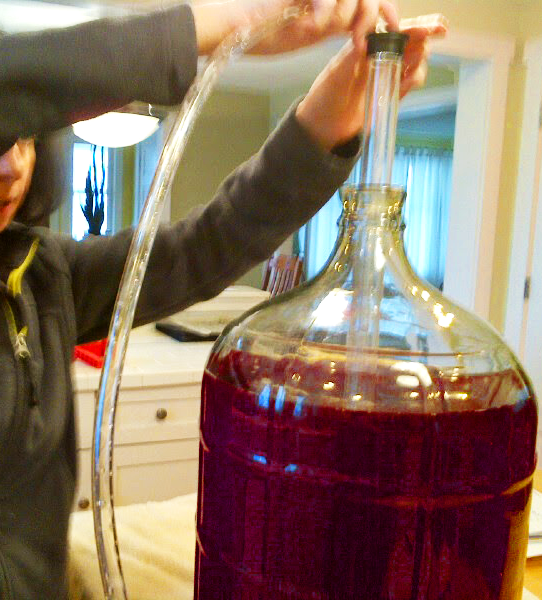 updated you all on the progress of the Rosso Fortissimo wine ingredient kit, I had just put it to bed for secondary fermentation. Things have been going well so far, and — fingers crossed — they continue to do so.
According to the instructions that came with this kit, I was supposed to leave the wine in secondary fermentation until at least day 20. Well, I ended up leaving it until day 22, basically because that’s how it worked out for my schedule. I figured leaving it an extra day or two wouldn’t hurt it at all — at the very least, I’d be ensuring that secondary fermentation was complete!
Checking the specific gravity with my hydrometer on day 22, it read 0.998. The instructions say secondary fermentation is complete and you’re ready to move on and siphon the wine into a clean carboy if the specific gravity is 0.998 or less, so I took that as the green light to go!
Next, I added the packet of potassium metabisulfite that came with the wine kit and stirred vigorously for two minutes per the instructions. I then realized that I actually wanted to rack the wine into a different vessel BEFORE this step, but it was too late at this point to do much about that. Technically, the suggestion to rack the wine wasn’t in the instructions until after the potassium metabisulfite addition, but I would have felt better anyway if I had done it first, just in case I accidentally left some behind in the original vessel. Maybe this doesn’t even matter — we’ll see.
Anyway, I then siphoned the wine immediately after the 2 minute stirring step for the potassium metabisulfite.
At this point, the instructions said that if gas was still being released to go ahead and stir the wine over the next day or two. Well, it was hard to say if it was, because I’ll be honest I didn’t pay too close attention to it, but I decided better safe than sorry and I would go ahead and stir the wine a few times over the next two days.
Two days later….
 I then added the potassium sorbate, and subsequently siphoned the wine again into a clean carboy so I could actually see if the wine was clearing or not. I know I know, I really should have racked the wine first prior to adding the potassium sorbate just in case I accidentally left some behind in the process, but like the last time, I just didn’t think about it. Here’s hoping I did it swiftly enough that none of it had a chance to settle.
After siphoning the wine into a carboy that I could actually see through, I added the packet of kieselsol and stirred gently for two minutes.
Then, I waited one hour.
Next, I added the packet of chitosan and stirred gently for one minute.
Then, I waited three hours.
Finally, I stirred the wine again for two minutes, re-fit the airlock, and said goodbye until day 42.
I realized I made a couple minor errors this time, but I’m hoping that this wine ingredient kit will be a little forgiving and it won’t really matter in the end. Here’s hoping for clear, tasty wine in the next couple weeks!
———————————–
My name is Leigh Erwin, and I am a brand-spankin’ new home winemaker! E. C. Kraus has asked me to share with you my journey from a first-time dabbler to an accomplished home winemaker. From time to time I’ll be checking in with this blog and reporting my experience with you: the good, bad — and the ugly.
Preparing for a Black Lager Brew Day
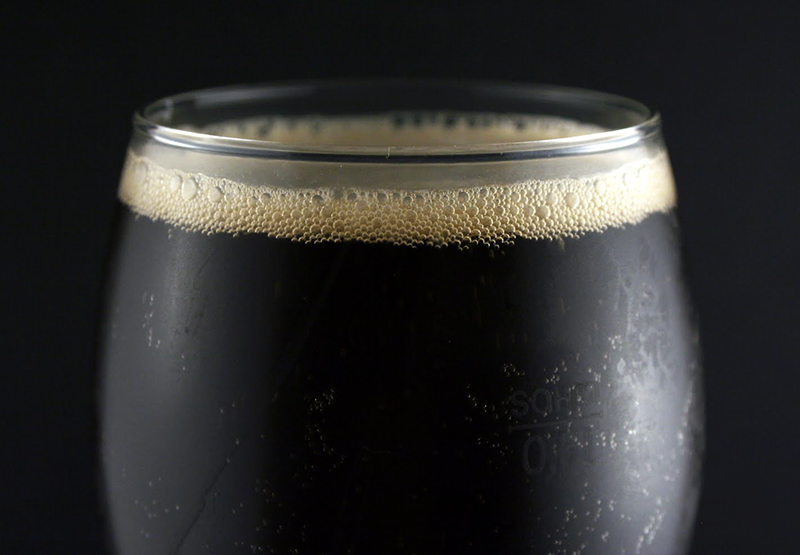 A few months ago I shared beer recipe for a German black lager: schwarzbier. I’ve decided to make this my next batch.
To me, dark lagers represent the best of two worlds. With roasted malt, they offer the depth of flavor of some heavier beers while still being relatively light and smooth – qualities contributed by the lager side of the equation.
As a lager, I find this to be a more challenging style to brew than say, a double IPA. With a relatively low amount of hops, there’s no hiding potential faults behind extreme hop bitterness or flavor. Paying particular attention to yeast pitching rates and fermentation temperatures will be critical towards making this a great beer.
To gear up for my black lager brew day, I’m going to plan my water amendments and prepare a yeast starter.
Water Amendments for a Munich Schwarzbier
To calculate the water amendments for this beer recipe, I’m going to head over to the mash chemistry calculator over at Brewers Friend. First, I’ll input my local water profile.
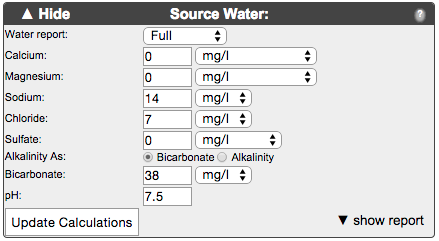
Then I’ll play around with the “Salt Additions” section until the “Actual” numbers for each of the main brewing minerals matches relatively closely to the profile for Munich Dark Lager. It’s not about getting a perfect match so much as getting in the ballpark.
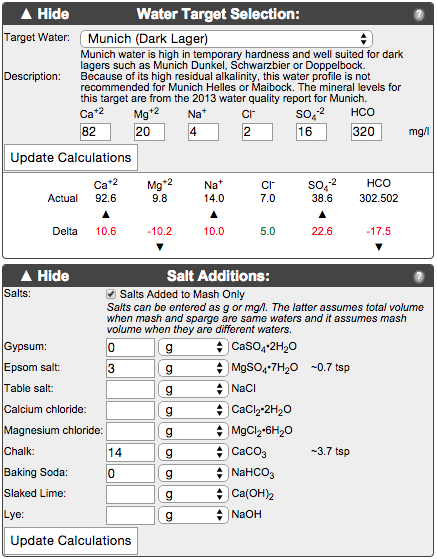
So, I’ll add 14 grams of chalk and 3 gram of Epsom salt, which gets me pretty close to the Munich water profile.
Now I can get to work on the yeast starter.
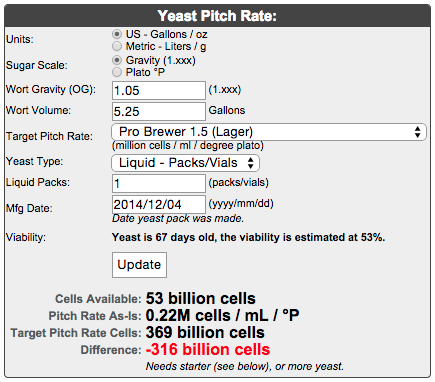
Yeast Starter for a Munich Schwarzbier
Of the two, this part is probably more important than the water amendments. Pitching enough yeast to fully ferment the lager is critical to getting a complete fermentation with a minimum of off-flavors. And since lagers require about twice as much yeast as ales, it’s extra important to build a yeast starter.
For this calculation, I’ll use the Brewer’s Friend Yeast Pitch Calculator to make sure my yeast starter has enough cells to do the job.
First, I’ll input the original gravity of the beer, the wort volume, and the number of yeast packs I’m using, and the manufacture date of the yeast. Unfortunately, I’ve been sitting on this yeast for a little while, so the “cells available” count falls well short of the target 386 billion yeast cells need for this beer. Clearly, we need a yeast starter.
Scroll down to the next section to continue. Hit the “Grab from Above” to pull in the info from the previous section. Then, using the defaults, choosing the appropriate growth model and aeration technique. I don’t have a stir plate yet, so I’ve chosen “C. White – Shaking.” This means I’ll give the starter swirl every now and then.
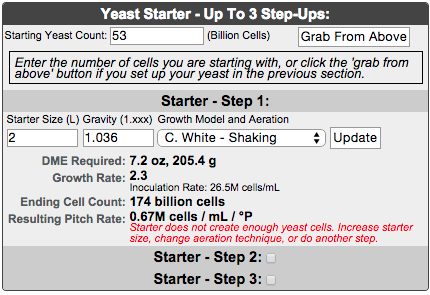
As you can see, the ending yeast cell count is still well short of the yeast count we need. To step up the starter again, we’ll check the box for step 2 and repeat the process.
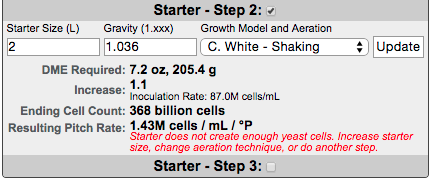
In practice, all that’s required in stepping up a yeast starter is decanting some of the liquid from the starter and then transferring it onto an additional 2L of starter wort. After two steps, the yeast count is still a tiny bit short of the target (368 vs. 369 billion cells), but it’s close enough. On brew day, after the beer is chilled to pitching temperature, the whole starter can go right into the wort. Make sure there’s plenty of headspace in the primary fermenter – this one should get chugging right away!
Check back soon to follow along with brewing this schwarzbier! Cheers!
—————————————————————–
David Ackley is a beer writer, homebrewer, and self-described “craft beer crusader.” He holds a General Certificate in Brewing from the Institute of Brewing and Distilling and is founder of the Local Beer Blog.
Get Ready for the 2015 AHA Big Brew
 Every year for National Homebrew Day, the American Homebrewers Association organizes a “Big Brew.” The idea is that homebrewers across the country – and even around the world – celebrate homebrewing by all brewing on the same day. In 2014, it’s estimated that over 8,000 homebrewers from 49 states and 14 countries brewed some 17,550 gallons of beer!
Find a Big Brew Event Near You
Register Your Own Big Brew Event
Each year, the AHA selects a handful of recipes for the Big Brew, just to increase the sense of community among homebrewers. This year, the recipes come from Gordon Strong, President of the BJCP. The recipes are soon to be published in Gordon’s new book, Modern Homebrew Recipes.
Columbus Pale Ale
(5-gallon batch, all-grain)
Specs
OG: 1.056
FG: 1.012
ABV: 5.8%
IBUs: 43
SRM: 6
Ingredients
8.5 lb. Pale two-row malt
8 oz. Munich malt
4 oz. Wheat malt
8 oz. CaraVienne® malt
4 oz. 20° L Crystal malt
4 oz. Victory malt
8 oz. Orange blossom honey (added during the boil)
0.5 oz. Columbus whole hops at 60 min
0.5 oz. Columbus whole hops at 15 min
0.5 oz. Columbus whole hops at 5 min
1 oz. Columbus whole hops at flameout
1.5 oz. Centennial whole hops, dry-hopped for 9 days
Wyeast: 1272 American Ale II or Safale US-05
Directions: Mash crushed grains in about 4 gallons of clean water at 152˚F. Hold for 60 minutes, then raise to 168˚F for mash out. Sparge to collect 6.5 gallons of wort. Boil for 75 minutes, adding hops according to schedule. Add the honey during the last 5 minutes of the boil. Chill and transfer to a clean, sanitized fermenter. Pitch at 68˚F and ferment at that temperature for 9 days, then transfer to a secondary fermenter and dry hop. After 9 days, bottle or keg.
Extract option: Replace the 2-row, Munich, and wheat malts with 7.5 lbs. light LME. Reduce boil time to one hour.
Old School Barleywine 
(5-gallon batch, extract with grains)
Specs
OG: 1.109
FG: 1.033
ABV: 10%
IBUs: 95
SRM: 13
Ingredients
13 lbs. Light LME
4 oz. Biscuit malt
8 oz. CaraVienne® malt
8 oz. Crystal 40˚L malt
4 oz. Crystal 60˚L malt
2 oz. Crystal 120˚L malt
2 oz. Special B malt
1 lb. orange blossom honey
1 oz. Cascade whole cone hops (first wort hops)
2 oz. Columbus hops at :60
1 oz. Centennial hops at :15
1 oz. Cascade hops at :5
1 oz. Columbus hops at :2
1 oz. Cascade hops at :0
1 oz. Centennial hops at :0
2 oz. Cascade hops, dry-hopped for nine days
1 oz. Centennial hops, dry hopped for nine days
Wyeast: 1272 American Ale II or Safale US-05
Directions: Steep the specialty grains (in a grain bag) and the 1 oz. of Cascade first wort hops in two gallons of 160˚F water for 30 minutes. Remove the grain bag, allowing the wort to drip back into the pot. Mix in malt extract and bring to a boil. Boil for 75 minutes, adding hops according to schedule. Add the honey during the last 5 minutes of the boi. At the end of the boil, strain the wort into a sanitized fermenter with about 2.5 gallons of pre-boiled, pre-chilled water. Top off to make 5 gallons. Pitch yeast and ferment at 68˚F for nine days, then transfer to a secondary fermenter for dry hopping. After nine days, keg or bottle.
All-Grain option: Replace the LME with 12 lbs. two-row pale malt and 6 lbs. Maris Otter malt. Mash these grains at 152˚F for 90 minutes, then mix in the specialty grains listed above during the vorlauf and sparge. Collect 6.5 gallons of wort in the brew kettle and proceed with recipe above.
Killer Kolsch
(5-gallon batch, all-grain)
Specs
OG: 1.046
FG: 1.011
ABV: 4.6%
IBUs: 16
SRM: 3
Ingredients
8.5 lb. Pilsner malt
3.1 oz. Vienna malt
3.1 oz. CaraVienne® malt
0.3 oz. Liberty hops (first wort hops)
1 oz. Hallertauer hops at 30 min
0.3 oz. Crystal hops at 5 min
Wyeast 2565: Kolsch yeast
Directions: Implement a step mash as follows: 10 minutes at 131˚F, 45 minutes at 145˚F, 20 minutes at 158˚F, 10 minutes at 168˚F for mash out. Sparge to collect 6.5 gallons of wort. Boil for 90 minutes, adding hops according to schedule. Chill and transfer to a clean, sanitized fermenter. Pitch yeast at 58˚F and ferment allowing temperature to rise to 68˚F after 4 days. Lager for two months at 40˚F, then bottle or keg.
Extract option: Replace the pilsner malt and 0.8 oz. each of the Vienna and Caravienne malts with 6.5 lbs. pilsen LME. Reduce the 30-minute hop addition to 0.8 oz.
All of the recipes can be found in their original form, both extract and all-grain, here, along with more information about Big Brew 2015.
We’ll be homebrewing for the Big Brew – will you?
———————————–
David Ackley is a writer, brewer, and craft beer marketing consultant. He holds a General Certificate in Brewing from the Institute of Brewing and Distilling and is founder of the Local Beer Blog.
Leigh Erwin: Bottling My Gewurztraminer Wine Kit
 It’s bottling day for the Gewurztraminer wine kit! I’m so excited about this one because so far, it’s been tasting really nice!
One final specific gravity measurement with my hydrometer today and it looked to be somewhere between 0.994 and 0.995. I’ll just call it 0.995 to keep it simple.
I wanted to know what the final alcohol content was of my wine, so I looked up an online alcohol content calculator that used the beginning and ending specific gravity levels to calculate that. The original specific gravity reading was about 1.113 and the final reading was about 0.995. Plugging that into the online calculator, that gives me a percent alcohol value of 16 with this wine kit. I don’t think I’ve ever had a 16% alcohol by volume Gewurztraminer, but hey, there’s always a first time for everything!
Even though the alcohol seems kind of high, it still tastes pretty good if you ask me! In fact, I think this Gewurztraminer is probably the best wine I’ve made so far! I think part of it has to do with the fact that a good chunk of the time the wine was hanging out in glass instead of plastic, so it doesn’t have nearly as much (if any) of that plastic flavor that I kept getting on my first few wines.
I ended up bottling this wine kit a little differently than in the past. First, I racked the wine into a clean and sterilized carboy that did not have a spigot on it. Then, instead of cleaning out the carboy that did have a spigot, I decided to just bottle the wine kit directly from the carboy without a spigot. That meant siphoning the wine directly into each wine bottle without the aid of an on/off “switch”, which at first I was kind of nervous about.
Turns out, it’s easier than I thought. No extra messes were made! Once the wine bottle got full enough, I just stood up to stop the flow and slowly lower the bottle to add a little bit more wine if needed. A couple of times I put a little bit too much in the bottle, so I just poured the extra back into the carboy. No problems!
Once I got down to the very bottom, I just poured the remaining wine into a bottle by lifting and dumping the entire carboy through a funnel. Since I had previously racked the wine into a clean carboy leaving all dregs behind, I wasn’t worried about pouring the remainder in like that. In fact, that’ll just be the first bottle we drink and we won’t give it to anyone else just in case.
I ended up filling 21 bottles with wine kit, with the 21st bottle only actually filling up about ¾ of the way. The kit was supposed to make 30 bottles ideally — I remember I spilled some of the juice on the floor in the very beginning, so that probably had something to do with it. Oh well, 21 bottles is better than 0 bottles!
All-and-all, bottling this wine kit went pretty well. The wine smells delicious and I can’t wait for it to age a little. But I have to be honest… right now it’s testing my patience!
—————————————————————–
My name is Leigh Erwin, and I am a brand-spankin’ new home winemaker! E. C. Kraus has asked me to share with you my journey from a first-time dabbler to an accomplished home winemaker. From time to time I’ll be checking in with this blog and reporting my experience with you: the good, bad — and the ugly.