
 I’m curious as to why does wine turn to vinegar. When the threat of this happening over, if ever, and what causes it. Is there an in depth explanation anywhere I can get?
Thanks Jane
—–
Dear Jane,
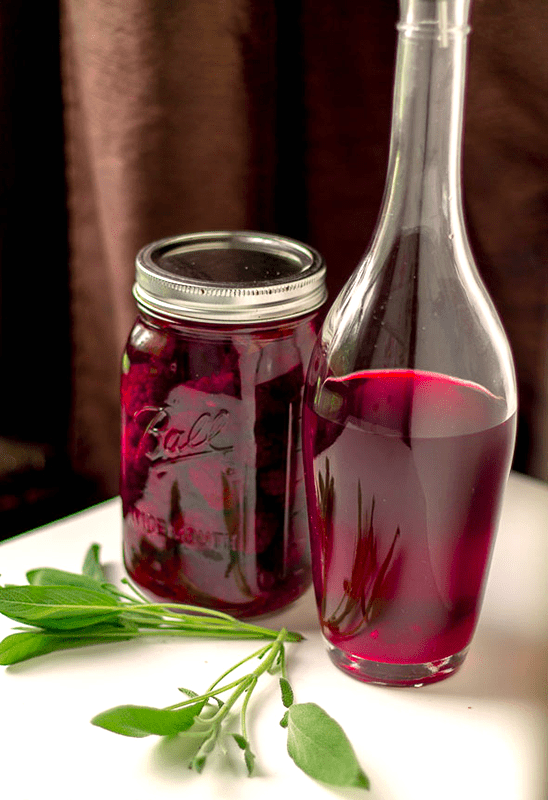
When you talk about how or why a wine turns to vinegar, you have to start with the acetic acid. This is the stuff that makes vinegar taste like vinegar. It’s the tang. If you had acetic acid in a jar and poured some of it into a fruit drink, it would immediately start to take on the characteristics of vinegar. It’s what makes vinegar, vinegar.
Acetic acid is made by a bacteria known as acetobacter. This bacteria is everywhere: in the air, on fruit, on grape presses, etc. When acetobacter gets into your wine it can slowly turn the alcohol into acetic acid, if left unhindered.
The key takeaway here is: if you control the acetobacter; you control the vinegar.
During a fermentation the wine is relatively safe. The gases from the fermentation help to keep acetobacter fall-out from getting into the wine must. Also, domesticated wine yeast are bred to inhibit bacterial growth, giving them the term killer yeast. It is not until the fermentation is over that caution needs to be taken.
Fortunately for us winemakers, acetobacter can be very easily destroyed before they have a chance to colonize and produce acetic acid. All it takes is the addition of sulfites in the form of either Campden Tablets, Sodium Metabisulfite or Potassium Metabisulfite. Use any of these in the wine, and the acetobacter will be very easily destroyed.
 I would suggest using sulfites 24 hours before adding the wine yeast. Do not use an air-lock or lid on the fermenter during this time. You need the sulfite gases to dissipate into the air during the 24 hours, otherwise it will remain in the wine must and destroy some or all of the wine yeast when you add it. I also suggest adding sulfites just before bottling to keep the wine fresh while in the bottle. You can find more information on our blog about when to add sulfites to your wine.
Make sure you use a domesticated wine yeast to keep your fermentation clean. And, always sanitize your homemade wine equipment with a sulfite/water solution before using it.
The bottom line to the question: “why does wine turn to vinegar?” is because acetobacter was allow to grow in your wine. Stop the acetobacter, and you’ll stop the vinegar.
Happy Wine Making,
Ed Kraus
———————————–
Ed Kraus is a 3rd generation home brewer/winemaker and has been an owner of E. C. Kraus since 1999. He has been helping individuals make better wine and beer for over 25 years.
Leigh Erwin: Starting A Nebbiolo Wine Ingredient Kit
Hello everyone,
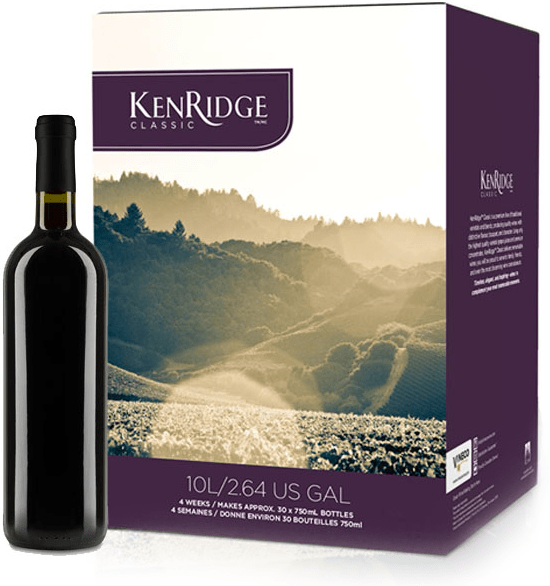
If you recall from before, at the same time I purchased my Chardonnay kit, I also purchased the Ken Ridge Classic Nebbiolo wine ingredient kit.
Just like all other times, I drew off tap water the day before to blow off any potential chlorine that might be in the water. Then, the next day, I poured the grape juice concentrate from the kit into my cleaned and sterilized primary fermenter and used the water to rinse the bag. The instructions that came with the wine ingredient kit said to use warm water but I used room temperature water instead. I don’t THINK that’ll make a difference, but I could be wrong.
At this point, I added the elderberry packet that was included in my wine kit and then added enough water to bring the whole thing up to 6 gallons. I think the elderberries will be a nice touch to the particular wine.
At this point, I took the temperature with my thermometer and the specific gravity measurement with my wine hydrometer, which came out to 64°F. and 1.092, respectively. Since the temperature was a little low to start the primary fermentation, I turned on the heating pad and left the whole thing overnight to heat up a bit before adding the yeast. The next day, the temperature was up to 74°F. which was perfect.
I then sprinkled in the wine yeast and left the cover loosely on the primary fermenter.
One thing I did differently this time to keep the wine nice and appropriately warm was to warm a towel around the fermenter. I noticed that based on the shape of the base and the material of the fermenter, it was taking a while to heat up, so I wrapped it in a towel to get it going faster.
I’ve been checking on the wine every day now, and it has been bubbling along quite nicely and it smells great. I did notice the temperature was starting to creep up to a little too high (it was 84°F. last I checked), so I removed the blanket so that hopefully the temperature will drop back down a couple of degrees. I remember reading somewhere that too warm of fermentation temperature can promote off-flavors in the wine, so we’ll have to watch that – 70°F. to 75°F. is what I’m shooting for.
I’m very excited about this wine ingredient kit. The Nebbiolo smells and looks great. I can’t wait for it to be done.
———————————–
 My name is Leigh Erwin, and I am a brand-spankin’ new home winemaker! E. C. Kraus has asked me to share with you my journey from a first-time dabbler to an accomplished home winemaker. From time to time I’ll be checking in with this blog and reporting my experience with you: the good, bad — and the ugly.
Degassing Homemade Wine
 At the very center of wine making is the process of fermentation. Fermentation occurs because the yeast want to consume the sugars in a wine must. As a result, the sugars are converted into both alcohol and CO2 gas by the fermentation. Normally as winemakers, we are concerned about the alcohol, but in this post we are going to change directions and talk a little about the gas.
Almost all of the CO2 produced during a fermentation dissipates into the air and goes away very quickly, but not all of it. Any liquid – wine included – has the ability to hold some CO2 gas for a period of time. It stays saturated in the wine. This CO2 gas is the same stuff that puts the fizzy in soda pop, beer and even the sparkle in sparkling wines, but when it comes to still wines we don’t want CO2 gas to do anything but be gone.
A Little Degassing Background
When I first started making wine, degassing was not even a word in the winemaker’s vocabulary. Finished homemade wines always sat around long enough in bulk glass jugs clearing and aging and whatnot, that they degassed themselves naturally with time. Wines back then needed extra time, and along with this time the wine was able to release all the CO2 gas it contained.
But things changed when 28 day and 6 week wine kits came onto the scene. These kits allowed the home winemaker to bottle their wines in a relatively short amount of time. This is not enough time for the CO2 gas to escape on its own. Because of this, the wine kit producers added the extra step of degassing in their directions they included in the kit.
How Do You Degas A Wine?
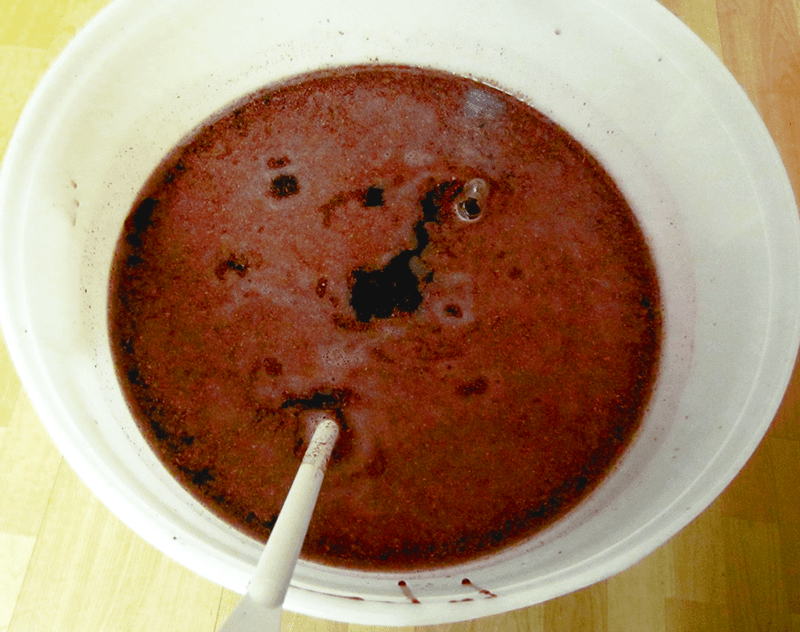
 A portion of the CO2 gas can stay saturated in a wine indefinitely because the gas molecules will lightly bond with the wine, but by agitating the wine with something as simple as a stirring spoon, the gas molecules will start to release and float to the surface and dissipate. If you stir the wine long enough, all but an untraceable amount of the CO2 gas will be released. The amount of time it takes to degas a homemade wine the with a stirring spoon can vary greatly. It could take a few minutes or a few hours depending on how much CO2 is still in the wine at this point.
One way to speed up the process is to use a degassing/mixing paddle. The paddle attaches to a hand drill just like a drill bit would. This significantly reduces the amount of labor and time needed to degas a wine.
Another way of degassing a homemade wine it by putting the wine under a vacuum. This can be done with a wine preserving vacuum pump, like our Vacuvin Wine Saver or any other hand-held wine preservation system to degas the wine. By putting the vacuum pump directly over the air-lock hole of a rubber stopper, you can literally suck the CO2 gas out of a glass jug.
———————————–
Ed Kraus is a 3rd generation home brewer/winemaker and has been an owner of E. C. Kraus since 1999. He has been helping individuals make better wine and beer for over 25 years.
How To Tell If Your Wine Yeast Is Working
 How do you know if the wine yeast is working, I prepared the yeast per the instructions that were on the packet and when set to ferment the air-lock is not popping. Did I do something wrong, What would cause this to happen?
Thank you for your help,
Albert the beginner
—–
Good Morning Albert (the beginner),
Let’s see if we can’t figure out what’s going on…
First, it’s important to understand that it can take a wine yeast up to 36 hours to start showing signs of fermentation. On average, it takes a yeast about 8 hours, so if it hasn’t been this long, you may need to wait.
How long a fermentation actually takes to begin depends on a whole host of factors: temperature being the most critical. You want the wine must to be between 70° and 75°F. for a timely fermentation. You can find other factors by reviewing, The Top 10 Reasons for Fermentation Failure.
You will notice the first signs of fermentation activity as little patches of fine bubbles on the surface of the wine must. These patches will eventually grow into a thin layer of fine bubbles across the entire surface. You are likely to notice this before you will see any activity in the air-lock.
Here are a couple of issues I would like to bring up briefly that are indirectly related to your question but may bring some light to it:
Yeast Preparation
The directions on a typical packet of wine yeast will state to put the wine yeast in water that is at such-and-such temperature for so-many minutes before adding to the wine must. It is perfectly fine to follow these directions, but only if you actually follow them. This means using a thermometer to track temperature and a watch to track time. Following such directions in a haphazardly way will lead to the destruction of the wine yeast and a fermentation that has no chance of starting.
 If you are not willing to monitor the process precisely, you are much better off just sprinkling the yeast on to of the wine must. The must will start fermenting, but it may take a little more time to get going.
Using The Air-Lock
You stated that you are watching the air-lock for signs of activity. In spite of what many wine making instructions may say, we do not recommend using an air-lock during the first few days of a fermentation (primary fermentation).
Yeast needs air to successfully multiply into a larger colony. By using an air-lock, the air is being kept away from the yeast. For this reason, we recommend that you do not use an air-lock during the primary fermentation. Instead, take the lid off and cover the fermenter with a thin cloth towel or something similar.
If you are concerned about leaving a fermentation exposed to the elements, rest assured that as long as you have an active fermentation starting up as scheduled, your wine must will be safe from any airborne contaminants. The positive flow of CO2 gas from the fermentation will help protect against this.
Another Wine Making Tip…
One think I like to do is put the air-lock on the fermenter for just the first few hours – just long enough to determine that the yeast is going to start. Once I see the first signs of fermentation, I then take the lid and air-lock off and cover with a thin cloth towel. This give the wine protection when it is most vulnerable and oxygen when the wine yeast most need it.
Happy Wine Making,
Ed Kraus
———————————–
Ed Kraus is a 3rd generation home brewer/winemaker and has been an owner of E. C. Kraus since 1999. He has been helping individuals make better wine and beer for over 25 years.
12 New Budget-Friendly Homebrew Kits from Black Rock Brewery
 We’re excited to share that we’ve added twelve new homebrew beer kits to our lineup of malt extract beer kits! These kits are very easy to brew – ideal for anyone new to homebrewing or for seasoned homebrewers looking to simplify their brew day.
Each kit is fully hopped and comes with straightforward directions to guide you through the homebrewing process. You’ll just need to add water and 2.2 lbs. of corn sugar to complete the recipe. If you’ve never brewed before, we recommend you browse our “New to Brewing” articles to learn what it takes to get started. These are no-boil kits, so the only equipment you really need is a beermaking starter kit.
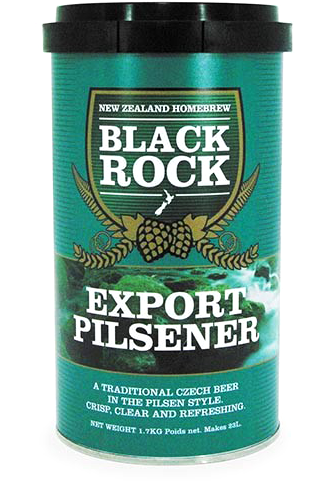
The twelve new malt extract beer kits from Black Rock Brewery include:
- Pilsner Blonde – A European-style golden lager. Dry with full hop flavor. 14-18 IBUs, 2-4 SRM.
- Apple Cider – Not a beer of course, this kit is made using New Zealand’s finest apples. 0 IBUS, 2-4 SRM.
- Miner’s Stout – An everyday stout. Dark and roasty with flavors of chocolate and coffee, but not too bitter. 25-35 IBUs, 40+ SRM.
- Bock – A German classic, bock is a dark, malt-forward lager with flavors of toast and caramel. 14-18 IBUs, 23-28 SRM.
- Nut Brown Ale – An English-style amber ale with flavors of caramel and toffee and a hint of biscuit. This beer kit is a great choice for beginning homebrewers. 19-23 IBUs, 11-14 SRM.
- New Zealand Company Bitter – A New Zealand take on the English bitter. Rich, strong, and well-balanced with a pronounced hop character, but not overhopped. A sessionable pale ale. 26-34 IBUs, 11-14 SRM.
- Pale Ale – A light, golden ale with a subtle, floral hop character from the finest New Zealand hops. Easy drinking, yet full of flavor. 14-18 IBUs, 2-4 SRM.
- Whispering Wheat – An easy-drinking and refreshing wheat ale. Crisp and slightly sweet. A great beer for warmer weather. 14-18 IBUs, 2-4 SRM.
- Mexican Lager – A smooth lager in the Mexican style, perfect for your next fiesta. 14-18 IBUs, 2-4 SRM.
- Lager – A crisp, clean, pale golden lager. Moderate hop bitterness and aroma. 18-22 IBUs, 2-4 SRM.
- Dry Lager – A pale lager with a crisp, dry finish. Not quite as bitter at the lager above. 14-18 IBUs, 2-4 SRM.
- Export Pilsner – A Czech-style pilsner lager, similar to Pilsner Urquell, with more hop bitterness than the other lagers listed here. 35-40 IBUs, 6-7 SRM.
If you’re new to homebrewing, any one of the malt extract beer kits would be a good place to start!
What other kinds of beers are you interested in making?
———————————–
David Ackley is a writer, brewer, and craft beer marketing consultant. He holds a General Certificate in Brewing from the Institute of Brewing and Distilling and is founder of the Local Beer Blog.
Leigh Erwin: A Slow Fermentation
 Hi everyone!
Last time I checked in, I think I solved the slow fermentation issue I was having with one of my wine making kits. I did this by increasing the temperature of my wine with a heating pad. The fermentation was simply too cool for the yeast to ferment. Things still moved along very slowly after that, but it eventually hit 1.000 on my wine hydrometer (after 19 days!).
I have a feeling the rest of the process is going to do incredibly slow, so if things aren’t where they should be according to the time frame set on the instructions that came with the kit, I won’t be upset. I suppose I’ll be upset if the wine starts to look or smell funny, but for now, all seems to be going OK with the exception of the time-frame of the fermentation.
….fast-forward until today….
So, it’s been 17 days since I transferred the wine over to another carboy for secondary fermentation. According to the instructions, the wine needs to be less than 0.996 on the specific gravity scale of my hydrometer in order to move forward. I anticipate that the fermentation might finish out slower than that, but who knows.
Checking the specific gravity 17 days after starting secondary fermentation, it hasn’t moved AT ALL. It’s STILL 1.000. The temperature was 66°F., just a little to cool.
To top it off, the wine tastes disgusting. Overripe fruit overload, as well as other things I just can’t really describe. I guarantee that way too much oxygen was in contact with the wine for way too long causing the wine to become oxidized – I mean it took 19 days for primary fermentation to finish for crying out loud, leaving ample time for oxygen to do it’s dirty work.
I am extremely disappointed. I don’t even know at this point if the wine is even going to continue on its own. 2.5 weeks later and no change in the specific gravity? That, and it tastes nasty (reminiscent of that mead I tried to make)? I think it’s done. Destined for the drain.
I will never forget now to at least poke my head in to check on my wine once every day to two instead of waiting until when the instructions say it’s time to move on. If I had noticed that my fermentation wasn’t getting going after 12-24 hours to begin with, I would have been able to warm the fermentation sooner and most likely save it.
I will also get in the habit of checking the temperature of the fermentation more often as well, particularly since I live in Colorado and I’m making it in a basement which does not have its own individual temperature control. After all, temperature is #1 on the list of The Top 10 Reasons of Fermentation Failure.
I may as well assume I’m always going to need a alternate heating source of some kind while I’m sending my wines through primary fermentation. That being said, if I want to increase my production and have more than one wine going at the same time, I’ll want to purchase a second (or more) heating elements to do that.
Live and learn, my friends!
———————————–
My name is Leigh Erwin, and I am a brand-spankin’ new home winemaker! E. C. Kraus has asked me to share with you my journey from a first-time dabbler to an accomplished home winemaker. From time to time I’ll be checking in with this blog and reporting my experience with you: the good, bad — and the ugly.
Bottling My Black Lager Beer
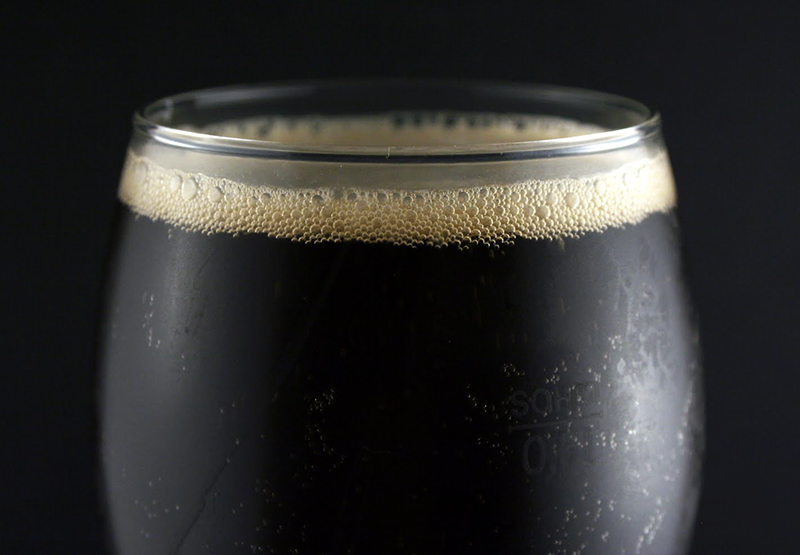 After three months of patience, it’s finally time to bottle my black lager beer It’s been quietly waiting at about 40°F for the lagering phase and I can’t wait to taste it.
Three months seems like a long time to wait for beer, and it is. That’s why very few craft breweries make lagers. They just can’t commit to tying up that much fermentation capacity when they could turn out three (or more) batches of IPA in the same time period. Of course, it’s the same thing for homebrewers. I’d be happy to let the beer age even longer, but I want to brew more beer!
For me, bottling day for my homebrew always starts with an assessment of the situation: What do I need to bottle this batch of beer? Bottles, obviously, but also bottle caps, a bottling bucket, priming sugar solution, an auto siphon, tubing, and a bottle filler. One of the first things I do when bottling my beer is check the bottling bucket spigot. This is a notorious place for gunk to build up and potentially contaminate your bottled beer. It doesn’t need to be checked every time you bottle, but definitely every two or three times is a good idea.
Another thing I do pretty early on when bottling my beer is move the fermenter into position. This will give any sediment that gets stirred up a chance to settle down before racking the beer into the bottling bucket.
Once that’s taken care of, I usually fill up the bottling bucket with cleaning solution and clean all the necessary parts. If you’ve done a good job rinsing equipment and bottles after use, cleaning should be pretty easy – just a quick soak will suffice. But be sure to keep an eye out for deposits inside the beer bottles that may need a little extra scrubbing. With a brewing cleanser like One Step, you don’t even need to rinse.
Sanitizing is basically the same process as cleaning, but instead of using a cleanser, you use a solution of sanitizer. Most homebrewers like working with Star San or Iodophor.
While my beer making equipment is soaking in sanitizer, I usually start getting the priming sugar ready. I am a huge advocate of getting as specific as possible with priming sugar. I recommend using a digital scale and a priming sugar calculator to figure out exactly how much sugar to use to prime the beer.
By the time the priming sugar solution is mixed, it’s time to take a final gravity reading from the beer – and my favorite part – tasting it! The beer is pretty flat at this stage, but it gives a pretty good indication of what the beer will be like when it’s ready to drink.
This black lager is tasting good! Bready malt flavor and aroma, with just a hint of chocolate and a touch of hop bitterness. Can’t wait to to get this beer primed, bottled, conditioned, and ready to drink!
———————————–
David Ackley is a writer, brewer, and craft beer marketing consultant. He holds a General Certificate in Brewing from the Institute of Brewing and Distilling and is founder of the Local Beer Blog.
Double The Sugar To Sweeten The Wine… Wrong!
 Most of my “fresh fruit” wines are dry. I was talking with a gentleman who also makes his own wines. He told me to double up on the sugar to sweeten my batches. Right now I have a batch of wine (brewing since mid-May). It needs to be racked again. If I add sugar to this batch now, will it start fermentation all over?
Thanks,
Marlene
—–
Hello Marlene,
The short answer to your question is, “yes.” Continuing to add more sugar to your wine must while it is still fermenting will contribute to more fermentation and alcohol content, not to the wine’s sweetness. When first learning how to make your own wine this can be a great area of confusion for many.
If you keep adding more and more sugar you be raising the alcohol level of the wine, but will eventually come to a point where the wine yeast can no longer ferment more alcohol. Where that point is is something that varies greatly from one batch to the next based on a whole host of conditions. Factors such as temperature, available nutrients, the type of wine yeast, and many, many others. All of these factors sum up to either contribute or hinder the wine must’s ability to ferment.
Some factors such as available oxygen and temperature can even change over the coarse of the fermentation. This means that the fermentation can stop at some point and then start up again. For example, if the fermentation gets cooled down by weather, then warms up again. You could have a fermentation the temporarily stops for a few days.
Fortunately, there is another way to approach making a sweet wine beside adding a bunch of sugar and hoping for the best. One that is more predictable, more controlled and easy to accomplish. This is also the method that any of the wine making books you read will suggest.
The first step is to accept the fact that any sugar you add before fermentation is to contribute to the alcohol content of the wine and not its sweetness. You can follow your wine recipes suggested amount, or you can use a wine hydrometer to tell you how much sugar to add. Shoot for an alcohol range of 10% and 13% alcohol. Any wine yeast can achieve this amount under reasonable conditions.
The second step is wait until the wine’s ready to bottle before worrying about sweetness. Once the wine has fermented, cleared and ready to bottle, you can then add sugar to taste. Once you get the wine’s sweetness to where you like it, you will then add potassium sorbate. This is a wine stabilizer that will hinder the residual yeast’s ability to recolonize and support a re-fermentation.
Don’t confuse potassium sorbate with Campden tablets or sodium metabisulfite. These work differently and can not completely eliminate a chance of re-fermentation. They should be added regardless if potassium sorbate is added to the wine or not.
By going about sweetening your wine in this way you are taking charge of the wine’s sweetness and no longer are at the mercies of a wine must’s ability to ferment or not ferment. If you’d like, you can also think about it as taking control or your wine’s alcohol content – particularly if you are using a wine hydrometer to help you target an finished alcohol level.
Happy Wine Making,
Ed Kraus
———————————–
Ed Kraus is a 3rd generation home brewer/winemaker and has been an owner of E. C. Kraus since 1999. He has been helping individuals make better wine and beer for over 25 years.
How To Make Chicha: Corn Beer Recipe
 What would you do if corn were the only grain you had available to brew with? You’d make corn beer with it!
That’s exactly what native cultures throughout Latin American have done for hundreds, maybe even thousands of years. Plenty of variations exist, but chicha is a corn-based beer traditionally made by chewing the corn to convert its starches to fermentable sugars, spitting it out, and fermenting the corn in water. Sometimes chica is consumed young, sweet, and low-alcohol, sometimes it is allowed to ferment to a higher alcohol content.
As Sam Calagione of Dogfish Head found out, making chicha this way is not easy. Luckily, modern day homebrewers have access to practically unlimited ingredients for making corn beer at home. Making a corn-based beer is as easy as mixing flaked corn with hot water, adding various flavoring ingredients, and fermenting as you normally would any other batch of homebrew.
The corn beer recipe below is a modern interpretation from one of my favorite homebrewing books, the Homebrewer’s Garden. It’s a one-gallon recipe, so be sure to have a one-gallon glass jug with a 6.5 rubber stopper and an airlock. You can easily scale up the recipe to a five-gallon batch, but you should probably try the one-gallon batch first to make sure you like it.
Chicha (Corn Beer) Recipe
(one-gallon recipe, adapted from the Homebrewer’s Garden)
Specs
OG: 1.048 – 1.060
FG: 1.010 – 1.013
ABV: 5 – 6.2%
IBUs: 0
SRM: 5
Ingredients
4 lbs. flaked corn (maize)
1/4 lb. brown sugar
16 oz. homebrewed porter
2 bags Tension Tamer tea (or approx. 4 grams of cinnamon, ginger, and chamomile)
1 packet Munton & Fison ale yeast
1/4 cup corn sugar for priming
Directions
Mix the flaked corn with 1 gallon of boiling water. After one hour, strain the wort into a brewpot. Repeat in order to collect 1.5-1.75 gallons of wort. Bring wort to a boil and mix in the brown sugar and the porter. Boil gently for three hours, or until one gallon of wort remains. Add the tea to the wort at the end of the boil, then chill and transfer to a sanitized one-gallon jug. Ferment at 60-70˚F. Chicha is traditionally consumed after only 3-4 days. In this case, you may transfer the beer to a serving vessel (a growler, for example) and store in the fridge. Otherwise, ferment until complete and bottle condition as normal.
This chicha corn beer recipe is easy to make and can be altered with different spices or beer to match your personal tastes.
Interested in other ways to add corn to your homebrewed beer? Read: Brewing with Corn.
———————————–
David Ackley is a beer writer, brewer, and self-described “craft beer crusader.” He holds a General Certificate in Brewing from the Institute of Brewing and Distilling and is founder and editor of the Local Beer Blog.
Leigh Erwin: My Stuck Fermentation
 Hello fellow home winemakers!
In case you haven’t been following my posts, my latest issue in my home winemaking adventures is a seemingly slow or stuck fermentation with my Cellar Craft Sterling Chardonnay. I had set up the primary fermentation according to the letter, but six days later, the specific gravity had gone from a 1.100 to a pathetic 1.080. Just as the name sounds a stuck fermentation is a fermentation that is not doing anything when it should.
I had mentioned to you that I’d been using the air conditioning a bit more during this time and had not closed the vent to the winery room, making the room a lot colder than it had been previously.
In a panic, I tossed in some yeast nutrient and yeast energizer, stirred it up, and then got out my heating pad. I plugged that in and set it under the fermenter, then crossed my fingers and went straight to my computer to ask the pros at E. C. Kraus to see if they could tell my why I had a stuck fermentation.
Here was their response:
“When I see this happening in this way with a wine ingredient kit, it normally points to one of two things:
1) Either the room temperature is too cold — which I’m sure you know, already;
2) Or, some of the yeast cells were killed through the rehydration process. See this article:
“Pros And Cons Of Yeast Rehydration”
It doesn’t hurt to add more nutrients, but I doubt if this will help. Wine ingredient kits, in general, are packed with a lot of nutrients, already. I would go ahead and add another pack of yeast to the wine must. Be sure to just sprinkle the granules directly on top. They will soak in and dissolve on their own.”
So, it sounds like I may have wasted some yeast nutrient and energizer in my little panic, since wine kits usually contain plenty of nutrients themselves, but that’s OK. I suppose it shouldn’t hurt the wine.
I did add some new yeast to the mix, though I decided to try and rehydrate them first instead of just sprinkling them on top. I don’t really know why I did this – in retrospect, this was probably another bad decision on my part, but I was in a slight panic and wasn’t thinking totally straight.
After a bit of waiting, I FINALLY hit 1.000 on the wine hydrometer 19 days after starting fermentation. I have no idea how having a stuck fermentation affects the quality of the finished wine, but so far the wine looks OK and smells OK. I’m not going to keep my hopes up with this wine, but I think it might still be salvageable.
A couple things I learned this time around: 1) check on the wine every day or two instead of waiting so long (I waited 6 days instead of peaking my head in to see if things were moving) and 2) always monitor the temperature of the wine with a thermometer, particularly when the weather outside is in flux and the heat or air conditioning is being used differently than it had been previously. Doing these two things would have helped to keep my wine from being prey of a stuck fermentation.
———————————–
My name is Leigh Erwin, and I am a brand-spankin’ new home winemaker! E. C. Kraus has asked me to share with you my journey from a first-time dabbler to an accomplished home winemaker. From time to time I’ll be checking in with this blog and reporting my experience with you: the good, bad — and the ugly.