How to Store Home Brewing Supplies

How To Store Home Brew Supplies
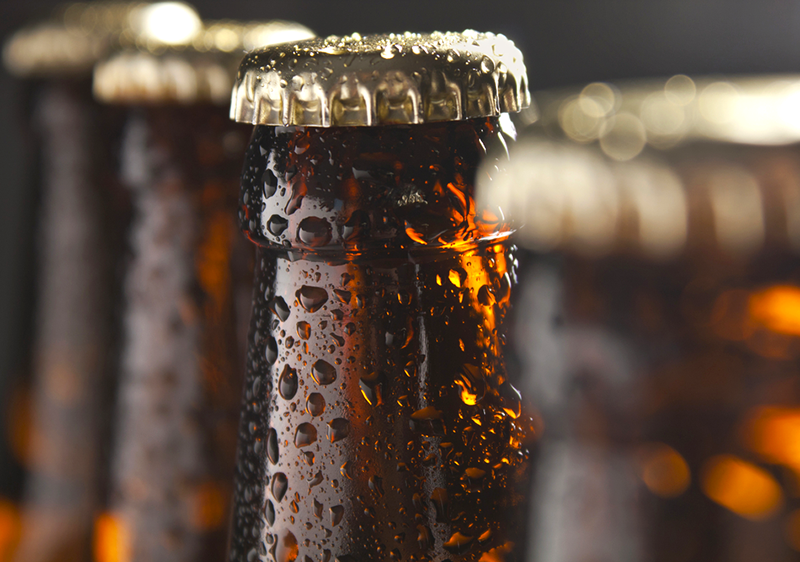
One of the reasons that 1.2 home brewers in the United States have picked up the hobby is that brewing your own beer is a simple, enjoyable pastime that you can do from the comfort of your own home. It’s easy enough for beginners to pick up without much prior knowledge and it’s a great hobby for sharing with friends!
However, if you don’t store your brew supplies and ingredients in the right conditions, you might expose your supplies to mice, spoil the ingredients, or even accidentally have a beer bottle explode! Here’s what you need to know in order to properly store your home brew supplies and ingredients.

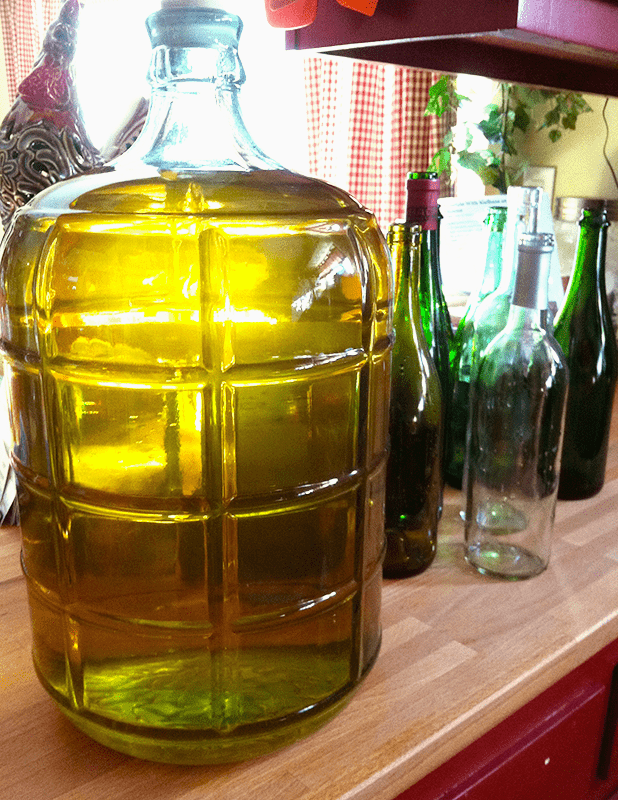
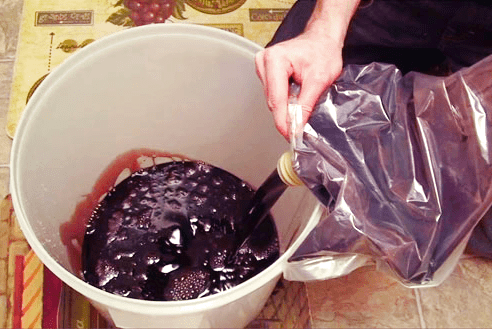
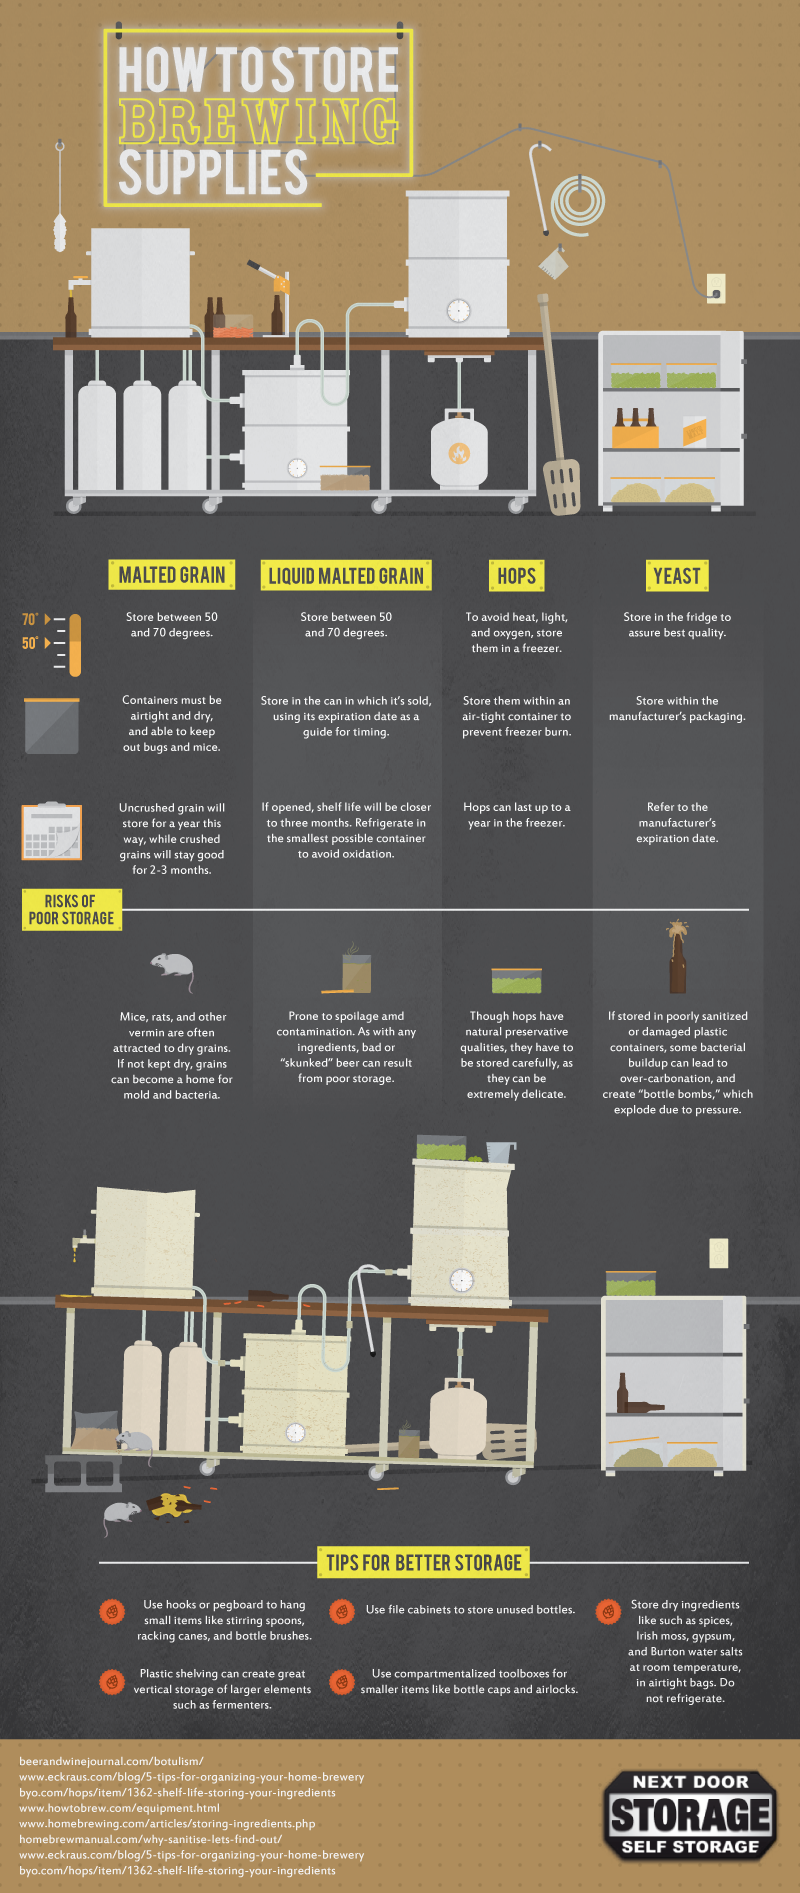
Storing Brewing Ingredients

Malted grain and malt extract should be stored between 50-70 degrees. Store malted grains in dry, airtight containers to keep out vermin, and store liquid malt extract in its original can, using the expiration date to judge its timing (once opened, its shelf life will be about three months). Otherwise, your liquid malt extract can be prone to spoilage and contamination.
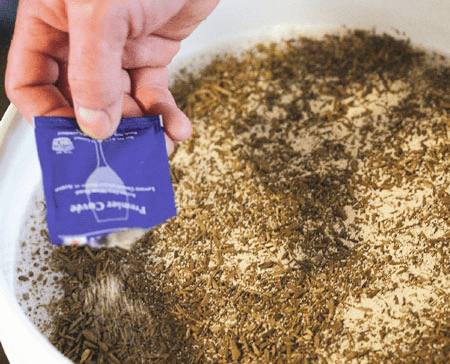
Hops, meanwhile, should be stored in a freezer to avoid heat, light, and oxygen, while yeast should be stored in the fridge. Hops should be stored within an air-tight container to prevent freezer burn, and they can last up to a year in the freezer.
Yeast can be stored within the manufacturer’s original packaging and according to the manufacturer’s expiration date.
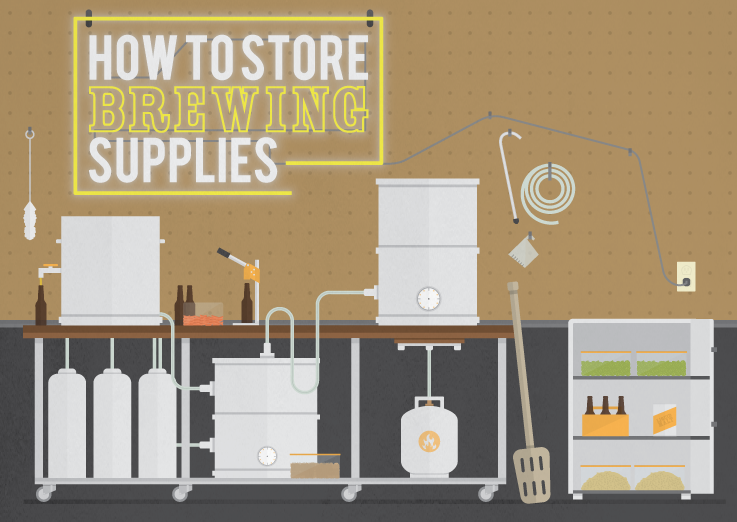
Shop LIquid Malt ExtractStorage Tips

Organize your small items (like stirring spoons, racking canes, and brushes) using hooks or a pegboard so that you can easily see and grab what you need. Other small items, like bottle caps and airlocks, fit perfectly in compartmentalized toolboxes.
For larger elements like fermenters, use plastic shelving to create vertical storage. You can also keep unused bottles safe from breaking by storing them in file cabinets.
For dry ingredients that add that little something extra to your beer’s flavor (spices, Irish moss, gypsum, and Burton water salts), make sure to keep them at room temperature in airtight bags. Do not refrigerate your dry ingredients.
The taste of your home brewed beer depends completely on the quality of your ingredients. By storing them safely and according to best practices, you’ll achieve the perfect flavor profile for your original beer. Cheers to home brewing!
—–
About the Author:
Kristen Geil is a Digital Content Writer/Blogger at Digital Third Coast, a SEO company in Chicago.
Graphic for storing homebrew supplies

Are There Any Rules in Home Brewing?

Home Brewing Rule Book“Rules are meant to be broken.” Nowhere is this more true than in home brewing!
Sure, there are plenty of recommendations about what you should do in order to make the best beer you can, but homebrewing wouldn’t exist without experimentation. It’s often how new discoveries are made. Without experimentation, would double IPAs and chocolate stouts even exist?
With that in mind, here are just a few home brewing rules you might consider breaking on your next brew day:

  • Cleaning and sanitation – 99% of the time, yes, cleaning and sanitation is very important if you want a degree of predictability in your beer. But as a homebrewer, you have the luxury of deciding when – and when not – to follow the rules. If you’re into Belgian, wild fermented, or sour beers, maybe you can risk a little slack in your cleaning routine. No guarantees that it will turn out well – but what’s the worst that can happen? Start with a one-gallon, “wild” batch before risking a whole five-gallons.
  • Beer must have hops – Depending on who you ask, beer isn’t beer without hops. But anyone who knows a little beer history can tell you that hops weren’t always a main flavor ingredient in beer. Want to try something unique? Mix a blend of herbs and spices to make a gruit or mumm – hops are optional!
  • Beer must have malted barley – Yes, most beers have malted barley, but not all. Chicha is a traditional Peruvian corn beer. Sound intriguing? Brew it!
  • Yeast starters – Do you have to do a yeast starter? Absolutely not. At least one experiment has actually shown that they do little, if anything, to actually improve beer flavor. Maybe this is a step you can skip on your next brew?Shop Conical Fermenter
  • Temperature control – You’ve heard it time and again: temperature control is the most important thing you can do to make better beer. But what happens when you let temperature go? This experiment shows that temperature control might not be as important as we think. Plus, many Belgian yeast strains do well at higher temperatures. Try pushing the temperature on your next saison and see what happens.

Of all the home brewing “rules”, there is only one that is sacred: have fun! Because if it’s not fun, what’s the point? Yes, there will be challenges, there will be frustrations. These are times to recall the homebrewer’s mantra: “Relax, don’t worry, have a homebrew.” But beyond that, don’t let anyone tell you there’s a certain way things have to be done. Experiment, test, evaluate, go crazy! You may just stumble upon the next big thing!
What are some home brewing rules you like to break on brew day? 
———————————–
David Ackley is a writer, brewer, and craft beer marketing consultant. He holds a General Certificate in Brewing from the Institute of Brewing and Distilling and is founder of the Local Beer Blog.

Winemaking: A Homebrewer’s Perspective – Pt. 5: Bottling & Tasting

California Connoisseur Shiraz Wine KitPart 1 | Part 2 | Part 3 | Part 4 | Part 5

Having stabilized and clarified my Shiraz winemaking kit, this homebrewer has now bottled his own wine. Now, I’m enjoying the fruits of my labor. The bottling process ended up being fairly straightforward, though there were a few key differences between bottling wine and bottling homebrewed beer. In the end though, the wine turned out great! In this blog post, I’ll walk you through the final steps of making this wine kit and then share my tasting notes.

Bottling the Wine

After stabilizing and clarifying the wine, I simply let it sit in the fermenter for several days, allowing the clarifying agents to do their work and pull any remaining sediment from the wine to the bottom of the fermenter. At this point, the wine was already in a bottling bucket. While the instructions called for racking one more time, I decided to omit this step since the samples I pulled from the bucket were already clear. The bottling bucket has about 1” of clearance below the spigot, so I was able to draw the wine off the sediment without pulling any into the wine bottles. Unlike beer, there’s no need to add priming sugar, so at this point the wine was ready to go.
With my bottling bucket in place on the counter and about 30 bottles cleaned and sanitized, I set to filling each bottle. To do this, I rigged up my bottling wand directly to the spigot on the bucket. One technique that I’ve found works well is to use a short, 2” segment of hose to connect the wand to the bucket. This way, I can easily sit in a chair to fill beer bottles and don’t have to deal with an unwieldy 3-ft. section of hose. This ended up working just as well for filling wine bottles as it does for beer bottles. You can see an example of what this looks like here.

Corking & Finishing
The next step – and herein lies a big difference between bottling beer and bottling wine – was to cork the wine. Since I don’t have a wine bottle corker, I elected to use these mushroom corks, which can be put into the bottles by hand. I was a little concerned about whether they would fit correctly, but as far as I can tell, they’re working out just fine. No leaks!Shop Wine Bottle Corkers
Finally, to finish the wine, I got a set of these heat shrink capsules for putting around the top of the bottle. As far as I know, they’re purely cosmetic, but they seem like a nice touch. At first I wasn’t sure how to apply them exactly – I tried using a hair dryer, but that didn’t produce a very tight fit. But a quick YouTube video showed me the best way to do it: Just heat up some water in a pot, then, holding the capsule over the bottle, carefully submerge the top of the bottle to shrink the cap. Sure enough, about 15 minutes later I had 30, great-looking bottles of wine!

California Connoisseur Shiraz Tasting Notes
So I bet you’re wondering how the wine turned out! Here are my tasting notes:

  • Aroma – big fruity aroma, mostly strawberry; alcohol is noticeable but not overpowering
  • Appearance – ruby red, great clarity
  • Flavor – again, strawberry notes upfront, spicy with some mineral character
  • Finish – dry and acidic with a bit of alcoholic bite, but smoother once it has a chance to breathe
  • Body – medium-light
  • Overall – I’m pretty pleased! I generally drink a more full-bodied red, but I don’t detect any faults in this wine. I suspect that some of the alcohol and acidity will smooth out over time.

Conclusion

All in all, this has been a great experience! Not only has making this wine taught this homebrewer a few additional techniques, but I’ve now got 30 bottles of perfectly enjoyable wine to share with friends and family – a nice divergence from my homebrew. I’ll be making more wine soon!
Are there any other homebrewers who have made wine, as well. When did you start making wine at home? What are some of your favorite styles to make?
Review the earlier posts in this series below:
Part 1 | Part 2 | Part 3 | Part 4 | Part 5

—–
David Ackley is a writer, brewer, and craft beer marketing consultant. He holds a General Certificate in Brewing from the Institute of Brewing and Distilling and is founder and editor of the Local Beer Blog.

Leigh Erwin: What About Fermentation Temperature?

Cellar Craft SterlingHi guys!
Just a quick follow up on how things are going with my Cellar Craft Sterling California Chardonnay! Last time, I’d taken you through the degassing stage, and other than a (hopefully) minor oversight that resulted in me stopping secondary fermentation 2 specific gravity points early, I think everything is going well!
The next stage, then, is the clearing stage. The specific gravity is still holding at 0.980 on the hydrometer, though the wine’s fermentation temperature is a lot lower now that I decided to unplug the heating pad after the fermentation was complete. My reasoning was since I don’t need to keep the yeasts happy anymore with good fermentation temperatures, then I didn’t need to keep the heating pad plugged in and running. Hopefully that was the right decision.
The only issue I ran into during the clearing stage was that I accidentally spilled most of the Kieselsol pouch on the counter due to clumsiness. Thankfully, since I never got to that stage with my last batch of Sterling California Chardonnay, I still had the Kieselsol package from that, so I just went ahead and opened that one and dumped those contents into my wine. Problem solved! Ah, the benefits of having extra ingredients laying around! I’ll have to keep that in mind for my next order and just stock up on a bunch of ingredients that I use on a semi-regular basis.
Now, I have the wine sitting around waiting to clear and basically waiting to be bottled. I don’t think I’ll be filtering the wine this time, as I forgot to purchase new filter pads for my wine filter system and I’m not convinced the system even works very well to begin with, but me making unfiltered wine is pretty much par for the course at this point and my husband is still pleased with the wines, so why not continue that trend!
Shop ThermometersThe only other question I had so far when making this Chardonnay was again related to the wine’s fermentation temperature. I noticed that the heating pad kept my wine consistently in the high 70°F range. This is according to my thermometer strip I have stuck to the side of the fermenter. I am only slightly concerned about this, as according to the instructions, the upper fermentation temperature limit recommended was 75oF. Now, the heat pad that I bought seems to have been keeping the temperature around 78oF which makes me a little nervous. How big a deal is 3oF? Does that really matter?
Seeing as how I didn’t do anything about the temperature and it still ended finishing out fermentation around the appropriate specific gravity, it is probably OK, but I would not be surprised if it had slowed it down just a little at the end. If you recall, it did take an extra couple days for the wine to reach 0.998, though technically I was supposed to take it to 0.996 and likely would have taken several more days to do that. I’m wondering if that extra 3 degrees of fermentation temperature was too much for some of the wine yeast and a few more of them died off than would have if the temperature was just a little cooler.
Why in the world, then, would a heating pad designed for winemaking be programmed to heat up to that high of a fermentation temperature? Maybe next time I’ll have to just remember to plug and unplug a bunch of times to try and keep the temperature a little lower.
———————————–
leigh_erwin_bioMy name is Leigh Erwin, and I am a brand-spankin’ new home winemaker! E. C. Kraus has asked me to share with you my journey from a first-time dabbler to an accomplished home winemaker. From time to time I’ll be checking in with this blog and reporting my experience with you: the good, bad – and the ugly.

Winemaking: A Homebrewer’s Perspective – Pt. 4: Stabilizing, Clarification, & Prepping Bottles

Used Wine BottlesPart 1 | Part 2 | Part 3 | Part 4 | Part 5
After degassing my Shiraz winemaking kit, now it’s time to stabilize the wine and clarify it. Things have gone pretty smoothly so far, but with bottling day on the horizon, I need to start getting bottles ready for filling.

Stabilizing & Clarification
As expected, this next step was pretty straightforward:

  1. Sanitize a stirring spoon
  2. Mix in the potassium sorbate (the stabilizer)
  3. Mix in the kieselsol (the clarifier)
  4. Let it sit for another 5-7 days

Done! So far, I continue to find this winemaking this pretty efficient!
Now for what is likely to be the most labor intensive part of this whole process: removing labels from 30 used wine bottles to get them ready for filling.

Removing Labels from Glass Wine Bottles

As a seasoned homebrewer, I‘ve known about the “joy” of removing labels for some time. Luckily, after a couple years of brewing, I’ve accumulated plenty of clean, label-free bottles and have since moved on to kegging, so I haven’t had to remove any labels in quite some time. But still, I remember how difficult removing labels can be.
So even though I was mentally prepared for the job of removing label, I wasn’t exactly looking forward to it. But I just reminded myself that it would get me one step closer to having some 30 bottles of red wine ready to share with friends and family, so last night, I decided to go ahead and get the process started.
Luckily, Ed has shared some tips for removing wine bottle labels on the E. C. Kraus Winemaking Blog. The gist of the instructions include:

  • Soaking the bottles in hot water and One Step over night.
  • Hopefully the easy ones will slide right off.
  • The more difficult labels will take some elbow grease (and a scraper of some sort) to remove.

Shop Wine BottlesThankfully, most of my salvaged wine bottles had paper labels, so sure enough, most of them came off without too much extra effort. (Somehow I’d managed to sort out the plastic-adhesive type labels out early on.)
So in a few more days, I’ll blaze forward and bottle this wine! I’m not entirely sure about how the corking is going to go (note to self: go buy some corks!), but if things continue to go as easily as they have been, pretty soon I’ll be pretty well stocked with Shiraz!
Review the earlier posts in this series below:
Part 1 | Part 2 | Part 3 | Part 4 | Part 5
Are you a homebrewer interested in winemaking? So far, I’d highly recommend it!

———————————–
David Ackley is a writer, brewer, and craft beer marketing consultant. He holds a General Certificate in Brewing from the Institute of Brewing and Distilling and is founder and editor of the Local Beer Blog.

Why I Don’t Keg

Bottled Homebrew BeerI’ve been brewing for years, and I still break out the beer bottles when it’s time to package my beers. Oh, I’ve thought many times about investing in a kegging setup, but I still can’t justify it to myself, either in terms of price or function. Just like most things in life, there are pros and cons when it comes to bottling vs kegging homebrew. When I balance them out from my personal point of view, the scales tip towards bottling, and here’s why.
First and foremost is the cost. For the amount of beer I brew, I’d need three or four kegs at a minimum. The cheapest I’ve seen for a set of four used kegs (without the related hardware) is $130. Yes, I might find a good deal on craigslist, but I live in Boulder County, Colorado, a home-brewing hotbed, and finding good used brewing items is very difficult. Of course, beyond the kegs themselves, I’d need the CO2 tank, regulator, hoses, etc. In the end, it would be several hundred dollars to get started. If you have the funds for a draft system, by all means go for it, for those of us on a tighter budget, kegging will just have to come later.
The other reason I don’t keg is lack of space. I have a “beer fridge” in my basement, so I suppose at worst I can commandeer half of that for kegs, but we actually use the beer fridge for food too, so I can’t use the whole fridge. I could probably find another fridge on craigslist for free, but I don’t really think I want three refrigerators in my house!
The big benefit of kegging, many people say, is the ease by which “bottling day” is reduced to just filling a keg and slapping it on a CO2 thank and that’s that. And, I know that works for a great many people, but to be honest, bottling never really seemed like that much of a chore to me. I generally rinse my bottles well after use, so on bottling day, I throw them in the dishwasher on “hot wash” with no soap, take them out, give them a shot of sanitizer with a bottle rinser, fill and cap. Bottling at batch of beer really only takes me about 90 minutes, and I realize kegging is quicker, but in the grand scheme of things, 90 minutes isn’t a huge deal for me.
Shop Draft SystemAnother benefit of bottling – beer bottles are essentially free. I still buy beer, and when I do, I re-use the bottles whenever possible. Also, I just picked up over 100 bottles off of craigslist for free because I am brewing a batch for a wedding, and didn’t want to lose 50 or so of my own bottles. Though in a pinch, or if you want a special kind of bottle, most homebrew shops do carry beer bottles.
Lastly, I know this doesn’t fit into most brewer’s pros and cons list for bottling vs kegging, but I like beer bottles. I like that I can grab a six-pack and take it to a friend’s house; I like that I can have several varieties in my beer fridge and grab whatever I am in the mood for; and finally, there’s just something inherently nostalgic about a bottle of beer that you don’t get with a keg hidden off in a fridge somewhere.
If you’ve been considering getting a kegging setup, but you have reservations about doing so, just know that there’s nothing inherently wrong with bottling your beer, and you’re no less of a brewer because of it. There are pros and cons to everything, and it is no different when it comes to bottling vs. kegging your homebrew.
———————————–
John Torrance is a database developer, gadget lover, and avid home brewer living in Lafayette, Colorado. When he’s not actively brewing, he’s generally daydreaming about what he’s going to brew for his next batch. John also makes and sells brewing-related items, which are available at Fermentropy.com.

Winemaking: A Homebrewer’s Perspective – Pt. 3: Secondary Fermentation & Degassing

Racking Wine With AutosiphonePart 1 | Part 2 | Part 3 | Part 4 | Part 5
Over the past couple weeks I took the next steps towards making my California Connoisseur Shiraz Kit: Secondary Fermentation and Degassing. I’m a few days behind schedule according to the kit instructions, but hopefully that shouldn’t make much of a difference. If I’ve learned anything from homebrewing, patience is a virtue and taking your time is often rewarded in the quality of the product. I’d imagine that’s the case with making red wine as well. We shall see! Let me walk you through the next steps of the process.
First a review:
In Part 1, I opened the box and reviewed all the ingredients, a few of which are new to me, but they seem easy enough to use. In Part 2, I mixed the kit together and started the fermentation. I was pretty impressed with how quick and easy it was to get things started! A quick mix of the juice concentrate with water, some bentonite, yeast, and away it went!

Secondary Fermentation
After about one week, the winemaking kit instructions had me transfer to a secondary fermenter. This is a process I’ve done numerous times through homebrewing, so no big deal there. I can’t stress enough for new homebrewers and winemakers how helpful it is to use an autosiphon when transferring, or racking, between fermenters. Sterilize the autosiphon and some transfer tubing, connect them together, then pump-pump and away it goes! If you don’t have an autosiphon yet, I highly recommend getting one! It’s probably the most cost efficient upgrade to your process you can get!
The hydrometer reading at this point was 1.004, so we’re right on track!

Degassing
About two weeks later, it was time for the degassing step. Technically the instructions called for degassing on day 20, but life kind of got in the way of my schedule. I ended up doing this step on day 25. I can’t imagine that this delay would negatively impact the wine. I took a taste of the wine and it was bright, fruity, and zippy. Acidity and alcohol were noticeable, but not too sharp. I’d imagine they will round out with time.
Shop Degassing PaddlesThe wine also had a bit of carbonation – I guess that’s why we need to degas! First, I racked the wine into a new fermenter. Technically this is the third fermentation step, and herein lies another big difference between winemaking and homebrewing. Whereas secondary fermentation in homebrewing is entirely optional, it seems that multiple rackings are the norm in winemaking. Though it takes a little extra time during the fermentation phase, I’m probably still ahead compared to the total time involved for homebrewing.
After racking, I added two additives: potassium metabisulfite (an antioxidant and preservative) and kieselsol (a clarifying agent). The sulfites sizzled as soon as they hit the wine; the keiselsol was less dramatic.
Finally, I’ve stirred the wine periodically over the past few days to release as much carbon dioxide as possible.
All in all, everything seems to be going smoothly! Check back soon to hear about stabilizing, clarification, bottling, and the best part – tasting!
Part 1 | Part 2 | Part 3 | Part 4 | Part 5
—–
David Ackley is a writer, brewer, and craft beer marketing consultant. He holds a General Certificate in Brewing from the Institute of Brewing and Distilling and is founder of the Local Beer Blog.

Leigh Erwin: Making A California Chardonnay Wine Kit

California Chardonnay made from wine kitHi everyone!
I’m excited to finally be making a new batch of wine after a couple of weeks hiatus. I’m partially nervous, though, because I’m making the Cellar Craft Sterling California Chardonnay wine kit again, and if you recall last time I tried to do that, I messed up big time in regards to the fermentation temperature.
This time, however, I am prepared! I have the heating pad all set up and am not going to touch it at all until fermentation is complete.
To start the Chardonnay wine kit off, I ended up using tap water as if you recall from an earlier post I wrote, the tap water here where I live doesn’t give off any sort of chlorine smell and I’m pretty positive it’s winemaking worthy. I remember making a red wine in the past with straight tap water and it came out just fine, so hopefully the same will be true for this white.
Primary fermentation for this Chardonnay wine kit went very smoothly. I followed all instructions that came with the wine kit to the letter and made sure the temperature of the wine was never too low.
Secondary fermentation came right on schedule for this Chardonnay (day 7), though I did notice it still smelled a bit yeasty. Cue flashbacks from the screwed up batch….
Anyway, since there is still yeast doing their thing in there, I was not at all concerned about the yeasty smell and crossed my fingers that it could complete secondary instead of getting stuck like it did last time. Actually, I don’t think it even made it out of primary fermentation last time, but I digress…
The end of secondary fermentation, however, did not come exactly on time as the instructions suggested it probably would. Instead of finishing up on Day 20 as the instructions indicated, I didn’t move on to the degassing stage until Day 24. I actually think I may have made a slight mistake at this point though, as I think I stopped secondary 0.002 specific gravity points too soon, according to my wine hydrometer.Shop Wine Kits
See, the instructions said: “Targets: Sterling Reds, Showcase Reds & Whites: <0.998 or Sterling Whites: <0.996.” The specific gravity I noted on Day 24 was 0.998, so quickly looking at the Target values, I thought I had been working with the Showcase White and that 0.998 was correct. Well, turns out I read it a little too quickly and had forgotten that I was actually working with the Sterling White, so I shouldn’t have moved onto the next step until the specific gravity was 0.996. Oopsie. I hope that doesn’t come back to bite me.
The wine didn’t smell nearly as yeasty any more, though I thought I might still be able to smell a little bit. I should note: my sense of smell might be a little heightened right now since I am pregnant (surprise!), so I’m hoping it’s still going to be OK and whatever yeasts might still be in there will fall out during the clearing stage.
———————————–
leigh_erwin_bioMy name is Leigh Erwin, and I am a brand-spankin’ new home winemaker! E. C. Kraus has asked me to share with you my journey from a first-time dabbler to an accomplished home winemaker. From time to time I’ll be checking in with this blog and reporting my experience with you: the good, bad – and the ugly.

Winemaking: A Homebrewer’s Perspective – Pt. 2: “Brewing” It Up!

Homebrewer Start A Batch Of WinePart 1 | Part 2 | Part 3 | Part 4 | Part 5
Well, I’m a homebrewer, but just started my first batch of red wine! It’s a Shiraz winemaking kit from E. C. Kraus. As a homebrewer, I was curious to see how it would go compared to a standard brew day. Long story short – it was much faster and easier than I anticipated! Read on for the details.

Well that was fast…
Mixing up the wine kit took just over an hour, and most of that time was spent cleaning and sanitizing a fermenter, airlock, and stirring spoon. Compare that to all the steps involved in brewing a batch of beer, starting this batch of wine was pretty quick! Just consider the time-saving opportunities for making wine vs. beer:

  • No mash (60+ minutes saved)
  • No boil (60+ minutes saved)
  • No chill-down (30-60 minutes saved)

There’s also a significant amount of energy and water saved wine making wine as compared to beer, since there is no heating involved and no water used to chill the batch.

No new investment in equipment
Since I’ve been homebrewing for several years, I already had pretty much all of the equipment needed to make the wine. My fermenter didn’t leave a ton of headspace for the six-gallon kit, so I may not have reached a full six-gallons. But I can always top off with extra water for secondary fermentation.

Labor? What labor?
Though the usual effort was involved in cleaning and sanitizing the equipment, starting a batch of wine required no more work than what goes into brewing a batch of beer. If anything, it was a little less! There were however a couple of unique tricks that I had to get used to, but after figuring it out it will be that much easier the next time around.
Shop Wine Kits 2The hardest part of the whole procedure was getting the cap off the bag of juice concentrate! But with a quick search on E. C. Kraus’ website I discovered that they have a cap removing tool that you can purchase for taking the cap off the bag. Problem solved!
The next tricky part was pouring the contents of the bag – almost two gallons of juice – into the fermenter. Not that it was especially challenging – I just had a vision of spilling all that red juice all over the kitchen floor! Luckily, I managed to avoid making a huge mess.
From there the rest was easy. The winemaking kit instructed me to top off with water to make six gallons (I used reverse osmosis water) and add a packet of bentonite. After taking a gravity reading with a sanitized hydrometer (OG: 1.084), I stirred it all together to mix it well and pitched the yeast. And that was that!
Compared to a six-hour brew day, starting a batch of wine is a breeze! Of course it ain’t over til it’s over, so we’ll see how it turns out. But for now, the fermenter’s sitting comfortably at about 70˚F. We’ll check it out in about a week!
Part 1 | Part 2 | Part 3 | Part 4 | Part 5
———————————–
David Ackley is a writer, brewer, and craft beer marketing consultant. He holds a General Certificate in Brewing from the Institute of Brewing and Distilling and is founder of the Local Beer Blog.

Can You Add More Yeast To Wine?

Sprinkling Wine YeastOne of my wine making kits seem to be slow in starting & after a few days, we added another yeast pkg. to the wine……which finally begin activity. With 2 wine yeast pkg. Was it OK to add another package? Can you add more yeast to a wine? Will the wine have a yeast taste?
Thank you
Chris D.
—–
Hello Chris,
Whether you use one, two or even three packets of wine yeast, it will not have a direct impact on the flavor of the wine.
The reason for this is when a single packet of wine yeast starts to ferment, it first goes through what is know as an aerobic stage. This is when the yeast begin to multiply themselves into larger numbers. This aerobic phase will typically increase the cell count of a single packet by about 150 to 200 times.
This explosive growth of yeast cells is what eventually causes a significant amount of the sediment you typically see at the bottom of your carboys.
If two packets of wine yeast are added, it will not cause double-the-volume of yeast, but it will make a little more than one packet would, but only marginally so. In either case, the yeast cells will all drop out when they are finished fermenting. If the fermentation goes correctly, all the yeast will eventually be removed, regardless.
But having said this, you should have only needed one packet of yeast in the first place. The fact that a second packet caused the fermentation to take off would be an indication of one of three things:

  1. First packet of wine yeast was old. Not very likely, but it does happen.Shop Conical Fermenter
  1. The water used in making the wine was too cold when it came out of the tap, but eventually warmed up enough to allow a fermentation. This is usually around 24 to 36 hours after being drawn – about the same time you added the second pack of wine yeast. Something we see sometimes in the colder months.
  1. You re-hydrated the first pack of yeast in warm water, just as the packet directs you to, but you did not actually control the temperature of the warm water by taking a temperature reading and/or you did not leave the wine yeast in the warm water for the exact amount of time called for in the directions – usually 10 or 15 minutes. In either of these cases, the wine yeast could have been destroyed during the re-hydration process.

Number 3 is by far the most common reason we see a fermentation not starting. Regardless of the reason, its always okay to add more yeast. You can add more yeast to the wine without causing unwanted results. Just realize that it is not usually a solution to the problem. You also have to be aware of other factors that can interfere.
One thing you could do when a fermentation is not starting as planned is to run through the, Top 10 Reason For Fermentation Failure. These 10 reasons cover over 95% of the stuck fermentations we see.
So as you can start to see, you can add more yeast to a wine; the point is, you shouldn’t have to!
Happy Wine Making,
Ed Kraus
———————————–
Ed Kraus is a 3rd generation home brewer/winemaker and has been an owner of E. C. Kraus since 1999. He has been helping individuals make better wine and beer for over 25 years.