
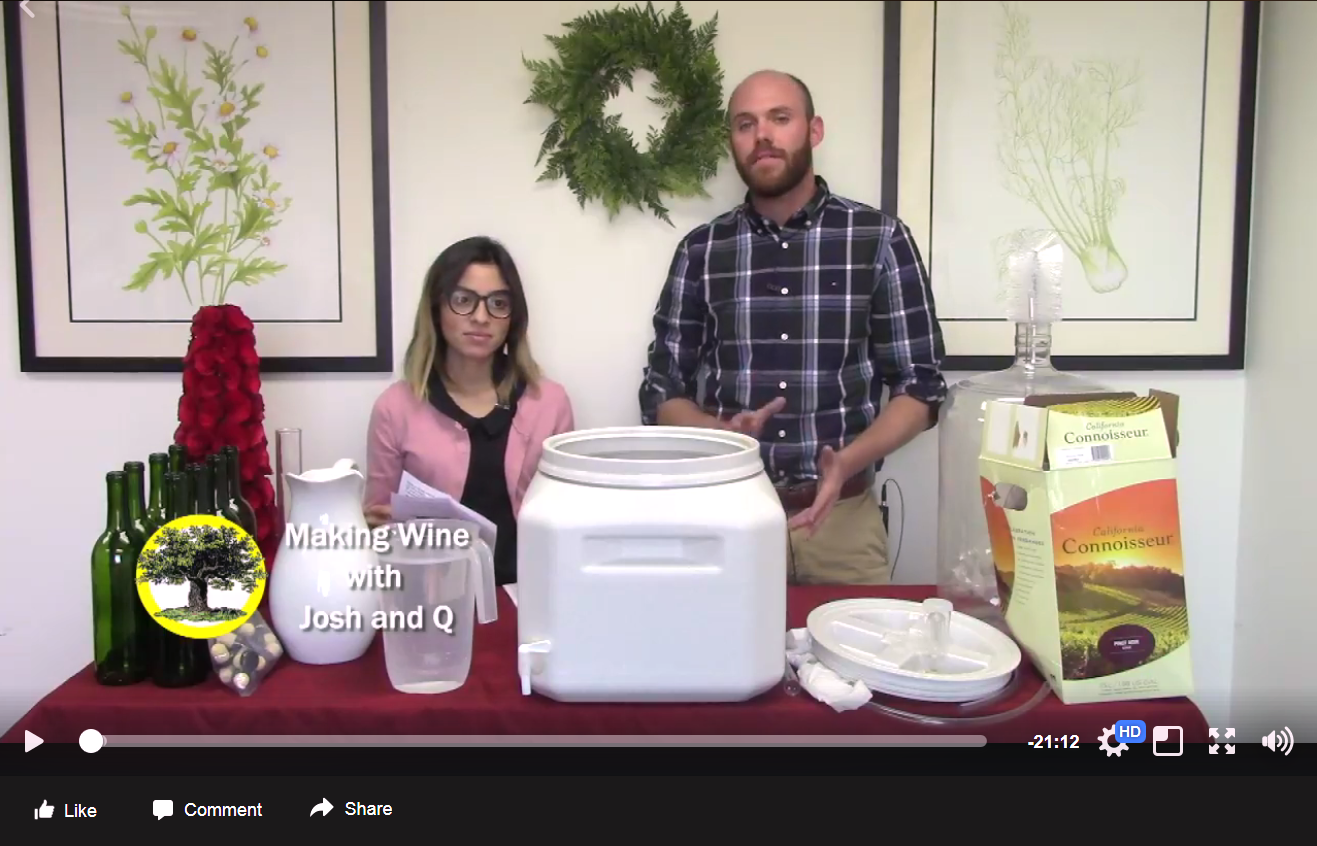
We did something interesting! We sent one of our wine making kits to the folks at Mother Earth News, and we had them video themselves making the wine. None of them had ever made wine before, and we provided no information — just the kit and the directions that normally comes with it. Watch what happened.
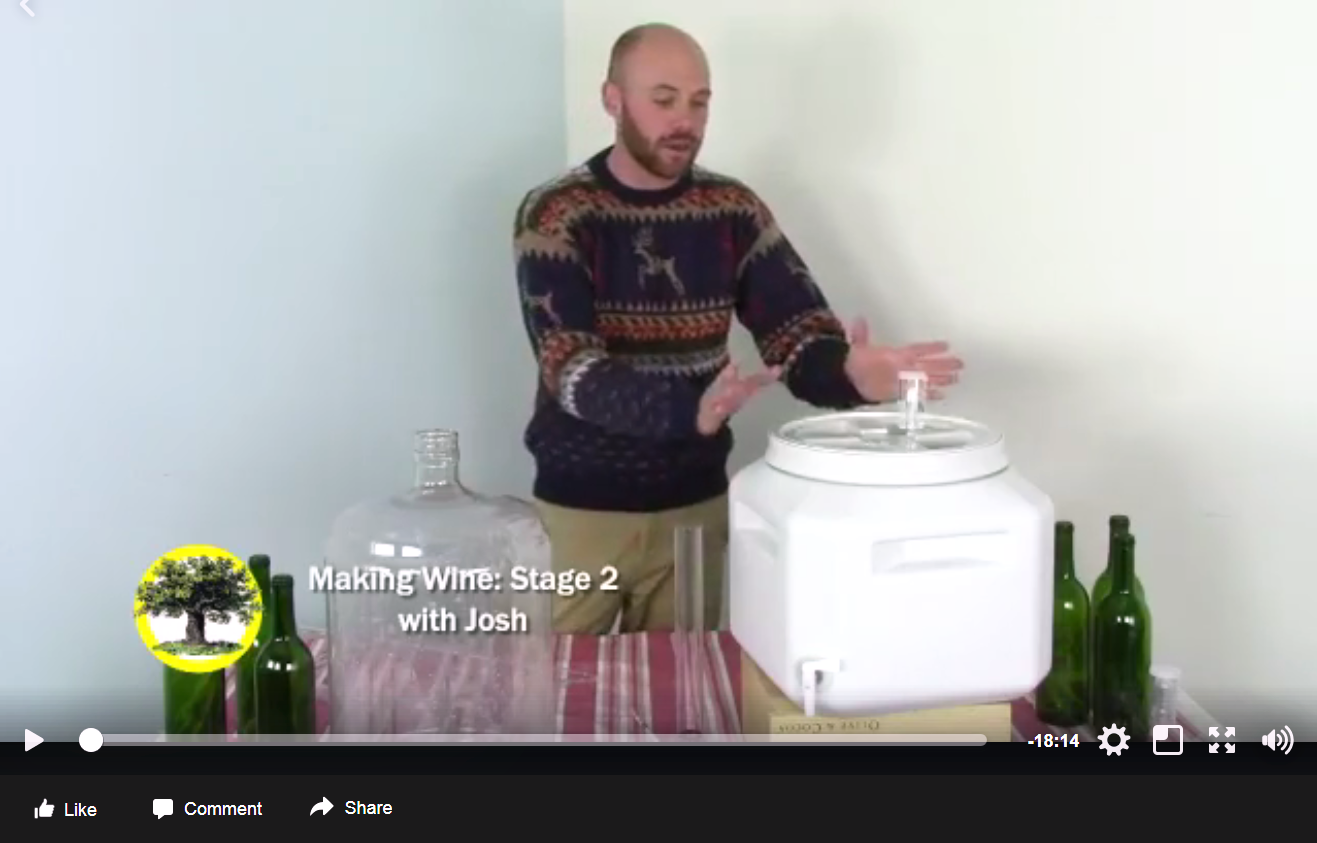
Below are three videos they shot while making the wine. You can go to Mother Earth News’ website to view more videos on other self-sustaining projects. Click on the pictures to play the video:
Part I
Part II
Part III

These guys did an amazing job and plowed right through the steps with no trouble at all. Hopefully, these videos will help to show others just how easy it is to make your own wine.
For those of you who have never heard of Mother Earth News, it is one of the most popular and longest-running magazines for people wanting to live a self-sustainable lifestyle. It is filled with all kinds of ideas, information and projects. In addition to their magazine, their website is a pleasure to learn from, as well!
Style Guide: How to Brew an American Amber Ale
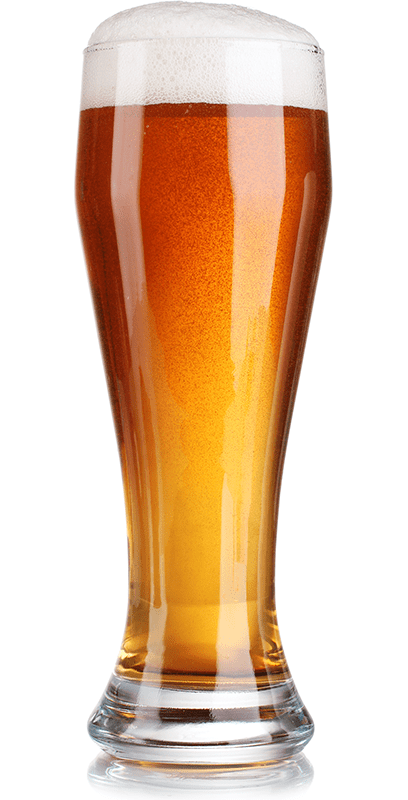 An American Amber Ale profile, as the name implies, lies somewhere in the spectrum between a pale ale and a brown ale, with a rich, amber color matched by a sweet, caramel malt flavor. They’re often moderately to aggressively hopped, more so than a golden ale or pilsner, but not as much as an India Pale Ale. Their middle-of-the-ground nature makes them agreeable to many a beer fan, ideal for every day drinking, and part of many craft breweries’ year-round line-ups.
There are many good examples of American Amber Ales on the market. New Belgium’s Fat Tire, Bell’s Amber, and Highland’s Gaelic Ale all come to mind.
The BJCP Guidelines for an American Amber Ale profile offer the following: “Like an American pale ale with more body, more caramel richness, and a balance more towards malt than hops (although hop rates can be significant).” That emphasis on caramel richness makes Caramel malt a critical ingredient when brewing.
Further, according to the BJCP, Amber Ales should fit more or less within these guidelines:
- IBUs: 25 – 40+
- Color (SRM): 10 – 17
- OG: 1.045 – 1.060
- FG: 1.010 – 1.015
- ABV: 4.5 – 6%
We carry an excellent Fat Liar Amber Ale beer recipe kit, but if you’d like to create your own beer recipe, here are some suggestions:
Grain Bill
- All-Grain: Start with a good 2-Row Malt or Pilsner malt. Add 1-2 lbs. of Caramel 20L, Caramel 40L, Caramel 60L, or a combination of the three for color and caramel flavor. Other specialty malts, such as Vienna, Munich, or Belgian Biscuit malt may be used to impart a toasty character.
- Extract: If brewing with extract, I recommend one can of light malt extract, such as Steam Freak Light Extract with one can of amber malt extract. Consider steeping or doing a “mini-mash” with a combination of the specialty malts mentioned above.
Hops
- American Amber Ales
 should be brewed with American hop varieties. Marty Nachel, author of Homebrewing for Dummies, recommends finishing with Cascade. New Belgium’s Fat Tire, a very popular American Amber, uses Willamete, Target, and Goldings.
 - Amber Ales are sometimes dry-hopped.
Yeast
- A classic American Amber Ale should use a clean fermenting American ale yeast strain. All of the following beer yeasts are great options: Safale S-05, Wyeast 1056: American Ale, or Wyeast 1272: American Ale II. There should be little to no yeast character or esters in the aroma, so try to keep fermentation temperatures in the recommended range for your selected yeast strain.
These are the very basics of an American Amber Ale profile. What ingredients and techniques do you use when home brewing your American Amber Ale? Share in the comments below!
Til next time…Cheers!
—–
David Ackley is a beer writer, brewer, and self-described “craft beer crusader.” He holds a General Certificate in Brewing from the IBD and is founder of the Local Beer Blog.
Bière de Mars Beer Recipe (Partial Mash)
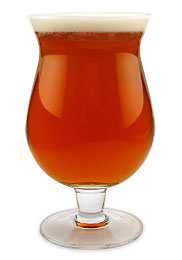 If you’re like me, you’re already thinking ahead to the warmer temperatures of spring. Traditional Belgian and French brewers did the same thing. In the winter, they would often brew a Bière de Mars (March beer) that could stand up to the final colder months, yet still be enjoyable in the warmer spring weather.
According the BJCP, Bière de Mars is a subset of the Bière de Garde category (16D). Bière de Garde is a strong ale meant to be stored. As such, it often displays a somewhat funky, “corked” cellar character. Bière de Mars, on the other hand, is intended to be consumed fresh. Maybe this freshness is reminiscent of spring.
The main features of the style include a malt forward balance and toasty or toffee-like sweetness, with little to no hop aroma. The finish is dry, with the yeast contributing some fruity and/or spicy characteristics.
The most prominent commercial example in the US is probably New Belgium’s Bière de Mars. It sits comfortably within the BJCP guidelines for the Bière de Garde style:
- OG: 1.060-1.080
- FG: 1.008-1.016
- ABV: 6-8.5%
- IBUs: 18-28
- SRM: 6-19
New Belgium’s rendition also uses lemon peel to enhance the fruity aroma of the beer. If you’re so inclined, add the fresh zest from one lemon during the last ten minutes of the boil.
Bière de Mars Beer Recipe
(Partial Mash, five gallon batch)
Specifications
OG: 1.066-1.073
FG: 1.015-1.017
ABV: 6.7-7.3%
IBUs: 20-24
SRM: 11
Ingredients
6.6 lbs. Light Liquid Malt Extract
1 lb. Amber Dried Malt Extract
1 lb. Munich Malt
1 lb. Belgian Aromatic Malt
1 lb. Belgian Biscuit Malt
1 lb. Flaked Oats
1 lb. Belgian Candi Sugar (light)
.75 oz Styrian Gold hops at :60 (3.8 AAUs)
.75 oz Styrian Gold hops at :20 (3.8 AAUs)
zest from one lemon at :10 (optional)
Yeast: Safbrew S-33
Beer Recipe Directions
Mash the crushed grains and flaked oats in 1.5 gallons of water at 150F. Strain the grains and rinse with 1 gallon of water at 170F. Mix in malt extracts and Belgian candi sugar. Add water if needed. (Calculated boil volume: 7 gallons)
Bring wort to a boil. Add hops as scheduled and lemon peel if desired. Whirlpool, chill, and transfer to a clean, sanitized fermenter. If needed, mix in enough clean, sanitized water to make five gallons. Pitch yeast at 70F and ferment at 65-70F for seven days, then transfer to secondary for ten. Bottle or keg as you would normally.
Are you a fan of brewing Bière de Mars? Do you have a Bière de Mars beer recipe you’d like to share with us? Share your tips in the comments below!
—–
David Ackley is a beer writer, brewer, and self-described “craft beer crusader.” He holds a General Certificate in Brewing from the Institute of Brewing and Distilling and is founder and editor of the Local Beer Blog.
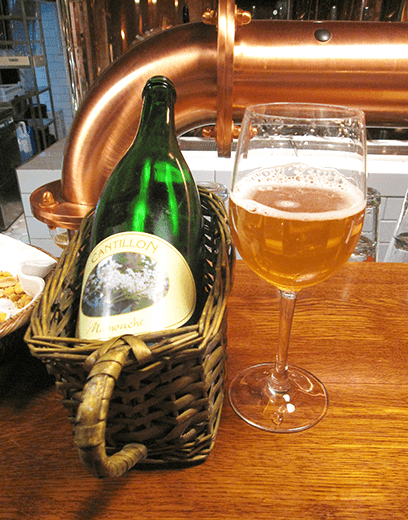
Tips for Brewing A Lambic Beer Recipe At Home
 I love lambics. I don’t have much of a sweet tooth for anything except alcohol, but a good lambic seems out of my reach if for no other reason than I don’t have a building with louvred vents like they do in Belgium to capture wild yeasts. I’ve done a little searching online for lambics, but the process seems to be: “make a good ale, then add a bushel or two of apples and let ferment for another 2 years and bottle.” There has to be more to it than that. What do you recommend?
Name: Justin V.
State: Pennsylvania
—–
Hi Justin, thanks for your great question!
I can tell you right now that brewing a lambic beer recipe at home will be a labor of love. First, let me cover some of the elements that make a traditional lambic a lambic, and then I’ll share a couple lambic beer recipes.
As you probably know, lambics were developed around Belgium, specifically in the area of Brussels and the nearby town of Lembeek. Lambic can be traced back hundreds of years and is a very distinctive brew.
One of the main characteristics of lambic is that it is fermented with a variety of wild yeasts, particularly Brettanomyces. These wild yeasts and bacteria gave the beer a dry, unique flavor profile, a combination of tart, earthy, leather, fruity, and even “horse blanket.” As you mentioned, Belgian brewers would traditionally move their wort to a “cool ship,” a large, rectangular vessel with an open top, then leave the wort in the open to collect wild yeasts and bacteria through windows or vents. Some brewers would even refuse to clean those rooms for fear of disturbing the precious microbes!
Lambics can be characterized as pale and moderate in gravity. It’s traditional to have about 30% unmalted wheat in the grain bill. You might try using torrified wheat.
It’s also traditional to use aged hops when brewing a lambic beer recipe, which were used for their preservative value more than their bittering, flavoring, or aroma characteristics. The aged hops would produce a negligible bitterness that wouldn’t interfere with the sour, earthy, and complex wine-like flavors of the lambic. If you don’t have any aged hops on hand, try asking around your homebrewer friends – someone will likely have some lying around.
After the mash and boil, the beer would be moved to the cool ship, and then fermented in barrels. Sometimes fruit was added, especially cherries and raspberries, for added flavor and fermentability. Here is where the tough part comes in – lambic is usually aged one to three years or longer!
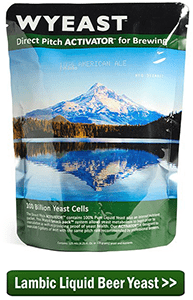 As a beginning lambic brewer, I would recommend using a premixed lambic culture, such as the one offered by Wyeast . This blend contains the appropriate combination of yeast and bacteria to make a lambic. Some brewers will recommend that you use a dedicated set of equipment for your lambic and other “funky” beers so as to avoid cross contamination with your other brews.
With all the information above, I believe you have some good hints as to what to do when you brew a lambic beer recipe at home. Below are two beer recipes. The first is for a lambic-esque beer, made sour with cranberries rather than funky microbes. The second beer lambic recipe is for a more traditional lambic, and comes from the book Brewing Classic Styles by Jamil Zainasheff.
Good luck!
Cranberry “Lambic”, from A Year of Beer
(5-gallon batch, all-grain recipe)
Specs
OG: 1.053
FG: 1.018
ABV: 4.6%
Ingredients
6 lbs. Wheat malt
3.5 lbs. Pilsner malt
1 oz. Hallertau hops at :60 (2.8 AAUs)
.25 oz. Hallertau hops at :15 (.7 AAUs)
.5 oz. orange peel (5 minutes)
5/8 cup priming sugar
1 can cranberry juice concentrate added to secondary
Bavarian Wheat ale yeast
Directions
Mash crushed grains at 124˚F for 30 minutes, then raise temperature to 153˚F for 60 minutes. Raise to 168˚F for mash out. Boil wort for 75 minutes, adding hops according to schedule above. Ferment at 65˚F for 10 days, then move to secondary for 14 days. Glass carboys are recommended for fermentation.
Lambicus Piatzii, from Brewing Classic Styles
(5-gallon batch, extract recipe)
Specs
OG: 1.053
FG: 1.006
ABV: 6.2%
IBUs: 5
SRM: 4
Ingredients
5 lbs. Wheat LME
4.1 lbs. Pilsner LME
3 oz. aged hops (any European low-alpha variety) at :90 minutes
Safale US-05
Directions
Mix LME with enough hot water to make 7.7 gallons and bring to a boil. Add hops and boil for 90 minutes. Chill wort to 68˚F and pitch ale yeast (use half a packet of dry yeast or a full packet of liquid yeast without a starter). After a week, add the lambic blend. Ferment at 68˚F for six months to a year. A layer will form on the top of the beer called a pellicle. This is caused by the lambic culure and it is normal. The pellicle will often fall to the bottom of the fermenter when the beer is ready to be bottled. Bottle for 1 to 1.5 vols CO2.
Justin, this should be enough information to get you on your way to brewing a lambic beer. There are two beer recipes that you can brew at home and some insight and tips on how to get either of them brewed.
—–
David Ackley is a beer writer, brewer, and self-described “craft beer crusader.” He holds a General Certificate in Brewing from the Institute of Brewing and Distilling and is founder and editor of the Local Beer Blog.
Do Your SunCal Concentrates Make Sweet Wines?
 I was looking at your homemade wine kits and was wondering about using the SunCal concentrates to make a Chianti. I saw in the directions that for all the SunCal kits call for 6.5 pounds of sugar. Does this mean that these wine recipes are going to make a sweet wine? I have made wines in the past from buckets of juice and other wine making materials from a local supplier and never had to add sugar.
Barry H.
———-
Hello Barry,
This is a great question about an area of wine making that seems to cause a lot of confusion for some winemakers.
Alcohol is made when yeast consume sugar and turn it into alcohol. If the fermentation is successful there be no more than a residual amount of sugar left in the resulting wine – nothing that would make the wine sweet. All the sugar you add in the beginning is meant to be turned into alcohol leaving the wine dry.
With most homemade wine kits all the original sugars that the grapes provide are still in the concentrate. You are simply adding water to bring the concentrate back to a juice so that you can make wine with it. With the buckets of juice you got locally, all the original sugars were in them, as well, so no additional sugar was needed to achieve a reasonable alcohol level.
But in the case of SunCal Concentrates, not only is water taken out during the concentration process but some of the sugar is removed as well. This is why you need to add the 6-1/2 pounds of sugar. Without doing so you will not get enough alcohol from the fermentation.
 But what if you want a sweet wine, you say. This is something that is controlled after the fermentation has completed. It has nothing to do with the sugar added in the beginning; it as to do with the sugar added after the fermentation. If the fermentation goes as planned, you wine should always turn out dry.
If you want to sweeten your wine, the time to do it is right before you bottle. Just sweeten it to taste and then add a wine stabilizer (potassium sorbate) to eliminate any chance of re-fermentation, or you can use Wine Conditioner which has sweetener and wine stabilizer mixed together.
With this basic understanding of the role sugar plays in a wine you can make any of our wine recipes or homemade wine kits as sweet or as dry as you like. Make the wine the way you like!
Happy Wine Making,
Ed Kraus
—————
Ed Kraus is a 3rd generation home brewer/winemaker and has been an owner of E. C. Kraus since 1999. He has been helping individuals make better wine and beer for over 25 years.
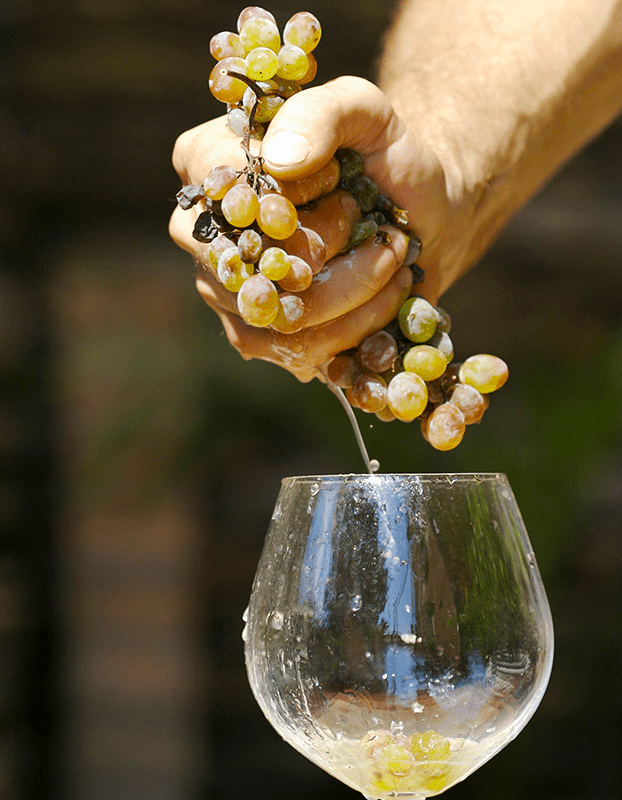
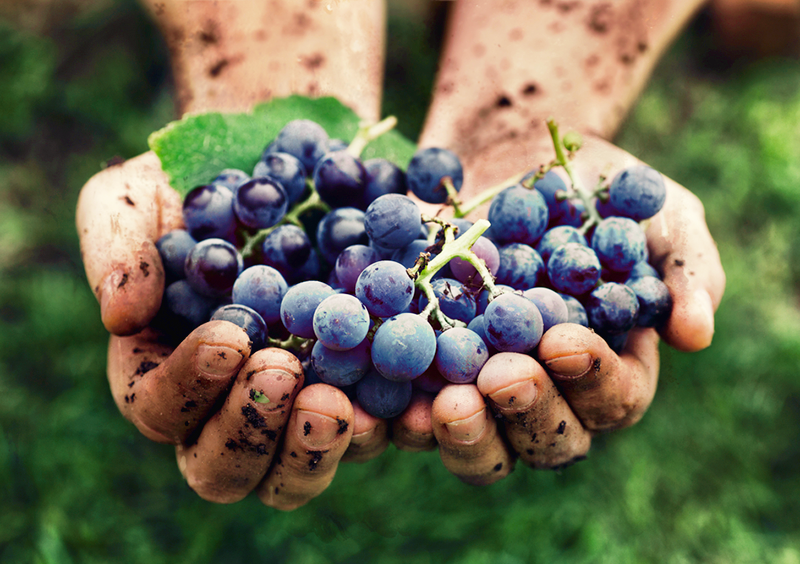
How To Crush Grapes And Why It's Important!
 You say grapes must be crushed before pressing, what do you use to crush them with?
Thank you,
Tony
—–
Hello Tony,
Crushing the wine grapes is a very straight forward process. All you want to do is burst the skin of each grape. This is necessary to release the juice from the grape. It also allows the yeast and enzymes into the grape to further break down the fiber and release even more juice along with flavor and body elements that will make up the character of the resulting wine.
If you do not crush the grapes, you will discover that a significant number of grapes will not release any juice at all. They will stay whole when being pressed. Other grapes may only give up a marginal amount of their juice while being squeezed. This is true regardless of the type of wine press you are using.
On the flip-side, you do not want to over-crush the wine grapes. Doing so may release too much tannin. This could lead to a wine that is out of pH balance and bitter tasting. You just want to solidly burst the skins. As an example, don’t pull out the food processor. That is not how to crush grapes and would definitely be overkill!
Another aspect to consider is that you need to remove the stems from the wine grapes at some point. A few stems are okay, but you do not want all of the stems in the fermentation. This too will cause the wine to become overly bitter with excessive tannin.
How you tackle the crushing of the grapes will depend on the amount of grapes you are dealing with. If you have just 10 or 20 pounds it wouldn’t be a bad idea to crush them by hand. With 100 pounds you might get away with crushing the grapes by beating them with the butt end of a 2×4 while in a bucket. But anything beyond this, and you are going to want to start considering an actual grape crusher.
We offer four different grape crushers. They all crush the wine grapes equally well. The biggest difference between these crushers is speed. Some have de-stemmers with them, or you can de-stem the grapes by hand. Regardless, if you have a large pile of grapes, using one of these units is how you will want to crush your grapes:
- Wooden Fruit Crusher: This is the smallest grape crusher we offer. It is hand-cranked and easily does about 80 to 100 pounds an hour. It is well designed and will crush small berries as will as larger fruit.
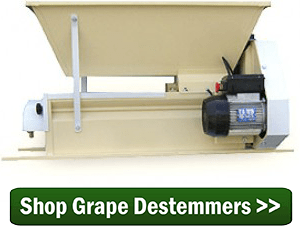
- Stainless Steel Fruit Crusher: This is a manual grape crusher as well. The main differences are that it is rated at 1850 pound per hour and it is stainless steel, very easy to clean up. It also has rotating knives within the hopper for handling other types of fruit.
- Motorized Crusher / De-stemmer: This is a motorize grape crusher. And as the name suggests, it is also a grape de-stemmer. The crushed grapes fall out the bottom and the stems will come out the side of the unit. It is rated at 2,200 pounds per hour.
I hope this information helps you out and gives you a better idea of how to crush your grapes. The bottom line is the wine grapes need to be crushed before they can be made into wine, and they need to be crushed by the right amount. Burst the skins thoroughly, but don’t do more than that.
Happy Wine Making,
Ed Kraus
—————
Ed Kraus is a 3rd generation home brewer/winemaker and has been an owner of E. C. Kraus since 1999. He has been helping individuals make better wine and beer for over 25 years.
Do Wine Concentrates Need Sulfites Added?
 I started a batch of the SunCal California red [grape concentrate]. This is first time I have used a kit like this. I noticed it does not call for Campden tablets to be used. Is this correct, or does this wine concentrate need sulfites?
David J.
—–
Hello David,
When making wine from fresh fruits it is important to treat the wine must with a sulfite of some kind before starting the fermentation. You could use the Campden tablets you mentioned. You could also use potassium metabisulfite or sodium metabisulfite. Any of these will release sulfites into the wine. The dosage is right on the container they come in.
The reason for adding sulfites to a wine must is to destroy any wild molds, bacteria and other unwanted, microbial nasties that could eventually grow and ruin your wine. The sulfites release into the juice killing these wild elements. After that, they leave the wine, dissipating into the air as a gas. Once the wine must has sat for 24 hours, with the cover off the fermenter, you can then add wine yeast and start the wine making process as you normally would.
However, when making wine from wine concentrates you do not need to add sulfite. Any of the SunCal concentrates or other packaged wine making juices have already been treated and are ready to go when you get them. All you need to do is mix in the wine yeast and other ingredients, and let it ferment.
As an additional note, it is important to remember that even thought wine concentrates do not need sulfites added before fermentation, they do need them before bottling. By adding sulfites to any wine before bottling, you are are dramatically reducing the chance of the wine spoiling. You are also dramatically increasing the wine’s ability to retain its freshness for an extended period of time.
There is no reason to wait 24 hours after adding the sulfites. Just blend it in and bottle immediately. You can find more info on when to add sulfite to a wine on our website.
David, I hope this information helps you out. Now you know that wine concentrates don’t need sulfites added before fermentation It was a great question, and I’m glad you asked it.
Happy Wine Making,
Ed Kraus
—————
Ed Kraus is a 3rd generation home brewer/winemaker and has been an owner of E. C. Kraus since 1999. He has been helping individuals make better wine and beer for over 25 years.
What's The Difference Between Crushing And Pressing Grapes?
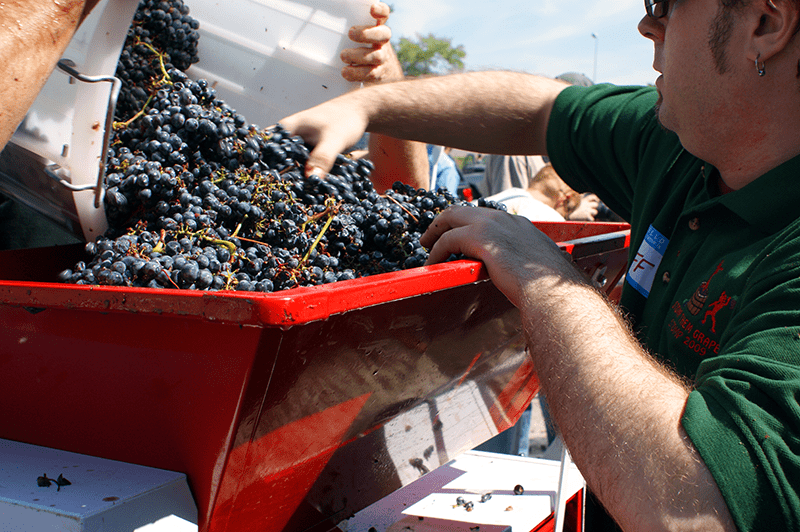 Any of the wine making books you read, will tell you that wine grapes need to be crushed and pressed. The same holds true for the directions that typically come with any wine making recipes, but what does it actually mean to crush and press the wine grapes?
Many beginning winemakers think crushing and pressing to mean the same thing, that the terms are interchangeable, when in fact both mean something very different. To understand just how different you must first know a little bit about the wine making process.
When making wine from grapes it is important to realize that you are not only dealing with the juice from the grapes. You are also dealing with the pulp, the skin, and all the fiber that make up the grape. It is from these organic solids that the grape is able to provide body, color and certain flavor characteristics to the wine. Without them all you have is clear grape juice with very minimal qualities.
This is why when a winery makes a red wine, the skin and pulp are actually in the fermentation along with the grape’s juice. Once the fermentation has almost completed, all the fibrous solids of the grapes are then removed.
But how do these grapes become a soupy mix that is fermentable? Then later, how is the skin and pulp removed? This is where crushing and pressing come into practice.
Crushing Wine Grapes
Crushing is what’s done before the fermentation. It’s what changes the plump grapes from something you pop into your mouth to something you can slop around in a fermenter.
Crushing the grapes is a very straight-forward task. It’s simply a matter of bursting the skins so that all the inner solids can be exposed to the fermentation. Enough free-flow juice will release from the grapes to turn the crushed mix into something liquid we call a wine must.
You can crush the grapes by doing something as archaic as throwing the grapes into a bucket and pounding them with the butt end of a 2×4, or you can be as elaborate as processing them through a grape crusher that was designed specifically for the purpose. A grape crusher is typically a hopper that leads to two rollers that are placed closely together. The wine grapes are crushed by going between the two rollers. Both methods do equally well. It’s more a matter of how many pounds of wine grapes you are needing to crush and how much work you are willing to do.
Pressing Wine Grapes
 Once the wine must has fermented for around 5 to 7 days it is then time to remove all the solids. This is when you’ll see a winery pull out the grape presses and start pressing the wine must. The must is dumped into the pressing basket. Immediately, free-run juice will start flowing from the grape press spout. What’s remaining in the basket is then pressed to extract even more juice.
As a home winemaker you do not necessarily need to use a wine press. If you are dealing with a small batch and have only 2 or 3 pounds of pulp, you can press it by hand as best as you can. A fermentation bag can come in handy for this process. Collect the pulp into the bag. Then hang it over a fermenter while you squeeze it. The biggest drawback to this is you will not get nearly as much juice from the pulp as a wine press can.
If you are dealing with a little larger amount, a wine press is almost a necessity. We have affordable grape presses as small as our Table-Top Press. It is ideal when making 10 or 15 gallons of wine.
So, as you can see there is a big difference between crushing and pressing grapes. And, each as an important function in the wine making process.
—————
Ed Kraus is a 3rd generation home brewer/winemaker and has been an owner of E. C. Kraus since 1999. He has been helping individuals make better wine and beer for over 25 years.
A Simple Guide To Making Wine From Grapes
 Making wine from a grape wine kit is relatively straightforward. You have the directions and the other ingredients pre-measured. But now that you’ve grown more comfortable with making wine from these kits, you’re ready for the next level: making wine from grapes. It’s not really all that different from making wine from a wine concentrate?
Most of the process is the same. However, the first few steps is where making wine from grapes becomes more involved and just a little more complex. You can no longer rely on the wine kit producers to prep the grapes for you. It’s now up to you!
Choosing The Wine Grapes:
When making wine from grapes, the first thing you’ll need to determine is what variety of grape you will be using, and where you will be getting these grapes.
What it boils down to is: what kind of wine do you like to drink? Are you a big red fan? Then maybe don’t buy Sauvignon Blanc grapes, buy Cabernet Sauvignon! You get the idea.
Next, you’ll need to decide where you wish to purchase your wine grapes. Are you looking for a particular style – say a Napa Cab? Maybe you just want to find the source that’s closest to you – for example a mid-western variety such as Chambourcin or Vignoles. Depending on the time of year and place, you may only have a few varieties to choose from.
Inspecting The Wine Grapes:
 This is where making wine from grapes gets down and dirty. Squeeze a couple of grapes in between your fingers and taste the juice. Fill a hydrometer jar with some of the juice, and use a gravity hydrometer to measure the sugar content of the juice. If you want to get more serious, a refractometer also works good for testing the grapes and only require a drop or two of juice to do so. Ideally, you’re looking for a reading somewhere between 22 and 24 Brix.
Washing and Sorting The Wine Grapes:
You will want to wash the grapes lightly to remove any dirt, debris or any other foreign matter.
Preparing The Wine Must:
Now that you have the wine grapes ready to go, it is time to de-stem, crush and press the grapes:
- De-stemming The Wine Grapes:
This is something that can be done by hand. It’s simply a matter of pulling the grapes from the stems. If you have a larger amount of grapes, you may find it necessary to invest in a de-stemmer. Not only does the de-stemmer remove the stems, it crushes the grape, as well. Which happens to be the next step…
- Crushing The Wine Grapes:
One of the most common mistakes when making wine from grapes is over-crushing the grapes. You do not want to shred or macerate the grapes. You only want them to be crushed enough to break the skin. Nothing more is necessary. Crushing the grapes beyond this can lead to a wine with excessive tannin and bitterness. Crushing can be done by hand, but again, if you have a large number of grapes, you may decide it best to invest in a crusher/de-stemmer, or at least, a grape crusher.
- Pressing The Wine Grapes:
Most beginning winemakers will find it surprising to discover that most of the time the grapes are not pressed until after the first 3 to 5 days of fermentation. This is almost always true for red wines and sometimes even for whites. You want the pulp in with the fermentation. This is where the wine gets most of it’s flavor and body – from the pulp and skin of the grape. With white wines the pressing usually comes first – before the fermentation has started. While you can squeeze the grapes by hand or be some other rigged means. You will most likely want to purchase a wine press. They are available in several different sizes. A press will allow you get more juice/wine from the pulp. So much so, the pulp will have a dry feel to it when you are done – something that can’t be done by hand.
What’s Next?
Once you have the wine must together, the method for making wine from grapes and making wine from grape juice mostly comes back into sync: ferment, rack, etc. – with the exception of pressing the grapes.
 Even though you tested the grapes when purchasing them, you may also want to verify with a wine hydrometer that the must has enough sugar. If not, you will need to add sugar until the potential alcohol scale on the hydrometer reads between 11% and 13%. Most of the time the wine must will already be in this range.
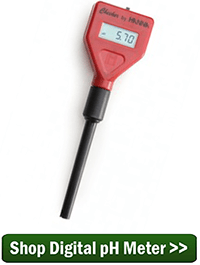
You may also want to check that the pH of the wine is in the correct range. The pH relates to the acidity of the wine. This can be done with either pH papers or a digital pH meter. An ideal reading would be between 3.4 and 3.8. It is important to remember that the pH scale works backwards, so adding more acid blend will lower the pH. You can read more about adjusting acidity on our website.
—————
Ed Kraus is a 3rd generation home brewer/winemaker and has been an owner of E. C. Kraus since 1999. He has been helping individuals make better wine and beer for over 25 years.
Pellet Hops vs Whole Leaf – Which is Better?
 Among the “this or that” debates of homebrewing, the question of whether to use pellet hops or whole leaf hops is primarily a matter of personal preference. But, there are a few things to consider when deciding what kind of hops to use when brewing.
Pellet Hops vs Whole Leaf
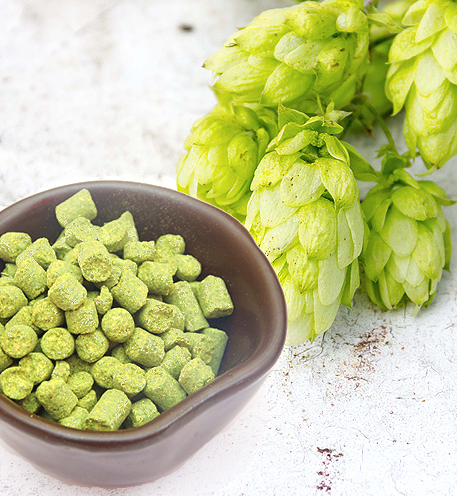
The term “whole leaf” is a bit of a misnomer when it comes to talking about hops. Brewers use the flowering part of the hop plant, often called a cone or a strobile. When hops are harvested, the pinecone-shaped flowers are picked by hand or with a machine. Then the hops are dried in an oast. Next, if the hops are being processed into pellets, the hop cones get milled and pressed into pellets. Finally, the hops are pressed into bales, vacuum packaged, sealed, and stored cold.
One of the main arguments against using pellet hops in your beer is that heat generated during the pelletizing process can degrade the quality of the hops, but most any modern hops farm will take precautions against this. You can be confident that any of the major hop producers you buy from have taken care to prevent any degradation due to pelletizing of the hops.
Without further delay, below are several of the pros and cons of pellet hops vs whole leaf.
Pellet Hops: Pros 
- Less plant material means less wort gets lost in the kettle trub, improving brewhouse efficiency.
- Pellet hops offer slightly higher hop utilization, meaning more IBU bang for your buck.
- Pellet hops store well.
- Pellet hops are readily available.
Pellet Hops: Cons
- The processing of the pellets may damage some of the aroma compounds in the hops. That said, with modern harvesting and processing techniques, actual damage is likely negligible. Hop pellets are used by brewers all over the world.
- Since the hop material is shredded, it can sometimes clog spigots and tubing. A bazooka screen can be installed inside the brew kettle to protect against this.
Leaf Hops: Pros 
- Whole leaf hops can be used as a filter bed when drawing wort from the brew kettle.
- Whole leaf hops are the best option if brewing a wet hop beer.
- Some think whole leaf hops offer better flavor and aroma characteristics. Sierra Nevada uses exclusively whole leaf hops. Randy Mosher, author of Radical Brewing, also prefers whole leaf hops.
Leaf Hops: Cons
- Whole leaf hops take up more space in storage and in the brewing kettle.
- Whole leaf hops offer slightly less hop utilization than pellet hops.
- Whole leaf hops may not always be available or their selection may be more limited.
There you have it. There are some of the pro’s and con’s of pellet hops vs whole leaf hops. As you can see they are somewhat minor, even thought there is a minority who believe whole leaf is the only way to go. In the end, both can be used to make excellent beer.
So what’s your preference – pellet hops or whole leaf?
—————
David Ackley is a beer writer, homebrewer, and self-described “craft beer crusader.” He holds a General Certificate in Brewing from the Institute of Brewing and Distilling and is founder of the Local Beer Blog.