The Difference Between Malt Extract vs All Grain Brewing

Pouring Malt ExtractOne of the eternal debates in the world of homebrewing is around the merits of malt extract vs all grain brewing. There’s no one-size-fits-all answer to the questions. Homebrewers who love to make beer the way the professionals do it prefer all grain brewing. Homebrewers with limited time, space, and equipment may find it easier to brew with malt extract. Though you will hear some people say that all grain brewing makes better beer, it is certainly possible to make great beer with malt extract, and conversely bad beer with all grain. Taste is not a concern here.
Whether you brew using extract or grain, it will ultimately be a decision based on your needs and constraints. Here are some of the primary differences between malt extract vs all grain brewing to consider when deciding which method to use in your home brewery:

Malt Extract Benefits

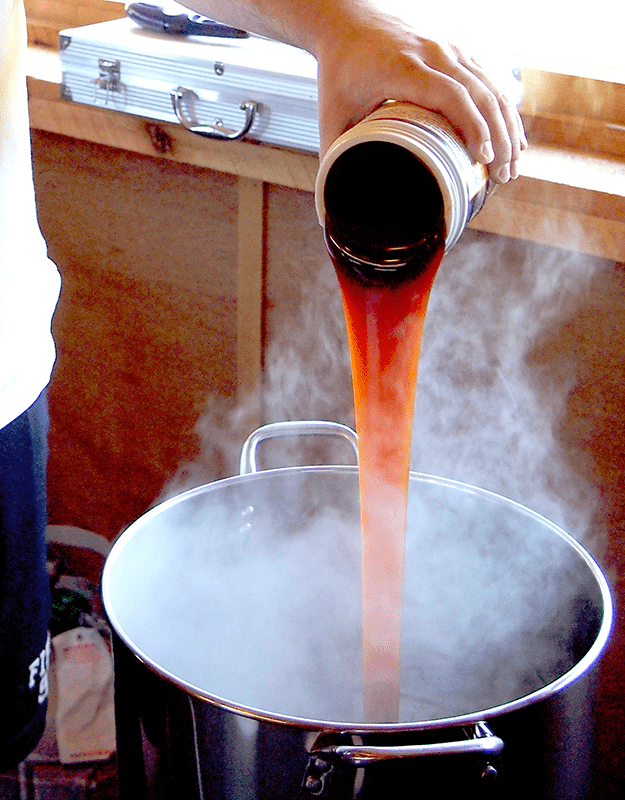
  • Faster: With extract brewing, there’s no need to wait 60 minutes for the mash. Just mix the extract with water and you’re ready to start the boil. If you play your cards right, you can be done with a brew in as little as two hours, including cleanup.
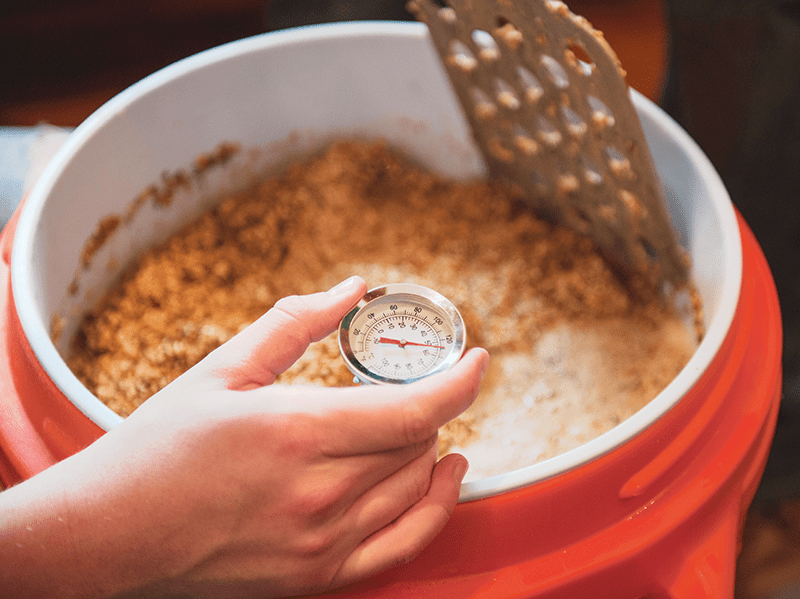
  • Easier: Again, with extract brewing, we skip the mash. That means no measuring pH and no measuring temperature.
  • Less equipment required: When brewing with malt extract, there’s no need for a separate mash tun. This can easily save the homebrewer a hundred dollars or more.
  • Less kettle capacity required: When brewing malt extract vs all grain, it’s typical to brew with a smaller kettle. Again, the smaller kettle makes extract brewing more economical for the budget brewer.

Malt Extract Drawbacks

  • Higher ingredient cost: You will likely pay more for the malt and hops when brewing with extract. Malt extract tends to cost more than the amount of grain needed to achieve the same gravity. Additionally, extract brewers often use a higher gravity boil. Due to the higher gravity of the boil, hop utilization decreases and it takes more hops to extract an equal amount of bitterness.Shop Liquid Malt Extract
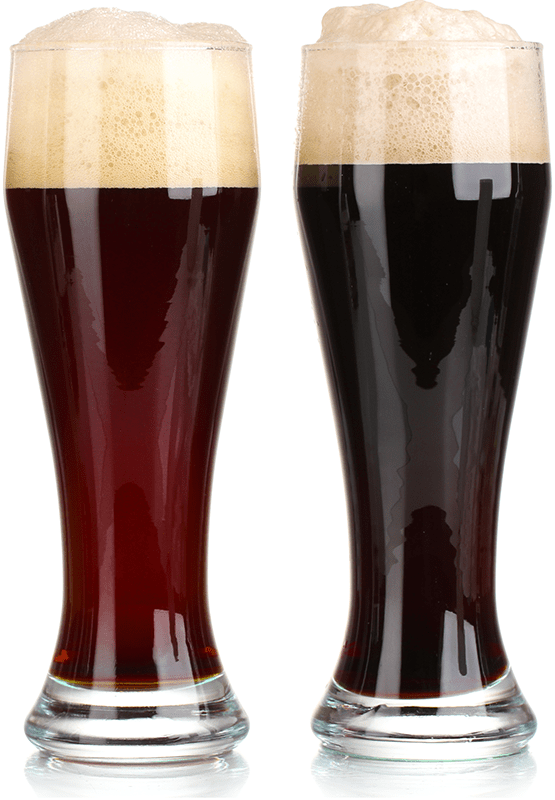
  • More difficult to brew lightly colored beers: Between two beers brewed to the same original gravity, one extract, one all-grain: the extract brew will most likely be darker. This can make it tricky to get beers like wits, Kölsches, and hefeweizens to come out on the lighter end of the color spectrum.

All Grain Brewing Benefits

  • Ingredients cost less: As previously mentioned, you will probably spend less money brewing all grain vs malt extract when brewing the same beer.
  • It’s how the pros do it: If you have aspirations to be a professional brewer, you should learn how to brew all-grain. The mechanics of mashing is very important component of brewing great beer.

All Grain Brewing Drawbacks

  • Takes longer: A mash of 60 minutes or longer – plus the sparge – adds a significant amount of time to the brew day. If you’re tight on time, you may want to stick with malt extract.
  • More mess: The mash leaves behind a significant amount of wet grain. You have to account for the extra time required to dispose of the grains and clean the mash tun.Shop Barley Crusher
  • Requires more equipment: As mentioned earlier, all-grain brewing requires some additional equipment. The most economical way to get into all-grain brewing is Brew in a Bag.

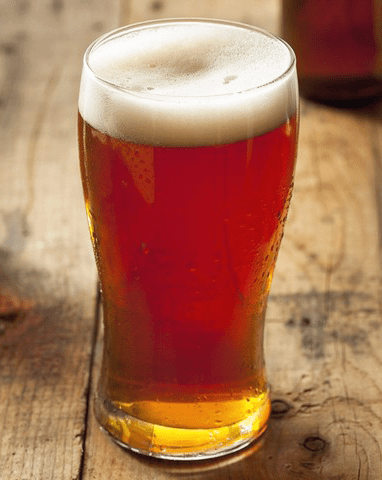
There you have it: the pros and cons of malt extract vs all grain brewing. Whether you choose extract or all grain will depend on your cash flow, level of experience, and time availability. Regardless of the method you choose, be confident that you can brew great beers with great taste either way!
—–
David Ackley is a beer writer, brewer, and self-described “craft beer crusader.” He holds a General Certificate in Brewing from the Institute of Brewing and Distilling and is founder and editor of the Local Beer Blog.

10 Homebrew Beer Recipe Kits To Get You Through The Summer!

Beer Recipe KitAs the weather gets warmer, many homebrewers turn towards beers that are relatively light and refreshing – Russian Imperial Stouts are a bit heavy this time of year. Here are ten suggestions from our catalog of beer recipe kits that are perfect for warm weather homebrewing. Each recipe kit comes with all of the ingredients you need for a five gallon batch: fermentables, hops, yeast – even bottle caps!
(Remember – order any two or more beer recipe kits and save 10% on each one! Plus, as always, get free shipping on orders over $50!)

American Ales

  • American Amber – Ambers tend to be a little sweeter than pale ales, but still have a decent amount of hops. This beer kit uses all amber malt extract plus a pound of Caramel 80°L malt for added color and flavor. Expect a well balanced beer at about 40 IBUs and 5% ABV.
  • American Light – Need a “lawnmower beer” for post-yard work refreshment? A bit of corn sugar and rice syrup lighten the body on this one. For an even smoother beer, try lagering it by doing a secondary fermentation at colder temps than usual (40°-50°F). IBUs 13-16, ABV 4-4.5%
  • Pacific NW Pale Ale – A “West Coast” style pale ale that uses Centennial hops for bittering, and Cascade for flavor and aroma – the classic combination for American Pale Ales.
  • Double IPA – Out of these 10 beer recipe kits this is the one for the hop heads! Despite its high gravity (OG: approx. 1.070), this is a very straightforward beer recipe that’s easy to brew. With and IBU approaching 100 and alcohol approaching 7%, you’ll want to savor every sip!
  • Rye Pale Ale – A unique combination of specialty grains will make this a fun one. This is a pale ale with a twist — flaked rye lends a spicy character, balanced by honey malt, Munich malt, and hops. Practice both partial mash and dry hopping!Shop Home Brew Starter Kit

German Ales

  • Kölsch – A Kölsch is an ale from Cologne, Germany. It’s very light in color and moderately hopped, making it comparable to a Pilsener. 25-28 IBUs, about 4.5% ABV
  • Weizenbier – A Weizen is a Bavarian style wheat beer featuring banana/clove character from the yeast and low hops bitterness. I’d recommend upgrading to the Weihenstephan Weizen Yeast from Wyeast. It’s the same strain of yeast used by the Weihenstephan brewery in Germany, where they’ve been making beer for nearly a thousand years!

Lagers
These lager beer recipe kits will require more control over fermentation temperature than the ales. Fermentation should take place around 40° or 50°F, which for most people means a dedicated beer fridge. Also keep in mind that fermentation usually takes longer for lagers.

  • Munich Helles – “Helles” means “light” in German. This Munich lager is just a little lighter in color and a touch lower in IBUs than the Vienna Lager above.Shop Malt Extract Kits
  • German Pilsner – If you’re looking for something with a little body and still crisp you might take a look at this beer recipe kit. German Pilsners are known for their brilliant golden color and assertive bitterness that is accentuated by its dry finish.

You’ve got some choices ahead of you…what will you brew this summer? If these 10 don’t excite you then take a look at the other 70 or so beer recipe kits we offer!
—–
David Ackley is a beer writer, brewer, and self-described “craft beer crusader.” He holds a General Certificate in Brewing from the Institute of Brewing and Distilling and is founder of the Local Beer Blog.

An Intro to the Infusion Mashing Process

Homebrewer Using Infusion Mashing ProcessAs many of you know, using the infusion mashing process is just one of the ways that grains can be used to make wort (which is then turned into beer by yeast). In this article, we will go over the basics of the infusion mashing process, followed by step-by-step instructions for a single infusion mash.

The Science of Infusion Mashing
For the starches in malted grain to be converted into fermentable sugar, they must be mixed with water and held under certain conditions. This process is called saccharification.
Four main variables affect how much of the available starches are converted during the infusion mashing process: time, pH, temperature, and mash thickness. The ideal values for each of these variables are as follows*:
Time: 30-60 minutes
pH (acidity): 5.4
Temperature: 149°F. (65C)
Thickness: 1.5 qts. water/lb. grain
In theory, it should only take about 30 minutes for saccharification to complete, but many brewers employ a 60-minute mash just to be safe. Conversion will take place at a pH between about 5 and 7, but 5.4 is the ideal target. Finally, conversion will happen at temperatures ranging from about 148°F. to 158°F., but if there isn’t enough heat the starches won’t convert. If there’s too much heat, the enzymes that are responsible for conversion will become less active and possibly denatured.
Further, brewers can raise or lower mash temperatures within a given range to control the amount of fermentable sugars in the wort. A mash around 148°-150°F. will create a more fermentable wort and result in a drier beer. A mash around 154°-158°F. will create a less fermentable wort. This will result in a higher proportion of unfermentable sugars in the wort, meaning a sweeter beer with a heavier mouthfeel and body.Shop All Grain System

Single vs. Step Infusion Mashing
Grains that have been “well-modified” (i.e. malted to maximize their conversion potential) usually just require a one step mash, which we call a single infusion mash. Grains that are less modified may require additional processing in the mash tun.
If brewing with a high proportion of less modified malt, the brewer may choose to add an additional step in the infusion mashing process. Before the saccharification step, they may want to do a “protein rest”. This simply means mashing the grains at a lower temperature (~122°F.) to help proteins break down and makes starches more accessible, then raising the mash temperature for the saccharification rest (~149°F.). Because modern malting practice has made most malt well modified, a single step infusion mash is usually sufficient.

Instructions for the Single Infusion Mashing Process

  1. Crush malted grains.Shop Barley Crusher
  2. Fill mash tun with 1.5 qts. of clean water at 165°F. for every pound of grain.
  3. Mix crushed grains with the water and stir.
  4. Hold mash temperature between 148°F. and 158°F. If too low, add hot water, if too high, add cold water.
  5. Check pH using a digital pH meter or pH test strips.
  6. If above 5.5 add ¼ teaspoon of gypsum and stir. If below 5.0, add ¼ teaspoon of calcium carbonate and stir.
  7. Hold mash for 60 minutes.
  8. Raise temperature to 170°F. and slowly begin to draw off wort into brew kettle. If needed, recirculate wort through the mash until it comes out clear.

When it comes down to it, the single infusion mashing process is very simple. It’s something that anyone can do if they have a mind to. Are you ready to give it a try?
—–
David Ackley is a beer writer, brewer, and self-described “craft beer crusader.” He holds a General Certificate in Brewing from the Institute of Brewing and Distilling and is founder and editor of the Local Beer Blog.
*Source: Institute of Brewing and Distilling

Creating A Summer Ale Homebrew Recipe

Homebrewed Summer AleA summer ale is just that: a perfect ale to add to your summer brewing repertoire. That’s why I thought, now, would be a good time to put together a summer ale homebrew recipe.
Based on English ales, summer ales are light in color, not too heavy or alcoholic, and moderate in the hop department. Because it’s a well-balanced style, the summer ale still lets the drinker get a good sense of the malt character. And, because Summer ales are so well balanced, they are a great beer to brew as a SMaSH ale.
What is a SMaSH ale you say? I’m glad you asked.
SMaSH stands for Single-Malt and Single-Hop. Pick a malt, pick a hop, and brew! It’s a great way to learn about the characteristics of a particular ingredient, without a lot of background noise. You may also try brewing a single malt base beer, then choose several different hops or different beer yeasts for each one. Maybe you heard about the Single Hop series by Mikkeller? That’s exactly what we’re doing here.
According the BJCP, summer ales are part of the Blonde Ale (6B) category. Therefore, we should aim for these guidelines when creating a summer ale homebrew recipe:

  • OG: 1.038 – 1.054
  • IBUs: 15 – 28
  • FG: 1.008 – 1.013
  • SRM: 3 – 6
  • ABV: 3.8 – 5.5%

So here’s how we can build the recipe.

  1. Pick a malt. Now, we can’t just pick any malt. It has to be a good base malt, something with diastatic power, or the ability to break down starches in the malt. Two-row malt, Avangard ale malt, and Vienna malt are all good options. Anything that has been too highly kilned, like caramel malt, won’t contain enough enzymes for a successful mash. If brewing with extract malt, try a Alexander’s, Steam Freak, or Munton’s, all high quality liquid malt extracts.shop_liquid_malt_extract
  1. Pick a hop. For a summer ale recipe, I recommend Fuggles, Willamette, or Hallertau. The low alpha acids will ensure that the bitterness in the summer ale isn’t too overpowering. On the other hand, it’s your brew, so pick whatever hop you want!
  1. Pick a beer yeast. In this context, an English ale yeast would be most appropriate. Good dry yeasts include Safale-S04, Nottingham, Windsor, and Munton’s. There are a lot of choices in the liquid yeast department: Wyeast 1318 London Ale III, 1968 London ESB, 1098 British Ale are all good options. Remember, we’re experimenting here, so you pick one for this batch, then pick another for your next batch and then compare the results.
  1. Brew!

Here’s the recipe I came up with:
SMaSH Summer Ale Homebrew Recipe
(5 Gallons)

Malt: 9 lbs. of Avangard Ale Malt
Hops: 3 oz. of Fuggles, one each at :60, :15, and :5Shop Steam Freak Kits
Yeast: Safale S-04
Est. OG: 1.050
Est. ABV: 4.8%
Est. IBUs: 25

Have you tried any SMaSH brews? How did it go? Do you have a summer ale homebrew recipe you’d like to share? Leave it in the comments below.
—–
David Ackley is a beer writer, brewer, and self-described “craft beer crusader.” He is a graduate of the Oskar Blues Brew School in Brevard, NC and founder of the Local Beer Blog.

Choosing And Using A Homebrew Airlock

Homebrew Airlock Close UpAs homebrewers, we spend lots of time cleaning and sanitizing our home brewing equipment to make sure nothing will ruin our beer. I often joke that our job is essentially that of a glorified janitor.
But for all the effort we put into caring for our beer and the items it touches, it’s important to never overlook the small details that can ensure a well-made beer. Among the finishing touches of our brew days, as we push, pull or gently place our carboys and buckets into a resting spot for fermentation, is popping in that airlock.
It may seem trivial, but how we care for our beer’s ability to “breathe” during its fermentation can be the difference between beer in our glass or down the drain. That is essentially what an airlock does. For that reason here’s some info on choosing the right type of homebrew airlock and using a homebrew airlock.

Choosing the Right Home Brewing Airlock
Whether at your local store or online, you’ve probably noticed the array of airlocks available for brewing. Here at Adventures in Homebrewing, there are six home brewing airlocks to choose from! They all perform the same essential job – acting as a barrier between the air and your beer – but they can also serve different purposes. Just make sure you’re filling your home brewing airlock up with sanitized water or a strong alcohol like vodka to act as a barrier against airborne nasties.
A three-piece airlock can be ideal because it’s easy to clean. Disassembling this type of airlock means rinsing or hand washing is simple. It’s also ideal for primary fermentation because if you’ve got an overly active brew during the first few days and some wort “overflows” into the airlock, you won’t have to worry about buying a new one. Different versions of these brewing airlocks are useful for batches all the way up to 50 gallons.
The s-shape airlock or triple ripple airlock can’t be taken apart to be cleaned, but are still handy for small batches during primary fermentation and are ideal for secondary fermentation because of the decreased risk of heavy fermentation. Both these types of airlocks are also great for tracking slow-moving fermentations, so as your beer nears its final gravity, you’ll have an easy time following the escaping CO2 so you know when to pull a sample to see if your beer is done. For this reason I have both types of brewing airlocks on hand.Shop Airlocks

Protecting Your New Beer
One extra precaution I like to take after filling up my carboy with fresh wort is using a blow off tube for the first few days before using a homebrew airlock. It gives me peace of mind know that there’s very little risk of a strong fermentation causing an airlock to fly off the top of my carboy.
I sanitize my blow off tube just as I would any other airlock and after placing one end in the carboy, put the other end in a container of sanitized water. After the most active first few days of fermentation, I’ll take off the blow off tube and pop on an s-shape airlock until I move my beer to a secondary carboy.

Troubleshooting with Airlocks
One important step to remember when making homebrew is to cool your wort to its specified temperature after boiling. For lagers, that may initially be around 60° F. and around 70° F. for ales. If you don’t get the wort down to its correct temperature and slap a home brew airlock on your carboy, the difference between CO2 trying to escape, volume of liquid and temperature will create a pressure difference and cause reverse suction – meaning the carboy will start sucking liquid from your airlock into the wort.
Always make sure to cool your wort to its suggested temperature. This is one little tip on how to use an airlock that I learned the hard way.Shop Home Brew Starter Kit
Another common issue when using a homebrew airlock is having an airlock or bung fall into a carboy. If this happens, don’t worry. As long things are sanitized correctly, your beer will end up just fine nearly every time. It’s one of those “Relax. Don’t worry. Have a homebrew.” moments which Charlie Papazian’s quote helps us get through.
If properly sanitized, just leave the airlock and/or bung in the carboy and fish it out after you’ve racked your homebrew out of the vessel.
This is the basics of choosing an airlock and the “how-to’s” of using a homebrew airlock. As you can see it’s fairly straight forward. There are different home brewing airlocks to use for different reasons, and keeping them sanitized is a must.
—–
Bryan Roth is a beer nerd and homebrewer living in Durham, North Carolina. You can read his thoughts on beer and the beer industry on his blog, This Is Why I’m Drunk, and send him suggestions on how to get his wife to drink craft beer via Twitter at @bryandroth.

Why Is My Beer Not Carbonating?

Pouring Flat Homebrewed BeerI made a batch of Mexican beer that I primed with 1 tsp. per 16 oz. bottle. After 45 days, but the beer is flat. The taste is OK, but no bubbles. Can I reprime it? Why is my beer not carbonating?
Name: Bruce
State: Montana
—–
Hi Bruce,
As you probably know, beer carbonates in the beer bottle when the yeast in the beer is given an extra dose of sugar (known as priming sugar). The yeast then converts the sugar into CO2. Since the beer bottle is sealed, the CO2 has nowhere to go besides into solution, thus carbonating your beer. This is called bottle conditioning.
If your homebrew beer is flat, it likely means one of three things:

  1. The beer yeast is not consuming the priming sugar due to lack of time or cold temperature,
  2. The beer yeast does not have enough sugar to convert into CO2, or
  3. The beer bottles are not thoroughly sealed.

If you used 1 tsp. of corn sugar per bottle, that should be sufficient. However, if you primed with dried malt extract, this may not be enough to produce the desired carbonation level.
Either way, before you re-prime the flat beer bottles, I would recommend troubleshooting this flat beer in the following order.

  • First, ensure that your flat beer bottles have been sitting in a room with a steady temperature of 70°-75°F. Temperatures lower than this could cause the beer to carbonate very slowly or not at all. Keep in mind that certain closets and storage areas may not be as warm as the rest of the house. If you suspect that the beer bottles were in a cooler storage room, move them somewhere warmer and wait another two-three weeks. By the way, when someone ask: “why is my beer not carbonating?” this is by far the most likely the solution to the problem.Shop Bottle Cappers
  • Second, check that all of the bottles of flat beer have been capped securely. If there’s any kind of leak, the CO2 pressure may be escaping. This could be happening if you’re using twist-off beer bottles instead of pop-off beer bottles. Maybe it was just the first bottle you opened that didn’t have a good seal?

If the first two actions didn’t fix the problem, then you can re-prime the bottles of flat beer. I would only do this if you are certain that the bottles have had at least six to eight weeks of conditioning time in a room at 70°-75°F.
Consider this carefully – if you add too much sugar to the bottles, you run the risk of bottle bombs. Keep in mind that beer bottles primed with honey or DME may require more time than bottles primed with corn sugar.
Here’s how to re-prime beer if you decide to do so: open each bottle and add half as much priming sugar as you did the first time and reseal with sanitized bottle caps. Move the bottles to a safe location where they won’t make a mess or hurt someone if they explode.
Shop Beer BottlesChances are high that all you need to do is give your bottles adequate time at the appropriate temperature. For more ideas about carbonating your homebrew, consider this blog post.
So, if your homebrew beer is flat can you re-prime? Yes. Should you? Maybe, but not likely. Remember re-priming a flat beer is a last resort. Troubleshooting flat beer can be tricky. Just remember, it is only after you have tried to keep the flat beer at a reasonable temperature first, that’s how to re-prime beer.
Thanks again for your question and good luck!
—–
David Ackley is a beer writer, brewer, and self-described “craft beer crusader.” He holds a General Certificate in Brewing from the Institute of Brewing and Distilling and is founder and editor of the Local Beer Blog.

Hop Bursting Homebrew 101: Tips for BIG Hop Flavor and Aroma

Hop Bursting A Batch Of Homebrew BeerOver the past several years, IPAs and Double IPAs have been all the rage in the craft beer scene. Heady Topper, Pliny the Elder, and others have put hops in the spotlight. Though the term “hop bursting” has only just gained some notoriety, the technique could be the secret the success of these massively popular beers.

So what is hop bursting?
Hop bursting is simply adding massive amounts of late addition hops to the boil. Instead of early additions for the bulk of a beer’s bitterness. These late additions supply most of the IBUs.
Let me explain.
In a standard beer recipe, you may have an ounce of bittering hops, an ounce of flavor hops, and an ounce of aroma hops. Seems pretty balanced. However, since more bitterness is extracted the longer hops are boiled, the majority of the IBUs in this scenario come from the first addition. Just play around with an IBU calculator to see what I mean. With hop bursting, the first addition will be very small or even nonexistent, which means that most or all of the IBUs come from the later additions.
You’ll find that to achieve the same level of IBUs, hop bursting will require significantly more hops in total. However, this technique can help the brewer to achieve very intense hop flavor and aroma without overpowering bitterness.
If you’re a fan of massive hop flavor and aroma, try the hop bursting recipe below!

Hop Bursted Amarillo IPA
(partial mash recipe, five gallons)
Specifications
OG: 1.064
FG: 1.016
ABV: 6.3%
IBUs: 64
Boil time: 60 minutes
Ingredients
6.6 lbs. Light LME
1 lb. Amber DME
1 lb. Caramel 20L malt
Shop Barley Crusher1 lb. Carapils malt
.5 oz. Amarillo hops at :30
1 oz. Amarillo hops at :15
1 tsp. Irish moss at :15
2 oz. Amarillo hops at :10
1.5 oz. Amarillo hops at :5
Yeast: Safale US-05
3/4 cup priming sugar

Directions
Steep the crushed Caramel 20L and Carapils malts for 30 minutes in one gallon of water at 152°F. Strain the grains and rinse them with 1 gallon of water at 170°F, collecting the runoff in the boil kettle. Mix in the liquid malt extract and top off to 7 gallons of wort. (To get 64 IBUs, you will need a 7 gallon boil. If using a 5 gallon kettle, top off to 4 gallons and increase the first hop addition to 1.5 oz.)Shop Hops
Boil for 60 minutes, adding the hops according to the schedule. Add 1 teaspoon of Irish moss with 15 minutes left in the boil. Whirlpool, chill, and transfer to a clean, sanitized fermenter. If needed, top off with enough water to make five gallons. Ferment at 66°-70°F for seven days. Rack to secondary for ten days. Bottle or keg as you would normally.
Are you a fan of the hop bursting technique? What’s your strategy? Do you have a hop bursting recipe or schedule you’d like to share? Put it in the comments section below…
—–
David Ackley is a beer writer, brewer, and self-described “craft beer crusader.” He holds a General Certificate in Brewing from the Institute of Brewing and Distilling and is founder and editor of the Local Beer Blog.

The Difference Between Stouts and Porters

Stout and PorterBeer blogger Bryan Roth explores the subtle differences between two classic beer styles: stouts vs. porters.
—–
Brewing up a variety of beer recipes is one of the reasons why many get into the hobby of homebrewing. While you may be excited about creating something experimental (watermelon wheat, anyone?) honing base beer recipes is important, especially if you want to better understand the beers we love so much.
You may enjoy extra hoppy IPAs, but porters and stouts can offer tons of complex, malt-forward flavors. But what exactly are the differences between the stouts and porters? Sure, they both look dark, but there are plenty of slight differences that go into each beer. But what makes both beer styles different. What is the difference in taste?
Here’s a helpful history lesson: stouts came into existence as a descriptor for a stronger version of a beer style. A “brown stout” in the 1700s was simply a porter with higher alcohol content. Changes to brewing and brewing laws over the next 200 years eventually made way to how we recognize these beers today.
The most important change from the 1700s? The use of roasted barley.
While the BJCP outlines various styles of porters and stouts, here are basic characteristics of what you should aim for when crafting your next version of either, courtesy of Randy Mosher’s Tasting Beer. These are the basic characteristics that define the difference between stouts and porters:

 Porter  Stout
 Flavor Creamy roasty-toasty malt, hoppy or not Always roasty; may have caramel and hops too
 Aroma Roasty maltiness; usually little or no hop aroma Roasty malt; with or without hop aroma
 Balance Malt, hops, roast in various proportions Very dry to very sweet (depending on style)

These are slight differences, but important if you want to nail your next batch.
Shop LIquid Malt ExtractAnother tip to consider when creating your recipe is the success of others. According to Ray Daniels’ book, Designing Great Beers, the key difference between the winning porter and stout recipes from the National Homebrew Competition was – no surprise – the use of malt.
The average grain bill of well-performing homebrewed porter used 80 percent pale ale malt while stout beer recipes used an average of 61 percent. The other big difference was the use of roasted barley, which was twice as much in stouts (8 percent) compared to use in most porters (4 percent).
Generally speaking, pale ale malt would supply a beer with more “toasty” flavors. Roasted barley, of course, would impart flavors closely associated to coffee.
That is important, because roasted grains were widely used in successful competition homebrewed stouts (90+ percent) compared to porters, where roasted grains appeared in 30 to 60 percent of “robust” porters, but not at all in brown porters.
All those numbers are to say, for homebrewers, “roasted” is to stouts as “toasty” is to porters.
Shop Home Brew Starter KitIf you plan to enter a stout or porter into a judged homebrewing competition, these slight differences will be important to your success. But even if you’ll just be enjoying your creation at home, a better understanding of these two beer styles can help improve your palate, make you a better brewer and give you some extra tasty homebrew to drink! And, that is the difference between stouts and porters in a nutshell.
—–
Bryan Roth is a beer nerd and homebrewer living in Durham, North Carolina. You can read his thoughts on beer and the beer industry on his blog, This Is Why I’m Drunk, and send him suggestions on how to get his wife to drink craft beer via Twitter at @bryandroth.

Your Wine Could Be Cloudy Because Of A Pectin Haze

Wine With HazeI am having some trouble getting some of my fruit wine to clear. The berry wines clear right away (black raspberry, elderberry, blueberry, raspberry, current) but some of the other fruit wines stay cloudy (apple, peach, pear, dogwood). Is there something different I should be doing with these wines to make them clear better?
Name: Charlene
State: New York
—–
Hello Charlene,
It might be a pectin haze that’s making your wine cloudy. Some fruits have more pectin in them than others. Pectin is the gel that holds the fruit’s fiber together. If the pectin is not completely broken down during the fermentation you can end up with what known as a pectin haze in your wine. This sounds like what is giving you a cloudy wine.
During the fermentation the yeast will produce pectic enzymes to breakdown the pectin cells. You may have also added pectic enzyme directly to the batch per your wine recipe. With most fruits this is sufficient, but even then you can sometimes end up with a pectin haze with the particular fruit wines you mentioned.
Apple, peach and pear all have significant levels of pectin, more so than most other fruits. The dogwood I’m not sure about. If you did not add pectic enzyme to your wine recipe, then most certainly a pectin haze is the issue at hand. But, even if you did add pectic enzyme, this is still what I suspect is going on because of the specific wines that are cloudy. Pectic enzyme is that important.
As for what you can do now…Shop Pectic Enzyme
Whether or not you have added pectic enzyme to your wine must, you can add more now, however it may take some time for the wine to clear… sometimes months. Of course, this is assuming you have not bottled the wine already. If you have, then that ship has already sailed, so to speak. You could decant the wine; treat the wine; and then re-bottle, however I would not do it if it were my wine, simply for the fact that this type of cloudiness dose not affect the flavor at all only appearance. Live-and-learn, and move on.
Even at that, one thing you could do for future reference is to take a bottle of the suspect wine; add it to a quart Mason jar, or similar; and treat it with a teaspoon of pectic enzyme. This would be an extremely strong dose, so if a pectin haze is the issue at hand, you should see it respond to the addition of pectic enzyme by clearing in a matter of days if not hours. This will let you know if you have found the problem in the form of a pectin haze for future reference and give you a little piece of mind.
As a home winemaker, pectin haze issues should always be in the back of one’s mind. It’s something that doesn’t happen all that often, but when it does, it can be very aggravating. Shop Wine ClarifiersKeep a particularly close eye when fermenting fruits high in pectin and always use pectic enzyme when fermenting fresh fruits.
Happy Winemaking,
Ed Kraus
—–
Ed Kraus is a 3rd generation home brewer/winemaker and has been an owner of E. C. Kraus since 1999. He has been helping individuals make better wine and beer for over 25 years.

Quick Guide To Brewing Beer With Herbs

The results of brewing beer with herbs.
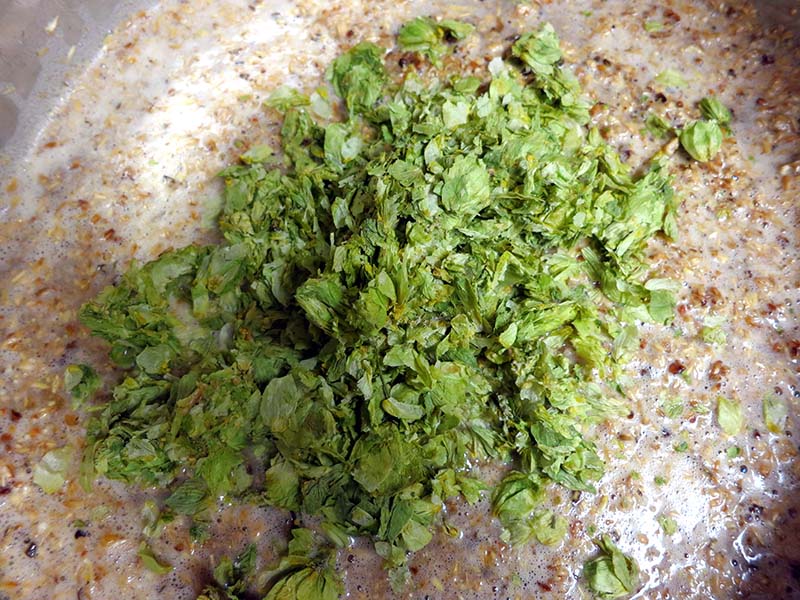
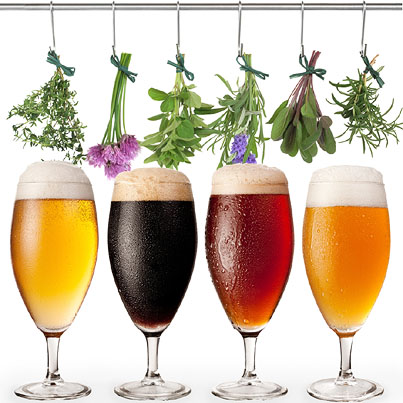
Brewing beer with herbs is not some new fad, a product of the recent craft beer boom. Before hops were popular (we’re talking hundreds of years ago), a wide variety of herbs and spices provided the bittering and flavoring characteristics to balance beer’s malty sweetness. Brewing beer with herbs was the norm. By adding herbs in your own homebrew, you can recreate ancient styles of beer (such as Sahti and Scottish Gruit) and also exercise your creative spirit to develop something entirely new. Below are just a short list of herbs, flowers, and other plants that can be used, alone or in combination, to contribute a unique flavor profile to your homebrew:

  • Basil
  • Betony
  • Birch
  • Borage
  • Chamomile
  • Coriander
  • Dandelion
  • Elderflowers
  • Ginger
  • Ginseng
  • Heather
  • Horehound
  • Juniper
  • Lavender
  • Lemon Balm
  • Licorice
  • Mint
  • Nettles
  • Oregano
  • Rhubarb
  • Rosemary
  • Sage
  • Savory
  • Thyme

When thinking about how to use herbs in homemade beer, add them in the same way as we do hops. These herbs may be added early or late in boil (depending on whether you’re looking for more bitterness, flavor, or aroma) or to the secondary fermenter, just like with dry hopping. One thing to keep in mind when brewing beer with herbs is that the herbs tend to be more delicate than hops. Many of them don’t need to be boiled as long as hops in order to extract bitterness and flavor.
You can pick these herbs from your own garden, or buy them from the store. Many herbs are available as tea blends, the tea bags making it east and convenient to strain out the herbs.
When developing an herb beer recipe, think about what flavor characteristics work well with the base beer. The herbs should complement the style characteristics, rather then dominate them. (Consult the BJCP guidelines for style 21A for more detailed information.) If brewing a gruit, forgo the hops. Other base beer styles, such as pale ale and wit, can be given an interesting twist by incorporating herbs in addition to the hops.Shop Beer Flavorings
To help start you out brewing beer with herbs, here is a pale ale recipe using oregano. Feel free to substitute basil, rosemary, and other herbs as desired.

Oregano Pale Ale Recipe (5 gal):
OG: 1.054
FG: 1.011
ABV: 5.6%
SRM: 11
All-grain:
8 lbs. Two Row Malt
1 lb. Munich Malt
1 lb. Caramel 40L
Partial Mash:
6 lbs. Golden Light Extract
1 lb. Munich Malt
1 lb. Caramel 40L
Hops:
1 oz. Northern Brewer @ :60
1 oz. Centennial @ :30
0.5 oz. Tettnanger @:15
0.5 oz Tettnanger @ :5
Other:
0.25-1 oz. of fresh oregano* @ :15
1 tsp. Irish Moss @ :15Shop Steam Freak Kits
Yeast:
Wyeast 1056 American Ale Yeast**
*The oregano can contribute a lot of bitterness and flavor. Up to a full ounce of fresh oregano may be used, but may need to be aged depending on your taste preferences.
**For best results, prepare a yeast starter.
Have you ever tried brewing beer with herbs before? How did it turn out? Do you have an herb beer recipe you’d like to share? Put it in the comments section below.
—–
David Ackley is a beer writer, brewer, and self-described “craft beer crusader.” He is a graduate of the Siebel Institute of Technology’s “Start Your Own Brewery” program and the Oskar Blues Brew School in Brevard, NC.