7 Skills For Becoming A Better Homebrewer

Person Becoming A Better HomebrewerWhat skills are needed for becoming a better homebrewer? Do you need to be the boldest out of your friends or have the biggest beard? I don’t think so.
Homebrewing is a hobby that (in addition to providing you with great beer!) offers an opportunity to develop a wide range of skills. Not only do these skills make you a better brewer, but they can be transferred to other hobbies and activities as well. So in a sense, becoming a better homebrewer is a path towards self-improvement.
Below you can learn about 7 key skills I’ve needed to master to help me become a better homebrewer:

  1. Attention to detail – Together, cleaning and sanitation comprise the critical first step in homebrewing. If you can’t keep your equipment clean or skip steps on the sanitation process, sooner-or-later you’ll get an infected homebrew and have to dump a batch. While you can avoid some of the more “science-y” aspects of homebrewing, don’t skimp on cleaning and sanitation.
  1. Resiliency – Homebrewing is not for people who give up easily. At times, you may encounter frustration. Just remember to breathe and keep in mind that you’re doing this for fun!
  1. Problem solving – Becoming a better homebrewer means being Shop Liquid Malt Extracta better problem solver. Occasionally, something will not go as planned with a batch of beer. Homebrewing tests your ability to break down a multi-step process to identify the source of a problem. Even when things go right, you will be tested to identify the nuances in process and ingredients that affect a beer’s color, flavor, aroma, and other characteristics.
  1. Creativity – Homebrewing is a great avenue for exploring your creative side. Just about any ingredient can be used when making beer. Want to brew some unusual concoctions? Try a chipotle smoked porter, oak barrel IPA, or a maple Scotch ale to flex your creative muscle.
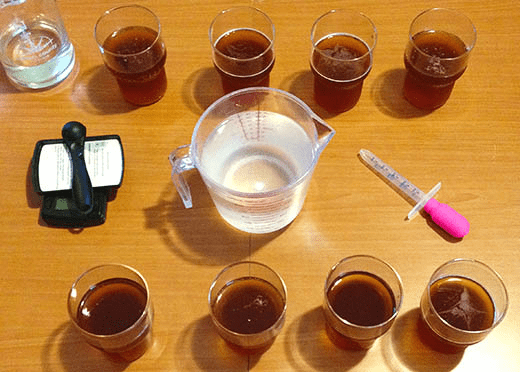
  1. Consistency – This skill is essential for professional brewers, but it can be important for homebrewers as well. Anyone can brew one good batch of beer, but can you do it over and over? Take good homebrewing notes and test your consistency by perfecting some of your favorite beer recipes.
  1. Curiosity – Homebrewing offers an endless path for learning, whether it’s about yeast propagation, water chemistry, or calculating IBUs. If you’re inclined to dive deep into a hobby, then homebrewing is for you.Shop Home Brew Starter Kit
  1. Good attitude! – This one can’t be stressed enough. Above all, homebrewing should always be fun. That’s not to say it won’t be challenging at times. But sometimes becoming a better homebrewer requires that you remind yourself of the reasons you started homebrewing in the first place. If you ever need a refresher on how to keep your cool, check out Hops, Malt, and Zen: How I Learned to Relax, Not Worry, and Enjoy Homebrewing.

What skills would you add to the list for becoming a better homebrewer?
—–
David Ackley is a beer writer, brewer, and self-described “craft beer crusader.” He holds a General Certificate in Brewing from the Institute of Brewing and Distilling and is founder of the Local Beer Blog.

Mead Making Tips From Michael Fairbrother

Mead Making Tips From Michael FairbrotherThe BeerSmith blog featured a video interview back in 2015 that had some very good insights to making mead. It was with the founder of Moonlight Meadery, Michael Fairbrother, how to brew your own mead. As I’m planning on making my first mead, I thought I’d share some of the mead making tips I learned from the video.
Below are some of Michael’s key mead making tips. There’s enough clear-cut information here that you will be able to create your own mead recipe:

Water

  • Use clean, filtered, or reverse osmosis water for your mead.

Honey

  • Use fresh, non-pasteurized honey whenever possible for best flavor. See the honey locator at honey.com to find fresh, raw honey near you!
  • Different honeys have different flavors: tupelo honey tends to be spicy, and citrus honey might have notes of orange.
  • Michael recommends using cranberry, blueberry, blackberry, and avocado honeys, among others.
  • Michael does not recommend buckwheat or heather honey, as these tend to be heavy.
  • Michael suggests a honey to water ratio of 25:75 for a semi-sweet mead. Use more honey for a sweeter mead, less honey for a drier mead.Shop Wine Yeast

Yeast

  • One of Michaels biggest mead making tips is do not use champagne yeast.
  • Michael uses Lalvin 71B wine yeast for all of his meads.
  • Pitch about 1 gram of yeast per gallon for a healthy fermentation.

Equipment
If you’re a homebrewer or winemaker, you probably already have all the equipment you need for making mead.

  • Use a fermenting bucket for primary fermentation. It’s easier to stir the must and helps prevent some kind of blow-off situation.
  • After primary fermentation, move the mead to a carboy and minimize headspace.Shop Fermenter

Yeast Nutrients

  • Always rehydrate your yeast nutrient in a pint of water.
  • For best results, divide your yeast nutrient by four and pitch it four times during primary fermentation: at 0, 24, 48, and 72 hrs into fermentation. This will help the mead develop more quickly.

Fermentation

  • Primary fermentation – Michael usually lets his mead sit for three months before racking to a secondary fermenter.
  • Ferment at about 62°F. This is one of Fairbrother’s favorite mead making tips. The cooler temperature will result in a longer fermentation, but with a cleaner tasting mead.

AdditivesShop Bentonite

  • Michael recommends using bentonite or a wine filter to get good clarity.
  • Sulfites or sorbates can be used to keep the mead stable after fermentation.
  • Flavorings – Moonlight’s most popular mead is made with apple, honey, cinnamon, and vanilla.
    • Fruit – Adding fruit to a mead makes a melomel. The fruit is typically added right at the beginning, though it can be added to the secondary as well.
    • Spices – Add spices to your mead to make a metheglin. Add the spices during secondary fermentation. Taste the mead throughout the secondary fermentation and rack the mead to another fermenter when the balance tastes right. This may be just a few days for some of the more aggressive spices.

Shop Mini Jet Wine FilterResources
These are great mead making tips for the beginner. You can also fine more information in the book Mead Making, available in the E. C. Kraus web store.
Are you a fan of making mead? What kinds of honey do you use, and what is your favorite style of mead to make?  Do you have any mead making tips? Or, maybe a mead recipe you’d like to share?
—–
David Ackley is a beer writer, brewer, and self-described “craft beer crusader.” He holds a General Certificate in Brewing from the Institute of Brewing and Distilling and is founder and editor of the Local Beer Blog.

Oktoberfest Beer Recipe (Extract and All-Grain)

Oktoberfest BeerBelieve it or not, summer is coming to a close and fall is quickly approaching. It’s time to celebrate the bounty of the growing season and get ready for the brewing season ahead. That’s where these Oktoberfest beer recipes come in!
The first Oktoberfest was held in 1810 to celebrate the marriage of Crown Prince Ludwig and Princess Therese. Since then, the Oktoberfest in Munich has grown, attracting some 6 million visitors every year, and now holds the title of the world’s largest fair. The tradition has spread throughout Germany, and into the US and other parts of the world.
Here’s a little about the Oktoberfest beer style. Contrary to what the name implies, Oktoberfest actually begins in September. Oktoberfest beer is technically a Märzen, an amber lager brewed in March to be stockpiled through the summer. At the Oktoberfest celebration, all remaining Märzen would be consumed prior to the beginning of the new brewing season. Today, only a handful of Munich breweries are allowed to serve beer at Oktoberfest and dub their brews “Oktoberfestbier”.
To brew an authentic Märzen or Oktoberfestbier, it should be lagered, or stored at colder temperatures to develop a smooth flavor. My very first home brew recipe kit was a German Oktoberfest beer recipe. Even though I wasn’t able to lager it, you can bet I drank every last drop. If you can’t lager your Oktoberfest, don’t worry – you can still make a delicious Oktoberfestbier!
The following two Oktoberfest beer recipes are suitable for any level of brewer:

Oktoberfest Beer Recipe (Extract)
Shop Steam Freak KitsInstructions: This simple extract recipe comes from our beer recipe database. Either steep the specialty grains at around 150°F as you heat the brewing water, or perform a partial-mash following these directions.
Batch Size: 5 Gallons
Recipe Type: Partial Mash
Approx. Original Gravity: 1.053
Total Boil Time: 35 min.
Est. IBU: 24-26
Fermentables:
6.6 lbs. Steam Freak Munich LME
Specialty Grains:
8 oz. Carapils® Malt
8 oz. Caramel (Crystal) Malt 40°L
Hops:
1.00 oz. Pelletized Mt. Hood Hops (35 min. Boil Time)
1.00 oz. Pelletized Hallertau Hops (15 min. Boil Time)
Yeast:
Lallemand’s Munich
Bottling:
5 oz. Priming Sugar (Corn Sugar)
52 Bottle Caps

Oktoberfest Beer Recipe (All-Grain)
Shop FerMonsterHere, I’ve adapted the beer recipe above for all-grain brewing. If you can’t lager your beer, do your best to keep fermentation temperatures low and under control.
Batch Size: 5 Gallons
Recipe Type: All Grain
Approx. Original Gravity: 1.053
Total Boil Time: 35 min.
Est. IBU: 24-26
Fermentables:
5 lbs. Briess Munich Malt
5 lbs. Briess Pilsen Malt
8 oz. Carapils® Malt
8 oz. Caramel (Crystal) Malt 40°L
Hops:
1.00 oz. Pelletized Mt. Hood Hops (35 min. Boil Time)
1.00 oz. Pelletized Hallertau Hops (15 min. Boil Time)
Yeast:
Lallemand’s Munich
Bottling:
5 oz. Priming Sugar (Corn Sugar)
52 Bottle Caps
Shop FermentersInstructions: Mash the grains at 154°F for 45 minutes. Raise to 170°F and sparge, drawing off 5.5 gallons of wort. Boil 60 minutes, adding hops at the times listed above. Remove from heat, cool, and pitch yeast. If possible, do a primary fermentation at 55-60°F for two weeks, then lager for one month or longer at 40°F.
Do you have a Oktoberfest beer recipe you’d like to share? It doesn’t matter the recipe can extract, partial mash or all grain. What’s your favorite commercially made Oktoberfest beer? Sam Adams? Do you have a clone Oktoberfest beer recipe for that? Share below!
—–
David Ackley is a beer writer, brewer, and self-described “craft beer crusader.” He holds a General Certificate in Brewing from the IBD and is founder of the Local Beer Blog.

Homebrew Experiment: Adding Gypsum To Beer To Affect Flavor?

Adding Gypsum To BeerI recently dove head on into the world of water treatments for homebrewing. I’ve always made changes to my brewing water to control mash pH, but I decided it was time to look at water from a historical/regional perspective to see exactly how does gypsum affect beer flavor. Gypsum, also known as calcium sulfate, is a major component in many of the brewing water profiles used around the world. But, does adding gypsum to beer really make a difference in flavor?
Let’s back up for a moment to review one of the ways water and its mineral content, or hardness, can impact your homebrew’s flavor. Different regions of the world have different mineral compositions in their brewing water supply. These differences can be significant. Just look at the levels (ppm) of these common minerals in Burton-on-Trent (UK) vs. Plzn:

Burton-on-Trent

Plzen

Calcium

294

7

Carbonate

200

15

Chloride

36

5

Magnesium

24

2

Sodium

24

2

Sulfate

800

5

*Source: Homebrewing for Dummies

In these two examples, it’s believed that the high sulfate water of Burton-on-Trent led to the development of bitters and pale ales, whereas the soft water of Plzen in Bohemia (now the Czech Republic) was suited to the creation of crisp, clean lagers. Homebrewers have the ability to mimic regional brewing water profiles by adding gypsum to beer along with others such as calcium carbonate.
Having just brewed and English Bitter, I was curious how a Burton brewing water profile might affect the flavors in the beer. After doing some research, I came across an experiment to help gauge the effects of a mineral salt on a beer. It goes like this:Shop Gypsum

  1. Prepare concentrated solutions using the mineral salt in question. For my test, I’m using gypsum. I started with filtered or distilled water and add measured amounts of the salt in one-gram increments into 500ml or 1L volumes of water.
  1. Measure out equal beer samples. Be sure to use a consistent volume and record it in your notes.
  1. Add 1 ml of each solution to the different samples. After doing the first round of taste tests, you might try adjusting the concentration of the solution.
  1. Take notes on how the flavor changes and find your ideal adjustment. Be sure to have some water and possibly some unsalted, relatively bland crackers or bread between each sample to cleanse your palate.
  1. Calculate how much salt would be needed for a full volume batch of beer.

So how did my experiment go? Did adding gypsum to beer affect its flavor?
Initially, the concentration of gypsum I was adding to the beer was too low to make any difference. I started with a 1 gram gypsum/500 mL water solution. Adding 1 mL of said solution to a 125 mL sample of beer only increased the effective concentration of by 1.6 ppm – an imperceptible change for my palate. As you can see, it would take a very concentrated amount of gypsum/water solution to simulate the Burton water profile. What I ended up doing was stirring about .5 gram of gypsum into a .5 L sample of beer to come close to the level of Burton water in the English bitter. Using this concentration of gypsum absolutely affected the beer’s flavor. The hops went from a background bitterness to a full floral sensation that covered the whole mouth. I will definitely use more gypsum in future pale ales.
Shop Digital pH MeterUsing the method above you can begin to get a stronger understanding of how to adjust your brewing water. Just remember different salts affect beers in different ways, and different styles may lend themselves to different mineral concentrations. Experiment, test, record your results!
While the above experiment does give us some ideas as to how adding gypsum to beer affects its flavor, it does leaves some questions. In particular, how does mashing and boiling the hard, gypsum-infused water throughout the brewing process affect the perception of different flavors?
What is your take on the subject? Share in the comments below!
—–
David Ackley is a beer writer, brewer, and self-described “craft beer crusader.” He holds a General Certificate in Brewing from the Institute of Brewing and Distilling and is founder of the Local Beer Blog.

Controlling Fermentation Temperature Of Your Homebrew

Controlling Fermentation Temperature Of HomebrewThere’s a tendency among homebrewers, myself included, to put an emphasis on recipe development. However, there are many factors beyond the beer recipe which affect the final beer. Just like with cooking, when the chef’s technique and process can have a profound effect on the food, a brewer’s skill and expertise can make or break what might start out as a good recipe.
One of the most important factors affecting a beer is fermentation temperature. There should be some attempt at controlling fermentation temperature. This is because allowing a beer to ferment outside of recommended temperatures can produce undesirable off-flavors, or worse, stop the fermentation, all together.
For example, the hefeweizen yeast strain of beer yeast is know for producing banana and clove flavors that, when in moderation, are desirable for the style. But when the same yeast strain ferments too hot, the banana flavors get produced in excess and result in a banana bomb! This is only one example of why controlling fermentation temperature is important. The same thing can happen with many other beer yeast strains. These flavor and aroma characteristics, called phenols, must be controlled so that they don’t overwhelm your beer.

So what’s the right temperature for fermentation?
Generally speaking, ales ferment at a warmer temperature than lagers. Most ale yeasts perform best between 60 and 70°F, while lager yeast tend to work well between about 40 and 50°F. Conditioning post fermentation temperatures may be even lower, in some cases approaching freezing.Shop Carboys

So my house is at 70°F – I should be fine to make ales right?
Not exactly. Yeast cells give off heat as they run around consuming all that sugar in your beer. This can raise the fermentation temperature 5-10 degrees above the ambient temperature in the room — and possibly push you out of the comfortable range for your yeast strain. So, controlling fermentation temperature isn’t necessarily about controlling your room thermostat.

How to go about controlling fermentation temperature
There are a few techniques for controlling fermentation temperature that are used by homebrewers:

  1. Cold room – Find a room, garage or shed that stays well within the recommended temperature range for the yeast strain you’re using. For this reason, many brewers wait until winter for making certain styles of beer.
  2. Bucket/ice/towelShop Temp ControllerBrewers on a budget can gain some level of temperature control by placing the fermenter in a large container of water and periodically adding ice or frozen water bottles to it. A wet towel or t-shirt can be wrapped around the fermenter to provide a wicking effect. Just like how sweating cools the body, the towel can cool the fermenter.
  3. Fermentation Chamber – This is far and away the best way to control fermentation temperature. You are essentially taking a chest freezer or refrigerator and attaching to it a power interrupt thermostat that can sustain higher temperatures evenly.

Additional Tips for Controlling Fermentation Temperature

  • Each beer yeast should be packaged with a recommended temperature range. Do your best to keep your temperature controlled to stay within that range.
  • This said, not everyone will have the ability to get their fermentation temperatures as low as they would like. Beginning Brewers often start with ales because it is easier to ferment ale at room temperature than it is to ferment beers at cooler lager temperatures.Shop Thermometers
  • Some beer yeast strains do better at warmer temperatures and benefit from a certain level of esters and phenolics. If you have trouble getting your fermentation temperatures low, you might want to stick with Belgian styles, as esters and phenolics are generally desirable. I’ve heard of Saison strains working well even into the high 90s.

What tips do you have for controlling fermentation temperature?
—–
David Ackley is a beer writer, brewer, and self-described “craft beer crusader.” He holds a General Certificate in Brewing from the Institute of Brewing and Distilling and is founder and editor of the Local Beer Blog.

Roasted Pumpkin Beer Recipe (All Grain & Partial Mash)


Made From Pumpkin Beer RecipePumpkin beer is a distinctly American creation. Rumor has it that even Thomas Jefferson even had a pumpkin beer recipe he brewed.
As we get into the final days of summer, these popular pumpkin beers start flying off the shelves. But you’re a homebrewer. Why buy someone else’s pumpkin beer when you can brew your own?
The pumpkin beer recipe below uses a number of fall spices and a hefty amount of pumpkin to produce a fairly high-gravity, creamy, sweet, and spicy brew. Just like pumpkin pie in a glass! This pumpkin beer recipe works best as an all-grain or partial mash. You’ll need a kettle as well as a separate mash tun for “stewing” the pumpkin and the grains.

Pick a Base Style
Balanced and malt forward beers work best. Porters, ambers, and brown ales make for good base styles. A lager, such as an Oktoberfest could also be interesting. Either pick a Steam Beer or use the pumpkin beer recipe below.
Roasted Pumpkin Ale Recipe:

OG: 1.070
FG: 1.015
ABV: 7.2%
IBUs: 28-32Shop Home Brew Starter Kit
8 lbs. Two-row malt
2 lbs. Munich malt
1 lb. Caramel 60°L
1/2 lb. Victory® malt
8 lbs. Pumpkin, peeled and roasted
1 oz. Northern Brewer hops @ :60
1 oz. Willamette hops @ :10
1 tsp. Irish moss @ :10
1/4 oz. fresh ginger, peeled and grated
1 stick cinnamon
1 tsp. allspice
1/4 tsp. ground cloves
1 tsp. nutmeg
English or American Ale yeast (Suggestions: Safale S-04, Safale S-05, Wyeast 1056, Wyeast 1099)
5 oz. corn sugar for priming
Shop Barley Grains
Preparing the Pumpkin
If you’re so inclined, you can use a whole pumpkin in this pumpkin beer recipe. Choose a variety that’s suitable for pumpkin pie, about 10 pounds in size. Clean out the pumpkin, setting aside all the pulp and seeds. Peel the rind from the pumpkin, reserving the meaty flesh. Bake the pumpkin at 350°F for 1 1/4 hours, then mash into a pulp.
If you’re short on time, canned pumpkin will work in a pumpkin beer recipe, too. Leave behind the preservatives and artificial coloring and go with 100% pumpkin.

Procedure – All Grain
Using 1 quart of water for every pound of pumpkin and grain, mash the pumpkin with the crushed grains for 60 minutes at 150°F. Sparge with water at 170°F, collecting 5.5 gallons of run-off. Bring to a boil, then add the bittering hops. At the 30 minute mark, add the spices. Add the flavoring and aroma hops according to your beer recipe. At the :10 minute mark, add the Irish moss. Whirlpool, cool, and transfer to a clean, sanitized fermenter. Pitch yeast when the wort reaches 70°F.
Primary fermentation for one week, secondary for two. Prime with corn sugar, then bottle.

Procedure – Partial MashShop Hops
Using 1 quart of water for every pound of pumpkin and grain in the pumpkin beer recipe. Mash the pumpkin with the specialty grains at 150°F for 30 minutes. Strain out the pumpkin and the grains, collecting the wort in the brew kettle. Add water (up to about 75% of your brew kettle capacity). Bring wort to a boil, then add the bittering hops. At the 30 minute mark, add spices. Add the flavoring and aroma hops according to your beer recipe. At the :10 minute mark, add the Irish moss. Whirlpool, cool, and transfer to a clean, sanitized fermenter. Pitch yeast when the wort reaches 70°F.
Primary fermentation for one week, secondary for two. Prime with corn sugar, then bottle.
Feeling extra adventurous? Serve the pumpkin beer with a scoop of vanilla ice cream to make a pumpkin beer float!

10 Home Brewing Tips For Beginners

Home Brewing Tips For Beginners Like Him!Are you getting ready to brew your first batch of beer? While the idea of home brewing may be intimidating, don’t let it keep you from making taking that first step. Here are 10 home brewing tips for beginners to help get you through that first brew:

  1. Relax, don’t worry have a homebrew – Charlie Papazian’s mantra is a good place to start. Always remember that you’re doing this for fun. Don’t let little mishaps get you down – they will happen – but it’s all part of the experience. Be prepared to laugh it off when things don’t go right and don’t let it throw you off your game.
  1. Focus on the cleanGood sanitation is critical to brewing good beer. If there’s anything you should put a little extra time and effort into, it’s making sure you have a clean, sanitary environment for your beer.
  1. Don’t cut corners – With the demands of modern life, sometimes it’s hard to find a block of time for home brewing. That said, don’t try to save a few minutes by cutting corners, especially on the cleaning and sanitation front. It’s worth repeating the importance of cleaning and sanitation – the last thing you want to do is dump a batch of infected beer. That will be a waste of time… and money!Buy Basic A
  1. Brew with a friend – Of all the home brewing tips for beginners I’ve seen, this one is my favorite. An extra pair of hands can make some tasks much easier, especially bottling. Plus it’s more fun! Crack open a beer with a friend or two and learn how to make beer together. That’s how the home brewing revolution began in the first place… one friend at a time.
  1. Avoid multitasking – Once you get a few brews under your belt, you might be able to handle multiple tasks at once. Of all the home brewing tips for beginners, this one is the most subtle, but focus on one task at a time. When you’re cleaning, just clean. This will help keep you from getting distracted and avoid potential mishaps like boil-overs.
  1. Begin with the basic styles – You’re welcome to brew whatever you want, but for your first batch, you might want to brew something straightforward. Unless you have a temperature controlled fermentation chamber, stick with ales. Stouts and porters make good starting points for a first homebrew.
  1. Shop Steam Freak KitsSave beer recipe formulation for later – While it’s tempting to build your own beer recipes early on, consider brewing a few established beer recipes first. There are plenty of homebrewing books out there with solid beer recipes. Once you get your process down, you can branch out and start to develop a sense of what different ingredients bring to different beer styles.
  1. Pay attention to fermentation temperature – Don’t stress out too much over fermentation temperature for your first batch, but do keep in mind that it can make a big difference in the flavor of your homebrew. Take a look at the recommended fermentation temperature for whatever yeast strain you’re using and aim for keeping your fermenter smack in the middle of the range for the duration of the fermentation process.
  1. Take good notes – In the long run this is probably the most valuable home brewing tip for a beginner. If you see yourself brewing long term, make a habit early on of taking good notes for each of your brews. This will make it much easier to remember good recipes and to identify possible problems that might occur in your process.
  1. Shop Home Brew Starter KitShare your beer with friends – One of the best ways to get feedback on your homebrew is to share it with friends, especially if they’re homebrewers or craft beer geeks. Take their advice with a grain of salt and don’t be offended if they don’t like what you brewed – everyone has different tastes!

There you have it, 10 home brewing tips for beginners. What other advice would you offer the first time homebrewer?
—–
David Ackley is a beer writer, brewer, and self-described “craft beer crusader.” He holds a General Certificate in Brewing from the Institute of Brewing and Distilling and is founder of the Local Beer Blog.

8 Reasons Your Homebrew Tastes Too Sweet!

Homebrew That Tastes Too SweetSugar is an essential component of beer. Without fermentable sugar in the wort, there would be no alcohol. Most of the sugar in a beer ferments out, with a little being left behind for body and flavor. But balance is critical, and there are several reasons that a beer might come across as being too sweet. If your homebrew tastes too sweet you may want to take a look at these tips so that you can avoid ending up with home brew beers that finishes too sweet.

  1. Use more hops. Hops provide bitterness, which helps balance out a beer’s sweetness. Maybe your homebrew recipe just needs a little more hops added early in the boil?
  1. Mash low. When brewing all-grain, starch conversion takes place between about 148° and 160° Fahrenheit. At the higher end of the scale, fewer fermentable sugars are produced than at the low end. If your homebrew tastes to sweet, try mashing in the 148-150˚F range to create a more fermentable wort and ultimately a drier beer.
  1. Use less crystal/caramel malt. Crystal and caramel malts contribute significant sweetness to your homebrew, including unfermentable dextrins that simply won’t convert into alcohol. A reduction in the percentage of crystal malts will help if your homebrew tastes too sweet.
  1. Shop Conical FermenterReplace pale malt with pilsner. Similar to crystal malts, pale malt has more sweetness than pilsner malt, so when selecting a base malt for all-grain brewing you may want to go with pilsner over pale. Certain styles of beer, such as dry lagers and Belgian ales, may benefit from using pilsner malt as the base malt.
  1. Use simple sugar. Adjunct sugars like corn sugar and cane sugar ferment out almost 100%. Though contrary to what your might expect, using sugar to reach your original gravity will increase the overall attenuation of your beer. If your homebrew tastes too sweet this will help. Exception: lactose sugar is unfermentable and will make your beer more sweet.
  1. Check your fermentation. Residual sweetness may be caused by an incomplete or stuck fermentation. Use your hydrometer to determine whether you have reached your target final gravity. If your gravity ends up too high, try using a yeast starter, yeast nutrient, or a different yeast strain.
  1. Check your yeast strain. Some strains of brewer’s yeast are more attenuative than others, meaning that they ferment a larger percentage of available sugars. If your homebrew tastes too sweet, maybe a different type of yeast is in order.Shop Barley Grains
  1. Reduce your boil time. An extended boil may result in reactions that increase sweetness in your brew. Similarly, an intense boil may cause caramelization or Maillard reactions. Take it down a notch to see if that reduces residual sweetness.

Have you ever made a home brew beer that finished too sweet? What did you do to correct the problem?
—–
David Ackley is a beer writer, brewer, and self-described “craft beer crusader.” He holds a General Certificate in Brewing from the Institute of Brewing and Distilling and is founder and editor of the Local Beer Blog.

How to Make Mead Like a Viking!

Viking Who's Learned How To Make MeadThough mead making has been covered on the E. C. Kraus Winemaking Blog, mead also falls into the homebrewing side of the equation. It is often judged in BJCP competitions and as it turns out, the mead making process is fairly simple and generally less time-consuming than making beer – at least on brew day itself.
I recently had the opportunity to attend a presentation called “How To Make Mead Like a Viking”, presented by Jereme Zimmerman. Keep reading to learn about what I gathered from the class about how to make mead from honey.
Mead is quite possibly the oldest alcoholic beverage known to man. It’s simply a fermented combination of honey and water. Though mead can be made using commercial wine or beer yeast, to make mead “like a Viking”, it should be spontaneously fermented… without yeast added. In other words, the yeast comes from the air or from fruits and/or spices.
The ancient Vikings would often use all parts of the bee hive in their mead, including the honeycomb, the raw honey, and even the bees. If you have access to raw honey or a honeycomb, by all means use them, but also feel free to just use plain honey. Jereme recommended sourwood honey, clover honey, and buckwheat honey.

Ingredients
The only ingredients you absolutely need starting out learning how to make mead is honey and water:

  • Shop FermentersDo your best to find raw unpasteurized honey for your mead recipe. Your local farmers market is a good place to look. Just try to avoid the store-bought stuff that’s made with corn syrup and artificial flavors. It will ferment, but the results will be less satisfying.
  • As for water, use distilled, spring, or purified water. If you must use tap water, either boil it or let it sit out overnight in order to evaporate any chlorine that may be in the water. Use about 1 gallon of water per quart of honey for a semi-sweet mead, less water if you like your mead sweeter, more water if you like it drier.

You may also wish to include flavoring ingredients, including fruit, herbs, spices, etc. Zimmerman recommends also throwing in 10 to 12 organic raisins, a bit of tree bark, such as oak, chestnut, or cherry, or black tea for flavor and nutrients for the yeast. Another optional ingredient when learning how to make mead is some sort of acid added to the mead recipe for flavor and mouthfeel.

Equipment
If you are a homebrewer or winemaker, you probably already have the basic idea of how to make mead. You probably already have everything you need equipment-wise, as well. This includes:

  • A ceramic, glass, or food-grade plastic fermenter
  • A stirring spoon – Vikings would use a totem, or “magic” stick. They didn’t understand the science of fermentation, however the yeast that would reside on their stirring stick would carry from batch to batch.
  • Cheesecloth or other cloth material to wrap around the mouth of the fermentation vessel, plus a string or rubber band to secure it in place.

How to Make Mead Like a VikingShop Beer Growlers
This is how to make mead using a spontaneous fermentation. Your mead brew day should take about an hour from start to finish.

  1. Clean and sanitize your equipment – Again if you’re a homebrewer or winemaker, you know how to do this.
  2. Mix the water and the honey – There’s no need to boil or even heat the mixture. However, you may wish to warm the honey just enough to make it easier to pour out of its bottle. Mix about 3/4 gallons of water per quart of honey.
  3. Add flavorings and yeast nutrient – Though flavorings aren’t required, they can add an interesting dimension to your mead. You might also consider adding yeast nutrient to support the fermentation (though that’s not how the Vikings did it!).
  4. Add yeast – Yeast naturally lives on many different fruits, so this may be just throwing in a few (10-12) organic raisins. Alternatively, add a commercial wine yeast such as Lalvin ICV D-47. Fix your cheesecloth over the top of the fermenter.
  5. Ferment – This is probably the most critical part of the mead making process. About an hour after pitching your yeast, give the mixture a vigorous stir to aerate. Repeat this a few times a day for the first three days or so. You’ll know when fermentation takes off by the froth that forms on the top of the mead. Once the froth settles down, get ready to rack.
  6. Rack to a secondary fermenter – Vikings typically drink their meads young, but modern tastes may appreciate some aging. Some of today’s meads are aged for a year or longer. Feel free to take a sample of the mead to see how it tastes. If you decide to age the mead go ahead and rack it into a carboy and seal with a bung and an airlock. Minimize headspace in the carboy by topping it off with enough water, fruit juice, or honey and water mixture to bring the level of the mead up to within an inch or so of the airlock’s bung.
  7. Shop Wine Bottle CorkersAge – Allow the mead to age for at least 3-4 months. It should continue to improve over the course of a year. This may be hard for someone just learning how to make mead, but it’s well worth the wait.
  8. Bottle – When the mead has completely finished fermenting and it tastes to your liking, bottle the mead. You can bottle with wine bottles and a corker or beer bottles and a capper. Either way is fine. Use a bit of honey or priming sugar if you want a carbonated mead, but only do this if putting in beer bottles. Wine bottles are not designed to hold any kind of pressure.
  9. Drink – You can continue to age your mead, or go ahead and drink it. Either way – skål!

And that’s how to make mead like a Viking. Now it’s your turn. Sounds easy enough, right? I’ll give the process a try and let you know how it goes!
—–
David Ackley is a beer writer, brewer, and self-described “craft beer crusader.” He holds a General Certificate in Brewing from the IBD and is founder of the Local Beer Blog.

How to Make a Full-Bodied Beer

Example Of How To Make A Full-Bodied BeerAnyone who’s had a Guinness knows the unique texture that beer provides – a creaminess that flows over your tongue thanks to the use of nitrogen and carbon dioxide. But how can you get a similar characteristic in your homebrew beer without going that extra gas-based step?
Here’s how to make a full-bodied beer. It’s easier than you think.
What making a full-bodied homebrew beer comes down to is mouthfeel. You can brew a stout black as midnight in the dead of winter, but sometimes it’s best to complement that with a little more heft in the body of the beer – and that doesn’t mean it has to be a high-ABV brew, either.
To achieve a full-bodied homebrew beer with a more substantial mouthfeel, all it takes is a little modification on brew day. Here’s how to make a full-bodied beer:

1. Use specialty malts
Once you dump your yeast into the cooled wort, they’ll start chewing up fermentable sugars that allows them to produce carbon dioxide and alcohol. But with unfermentable sugars in your wort, yeast will stay away from those and allow your beer to become thicker.
These unfermentable sugars are called dextrins and can be infused into your homebrew beer through the use of malt. “Cara” malts like Carapils are excellent for adding extra body with lots of unfermentable sugars during mashing. Dark and roasted malts like Crystal, Roasted Barley or Special B also offer high levels of unfermentable sugars. As a bonus, the use of specialty malts can also add color and flavor to your beer.Shop Barley Grains

2. Increase mash temperature  
While steeping malts like Carapils in an extract brew can help add some body, it’s more noticeable when doing a partial or all-grain mash. In this case, adjusting the temperature of your mash can greatly influence the body of your homebrew beer. By keeping your water temperature at a high level, say 158° to 165° degrees Fahrenheit, the reaction of malt with the water will produce more unfermentable sugars, giving your beer potential for lower ABV and a fuller body, thanks to sugars your yeast won’t eat up and convert to alcohol.

3. Add oats or wheat
One of the most popular ingredients used in stouts to add extra thickness are flaked oats. By using flaked oats as up to 10 percent of your malt bill, you can add greater viscosity.
Shop Steam Freak KitsFor ease of using oats, choose rolled or flaked oats. To convert starches from the oats into unfermentable sugars, you’ll need to mash the oats with barley malt, which allows for the chemical conversion necessary.
Usually a ratio of one pound oats to one pound barley will do the trick. All this makes the use of oats more ideal for partial or all-grain brewers, but not impossible for extract brewers who steep malt for their beer recipe. Extract brewers just may not get the same kind of body other brewers may find.

4. Use lactose sugar 
All is not lost for extract brewers, however. One easy way to add creaminess to mouthfeel and some extra body to a homebrew is with lactose sugar, which will also provide some sweetness to your beer. It’s a common ingredient in sweet stouts. Lactose isn’t fermentable and can be added during the boiling process – usually with 10 to 15 minutes to go.
Shop Home Brew Starter KitSome homebrewers also add it at bottling to increase its flavor. About a pound per five gallons will do just fine.

That’s the basics of how to make a full-bodied beer, but adding increased body to all your homebrews isn’t ideal – you wouldn’t want a thick, heavy Pilsner – but knowing how to make a full-bodied homebrew beer anytime you like is a great thing to have in your arsenal of homebrewing knowledge.
—–
Bryan Roth is a beer nerd and homebrewer living in Durham, North Carolina. You can read his thoughts on beer and the beer industry on his blog, This Is Why I’m Drunk, and send him suggestions on how to get his wife to drink craft beer via Twitter at @bryandroth.