5 Tips For Improving Your Home Brews

Homebrewer Sampling BeerAfter brewing a few batches of beer, you may be wondering what you can do to improve your home brews – to make them better. While there may be a lot of different things you can do, try just one at a time. If you’ve already brewed a few batches, you’ve probably got the bug. Don’t rush – there’s plenty of time to learn.
 

  1. Take notes – Due to the fact that it takes several weeks to make beer, it’s easy to forget what you may have done on brew day once your beer is ready to drink. If you notice a flaw – or maybe something you really like – in a brew, having detailed notes with all of your procedures and ingredients listed out will make it that much easier to replicate your successes and avoid repeating your mistakes.
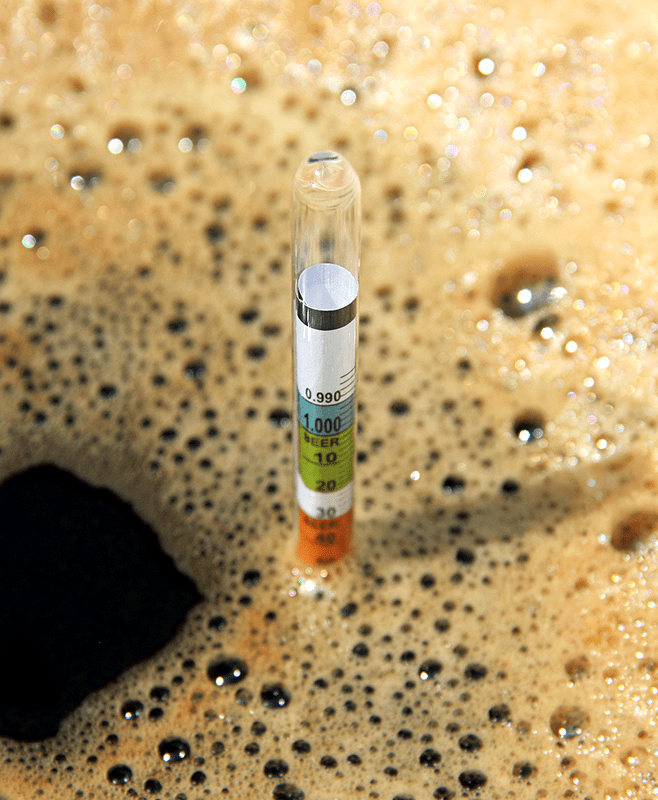
  1. Use filtered water – Though tap water is acceptable for your first batches of beer (and maybe beyond, depending on your water quality), using pure, filtered water is a simple way to improve your home brews. It gives you more of a blank canvas when it comes to reproducing certain beer styles. Some beers are heavy in mineral content; others are not. When you start with pure water you can customize your brewing water depending on what kind of beer you’re making.
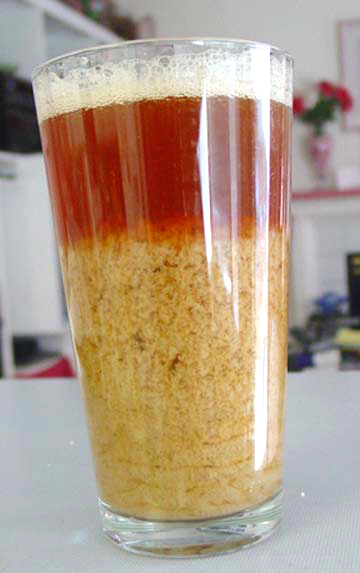
  1. Control fermentation temperature – Possibly one of the biggest improvements you can make to your home brewed beer is to control the fermentation temperature. Chances are, you started out just fermenting at room temperature – and that’s fine. But sometimes room temperature and optimal fermentation temperature don’t always line up. If you can dedicate a spare refrigerator to fermentation and rig up a temperature controller, you’ll open up the full range of styles and can begin to explore how even subtle changes in temperature can improve your home brews.Buy Temp Controller
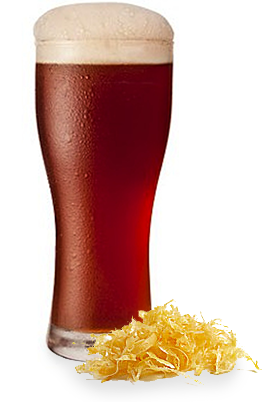
  1. Replace some extract with grains – I’m not necessarily suggesting you skip ahead to all-grain brewing right away. Depending on your skill level, this may mean just steeping some additional grains prior to mixing in the malt extract, or it may be doing a full-on partial mash, simply supplementing the mash with some extract. Over time, you can do bigger and bigger mashes. Either way you do it, making the move towards using malted grains will give you more options and may also improve the flavor of your home brews.
  1. Brew clone recipes – I’m a big advocate for brewing clone recipes. Clones are intended to be copies of commercial brews. It’s easy to find them in books and online. The big advantage with brewing clones is that you can compare them to the original, and then break down what you can do to make the clone more exact. It’s a great way to develop your palate and your skills as a brewer. Plus, by using beer recipes that have been tested before, there’s a higher likelihood that your beer will turn out good. Check out some of these clone recipe kits to get started!

 
Are you an experienced homebrewer? What upgrades helped you to improve your home brews?
—–
David Ackley is a writer, brewer, and craft beer marketing consultant. He holds a General Certificate in Brewing from the Institute of Brewing and Distilling and is founder and editor of the Local Beer Blog.

When To Pick Your Grapes: Taking Readings (Pt. 2)

Refractomer, pH Meter and Acid Titration KitThis is part 2 of a 4 part series on when to pick your grapes. Part 1 went over why timing is so important.
As the grapes start to become fully mature what you’ll want to do is take periodic readings. First with your refractometer, then with the pH meter and then finally with the titration kit. These three readings will be considered all together to determine when to pick your grapes.

Readings With Refractometers
Refractometers will give you a reading in a scale called Brix. This scale simply represents the amount of sugar in the grape juice as a percentage. For example, if your refractometer is reading 20 Brix, this means the grape juice is 20% sugar by weight.
As the grape matures the sugar percentage rises. This is important because during a fermentation the yeast turns about half of the sugar into alcohol. So the more sugar the grape juice has the more alcohol it can make. The other half of the sugar is turned into carbon dioxide gas (carbonation) and dissipates from the fermentation. In our example, this would mean that if you have a Brix of 20 when picking your wine grapes, you would have enough sugar to potentially make 10% alcohol.
Using refractometers to take Brix readings is very simple and instantaneous. All that is needed is a drop or two of the juice squeezed from the wine grape. Place the drops on the glass prism of the refractometer and then close the cover plate. Look into the lens while pointing it to a good light source, preferably the sun. You may have to adjust the lens to bring the Brix scale into focus. Wherever a brightness change occurs across the scale on the lens, that is the Brix of your wine.

Readings With pH Meters Shop Wine Hydrometers

Now it’s time to take a pH reading with your pH meter. What pH is telling you is the total strength of the acidity in the grape juice. As the grapes mature their acidic strength becomes weaker and weaker. If it becomes too weak then there is an increased potential for microbial action, spoilage. Having a low acidic strength can also weaken a wine’s color richness and lower its fruity impression.
The pH scale is a backwards scale. What this means is that the higher the number, the lower the acidity. So it’s important to understand that even though the acidic strength is weakening over time, you should be experiencing higher pH readings as time goes on. A typical pH reading might be 3.2.
To take a reading you will need to squeeze the juice from a hand-full of grapes into a cup or similar. The idea being, you need enough grape juice to completely submerge the entire probe end of the pH meter. Give it a few seconds, and you should get a reading on the display.

Readings With Titration Kits
A titration kit measures the total volume of acid in the wine regardless of its strength. It will give a reading as percentage of mass. While this reading does play a roll in the stability of the wine, it is more directly tied to the flavor of the wine. To much acid, the wine is too tart. Not enough acid, the wine if flat and lifeless. A typical reading might be .70%. This means the acid in the wine is 7 tenths of a percent by mass.
To take a reading with the titration kit you can use the same juice sample used to take the pH reading. Basically, what you’ll be doing is adding a solution to the wine until it changes color. By knowing how much solution it took to change the color of the wine sample, you can determine the wine’s total volume of acid. Shop Refractometers

Read More >>
Part I: The Importance Of Timing
Part II: Taking Reading
Part III: What Readings To Expect
Part IV: The Big Compromise
—–
Ed Kraus is a 3rd generation home brewer/winemaker and has been an owner of E. C. Kraus since 1999. He has been helping individuals make better wine and beer for over 25 years.

Tracking Your Homebrew Fermentation

Hydrometer In Homebrew FermentationDuring fermentation, yeast consumes sugar and turns it into alcohol and carbon dioxide. But yeast also produces a range of byproducts that have a huge effect on the flavor of beer. Doing some simple tracking of your homebrew fermentation is one thing you can do to analyze how the beer yeast is performing.

Why Track Your Homebrew Fermentation?
The more information you have, the easier it will be to address potential problems. The more you can learn about managing a fermentation, the better your beer will be!
Fermentation tracking helps you identify potential trouble areas. With just some basic notes on temperature and gravity, you can use this information to evaluate yeast performance. Maybe you’ll discover that fermentation temperature tends to peak on the second or third day. Now you can do something about it.
Towards the end of fermentation, it will be especially important to take gravity readings, as this is the best way to determine when fermentation is complete. Two to three days of consecutive readings indicate that fermentation is done. If you can more accurately predict when fermentation will complete, then you might be able to shave a few days off primary fermentation and have beer ready to drink that much sooner!
Tracking a homebrew fermentation becomes even more important if you are reusing yeast. You may find that when using a fresh yeast pitch, the fermentation goes relatively quickly. But with each successive reuse of yeast, the speed of fermentation may start to lag. When the fermentation deviates from the standard fermentation curve, it may be time for a fresh pitch.

Basic Note-Taking When Tracking a Homebrew Fermentation
To track your homebrew fermentation, take some readings at around the same time each day during fermentation:

  1. Make note of the fermentation temperature.
  2. Take a sanitary sample with a thief.
  3. Shop RefractometersTake a gravity reading with a hydrometer. You can also use a refractometer. It requires a smaller sample size, but values will need to be adjusted due to the presence of alcohol. There are various tools online that can be used to adjust the reading.
  4. Optional: take a pH reading (pH should drop during fermentation). You can use a digital pH meter or pH papers to do this.
  5. Plot the values onto a graph.
  6. Evaluate the curve.

Gravity values for a normal fermentation should resemble something of an S-curve – a slow decline to start with (day one, lag phase, while yeast are reproducing), followed by a sharper decline for the bulk of fermentation, followed by a slow down as most of the sugars are consumed and the yeast starts to settle out.
Though it’s not imperative that you track your homebrew fermentation, it can be a helpful tool when trying to optimize your procedures. And if you’re a big brewing geek like me, it’s just one more reason to distract yourself from whatever you’re supposed to be doing and do beer stuff instead!
—–
David Ackley is a writer, brewer, and craft beer marketing consultant. He holds a General Certificate in Brewing from the Institute of Brewing and Distilling and is founder of the Local Beer Blog.

When To Pick Your Grapes: The Importance Of Timing (Pt. 1)

Man Picking Grapes For WineKnowing the optimum time to pick your grapes for wine is a crucial skill that must be mastered before any vineyard can become successful, yet the “knowing when” seems to be the one thing that eludes many amateur vintners.
What’s At Stake
The timing of the harvest plays a serious roll in the resulting wine. Basic features such as flavor, acidity, body, color, as well as stability are all tied to this decision. One should think of the harvest timing as the first decision to be made in the wine making process.
The Goal
Grapes are no different than most fruits on the face of this earth. As they mature through the growing season, they go from small and tart to big and sweet. In general, we want the grapes to be as sweet as possible but without risking the loss of too much acidity or acidic strength.
The sugars are what the yeast ferment into alcohol. The more sugars there are in the grape juice the more alcohol you will have from the fermentation, so we always want more sugar. But we also don’t want the acidic concentration and strength to deplete too much. This will cause the wine to be less stable and less likely to be able to protect itself from flavor deterioration, loss of color intensity, and potentially spoilage. We also don’t want the wine to be too acidic. This will make the wine too tart or sharp in flavor.
The Tools
Shop RefractometersAs a vintner there are three key pieces of equipment that are necessary to determine the when to pick your grapes: a refractometer, an acid titration kit, and a pH meter. Refractometers measure the amount of sugar in the juice. An acid titration kit measures the amount of the acid in a juice. The pH meter measures the strength of the acid in the grape juice.
I would also strongly recommend getting a wine hydrometer for doing a final check of sugar levels before actually picking the grapes. The hydrometer actually floats in the juice to determine the Brix level. Having a wine hydrometer will also be handy later on when you’re actually making the wine.
Read More >>
Part I: The Importance Of Timing
Part II: Taking Reading
Part III: What Readings To Expect
Part IV: The Big Compromise
—–
Ed Kraus is a 3rd generation home brewer/winemaker and has been an owner of E. C. Kraus since 1999. He has been helping individuals make better wine and beer for over 25 years. #picking

Why Didn’t I Start Reusing Yeast a Long Time Ago?

Yeast From Primary FermenterOne thing that has constantly surprised me about homebrewing is that once you peel back the mystery on a particular method or aspect of brewing, pretty much everything turns out to be pretty easy. Which is part of the reason it’s such a rewarding hobby.
My latest discovery is reusing homebrew yeast. I’ve known since I started homebrewing that people would reuse and even “wash” yeast cake, but after reading about it and watching videos, it seemed like a process, which was difficult and was prone to introducing infection.
In addition, when you have racked your fermenter into a bottling bucket or keg, let’s face it, the stuff that’s left over is pretty nasty.
Well, a few weeks ago, I realized I had quite a few partial bags of hop pellets leftover from previous brews, so I decided to make a “kitchen-sink” beer to use up as much of those as I could. As chance would have it, the ideal day for brewing that was the day after I was going to be bottling a different batch of beer in which had used US-05 yeast. So, I decided that as long as I wasn’t going to spend money on hops and this was a largely experimental beer, I might as well try reusing the yeast from the primary fermenter.
I had read about an experiment where the brewer had used a pint or so of the yeast slurry at the bottom of a primary fermenter, along with new homebrew yeast which had been made into a starter. He brewed a batch, and split it into two fermenters, pitching the different yeasts. To make a long story short, there wasn’t much noticeable difference in the finished beers.
Well, that was enough for me, so in this latest batch, I just grabbed a little over a pint of the yeast cake from the primary fermenter. I put it in a mason jar in the fridge over night. The next day I took it out of the fridge in the morning, and when ready to pitch, I decanted off the liquid on top and pitched the sludge into my experimental beer.
Shop Liquid Beer YeastThe reused homebrew yeast took off pretty fast, and within four hours, it was bubbling away in the airlock. A little faster starting, but otherwise really nothing different than usual. I will say I noticed a larger krausen ring than I normally see. I cleared with gelatin, bottled, and waited.
I’ve been drinking this batch for about a week now. It’s not a heavy beer, but was meant to be a lighter beer. Not hoppy, but very well balanced. Very enjoyable, and in fact, as much as I hate to admit, it’s a little better than the previous batch which is a beer I’ve brewed quite a few times.
I am very happy with my decision to reuse the homebrew yeast cake from the primary fermenter, and I would encourage everyone to give it a try.

Do you ever reuse homebrew yeast? Why or why not?
—–
John Torrance is a database developer, gadget lover, and avid home brewer living in Lafayette, Colorado. When he’s not actively brewing, he’s generally daydreaming about what he’s going to brew for his next batch.

7 Tips For Using Your Acid Test Kit For Wine

Acid Test KitUsing a wine acid test kit is fairly straight forward. The instructions that come with the kit are easy to follow, and the process is somewhat simple. Where things can get confusing is learning how to interpret the readings. When using the acid test kit you are looking for a color change in the wine sample as you add solution to it. Determining when that color change occurs can take some practice.
With that in mind, here are 7 quick tips for using your acid test kit. These are tips on how to use an acid testing kit so that you can get the most accurate readings:

  1. Play Around With The Acid Test Kit Before You Actually Need It
    The acid test kit will provide you with about 50 tests, so you can afford to play around with it a bit and get use to how it works. If you don’t have a wine you want to test, you can test Welch’s concord grape juice. We already know from experience that you should be getting a reading of .67% with this juice.
  1. Use A White Background When Looking For A Color Change
    Look at the wine or wine sample with a white background behind it and in plenty of light. A sheet of paper or a white wall will work fine. Having a white background will help you to determine more clearly if the wine is experiencing a color change.
  1. Use A Second Sample As A Comparison
    Having a second test tube filled with the same wine sample will allow you to see more accurately if the wine is changing color or not by comparing the two. Only one test tube comes with the acid test kit, but we have additional glass test tubes you can order separately.
  1. Make Sure The Color Change Is Through The Entire Sample
    One common rooky-mistake when using the acid test kit is not waiting until the entire sample changes color. When you first add drops of the reagent you will get streaking. This is streaks of color changes that are noticeable in portions of the wine sample. This does not count as a color change. Agitate the sample until the streaking goes away. Then see if you can notice a color change in the entire wine sample.
  1. Heavily Colored Red Wines May Need To Be Diluted With Distilled Water
    Some wines are so darkly colored that you can’t tell if a color change has occurred or not when using the acid test kit. In these situations you will want to dilute the wine sample(s) with water. But not just any water. It needs to be distilled so that the alkalinity of the water does not affect your reading.
  1. Calculate The Acidity By The Amount Of Reagent Used, Not The Amount Left In The SyringeShop Refractometers
    This is a good one. Many times we have run across this error. The amount of acidity in the wine is calculated by how much reagent it took to change the wine’s color. This is measured by a graduated syringe. You slowly add regent to the wine sample until the color changes. Now you need to know how much reagent you used, but many first-timers will do their calculation based on the amount left in the syringe. Be sure you do your calculation based on the amount of reagent you used. Forget about what’s left in the syringe.
  1. Only Use The Acid Test Kit Either Before Fermentation Or Before Bottling
    This tip is pretty straight-forward. You do not want to test for acidity while there is CO2 from the fermentation still in the wine. Doing so will throw your reading off. The most convenient times for this is before the fermentation takes place, or before bottling the wine. It is important to de-gas the wine because some residual CO2 will stay saturated into the wine until it is persuaded to leave.

BONUS TIP!
Don’t Be Afraid To Test The Wine More Than Once

I have found that it is faster to do two tests than it is to do one. It can get pretty monotonous adding little drops of reagent to the wine and waiting for a color change. Yet, that’s what it takes to get an accurate acidity reading. It can take several minutes to get to the color change, and by then you might not even be paying that much attention.
So here’s what I do. I do a quick acid test, first. I put reagent in the sample fairly quickly and look for the color change. All I am trying to do with this first test is to find out ‘about‘ how much reagent it takes to get to the color change. Once I know the ‘about‘, I get a new wine sample and start all over again. I add reagent to just short of where I previously got my color change. Now I add a drop of reagent at a time, and wait for the color change.
There you have it: the 7+ tip on how to use an acid test kit for wine. They are basically some insight that I have learned the hard way of the years. Now you know them too!
—–
Ed Kraus is a 3rd generation home brewer/winemaker and has been an owner of E. C. Kraus since 1999. He has been helping individuals make better wine and beer for over 25 years.

Grapefruit IPA Recipe (Partial Mash)

Beer And Grapefruit ZestGrapefruit can be a divisive flavor – you either love it or you don’t. Some people – maybe you grew up eating grapefruit for breakfast – can’t get enough of its bitter, sour, pungent citrus flavor. In fact, some hops varieties are known for their grapefruit flavor.
California’s Ballast Point Brewing & Spirits capitalized on grapefruit’s affinity for pairing with hops with their Grapefruit Sculpin. It’s a spinoff on their highly-rated Sculpin IPA, using the grapefruit to enhance the citrus notes in the hops.

The recipe below, while not an exact clone of Grapefruit Sculpin, uses the same principle to craft a delightful summer IPA. It has a pale malt base enhanced with some caramel malt and rye malt for a little sweetness, some extra complexity, and mouthfeel. Amarillo hops throughout the second half of the boil provide a citrusy platform enhanced by grapefruit peel. And as a final touch, this brew is bottled with honey to provide just a little sweet note in the background.
Enjoy this one in the sun!
 
Grapefruit IPA Recipe (Partial Mash)

Specs 
OG: 1.061
FG: 1.015
ABV: 6%
IBUs: 49
SRM: 8-9

Ingredients 
5 lbs. light dry malt extract
1.5 lbs. Maris Otter malt
1 lb. Caramel 20L malt
0.5 lb. Victory malt
0.5 lb. rye malt
0.5 oz. Bravo hops at :60
1 oz. Amarillo hops at: 30
1 oz. Amarillo hops at :15
1 oz. Amarillo hops at :5
1 oz. grapefruit peel at :5
1 pack Wyeast 1056: American Ale yeast, pitched into a 2L starterShop Beer Flavorings
1 cup honey for bottling

Directions 
The day before brewing, prepare a 2L yeast starter. On brew day, take all of the malted grains and mash in 1.25 gallons water at 152˚F for 60 minutes. Strain wort into the brew kettle, sparge grains with about half a gallon of water at 170˚F, and add enough clean water to the kettle to make three gallons. Begin to heat the wort, mixing in the dry malt extract. Bring wort to a boil, then add Bravo hops. After thirty minutes, add one ounce of Amarillo hops. After 15 minutes, add one ounce Amarillo hops. After ten minutes, add the remaining Amarillo hops and the grapefruit zest. Boil for five minutes, then chill wort and strain into a clean, sanitized fermenting bucket. Top off with enough cool, chlorine-free water to make five gallons and mix well to aerate. When wort is about 70˚F, pitch yeast starter. Ferment at 68˚F until complete. On bottling day, use one cup of honey as the priming sugar. Bottle condition for 2-3 weeks and enjoy!
—–
David Ackley is a writer, brewer, and craft beer marketing consultant. He holds a General Certificate in Brewing from the Institute of Brewing and Distilling and is founder of the Local Beer Blog.

Corking Screw-Cap Wine Bottles

Screw Cap Wine BottleI am a winemaker and I use used wine bottles.  Used cork type wine bottles are becoming harder to find.  I was told by a winery around here that corking screw cap wine bottles is OK to use as they both have the same inside neck diameter.  I tried corking one filled water and it seemed to work fine. I would like to get your thoughts on this.
Thanks
William  P.
—–
Hello William,
As you have already discovered, it is very possible to put cork stoppers into screw-cap wine bottles. This works out great for someone in your position who is having trouble finding cork-finish wine bottles.
I have also seen many other home winemakers cork screw-cap wine bottles over the years with no issues, but I’ve also seen a few home winemakers run into problems, as well, so before you rush out and buy corks for your screw-cap bottles, there are a few things I would like to point out:

  • The first issue is with the bottle itself. Most screw-cap wine bottles are made of thinner glass, and are more fragile. The screw-cap bottles we carry are just as heavy as cork-finish bottles, but many are thin and tend to chip or crack more easily while being washed or sanitized.
  • Contrary to what your local winery states, the opening of these screw-cap wine bottles vary, and more often than not, they are a different size than a standard 3/4 of an inch opening of a cork-finish wine bottle.
  • Shop Wine Bottle CorkersWith cork-finish wine bottles the barrel of the neck is perfectly straight to accommodate the insertion and even sealing of the cork. With many screw-cap wine bottles the barrel of the neck is slightly bell-shaped. Or in other words, the shoulder of the bottle starts higher. This can cause a cork stopper to expand more at its bottom than at its top. Over time, this contortion can actually pull the cork stopper down the neck of the bottle into the wine itself.
  • And last, putting a cork stopper in a screw-cap bottling does not look all that great. If you plan on drinking all the wine yourself, this doesn’t matter, but if you plan on passing out some as personalized wine gifts or what have you, then you might want to take into consideration that corking a screw-cap wine bottle can look a bit tacky.

If all you can really find are screw-cap wine bottles, you may want to consider sealing them with actual screw-caps instead of corks. From an aesthetic point of view, it won’t look any worse than corking the screw-cap bottles, and there are some that say screw-caps actually keep and age some wines better than cork, but that’s another topic for another blog post.
Happy Wine Making,
Ed Kraus
—–
Ed Kraus is a 3rd generation home brewer/winemaker and has been an owner of E. C. Kraus since 1999. He has been helping individuals make better wine and beer for over 25 years.

10 Fun Facts About Beer and Homebrewing

Happy Beer DrinkersYou’ve already impressed your friends with your homebrew – now impress them with your knowledge about beer!
Warning: Any sharing of these random beer facts at non-beer related events may cause you to be labeled a “beer geek.” Read on with caution!

  1. Homebrewing was illegal from Prohibition until Feb. 1, 1979, when it was legalized under President Jimmy Carter. However, it remained illegal in many states until 2013, when Mississippi and Alabama became the last states to officially legalize homebrewing.
  1. Many of the Founding Fathers were homebrewers. George Washington, Thomas Jefferson, and Ben Franklin all dabbled in brewing. You can sample renditions of these brews from breweries like Yards and Starr Hill.
  1. There are 1.2 million homebrewers in the United States.[1] And these homebrewers collectively brew some 62 million gallons of beer a year! That’s almost half a billion pints!
  1. Beer is made with fungus! Yeast is added to sweet wort to start the fermentation process. Billions of yeast cells absorb sugar molecules and convert them into CO2 and alcohol. Yeast also produces a variety of flavor compounds, which have a significant impact on the flavor profile of a beer.
  1. Beer is made with flowers! Hops, the chief ingredient that makes beer bitter, is in fact the female flower of the humulus lupulus plant. (Making Flower Power a great name for an IPA!)
  1. Hops are closely related to marijuana. Both plants a members of the Cannabaceae
  1. Beer can be made with seaweed, fish, and just about anything else you can think of. Irish moss, a seaweed, and isinglass, made from fish swim bladders, are two common fining agents. In other words, they help clear your beer. Not to worry – both settle out before making it into your beer glass. Beyond that, just about everything else under the sun has been used to make beer at one time or another, from bull testicles to Count Chocula cereal.shop_home_brew_starter_kit
  1. The beer can was invented in 1935.[2] The iconic vessel that many of us consider to be a staple of the beer industry isn’t even 100 years old yet. The first versions of the beer can required a church key to puncture a whole into the “flat top” beer can.
  1. Nearly all of your favorite craft brewers got started with homebrewing. Ken Grossman of Sierra Nevada, Jim Koch of Sam Adams, Sam Calagione of Dogfish Head – each of these craft brewing pioneers got started with humble roots.
  1. Beer likely inspired civilization – and the pyramids.[3] I don’t know about you, but I find the promise of a cold pint at the end of the workday extremely motivating. Apparently, so did the thousands of workers who built the pyramids of Egypt. According to ancient fermented beverage expert Patrick McGovern, “The pyramids might not have been built if there hadn’t been enough beer.” Beer has also been presented as a key reason behind ancient cultures settling down and transitioning from a nomadic lifestyle to one based on agriculture.

What other random beer facts would you add to the list?
—–
David Ackley is a writer, brewer, and craft beer marketing consultant. He holds a General Certificate in Brewing from the Institute of Brewing and Distilling and is founder of the Local Beer Blog.

Don't Waste The Wine!

Spilled Glass Of WineI bought two wine making kits from you that makes 6 gallons (30 bottles). Last night we bottled the first wine and got 25 bottles. Is this about right considering you do lose some during racking? Approximately how much waste do you normally have due to sediments in the bottom?
Mary M
—–
Hello Mary,
While there will be some waste, there should be nothing close to the five bottles you lost on your first batch. You should be losing no more than one bottle when making wine from with a wine ingredient kit. This is a common issue among beginning winemakers who are just learning how to make your own wine. It’s also an issue that brings up a great wine making tip.
Most of the wine that is being lost, is being lost unnecessarily during the racking process. Racking means to transferring the wine off the sediment into a clean fermentation vessel. This is a process that is normally done three times if you are following the directions that typically come with a wine ingredient kit.
It’s only natural for the first-time winemaker to want to leave as much sediment behind as possible with each racking. The intentions are good, but the result is an excessive loss of wine, such as what you have experienced.
Shop Conical FermenterTo get the most wine out of every batch, you want to get as much of the wine as possible during the first two rackings, even if it means some sediment is coming along with it. You will still be leaving 95% of the sediment behind. It is only when you get down to the all-important, last racking that you will want to lose some of the wine because of sediment.
What you will find is by the time you get to the last racking there will be so little sediment in the fermenter that there will be very little loss by leaving it all behind.
If you stick to this method of racking your wine you will be pleasantly surprised by the results. It’s more wine, and it’s less hassle.
Happy Wine Making,
Ed Kraus
—–
Ed Kraus is a 3rd generation home brewer/winemaker and has been an owner of E. C. Kraus since 1999. He has been helping individuals make better wine and beer for over 25 years.