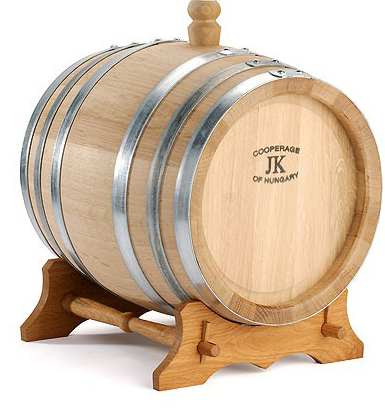
 My son gave me a 5 gallon oak wine barrel as a gift. I have a batch of red wine that I would like to put in the oak barrel and let it age a bit. When do I put the wine in the barrel? Do I let the wine finish up and clear with bentonite first and then put it in the barrel or should it go into the barrel now, let it age for a period of time then finish and bottle it?
Thanks,
David
—–
Dear David,
Thanks for the great question, and way to go son! An oak wine barrel is really one of the better wine making gifts you can receive as a home wine maker. A lot of people underestimate how valuable the effects of oak aging can be to a wine.
The most common time for a wine to be in barrels is after the fermentation has completed, and the yeast has had time to settle out. That is also when I would recommend you put your wine in the barrel. That being said, the direct answer to your question is: add the bentonite first; let the wine clear; then go to the oak wine barrel.
One thing you have do have to be concerned when aging a wine in a barrel is how long to keep the wine in the barrel. A vast majority of the wineries will barrel-age anywhere from 18 to 30 months. This is perfectly reasonable if using 50 gallons oak barrels, but when using smaller oak barrels, the length of time needs to be much less.
A 5 gallon wine barrel holds only 10% of what a 50 gallon wine barrel can hold, yet the surface contact between the wood and the wine is still about half that of a 50 gallon barrel. What this translates into is: smaller wine barrels will affect the wine much more quickly than larger wine barrels. In the case of 5 gallons versus 50, about 5 times faster.
Because of this, it is easy to over oak the wine when aging in small barrels, especially if you are used to aging in glass jugs. With glass jugs aging too long is hard to do, more forgiving, but with small barrels you can potentially ruin the wine with too much wood.
This is why I always urge anyone aging in smaller barrels to monitor their wine’s flavor progression closely. At least once a month, taste a sample so that the barrel aging effects does not become too much. This can be easily done with a wine thief.
In summary, after you have cleared out the wine yeast is when to put your wine in the barrel, and monitor your wine’s flavor closely, at least monthly. Make sure that the wine does not become to woody or overcome by the effects of the barrel.
Happy Wine Making,
Ed Kraus
—–
Ed Kraus is a 3rd generation home brewer/winemaker and has been an owner of E. C. Kraus since 1999. He has been helping individuals make better wine and beer for over 25 years.
An Introduction To Partial Mash Brewing
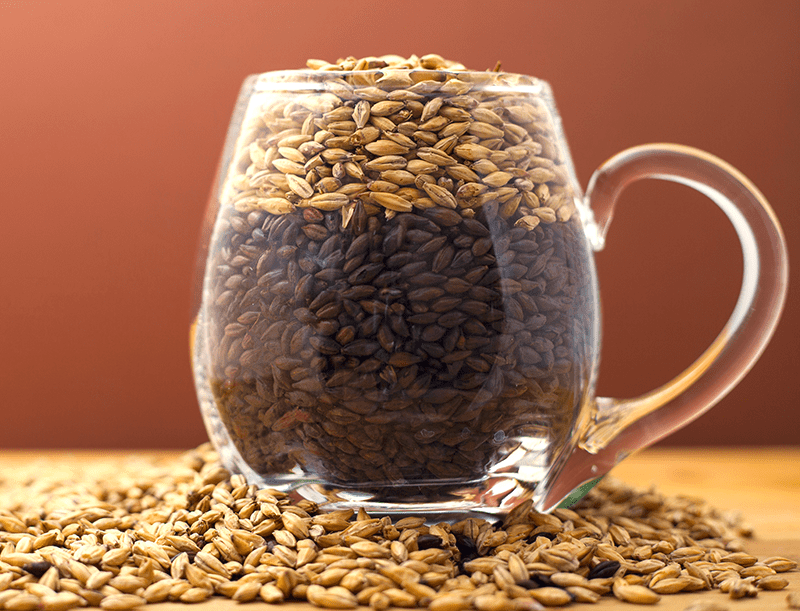 So, you’ve been brewing with malt extract and you’ve got your routine all figured out. The beer’s coming out pretty good, but you’re ready to take it to the next level. Enter: partial mash brewing. Partial mash brewing combines the simplicity of extract brewing with the slightly more advanced part of all-grain brewing called mashing.
The big advantage of partial mash brewing is that you get to learn how to mash without having to buy a lot of extra equipment. If you’re already brewing with malt extract, this is the only additional equipment you need to make the move to partial mash brewing:
- Malted grains – Use with a pound or so of base malt or another lightly kilned malt, like Vienna or 2-Row. Depending on your beer recipe, include a few ounces of specialty grains if you’d like.
- A colander or mesh strainer
- A thermometer.
- pH test papers (though if you have the funds, you should really go for a digital pH meter)
- A stock pot for mashing (a standard kitchen stock pot should be fine)
- Calcium carbonate and gypsum
 Unlike steeping grains, as we sometimes do with extract brewing, what we’re going to do here is convert the starches in the grain into fermentable sugars. To do this, we’ll soak the grains in warm water for 30-60 minutes. Here’s the trick: for the naturally-occurring enzymes in the grain to break down the starches, we need to control two important factors: temperature and pH. To properly break down the starches, we want to hold the mash water at a temperature between 150-158F and a pH level between 5.0 and 5.5. That’s it!
Here’s are the basic partial mash brewing instructions. See how it compares with what you’re already doing:
- Clean and sanitize as you would normally. This something that should be followed, regardless of your brewing method.
- Add 1-1.5 quarts of water per pound of grain to your stock pot.
- Heat the water to about 170°F. Since the grain is at room temperature, we heat the water a little above the ideal mash temperature. When we add the grains, we should be right in range.
- Add the crushed grain to the stock pot. Stir well to avoid clumping.
- Check the pH of your mash. If it’s above 5.5, add 1/4 tsp. of gypsum and stir. If it’s below 5.0, add 1/4 tsp. calcium carbonate and stir. Adjust until you’re in the proper range.
- Check the temperature of your mash. Hold the temperature as close to 154°F as possible. If below 150°F, add heat and stir. If above 158°F, add a little cold water and stir.

- Mash for about 60 minutes, adjusting temperature as needed.
- At the end of your mash, pour the mash through a strainer into your brew kettle. Recirculate the wort through your grains as needed to clarify.
- Add water to reach your desired boil volume and proceed as if you were brewing with extract.
There you have it: basic partial mash brewing instructions. That’s not too hard, is it?
Partial mash brewing is an easy way for homebrewers to transition from extract brewing to all-grain. Once you master the mash technique, you’re ready to brew all-grain!
Questions? Feel free to ask in the comments section!
Til next time…Cheers!
—–
David Ackley is a beer writer, brewer, and self-described “craft beer crusader.” He holds a General Certificate in Brewing from the Institute of Brewing and Distilling and is founder of the Local Beer Blog.
Do Wine Kits Need More Ingredients?
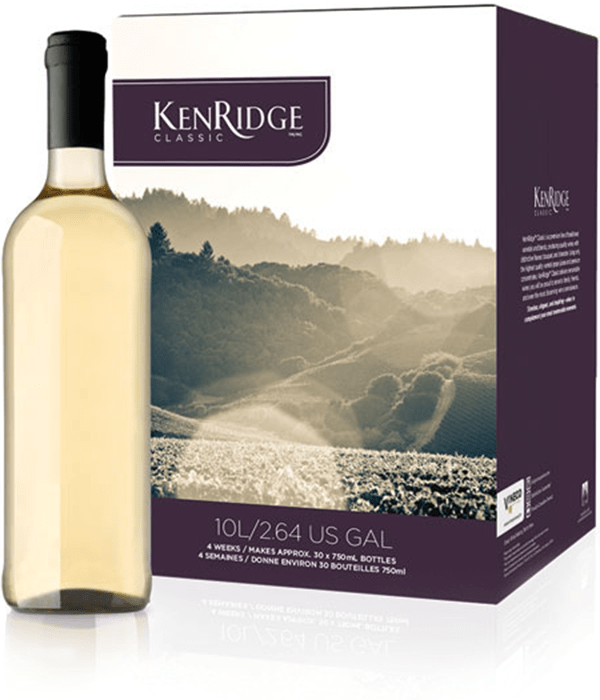 I’ve been making wine using wine kits such as KenRidge for several years. These kits seem quite complete with all the ingredients needed – but reading many of the posts on your site causes me to wonder. Should I, could I, must I supplement the ingredients provided in these wine kits with other ingredient such as Yeast Nutrients, Acids, Tannins, Potassium Sorbate, Wine Conditioner? Should I add Campden tablets between bottling?
Name: Paul
State: New Jersey
—–
Hello Paul,
One of the great things about using one of these wine kits is that the all of these wine making ingredients have already been taken care of for you. This has either been done directly by including the ingredient in the grape juice, or indirectly by eliminating the need for the ingredient, all together.
As an example, you mentioned acid blend. This is typically included in a wine recipe to bring the wine’s acid up to the proper level. If a wine’s acid level is too low, it will taste flat and flabby. With one of these wine kits, however, the grape juice has already been adjusted to the correct acidity level.
Not only is it been adjusted to a proper range for wine, it is adjusted to the optimum level for each specific type of wine. This is done by bench-testing a batch-sample of the juice with an actual fermentation beforehand, then test-tasting the resulting wine for balance and overall character. The optimal amount of acid is determined, then applied to the all of the grape juice. And, all of this is done before the grape juice goes through any packaging into one of the wine kits.
The same can be said about the yeast nutrient and the wine tannin. Each are already in the grape juice at a level that will result in the best possible wine for that wine kit.
Another aspect to this is the speed at which the wine progresses through the fermentation, then the clearing, and then the bottling. The wine kits on the market today are set up to get in the wine bottle so quickly, that they do not have a need for sulfites such as Campden tablets to be added along the way. It should be pointed out that most wine kits do include a packet of potassium metabisulfite. This is the same thing as Campden tablets, but they only recommend adding it if you plan on storing your wine for longer than 6 months in the bottle.
The last item I will mention is the Wine Conditioner. This is essentially a sweetener designed specifically for wine. It is something that can be added to taste before bottling, but only if you desire to change the wine kit manufacturer’s intended favor. If you decide to do so, proceed cautiously. You can always add more, but you can’t take it out.
If you would like to read more whether or not your wine kits need more ingredients, here is another blog post that continues on with this subject, Do Your Wine Juice Kits Need Adjusting? It has some additional info on this.
With that being said, don’t’ feel left out because you are not concerning yourself with all these wine making ingredients. Feel fortunate. Wine kits have come a long way toward making the process simple, and the results outstanding.
Happy Winemaking,
Ed Kraus
—–
Ed Kraus is a 3rd generation home brewer/winemaker and has been an owner of E. C. Kraus since 1999. He has been helping individuals make better wine and beer for over 25 years.
German Altbier Beer Recipe (Partial Mash)
 Similar to Kölsch or steam beer, German altbier is something of a hybrid beer style. Though it’s generally considered to be an ale, it’s fermented on the cooler end of the temperature range and goes through a cold conditioning period, resulting in a smooth, clean brew with lager-like characteristics. If you’re looking for an easy-drinking, yet flavorful beer to add to your homebrew lineup, brewing a German altbier beer recipe is a great option!
History of the Style
In German, “alt” means old, referring to the habit of brewing with top-fermenting ale yeasts before bottom-fermenting lager yeasts came into practice. Most of the remaining authentic versions of altbier come from the German city of Düsseldorf.
Style Guidelines
- Aroma – Clean with rich, bready malt character and spicy, German hop notes. Hop aromas range from low to moderate. Saaz hops are frequently encountered. Some mild esters may be present.
- Appearance – A good German altbier beer recipe should produce a beer light amber to copper in color. Clear with a billowy, creamy, off-white head.
- Flavor – Malt-forward with an assertive hop bitterness. Beer is relatively dry, but balanced by rich caramel malt flavors. Often has a complex, nutty finish with both hop bitterness and moderate noble hop flavor.
- Mouthfeel – Smooth, medium-bodied, with moderate to moderate-high carbonation. Full of flavor yet easy drinking.
Due to the need for temperature-controlled fermentation, altbier can be a difficult style to brew. But it’s well worth the challenge and can be a delicious go-to option for your home brewery!
German Altbier Beer Recipe
(five-gallon batch, extract with grains)
Specs
OG: 1.051
FG: 1.013
ABV: 5%
IBU: 38
SRM: 15
Ingredients
 6.6 lbs. Munich LME
1 lb. Munich 20L malt
12 oz. Caramel 60° malt
2 oz. Chocolate malt
1.5 oz. Perle hops at :60
1 oz. Saaz hops at :15
1 tsp. Irish moss at :15
1 oz. Saaz hops at :5
2 packs Wyeast 1007: German Ale Yeast
Directions
Place crushed grains in a grain bag and steep in 3 gallons of water at 154˚F for 30 minutes. Remove grain bag and discard. Add liquid malt extract to brewing liquor and mix in thoroughly. Bring wort to a boil and add hops and Irish moss according to schedule above. At the end of the boil, chill wort and transfer to a clean, sanitized fermenter. Pitch yeast and ferment at 58-60˚F for about two weeks. Optionally, transfer to a secondary fermenter. Cold condition at 32-40˚F for about 1 month, then bottle or keg for about 2.5-2.8 vols CO2. Cheers!
Sound tasty? Also consider brewing the German Altbier beer recipe kit from Brewer’s Best!
—–
David Ackley is a writer, brewer, and craft beer marketing consultant. He holds a General Certificate in Brewing from the Institute of Brewing and Distilling and is founder of the Local Beer Blog.
What You Should Know About Sweetening A Wine
 I have a batch of peach wine and a batch of pear wine in 5 gallon glass jugs ready to bottle. Both need to be sweetened at bottling time to bring out more of the fruit flavor. Please explain to this rookie exactly how you back sweeten a homemade wine as you bottle it. Do you add the sugar/water solutions to each bottle or do you add to the 5 gallon glass jugs, stir, and then bottle?? And, is plain sugar OK to sweeten with?
Thanks, ready to bottle in Missouri…
—–
Hello Missouri,
The first thing that needs to happen before sweetening your homemade wine is to make sure that it has completed its fermentation. This takes more than just a visual inspections. This needs to be verified with a wine hydrometer. The specific gravity reading on the hydrometer should read .998 or less. If it is not, then your wine is not yet ready to be back sweetened.
Essentially, the sugar needs to be added to your wine while it is still in bulk. Adding the sugar per wine bottle is not practical nor is it necessary. It is also important to note that you will also want to have the wine siphoned out of the fermenter and off the sediment before adding the sugar – a process called racking – otherwise unwanted sediment could be stirred up into your homemade wine.
Almost everyone uses plain-ole cane sugar when back sweetening their homemade wine, but what you choose to use is open for experimentation: honey, grape concentrate, corn sugar can all be experimented with to add different subtle flavors to their fruit wines. Just remember that once the sugar is in the wine it won’t be coming back out. The sweetening process is not very forgiving in this respect. For this reason you may want to do a test batch before adding the sweetener to the rest of the wine. Maybe take a gallon of the wine off and back sweeten that first.
 Anytime you add a sugar to sweeten a homemade wine you will also want to add potassium sorbate to help eliminate the chance of the wine brewing again. And, anytime you bottle a wine you will want to add sodium metabisulfite to help keep the wine from turning color and/or spoiling.
When adding sugar to a homemade wine you will want to pre-dissolve the sugar first. This can easily be done by mixing half and half with water and heat it on the stove until it becomes completely clear. Be sure to stir continuously when heating so that the sugar does not burn on the bottom of the pan. Allow the sugar mixture to cool before adding to the wine.
The article, Making Sweet Wines, may be of some interest to you. It goes through all of in’s and out’s of sweetening homemade wine in more detail, so you might be worth taking a look.
Happy Wine Making,
Ed Kraus
—–
Ed Kraus is a 3rd generation home brewer/winemaker and has been an owner of E. C. Kraus since 1999. He has been helping individuals make better wine and beer for over 25 years.
Recipe Formulation: Brewing Dark Beers
 One of the biggest challenges of homebrewing is recipe formulation. There are so many different ingredients available to the homebrewer, that it takes a lifetime of brewing to develop a solid understanding of how each one impacts beer flavor, aroma, color, and mouthfeel. That’s why I often recommend that new brewers try clone recipes. You have a good idea of how your homebrew is going to turn out, and you get learn about different brewing ingredients along the way.
But sure enough, coming up with your own beer recipes is one of the reasons people enjoy homebrewing. It’s a sudsy expression of creativity – that just happens to get you buzzed!
One of the more challenging aspects of beer recipe formulation is figuring out how different malts affect a beer. This post will cover some tips and tricks for developing dark beer recipes.
Tips for Brewing Dark Beers
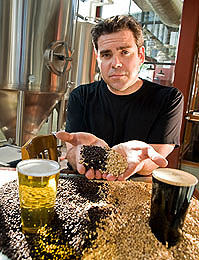
What makes a beer dark? Malt! In the third step of the malting process, a maltster heats the sprouted grain to dry it out and develop some flavor and color. This step is called kilning. Basically, the higher the heat and the longer the kiln, the darker color of the grain. Maltsters can used these variables to make malts that range from pale yellow in color to red, brown, or even black.
One thing to be aware of when brewing dark beer is, in general, it only takes a small amount of dark malt to affect beer color. But it’s not just about color – flavor is important too. It’s a balancing act between getting the flavor profile you want as well as the color.
When building a dark beer recipe, start by thinking about flavor. This clearly depends on the beer style, but also on your personal preference. Do you want a bready, almost chewy, sweet malt flavor? In this case the beer recipe might include decent amounts of lightly roasted Munich malts with just a touch of chocolate or Carafa to get the rest of the color. Or would you prefer a dry, bitter, roasty beer? In this case the beer recipe may include mostly regular pale malt with larger amounts of chocolate malt and roasted barley. Caramel malts can contribute complexity to beers, offering flavors of caramel, raisins, nuts, or dates. Think about the balance you want to achieve for your dark beer, then select the malts accordingly. Finally, small adjustments can be made to get the color where you want it.
What about using extract when brewing dark beers?
Dark malt extract works great for beginning homebrewers. It’s an easy way to brew a dark beer without having to figure out the right combination of malts to get the color you want. But a lot of homebrewers will agree that dark malt extract doesn’t give you a lot of flexibility when brewing dark beers. The dark malt extract was made with a specific blend of grains. You’re kind of stuck with the flavor profile you get.
An alternative way to do it is to use light malt extract and then use the darker specialty grains to get the color and flavor just the way you like it. You can certainly brew a stout using light malt extract! Just use 5-15% of the darker specialty grains to get the color and flavor you want. Explore some tried and true beer recipes to get a sense of what malts work well together and in what amounts.
With a little practice, you’ll soon get a feel for different specialty grains and how to go about brewing a delicious dark beer.
What’s your favorite dark beer style?
—–
David Ackley is a writer, brewer, and craft beer marketing consultant. He holds a General Certificate in Brewing from the Institute of Brewing and Distilling and is founder of the Local Beer Blog.
When Do I Add Campden Tablets To My Homemade Wine?
Help!
I was wondering if you can straighten me out on something. I have heard that you should add campden tablets before you add the wine yeast. I should also add campden tablets after every time I rack the wine. Then add them before I bottle the wine. That seems like a lot to me.
Thanks,
Gary
—–
Hi Gary,
Thanks for such an interesting question.
You do need to use Campden tablets or some other form of sulfite such as sodium metabisulfite, or the wine could eventually spoil or turn to vinegar. But how much you should add is another issue all together.
If you’re making wine from fresh fruit, we recommend that you add one Campden tablet per gallon before the fermentation. This is the standard dose. If you are making wine from a packaged juice, this step is not necessary.
Be sure that you wait 24 hours before adding the wine yeast, or the Campden tablets may kill the wine yeast. Also during this 24 hour waiting period, be sure the fermenter is not sealed. Leave the fermenter open to the air. If you like, you can cover it with a very thin towel or netting to keep bugs and fallout from getting to it. The sulfur dioxide from the Campden tablets need the opportunity to dissipate into the air during this time.
 We also recommend that you add another dose of Campden tablets as soon as the fermentation has completed. You should confirm with a wine hydrometer that the fermentation has actually completed before adding them.
The only other dose of Campden tablets we recommend is right before bottling. This last dose is what will keep the wine from spoiling or turning to vinegar.
The reason we recommend only adding Campden tablets at these three times is because it is possible to add too much. By sticking with these three times “too much” is not possible. These three times assumes that you will keep the fermenter topped-up and that long-term bulk aging is not in the plans — 1 months or more.
This reason for this is that while sulfites from these Campden tablets do dissipate into the air during rackings, a large percentage of the sulfites bond to the wine. As you add more doses, the bonded sulfites build up in the wine. This build up of bound sulfite does nothing to protect the wine, but if built into a high enough concentration, it can eventually affect the wine’s flavor.
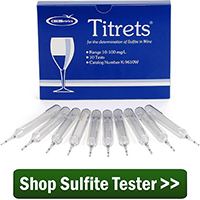 Having said all this, it is possible to add more Campden tablets after rackings, but you shouldn’t do this blindly. You need to test the sulfites that are currently in the wine before adding more. This can be done with Titrets Test Vials and the Titrettor Hand Tool. Shoot for a range of 25 PPM (Parts Per Million) for red wines to 35 PPM for whites. If you do not want to go through the testing, don’t add more than what’s recommended above.
I hope this answers your question and concerns about the use of Campden tablets in your homemade wine. I wanted to point out that this recommendation applies regardless of what form of sulfite you are adding, the three main ones being: Campden tablets, sodium metabisulfite and potassium metabisulfite. If you follow each one’s directions for the dosage you will be adding the same amount of sulfites in each case.
Happy Wine Making,
Ed Kraus
—–
Ed Kraus is a 3rd generation home brewer/winemaker and has been an owner of E. C. Kraus since 1999. He has been helping individuals make better wine and beer for over 25 years.
The Allure of All-Grain Brewing
 Most beginning home brewers start out brewing with malt extract kits. This is simple, not very time consuming, and the results are fairly predictable.
As a home brewer progresses and becomes more accomplished, they then learn how to add some grains to their brewing process in a concoction know as a partial-mash. There are partial-mash ingredient kits for them to choose from as well. This is a little more involved but opens the homebrewer to a larger world of beer styles.
Then comes the ultimate level of homebrewing: ‘all-grain brewing‘. As the name sounds, it is brewing beer with the use of no malt extracts whatsoever. All the sugars for fermentation come from malted barley grains themselves.
The popularity of all-grain brewing has increased by leaps and bounds in the recent past. There are many reasons why this could be for any one individual, but it is my personal belief that it usually has something to do with: accomplishment or learning something; having better control over flavor; or just having the ability to be more creative and adventuresome.
- Experience: The all-grain brewer gets to experience a brewing process that is much more closely related to the process commercial brewers use. We here at E. C. Kraus know of several home brewers that have gone on to work for commercial breweries.
- Ultimate control: You may use any malted grain of your choice as this method gives you complete freedom. It lets you have full control over the brewing process, and this is one of the main reasons why this method is gradually becoming the leading choice of people worldwide.
 Increased creativity: For people who love to experiment, all-grain brewing becomes a great experience. Most of us want to create our own homebrew recipes. There are virtually endless combinations of malts and you can try the various combinations with different beer yeast types, temperature, hops etc. to make your own brewing recipe masterpiece. This method will give wings to your imagination and boost your creativity.
- Fun and adventure: If you want to learn the secrets of brewing, this method gives you a nice opportunity to do so. You get to learn many things from experience. Many individuals brew all-grain to hone their brewing skills. At the same time, it is a fun-filled way that helps you in making good quality beer.
Beyond all these points, the process in itself is quite relaxing and it is an awesome experience to brew all grain. Being able to share a brew with friends, family and neighbors that you can say you made completely from scratch is a great feeling. To get more details on the all-grain brewing process, see “The Basics Of All-Grain Brewing“. It spells out the process a little more clearly.
Happy Brewing,
Ed Kraus
—–
Ed Kraus is a 3rd generation home brewer/winemaker and has been an owner of E. C. Kraus since 1999. He has been helping individuals make better wine and beer for over 25 years.
How Long Before Wine Yeast Starts Working?
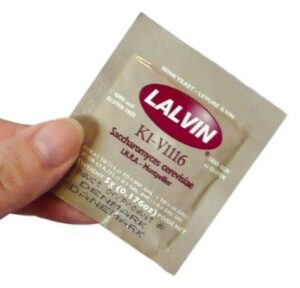 I bought your wine making starter kit and am up to the point where you add the wine yeast. I added the yeast about 12 hours ago and nothing has happened yet at all. Is this normal? The reason I ask is because I have made wine before in just a gallon milk jugs and added brewers yeast and instantly it foams. Can you please let me know…
Thank-You,
Harley
—–
Hello Harley,
The short answer is that you should expect to see activity of some kind within 36 hours, but usually within 24 hours. The fact that you are not seeing your wine working within 12 hours is not all that unusual. Just how long before your wine yeast starts working depends on numerous factors.
In regards to your previous batches, when making wine in a gallon glass carboy or something similar, it is expected that the fermentation will take off sooner. This is because you are using the same amount of yeast in a single gallon that you would be using in the typical five or six gallons of a wine making kit. The higher concentration of yeast cells, means your yeast will start fermenting sooner.
That’s the short answer to your question. The long answer is I don’t think there is a thing wrong with your wine must or wine yeast, but if you are still concerned I can go over some things that may put you more at ease.
- The #1 reason a wine yeast fails to ferment is temperature.
The wine must is either too hot or too cold. Temperature plays a major role in how fast or slow a wine yeast starts to ferment. The temperature should be between 70 and 75°F. The further you get from this fermentation temperature, the harder it is for the wine yeast to start fermenting. If you are not sure what temperature your wine must is at, you may want to consider getting a wine thermometer.
- The #2 reason a wine yeast fails is improper re-hydration.

The direction on most packets of wine yeast will tell you to re-hydrate the yeast in warm water before adding it to the wine must. The directions will specify a certain temperature for specific length of time. Normally, it’s something like 105°F. for 10 minutes. If you followed these direction, exactly, you will not have a problem whatsoever. But, if the temperature was hotter than the directions say, or if you left the wine yeast in the warm water for a longer length time than you were supposed to, you could have killed all or a significant portion of the yeast. If most of the yeast was killed it will take much longer for the fermentation to start. The fermentation may also be slow or sluggish once it does start.
In either of the above cases the solution is simple. Depending on the issue, either get the wine must to the proper temperature, or add another pack of wine yeast. Problem solved!
Just how long before your wine yeast starts working can depend on a number of different factors. The above two are by far the most common we run across, but if neither of these sound right, you may want to take a look at, “Top 10 Reasons For Fermentation Failure” that is listed on our website.
After have said all of this, it’s still only been 12 hours since you added the yeast. The most likely scenario is that it will have already started bubbling by the time you read this. While many fermentation will start before this, taking longer than 12 hours is not all that unusual.
Happy Winemaking,
Ed Kraus
—–
Ed Kraus is a 3rd generation home brewer/winemaker and has been an owner of E. C. Kraus since 1999. He has been helping individuals make better wine and beer for over 25 years.
I Am a Clarity Convert
 When I first started home brewing several years ago, like most new brewers, I was only concerned with getting a beer that tasted good and that was something that I enjoyed drinking or sharing with friends and family. In reading various home brewing forums, I knew that there were a lot of people who went out of their way to get the clearest beer they could. It seemed to me that this quest for beer clarity verged on a waste of time.
However, as I grew in the hobby, I came to appreciate the desire for clarity. It started with just one off-hand comment from a relative…
Several years ago, I set out to copy one of my favorite beers from a local nano-brewery. They did not publish their beer recipe, but they did list the ingredients on their beer list. I tried my best to recreate the grain bill and hop schedule, but never quite could match the beer. But, to make a long story short, over time, this beer morphed into a substantially different brew, but one I liked a lot! During a family party, I offered this beer to some family and my brother-in-law, who is also a home brewer, mentioned almost out of earshot, “Look how clear it is!”
I hadn’t even been setting out to clear the beer to that degree, but I had been saving several bombers of this batch specifically for this party. Since they were in the fridge for about six weeks, they got pretty clear. I must admit, I enjoyed both the pride I felt in his comment, and I really did enjoy what the aesthetic of that clear beer added to my drinking experience.
A year later, my local homebrew shop was having a contest, and I decided to enter beer made with this beer recipe. Again, I left it in the fridge for six weeks, and the shop stored it in their fridge for about four more weeks before judging. The comments from the three judges all specifically remarked on how clear the beer looked, and it was one of the factors that led to this beer taking second place overall.
 So yes, now I am a clarity convert, and now I set out to clarify my beer. I started with Whirlfloc tablets. It works well, but I wanted more, so I turned to cold-crashing and fining with gelatin finings. The process of using gelatin to clarify your beer is fairly straightforward, but if you’ve never tried it, I’d place this technique high on your list of things to add to your brewing repertoire. It really doesn’t take a lot of work at all, and as far as bang-for-your-buck is concerned, I can’t think of anything that is so inexpensive, so relatively easy, which adds so much to enjoyment of beer.
How important is clarity to you? What techniques do you like to use to clarify your beer?
—–
John Torrance is a database developer, gadget lover, and avid home brewer living in Lafayette, Colorado. When he’s not actively brewing, he’s generally daydreaming about what he’s going to brew for his next batch.