Home Brewing With Oats

Oats for Home Brewng
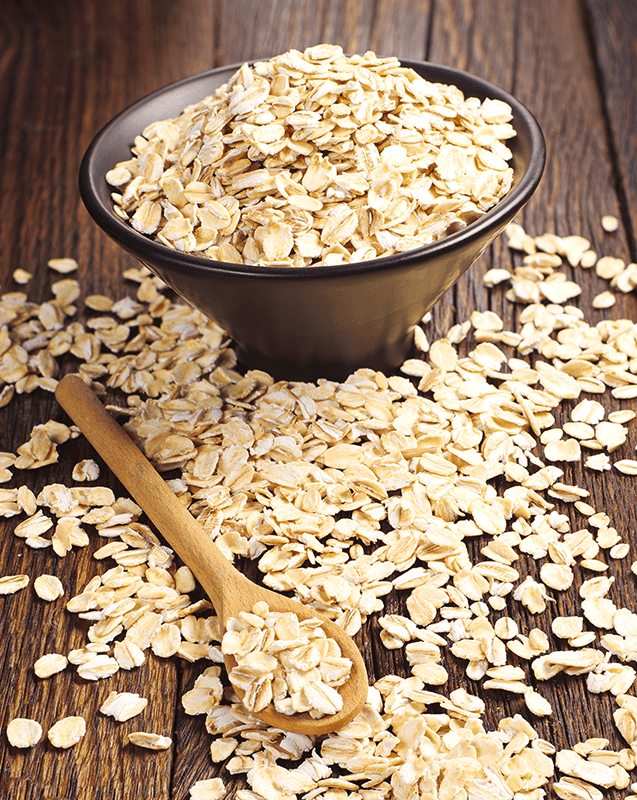
Like barley, wheat, and rye, oats are a cereal grain that can be used in home brewing. It would be difficult to make a desirable beer from 100% oats, but nonetheless oats often find their way into a number of beer styles, especially the oatmeal stout. They can be used to add smooth, silky body and oat flavor to just about any beer style. Oats help with head retention, but may contribute a bit of cloudiness. Here’s more information on home brewing with oats…

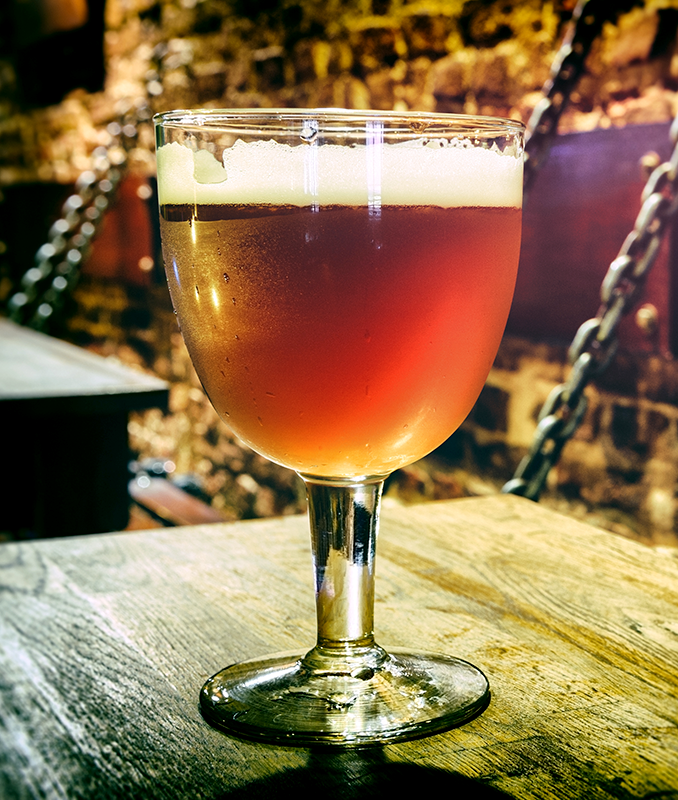
Oats are found in a number of Belgian and farmhouse styles, namely saisons and witbiers (as in the Brewcraft Belgian Witbier Recipe Kit).

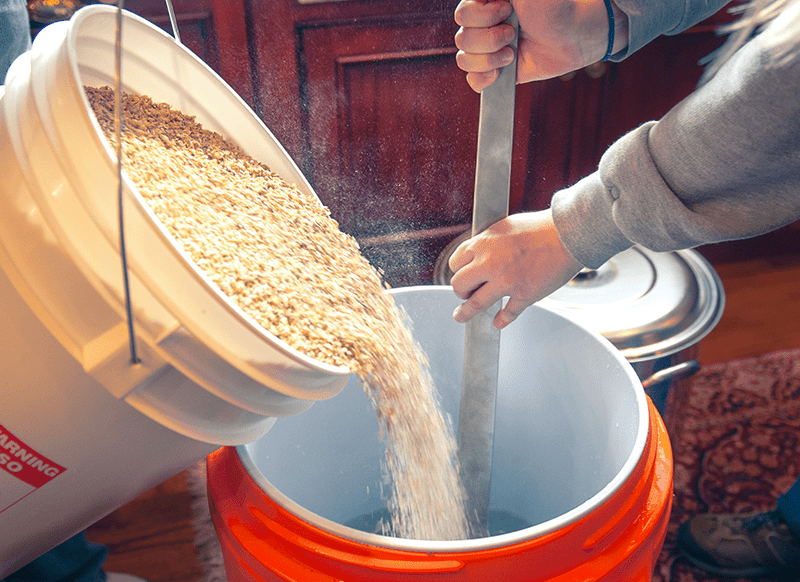
When home brewing with oats you will find that they are typically found in one of three forms: raw, flaked, or malted. As you might have guessed, raw oats are unprocessed. They have to be cooked prior to mashing in order to extract any fermentable sugar from the grain. Flaked oats are the most common form of oats used in brewing. They are gelatinized as they are pressed through heated rollers, allowing brewers to extract their fermentable sugars by adding them directly to the mash. Malted oats are malted in much the same way that barley is, but they are not very common.

It should be noted that oats are technically gluten-free, so they could possibly be used to make gluten-free beer, perhaps in combination with sorghum, rice, or corn. The only hitch is that oats are often processed on shared equipment with wheat. If making a beer for someone with a severe gluten allergy, only use oats that are certified gluten-free.

Home Brewing Your Own Oatmeal Stout…

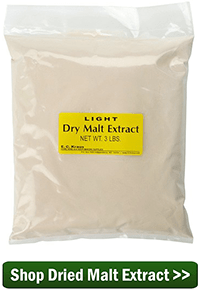
If you’ve never try home brewing with oats before, one could place to start is with an oatmeal stout. Oatmeal stouts became popular in England, so it stands to reason to use English ingredients when crafting our recipe. Start with two cans of Munton’s Light Malt Extract.

Next, we’ll derive color and flavor from some specialty malts. Try between 4 and 12 ounces each of Roasted Barley, Chocolate Malt, and Caramel 80L. Extract brewers can steep the grains, all-grain brewers can added them directly to the mash, or partial mash brewers can do a mini-mash with an equal amount of base malt. Add 4 to 16 oz. of flaked oats, or up to 10% of the total grain bill. You’ll find when home brewing with oats that this about the typical amount called for.Shop Home Brew Starter Kit

For the hops, we’ll want to use an English variety. Fuggles would be a good choice. The BJCP calls for 25-40 IBUs, so about 2 ounces of hops should do the trick. This beer should have little to no hop aroma or flavor, so add most (or all) of the hops at the beginning of the boil.

Finally, in the yeast department, English ale yeasts are the way to go and there are many good ones to choose from. Any of the following dry yeasts would give relatively clean flavors: Munton’s, Nottingham, Safale S-04. Wyeast 1084: Irish Ale will give more fruity esters, especially if fermented at warmer temperatures.

Have tips for home brewing with oats? Share in the comments!
—–
David Ackley is a beer writer, brewer, and self-described “craft beer crusader.” He holds a General Certificate in Brewing from the IBD.

Can You Age Wine In A Refrigerator?

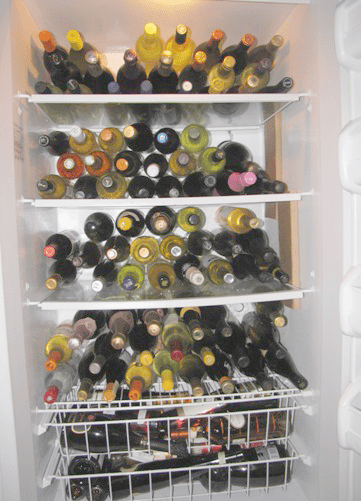
We purchased a refrigerator to store our wine in, but the temp. is 47 degrees.  We cannot get the refrigerator to go any higher… Is that too cold to age wine?

Darlene
—–
Hello Darlene,

Thank you for this great question.

You are correct in assuming that temperature does make a difference when aging wine. But having said this, most home winemakers store their wine at room temperature or basement temperature and do perfectly fine. But if you want to try aging your wine in a refrigerator, it is possible under certain situations.

Temperature affects a wine by changing how fast or slow it ages. The cooler the temperature, the slower it will age. The warmer the temperature, the faster it will age.

Aging is critical to a wine. It is the time when a series of enzymatic activities occur that cause a wine to become more pleasant. It will have better body structure, a fruitier bouquet, and more complex, layered flavors. So you’d think that you would want your wine to age faster so that it could taste better sooner, but this is really not the case. While wine does get better with age, there is also a life-cycle that needs to be consider.

A wine will typically improve for a period of time, then somewhat plateau in its improvement. Eventually, there will come a time when the wine will start to degrade in quality at a very, very slow pace. It will start to become flabby, lifeless, then eventually, unacceptable to drink. So while warmer temperature will cause the wine to become better sooner, it will also shorten its lifespan.

A wine may plateau in quality in 6 months. Other wines might take 6 years. A lot of this has to do with the wine itself, and of course, the temperature at which it is being stored. Its body, flavor and structure all play a role in determining how long a life-cycle the wine will have.

Just how high a wine will plateau in quality is up to the wine, but how fast and long it stays at this plateau is up to the keeper of the wine and the temperature they decide at which to store the wine.

Buy Temp ControllerAll of the above applies equally to commercially made and homemade wines. Most wine experts agree that 55°F. is a good temperature to stay with when aging wine for the long hall. This means that aging your wine in a refrigerator may not be practical for you, but it would not be a disaster to do so. It just may take longer than what is practical for the wine to age.

One way to ultimately resolve this issue is to purchase a power-interrupt thermostat. This is an item that is put in between the refrigerator plug and the wall outlet. It has a probe that goes inside the refrigerator to monitor temperature. Once the refrigerator temperature reaches the setting on the thermostat it will interrupt the power. I would almost call this a necessity for anyone who is planning on aging wine in a refrigerator.

Happy Wine Making,
Ed Kraus
——
Ed Kraus is a 3rd generation home brewer/winemaker and has been an owner of E. C. Kraus since 1999. He has been helping individuals make better wine and beer for over 25 years.

Big, Hoppy, American Barleywine Recipe (All-Grain & Extract)

BarleywineJust how much flavor can you pack into a homebrew? I’m not sure if there’s a limit, but this barelywine beer recipe really pushes the envelope!

Barleywines are big, malty beers, usually featuring a complex range of flavors, from sweet caramel and toffee, to raisins, dates, and molasses. To balance out the malty sweetness, they’re usually heavily hopped, but the level of hop flavor and aroma can range from subtle to quite aggressive. Alcohol content is high, so these beers are often aged for months or even years to round out the flavors.

At 96 IBUs, this barleywine beer recipe is for hop heads. Three of the “C” hops – Centennial, Cascade, and Chinook – are added throughout the boil and as dry hops to give this beer a piney, citrusy hop character – think of Sierra Nevada’s Bigfoot.

Since this is such a high gravity beer (OG = 1.112), we recommend a few things to ensure a healthy fermentation:

  • Pitch a yeast starter – Pitching enough healthy, viable yeast cells is critical. At the very least, pitch two packs of liquid beer yeast into a 2L starter. Use a yeast starter calculator to determine exactly what size starter you need.
  • Use yeast nutrientYeast nutrient can give yeast an added boost for high-gravity beers. Nutrient is added during the boil, but have some yeast energizer on hand in the event of a stuck fermentation.
  • Oxygenate – if you have the equipment to oxygenate your wort, by all means use it. Otherwise, be sure to aerate the wort very well. Splash it around more than usual when pouring into the fermenter. Maybe even pour it through a strainer to maximize aeration.

Ready to brew this mammoth beer? Good luck!

Neural Rust Barleywine Beer Recipe
(5-gallon batch, all-grain)

Specs
OG: 1.112
FG: 1.023
ABV: 11.7%
IBUs: 96
SRM: 19Shop Dried Malt Extract

Ingredients 
17.4 lbs. Pale Ale malt
1.1 lb. Carapils malt
1 lb. Caramel 60L malt
0.6 lb. Caramel 90L malt
0.4 lb. Caramel 120L malt
1.25 tsp. gypsum (added to mash)
1.2 oz. Chinook hops at :60 (13.2 AAUs)
1 oz. Chinook hops at :45 (11AAUs)
0.85 oz. Centennial hops at :30 (7.4 AAUs)
0.6 oz. Cascade hops at :15 (3 AAUs)
0.6 oz. Centennial hops at :15 (5.2 AAUs)Shop Liquid Malt Extract
1 tsp. Irish moss at :15
2 tsp. yeast nutrient at: :15
2 packs Wyeast 1056: American Ale Yeast
1 oz. Chinook hops, dry-hopped for 14 days
1 oz. Centennial hops, dry-hopped for 14 days
1 oz. Cascade hops, dry-hopped for 14 days


Barleywine Beer Recipe Directions: 
Mash crushed grains at in 5.25 gallons water at 150˚F for 90 minutes. Lauter and sparge to collect seven gallons of wort. Boil for 90 minutes, adding hops, Irish moss, and, yeast nutrient according to schedule above. Chill wort, aerate well, and transfer to a clean, sanitized fermenter. Ferment at 68˚F for one month. Transfer to secondary and dry hop for two weeks. Bottle or force carbonate to target 2.3 vols. CO2.

Partial Mash Option:
Replace the Maris Otter malt with 2.4 lbs. Maris Otter plus 10 lbs. light DME. If possible, do a 7-gallon boil. If not, add half of the DME before the boil, the other half at the end of the boil, and increase the first hop addition to 2.4 oz.

Any barleywine can be fun to brew, but this barleywine beer recipe is particularly fun to make. And if you are not into the all-grain scene, the partial mash option fills out the flavor quite well.

—–
David Ackley is a writer, brewer, and craft beer marketing consultant. He holds a General Certificate in Brewing from the Institute of Brewing and Distilling.oz

To Airlock Or Not To Airlock During Primary Fermentation

Airlock For Wine FermentationMy kit wine calls to immediately put the contents of the juice, wine yeast, etc. in an air-tight container with an airlock. However all over your site it says NOT to put it in an air-tight container for the first 5-7 days because it will inhibit the growth of the wine yeast. Can you clear this up for me?

Name: Dennis
State: North Carolina
—–
Hello Dennis,

It is a matter of weighing all the pros and cons differently.

The reason you use a fermentation airlock is to protect the wine from contamination. If you leave the lid and airlock off the primary fermenter and the fermentation begins in a timely manner and ferments vigorously, there is very little chance of the wine becoming compromised in any way. Not only is the CO2 gas rapidly rising off the fermentation, protecting it from fall-out of airborne nasties, but the vigorous activity of the wine yeast themselves are also destroying any contaminants that may make their way to the liquid.

The harder the wine ferments, the more protected the wine will be, and the sooner your wine will have completed its fermenting.

Wine kit manufacturers say to themselves, “we do not know that everyone’s fermentation is going to start as it should. What if it doesn’t and the airlock is not being used? Then there is a possibility of the fermentation being taken over by a mold or bacteria. We would rather be safe, because we are not sure every single fermentation will start-off as intended.”

So it comes down to this:Shop Wine Airlocks

  • Leaving the lid and airlock off will allow the primary fermentation to start sooner and continue more rapidly, but it can also leave the fermentation susceptible to contamination should it not start in a timely fashion.
  • Leaving the lid and airlock on will keep the fermentation much more protected, but it will cause their primary fermentation to go more slowly.

I would like to point out that keeping an airlock off the primary fermentation is not something we made up. It is regularly practiced in the wine industry. It is also the typical way a fresh fruit wine is made by home winemakers.

Also, I would like to make it clear that we are only talking about the primary fermentation. As the fermentation starts to slow down, and it becomes time to rack the wine into a secondary fermenter, you should always be using an airlock. The same holds true if the fermentation is not starting out as strong or as quick as it should; put the lid and airlock on until you see the fermentation is going.Shop Fermenters

As a final point, whether or not you use an airlock during the primary fermentation, the wine will be made. It’s a matter of how fast and vigorous the fermentation proceeds, not a matter of whether or not your wine will turn out, so don’t feel that it is a critical decision because it’s not.

Happy Winemaking,
Ed Kraus
—–
Ed Kraus is a 3rd generation home brewer/winemaker and has been an owner of E. C. Kraus since 1999. He has been helping individuals make better wine and beer for over 25 years.

Hops, Malt and Zen: How I Learned to Relax, Not Worry and Enjoy Homebrewing

Zen HomebrewingToday we have a guest post from beer blogger Bryan Roth, who explains why sometimes it’s nice to just sit back, relax, and let the beer brew itself.
—–
Technically, homebrewing is a science. But you’re not defusing an atom bomb – it’s just beer.

While I spent time on my early batches worrying about the intricate details of IBUs and grain bill percentages, I eventually let all that melt away. I’m a homebrewer. It’s fun. We should treat it that way!

No matter how you achieve the end product, the journey that gets you to a cold, frothy brew in a glass should be an enjoyable one. So let’s put away our refractometers, cool our jets in an ice bath, and reflect on the fun meaning of homebrewing.

Here are five lessons I learned to make sure homebrewing is always fun and stress-free:

Beer is flexible
A common adage among homebrewers is how forgiving beer can be. Compared to baking a cake or cooking soup, where small recipe changes can completely change the final product, a few extra ounces of malt isn’t going to make or break your brew.

There is some room for error with homebrewing, especially with styles like stouts or even a hopped-up IPA. It’s amazing what a little yeast, CO2 and alcohol can do to fix a mistake like a fly nose-diving into cooled wort (my SMaSH IPA last summer).

Brew time = play time
I homebrew outside on a small concrete slab in my backyard next to my wife’s garden. Being in close proximity to herbs and flowers constantly makes me second-guess recipe outlines I use for my brews. Half the fun of homebrewing is being able to experiment.

Don’t be afraid to grab something from home or your own garden and think how it could improve your next brew. Last-minute decisions to toss in some rosemary in an IPA I made this spring gave it some extra piney notes and lavender in a saison offered an incredible herbal aroma that paired with fruity Belgian esters.

Don’t sweat the small stuff…
There are just two aspects of homebrewing I pledge complete allegiance to: temperature and sanitation. As far as I’m concerned, there’s no need to get caught up in the nitty-gritty.

Some homebrewers may find good fun in having complete oversight of quality control and the brewing process, but for others, pH levels or water quality are something that may never cross your mind. That’s OK.

… but a little preparation goes a long way
A lot can seem to go wrong on brew day, but I’ve found it’s nearly always my anxiety making me worry. No need to be a helicopter parent to your brewing baby, especially when it’s easy to have an “emergency kit” of supplies just in case.

Instead of making extra trips to your homebrew store, keep some emergency items around the house. I always store two clean-fermenting Safale US-05 dry yeast packets in my fridge as a precaution and love having some extra muslin bags and Star-San sitting around.

Most important – don’t forget to always keep at least one chilled beer at the ready for brew day!

“Relax. Don’t worry. Have a homebrew.”
There’s a reason Charlie Papazian is considered the godfather of modern homebrewing, and that little gem of a quote is part of it. I always think of it as I’m sitting in my backyard with the wort boiling and my cares fading away.

Brew days can be long and tiring, especially when worrying about hitting efficiencies and getting temperatures just right. It’s easy to forget in the middle of mashing in just how exciting it will be to take the first sip of the beer you’re making. It never hurts to reflect on how pleasant an afternoon can be brewing with friends or even by yourself. Even if you think you screwed something up, all will be fine in the end.

From the beginner to the award-winning homebrewer, it’s important for all of us to remember what a great experience homebrewing can be and the people we’ll meet because of it. It’s a hobby that becomes more fun the more comfortable you are with it.

Next time you strain water from your malt or add your hops, keep in mind it’s OK to give yourself leeway. Relax, don’t worry, have a homebrew. Chances are you’ll still get tasty beer in the end.
—–
Bryan Roth is a beer nerd and homebrewer living in Durham, North Carolina. You can read his thoughts on beer and the beer industry on his blog, This Is Why I’m Drunk, and send him suggestions on how to get his wife to drink craft beer via Twitter at @bryandroth.

What Does Bottle Shock Mean In Home Wine Making?

Sampling A Wine With Bottle ShockWhen making white wines with your wine kits they tastes fine right after fermentation, but after a while the wine gets bitter and strong. I notice it most right after I bottle the wine. What do I do to solve this problem?

Name: Richard L.
State: MA
—–
Hello Richard,

Most likely you are dealing with is what’s known as “bottle shock“.  This can be noticed as a flabby diminishing of the wine’s fruitiness and bouquet. The acids can seem out of whack, and in some more dramatic cases the wine can become bitter.

You as the wine making may be asking yourself at this point: “what does bottle shock even mean?” In wine making it’s the result of a reductive process that occurs when too much oxygen is saturated into the wine in too short of period. Wines need to absorb minuscule amounts of oxygen over long periods of time in order to age properly — that’s the purpose of the cork, to allow air to pass very, very slowly — but when wines absorb a too much oxygen in a short period of time, that’s what causes bottle shock.

In wine making bottle shock is something that can happen to any wine right after it has been bottled. As a wine maker I’m sure you can imagine, the process of filling the wine bottle and ramming a cork into its neck will increase the saturation of oxygen into the wine.

Bottle shock can also happen if the wine bottle is excessively agitated, such as traveling by car or whatever. This sloshing causes the cork to breath air more rapidly than intended.Shop Wine Kits

The good news is the effects of bottle shock are temporary. The wine will overcome this condition given time. Just how long the bottle shock does last, depends on the severity of the condition, but usually it is a matter of one or two weeks.

Richard, hopefully your wine will experience improvements when given a little time. If it does, then you will know that bottle shock was the issue. The other possibility is a bacterial or fungal infection. Bacterial is usually more acetic in symptom and fungal more bitter. The way you will be able to tell if this is the issue is by the fact that your wine’s flavor continues getting worse and not slowly recovering.

With all that being said I am fairly confident that we are dealing with bottle shock. Just give it some time, and you should see your wine turn around.

Best Wishes,
Ed Kraus
—–
Ed Kraus is a 3rd generation home brewer/winemaker and has been an owner of E. C. Kraus since 1999. He has been helping individuals make better wine and beer for over 25 years.

Calculating and Improving Mash Efficiency

Improving Mash EfficiencyIf you’re a homebrewer, you may have heard about mash efficiency in the brewhouse. But what is it and why does it matter?

Mash efficiency is a measurement of the percent of available sugars obtained through the mashing process. Brewing malt contains a certain amount of complex sugars, and the percentage which are extracted in a mash give us the mash efficiency. By improving mash efficiency, one can use less malt and save a little money, but the real value for the homebrewer is the ability to accurately predict the amount of malt needed when formulating a beer recipe.

Calculating Mash Efficiency

Later we’ll get into improving mash efficiency, but for now, here is one method for calculating mash efficiency, by using the gravity measurement of points per gallon (PPG):

Suppose that we use 10 pounds of two-row malt in a mash, and that this malt has a gravity rating of 1.037, or 37 points. After the mash and the sparge, we end up with 5 gallons of wort. If we were to extract all of the sugars from that malt (achieving 100% efficiency), the resulting wort would have a total of 370 points (37 points * 10 pounds). Divide by 5 gallons, and the resulting pre-boil gravity would have 74 points per gallon, or a gravity of 1.074.

But even the most efficient mashing processes can’t extract all of the sugars from the malt. The typical mash efficiency of a homebrewer will be in the ballpark of 60-80%, though this number can vary quite a bit depending on the brew, the type of homebrewing equipment being used, and number of other factors.

Continuing with the example above, suppose that the actual measured gravity of the wort when taken by a hydrometer is 1.050. We simply divide the measured gravity by the potential gravity to calculate the mash efficiency:

50 / 74 = 67.6%

Shop Barley CrusherThe challenging part of calculating mash efficiency is that we tend to brew with multiple types of malts, often with different extract ratings. As a result, calculations become a little more complicated.

Suppose we mash the following grain bill and end up with 5 gallons of wort:

Our total extract potential is:

[(37 * 8) + (33 * 2) + (34 * 1)] / 5 = 79.2

If our measured pre-boil gravity is 1.060, then our mash efficiency is calculated in this way: 60 / 79.2 = 75.8%

That’s actually a pretty good efficiency!

Improving mash efficiency

Beginning all-grain brewers may find that their mash efficiency is in the 50-60% range. With consistent note-taking, mash efficiency can be improved in the following ways:

  • Better grain crushShop All Grain System – If grain isn’t crushed enough, it will be difficult to extract the sugars from the grain. On the other hand, if the grain is crushed to much, the brewer risks a stuck sparge. It’s important to set the grain mill to get an appropriate crush.
  • Improved mash procedures (appropriate pH, temperature, water-to-grain ratio, length of mash)
  • Appropriate water chemistry
  • Improved sprage techniques – A slower sparge (30-60 minutes) will rinse more sugars from the mash than a fast one. Sparging with too much water will decrease your mash efficiency.

All of the above are effective ways to improve your mash efficiency. Get a handle on them and you’ll get more sugar from your grains.

Do you calculate the extract efficiency when you homebrew? Has your mash efficiency been improving?
—–
David Ackley is a beer writer, brewer, and self-described “craft beer crusader.” He holds a General Certificate in Brewing from the Institute of Brewing and Distilling.

Do You Have To Filter Homemade Wine?

MiniJet Wine Filter SystemI have been reading your blog for some time. My neighbor makes wine and said I should try it.  I have a question. He uses a wine filter to clear his wine. Do you have to filter homemade wine? He says it is not but I don’t see how if you don’t have something to clear it.

Eric
—–
Hello Eric,

Let me start off by saying that you can make perfectly clear homemade wine without using a wine filter of any kind. You do not need to filter a homemade wine for it be clear. Let me explain why…

What causes a wine to be cloudy is mostly wine yeast. The yeast multiply themselves into a colony of incredibly huge numbers during the fermentation. This wine yeast is finer than flour and adds a milky look to the fermenting wine must. Even though the wine yeast cells are microscopically tiny and can easily be stirred-up by the fermentation. They will also settle out through gravity once the fermentation activity has stopped. The other stuff like the pulp and tannin from the fruit will fall out even before the yeast.

If you do absolutely nothing, the wine yeast cells will settle out on their own, usually within a matter of days. This is why you do not have to filter the wine. It will become surprisingly clear on its on if given a chance.

If you would like to speed up the process you can use something called a fining agent. A fining agent is something that you add directly to the wine must. It collects the particles together and drags them to the bottom more quickly than they would on their own. A particular fining agent routinely used by many wineries is Bentonite.

You may be asking yourself at this point, “if the wine yeast will settle out on their own and I can use fining agents to speed up the process, then why does my neighbor have a wine filter? And furthermore, why do wine filters even exist“?

Wine filters do have a purpose in wine making,
but it’s not to clear up a cloudy wine.

A wine filter is designed to make a clear wine look even clearer. A wine filter should only be used on a wine after it is already visually clear. It filters out wine yeast, even beyond what the human I can see. This level of filtering adds further polish or luster to the wine causing it to illuminate more brilliantly.shop_wine_filters

It is important to understand that a wine filter is not something that strains the wine. The wine is actually forced under pressure through extremely fine filter pads. It filters the wine so fine that it can make a white wine look like a solid piece of glass in the wine bottle. With this kind of filtering power, using it on a wine that seems even slightly murky will cause the filter pads to clog up quickly. The wine needs to look absolutely clear to the naked-eye before the use of a wine filter can even be considered.

My suggestion to you is to go ahead and make a batch of wine and don’t worry about using a wine filter for now. Most home winemakers do not filter their wines and are absolutely satisfied with the clarity. Once the wine is finished and had time to clear, take a look at it and see if you are happy with its clarity. If not, then you can revisit purchasing a wine filter system to filter that wine.

Just remember that if you do decide that you need to filter your homemade wine, we have several different models of wine filters in stock that can be shipped the same day your order.

Happy Wine Making,
Ed Kraus
—–
Ed Kraus is a 3rd generation home brewer/winemaker and has been an owner of E. C. Kraus since 1999. He has been helping individuals make better wine and beer for over 25 years.

10 Tips For Homebrew Cleaning And Sanitizing

Cleaning and sanitizing homebrew bottlesMany homebrewers will tell you that the first step to making good homebrew is to practice good cleaning and sanitizing habits. Without practicing good cleanliness, you run the risk of contamination by wild yeast and bacteria that could potentially ruin your batch of beer. While there are no known pathogens that can survive in beer, you certainly don’t want to throw a batch of homebrew down the drain because of spoilage!

But don’t worry! Cleaning and sanitation are easy to master. Before too long, it will become second nature, so invest some time and energy early in your homebrewing career to develop good habits.

Here are some homebrew cleaning and sanitizing tips to help you make sure your beer is clean, enjoyable, and free of contamination:

  1. Don’t rush through these important first steps! As tempting as it is to save time on brew or bottle day, cleaning and sanitation can make the difference between a great batch and one that gets thrown out. Also remember, it’s called cleaning and sanitation for a reason – it’s a two-step process. It’s important to clean away visible debris using a brewery specific cleaner, such as One Step Cleanser or Basic A. Follow package instructions to ensure effective sanitation.
  1. Making the most of ordinary household cleaning products may save you some money, but it’s important to know which products are transferable to the brewing world and which are not. Sanitizing homebrew equipment with unscented household bleach as an alternative sanitizer is a very effective, but it doesn’t take much – Charlie Papazian recommends using 1-2 ounces of regular, non-concentrated bleach per gallon of cold water, and soaking for about 30 minutes and allowing to dry. The biggest problem with using bleach to sanitize you equipment and bottles is that it does not rinse well. It likes to cling to surfaces. If you do use bleach, rinse thoroughly 3 times with hot water. NOTE: Do not mix bleach with other cleaners.Buy Basic A
  1. Do not use ordinary dish soap or detergent on your brewing equipment, as these can leave residues that will ruin your beer’s head retention. A good alternative is to us Five Star: Powdered Brewery Wash.
  1. Save a buck – and water – by reusing cleaning and sanitizing water when possible.
  1. Save more cash by filling a spray bottle with diluted sanitizer to spray down buckets and equipment. This uses less water than a soak, just make sure homebrew equipment gets enough contact time to ensure effective sanitation.
  1. Use non-abrasive scrubbers and brushes on plastic buckets and equipment. Scratches in the plastic are ideal hiding places for bacteria and wild yeast.

Tips for Homebrew Cleaning and Sanitizing on Bottling Day

  1. Be sure to remove the spigot from your bottling bucket before and after use and clean it well on the inside. By doing so you’re reducing the likelihood that significant “crud” will build up.
  1. If reusing beer bottles from the store or other homebrews, cleaning is much easier if you rinse well after drinking. This may seem like an obvious tip, but it can easily save a lot of time on bottling day!
  1. AShop Bottle Washer typical dishwashing machine set to the sanitize cycle can be used for sanitizing beer bottles. Make sure they are thoroughly rinsed BEFORE loading them up. A bottle washer can be attached to a standard kitchen faucet to make this process easier.
  1. Don’t forget to sanitize your bottle caps! Use the same method as you would for sanitizing other equipment.

As you brew more batches over time, you’re likely to develop your own homebrew cleaning and sanitizing tips and trick. What advice do you have for maintaining sanitation in the home brewery?

—–
David Ackley is a beer writer, brewer, and self-described “craft beer crusader.” He holds a General Certificate in Brewing from the Institute of Brewing and Distilling.

When Is My Wine Ready To Bottle?

Three homemade wines that are ready to be bottled.What is the best way to tell when my wine is ready to bottle?

Thank You,
Rick, IN
—–
Hello Rick,

Great question, and an important one too. The last thing anyone wants to do is bottle their wine too soon. This is especially important if you plan on handing any of it out as wine making gifts. A significant amount of sediment could eventually form in the wine bottle, or worse yet, corks could possibly start pushing out and cause a mess.

Fortunately for us home winemakers, it’s very easy to determine if a wine is ready to be bottled. Here is what has to happen before you can bottle your wine:

1. Your wine has to be completely clear. There should be no more sediment that needs to fall out. Most of the sediment you’ll be dealing with is made up of tiny, microscopic yeast cells. These cells are as fine as flour. It is important to understand that even the slightest amount of murkiness in the wine at bottling time could lead to sediment in the wine bottles later. Give the wine plenty of time to clear. If you’re not sure wait, longer.

2. Your wine should read less than .998 on the Specific Gravity scale of your wine hydrometer. This is telling you that the fermentation process has actually finished and hasn’t just stalled out halfway, or still fermenting very slowly as a stuck fermentation. If you do not have a wine hydrometer I would urge you to get one. They are not that expensive and can save you a lot of problems in the long run.Shop Degassing Paddles

3. The wine should be free of any residual CO2 gas. This is the gas that occurs when the wine ferments. CO2 gas is the same stuff that makes beer foam and soda pop fizzy. Once the wine is taken off the sediment, you can stir the wine to get this gas to release. You may want to consider purchasing a Degassing/Mixing Paddle to help you with this process. It is a paddle that attaches to a hand drill and will fit in the opening of a carboy as well as an opening of a plastic fermenter.

Best Wishes,
Ed Kraus
—–
Ed Kraus is a 3rd generation home brewer/winemaker and has been an owner of E. C. Kraus since 1999. He has been helping individuals make better wine and beer for over 25 years.