How To Save A Wine With Too Much Sulfite

Wine With Too Much SulfiteI inadvertently put too much sulfite in my wine must. Packaged advised 1/4 teaspoon PER 6 GALLONS OF MUST. I misread and added 1/4 teaspoon per gallon of must (6). My wine yeast did not ferment. All else was as it should be (SG, temp, and acid level). Is there anything I can do besides chalk it up to a learning experience and dumping it down the drain. It’s been a week and do not want it un-fermenting much longer. Please respond at your earliest convenience.

Name: Mary S.
State: Wisconsin
—–
Hello Mary,

This happens more often than you might think. Many times we’ve had winemakers contacting us telling us they think they’ve ruined their wine because they put too much sulfite in it, and many times we’ve helped them to get their wine, and its fermentation, back on track. So, don’t think that your wine is a loss. There is hope.

The trick is to give the sulfite an opportunity to leave. Fortunately for you, the sulfites want to leave. You just need to let it. What I mean by this is the free sulfite that is in the wine wants to dissipate into the air and go away. You just need to give it an opportunity to do so. The easiest way of doing this is to splash the wine. And, I mean seriously splash the wine. Splashing is the friend of any wine that has too much sulfite.

Shop FerMonster
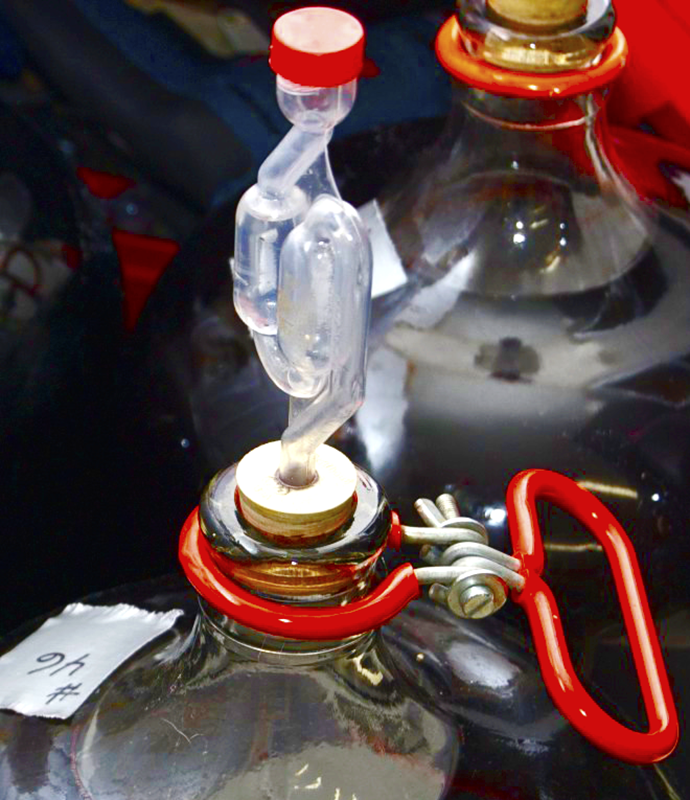
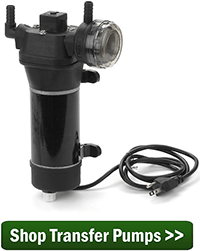
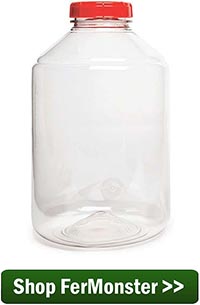
We always recommend siphoning the wine from one fermenter to the next and then back again. When the juice comes out of the siphon hose, allow it to splash against something. Let it to cascade down the sidewall of the vessel, or let a sanitized object float in the fermenter as the fermenter is being filled, and splash the wine against that.

Once you have done this, add another packet of wine yeast and wait 24 hours. If the fermentation starts up, then great. The wine is saved. But, if the fermentation does not show any signs of life after 24 hours, you will need to repeat the splashing process, and then add another packet of wine yeast, and wait 24 hours, again. You can keep repeating this process until you’ve over come the abundance of sulfite in the wine.

You can keep adding packs of wine yeast as necessary. This will not affect the resulting wine in any way.

You may  be wondering if the wine will start oxidizing from all the splashing. The answer is, no. Sulfite acts as an antioxidant. All of the gas releasing from the wine during the splashing will protect the wine from any oxidative processes.

Shop Transfer PumpsPlease realize that whenever you have too much sulfite in wine, it’s just a matter of getting the free SO2 gas to release and go away. It’s nothing more than that. There have been some situations where the dosage was so high that it has reached a point of no return for the wine, but based on your situation as you described it above, I don’t think there is any way you will lose this wine if you do the siphoning and splashing a prescribed.

Happy Wine Making,
Ed Kraus
—–
Ed Kraus is a 3rd generation home brewer/winemaker and has been an owner of E. C. Kraus since 1999. He has been helping individuals make better wine and beer for over 25 years.

Using Wine Corks vs Screw Caps: What’s The Difference?

Wine Cork And Screw CapHere’s a great question from one of our customers about using wine cork vs screw cap wine bottles. I thought this would be great to share!
—–
I live very close to a winery and use their used wine bottles for bottling my homemade wines. Sometimes they use cork wine bottles and screw cap wine bottles for the same wine. Do you know why this would be?

Name: William B.
State: Virginia
—–
Hello William,

Thank you for such a great wine making question. I’ll see what I can do to clear up why you would see a winery use both wine cork and screw cap, and more specifically, why a winery would use both on the same batch of wine!

Here’s the basic pros and cons of using one over the other.

Using screw cap wine bottles will extend the life of a wine. The screw caps make a perfect seal, not allowing any air to seep into the wine. This perfect seal extends the wine’s shelf-life. You could have a screw cap wine be fantastic for 7 or 8 years that otherwise would have only been at its best for 4 or 5 years under cork.

But this “perfect seal” also extends the amount of time the wine needs to mature into a drinkable or – in the case of a winery – salable wine. In fact, it could take up to twice as long for the wine’s maturation process to plateau. This means more inventory sitting in the racks that can’t be sold.

On the other hand, wine corks facilitate the aging process a little more freely. A natural cork allows minuscule amounts of air to pass by it. Over time, this trace amount of air will facilitate the wine’s ability to age and become more drinkable sooner. The downside is that the entire life of the wine will be shortened. So while it will be ready for market sooner it will not last as long on the shelf.

Shop Wine BottlesIt is possible that the winery corked some of their wine to sell earlier and used screw caps on some to sell later. In effect, this would time out the aging of the wine so that there would be more wine reaching peak maturity over a longer period of time. However, this is only speculation on my part.

There used to be great debates over the use of screw caps. Whenever someone saw a wine under a screw cap they automatically thought: cheap or low-grade wine. That’s absolutely not the case today. Whether a winery uses wine cork vs screw cap is a matter of wine treatment, a calculation of sorts that has nothing to do the the aesthetics and everything to do with maximizing the quality of the wine.

In general, you will discover that lighter-colored wines with less body, such as a Zinfandel Blush or a Chablis are more likely to be under screw cap. This is not because the wines are of low quality, but rather, because the wines are anticipated to fully maturate more quickly than most and do not need the air seepage the natural wine corks provide. They need the air-tight, screw cap wine bottles to slow the process down.

This principal of controlling how a wine ages can be incorporated into home winemaking as well.

Whenever you are ready to bottle a wine, first think about how long the wine could potentially be shelved before it is all consumed: 1 year, 3 years, 3 months! Think about the color of the wine. Is it a white wine that is at risk of oxidation? Are the grapes used to produce the wine known for producing complex, rich wines that can take advantage of abundant aging, or are the grapes known for being crisp, fresh and quickly aging?

Shop Wine CorksWhen you consider such factors you can start to come up with your own plan and know how to handle the question of wine cork vs screw cap. If your wine’s do not sit around long, go with the wine corks so they can get some aging in. If your batches of wines tend to sit around for years before being consumed go with screw cap and so on with other considerations.

William, I hope this answers the question you had about wine cork vs screw cap. As you can see, there is definitely a reason for using one over the other.

Happy Winemaking,
Ed Kraus
—–
Ed Kraus is a 3rd generation home brewer/winemaker and has been an owner of E. C. Kraus since 1999. He has been helping individuals make better wine and beer for over 25 years.

Find Your Perfect Match on Valentine’s Day

Wine with Valentine's dinnerIt’s hard to believe that Valentine’s Day has been celebrated for over 15 centuries, and most of us are still searching for our perfect match.

We’re talking about the perfect wine pairing, not soulmates. Cupid has that covered.

Whether you’re dining in or hitting the town, we have some easy tips to impress your date, but more importantly, your tastebuds.

Breaking the Rules

For years sommeliers and connoisseurs alike have preached “rules of engagement” for wine and food pairings. Before wine was truly mass produced, these guidelines made sense.

But today, there are more options from regions across the world to experiment with. It’s time to break away from those stubborn standards!

But we know Valentine’s Day might not be the best time to take a risk, so we’ve put together some loose guidelines to help make your night special.

Back to Basics

Let’s start with some general pairing rules:

Hors d’oeuvres

Appetizers are meant to be an invitation to your delicious courses, and your drink should reflect that. Sparkling wines or Champagnes usually go well here because of their airy body. It’s easy to drink, never overpowering, and a festive start to the evening.

The main event

If you’re having multiple courses for dinner, you can build up to fuller bodied wine. Different courses bring out different flavors, so feel free to switch up your sips to compliment each.

On a budget? Changing wines between courses is not a necessity. Pick a wine you feel compliments most of your meal and stick with that for ease.

Dessert

Sharing a sweet treat with your Valentine? Pair decadent dishes with ports or wines with very concentrated flavors. Your wine should be sweeter than the food to avoid bitterness.

Raise a glass for a toast. You’ve just completed Wine Pairings 101!

Still need a little more guidance? We’ve got you covered.

All in the Details

Now that we’ve got the basics covered, let’s talk about specific food types.

Red Meat vs Fish

Traditionally, people have sworn by the “red meat, red wine” and “white fish, white wine” rule. This can be a good start, but there’s a better approach. Pair your wine to compliment the most dominant flavor – the sauce. Often times, sauces are the secret behind bold flavor.

So go crazy and pair a Zin with your tuna!

Spicy vs Creamy

There’s a delicate balance between wine and spicy/creamy foods. Not everyone experiences the same tastes, so lean into your intuition here.

Fatty or dense dishes can mesh well with lighter options such as Cava. Spicy entrees are balanced by Riesling or deep Rosé. And creamy dishes are heightened by buttery Chardonnays and Pinot Noirs.

Best of luck finding the perfect match for your Valentine’s Day dinner, and share your favorites with us.

Happy Valentine’s Day!

Cheers

How To Stop A Wine Fermentation

Fermentation That Has StoppedI have several 2 1/2 gallon jugs of wine going at this time started in December. The problem is – I am satisfied with the taste and the alcohol content however they won’t stop working. It seems like in the past, when I have allowed the wine to stop fermenting on its own, the taste changes? I have read that potassium sorbate does not completely kill off the yeast? What can I do to stop the ferment at this time and how much alcohol (brandy?) would I have to add to stop the ferment. Thanks.

Name: Skip K.
State: MN
—–
Hello Skip,

The first thing I’d like to point out is that stopping a wine fermentation is not normal. What is normal is letting the wine fermentation continue until all the sugars in the wine must have been consumed by the wine yeast. If you prefer your homemade wines sweet, you would add sugar to taste at bottling time, and then add potassium sorbate to eliminate a chance of re-fermentation in the wine bottle.

What also is not normal is having a wine fermentation continue on for months. A typical wine fermentation will last anywhere from 5 days to two weeks. The fact that yours has lasted for months tells me that there is something fundamentally wrong.

I would suggest taking a look at the Top 10 Reasons For Fermentation Failure that is listed on our website. It runs through the most common reasons for a wine fermentation to either fail to start or to drag out, such as the case with yours. See if any of the top 10 reasons ring true to your situation. Now on to your question…

What can I do to stop a wine fermentation?
Well, what you can’t do is use either sulfites such as Campden tablets or use stabilizers such as potassium sorbate. Neither of these will stop a wine fermentation with any dependable success. Here’s why:

  • Sulfites (Campden tablets, sodium metabisulfite, potassium metabisulfite):Shop Potassium Metabisulfite
    Wine yeast are bred in such a way as to be acclimated to sulfites. They can withstand the levels that are typically present after a dose has been added to a wine. It is true that if a wine fermentation is on the verge of stopping anyway – for whatever reason – that a dose of sulfite can hasten its ending, but not with any predictable consistency. If a dose of sulfite is added to a fully active wine fermentation, you may see it slow down, maybe even to a crawl, but it would then eventually recover and go on to completion, but usually at a annoyingly slower pace than before. What happens is the sulfite will kill a portion of the yeast cells, stunting the fermentation activity, but then the wine yeast would slowly begin to recolonize and continue on with the task at hand.
  • Potassium Sorbate:
    Shop Potassium SorbateAdding potassium sorbate to a wine fermentation will not hinder it in any way. What it will do is stop a wine yeast colony from regenerating itself. The potassium sorbate puts a coating on the yeast cells that make it incapable of reproducing itself. In other words, it makes the wine yeast sterile. This makes potassium sorbate an effective ingredient to add to a wine that is already clear but may have some trace amounts of wine yeast still in it. If you sweeten that wine before bottling, the potassium sorbate will eliminate any chance of these few yeast cells from growing into large enough numbers to create a fermentation within the wine bottles.

As you suggested, you could add alcohol to the wine to stop the wine fermentation. This is known as fortifying the wine. But you would need to get the alcohol level up to about 20% for this purpose. Brandy is typically used for this. It should be noted that this will dramatically change the wine’s flavor. The wine will seem less fruity as the alcohol level rises.

If you absolutely, positively, without question, must stop a wine fermentation in midstream, here’s how a winery would do it:

  1. Chill Down The Fermenting Wine:
    The cooler the better, but 50°F. is sufficient. This will stop the wine fermentation, and the wine yeast will slowly begin to settle to the bottom. You may also want to add bentonite while chilling the wine to help the wine yeast clear out faster and more thoroughly.
  1. Rack The Wine Off The Sediment:
    Give the wine plenty of time to clear up before racking it. Technically, it is possible to rack the wine in as soon as 5 days, but it is much better to wait a couple of weeks. You could get extra solids precipitating out of the wine during this extra time such as acid crystals. That would be a good thing.
  1. Filter The Wine:Shop Mini Jet Wine Filter
    When I say filter the wine, I do not mean to drip it through some cheese cloth or a coffee filter or something along this line. You need to be able to put it through an actual wine filter that will filter fine enough to remove any leftover yeast cells. This means filtering down to .5 microns in size. A coffee filter only filters down to about 20 to 25 microns. A .5 micron filter pad will remove over 99.9% of the wine yeast in a wine and is considered sterile. Depending on how much tannin is in the wine, you may need to put the wine through a more coarse filter pad first. I always filter through a 1 micron filter pad before attempting to run the wine through a .5 micron filter pad. This eliminates the chance of the filter pad being clogging up with wine solids.

So there you have it: how to stop a wine fermentation. My personal opinion is that the effort is not worth it from an individual winemaker’s perspective. It is much less work to let the wine fermentation complete on its own, then deal with adjusting the sweetness to your liking.

Happy Winemaking,
Ed Kraus
—–
Ed Kraus is a 3rd generation home brewer/winemaker and has been an owner of E. C. Kraus since 1999. He has been helping individuals make better wine and beer for over 25 years.

Can You Add More Yeast To Fermentation?

Wanting To Add More Yeast To This WineAfter the wine is done fermenting and it sits for a few days can I add more yeast and sugar to increase the alcohol level?

Name: Dennis
State: Missouri
—–
Hello Dennis,

Once your wine has successfully fermented there is never any reason to add more yeast to the wine. The wine yeast you originally added at the beginning multiplies during the fermentation. If the fermentation went as it should, there should be about 100 to 150 times the amount of wine yeast you added, originally.

If the activity has stopped it does not mean that the yeast are dead. They have just gone dormant and are settling to the bottom. They ran out of sugar to consume, so they became inactive. When more sugar is added the yeast should pick up just fine on their own. There is absolutely no reason to add more yeast to the wine.

If you have racked the wine off the sediment this is still okay. There will still be plenty of wine yeast to get the fermentation up and running, again. Adding more yeast is not necessary.

Now that we have established that there is no reason to add more yeast to the wine, I would like to bring up a little twist that could put a wrench in the works.

There is a limit to how high of an alcohol level a wine yeast can produce. Most strains of wine yeast can make it up to 12% or 13% just fine. Some strains can even produce up to 16%, faithfully. But each strain of yeast does have its limits.

Shop Wine YeastThe point here being, is if you add more sugar than your wine yeast can handle, you could end up with a sweet wine – even one that is disgustingly sweet. It is important to understand this when making high alcohol wines.

So in summary, you can add more sugar to the wine to increase the alcohol level of the wine to a point, and to answer your specific question: Can you add more yeast to wine? There is absolutely no reason to do so, your wine will still have plenty of yeast in it.

Happy Winemaking,
Ed Kraus
—–
Ed Kraus is a 3rd generation home brewer/winemaker and has been an owner of E. C. Kraus since 1999. He has been helping individuals make better wine and beer for over 25 years.

Adding Oak Chips During Fermentation

Oak Chip For Wine MakingThe wine kits I use often have a small packet of oak chips for adding during the fermentation. Your article on the use of toasted oak chips for wine making says to add them during the aging process, not during the primary fermentation. What is the difference?

Name: David F.
State: Illinois
—–
Hello David,

Thanks for the great question on adding oak chips during fermentation in the primary.

An important thing to know is that oak chips have an effect on the wine that is directly controlled by the amount of oak chips use and how long the chips are in the wine.

Wine kits that have been packaged with the pre-measured ingredients have been bench-tested. Trials of the wine has been made several times by the producer with variations of ingredients – such as the oak chips – to see which recipe combination produces the best wine. The goal is to produce a wine with the best overall balance and character. The producer of your wine kit knows how much oak chip to add to the fermentation to make an optimal wine because they bench-test.

By adding the oak chips during the fermentation, the wine is able to clear up more quickly and not have to go through the extra step of carefully bulk-aging with oak chips after the fermentation. This allows you to be able to bottle your wine in 4 to 6 weeks.Shop Toasted Oak Chips

The home winemaker who is making wine from fresh fruit does not have the luxury of knowing ahead of time the optimal amount of oak chips to put in the fermentation. The juice at hand is unique and has not been bench-tested.

Even for the home winemaker that makes the same wine from the same vines in their backyard every year, experiences variations in the profile of the juice from one year to the next. Adding oak chips during the fermentation in these situations would give the winemaker absolutely no control over the outcome. They could only take a wild guess as to home much oak to add to a primary fermentation.

For this reason, it is much better for the home winemaker to add the oak chips after the fermentation, while the wine is aging, instead during the fermentation. After the fermentation is done and has cleared, they can add in a reasonable amount of oak chips (we suggest 2 oz. to 4 oz. to 5 gallons); leave the oak chips in over time as the wine ages; sampling their effects along the way.

Being able to sample the wine over time is the key. Once the desired amount of oak character is achieved, the oak can be removed.

Handling the oak chips in this way allows the winemaker to have exacting control over the amount of barrel-aged character the wine will have. Leave the oak chips in until it’s right; then take them out.Shop Oak Wood Extractive

I hope this information helps clear up the difference between adding oak chips during fermentation and after the fermentation. Unless you have a wine kit that includes oak chips, you will want to add the oak chips to the secondary fermentation not the primary.

Best Wishes,
Ed Kraus
—–
Ed Kraus is a 3rd generation home brewer/winemaker and has been an owner of E. C. Kraus since 1999. He has been helping individuals make better wine and beer for over 25 years.

The Straight-Talk On Acid Testing Wine

acid testing wineThis will be my 3rd season of making wine. I have had some that were excellent and some that weren’t. I have not done anything with acid testing wine. I believe if I do I will have more consistency. Can u explain in more detail the timing and amounts of acid testing. I have purchased the pH test strips to start with. I have read previous blogs and that has not given me enough info.

Name: Jon
State: Wisconsin
—–
Hello Jon,

You will want to use the pH test strips to verify that the wine must is in the right range before starting the fermentation. When acid testing wine at this time you should expect a reading of 3.2. to 4.0 on the pH scale. If you are following a wine recipe this will normally be the case. A proper acid pH range is important for having a sound fermentation and to protect the wine from the growth of unwanted microbes.

If your wine is not in this pH range then you should make adjustments: either add water to lower the acidity or Acid Blend to raise the acidity. Remember: the pH scale work backwards – the lower the number the higher the acid. If your acid level is extremely high you may want to use more drastic measure such as adding Acid Reducing Crystals in the fermentation instead of dilution with water, but it would be unusual to have to go that far.

You should also acid testing the wine, again, before bottling. The acidity level will almost always change slightly during a fermentation, so expect a different pH reading than from before. From a taste perspective you would like the wine to be somewhere around 3.6, but the optimal reading can be different for each wine depending on the character of the wine.Shop pH Testing Strips

Before making any adjustments such as adding more Acid Blend, etc., taste the wine and make an evaluation yourself. Acidity has to do with the tartness of the wine as well as its stability. Is the wine too tart or too flat – regardless of what the pH strips say? The whole goal is to get it the way you like it.

You may also want to consider using a Acid Titration Kit at this stage for acid testing wine. It is easy to use and is quite helpful to take a titration reading at bottling time. A titration reads the actual strength of the acid in the wine, not the amount of acid like the pH test strips. The amount and strength of the acids do not directly correlated because some acids are stronger than others, and any wine has a mixture of acids varies from one wine to the next.

So, A titration reading relates to taste, whereas pH is more related to how many acid molecules there are in a sample of the wine. Different acids have different strengths or tartness, so you could have two wine’s with the same pH but with different perceived level of tartness. You can read more about the relation of these two readings in, In Plain English: The Difference Between pH And Titratable Acidity In Wine.Shop Acid Test Kit

I would also suggest taking a look at an article on our website titled, Getting A Handle On Wine Acidity. It goes into more detail on acid testing wine and how to actually control the acidity

Happy Winemaking,
Ed Kraus
—–
Ed Kraus is a 3rd generation home brewer/winemaker and has been an owner of E. C. Kraus since 1999. He has been helping individuals make better wine and beer for over 25 years.

Why Is My Homemade Wine Fizzy?

Homemade Wine That Is FizzyI bottled some blackberry a few months ago. When I opened a bottle today it fizzed over and kept bubbling for a while. What did I do wrong, I followed a wine recipe?

Name: Ed W.
State: FL
—–
Hello Ed,

Sorry to hear that your wine has gotten a little out of control. Let’s see if we can figure out what’s going on. If you find yourself asking, “Why is my homemade wine fizzy,” keep reading.

There are basically two ways a homemade wine can end up fizzy or bubbly. I’ll go over them here:

1. Re-Fermentation:
This is the most common way to get a fizzy wine. When a fermentation stops it usually means that it has finished. That means all the sugars in the wine must have been fermented into alcohol. There are no more sugars to ferment.

But on occasion a fermentation will stop before the sugars are all gone. This is known as a stuck fermentation. This can happen for a number of reasons: wrong fermentation temperature, using distilled water, etc. (see The Top 10 Reasons For Fermentation Failure) For this reason it is important that you check the must with a wine hydrometer to confirm that all the sugars have been fermented before moving on to the next step.

If you continue on with the wine recipe and end up bottling the wine with sugars still in it, then a fermentation could start up within any or all the wine bottles at any time in the future, even months down the road. It is important to remember that even the slightest amount of fermentation can cause a lot of fizzy within the wine.

Shop Potassium SorbateThe only exception to the above is if you have added potassium sorbate to the wine, also known as wine stabilizer. If you have added this before bottling, then the chance have having a re-fermentation within the wine bottles is greatly diminished. The same holds true if you have sweetened the wine before bottling. You need to add potassium sorbate along with the sugar to eliminate a potential for a re-fermentation within the wine bottle.

2. Bacterial Infection:
This is not as common of a reason for a homemade wine being fizzy as a re-fermentation, but it happens. If the fermenters, stirring spoons, hoses, wine bottles, corks and anything else the wine comes into contact with has not been sufficiently sanitized, then you run the risk of infecting your wine with a bacteria.

There are many excellent sanitizers on the market. We recommend Basic A because it is very safe and simple to use. You should also add sulfites directly to the wine after the fermentation, and again, right before bottling the wine. If you miss killing some bacteria, then adding sulfites such as Campden tablet or sodium metabisulfite to the wine will go a long way towards protecting it.

One thing you have mentioned is that the wine is fizzy instead of bubbly. If the wine has re-fermented, most people would describe it as bubbly and not fizzy. The CO2 bubbles from a fermentation are pretty good size. Fizzy sounds like the bubbles are smaller than that. That is what you would expect to find with a bacterial infection.

Shop Basic AYou also said that it fizzed for a long time. This is fairly definitive. When you get a fizzing that bubbles evenly for a period of time, that is also an indicator of a bacterial infection. Carbonation from a re-fermentation is more explosive and short-lived. A bacterial infection is not explosive. Once you open the bottle, it take a few seconds for it to build up a head of steam and get going.

I’m not sure, because I am not there, but I would guess the reason your homemade wine is fizzy is because of a bacterial infection. That being the case, sanitation of equipment and use of sulfites needs to be the focus when making future batches.

Best Wishes,
Ed Kraus
—–
Ed Kraus is a 3rd generation home brewer/winemaker and has been an owner of E. C. Kraus since 1999. He has been helping individuals make better wine and beer for over 25 years.

3 Clever Ways To Reduce Wine Acidity

Why To Reduce Wine AcidityHave now racked my muscadine wine for the 2nd time and gave it a taste test. It seems to have a very tart taste. What can I do to correct this?

Name: Bud
State: Tennessee
—–
Hello Bud,

The reason your homemade Muscadine wine is too tart is because the acidity is too high. The acidity comes from the fruit, itself, in this case the Muscadine grapes. It can also come from any Acid Blend you added as called for in your wine recipe. Every crop of Muscadines has a little difference in tartness, so it is hard for a homemade wine recipe to be accurate every time. The same goes for making wine with most fruits.

There are some things you can do to reduce wine acidity, but now is not the time to do it. You will want to wait until the wine has completely cleared and is to the point where it could be bottled. Once you are at this point in the wine making process, you can take corrective actions to lower the wine’s acidity.

The best place to start is with an Acid Test Kit. This will tell you how much fruit acid is in the homemade wine and how much should be in it. It’s a great product to use in such a situation. All you need is a small sample of the wine to take a reading, and it’s fairly quick. The reading will tell you exactly how much titratable acid is in the wine and what it should be.

There are three ways to reduce wine acidity and get the wine’s tartness in the right range:

  • Dilution:
    If the wine is just a little too tart, you can do something as simple as add water to dilute it. You should use distilled water so that free oxygen from the water is not introduced into your wine. The obvious problem with using this method to lower the acidity of a wine is that it isShop Acid Test Kit diluting the wine’s flavor as well. If you have taken a reading with the Acid Test Kit and know what your wine’s acid level is and what it should be, you can use something called a Pearson’s Square to figure out how much water it would take to reach your target acidity level.
  • Neutralization:
    One product that is perfect for reducing wine acidity is Acid Reducing Crystals. It is added directly to the wine and neutralizes a portion of the acid causing it to drop out as tartrate crystals. The directions on the side if the jar will tell you exactly how much of the Acid Reducing Crystals to add to reach your target acidity level.
  • Malolactic Fermentation:
    A malolactic fermentation is essentially a controlled bacterial fermentation with a selected malolactic bacterial culture. It is something separate from the alcohol fermentation and is usually started at the tail end of a yeast fermentation or later. The malolactic culture slowly ferments malic acid into both lactic acid and CO2 gas. Not only is lactic acid not as tart as malic, there will be less of it when the fermentation is done, by about half. The other half is dissipated from the wine as CO2 gas. Some types of wines are routinely put through a malolactic fermentation for flavor considerations, but not all wines are well suited for a malolactic fermentation. For this reason, you should use malolactic fermentations with caution when used for the sole purpose of reducing wine acidity.

Shop Acid Reducing CrystalsIt may be a little obvious at this point, but you can also use a combination of the three methods to lower the acidity of the wine. This is a good option for wines that are way too tart.

If you make wine from fresh fruits for any length of time, eventually you’ll run into a situation where the wine is to tart. Knowing how to reduce wine acidity is key to becoming a well-rounded home winemaker.

Happy Winemaking,
Ed Kraus
—–
Ed Kraus is a 3rd generation home brewer/winemaker and has been an owner of E. C. Kraus since 1999. He has been helping individuals make better wine and beer for over 25 years.

Wine Concentrate vs Fresh Grapes

Napa Valley SignI have been making wine from top end ($200+) wine concentrate kits and really getting into it. I was wondering if I should continue with wine kits or jump into creating wine from fresh grapes. I guess my questions is: What will produce a better red wine, a high end wine kit or quality fresh grapes?

Best Regards,
Dominick S.
—–
Hello Dominick,

This is really a great question, and one that I’m sure is on the minds of many individuals who use these wine concentrate kits, so I’ll cut right to the chase.

As surprising as it may seem, your better wines are much more likely to come from our high-end, wine kits. There are two very compelling reasons for this:

1. You cannot make a wine that is better than the grapes used to produce it.

This is an adage that is well known and respected throughout the wine making industry. While adhering to sound wine making practices is extremely important, the quality of your wine is limited by the quality of your grape. Being a good wine maker does not trump having good grapes.

And that is exactly what you are paying for when you purchase our high-end concentrate kits. You are paying for select grapes. These are grapes from prized wine making regions around the world. So unless you are writing to me from Napa or Sonoma County, or some other stellar wine region, the quality of the grapes you can find will have to be taken into consideration. Most home wine makers do not have access to the caliber of grapes these kits provide, but if you do, then go for it.Shop Wine Kits

2. The juices in these kits have been bench-tested several times.

What I mean by this is the producers of these concentrate kits have already made the wine from them and have made the optimal adjustments before they are brought to the home wine maker market. All the controllable variables such as acidity, brix level, and others have all been taken care of for you so that you can have consistently good results.

All of the above does not mean that you shouldn’t make wine from fresh grapes. There’s always something charming about making something from scratch, and the case of making your own wine, is no different. It’s fun… It’s gratifying… It’s rewarding… It gives you a sense of accomplishment, just like any good hobby should do.

Making wine from fresh grapes is also a great learning experience. You get to acquaint yourself, first-hand, to what a winery has to accomplish to turn the grapes into a wine. So if you are in the hobby to learn more about wine, then by all means go ahead. Make some wine from fresh grapes. But, if you’re in it to make the best wine possible and do not have access to world renowned grapes, the smart money is on wine concentrate kits.shop_wine_making_kits

Best Wishes,
Ed Kraus
—–
Ed Kraus is a 3rd generation home brewer/winemaker and has been an owner of E. C. Kraus since 1999. He has been helping individuals make better wine and beer for over 25 years.