 Dear Sir;
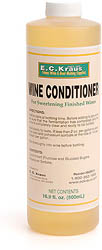
I have a question concerning adding the wine conditioner (sweetener) to a batch of Zinfandel wine I just made.
If the wine has a rather harsh taste at this point (before aging) won’t that affect the determination of how much sweetener that needs to be added before bottling? In other words will the harsh taste mask or interfere with the sweetness taste adjustment?
Jay
———-
Hello Jay,
Yes, you are correct. You have to be careful with how much of a sweetener, such as Wine Conditioner, you add when bottling homemade wine. This is because the wine is going to develop into something much different during aging. Most noticeably, will be the mellowing of its harsher characteristics.
When bottling the wine, if sweetening is added to cover these displeasing flavors, by taste, you may be headed for a wine that will end up too sweet once the effects of aging have come to full fruition.
This is actually an argument for aging wine in bulk instead of in wine bottles. By letting the wine age in something like carboys for a few month, before bottling, you will be in a position to add any sweetening desired without worrying about getting the wine too sweet.
This is another one of my wine making tips I like to share with beginners. Bulk age your wine in wine carboys, first, if you plan of sweetening your wine at bottling time.
Happy Wine Making
Customer Service
———————————————————————————————————
Ed Kraus is a 3rd generation home brewer/winemaker and has been an owner of E. C. Kraus since 1999. He has been helping individuals make better wine and beer for over 25 years.
Category Archives: Wine
Do New Wine Bottles Need To Be Sanitized?
 Dear Winemaster Kraus,
Do I need to sanitize the new out of the box wine bottles? I got two cases from you folk last week.
Thanks Kevin
———-
Hello Kevin,
The quick and painful answer to your question is, Yes. Just like any other homemade wine equipment and supplies, you need to treat them with a Sodium Metabisulfite and water solution before filling them with wine–1 teaspoon per gallon of water is the dosage.
You can treat the wine bottles in one of two ways:
- Pour an inch worth of the solution in each wine bottle. Let the wine bottles stand up-right for 20 minutes and then drain.
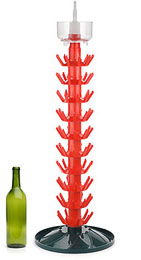
- Use our Sulphatizer and Bottle Tree combination. The Sulphatizer shoots a stream of the sanitizing solution into the wine bottle, releasing the sulfite gases to linger inside. The bottle is then placed on the Bottle Tree and allowed time to drain.
Either one of these methods should be employed within an hour or so of filling, not the day before or anything like that.
While We’re On The Subject Of Wine Making Cleanliness…
Corks, vinyl hoses, and other wine making materials should be sanitized as well when bottling wine. Counter-tops and other surfaces around the general bottling area should be treated with the same water/sulfite solution.
All of these careful steps are done in the name of keeping your wine from becoming the victim of spoilage, a needless outcome for any wine. Sodium metabisulfite is cheap and easy to use, so why not do it?
Best Wishes,
Customer Service
———————————————————————————————————
Ed Kraus is a 3rd generation home brewer/winemaker and has been an owner of E. C. Kraus since 1999. He has been helping individuals make better wine and beer for over 25 years.
Using A Hydrometer: It’s Not That Complicated
 Of all the pieces of homemade wine equipment in which you can invest, the gravity hydrometer ranks as one of the highest as being money well spent. Not only can the hydrometer tell you how much alcohol your wine is going to have, it can tell you how far along your fermentation has progressed and even whether or not the fermentation has completed.
Yet, many beginning winemakers do not use a hydrometer. I can see their eyes glaze over as I begin to explain to them how the hydrometer works and its applications. They think it’s over-complicating their newly-found hobby and want nothing to do with such scientific equipment.
In reality, the hydrometer simplifies the winemaker’s life for all the reasons mentioned earlier. Think of the hydrometer as a compass for navigating your fermentation. It will tell you where your fermentation stands and in what direction it is headed.
Taking a hydrometer reading is deceptively quick and easy. In fact, it’s easier than using a thermometer. All you are trying to do is see how high or low the hydrometer is floating in your wine. You take a reading by seeing where the surface of the wine is crossing the scales on the hydrometer.
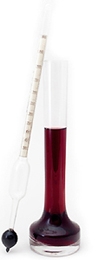
It’s that simple: make sure the hydrometer is floating, and take a reading. If the hydrometer is touching bottom, then you either need more wine or you need to use a taller container. For example, a gallon glass carboy is typically not tall enough to take a reading with most hydrometers.
We have hydrometer test jars, also known as H-jars to help make this process even easier than it already is. They are basically slender tubes or vials with a sturdy base. They are designed specifically for taking hydrometer readings. And, they’re not that expensive when compared to the wine is will be helping you to make.
Here are a couple of articles listed on our website that cover this topic in a little more detail: Getting To Know Your Hydrometer and Hydrometer Scales And What They Mean. You may also want to get the book, First Steps In Winemaking, which has a great section on using a gravity hydrometer.
———————————————————————————————————
Ed Kraus is a 3rd generation home brewer/winemaker and has been an owner of E. C. Kraus since 1999. He has been helping individuals make better wine and beer for over 25 years.
Can I Use Tap Water When Making Wine Kits?
 Hello,
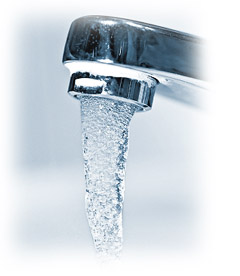
I am just getting ready to get my first batch of wine brewing with one of your wine making starter kits. I have a quick question. Is it was ok to use tap water from my sink to make this wine kit? Do I need to get bottle water from the store or what? We have good water here in our town, but I’m sure it has chlorine and other stuff in it.
Thanks,
Gerald
__________
Dear Gerald,
This is a great question that many beginning winemakers ask. Water is one of the main ingredients in any wine, so when you are first learning how to make your own wine, the source of water should be questioned.
Chlorine is the main issue with most municipal water systems. A trace amount of chlorine is added to the water to keep microbial growth at a standstill. For most urban areas the tap water is fine to use, but in some areas enough chlorine can be added to inhibit the fermentation. That’s the bad news. The good news is that chlorine can easily be taken out of the water before using.
This is another one of my simple wine making tips that I tell beginning winemakers: If you suspect that the tap water in your area has high levels of chlorine, I suggest that you draw the tap water a day ahead of time and allow it to sit open in a bucket overnight. Most of the chlorine will dissipate into the air, bringing it down to a level that is insignificant to making wine.
Happy Wine Making
Customer Service
———————————————————————————————————
Ed Kraus is a 3rd generation home brewer/winemaker and has been an owner of E. C. Kraus since 1999. He has been helping individuals make better wine and beer for over 25 years.
The Best Selling Wine Ingredient Kits of 2010!
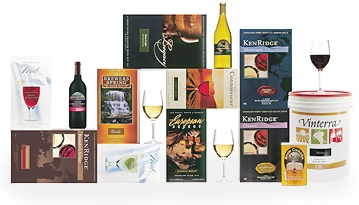 Finally, the numbers are in! We have tallied, checked, scrutinized, scratched our heads, double-checked some more, and licked-our-pencil-sharp to come up with:
Yes, that’s correct! Listed below are the 2010 winners of each brand of wine ingredient kit we offer. These are the wine varietals and blends that have smacked across more lips than any other type in their particular product group.
This may be an eye-opener for some and a breath of fresh air for others, but in either case, the chart below shows what’s been hot and what’s been not in 2010. Why not try one of these winners for your next batch?
| Brand: Niagara Mist Best Seller: Cherry Pinot Noir |
Brand:California Connoisseur Best Seller: Cabernet Sauvignon |
Brand:European Select Best Seller: Chianti |
| Brand: KenRidge Classic Best Seller: Trilogy |
Brand: Cheeky Monkey Best Seller: Malbec |
Brand: Legacy Best Seller: Merlot |
| Brand: KenRidge Showcase Best Seller: Aust. Chardonnay |
Brand: Vinterra Best Seller: Amarone |
Brand: KenRidge Founder’s Best Seller: Ital. Super Tuscan |
What Are Wine Ingredient Kits, You Ask?
A wine ingredient kit contains all the ingredients you will need to start a batch of wine brewing. All the wine ingredients are packaged together into a convenient ingredient kit form. You get: the grape juice, the wine yeast, wine clarifiers, even oak wood in some cases to give your wine barrel-aged qualities–enough to make 6 gallons of wine (30 bottled).
Many wine ingredient kits even come with decorative wine bottle labels that will give your bottles of wine a professional look, something you can be proud to pass along to family and friends.
These kits make it extremely easy for you to learn how to make your own wine. Complete, foolproof directions are included that tell you specifically what to do and when to do it. They take the guesswork out of the equation and put you on the path to successful wine making, starting with your very first batch of wine.
Happy Wine Making
Customer Service
———————————————————————————————————
Ed Kraus is a 3rd generation home brewer/winemaker and has been an owner of E. C. Kraus since 1999. He has been helping individuals make better wine and beer for over 25 years.
Can I Bottle My Wine In Beer Bottles?
 Hello
Hello
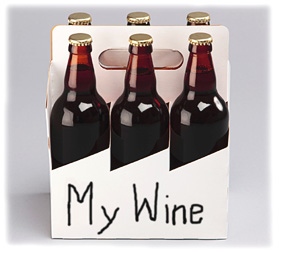
Can I bottle my wine in beer bottles and use bottle caps or do I have to use cork bottle stoppers because it is wine? I have the stuff to bottle beer but I do not have wine making materials for bottling. If I have to buy corks for beer bottles what ones should i get?
I am planning to make mostly fruit wines. Right now I have a blackberry wine working that I made from frozen blackberries.
Thanks Manny__________
Hello Manny,
In theory, there is no reason why you can’t use beer bottles and bottle caps to bottle your wine. You would not have to buy corks. In fact, there are not really any actual cork stoppers that would work that well on beer bottles, so bottle caps would be preferred in this instance. It would be no different than using screw cap wine bottles to bottle wine–in theory…
In reality, bottling wine in beer bottles is a lot of extra work. Whether you bottle in a 12 ounce beer bottle or in a 25 ounce wine bottle, its still the same amount of work per bottle, so basically you’re doubling the amount of time and effort to bottle the wine. Trust me I’ve been there.
There’s also the issue of aging. The ability of the wine to improve with aging may be impaired by using beer bottles, not because of the bottle, but because of the bottle caps. Cork stoppers allow a wine bottle to breath slowly or exchange air over time. This is was causes aging to occur… a very slow infusion of air. Bottle caps do not allow for this exchange. Bottle caps don’t let any air through at all. This can limit how much the wine can age.
In the case of most fruit wines such as your blackberry, this is not so important, but in the case of heavier red grape wines, where successful aging is a must, this could very well be detrimental to the wine.
Happy Wine Making
Customer Service
———————————————————————————————————
Ed Kraus is a 3rd generation home brewer/winemaker and has been an owner of E. C. Kraus since 1999. He has been helping individuals make better wine and beer for over 25 years.
How To Handle The First Wine Racking
 Dear Adventures in Homebrewing:
I just started my first batch of wine using the “California Connoisseur Necessities Box” (Chianti option). In 6 days, I will be racking the wine.
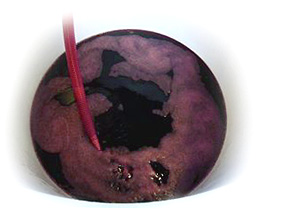
When racking into glass jugs, I understand that I need to leave behind the sediment created during the primary fermentation. However, the plastic fermenter is NOT transparent and it will be difficult to see when I will start encountering the sediment as I drain the wine in to my glass wine carboy. Naturally, I would like to get as much of the good wine as possible and leave behind the sediment. Any suggestions on how to achieve.
Thanks Gil
__________
Hello Gil,
I wouldn’t make too big a fuss about the first racking. If you get some of the sediment along with the wine in to the wine carboy, that’s just fine.
All you are looking to do at this stage is to leave the bulk of the sediment behind–most of it, not all of it. If you attempt to eliminate all of the sediment during this particular racking, you will be loosing too much wine, unnecessarily.
During the first racking you are much better off focusing on the wine as opposed to the sediment. Get as much wine as possible, regardless of the amount of sediment that comes with it into the wine carboy.
When you do the last racking, before bottling, this is when you want to focus on eliminating all the sediment, even at the expense of a little wine. Fortunately, by the time you get to this stage the amount of sediment to deal with will be very minimal, so the amount of wine lost is very small.
Happy Wine Making
Customer Service
———————————————————————————————————
Ed Kraus is a 3rd generation home brewer/winemaker and has been an owner of E. C. Kraus since 1999. He has been helping individuals make better wine and beer for over 25 years.
Top 10 Most Helpful Posts Of 2010!
 As 2010 draws to a close, and a new year comes into view, I thought it would be nice to take another look at the blog entries that have proved to be most helpful to home winemakers this years.
These are the blog entries that everyone here has gotten the most response from, or has been able to utilize the most when helping a customer.
As I result here is the list of the top 10 most helpful posts of 2010:
- Can I Make Wine As Good As The Pros?
- Avoid The Potholes Of Home Wine Making
- Can I Use Grape Juice From The Grocery Store To Make Wine?
- Is Wine Yeast And Baking Yeast The Same?
- Controlling Alcohol With A Gravity Hydrometer
- Are Sulfites Needed To Make Wine From Concentrates?
- Picking When To Pick… The Winemaker’s First Decision
- Why Do I Have To Rack My Wine?
- Controlling Your Wine’s Acidity With An Acid Testing Kit
- The Role Oxygen Plays In Aging Wine
I’d like to point out that there were a lot of other topics not covered in these 10 posts. These are posts covering an array of subjects from choosing the right rubber stopper size to choosing the right wine bottle label, or how to use a grape destemmer, so feel free to explore the rest of this blog.
———————————————————————————————————
Ed Kraus is a 3rd generation home brewer/winemaker and has been an owner of E. C. Kraus since 1999. He has been helping individuals make better wine and beer for over 25 years.
Can Your Tuff-Tanks Be Use For Secondary Fermentations?
 Hi Kraus,
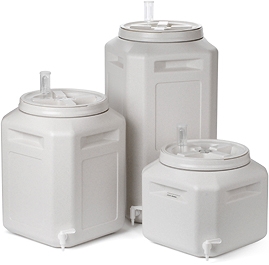
I am using the 14 gal tuff-tank for the primary fermentation and like it. My questions are can you also use the 14 gal tuff-tanks and other similar plastic fermenters for the second stage fermentation instead of glass carboys and Is there pros’s and con’s?
I thank you for your great service, JL.
__________
Dear JL,
The only thing you need to be concerned about when using our Tuff-Tanks or any other plastic fermenter in a secondary fermentation situation is head-space. This is the area between the surface of the wine must and the fermenter’s lid.
Air can be a spoiler of wine. If the air exposure is excessive, it can allow mold to grow on the wine’s surface, and it can also cause the wine to brown or oxidize. These are thing that don’t happen overnight, but if enough time is given, they can occur. For these reasons, head-space is always an area of concern.
The good news is air exposure and its effects are of little issue while the wine is still fermenting in a plastic fermenter. During the fermentation, CO2 gas is being given off which protects the wine must from air.
What this means for the winemaker is that during the primary fermentation, there is so much protective gas coming off that you don’t even need a lid on the plastic fermenter. Just a thin towel or similar will work fine. And, during the secondary fermentation, having head-space is okay as well, just as long as a fermentation of some sort is still occurring.
After the fermentation has stopped, or the air-lock has stopped bubbling, the head-space is still okay, so long as you do not remove the lid from the plastic fermenter. This is because the head-space is filled with CO2 gas, not air, at that point. The gas is heavier than air, so it does not want to escape from the plastic fermenter. It wants to stay as a protective blanket over the wine.
However, once the lid has been removed after the fermentation is complete, all bets are off. Something will have to be done at that point, whether it be transferring the wine from the plastic fermenter into carboys for aging, or just going ahead and bottling the wine.
JL, I hope this information clears things up for you. If there is still something you don’t understand, please contact us so we can discuss it further.
Happy Wine Making
Customer Service
———————————————————————————————————
Ed Kraus is a 3rd generation home brewer/winemaker and has been an owner of E. C. Kraus since 1999. He has been helping individuals make better wine and beer for over 25 years.
The Importance Of Aging Your Wines
 Almost everyone understands that wines need to age, but very few people realize just how important aging actually is to a wine. Aging is a process that is most often either underestimated or completely ignored by the home winemaker.
In reality, I would venture to say that aging a wine is just as important as the quality of the grapes used to produce the wine. If you’re missing either one, the wine will suffer noticeably.
Within the first 30 days of aging most people experience enough improvement in their wine’s flavor and bouquet to agree with this statement. The first 30 days is when a significant portion of the improvement happens. Continued aging will also reap additional benefits, and each additional month will provide marginal improvements.
As a frame of reference, the chart below displays the typical amount of aging that is expected by several of our homemade wine kits. They are listed by brand.
RECOMMENDED AGING TIMES:
|
Brand
|
Whites
|
Reds
|
| Niagara Mist |
0 to 12 Months
|
0 to 12 Months
|
| California Connoisseur |
1 to 18 Months
|
2 to 24 Months
|
| European Select |
1 to 18 Months
|
2 to 24 Months
|
| KenRidge Classic |
1 to 20 Months
|
2 to 28 Months
|
| KenRidge Classic IceVine |
1 to 20 Months
|
|
| KenRidge Classic Port & Sherry |
2 to 30 Months
|
|
| Cheeky Monkey |
1 to 20 Months
|
2 to 28 Months
|
| Legacy |
2 to 24 Months
|
2 to 30 Months
|
| Vinterra |
2 to 24 Months
|
2 to 30 Months
|
| KenRidge Showcase |
3 to 30 Months
|
3 to 36 Months
|
| KenRidge Founder’s Series |
3 to 30 Months
|
3 to 36 Months
|
The wines made from these homemade wine kits can either be aged in wine bottles, or they can be left to age in a wine carboy or similar. Either way is fine. You will notice improvements with either method of aging.
My personal preference is to age the wine in bottles with a traditional cork stoppers. If it is a white wine, I may consider using synthetic corks to better control the amount of oxygen that is being exchange passed the cork.
Happy Wine Making
Customer Service at E. C. Kraus
———————————————————————————————————
Ed Kraus is a 3rd generation home brewer/winemaker and has been an owner of E. C. Kraus since 1999. He has been helping individuals make better wine and beer for over 25 years.
