How To Tell If Your Wine Yeast Is Working

Starting Wine FermentationHow do you know if the wine yeast is working, I prepared the yeast per the instructions that were on the packet and when set to ferment the air-lock is not popping. Did I do something wrong, What would cause this to happen?
Thank you for your help,
Albert the beginner
—–
Good Morning Albert (the beginner),
Let’s see if we can’t figure out what’s going on…
First, it’s important to understand that it can take a wine yeast up to 36 hours to start showing signs of fermentation. On average, it takes a yeast about 8 hours, so if it hasn’t been this long, you may need to wait.
How long a fermentation actually takes to begin depends on a whole host of factors: temperature being the most critical. You want the wine must to be between 70° and 75°F. for a timely fermentation. You can find other factors by reviewing, The Top 10 Reasons for Fermentation Failure.
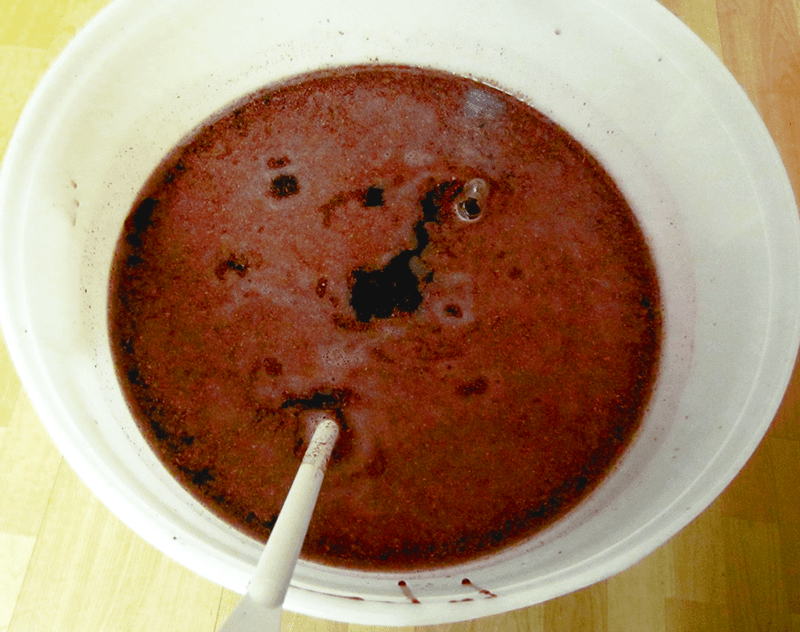
You will notice the first signs of fermentation activity as little patches of fine bubbles on the surface of the wine must. These patches will eventually grow into a thin layer of fine bubbles across the entire surface. You are likely to notice this before you will see any activity in the air-lock.
Here are a couple of issues I would like to bring up briefly that are indirectly related to your question but may bring some light to it:

Yeast Preparation
The directions on a typical packet of wine yeast will state to put the wine yeast in water that is at such-and-such temperature for so-many minutes before adding to the wine must. It is perfectly fine to follow these directions, but only if you actually follow them. This means using a thermometer to track temperature and a watch to track time. Following such directions in a haphazardly way will lead to the destruction of the wine yeast and a fermentation that has no chance of starting.
Shop Wine YeastIf you are not willing to monitor the process precisely, you are much better off just sprinkling the yeast on to of the wine must. The must will start fermenting, but it may take a little more time to get going.

Using The Air-Lock
You stated that you are watching the air-lock for signs of activity. In spite of what many wine making instructions may say, we do not recommend using an air-lock during the first few days of a fermentation (primary fermentation).
Yeast needs air to successfully multiply into a larger colony. By using an air-lock, the air is being kept away from the yeast. For this reason, we recommend that you do not use an air-lock during the primary fermentation. Instead, take the lid off and cover the fermenter with a thin cloth towel or something similar.
If you are concerned about leaving a fermentation exposed to the elements, rest assured that as long as you have an active fermentation starting up as scheduled, your wine must will be safe from any airborne contaminants. The positive flow of CO2 gas from the fermentation will help protect against this.

Another Wine Making Tip…
One think I like to do is put the air-lock on the fermenter for just the first few hours – just long enough to determine that the yeast is going to start. Once I see the first signs of fermentation, I then take the lid and air-lock off and cover with a thin cloth towel. This give the wine protection when it is most vulnerable and oxygen when the wine yeast most need it.
Happy Wine Making,
Ed Kraus
———————————–
Ed Kraus is a 3rd generation home brewer/winemaker and has been an owner of E. C. Kraus since 1999. He has been helping individuals make better wine and beer for over 25 years.

Leigh Erwin: A Slow Fermentation

Woman With Face In HandHi everyone!
Last time I checked in, I think I solved the slow fermentation issue I was having with one of my wine making kits. I did this by increasing the temperature of my wine with a heating pad. The fermentation was simply too cool for the yeast to ferment. Things still moved along very slowly after that, but it eventually hit 1.000 on my wine hydrometer (after 19 days!).
I have a feeling the rest of the process is going to do incredibly slow, so if things aren’t where they should be according to the time frame set on the instructions that came with the kit, I won’t be upset. I suppose I’ll be upset if the wine starts to look or smell funny, but for now, all seems to be going OK with the exception of the time-frame of the fermentation.
….fast-forward until today….
So, it’s been 17 days since I transferred the wine over to another carboy for secondary fermentation. According to the instructions, the wine needs to be less than 0.996 on the specific gravity scale of my hydrometer in order to move forward. I anticipate that the fermentation might finish out slower than that, but who knows.
Checking the specific gravity 17 days after starting secondary fermentation, it hasn’t moved AT ALL. It’s STILL 1.000. The temperature was 66°F., just a little to cool.
To top it off, the wine tastes disgusting. Overripe fruit overload, as well as other things I just can’t really describe. I guarantee that way too much oxygen was in contact with the wine for way too long causing the wine to become oxidized – I mean it took 19 days for primary fermentation to finish for crying out loud, leaving ample time for oxygen to do it’s dirty work.
I am extremely disappointed. I don’t even know at this point if the wine is even going to continue on its own. 2.5 weeks later and no change in the specific gravity? That, and it tastes nasty (reminiscent of that mead I tried to make)? I think it’s done. Destined for the drain.Shop Heating Belt
I will never forget now to at least poke my head in to check on my wine once every day to two instead of waiting until when the instructions say it’s time to move on. If I had noticed that my fermentation wasn’t getting going after 12-24 hours to begin with, I would have been able to warm the fermentation sooner and most likely save it.
I will also get in the habit of checking the temperature of the fermentation more often as well, particularly since I live in Colorado and I’m making it in a basement which does not have its own individual temperature control. After all, temperature is #1 on the list of The Top 10 Reasons of Fermentation Failure.
I may as well assume I’m always going to need a alternate heating source of some kind while I’m sending my wines through primary fermentation. That being said, if I want to increase my production and have more than one wine going at the same time, I’ll want to purchase a second (or more) heating elements to do that.
Live and learn, my friends!
———————————–
Leigh Erwin My name is Leigh Erwin, and I am a brand-spankin’ new home winemaker! E. C. Kraus has asked me to share with you my journey from a first-time dabbler to an accomplished home winemaker. From time to time I’ll be checking in with this blog and reporting my experience with you: the good, bad — and the ugly.

Double The Sugar To Sweeten The Wine… Wrong!

Potassium Sorbate With Sugar CubesMost of my “fresh fruit” wines are dry. I was talking with a gentleman who also makes his own wines. He told me to double up on the sugar to sweeten my batches. Right now I have a batch of wine (brewing since mid-May). It needs to be racked again. If I add sugar to this batch now, will it start fermentation all over?
Thanks,
Marlene
—–
Hello Marlene,
The short answer to your question is, “yes.” Continuing to add more sugar to your wine must while it is still fermenting will contribute to more fermentation and alcohol content, not to the wine’s sweetness. When first learning how to make your own wine this can be a great area of confusion for many.
If you keep adding more and more sugar you be raising the alcohol level of the wine, but will eventually come to a point where the wine yeast can no longer ferment more alcohol.  Where that point is is something that varies greatly from one batch to the next based on a whole host of conditions. Factors such as temperature, available nutrients, the type of wine yeast, and many, many others. All of these factors sum up to either contribute or hinder the wine must’s ability to ferment.
Some factors such as available oxygen and temperature can even change over the coarse of the fermentation. This means that the fermentation can stop at some point and then start up again. For example, if the fermentation gets cooled down by weather, then warms up again. You could have a fermentation the temporarily stops for a few days.
Fortunately, there is another way to approach making a sweet wine beside adding a bunch of sugar and hoping for the best. One that is more predictable, more controlled and easy to accomplish. This is also the method that any of the wine making books you read will suggest.
The first step is to accept the fact that any sugar you add before fermentation is to contribute to the alcohol content of the wine and not its sweetness. You can follow your wine recipes suggested amount, or you can use a wine hydrometer to tell you how much sugar to add. Shoot for an alcohol range of 10% and 13% alcohol. Any wine yeast can achieve this amount under reasonable conditions.Buy a Hydrometer from the shop
The second step is wait until the wine’s ready to bottle before worrying about sweetness. Once the wine has fermented, cleared and ready to bottle, you can then add sugar to taste. Once you get the wine’s sweetness to where you like it, you will then add potassium sorbate. This is a wine stabilizer that will hinder the residual yeast’s ability to recolonize and support a re-fermentation.
Don’t confuse potassium sorbate with Campden tablets or sodium metabisulfite. These work differently and can not completely eliminate a chance of re-fermentation. They should be added regardless if potassium sorbate is added to the wine or not.
By going about sweetening your wine in this way you are taking charge of the wine’s sweetness and no longer are at the mercies of a wine must’s ability to ferment or not ferment. If you’d like, you can also think about it as taking control or your wine’s alcohol content – particularly if you are using a wine hydrometer to help you target an finished alcohol level.
Happy Wine Making,
Ed Kraus
———————————–
Ed Kraus is a 3rd generation home brewer/winemaker and has been an owner of E. C. Kraus since 1999. He has been helping individuals make better wine and beer for over 25 years.

Leigh Erwin: My Stuck Fermentation

Woman with a stuck fermentationHello fellow home winemakers!
In case you haven’t been following my posts, my latest issue in my home winemaking adventures is a seemingly slow or stuck fermentation with my Cellar Craft Sterling Chardonnay. I had set up the primary fermentation according to the letter, but six days later, the specific gravity had gone from a 1.100 to a pathetic 1.080. Just as the name sounds a stuck fermentation is a fermentation that is not doing anything when it should.
I had mentioned to you that I’d been using the air conditioning a bit more during this time and had not closed the vent to the winery room, making the room a lot colder than it had been previously.
In a panic, I tossed in some yeast nutrient and yeast energizer, stirred it up, and then got out my heating pad. I plugged that in and set it under the fermenter, then crossed my fingers and went straight to my computer to ask the pros at E. C. Kraus to see if they could tell my why I had a stuck fermentation.
Here was their response:
“When I see this happening in this way with a wine ingredient kit, it normally points to one of two things:
1) Either the room temperature is too cold — which I’m sure you know, already;
2) Or, some of the yeast cells were killed through the rehydration process. See this article:
“Pros And Cons Of Yeast Rehydration”
It doesn’t hurt to add more nutrients, but I doubt if this will help. Wine ingredient kits, in general, are packed with a lot of nutrients, already. I would go ahead and add another pack of yeast to the wine must. Be sure to just sprinkle the granules directly on top. They will soak in and dissolve on their own.”
So, it sounds like I may have wasted some yeast nutrient and energizer in my little panic, since wine kits usually contain plenty of nutrients themselves, but that’s OK. I suppose it shouldn’t hurt the wine.Shop Yeast Nutrients
I did add some new yeast to the mix, though I decided to try and rehydrate them first instead of just sprinkling them on top. I don’t really know why I did this – in retrospect, this was probably another bad decision on my part, but I was in a slight panic and wasn’t thinking totally straight.
After a bit of waiting, I FINALLY hit 1.000 on the wine hydrometer 19 days after starting fermentation. I have no idea how having a stuck fermentation affects the quality of the finished wine, but so far the wine looks OK and smells OK. I’m not going to keep my hopes up with this wine, but I think it might still be salvageable.
A couple things I learned this time around: 1) check on the wine every day or two instead of waiting so long (I waited 6 days instead of peaking my head in to see if things were moving) and 2) always monitor the temperature of the wine with a thermometer, particularly when the weather outside is in flux and the heat or air conditioning is being used differently than it had been previously. Doing these two things would have helped to keep my wine from being prey of a stuck fermentation.
———————————–
Leigh Erwin bio pictureMy name is Leigh Erwin, and I am a brand-spankin’ new home winemaker! E. C. Kraus has asked me to share with you my journey from a first-time dabbler to an accomplished home winemaker. From time to time I’ll be checking in with this blog and reporting my experience with you: the good, bad — and the ugly.

Other Ways To Seal Wine Bottles

Closures that provide other ways to seal wine bottles.Many beginning winemakers will be happy to know that you do not have to buy a corker to seal your wine bottles. We have other ways to seal wine bottles during the wine making process. Consider the alternatives listed below for your next batch!
When you go to buy wine corks for your wine bottles you will find that most of them require a corker to press the cork into the wine bottle. This is because a new cork starts out much fatter than what you are used to seeing coming out of the wine bottle when decanting.
These are the type of wine corks we recommend using, particularly if you know you’re going to continue to make more wine into the future. But, if you are not sure if you’ll be making more wine, or you just don’t feel like buying a corker, just yet, there are other ways to seal your wine bottles.
Mushroom corks are an easy way to seal your wine bottles without using a corker. They are basically a cork with a plastic grip top. They come both in natural cork and synthetic cork. With some force they can be pushed in by hand to create a tight seal. While they do not seal quite as tight as traditional corks being pressed in, they are more than sufficient for any wine that will be consumed within 12 months.
Another way to seal your wine bottles that does not require a corker is our reusable wine bottle stoppers. Just like the mushroom corks, these stoppers can be put in by hand as well. Their unique design of ridges creates a series of chambers to produce a seal. While these stoppers are not all that attractive for passing out as wine making gifts, they can be covered up with decorative heat shrink capsules to give them a professional look.Shop Heat Shrink Capsules
And yes, you can always use screw cap wine bottles. By using screw caps you will be sealing the wine bottle air-tight, however you must have the right screw cap on the right bottle. Not any wine bottle can take a screw cap; it must specifically be a screw cap wine bottle. And, the screw caps you are using must be the correct size with matching threads. Not all threads are the same.
In summary, you do not have to buy a corker. There are other ways to seal a wine bottle. But, if you plan to continue making wine corks and a corker are your best long-term option.
Happy Wine Making,
Ed Kraus
———————————–
Ed Kraus is a 3rd generation home brewer/winemaker and has been an owner of E. C. Kraus since 1999. He has been helping individuals make better wine and beer for over 25 years.

Leigh Erwin: Wine Fermentation Temperature

Cellar Craft SterlingHi everyone!
I am very excited to finally be starting some new wines! I ended up purchasing two more wine making kits: the Cellar Craft Sterling California Chardonnay and the KenRidge Classic Nebbiolo. I chose the Cellar Craft Sterling Chardonnay because I have yet to make a white wine using oak chips and I wanted the opportunity to do so. As far as the red goes, I chose the Ken Ridge Classic Nebbiolo because it is a red that did not come with the skins, nor does it use oak. It does contain a packet of dried elderberries, which I thought was a fun change-up for a wine making kit.
I decided to start with the Chardonnay first for no reason in particular. Just like all the other times, I drew off water the night before, just in case there was chlorine in there so it could dissipate. The day of fermentation, I first prepared and added the bentonite solution, then added the wine base. Then, I used about 8 cups of warm water to rinse out the bag.
At this point, I checked the specific gravity with my hydrometer as well as the temperature, which came out to 1.100 and 69oF.
Feeling satisfied with these values, I then sprinkled the yeast onto the top of the juice and loosely placed the lid on top. I decided not to place the lid on tightly or use an air lock because from what I’ve read about primary fermentations, they actually like and need to have some oxygen in order to successfully proceed through the process.
According to the instructions that came with the wine making kit, I was to leave the wine fermenting until at least day 6. So, I did just that.
On day 6, I went to check in on the specific gravity and was surprised to find it had barely moved and was at 1.080. I had forgotten to check the temperature of the wine, but I could feel in the room it was somewhat cool.
See, previously the heat was switching on regularly, as it was late winter and that’s what happens! Around the time I started the Sterling Chardonnay, however, it had actually been very warm outside, so I wasn’t using the heat at all. There were actually a couple of days where it was so hot that I needed to switch on the air conditioning, but didn’t think about the fact that the vents were open in the winery room and while I was making things nice and comfortable in the upstairs living areas, I was inadvertently making things very cold in the basement where the winery room is located.
Beginning to wonder if that had something to do with my ridiculously slow fermentation; I decided to try a couple things to get this wine making kit fermenting while simultaneously reaching out to ECKraus for advice. My next post will follow up more on that.
———————————–
Leigh Erwin Bio PictureMy name is Leigh Erwin, and I am a brand-spankin’ new home winemaker! E. C. Kraus has asked me to share with you my journey from a first-time dabbler to an accomplished home winemaker. From time to time I’ll be checking in with this blog and reporting my experience with you: the good, bad — and the ugly.

Q&A: How To Clear Up Homemade Wine

Bentonite Wine Clarifier I’m really pleased with your service, but need some advice. Last year I produced about 13 gal. of blackberry wine with 13% alcohol with pretty good taste. Problem–not as clear as would like. I’ve used pectic enzymes, sparkolloid and the diatase enzymes. Would like your recommendation on further clearing.
Thanks
Patrick J.
——
Hello Patrick,
Sorry to hear that your wine is not clear up all the way.
Usually when we see a situation like this in spring or early summer it is because the fermentation never did complete. In other words, the cloudiness is actually being caused by a slight resurgence of fermentation activity. The yeast went dormant during the cold winter months. But now, since things are warming up again, the yeast are starting to become active – just enough to cause the little bit of cloudiness you are experiencing.
If this is the situation, no wine finings will be able to clear a wine. The fermentation has to be allowed time to finish fermenting all the sugars.
One way to know if a renewed fermentation is what’s causing this cloudiness is to take a reading with a wine hydrometer to see if there are still sugars in the wine that could be causing a slight fermentation. This slight fermentation would most likely be too minor to detect by observing an air-lock, so using a hydrometer is the best way to determine this.
If you believe that there might be a fermentation going on, then your most practical course of action is to allow the wine to ferment until it is done. You can encourage the fermentation by adding a dose of yeast nutrient to the wine and by making sure the temperature stays between 70° and 75°F. Wine yeast is very sensitive to temperature.
If the wine hydrometer indicates that there are no sugars still in the wine, then we need to think about what wine making materials would best clear up the wine. If you have the book, First Steps In Winemaking, the author suggests using a bentonite fining, and I would tend to agree, particularly in the situation.Shop Wine Hydrometers
There are two reasons for this:

  • Bentonite is good at clearing what Sparkolloid misses. So much so that some wineries will automatically use one then the other. Since you’ve already used Sparkolloid with limited success, it would only make sense to try its opposite.
  • Bentonite is good at clearing excess proteins from a wine, including tannins. Sometimes when you have a wine that isn’t brilliantly clear at this late stage it is due to excessive tannin dropping or precipitating out of the wine. As a side note, warmer temperatures can induce this reaction as well.

Patrick, I hope this gives you some idea as to why your wine is not clear up all the way.
Happy Wine Making,
Ed Kraus
———————————–
Ed Kraus is a 3rd generation home brewer/winemaker and has been an owner of E. C. Kraus since 1999. He has been helping individuals make better wine and beer for over 25 years.

Getting Used Wine Bottles Ready For The Wine

Used Wine BottlesI’m just starting in wine making and my first batch, one gallon of strawberry wine is about ready to be bottled. I have wine bottles from a local hotel/convention center. A friend told me to get Iodophor to sterilize them, but I’m not sure what that is. Can you tell me what I should do to clean these bottles?
Thank You
Jerry R.
——–
Hello Jerry,
Whether you need to clean 5 or 6 wine bottles or 50 or 60 bottles, the process of cleaning and sanitizing the used wine bottles is the same.
Getting the labels off the used wine bottles will be the first job at hand. I have found that there are two types of glues used to put labels on wine bottles: the kind that allows the labels to fall off with a little soaking in water, and the kind that requires a lot of scrubbing, regardless of how long you soak them.
Since you only need five or six bottles, I would take a dozen or so at random. Put them in a soapy bath. You can use a plastic fermenter or something similar. Let them sit over night, and see which labels fall off. Hopefully, you’ll have at least five. If none of the labels fall off the used wine bottles, this will reduce you to having to scrape them of with a utility razor.
Once you get the wine bottle labels off you will need to get the used wine bottles soapy clean, both inside and out. Cleaning the used wine bottles means all the grit and grime needs to be removed.
Regular dish soap works fine for this purpose. You will need a wine bottle brush to scrub the inside and get any dried, leftover wine removed. Our Brass Bottle Washer is also handy for blasting out the inside of the wine bottle with water. It also makes rinsing the soap from the inside of the bottle much easier and quicker.
Shop Sodium MetabisulfiteNow the used wine bottles are clean, but clean isn’t good enough for bottling wine. They need to sanitized. Your friend’s idea of using Iodophor is not a bad idea and will work for this process, however most winemakers prefer to use sodium metabisulfite for sanitizing their used wine bottles.
There should be directions that come with the sodium metabisulfite, but essentially all you do is mix in 1 teaspoon for each gallon of water.  You don’t want to put the wine bottles in the solution, but rather, just put an inch or two of the solution in each wine bottle and let them stand for 20 or 30 minutes. The sulfur fumes from the sodium metabisulfite will sanitize the insides without any effort on your part.
Cleaning and sanitizing used wine bottles can seem like a chore the first time you do it, but what I and most others have eventually discovered is that once you have your own system down, its really not that difficult.
I hope this helps you out.
Best Wishes,
Ed Kraus
———————————–
Ed Kraus is a 3rd generation home brewer/winemaker and has been an owner of E. C. Kraus since 1999. He has been helping individuals make better wine and beer for over 25 years.

Leigh Erwin: What To Make Next…

Bottled Vineco WinesHi everyone!
Well, after the whole filtering debacle from last time (with my Rosso Fortissimo), I am more than ready to move on. I’m sure it’s just something I did—I probably just pushed on the pump on the wine filter too hard or tried to send the wine through when it wasn’t clear enough, but I’ve made my peace with it. After reading the reviews of the wine filter system, it sounds like everyone else is happy with it and I’m the only one putting up a stink about it. I’ve decided to give it another try (when the time comes) and next time really put more of an effort into making sure the wine is clear enough to begin with to function properly.
Even with all that hullaballoo, the wine from this wine ingredient kit turned out great! It’s not filtered, but it still tastes pretty nice! I don’t think it’s winning any medals, but then again, I have extremely high standards and it’ll probably take me years before I can make a wine that is THAT good.
Now that I’ve bottled both my Gewurztraminer and my Rosso Fortissimo, it’s time to think about making another wine(s)! What to do…what to do…..
I do eventually want to try making wine from fruit; however, it’s not exactly the season right now to get a bunch of fresh fruit. I suppose I could go to the grocery store and clean them out, but I never feel as though the fruit there is really fresh. It’s the local suppliers who will have the fruit I want, and it’ll still be at least another month before the local farmers market even opens to the public.
I am also looking forward to seeing how many apples I’ll actually get from the small tree that’s in the backyard of our new house! I don’t think it’s a very old tree, so it might not produce enough to make an entire batch of wine, but we’ll see. I suppose I could always supplement what I don’t get from my own tree with other apples from the local farmers market.Shop Wine Kits
In the meantime, I will have to stick with wine ingredient kits for now!
Like last time, I will choose both a red and a white. I’ve been making a lot of California Connoisseur wines, which have been fantastic, but I do want to try some of the other brands E C Kraus sells just to see what those are like.
This time, to mix things up, I think I’ll go with the Chardonnay Reserve from Cellar Craft Sterling Collection since it uses oak and I’ve yet to make a white with oak, and then for the red, I might go with the Nebbiolo (Barolo) from KenRidge Classic because why not!
———————————–
leigh_erwin_bioMy name is Leigh Erwin, and I am a brand-spankin’ new home winemaker! E. C. Kraus has asked me to share with you my journey from a first-time dabbler to an accomplished home winemaker. From time to time I’ll be checking in with this blog and reporting my experience with you: the good, bad — and the ugly.

Leigh Erwin: Problems Filtering My Wine

Woman Typing On ComputerIn my last post I promised you all a more detailed explanation of what went wrong when filtering my Rosso Fortissimo wine kit. There were definitely problems filtering this wine, so here it goes…
So far, I’m basically 0 for 2 when it comes to successfully filtering my wine using the wine filter system. I’m not happy with it and I’m debating whether or not I should just get rid of it all together and try something else. I’m sure it’s mostly something I’m doing wrong, however maybe I should just take it as a sign that this particular wine filtering system and I just don’t get along and that we weren’t meant to be. I’m getting a little stressed out just thinking about it again.
This time around, I KNOW that I put the filtering system together properly. I checked the instructions about a million times and followed them to the letter.
I filled up the pressure tank to the appropriate level with water, and pumped it through the filter so as to remove possible cardboard or other paper-like flavors. That all went great! Barely any leakage through the filter! All right! It’s all ready for the wine to go through now!
Or so I thought….
I transferred some of the wine from the carboy into the holding tank/vessel and started pumping it through the wine filter. All of a sudden a TON of wine comes pouring out the filter and NOT into the clean carboy that it was supposed to go into. Seriously, the amount of wine going into the carboy was on a 1-to-1 ratio with the amount of wine just happily flowing out of the wine filter onto my catch pan like a creek in a flood.
The amount of wine spilled in the tiny bit of pumping that I did was already markedly greater than the amount of water I lost TOTAL just previously.
Shop Wine FiltersThere was no way I was going to lose half of my precious, homemade wine just to get it cleared up, so I immediately decided to stop filtering it and poured all the unfiltered wine that was in the holding tank/vessel into the clean carboy. I then went ahead and racked the remaining wine from the old carboy into the new clean carboy, cursed the wine filter to hell and back, and moved forward with the bottling process.
What the heck just happened here? I never expected to have another problem filtering my wine. The water moved through the filter perfectly and I barely lost anything, but when I sent the wine through, most of it went spilling out onto the catch pan.
My only guess is that the filter size was too small for this particular wine. Perhaps the wine wasn’t clear enough after all and what I really needed was a filter with a much larger pore size. Maybe with the smaller pore size it got clogged up almost immediately (though after inspecting the filters they didn’t look clogged — but who knows) and the wine had no choice but to find its way out through any opening possible.
Anyway, now that I am reliving this story to you all, my frustration level with this wine filter has once again skyrocketed. I’m not sure what I’m going to do exactly — be it just buy larger filters and cross my fingers that that’s the issue, or throw the whole darn thing out the window and buy a completely different wine filtering system.
Sigh…
Any help any of you could provide about using this wine filter system— or have this problem filtering my wine — would be greatly appreciated.
———————————–
leigh_erwin_bioMy name is Leigh Erwin, and I am a brand-spankin’ new home winemaker! E. C. Kraus has asked me to share with you my journey from a first-time dabbler to an accomplished home winemaker. From time to time I’ll be checking in with this blog and reporting my experience with you: the good, bad — and the ugly.