 I’ve heard that Pot Met [potassium metabisulfite] does not need to touch the carboy or bottles to sanitize, but the fumes are what actually does the sanitizing. Can you tell me which is correct?
Name: Bob
State: NY
—–
Hello Bob,
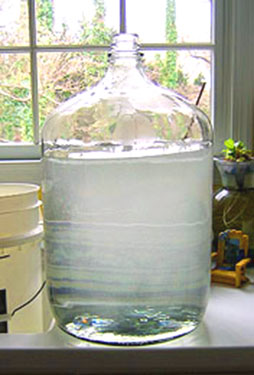
What you have stated above is correct. The SO2 gas that releases from a solution of water and potassium metabisulfite will sanitize the inside of your secondary carboys and primary fermenter buckets. It’s very effective, simple to do, and cost efficient.
Put about 2 or 3 inches of water in the bottom of your carboy, then add 1 teaspoon of potassium metabisulfite. It is also very important that you add 1/2 teaspoon of citric acid along with it. Without the citric acid, the SO2 will not release readily enough to do the sanitizing. If you are doing this in a bucket-style primary fermenter you will want to put the lid loosely on the fermenter to cause the gas to linger longer. Do not seal the fermenter or carboy air-tight. Allow the fumes to vent.
You only need to let the sulfite/water solution fume for about 30 minutes, and the fermenter will be sanitized. No need to rinse anything off. Just dump the solution out of the fermenter then add your wine.
To take this method of sanitizing a fermenter even further, you can also put your smaller pieces of wine making equipment in a primary fermenter while sanitizing it. You can put in: hydrometers, siphon hose, rubber stoppers, air-locks. Anything that will fit in fermenter, and all will be sanitized at the same time.
This method works whether you use the potassium metabisulfite, sodium metabisulfite or Campden tablets. All can be added to water with citric acid to make this fuming sanitizing solutions. To read more about these sulfites you may want to take a look at another blog post: “A Simple Guide To Metabisulfites“.
This using sulfite fumes to sanitize can also be applied to wine bottles just as well. Mix up the solution and add an inch or two to each wine bottle. Let sit for 30 minutes; drain then use.
Using a sulfite solution is an easy and effective way to sanitize your carboy and other fermenters and equipment. Hope this information helps you out.
Happy Winemaking,
Ed Kraus
———————————–
Ed Kraus is a 3rd generation home brewer/winemaker and has been an owner of E. C. Kraus since 1999. He has been helping individuals make better wine and beer for over 25 years.
Category Archives: Wine
Leigh Erwin: Bottling My Homemade Chardonnay Wine
 Hi everyone!
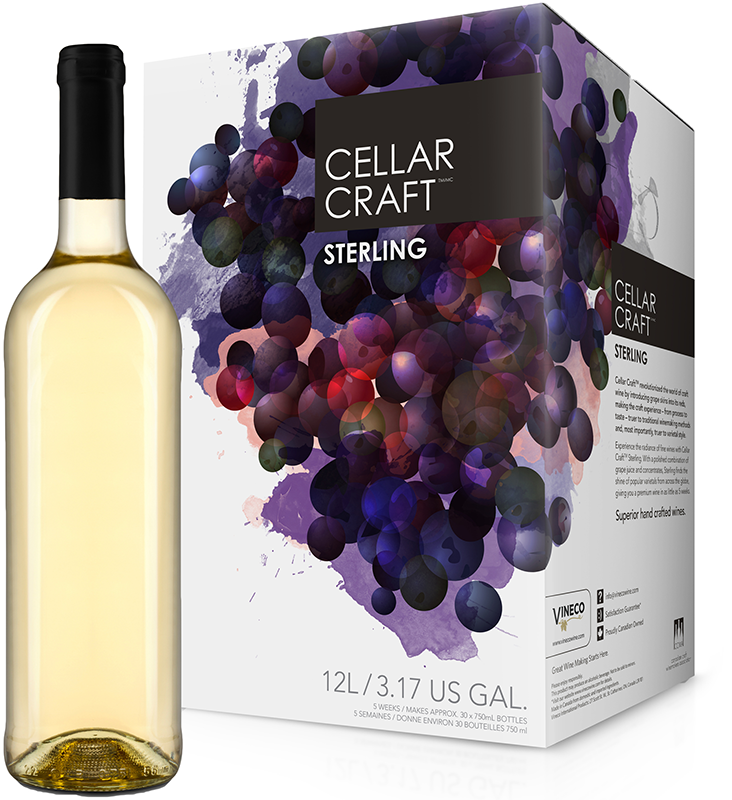
So, I finally finished my Cellar Craft Sterling California Chardonnay! I’m very happy it’s done, especially since it’s my second time attempting to make it, but I’m still not 100% convinced it’s going to turn out the best it can be. The specific gravity on my wine hydrometer never got exactly to where it was supposed to—it was very close though.
By the end, the specific gravity was supposed to be 0.998 or less, but as luck would have it, it ended up at 1.000. It’s strange because when I started the clearing stage it was at 0.998, but when I went to bottle the wine, it was back up to 1.000. I suppose maybe the temperatures weren’t exactly the same on those two days, but I foolishly did not check.
Anyway, bottling this homemade wine went very smoothly. I steamed the corks before putting them into the wine bottles as I have been doing, and cleaned and sterilized more bottles that I probably needed. I ended up only needing 23 wine bottles in the end, so I must have lost a little bit of wine at some point. I do remember that every time I racked the wine there was a little left over in the bottom of the carboy, so that’s probably where most of my losses occurred. I suppose the only other losses would be during evaporation over time, but that’s pretty much out of my control (other than topping off, but I didn’t do that).
One thing I should note is that I did deviate from the instructions a little bit in terms of when I did the actual bottling of the wine. Life kind of got in the way, and I did get a little lazy for a while there, so I ended up delaying the bottling process for a couple of weeks longer than usual. I figured since it was completely closed off from oxygen, I didn’t really have anything to worry about. Hopefully it sitting there in the carboy for longer only makes it better!
Since I am currently pregnant, I haven’t actually tasted the wine so I have no idea how it turned out! My husband sampled it and said he thinks it reminds him of the Gewurztraminer I made previously, but with less floral character. He also guessed that the alcohol content was on the relatively high side for a Chardonnay (as it was with my Gewurzt), though when I crunched the numbers, it turned out to be 13.13%. It’s not as high as the Gewurzt, so maybe it was the fact that he was tasting the wine pretty much immediately after bottling the wine that made it seem a little unbalanced.
I lovingly reminded my husband to save me at least half a case so that after the baby is born I can actually enjoy some of the wine myself!
All and all, bottling this homemade wine at home went pretty smooth. No surprises—and that’s a good thing. Now all we have to do is let the wine sit for a while and see how things turn out.
———————————–
 My name is Leigh Erwin, and I am a brand-spankin’ new home winemaker! E. C. Kraus has asked me to share with you my journey from a first-time dabbler to an accomplished home winemaker. From time to time I’ll be checking in with this blog and reporting my experience with you: the good, bad – and the ugly.
Leigh Erwin: Cold Stabilizing Your Wine
 Hi all!
I’m still just waiting for my Cellar Craft Sterling California Chardonnay Reserve to finish clearing so I can move onto the next stage, but for now I wanted to talk a little bit about a specific stage in the winemaking process that I’ve noticed is never present in any of the winemaking kits I’ve made so far…
Cold stabilization.
Cold stabilization in wine making is a common practice, so why is it not done in any of the home wine making kits I’ve made?
Cold stabilization is basically the process of keeping tartaric acid crystals from forming in the wine after it has been bottled. If a wine has not gone through cold stabilization before bottling, sticking the wine in the refrigerator, cellar, or otherwise very cold room may cause tartaric acid crystals, or “wine diamonds” to form. These crystals aren’t bad for you (it’s just cream of tartar!) and won’t hurt the wine, but some think it’s better for aesthetic purposes.
Tartaric acid is naturally present in grapes, so theoretically any wine is at risk of developing tartaric acid crystals or “wine diamonds” when at the right temperature or if the wine just jostled around or bumped just right. There has to be a concentration of tartaric acid higher than what can be handled by the wine in order for these crystals to be created under those circumstances, but for consistency, winemakers usually perform a cold stabilization prior to bottling regardless.
Actually performing a cold stabilization is actually pretty simple according to what I’ve read online.
All you have to do is before bottling, reduce the temperature of your wine to 30°F or lower for at least 36 hours. Doing this might be a little difficult if you don’t have a space refrigerator or if you’re not making your wine in the middle of winter in a cold locale, but if you have the ability, it wouldn’t hurt to just do it.
I also read that it is recommended you add potassium bitartrate powder to the wine right before you drop the temperature, as the presence of the potassium bitartrate (cream of tarter) will help pull any tartrate crystals out of the wine faster than if you were simply relying on the temperature drop.
The amount of alcohol present in your wine could affect the ideal cold stabilization temperature, so a simple mathematical equation is all you need to figure that out. All you have to do is take the alcohol level of your wine, divide that by 2, and then subtract 1. This will get you the ideal cold stabilization temperature for your wine in Celsius.
Now that I’ve read about how to do a cold stabilization in wine making, I have a feeling I know why it’s not listed on the instructions for any home winemaking kit I’ve ever made. It’s probably related to the fact that you need an entire separate refrigerator or need to be living in a place where it’s very cold outside when you’re making that wine in order to successfully cold stabilize your wine. Of course, they sell cooling jackets for stainless steel tanks, but that’s not something the home winemaker has.
———————————–
My name is Leigh Erwin, and I am a brand-spankin’ new home winemaker! E. C. Kraus has asked me to share with you my journey from a first-time dabbler to an accomplished home winemaker. From time to time I’ll be checking in with this blog and reporting my experience with you: the good, bad – and the ugly.
Leigh Erwin: What's The Best Temperature For Wine Yeast?
 Hi all!
I just wanted to follow up a little bit more on the fermentation temperature “issue” I had noted in my last post. If you recall, the instructions for primary fermentation for my Chardonnay wine had a recommended maximum of 75oF, however, the heating pad I was using (that’s built specifically for winemaking) kept the wine at around 78oF. I was basically wondering if 3oF would really make that big a difference, and if it’s still feasible to ferment my wine at that temperature without any problems. Is staying below 75°F the best temperature for wine yeast?
Reading around the message boards and other sites, it appears as though there are a lot of people who have no trouble fermenting their wines at 78oF. The big thing to note here, however, is that it all depends on which specific wine yeast you are using. Some wine yeasts only function in certain temperature ranges, while others function at different temperature ranges. If I’m using yeast that’s still good through 78oF, regardless of what the range the kit instructions recommended it should still be fine.
So, what is the best temperature for the wine yeast I was using? I threw out the yeast packaging right after I used it and couldn’t find that information anywhere on the instructions or online, so I’ll have to just make a guess. I know I have used the yeast strain EC-1118 in the past, so I’m going to assume that’s the same one I used for this particular wine and go from there. Doing a quick online search, it turns out that the appropriate temperature range for EC-1118 is 50oF to 86oF. That leaves me plenty of wiggle room and my 78oF seems like it should work just fine for this particular wine and temperature combination.
For fun, I decided to look up the yeast profile chart on the Adventures in Homebrewing website to see what the temperature ranges for the other yeast types available are. Some wine yeasts are better for making dry white wines than others, and if I’m reading this chart correctly, it appears as though these are the yeast strains listed best to worst for making dry white wines: ICV D-47, EC-1118, K1V-1116, 71B-1122, and RC212. After a quick search for appropriate temperature ranges for each of these five yeasts, this is what I came up with:
According to what I found, most of the wine yeasts available from the yeast profile chart on the Adventures in Homebrewing website have incredibly wide ranges of temperatures at which they can survive. As long as I wasn’t using the ICV D-47 yeast, the temperature that my heating pad made my wine (78oF) should be just fine.
It kind of makes me wonder though, why do the kit instructions say to ferment no higher than 75oF? Could they be assuming the winemaker might be using any number of wine yeasts and this is just the average high temperature that is appropriate? I suppose perhaps at the higher (or lower) temperatures you can still make the wine just fine, though the specific dates for each step will change depending upon that bit of information. Keeping it no higher than 75oF probably maximizes the likelihood that the wine will progress in the time frame specified by the instructions.
Does anyone else have any insights for the best temperature for wine yeast?
———————————–
My name is Leigh Erwin, and I am a brand-spankin’ new home winemaker! E. C. Kraus has asked me to share with you my journey from a first-time dabbler to an accomplished home winemaker. From time to time I’ll be checking in with this blog and reporting my experience with you: the good, bad – and the ugly.
Are There Any Rules in Home Brewing?
 “Rules are meant to be broken.” Nowhere is this more true than in home brewing!
Sure, there are plenty of recommendations about what you should do in order to make the best beer you can, but homebrewing wouldn’t exist without experimentation. It’s often how new discoveries are made. Without experimentation, would double IPAs and chocolate stouts even exist?
With that in mind, here are just a few home brewing rules you might consider breaking on your next brew day:
- Cleaning and sanitation – 99% of the time, yes, cleaning and sanitation is very important if you want a degree of predictability in your beer. But as a homebrewer, you have the luxury of deciding when – and when not – to follow the rules. If you’re into Belgian, wild fermented, or sour beers, maybe you can risk a little slack in your cleaning routine. No guarantees that it will turn out well – but what’s the worst that can happen? Start with a one-gallon, “wild” batch before risking a whole five-gallons.
- Beer must have hops – Depending on who you ask, beer isn’t beer without hops. But anyone who knows a little beer history can tell you that hops weren’t always a main flavor ingredient in beer. Want to try something unique? Mix a blend of herbs and spices to make a gruit or mumm – hops are optional!
- Beer must have malted barley – Yes, most beers have malted barley, but not all. Chicha is a traditional Peruvian corn beer. Sound intriguing? Brew it!
- Yeast starters – Do you have to do a yeast starter? Absolutely not. At least one experiment has actually shown that they do little, if anything, to actually improve beer flavor. Maybe this is a step you can skip on your next brew?

- Temperature control – You’ve heard it time and again: temperature control is the most important thing you can do to make better beer. But what happens when you let temperature go? This experiment shows that temperature control might not be as important as we think. Plus, many Belgian yeast strains do well at higher temperatures. Try pushing the temperature on your next saison and see what happens.
Of all the home brewing “rules”, there is only one that is sacred: have fun! Because if it’s not fun, what’s the point? Yes, there will be challenges, there will be frustrations. These are times to recall the homebrewer’s mantra: “Relax, don’t worry, have a homebrew.” But beyond that, don’t let anyone tell you there’s a certain way things have to be done. Experiment, test, evaluate, go crazy! You may just stumble upon the next big thing!
What are some home brewing rules you like to break on brew day?
———————————–
David Ackley is a writer, brewer, and craft beer marketing consultant. He holds a General Certificate in Brewing from the Institute of Brewing and Distilling and is founder of the Local Beer Blog.
Leigh Erwin: What About Fermentation Temperature?
Hi guys!
Just a quick follow up on how things are going with my Cellar Craft Sterling California Chardonnay! Last time, I’d taken you through the degassing stage, and other than a (hopefully) minor oversight that resulted in me stopping secondary fermentation 2 specific gravity points early, I think everything is going well!
The next stage, then, is the clearing stage. The specific gravity is still holding at 0.980 on the hydrometer, though the wine’s fermentation temperature is a lot lower now that I decided to unplug the heating pad after the fermentation was complete. My reasoning was since I don’t need to keep the yeasts happy anymore with good fermentation temperatures, then I didn’t need to keep the heating pad plugged in and running. Hopefully that was the right decision.
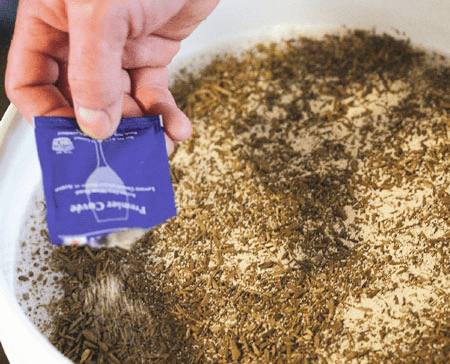
The only issue I ran into during the clearing stage was that I accidentally spilled most of the Kieselsol pouch on the counter due to clumsiness. Thankfully, since I never got to that stage with my last batch of Sterling California Chardonnay, I still had the Kieselsol package from that, so I just went ahead and opened that one and dumped those contents into my wine. Problem solved! Ah, the benefits of having extra ingredients laying around! I’ll have to keep that in mind for my next order and just stock up on a bunch of ingredients that I use on a semi-regular basis.
Now, I have the wine sitting around waiting to clear and basically waiting to be bottled. I don’t think I’ll be filtering the wine this time, as I forgot to purchase new filter pads for my wine filter system and I’m not convinced the system even works very well to begin with, but me making unfiltered wine is pretty much par for the course at this point and my husband is still pleased with the wines, so why not continue that trend!
 The only other question I had so far when making this Chardonnay was again related to the wine’s fermentation temperature. I noticed that the heating pad kept my wine consistently in the high 70°F range. This is according to my thermometer strip I have stuck to the side of the fermenter. I am only slightly concerned about this, as according to the instructions, the upper fermentation temperature limit recommended was 75oF. Now, the heat pad that I bought seems to have been keeping the temperature around 78oF which makes me a little nervous. How big a deal is 3oF? Does that really matter?
Seeing as how I didn’t do anything about the temperature and it still ended finishing out fermentation around the appropriate specific gravity, it is probably OK, but I would not be surprised if it had slowed it down just a little at the end. If you recall, it did take an extra couple days for the wine to reach 0.998, though technically I was supposed to take it to 0.996 and likely would have taken several more days to do that. I’m wondering if that extra 3 degrees of fermentation temperature was too much for some of the wine yeast and a few more of them died off than would have if the temperature was just a little cooler.
Why in the world, then, would a heating pad designed for winemaking be programmed to heat up to that high of a fermentation temperature? Maybe next time I’ll have to just remember to plug and unplug a bunch of times to try and keep the temperature a little lower.
———————————–
My name is Leigh Erwin, and I am a brand-spankin’ new home winemaker! E. C. Kraus has asked me to share with you my journey from a first-time dabbler to an accomplished home winemaker. From time to time I’ll be checking in with this blog and reporting my experience with you: the good, bad – and the ugly.
Leigh Erwin: Making A California Chardonnay Wine Kit
 Hi everyone!
I’m excited to finally be making a new batch of wine after a couple of weeks hiatus. I’m partially nervous, though, because I’m making the Cellar Craft Sterling California Chardonnay wine kit again, and if you recall last time I tried to do that, I messed up big time in regards to the fermentation temperature.
This time, however, I am prepared! I have the heating pad all set up and am not going to touch it at all until fermentation is complete.
To start the Chardonnay wine kit off, I ended up using tap water as if you recall from an earlier post I wrote, the tap water here where I live doesn’t give off any sort of chlorine smell and I’m pretty positive it’s winemaking worthy. I remember making a red wine in the past with straight tap water and it came out just fine, so hopefully the same will be true for this white.
Primary fermentation for this Chardonnay wine kit went very smoothly. I followed all instructions that came with the wine kit to the letter and made sure the temperature of the wine was never too low.
Secondary fermentation came right on schedule for this Chardonnay (day 7), though I did notice it still smelled a bit yeasty. Cue flashbacks from the screwed up batch….
Anyway, since there is still yeast doing their thing in there, I was not at all concerned about the yeasty smell and crossed my fingers that it could complete secondary instead of getting stuck like it did last time. Actually, I don’t think it even made it out of primary fermentation last time, but I digress…
The end of secondary fermentation, however, did not come exactly on time as the instructions suggested it probably would. Instead of finishing up on Day 20 as the instructions indicated, I didn’t move on to the degassing stage until Day 24. I actually think I may have made a slight mistake at this point though, as I think I stopped secondary 0.002 specific gravity points too soon, according to my wine hydrometer.
See, the instructions said: “Targets: Sterling Reds, Showcase Reds & Whites: <0.998 or Sterling Whites: <0.996.” The specific gravity I noted on Day 24 was 0.998, so quickly looking at the Target values, I thought I had been working with the Showcase White and that 0.998 was correct. Well, turns out I read it a little too quickly and had forgotten that I was actually working with the Sterling White, so I shouldn’t have moved onto the next step until the specific gravity was 0.996. Oopsie. I hope that doesn’t come back to bite me.
The wine didn’t smell nearly as yeasty any more, though I thought I might still be able to smell a little bit. I should note: my sense of smell might be a little heightened right now since I am pregnant (surprise!), so I’m hoping it’s still going to be OK and whatever yeasts might still be in there will fall out during the clearing stage.
———————————–
My name is Leigh Erwin, and I am a brand-spankin’ new home winemaker! E. C. Kraus has asked me to share with you my journey from a first-time dabbler to an accomplished home winemaker. From time to time I’ll be checking in with this blog and reporting my experience with you: the good, bad – and the ugly.
Can You Add More Yeast To Wine?
 One of my wine making kits seem to be slow in starting & after a few days, we added another yeast pkg. to the wine……which finally begin activity. With 2 wine yeast pkg. Was it OK to add another package? Can you add more yeast to a wine? Will the wine have a yeast taste?
Thank you
Chris D.
—–
Hello Chris,
Whether you use one, two or even three packets of wine yeast, it will not have a direct impact on the flavor of the wine.
The reason for this is when a single packet of wine yeast starts to ferment, it first goes through what is know as an aerobic stage. This is when the yeast begin to multiply themselves into larger numbers. This aerobic phase will typically increase the cell count of a single packet by about 150 to 200 times.
This explosive growth of yeast cells is what eventually causes a significant amount of the sediment you typically see at the bottom of your carboys.
If two packets of wine yeast are added, it will not cause double-the-volume of yeast, but it will make a little more than one packet would, but only marginally so. In either case, the yeast cells will all drop out when they are finished fermenting. If the fermentation goes correctly, all the yeast will eventually be removed, regardless.
But having said this, you should have only needed one packet of yeast in the first place. The fact that a second packet caused the fermentation to take off would be an indication of one of three things:
- First packet of wine yeast was old. Not very likely, but it does happen.
- The water used in making the wine was too cold when it came out of the tap, but eventually warmed up enough to allow a fermentation. This is usually around 24 to 36 hours after being drawn – about the same time you added the second pack of wine yeast. Something we see sometimes in the colder months.
- You re-hydrated the first pack of yeast in warm water, just as the packet directs you to, but you did not actually control the temperature of the warm water by taking a temperature reading and/or you did not leave the wine yeast in the warm water for the exact amount of time called for in the directions – usually 10 or 15 minutes. In either of these cases, the wine yeast could have been destroyed during the re-hydration process.
Number 3 is by far the most common reason we see a fermentation not starting. Regardless of the reason, its always okay to add more yeast. You can add more yeast to the wine without causing unwanted results. Just realize that it is not usually a solution to the problem. You also have to be aware of other factors that can interfere.
One thing you could do when a fermentation is not starting as planned is to run through the, Top 10 Reason For Fermentation Failure. These 10 reasons cover over 95% of the stuck fermentations we see.
So as you can start to see, you can add more yeast to a wine; the point is, you shouldn’t have to!
Happy Wine Making,
Ed Kraus
———————————–
Ed Kraus is a 3rd generation home brewer/winemaker and has been an owner of E. C. Kraus since 1999. He has been helping individuals make better wine and beer for over 25 years.
What Causes A Homemade Wine To Taste Too Sour?
 May I know what causes a fresh fruit wine to taste too sour? I’ve tasted a homemade fresh fruit wine that is sooo sour, and what is the remedy to remove the taste?
Thanks very much!
Shirley S.
—–
Hello Shirley,
In almost all cases, the reason for a homemade wine tasting too sour is because it has too much fruit acid it it.
All fruits have various acids in them that contribute to a tart/sharp/sour taste. If the fruit is too acidic, or too much of the fruit is used in the wine recipe, you can end up with a wine like you are describing.
This type of wine fault is also enhanced by the fact that during a fermentation almost all of the the sugars are fermented into alcohol. This doesn’t make the wine more acidic, but it does allow the sour flavor to stand out much more.
Acidity can be a problematic area if you are just leaning how to make your own wine. With your future batches I would suggest that check the acidity level both before and after the fermentation.
If the wine is flat tasting this means there is not enough acid. You may need to add more acid to bring the wine back into balance. This is normally done with the addition of acid blend.
If the wine is too acidic, there are a few ways you can go about reducing it, including dilution. A very good article on the subject is Getting A Handle On Wine Acidity. It has some wine making tips for reducing the acidity of a finished homemade wine that is too sour, as well as other information.
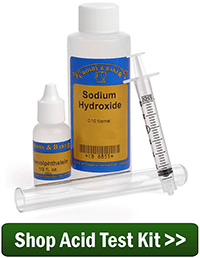 Following trusted wine recipes will normally keep you out of trouble. A further step you can take is to get an acid testing kit. It will come with directions that will tell you what reading to shoot for and what to do to get it there – even before the fermentation starts.
Acidity is one of the fundamental flavor components of any wine. It has to be right before even having a chance of the wine tasting any good. If there’s not enough acid in the wine it will taste flat and lifeless; and if there’s too much you end up with a homemade wine that too sour.
Best Wishes,
Customer Service
———————————–
Ed Kraus is a 3rd generation home brewer/winemaker and has been an owner of E. C. Kraus since 1999. He has been helping individuals make better wine and beer for over 25 years.
Leigh Erwin: Can I Use Tap Water For Winemaking?
 Hi everyone!
I wanted to take a moment to chat with you all about water in home winemaking. What I mean is basically what kind of water is best to use in home winemaking. The instructions on some of the wine kits that I have been using have said that if you’re using tap water to draw it off the day before you actually want to use it, to give the chlorine a chance to “burn off”. However, other instructions I’ve used have not said anything like that at all.
It made me wonder: is my tap water OK for winemaking?
I actually had been delaying the start of my most recent batch of wine because I had kept forgetting to draw off some tap water the night before. One day, however, I found a short article that said if you can drink the water from your tap and you don’t notice any chlorine or other off-flavors or aromas, it’s probably just fine to use for home winemaking.
If you get your water from your city or municipality, they most likely treat the water with chlorine to get rid of bacteria that might be present. This same chlorine, however, is bad news bears for your wine if it’s at levels high enough to smell it in the water, so if you can smell chlorine, you probably want to go elsewhere for your water or boil it, draw it off the day before, or treat it with activated charcoal.
If you get your water from a well, there could be all sorts of bacteria or other harmful things in there since it has not been treated like city water has. It’s probably a good idea in general for you to have your water tested anyway, so now might be a good time to do that if you haven’t done so already. Once you know what’s in your water, you can go ahead and start determining how to treat it.
Distilled water is often not recommended for winemaking, as the distillation process basically removes everything from the water, including minerals that yeasts like to use as nutrition.
 Spring water is usually the best way to go, in place of tap water as it’s typically very clean and has enough trace minerals to keep the yeasts happy. You can find spring water bottled in grocery stores. In general, any bottled water you find at the grocery store for drinking will be just fine to use, as long as it’s not distilled.
For me this time around, I decided to play my cards a little bit a use the water from my tap for making my next batch of wine. My husband and I drink it on a regular basis and I do not smell any chlorine or anything else in the water. Now that I think about it, I did make at least one batch early on with tap water not drawn off the night before, and the wine turned out just fine. We’ll see if I made the right decision this time.
———————————–
My name is Leigh Erwin, and I am a brand-spankin’ new home winemaker! E. C. Kraus has asked me to share with you my journey from a first-time dabbler to an accomplished home winemaker. From time to time I’ll be checking in with this blog and reporting my experience with you: the good, bad – and the ugly.