
 I started a batch of the SunCal California red [grape concentrate]. This is first time I have used a kit like this. I noticed it does not call for Campden tablets to be used. Is this correct, or does this wine concentrate need sulfites?
David J.
—–
Hello David,
When making wine from fresh fruits it is important to treat the wine must with a sulfite of some kind before starting the fermentation. You could use the Campden tablets you mentioned. You could also use potassium metabisulfite or sodium metabisulfite. Any of these will release sulfites into the wine. The dosage is right on the container they come in.
The reason for adding sulfites to a wine must is to destroy any wild molds, bacteria and other unwanted, microbial nasties that could eventually grow and ruin your wine. The sulfites release into the juice killing these wild elements. After that, they leave the wine, dissipating into the air as a gas. Once the wine must has sat for 24 hours, with the cover off the fermenter, you can then add wine yeast and start the wine making process as you normally would.
However, when making wine from wine concentrates you do not need to add sulfite. Any of the SunCal concentrates or other packaged wine making juices have already been treated and are ready to go when you get them. All you need to do is mix in the wine yeast and other ingredients, and let it ferment.
 As an additional note, it is important to remember that even thought wine concentrates do not need sulfites added before fermentation, they do need them before bottling. By adding sulfites to any wine before bottling, you are are dramatically reducing the chance of the wine spoiling. You are also dramatically increasing the wine’s ability to retain its freshness for an extended period of time.
There is no reason to wait 24 hours after adding the sulfites. Just blend it in and bottle immediately. You can find more info on when to add sulfite to a wine on our website.
David, I hope this information helps you out. Now you know that wine concentrates don’t need sulfites added before fermentation It was a great question, and I’m glad you asked it.
Happy Wine Making,
Ed Kraus
—————
Ed Kraus is a 3rd generation home brewer/winemaker and has been an owner of E. C. Kraus since 1999. He has been helping individuals make better wine and beer for over 25 years.
Category Archives: Wine
What's The Difference Between Crushing And Pressing Grapes?
 Any of the wine making books you read, will tell you that wine grapes need to be crushed and pressed. The same holds true for the directions that typically come with any wine making recipes, but what does it actually mean to crush and press the wine grapes?
Many beginning winemakers think crushing and pressing to mean the same thing, that the terms are interchangeable, when in fact both mean something very different. To understand just how different you must first know a little bit about the wine making process.
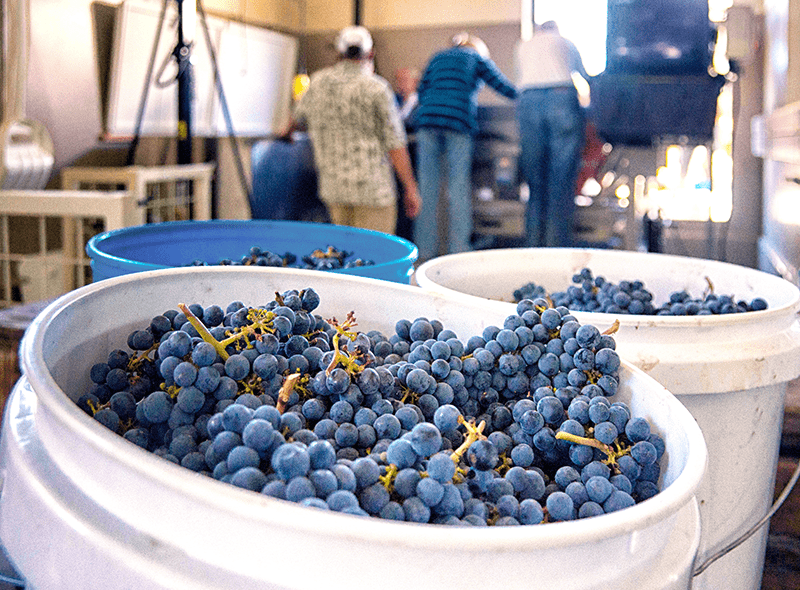
When making wine from grapes it is important to realize that you are not only dealing with the juice from the grapes. You are also dealing with the pulp, the skin, and all the fiber that make up the grape. It is from these organic solids that the grape is able to provide body, color and certain flavor characteristics to the wine. Without them all you have is clear grape juice with very minimal qualities.
This is why when a winery makes a red wine, the skin and pulp are actually in the fermentation along with the grape’s juice. Once the fermentation has almost completed, all the fibrous solids of the grapes are then removed.
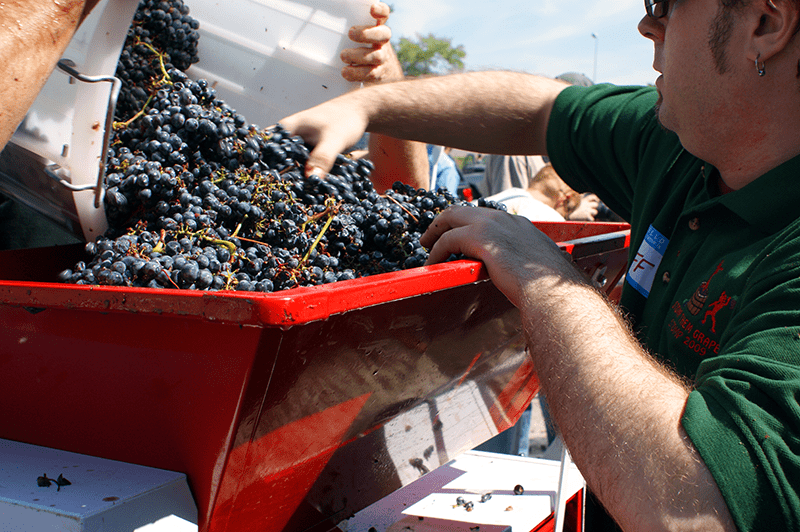
But how do these grapes become a soupy mix that is fermentable? Then later, how is the skin and pulp removed? This is where crushing and pressing come into practice.
Crushing Wine Grapes
 Crushing is what’s done before the fermentation. It’s what changes the plump grapes from something you pop into your mouth to something you can slop around in a fermenter.
Crushing the grapes is a very straight-forward task. It’s simply a matter of bursting the skins so that all the inner solids can be exposed to the fermentation. Enough free-flow juice will release from the grapes to turn the crushed mix into something liquid we call a wine must.
You can crush the grapes by doing something as archaic as throwing the grapes into a bucket and pounding them with the butt end of a 2×4, or you can be as elaborate as processing them through a grape crusher that was designed specifically for the purpose. A grape crusher is typically a hopper that leads to two rollers that are placed closely together. The wine grapes are crushed by going between the two rollers. Both methods do equally well. It’s more a matter of how many pounds of wine grapes you are needing to crush and how much work you are willing to do.
Pressing Wine Grapes
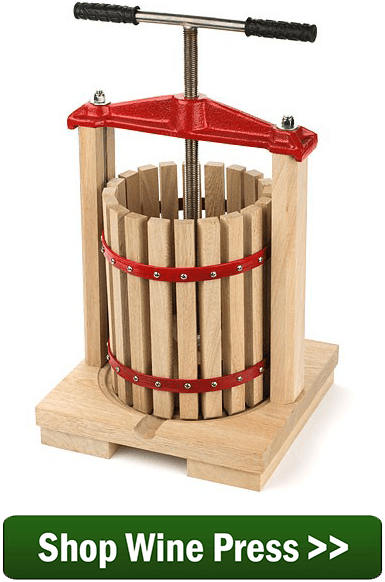
 Once the wine must has fermented for around 5 to 7 days it is then time to remove all the solids. This is when you’ll see a winery pull out the grape presses and start pressing the wine must. The must is dumped into the pressing basket. Immediately, free-run juice will start flowing from the grape press spout. What’s remaining in the basket is then pressed to extract even more juice.
As a home winemaker you do not necessarily need to use a wine press. If you are dealing with a small batch and have only 2 or 3 pounds of pulp, you can press it by hand as best as you can. A fermentation bag can come in handy for this process. Collect the pulp into the bag. Then hang it over a fermenter while you squeeze it. The biggest drawback to this is you will not get nearly as much juice from the pulp as a wine press can.
If you are dealing with a little larger amount, a wine press is almost a necessity. We have affordable grape presses as small as our Table-Top Press. It is ideal when making 10 or 15 gallons of wine.
So, as you can see there is a big difference between crushing and pressing grapes. And, each as an important function in the wine making process.
—————
Ed Kraus is a 3rd generation home brewer/winemaker and has been an owner of E. C. Kraus since 1999. He has been helping individuals make better wine and beer for over 25 years.
A Simple Guide To Making Wine From Grapes
 Making wine from a grape wine kit is relatively straightforward. You have the directions and the other ingredients pre-measured. But now that you’ve grown more comfortable with making wine from these kits, you’re ready for the next level: making wine from grapes. It’s not really all that different from making wine from a wine concentrate?
Most of the process is the same. However, the first few steps is where making wine from grapes becomes more involved and just a little more complex. You can no longer rely on the wine kit producers to prep the grapes for you. It’s now up to you!
Choosing The Wine Grapes:
When making wine from grapes, the first thing you’ll need to determine is what variety of grape you will be using, and where you will be getting these grapes.
What it boils down to is: what kind of wine do you like to drink? Are you a big red fan? Then maybe don’t buy Sauvignon Blanc grapes, buy Cabernet Sauvignon! You get the idea.
Next, you’ll need to decide where you wish to purchase your wine grapes. Are you looking for a particular style – say a Napa Cab? Maybe you just want to find the source that’s closest to you – for example a mid-western variety such as Chambourcin or Vignoles. Depending on the time of year and place, you may only have a few varieties to choose from.
Inspecting The Wine Grapes:
 This is where making wine from grapes gets down and dirty. Squeeze a couple of grapes in between your fingers and taste the juice. Fill a hydrometer jar with some of the juice, and use a gravity hydrometer to measure the sugar content of the juice. If you want to get more serious, a refractometer also works good for testing the grapes and only require a drop or two of juice to do so. Ideally, you’re looking for a reading somewhere between 22 and 24 Brix.
Washing and Sorting The Wine Grapes:
You will want to wash the grapes lightly to remove any dirt, debris or any other foreign matter.
Preparing The Wine Must:
Now that you have the wine grapes ready to go, it is time to de-stem, crush and press the grapes:
- De-stemming The Wine Grapes:
This is something that can be done by hand. It’s simply a matter of pulling the grapes from the stems. If you have a larger amount of grapes, you may find it necessary to invest in a de-stemmer. Not only does the de-stemmer remove the stems, it crushes the grape, as well. Which happens to be the next step…
- Crushing The Wine Grapes:
One of the most common mistakes when making wine from grapes is over-crushing the grapes. You do not want to shred or macerate the grapes. You only want them to be crushed enough to break the skin. Nothing more is necessary. Crushing the grapes beyond this can lead to a wine with excessive tannin and bitterness. Crushing can be done by hand, but again, if you have a large number of grapes, you may decide it best to invest in a crusher/de-stemmer, or at least, a grape crusher.
- Pressing The Wine Grapes:
Most beginning winemakers will find it surprising to discover that most of the time the grapes are not pressed until after the first 3 to 5 days of fermentation. This is almost always true for red wines and sometimes even for whites. You want the pulp in with the fermentation. This is where the wine gets most of it’s flavor and body – from the pulp and skin of the grape. With white wines the pressing usually comes first – before the fermentation has started. While you can squeeze the grapes by hand or be some other rigged means. You will most likely want to purchase a wine press. They are available in several different sizes. A press will allow you get more juice/wine from the pulp. So much so, the pulp will have a dry feel to it when you are done – something that can’t be done by hand.
What’s Next?
Once you have the wine must together, the method for making wine from grapes and making wine from grape juice mostly comes back into sync: ferment, rack, etc. – with the exception of pressing the grapes.
 Even though you tested the grapes when purchasing them, you may also want to verify with a wine hydrometer that the must has enough sugar. If not, you will need to add sugar until the potential alcohol scale on the hydrometer reads between 11% and 13%. Most of the time the wine must will already be in this range.
You may also want to check that the pH of the wine is in the correct range. The pH relates to the acidity of the wine. This can be done with either pH papers or a digital pH meter. An ideal reading would be between 3.4 and 3.8. It is important to remember that the pH scale works backwards, so adding more acid blend will lower the pH. You can read more about adjusting acidity on our website.
—————
Ed Kraus is a 3rd generation home brewer/winemaker and has been an owner of E. C. Kraus since 1999. He has been helping individuals make better wine and beer for over 25 years.
How Do You Make Non-Alcoholic Wine?
 How do you make non alcohol wine? I am interested in doing this. Do you have information that can tell me how to do this?
Thank You!
Lloyd
_____
Dear Lloyd,
Unfortunately, making non-alcohol wine is something that requires special equipment and a little technical know-how.
You could mix up some Welch’s grape concentrate and call that non-alcohol wine, but the non-alcoholic wines you buy at the store are different. They aren’t syrupy sweet. The sugars have been removed allowing the body and tannins to come forth and be the core of the juices character – just like an alcoholic wine would.
By far, the easiest way to remove the sugars from the juice is to have a fermentation that will turn the sugars into alcohol. This is what the commercial producers of non-alcoholic wines do. They ferment the juice and start out with an actual wine. Then the alcohol is removed. So when you ask: how do you make non-alcoholic wine?, the answer is: start with some alcoholic wine.
Anyone can take a juice and turn it into wine. That’s not the hard part. You make the wine as you normally would. The hard part is removing the alcohol from the wine. There are a couple of ways that the commercial producers of non-alcoholic wines go about doing this. Unfortunately, neither of them are practical for the home winemaker:
- Distillation
The first way is to distill the alcohol off the wine. Steam it away. This would work okay for the home winemaker except that heating up the wine causes it to oxidize and turn brown very quickly. The wine becomes caramelized to an extent. Commercial producers have learned how to get around this by putting the wine in a very strong vacuum. As the vacuum increase, the steaming or boiling temperature of the alcohol becomes lower. They create a vacuum that is so strong that the boiling point of the alcohol is down into the 70°F. In effect, they can distill the alcohol off the wine without ever heating it up and causing the wine to oxidize.
- Filtration
The second way commercial producers make non-alcohol wine is through filtration. The wine is forced under high pressure against a membrane that is so fine that only the water and alcohol can seep through it. The wine is ran past the membrane over and over again until the wine becomes a concentrate. Water is then added back to bring the wine to its original concentration – only now, there is little to no alcohol present.
So as you can see, when you ask” how do you make non-alcohol wine?, there is no simple answer for the individual home winemaker. It requires both extensive apparatus and inside knowledge. It is technology that is way beyond the realm of what the typical home winemaker could accomplish at home.
Happy Wine Making,
Ed Kraus
—————
Ed Kraus is a 3rd generation home brewer/winemaker and has been an owner of E. C. Kraus since 1999. He has been helping individuals make better wine and beer for over 25 years.
What Size Rubber Stopper Fits What?
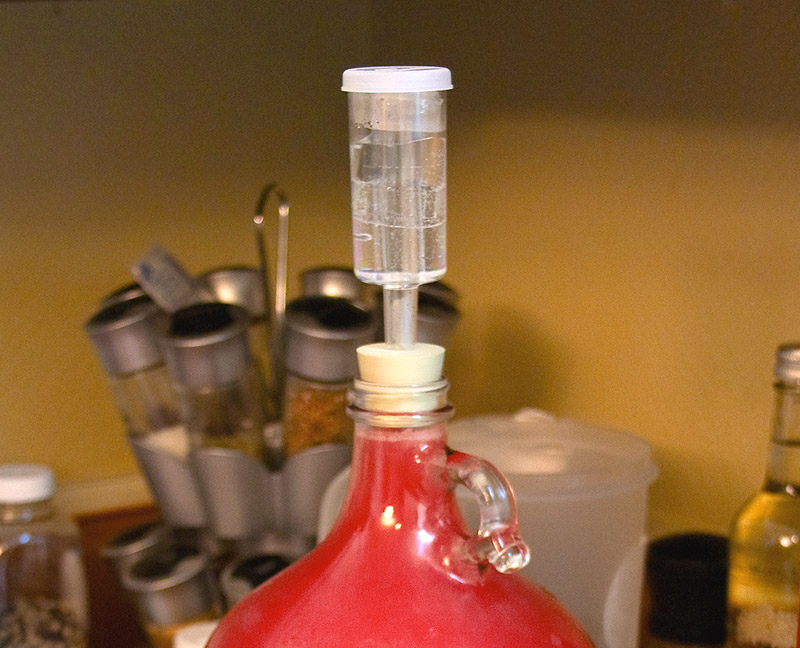 One of things that almost every home winemaker uses is a rubber stopper. It’s used to attach an airlock to a plastic fermenter or wine carboy. The rubber stopper is tapered in shape, has a whole in it for the airlock, and comes in various sizes.
Knowing what size of rubber stopper to purchase can be of some issue. Whether you are using a gallon glass carboy or plastic fermenter makes a difference as to the size rubber stopper you need. I thought it would be nice to go over, “what size rubber stopper fits what”, since we offer 25 different sizes to choose from.
I should start of by saying that any bucket fermenter we offer takes a size #2 rubber stopper. This may not be the case with a fermenter purchased elsewhere. It depends on the size of whole the supplier decides to put into the plastic fermenter.
Glass carboys come in an array of sizes and take a different sized rubber stopper as the size changes. There are 6.5 , 6 , 5 and 3 gallon sizes. The rubber stopper size for each is as follows:
6.5 Gal. Glass Carboys (Size #6.5) 
6.0 Gal. Glass Carboys (Size #6.5)
5.0 Gal. Glass Carboys (Size #7)
3.0 Gal. Glass Carboys (Size #7)
7.0 Gal. Large-Mouth (Size #10)
6.0 Gal. Large-Mouth (Size #10)
You may need to size a plastic wine carboy with a rubber stopper as these have become more popular over time. A plastic carboy takes a size #10.0 rubber stopper regardless of its size.
Other sizes of rubber stopper you may need to know is are:
Wine Bottle Opening (Size #2.0)
Beer Bottle Opening (Size #2.0)
Large-Mouth Gallon Glass Jugs, Quick Quarter Turn Lid (Size #8.0)
Small-Mouth Gallon Glass Jugs, Thread-Down Lid (Size #6.0) 
Visit our website. It lists all of these rubber stoppers and more along with their dimensions.
———————————–
Ed Kraus is a 3rd generation home brewer/winemaker and has been an owner of E. C. Kraus since 1999. He has been helping individuals make better wine and beer for over 25 years.
My Homemade Wine Has Bubbles And Sediment. What Should I Do?
 I made 36 gallons of wine last year, a Alicante and Zinfandel mix. This was my first attempt at winemaking. I followed the instructions from a winemaking book. I racked the wine three times put in the proper extra ingredients then bottled it over the correct period of time. The wine turned out terrible. There is still sediment and it must have not fermented properly because the wine still has bubbles. Is there anything that I can do? I’m thinking of emptying all the bottles into my 35 gallon container. Maybe letting it set and rack it again. I don’t know what to do because it really doesn’t taste good at all. Any suggestions would be really appreciated. Even throw it all out!
Thanks Frank
Name: Frank S.
State: Colorado
—–
Hello Frank,
Most of the time when I hear about bubbles and sediment in the wine it’s because the wine is still fermenting in the bottle. The fermentation causes CO2 (carbonation) to form in the wine and sediment to drop out (dead yeast cells). But, in this cause I am also concerned about the wine having spoiled, as well.
 Spoilage is best determined by the wine’s smell. Does it have a fingernail polish or paint thinner odor? Does it have a cooked cabbage or rotten food odor? Do you smell something like rubber or band-aids in the wine? Any of these would indicate potential spoilage. The only smell that would be acceptable, other than the fresh bouquet of the wine, would be a sulfur or yeasty smell. This would be expected from a freshly fermented wine and will lessen with time.
If it seems that the wine has spoiled, there is little you can do about it other than to discard it. There is nothing you can do to reverse such a wine fault. But, if the wine is not giving off any of these off-odors, then there is hope.
From you description you gave of bubbles and sediment in the wine, it may be very likely that your wine is still slightly fermenting or has fermented in the bottles. If this is the case – then just as you have suggested – decanting all the bottles of wine back into a fermenter would be the first plan of action. Try not to splash the wine anymore than necessary. This can cause the wine to oxidize.
The whole idea behind putting the wine back into a fermenter is to allow it time to finish fermenting, if necessary, and/or to clear up. Take a hydrometer reading of the wine. If the Specific Gravity is above .998, then some fermentation time is needed.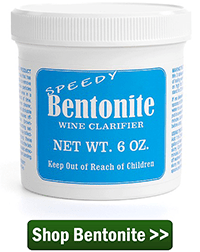
Once any fermentation is done, you will want to degas the wine. This is done simply by agitating the wine so as to release all the CO2 gas from the wine. You can use a tool call degassing paddle to help degas your wine as well.
The wine will need some time to clear. This is something that can only begin to happen after any fermenting has completed. A fining agent such as bentonite may be added to help speed up the settling process. Being patient with this step will be in the wines favor. Just keep it under air-lock and give it plenty of time, even months. There is nothing wrong with bulk aging a wine. If you do plan on waiting more than a couple of weeks to bottle the wine, you should add a half-dose of potassium metabisulfite to the wine. (1 teaspoon to every 32 gallons).
When the wine is ready to be bottled, you will want to siphon it off the sediment, first. You will also want to add another full-dose of potassium metabisulfite right before bottling. 
Happy Wine Making
Ed Kraus
———————————–
Ed Kraus is a 3rd generation home brewer/winemaker and has been an owner of E. C. Kraus since 1999. He has been helping individuals make better wine and beer for over 25 years.
Last Minute Guide For Wine Making Gifts
 We are in the midst of the holiday season, and the days to purchase gifts for your friends and loved ones are going by quickly. But there’s still time! Place your order with us by noon, December 19th, 2016, and you’ll have it in time to place your wine making gifts under the Christmas tree.
Perhaps you know someone who is an avid home winemaker, or maybe you know someone who keeps talking about making their own wine at home but hasn’t gotten around to getting started. Regardless if they’re an expert home winemaker or a beginner home winemaker; there are great wine making gifts to fit every level of expertise! And to help your out, here is a little wine making gifts guide to help you out.
Wine Making Gifts for the Beginner:
- Wine Making Books: A wine making book could be a perfect wine making gift for a new winemaker. From Techniques in Home Winemaking to The Home Winemaker’s Companion, one of the most important wine making gifts you can give you a new winemaker is a book to help guide them along the way.
- Wine Making Kits: There’s no better wine making gift than a wine making kit that has everything you need in one place. There are many different types of winemaking kits, from very basic kits to more complex kits. Winemaking kits can also come all ready to make a particular type of wine, such as Johannisberg Riesling or a Red Bordeaux.
Wine Making Gifts for taking it to the next level:
- Wine Presses: A wine press is a great wine making gift for the home winemaker who has been perfecting his or her art using packaged juices but is now ready to go to the next level and make wine using the fruits themselves. Buying a Table- Top Fruit Press in conjunction with a Wooden Fruit Crusher will surely make the home winemaker on your list giddy with joy!
- Motorized Crusher/De-Stemmer: This wine making gift is perfect for the home winemaker that has been making wine for fruit for some time and is hoping to increase the volume of wine that they are producing.
 The Motorized Crusher/De-Stemmer is a grape crusher and grape destemmer all rolled up into one. It can handle a significantly greater amount of grapes than a fruit press and is perfect for someone looking to grow their home winemaking outfit.
Wine Making Gifts for Gadget Lovers:
- The Brew Belt: This great little device is designed to keep fermentation batches nice and warm, in order to keep the fermentation going a desirable rate without over-heating the yeast. This is great for someone who needs help regulating the temperature of the fermentation, without having to turn up the heat in your entire home.
- Winery-Grade Floor-Corker: This device is great for someone who has many bottles to cork and don’t have time to use the smaller hand-held corkers. It is easy to use and gets you through many bottles quickly!
 Not Finding What You’re Looking For?
We have a larger gift guide on our website. There you will find more gifts and ideas to wrap under the tree this Holiday Season.
——————————
Ed Kraus is a 3rd generation home brewer/winemaker and has been an owner of E. C. Kraus since 1999. He has been helping individuals make better wine and beer for over 25 years.
Best Home Wine Making Books For Beginners
 If you’ve been thinking about making your own wine but not sure where to start, my suggestion to you is to get a good wine making book. There are many excellent wine making books that cover everything from making good ole country-style wines to making wines from fresh grapes.
Which of these books is best for you really depends on the kind of wine you are interested in making and whether you want to make it from fresh fruits or from wine making concentrates. With that in mind, here a breakdown of books on wine making at home, based on the kind of wine you want to make:
I’M INTERESTED IN FRUIT WINES. . .
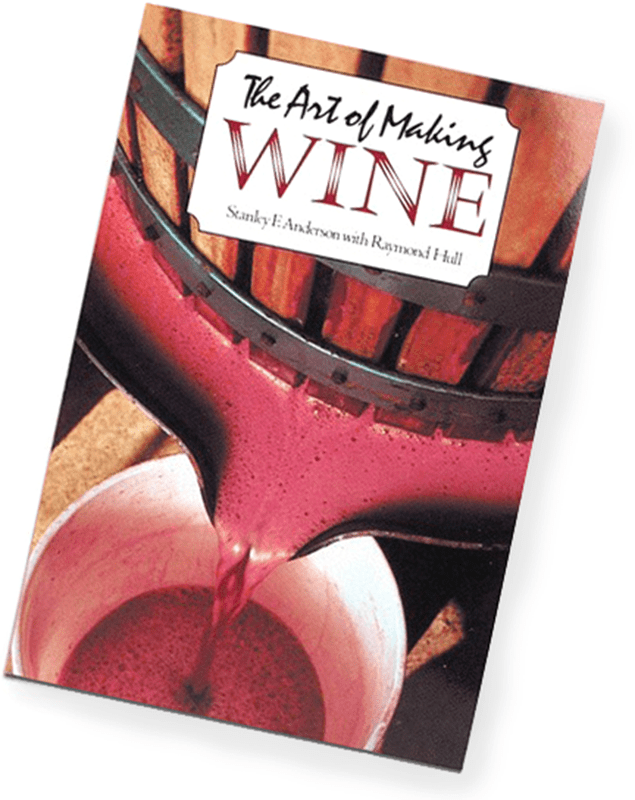
One of my all-time favorite wine making books for making fruit wines is, The Art Of Making Wine. It has a lot of good recipes for making wines from fresh blackberries, raspberries, apricots, apples and more. It also goes through the wine making process in fine detail.

I’M INTERESTED IN GRAPE WINES. . .
A great book the covers the basic aspects of making wine from fresh grapes is Guidelines To Practical Winemaking. It details all the procedures required to make your own wine from any type of wine grape.
 If you think you would like to grow your own grapes as well as ferment them, then the book From Vines To Wines is an ideal wine making book. The first half covers the establishment and maintenance of your own backyard vineyard, everything form planting to picking. The second half of the book details the process of making wine from those grapes.
I’M INTERESTED IN USING WINE CONCENTRATES. . .
All the wine making juices we offer come with very specific directions on how to make them. In all sincerity, a book is not necessary. However, to really be on top of your game, go ahead and grab one of our wine making books.
OTHER WINE MAKING BOOKS…
We have many other wine making books on various aspects of wine making at home. From mead making to wood working projects for making wine equipment. Also don’t forget, a book makes a wonderful gift for Christmas.
———————————–
Ed Kraus is a 3rd generation home brewer/winemaker and has been an owner of E. C. Kraus since 1999. He has been helping individuals make better wine and beer for over 25 years.
There's Too Much Sugar In The Primary Fermentation!
 I have 6 gallons of red wine must which failed to start fermenting even after 3 days since I added Lalvin 71B-1122 yeast. I may have added too much sugar to the primary fermentation. The Brix No. was 27 and Sp Gr 1.110. What can I do to get the wine must fermenting before it gets spoiled? Thank you for your help. Ulysses A.
Name: Ulysses A.
State: TN
—–
Hello Ulysses,
It may very well be that you have too much sugar in the primary fermentation, and that is what’s causing you to have a stuck fermentation. But I would also suggest going over the Top 10 Reasons For Fermentation Failure to make sure that it is not something else.
Putting too much sugar for the yeast to ferment is one of the 10 reasons listed, but by making sure the other 9 couldn’t possibly be the reason, your can then comfortably narrow your focus on the cause.
What I would do if I were in your shoes is take a quart jar – like a Mason jar – fill it half way with the wine. Then add water until the jar is 2/3 full. Mix in a quarter teaspoon of either Yeast Nutrient or Yeast Energizer. Then sprinkle directly into the jar another packet of wine yeast. This is simply to create a yeast starter for the wine yeast by using a diluted wine must. Do not rehydrate the wine yeast in warm water first. Add the packet directly to the yeast starter.
The yeast starter should start fermenting within hours. Once you see the level of foaming peak, that will be the optimal time to pitch the yeast starter in with the rest of the wine must. This is typically at around 18 hours, but can vary from 6 hours to 3 days.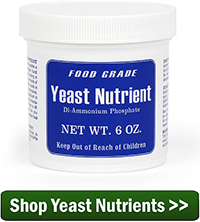
I am fairly confident that this will overcome your stuck fermentation and get your wine fermenting. A specific gravity of 1.110 is not all that ridiculous, it’s just high enough to cause some difficulties. With future batches you will want to use your wine hydrometer to make sure that you do not add too much sugar for the primary fermentation.
Other things you can do to help the yeast starter be successful is add an additional half dose of Yeast Nutrient to the entire batch. And as mentioned before, use the other 9 reasons for fermentation failure as a guide to improve your fermentation’s situation.
If the yeast starter fails to get things going then there are two other things you can do:
- Dilute the wine with water until the sugar level is brought down to a more suitable level. The fermentation should start on it’s own after doing this.
- Switch to a wine yeast that has a better tolerance of higher sugar levels. I would suggest Red Star: Pasteur Champagne for this purpose.

Putting too much sugar in the primary fermentation is something that can happen from time to time. Just realize that there are things you can do to resolve the issue without any sacrifice to the wine, whatsoever.
Happy Winemaking,
Ed Kraus
———————————–
Ed Kraus is a 3rd generation home brewer/winemaker and has been an owner of E. C. Kraus since 1999. He has been helping individuals make better wine and beer for over 25 years.
Wine of the Month: Pear Wine
Our wine of the month is pear wine. This lightly colored, sweet wine packs in the nutrients given the healthful properties of its main ingredient: pears. In addition to a delicious recipe, we’ve got some useful tips so you get the most flavor out of your wine.
Why should I make pear wine?
Pears are a member of the rose family of plants and are chockfull of antioxidants, dietary fiber, and flavonoids. In fact, about half of the fiber found in the pear can be found in its skin. The phylonutrients contained in this delicious fruit not only contain antioxidants and anti-inflammatory flavonoids, but also contain cinnamic acids that can help prevent cancer and decrease the risk for Type 2 Diabetes. Pears, along with apples, are known to have the second highest number of flavonols among all fruits and veggies.
Now let’s get to the wine part. Due to the fact that pear wine is a fruit wine rather than a grape wine, it has a higher ORAC content. In short, this means that it’s winning the antioxidant game. We’ll cheers to that!
Recipe:
Makes about 5 gallons
20lbs of Pears
10 lbs. of Sugar
1 tbsp. of Yeast Energizer
1/2 tsp. of Pectic Enzyme
3 tbsp. of Acid Blend
1/2 tsp. Wine Tannin
Yeast EC-1118
There are a few things to keep in mind while you’re making your pear wine. For the best results, you should slightly over ripen the pears. This is key, because they aren’t an extremely flavorful fruit by nature. If you don’t let them ripen, the wine will have more of an apple flavor. Let them get extremely soft (without rotting) and you’ll set yourself up for success. Also ensure that you rinse your pears before you crush them.
Where and how can I find pears?
The state of Washington is the largest grower of pears in the United States. It accounts for half of all of the pears distributed in the country, followed by California and Oregon. Most of the pears found in US grocery stores fall into the European Pear category. They can be found in green, yellow, red, gold, and brown. Once you find them at the grocery store, you’ll need to give them a few days to ripen. Just make sure you watch them carefully, because once they ripen, they tend to perish quickly. It can be hard to determine ripeness because many pears do not change color as they ripen.
What foods does pear wine pair best with?
Given pear wine’s light and refreshing taste, it pairs well with bold and flavorful cheeses like blue cheese and goat cheese. Spread some cheese on a cracker and sip some pear wine in between for the perfect pre-dinner snack. As for main courses, pear wine tastes great with white meats, either baked or roasted. Finish off the meal with a fruit or nut-based dessert and you’ve successfully and deliciously paired your pear wine!