Corking Screw-Cap Wine Bottles

Screw Cap Wine Bottle
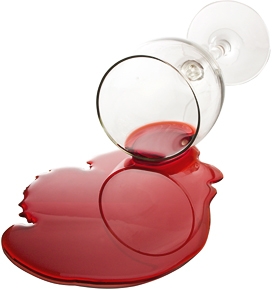
I am a winemaker and I use used wine bottles.  Used cork type wine bottles are becoming harder to find.  I was told by a winery around here that corking screw cap wine bottles is OK to use as they both have the same inside neck diameter.  I tried corking one filled water and it seemed to work fine. I would like to get your thoughts on this.
Thanks
William  P.
—–
Hello William,
As you have already discovered, it is very possible to put cork stoppers into screw-cap wine bottles. This works out great for someone in your position who is having trouble finding cork-finish wine bottles.
I have also seen many other home winemakers cork screw-cap wine bottles over the years with no issues, but I’ve also seen a few home winemakers run into problems, as well, so before you rush out and buy corks for your screw-cap bottles, there are a few things I would like to point out:

  • The first issue is with the bottle itself. Most screw-cap wine bottles are made of thinner glass, and are more fragile. The screw-cap bottles we carry are just as heavy as cork-finish bottles, but many are thin and tend to chip or crack more easily while being washed or sanitized.
  • Contrary to what your local winery states, the opening of these screw-cap wine bottles vary, and more often than not, they are a different size than a standard 3/4 of an inch opening of a cork-finish wine bottle.
  • Shop Wine Bottle CorkersWith cork-finish wine bottles the barrel of the neck is perfectly straight to accommodate the insertion and even sealing of the cork. With many screw-cap wine bottles the barrel of the neck is slightly bell-shaped. Or in other words, the shoulder of the bottle starts higher. This can cause a cork stopper to expand more at its bottom than at its top. Over time, this contortion can actually pull the cork stopper down the neck of the bottle into the wine itself.
  • And last, putting a cork stopper in a screw-cap bottling does not look all that great. If you plan on drinking all the wine yourself, this doesn’t matter, but if you plan on passing out some as personalized wine gifts or what have you, then you might want to take into consideration that corking a screw-cap wine bottle can look a bit tacky.

If all you can really find are screw-cap wine bottles, you may want to consider sealing them with actual screw-caps instead of corks. From an aesthetic point of view, it won’t look any worse than corking the screw-cap bottles, and there are some that say screw-caps actually keep and age some wines better than cork, but that’s another topic for another blog post.
Happy Wine Making,
Ed Kraus
—–
Ed Kraus is a 3rd generation home brewer/winemaker and has been an owner of E. C. Kraus since 1999. He has been helping individuals make better wine and beer for over 25 years.

Don't Waste The Wine!

Spilled Glass Of WineI bought two wine making kits from you that makes 6 gallons (30 bottles). Last night we bottled the first wine and got 25 bottles. Is this about right considering you do lose some during racking? Approximately how much waste do you normally have due to sediments in the bottom?
Mary M
—–
Hello Mary,
While there will be some waste, there should be nothing close to the five bottles you lost on your first batch. You should be losing no more than one bottle when making wine from with a wine ingredient kit. This is a common issue among beginning winemakers who are just learning how to make your own wine. It’s also an issue that brings up a great wine making tip.
Most of the wine that is being lost, is being lost unnecessarily during the racking process. Racking means to transferring the wine off the sediment into a clean fermentation vessel. This is a process that is normally done three times if you are following the directions that typically come with a wine ingredient kit.
It’s only natural for the first-time winemaker to want to leave as much sediment behind as possible with each racking. The intentions are good, but the result is an excessive loss of wine, such as what you have experienced.
Shop Conical FermenterTo get the most wine out of every batch, you want to get as much of the wine as possible during the first two rackings, even if it means some sediment is coming along with it. You will still be leaving 95% of the sediment behind. It is only when you get down to the all-important, last racking that you will want to lose some of the wine because of sediment.
What you will find is by the time you get to the last racking there will be so little sediment in the fermenter that there will be very little loss by leaving it all behind.
If you stick to this method of racking your wine you will be pleasantly surprised by the results. It’s more wine, and it’s less hassle.
Happy Wine Making,
Ed Kraus
—–
Ed Kraus is a 3rd generation home brewer/winemaker and has been an owner of E. C. Kraus since 1999. He has been helping individuals make better wine and beer for over 25 years.

When To Measure The pH Of A Wine

Testing pH of a wine.I got some pH test strips but do not know what the optimal pH of wine is.  I was also wondering if pH can be adjusted at anytime during wine making process?
Thanks,
Joe
—–
Dear Joe,
Thank you for the great questions about the pH of a wine. pH is an integral part of any wine and needs to be correct for the wine to taste balanced. The pH also needs to be in a reasonable range for the wine to be stable. If the wine’s acidity is to low it can become more susceptible to spoilage and oxidation.
Fortunately, if you make your wines using box wine kits, the pH has already been taken care of for you. Measuring the pH is not necessary when making wine with these kits. You also do not need to measure the pH of your wine if you are making a wine from a trusted wine recipe.
Having said this, there are times when measuring the pH is needed… If you don’t have a wine recipe for the fruit at hand, or if the fruit tastes unusually sharp or tart tasting, you may want to measure the pH and make any necessary acid adjustments to the wine must. Anytime you are making wine from fresh wine grapes or have a wine must made up of 100% fruit juice such as apple wine, this is when to measure the pH of the wine.
In these situations you will want to take the pH measurement before you begin the fermentation begins. If the fermentation has already started, CO2 gas will throw off the pH reading. A second time that a wine can be tested is right before bottling, however the wine should be degassed first. For this, I would suggest using a degassing paddle. It attaches to a hand-drill. This will allow you to remove all the CO2 gas left-over from the fermentation so that you can accurately measure the pH of the wine.Shop pH Test Stips
When measuring the pH of a wine, you are generally looking for a reading between 3.4 and 3.8. The scale runs backwards, so a reading of 3.0 is more acidic than a reading of 4.0. To make any acid adjustments you will either dilute the wine must with sugar water or you will add acid blend.
The big take-away here is: before fermentation and before bottling is when to measure the pH of a wine. And, this is only need if you are making wine from fresh fruit.
Best Wishes,
Ed Kraus
—–
Ed Kraus is a 3rd generation home brewer/winemaker and has been an owner of E. C. Kraus since 1999. He has been helping individuals make better wine and beer for over 25 years.

How Does A Refractometer Work?

Guy demonstrating how a refractometer works.Refractometers are an invaluable tool for any grape grower, large or small. Refractometers can let you know when its time to pick. And, they can do it with only a few drops of grape juice taken from throughout your vineyard. The alternative would be to extract enough juice from the grapes to take a reading with a wine hydrometer. This could take up to 200 berries – crushed and pressed.
For more info on refractometers and how to use them to time your grape harvest, take a look at another recent blog post, Refractometers Let You Know When To Pick!
Refraction
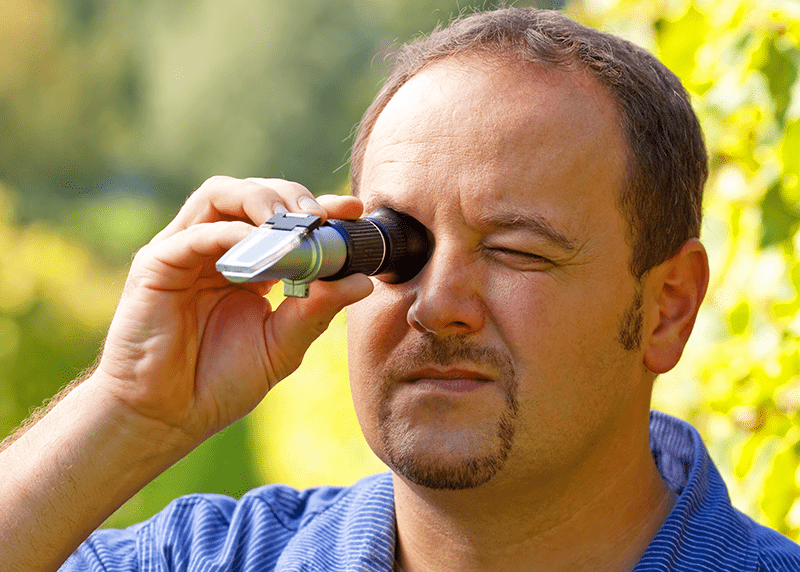
How a refractometer actually works is quite interesting. They can tell you what percentage of sugar is in a drop of liquid just by how much light bends or refracts as it passes through it. To see refraction in action put a straw in a glass of water. The straw in the water doesn’t seem to connect with the straw that’s out of the water. That’s refraction.
If you were to dissolve some sugar syrup in the glass of water, the straw would seem to be even more disconnected, and as you continued to dissolve more and more sugar, the “two straws” would seem to get farther and farther apart. This is the whole premise that a refractometers works upon to tell you what level of sugar is in your grapes.
Refractometer's Inside ViewA drop of grape juice is put between the refractometers prism and light-defusing plate. How much the light bends as it passes through the prism and down the barrel of the refractometer, tells you how what percentage of sugar is in the sample. As you look into the eyepiece you will be able to observe the refraction against a scale.
Because of how a refractometer works – it’s simplicity and quickness – anyone who has a vineyard of any size will find it extremely useful. With just a few random samples, you can get an accurate picture of how your grapes are doing.
Whether you have two acres or just two vines, visit our website and see the refractometers we have to offer for keeping track of your vineyard this season.
—–
Ed Kraus is a 3rd generation home brewer/winemaker and has been an owner of E. C. Kraus since 1999. He has been helping individuals make better wine and beer for over 25 years.

How To Determine Your Wine's Alcohol Level

Tipsy ManThis is the question every budding home wine maker wants to know, “How can I tell how much alcohol is in my wine?” The problem is, this question is usually asked about the time they’re ready to bottle their wine.  Unfortunately, for the amateur winemaker, this is far to late in the process to make any accurate determinations.
What Needs To Happen
The easiest way to know how much alcohol is in your wine is to take two readings with what’s known as a wine hydrometer: one reading is taken before the fermentation has started and the other reading is taken after the fermentation has finished. By comparing these two hydrometer readings you can determine – with great accuracy – how much alcohol is in your wine.
Very simply put, a hydrometer is a long, sealed glass tube with a weight on one end. By observing how high or low it floats in a liquid you can determine a reading.
“And what are we reading?” Essentially, we are trying to figure out how much sugar is in the wine or wine must. The higher the wine hydrometer floats, the more sugar there is in the liquid, and the opposite holds true as well.
During a fermentation, sugar is what yeast turns into alcohol. If we know how much sugar there was in the wine must before the fermentation, and we know how much sugar there is in the wine after the fermentation, we then know how much sugar was consumed by the yeast during the fermentation. From this information we can determine how much alcohol was made during the fermentation and is now in the wine.
It all sound complicated when it is all explained in detail this way, but in practice it is very easy to accomplish. All you need to do is:
1. Take a wine hydrometer reading at the same time you add the yeast to your wine must. The hydrometer has a scale along it called “Potential Alcohol”. At this point in the wine making process, you should be getting a reading of around 10% to 13%. The reading is the point where the surface of the liquid crosses the scale. This reading indicates how much alcohol the wine can have if all the sugars are fermented. Write this number from the gravity hydrometer down and save it for later.Shop Hydrometers
2. Take another reading with the hydrometer once the fermentation has completed. This reading should be somewhere around +1 to -1 on the Potential Alcohol scale. By comparing these two gravity hydrometer readings you can determine your wine’s alcohol level. Take the first number you wrote down and from that, subtract the second number.
The Calculations
As an example, if your reading before the fermentation was 12% and the reading after the fermentation was 1%, this means that your wine has 11% alcohol (12 minus 1). If your first reading was 12% and your second reading was -1%, that means your wine has 13% alcohol (12 minus -1).
Another way to think of it is you are monitoring how far along the wine hydrometer’s Potential Alcohol scale the fermentation is traveling. It started at 12 and ended up at -1. That’s’ 13 points along the scale.
Further Information
You can find more information about using a hydrometer to make wine in the book, “First Steps In Winemaking.” Also, the article, “Getting To Know Your Hydrometer” has lots of additional information about using your hydrometer when making wine.
—–
Ed Kraus is a 3rd generation home brewer/winemaker and has been an owner of E. C. Kraus since 1999. He has been helping individuals make better wine and beer for over 25 years.

When to Aerate A Wine

Primary FermentersAt what point do you aerate your fruit wine?
—–
Jason,
Aeration should only be done during the primary fermentation. This is the first 3 to 5 days of when the wine is in a primary fermenter and most active.
The only reason aeration is done is to give the wine yeast more ability to multiply and establish a solid colony. When a packet of wine yeast is put into a 5 or 6 gallon batch of wine, it has the monumental task of growing itself 100 to 200 times that little packet. That’s what causes all the beige-colored sediment you at the bottom of a fermenter. To readily do this the wine yeast need air. Without the air the colony size may suffer resulting in a sluggish fermentation.
Ironically, after the yeast colony is well established and the fermentation is starting to slow down, air is the enemy. For the rest of the wine’s life you want to keep air exposure time short and splashing to a minimum. The major concern here being oxidation of the wine.
What all this means for the home winemaker who is making 5 or 10 gallons is that the primary fermenter should be left exposed to air. This can mean doing something as simple as leaving the lid completely off a bucket fermenter. Cover it with a thin tea towel, nothing more. Or for a winery dealing with 500 gallon vats, this could mean continuously pumping and recirculating the wine back out on top the fermentation surface, much like a fountain.
There is a second element to this as well. Regardless of how much you are fermenting, you will always want to make an effort to keep Buy Aeration Systema dried cap from forming on the surface of the fermentation. The pulp will want to rise during a primary fermentation. If left undisturbed it can dry and form a solid cap, choking the wine yeast off from the much needed air.
To prevent this from happening you will want to punch the cap back down into the wine. For most home winemakers with their 5 and 10 gallon batches, once a day is plenty. You can use something as simple as a potato masher for this purpose or you can stir it until the cap is dispersed. For larger batches you may need to punch down the cap several times a day.
Hope this information helps you out.
Happy Winemaking,
Ed Kraus
—–
Ed Kraus is a 3rd generation home brewer/winemaker and has been an owner of E. C. Kraus since 1999. He has been helping individuals make better wine and beer for over 25 years.

How to Spot a Good Wine Store

When you’re not making your own wine and shopping Adventures in Homebrewing for all your homebrew needs, you’re likely out looking for inspiration and new wine adventures from your local wine store. Note the emphasis on local – most often our favorite wine store or liquor store is the closest one to our house or work. You’ve probably not thought much about it because of the convenience, but is it really the BEST wine store you could be taking your business? “Best” of course is relative and open to opinions, but there are a few common elements of wine stores that serve as good indications to their wine knowledge and professionalism.
wine bottles in wine store
Aesthetically Pleasing
What is the first impression that your wine store gives off? Sleek, clean, and well organized? Or cluttered and chaotic? Be sure to pay attention to the details while you’re browsing – are things easy to find and well-labeled? Are the bottles dusty? Is the selection past its sell-by date? Are bottles being stored properly? If you answered “no” to any of these questions, it may be time to take a second look at where you’re shopping.
A good wine store is clean and well-organized – you want to feel good about shopping there and the owner should want to create an environment that encourages customers to stay and browse. Wine should be stored properly, out of direct heat or sunlight, and organized by region, type, etc. (some even by taste!) to help you easily find what you’re looking for.
Decent Selection
Do they have at least one of each type of wine from each region? Is it only box wine and wine coolers? Did you just now realize your favorite wine stores doesn’t have a bottle over $30? The various types and styles of wine are seemingly endless, so no store will ever be able to stock them all, but it is beneficial to both shop owner and consumer that they offer an array of options at different price points. The best curated stores have hand-picked selections that will make the dedicated customer or casual shopper satisfied with their purchase, regardless of the wine occasion.
You know you’re shopping at the right place if the owner (or employee) is passionate and knowledgeable about the different labels – being able to make recommendations is key for making happy customers and keeping them coming back. If you don’t remember the last time your local wine store suggested a wine to you, or if you haven’t bought anything that didn’t have a screw top recently, it may be time to find a new place to shop.
Prices for all Shoppers
We all want to be adventurous with our taste in wine and want to be able to afford to do so – it doesn’t have to be difficult to find a great bottle of wine for cheap and your local wine store should help to enable your journey to your next favorite label. VinePair says that if loosen the purse strings and be open to spending $20 or more – you’ll expand your options and find new, better wines to experience.
A good wine store will have a large variety of stock at every price point – they’ll offer loyalty programs, daily or weekly deals, and bulk discounts – excited for their customers to discover new wines. For both customer and owner, it is important to note the distinction between reasonably priced wine and cheap wine.. they are two very different things. There are a vast number of great wines between $15 and $35 and your wine store should help you on your journey to finding your favorites.
Breaks You from Your “Comfort Zone”
Sticking to what you know is comfortable, even if the quality of your go-to wine isn’t great. A good wine store will do things to encourage you to break away from what you know and be open to potentially discovering new tastes. They’ll offer events and wine tastings, bring in experts to talk about how the wines are made and what meals they pair best with, and be a warm/inviting space for shoppers to expand their pallet. Attending wine tastings is fun, insightful, and a great way to find new wine stores. They usually have a bottle discount on the wine their tasting too.
We didn’t set out to bash your local wine store, but rather we wanted to point out some common traits shared by passionate store owners and employees that might make you reconsider your current wine shopping experience. Just because something is local to you does not mean it is the best for you – we want our customers to be educated on how to find good wine and discover their new favorites through amazing tasting and shopping experiences. You are here because of our shared love of wine, and I’m here to help you recreate your newly purchased favorite with all of your winemaking needs.
Happy wine shopping,
Ed Kraus
—–
Ed Kraus is a 3rd generation home brewer/winemaker and has been an owner of E. C. Kraus since 1999. He has been helping individuals make better wine and beer for over 25 years.

Mary's Wine Has A Pectin Haze, But Does That Mean It's Ruined?

I made 5 gallons of pear wine from fresh pears and added a half gallon of citrus pomegranate from concentrate which was cloudy thus my wine is cloudy. I added Kitosol 40 after second racking and it partially cleared the wine. Can I add more Kitosol or this is as clear as it will get?
Name: Mary
State: Indiana
—–
Hello Mary,
Sounds like you might have a problem, Mary. Let’s see what we can do to help you out.
The reason pomegranate juice is cloudy is because it has an abundance of pectin in it. Pectin is not a particle that clears out with fining agents such as Kitosol 40 or Bentonite. It is something that is organically bonded to the wine. It’s not a particle; it’s actually part of the juice. This is know as a pectin haze.
When a wine fermentation occurs the wine yeast produce, among other things, pectic enzymes. During the fermentation the pectic enzymes break-down the pectin that may be in the wine must causing the juice to become clear. The activity of the fermentation itself, helps to energize this organic process. This is why it is possible make a clear pomegranate wine. That’s why a peach wine can start out cloudy and end up clear.
Most fruit wine recipes will call for additional pectic enzyme to be added on top of what the wine yeast will produce, as well. This helps to insure that you have a wine that is clear of a pectin haze. If you take a look at another blog post, “Why Do Wine Recipes Call For Pectic Enzyme“, you can read a little more about pectic enzyme and what it does.Shop Pectic Enzyme
In your case, you added pomegranate juice to the pear wine after the fermentation was complete, so you do not have any fermentation activity to help the pectic enzymes along in clearing up the pectin haze in your wine. This means you need to boost the pectic enzyme level in the wine. It also means you will need to be patient. It may take some time for your pear wine to become clear, if it’s able to clear at all.
Here’s what you can do. If you did not add pectic enzyme to the wine originally, then add two times the dosage recommend on the container the pectic enzymes comes in. If you added a dose of pectic enzyme to the wine already, than add another full dose. Be sure to blend it in completely. It may take some time for the wine to clear, months even. And even at that, there is a possibility that the pectic enzyme many not be able to clear up the pectin haze at all, since it is without the energy of an active fermentation.
Beyond this, you can add another pack of Kitosol 40. It may clear up your wine even more by dropping out yeast particles and other proteins that may still be lingering in the wine, but when it comes to the last bit of clearing, it is going to be up to the pectic enzyme to do the job.Shop Wine Clarifiers
In a worst case scenario, the pectin that is making the wine cloudy does not affect the wine’s flavor in any way. A pectin haze only affects the wine visually. So at a bare minimum you should have just as good of wine as ever that you can enjoy taste-wise.
Mary, I hope this information helps you out and you end up with a perfect clear pear/pomegranate wine.
Happy Winemaking,
Ed Kraus
—–
Ed Kraus is a 3rd generation home brewer/winemaker and has been an owner of E. C. Kraus since 1999. He has been helping individuals make better wine and beer for over 25 years.

When To Add Oak Chips To Homemade Wine

Toasted Oak ChipsHowdy Ed,
…To balance the tannins, we French oak chipped the must at the start of fermentation [Petite Sirah] and at the half way point applied the Aussie method of Rack and Return to decrease the seeds in the must. Sieving out the seeds also removed the oak chips. My question is, at what stage should we re-oak the juice?
Jamie O. — CA
—–
Hello Jamie,
I would not automatically assume that you will need to add more oak chips to your homemade wine. In fact, I would not consider adding more French toasted oak chips to the wine until it has cleared and maturated to some degree while in bulk. See what tannins and other proteins drop out on their own, first.
There is nothing wrong with adding toasted oak chips during the fermentation, but you want to use a moderate dosage. Don’t go to overboard. It is possible to add to much. If you want to add oak to the wine during the fermentation, you may also want to consider using oak powder instead of oak chips. Oak powder does not strain out like the oak chips. Having said that, I do prefer using toasted oak chips after the fermentation.
If it is only protein stability that you are concerned about, you also have the option of treating the wine with bentonite, instead of more oak chips. Among other things, bentonite will collect and drop out excessive tannins. This will help to make the wine more heat stable while aging in bottles.
If it is the flavor effects of toasted oak chips you are primarily looking for, it would be best to wait until the wine has aged in bulk for a month or so after the fermentation has completed. This is when I would add oak chips to your homemade wine. I don’t know how many gallons you have, but you can store it in carboys or vats. At this point, you want the wine to be off any yeast sediment and the head-space should be eliminated, as well.
Shop Toasted Oak ChipsBuy waiting you are allowing the wine to get to a point where you can start to distinguish its developing flavor profile. Adding oak chips at this point will not only help you to stabilize the wine further, it will allow you to monitor the oak balance of the wine. Since the wine is already maturating, you can do this with a little clearer perception of the final outcome.
Monitor the wine by sampling along the way. Depending on the dosage you will want to sample every 1 to 4 weeks.
I recommend 1/4 pound of toasted oak chips for every 10 gallons of wine. At this dosage a typical amount of time for oaking is about 30 to 90 days. Sample the wine every 2 weeks. Here is some more information on how much and how long to use oak chips.
What you are looking for is balance. You want the reduced harshness of oak aging to be in line with woody character the oak is adding.
Best Wishes,
Customer Service at E. C. Kraus
—–
Ed Kraus is a 3rd generation home brewer/winemaker and has been an owner of E. C. Kraus since 1999. He has been helping individuals make better wine and beer for over 25 years.

Table Grapes Vs. Wine Grapes For Wine Making

Table Grapes vs Wine GrapesHello Kraus,
Please explain to me what is the difference between wine grapes and table grapes.
Thank you,
Mert B.
—–
Hello Mert,
This is a great question and one that gets down to the basics of learning how to make your own wine.
There are many significant differences between wine making grapes and table grapes – eating grapes as you called them:
Table grapes are crunchy-er with a stronger skin and firmer pulp than wine grapes. This not only makes them more pleasant and appealing to eat, but it also makes them hold up to the rigors of being transported long distances to your local market. As a consequence, grape you buy at the store tend to have less juice in relation to the amount of pulp.
The juice you get from the eating grapes is also not as sweet as the juice from wine grapes. A typical brix reading for table grapes is 17 to 19, whereas wine grapes are around 24 to 26 brix. This is important because it is the sugar that gets turned into alcohol during a fermentation — less sugar, less alcohol.
*Brix is a scale that represents the amount of sugar in a liquid as a percentage. It is the standard scale used by refractometers which are used to take these readings in the vineyard.
Another significant difference is that the acidity level of table grapes tend to be slightly lower that the average wine grape. This is to increase the grapes impression of sweetness while on the market. Buy Wine Kits
Having said all this, you can learn how to make your own wine using grapes you buy from the grocery store. You can run them through grape presses to get all the pulp out of the way. You can add extra sugar to bring the brix level up to that of a wine grape juice. And, you can adjust the acidity of the juice by adding acid blend to raise the acid level to what’s need for wine.
But all of this will not change the leading factor that makes a table grape far different from a wine grape… and that is flavor. While table grapes taste fine for popping into your mouth as a snack, once fermented, the flavor of the resulting wine is fairly uneventful and could also be described as non-existent.
While table grapes could be used for learning how to make your own wine – as a practice run, so to speak – do not expect this wine to bring any enthusiastic raves from family, friends and neighbors. The wine will be drinkable and may even be pleasant, but it will not be stellar.
Mert, I hope this answers your question about table grapes and wine grapes. It is a question that we get fairly often, so I plan on posting it on our wine making blog.  If you have anymore questions, just let us know. We want to do everything we can to help you become a successful home winemaker.
Happy Wine Making
Ed Kraus
—–
Ed Kraus is a 3rd generation home brewer/winemaker and has been an owner of E. C. Kraus since 1999. He has been helping individuals make better wine and beer for over 25 years.