What Are Yeast Nutrients?

Yeast Nutrient In Wine MakingIn home winemaking for the keep-it-simple winemakers, you toss yeast into wine must and see what happens.  What’s the problem here?  There are a lot of problems here, but the one we are referring to relates to the ability of that yeast to complete a wine fermentation.   One major component that’s missing from this equation is yeast nutrients!  Just as humans need sustenance to move and be active, wine yeasts also need nutrients to keep their metabolism going and to keep the fermentation going strong. But what are yeast nutrients in wine making?…

For wine yeasts, it takes a heck of a lot of energy to multiply themselves into a viable colony, then turn the sugars of the juice into alcohol and carbon dioxide, so their energy really needs to be thoroughly replenished in order for them to not give up and die from exhaustion. The alternative is a stuck fermentation where the yeast activity comes to a complete halt.  Wine yeasts are living creatures (yes, they are teeny tiny, but they are still alive and kicking!), and they need to have their nutrients replaced when it is depleted through the rigorous activity of fermentation!

OK, so your wine yeasts need yeast nutrients in order to avoid a stuck or stopped fermentation.  What do I give them?  Multivitamins?  Pasta primavera?  Red Bull?  Surely those items will cause more harm than good for your wine, so instead, we’ll recommend some nutrient products for your wine yeast to munch on in order to ensure your wine fermentation keeps on going until the end.
Shop Wine Yeast

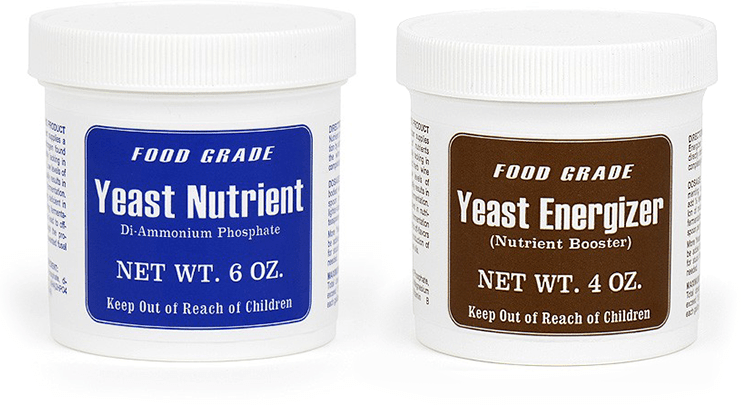
  • Di-Ammonium phosphate:  This is a common ingredient in a lot of wine yeast nutrients, and is the primary ingredient in the product Yeast Nutrients.  Basically, the yeasts utilizes the nitrogen component of the Di-Ammonium phosphate in order to supply the energy they need to keep that fermentation going strong.  Nitrogen to the wine yeast is like oxygen to us humans.  How much Yeast Nutrient to add will depend upon what kind of wine you are making, You can always add more Yeast Nutrient later if your fermentation becomes sluggish, so don’t worry too much if you think you aren’t adding enough.
  • Yeast Energizer: Sometimes when the yeast nutrients you added aren’t enough, you end up with a slowing, sluggish, or otherwise stuck fermentation.  Yeast Energizer is a great product to help jump-start the fermentation again and get your wine back on track.  The primary ingredients in Yeast Energizer are Di-Ammonium phosphate (the same stuff we’ve seen before), yeast hulls, magnesium sulfate, vitamin B complex, and tricalcium phosphate.  Not only will these ingredients help re-start your fermentation, but they also will ensure that your wine fermentation will keep going and at a rapid rate.Shop Wine Making Kits

As a general rule-of-thumb, Di-Ammonium phosphate is used by itself with wines made from grapes or hearty fruits similar to grapes such as bush-type berries. But as you start making wines with fruits that are more dissimilar to grapes, you are more likely to need Yeast Energizer. Herb wines such as dandelion, rose hip are prime candidates for Yeast Energizer, as is honey wine or mead. If you are following a wine recipe it will most likely tell you which type of yeast nutrient to use in your wine.

Remember, a wine that is lacking in yeast nutrients will not only cause a slow, sluggish, or even stuck fermentation, but can cause off-flavors and aromas in your finished wine.  So, don’t forget to feed your yeasts!
—–
Ed Kraus is a 3rd generation home brewer/winemaker and has been an owner of E. C. Kraus since 1999. He has been helping individuals make better wine and beer for over 25 years.

Using Potassium Sorbate When Wine Making

Potassium Sorbate For Wine MakingThanks again for being there.  You’re greatly helping an amateur wine-maker get by the label “amateur”.

Three part question, all using potassium sorbate when wine making.  This is a question recognizing that potassium sorbate does not stop fermentation, but is used to keep wines from starting to ferment again after the fermentation has been completed.

1).  When should the potassium sorbate be added to the wine — is it sufficient to add to the wine at day of bottling or should it be added earlier (like 7 to 10 days before bottling)?

2).  Will the answer to part 1) change if the wine has a sweetener added?  Is the potassium sorbate ALWAYS added to the wine AFTER the sweetener, or does it not matter as to the sequence?

3).  Does using a wine filter at time of bottling impact any of the above? Or is the filter process just the filter process?

Thanks, Steve S.
—–
Dear Steve,

Thanks for the great questions about using potassium sorbate when wine making. Let me see if I can put a dent in this subject.

First, A Little Background On Potassium Sorbate And Wine:

Potassium sorbate is one of those wine making ingredients that often gets used incorrectly or confused with other ingredients such as sodium metabisulfite.  I’d like to go over exactly what potassium sorbate will do for your wine and maybe that will clear up how it should be used.

Potassium sorbate does not destroy wine yeast. Let me repeat this for more emphasis:

“Potassium Sorbate Does Not Destroy Wine Yeast.”

What potassium sorbate does do is keep wine yeast from increasing in numbers. It stops the wine yeast from reproducing itself into a larger colony.

Shop Wine BottlesAs an example, if you add potassium sorbate to an active fermentation you will see the fermentation become slower and slower, day after day. This is because some of the wine yeast is beginning to naturally die off and new cells are not being produced to take their place. Eventually the yeast colony will either run out of sugars to ferment, or they will all die off from old age.

If you add sugar to a finished wine to sweeten it, and the wine is still laden with residual wine yeast, it does not matter if you add potassium sorbate or not. The wine yeast will ferment in either case. The only difference the potassium sorbate will make is whether the fermentation is going to become a full-blown one or just sputter along, almost unnoticeable, until the aging yeast cells can do no more.

What This Means For The Home Wine Maker:

What this all means for you is that before you add a sugar to a wine to sweeten it, you need to make sure that it is completely done clearing out as much of the wine yeast as possible. You want to give the wine plenty of time to drop out as many of the yeast cells as possible. Then rack the wine off these yeast cells. This is key to eliminating any chance for re-fermentation when sweetening a wine.

Whether or not the sugar is added to the wine before or after the potassium sorbate is immaterial. Just adding them both on the same day is sufficient. And to take this a step further, you can bottle the wine right after adding them. The only requirement is to be doubly sure that both the sugar and potassium sorbate are completely dissolve and evenly disbursed throughout the wine.Shop Wine Filter System

As a side note, you should always add sulfites such as potassium metabisulfite to the wine at bottling time, regardless if you are sweetening it or not.

As to your question about wine filtration… running a wine through a wine filter can only help not hurt during this process. This is simply due to the fact that wine filtration will get more of the yeast cells out of the wine. All three of the pressured wine filter systems we offer have sterile filtrations pads at .50 microns available to them. This will typically get 90% percent of the residual yeast cells that are left.

Happy Wine Making,
Ed Kraus
—–
Ed Kraus is a 3rd generation home brewer/winemaker and has been an owner of E. C. Kraus since 1999. He has been helping individuals make better wine and beer for over 25 years.

Keeping Track Of Your Homemade Wines Without Wine Bottle Labels

Keeping Track Of Homemade WinesI would like to track my wine bottles without using wine bottle labels which can be difficult to remove for my next batch of wine. Is there an easy way to mark my bottles that can be removed the next time I use them?

Name: Curtis B.
State: CO
—–
Hello Curtis,

There are several ways you could go about tacking your homemade wines without using wine bottle labels. Most home winemakers will use a color code. Each batch of wine will be assigned a color. Then that color is used on the wine bottle.

The simplest way to get the color on the wine bottle is to use different colored heat-shrink neck capsules. We have nine different colors, which is enough for most home winemakers. These neck capsules are a PVC plastic that will shrink to the neck of the wine bottle when heated. They also help seal the bottle more tightly.

We also have assorted colors of sealing wax. You can do the same with them. Just heat the wax up in an old tin can. Then dip the neck of the wine bottle into the molten wax. Instead of dipping the wine bottles, you can inset the wine cork about an 1/8″ into the neck of the bottle and pour the colored wax in the inset to form a colored disk over the cork.

In either case, keeping track of your homemade wines is just a matter of keeping your colors straight. You can do this with a color chart or “legend” that keeps track of what batch of wine each color represents. You can put it on the wall near your wine rack and problem solved.

If you don’t like using colors to track your batches of homemade wine, you can use wine bottle ID tags. These can be picked up at any commercial wine shop. This is basically a tag that has some writing space and a hole big enough for the neck of the wine bottle to fit through. Write on the tag what the wine is, and hang it over the neck of the wine bottle.

Shop Heat Shrink CapsulesThe down fall with the ID tags is that you have to write on each one. With a typical batch of wine being 25 or 30 bottles, this can become cumbersome. The second issue is that they do not secure to the wine bottles. Shut a door to fast or blow across the wine rack with the exhaust from a vacuum cleaner and your tagging could be all blown off the bottles. And this doesn’t even take into consideration what little kids could do if they got a hold of them.

I hope this gave you some ideas for keeping track of your homemade wines. With a little imagination, I’m sure there’s other ways to track them without using wine bottle labels, but these are the best ways I have discovered.

Happy Winemaking,
Ed Kraus
—–
Ed Kraus is a 3rd generation home brewer/winemaker and has been an owner of E. C. Kraus since 1999. He has been helping individuals make better wine and beer for over 25 years.

Wine Myth #64: The Older The Wine, The Better The Wine.

Couple Shopping For WineLet’s clear some things up. In general, wine does improve with age… but only to a point. Like many facets of life, there always seems to be some misinformation that makes its way to the realm of common knowledge. This seems to be the case with the myth: the older the wine the better it tastes.

Different wines age differently. Some wines age gracefully for 10 or 15 years. Other wines show improvement for a year or two and then plateau. Then there’s that very small group where no aging at all is ever going to do any good: might as well drink it now, because it ain’t gettin’ any better.

While all wines do vary in the way they age, one thing that is common among them all is that they each wine has its own life cycle. This fact can be partially surmised just by taking notice of the descriptors used to describe the aging qualities of a wine.

For example, a newly bottled wine is called young. Then later after some aging characteristics become evident, the same wine might be called mature. Then if the wine is not drank and left to set beyond its prime, one might refer to it as fallen-over.

Words like: young, mature and fallen-over, should give you a good sense as to how a wine goes about progressing through life. It improves for a period of time, just like everyone expects. Then it peaks in quality. Then it eventually declines. It’s the “decline” part that fails to make it into the realm of “common knowledge.” With each passing year the wine is actually becoming worse instead of getting better.

A wine doesn’t necessarily fall-over over night, but it will do so slowly over an extend period of time. For a big wine that has taken 5 or 10 years to peak in quality, we may be talking about a decline over several decades. For a wine that has peaked in a matter of a few month, we may talking about a decline over 2 or 3 years. Regardless, it is good to understand that:

There comes a time in any wine’s life
when it is begging to be drank!

Shop Wine BarrelsThis older-the-wine-the better myth has partially been perpetuated by the wine industry itself, although not intentionally. Many wines go up in price as they become older. This gives the perception that it is worth more because it is becoming better. With each passing year you can see the price of many vintages going higher and higher. In reality, this has less to do with the wine becoming better and has more to do with the wine becoming rarer.

If a certain vintage has been deemed to have aging potential, wine collectors will gravitate towards it and deplete its inventory level on the open market. When this happens it then becomes a simple issue of supply-and-demand. The fewer bottles left, the higher the price that can be commanded for that particular vintage.

The point here is: don’t judge a wine by its age. While wines do get better with age, they can also get worse.
—–
Ed Kraus is a 3rd generation home brewer/winemaker and has been an owner of E. C. Kraus since 1999. He has been helping individuals make better wine and beer for over 25 years.

Why You Should Be Using Sulfites In Your Wine Making Endeavors

Wine with sulfitesSulfites are a very important part of wine making. They are commonly used in both commercial wine making and home wine making. They can be used in granulated form such as potassium metabisulfite or sodium metabisulfite. Also for the home winemaker, sulfites can be used in tablet form called Campden tablets.

There are several reasons for using sulfites in the wine making process. They are extremely versatile and thus valuable in many ways. They act as a sanitizer in both the wine and on the equipment. Sulfites are also a protector against the damaging effects of oxygen.

Very briefly, when sulfite granules are added to a wine, sulfite gas is released and over time is passed through the liquid and escapes into the air.

One reason for using sulfites in wine making is sanitation.  For example, you may want to consider adding it directly to your juice prior to making the wine. Any fruit juice can be riddled with natural yeasts, bacteria, or other microscopic critters that could wreak havoc on the quality of your finished wine if left up to their own devices.  Adding sulfites directly to the wine will destroy unwanted organisms in the wine must so you don’t run the risk of ruining your wine before you’ve even begun.

Another reasons for using sulfites in wine making is to preserve your wine throughout the storage and aging process. Too much oxygen exposure to your wine can be problematic. It can cause it to become oxidized and lose many of its desired aromas and flavor characteristics while taking on undesired aromas, flavors, and colors.

By adding sulfites to the wine right before the bottling process, the sulfite gas molecules that are released into the wine have a opportunity to “push out” the excess oxygen into the atmosphere.  Think of it as the sulfite gas acting like a big bully and pushing the oxygen out of its way so the sulfite can sit in the wine and not oxygen. In short, when using sulfites in your wine making in this way, you prolonging the life of your wine, thus allowing you to enjoy it for longer than if you hadn’t used the sulfites.

shop_potassium_bisulfiteThere is a big myth floating around out there that sulfites cause headaches in people after drinking red wine, giving winemakers the idea of making sulfite free wine. So far, there is no credible evidence to support this idea, and it’s more likely that the histamines, tannins, or some other compound in red wine are causing some people to get headaches.

It’s also important to point out that many dried fruits such as prune and apricots have significantly higher doses of sulfites than any wine – typically more that 10 times – so if you do not get headaches from eating such dried fruits, then they are not allergic to the sulfites in wine.

The point is: using sulfites in your wine making is a good think note a bad thing. Take advantage of it, and claim all the benefits they have to offer.
—–
Ed Kraus is a 3rd generation home brewer/winemaker and has been an owner of E. C. Kraus since 1999. He has been helping individuals make better wine and beer for over 25 years.

Degassing Wine With A Drill Mixer

Illustration of Degassing Wine With A DrillThank you so much for all the information–it has been a lifesaver at times! My question is on degassing wine with a drill Mix-Stir in the carboy. How fast should I be using it with my drill? It seems like I just keep making more and more foam if I speed it up and I don’t know if that’s a good thing or not. It also takes forever. Should I slow the drill down? And when should I stop-is it okay to have just a few bubbles left? Thanks so much from a “Newbie”, and keep up the good work.

Name: Eileen M.
State: Florida
—–
Hello Eileen,

When degassing wine the a drill mixer, you want to run the drill as fast a possible. The only thing that should be slowing you down is the foam that is wanting to come up and out of the wine. Like pouring a glass of hot soda pop over ice, this may require a little patience on your part. But other than that go as fast as you can. No reason to keep things slow. Degassing the wine quickly will not hurt the wine in any way.

Having said this, the one thing you definitely do not want to do when degassing with a drill is splash the wine. Splashing is different than mixing the wine. When the Degassing/Mixing Paddle is submerged into the wine it is only agitating the wine within itself. When you are splashing the wine you are disrupting the surface of the wine.

Splashing the wine can allow air to saturate into the wine. This would be a bad thing since air in the wine will promote wine oxidation. Splashing is not so much an issue when you are first starting the degassing process because so much CO2 gas is coming off the wine that air can not saturate. But it does become a consideration as you finish up degassing the wine with a drill mixer.

As to your question about how long you should be degassing the wine or how far you should go, you want to get it to a point where there is only a small amount of foam being produce. Don’t worry about getting all the gas, just get to a point where it’s relatively hard to make foam. If a remnant amount of CO2 gas is still in the wine, that’s okay. This amount will have opportunities to leave during racking and bottling.

Shop Wine Bottle CorkersJust realize that degassing wine with a drill mixer is a safe and efficient way to go about it. Just get the paddles in the wine before spinning it, and you’ll have no issues whatsoever.

Happy Winemaking,
Ed Kraus
—–
Ed Kraus is a 3rd generation home brewer/winemaker and has been an owner of E. C. Kraus since 1999. He has been helping individuals make better wine and beer for over 25 years.

What Information Goes On A Wine Bottle Label?

Wine Bottle Label ExampleAs a home winemaker, you don’t have to worry about conforming to all the strict rules regarding wine bottle labels that are in place for commercial winemaking.  However, creating wine labels that will allow you to easily identify your wine in your cellar is highly recommended.

Simply writing a “Cab” for Cabernet Sauvignon or “P” for peach on the top of the cork or side of the bottle with a grease pencil isn’t going to cut it. The information that goes on the wine label is going to become more important as you start producing more styles and vintages.

Designing and creating a wine bottle label system that helps identify exactly what’s in the bottle and that looks stylish and professional if you’re gifting it for a friend or family member will save you a lot of headaches in the future.

You can as much or as little information on the wine bottle label as you’d like. You can make the wine bottle label as simple or as complex as you’d like. This is because it is your wine. You are the winemaker and are not bound by strict wine bottle label laws.

Each country has different laws in regards to what information must go on the wine label, however, most of them have basic similarities that you can apply to your own wine label.  If you’re looking to design a wine bottles label that’s similar to those from commercial wines, you’ll need a few standard pieces of information.

  • Brand Name: What do you want to name the wine? Joe’s Amazing Chardonnay? Sweet Peachy McGee?  You can get creative with this one!
  • Vintage:  What year were the grapes or other fruits picked?
  • Variety/Fruit Information:  What’s in the bottle? Is it Sauvignon Blanc? Or is it Raspberry wine?
  • Region/Geographical Location:Shop Wine Bottle Labels  Where did you make the wine?  Where did the fruit come from?  You could very well be making your wine in a different location from where you purchased the fruit, and that’s OK! Since you’re not bound by any wine bottle label laws, you have the freedom to write what you want here.  On commercial bottles, it must be made clear where the fruit is coming from as well as the location of the winery.
  • Alcohol content: This is information that goes on any wine label you see on the commercial shelf.  It might be nice to include this on your wine label as well, particularly if you’re going to be gifting it to someone else that isn’t familiar with how you made the wine.
  • Volume: This information indicates the volume of wine contained within the bottle.

As a home winemaker, what information goes on your wine labels is completely up to you. You have freedom to do anything you want with your wine label. However, it is important to label your wines in such a way that you can easily identity them. And, if you’re giving the wine to someone as a gift, it would be nice to design your wine label in such a way that it creates a little fun, as well.
—–
Ed Kraus is a 3rd generation home brewer/winemaker and has been an owner of E. C. Kraus since 1999. He has been helping individuals make better wine and beer for over 25 years.

Buying Corks For Wine Bottles

Corks For Wine BottlesSo, your homemade wine is just about ready and you’re preparing to bottle! All the hard work creating your masterpiece is nearly complete and transitions into a more passive process of waiting for the wine to be ready to be shared and enjoyed!

But you must be careful and not get too lax about things, as the bottling process is just as important as every step up until now. Buying corks for your wine bottles is a critical step, as well. Not all corks are the same and the corks you buy must ensure the proper fit for the aging at hand.

Selecting the right wine cork can be an overwhelming process. There are countless sizes, and source materials used. How are you supposed to buy corks when there are so many types from which to choose?  It helps to have a elementary understanding of the basic differences between the different wine corks. And, this is were we will start…

Your first decision when buying corks for wine bottles is whether or not you want to use synthetic corks or natural corks.  The difference between the two is that natural cork allows more oxygen into the wine than synthetic. This is preferable if you want a wine to age more quickly. The downside, however, is that the wine will not keep as long. In other words, the wine will have a short life-cycle. Instead of being fresh in the bottle for 5 or 10 years, it may be necessary to consume the wine within 2 or 3. We have different natural wine corks with different densities for this reason.

Conversely, synthetic corks are great for aging and keeping wines for longer periods of time. The amount of oxygen that is allowed to pass a synthetic cork is very minimal. They are as oxygen restrictive as our best quality natural corks. So as you can start to see, when buying corks for your wine bottles, natural vs. synthetic become an important decision.

Now, you need to consider the size of the corks. You’ll be happy to know that all cork-finish wine bottles have the same opening. This is regardless if they are 375 mL or 750 mL in size. The bottle opening is 3/4 inch. So, this is not an issue. But, natural corks are sold in different diameters:

Which of these diameters you choose depend on two thing: 1) Whether or not you have a wine bottle corker to insert the corks, and 2) How quickly you would like the wine to age.Shop Wine Bottle Corkers

If you do not have a wine bottle corker, then you will be limited to size #7 corks. Corks larger than this require that they be pressed into the wine bottle. They can not be put in by hand. Another option would be to use T-Corks instead of straight corks. These can be put in by hand as well.

If you would like the wine to age as quick as possible, then you would want to consider size #7 corks. If you would like the wine to keep as long as possible then #10’s may be an options. However, I would recommend staying away from these both these options when buying corks for your wine bottles. Remember, fast aging equals short keeping time. And the size #10’s are so hard to put in, you will need a professional floor-model corker to put them in. They are also hard to take out.

Most wine makers will either use size #8 or #9. This provide a nice balance of aging and shelf-life. It is also important to not that the standard size for the commercial wine industry is the size #9. All synthetic corks are size #9.

Buying corks for wine bottles doesn’t have to be stressful, and knowing what source material you’d like and the type of wine bottle you’ll be using will help you tremendously in narrowing down which you should ultimately purchase. You may want to take a look at another blog post, “Getting The Wine In The Bottle…“. It carries this subject a little further.
—–
Ed Kraus is a 3rd generation home brewer/winemaker and has been an owner of E. C. Kraus since 1999. He has been helping individuals make better wine and beer for over 25 years.

What Is ‘Bench Testing’ And How Does It Apply To Wine Making?

A Bench Trial Of Red Wines.I understand the practice of using bench trials, but don’t know how to apply it to my wine making. I want to blend Cabernet, Merlot, and Sangiovese to produce an Italian Chianti style red. I’ll take a small amount of each and get what I want. How do I use this “formula” to make a large batch.

Name: Cos S.
State: PA
—–
Cos, thanks for a very good wine making question. For those of you who have never heard of bench trials, in terms of wine making, it is basically taking a small sample of a batch of wine and treating it in a specific way, and then evaluating the effects on that wine sample. If the results are favorable, you do the same thing to the rest of the wine batch. That’s basically how you go about using bench trials in winemaking.

As an example of using a bench trial, if some one has 10 gallons of wine and wants it sweeter, they can take 1 measured gallon of wine from the batch then add measured amounts of sugar syrup to the wine until it is the sweetness desired to establish a dosage. The best part is if you accidentally add too much sugar to the sample, you can add it back to the other 9 gallons and start all over with a new sample — without ever jeopardizing your wine. No risk to the entire batch.Shop Wine Bottle Corkers

Cos, in the instance of using bench trials to blend wines together, it is a matter of getting the ratios down for each wine. It’s all about the ratios. This means that you need to measure each wine before adding it to your blended sample. Once you know how much you used of each wine, you can then apply the formula in larger numbers.

Let’s say after playing around with different blends for a couple of days and several bench trials, you have determined that you like the blend of:

6 oz. Sangiovese
3 oz. Merlot
1 oz. Cabernet Sauvignon

You now have your ratio: 6/3/1. Right now it’s in ounces, but it could be in any measuring units that is convenient for you: mL’s quarts, gallons, barrels. If you wanted to create 10 gallons of the blend you would use:

6 Gals. Sangiovese
3 Gals. Merlot
1 Gals. Cabernet Sauvignon

If you want to only blend 5 gallons of wine it would be:

3 Gals. Sangiovese
1.5 Gals. Merlot
.5 Gals. Cabernet Sauvignon

shop_wine_barrelsOne fun activity you can do when using bench trials in winemaking is to do blind tastings. Have someone make several different variations without revealing which sample is which. Then you and friends can taste them and see which one you like best. Use the winner to change the rest of your wine(s).

I hope this clears thing up a bit for you. The key to using bench trial in winemaking is to get everything measured that goes into the test sample. That way if you like it, you have a clear recipe as to what to do with the rest of the batch of wine.

I also wanted to mention that there is an article on our website titled, “Blending To Improve Homemade Wines” that you may want to look over. It goes into the art and science of blending homemade wine in more detail and covers a little more about using bench trials, as well.

Happy Winemaking,
Ed Kraus
—–
Ed Kraus is a 3rd generation home brewer/winemaker and has been an owner of E. C. Kraus since 1999. He has been helping individuals make better wine and beer for over 25 years.

How Long Does Homemade Wine Last?

How long can a finished homemade wine be stored or aged before going bad?

Gabe
—–
Hello Gabe,

There is nothing unique to homemade wine that makes it spoil or go bad any faster or keep any better than commercially made wines. As long as the homemade wine is treated properly, it will keep just as long and as good as wines you purchase at the store. So when you ask, how long does homemade wine last?, the simple answer is, just as long as any other wine!

But what does treated properly actually mean?

  1. It means your wine must be dosed with sulfites, and
  2. Your wine bottles must be sanitized before using

Treating Your Wine With Sulfites
This is very simple do and is very beneficial to the keeping qualities of the wine. If the wine is being made from fresh grapes or other fresh fruits, just add a standard dose of potassium metabisulfite or Campden tablets 24 hour before adding the yeast. If you are making wine from a wine concentrate this process can be skipped.

Another dose of potassium metabisulfite or Campden tablets should be added to the wine right before bottling. This dose before bottling goes for any wine – regardless if it’s made from fresh fruit or grape concentrate. There may be other times that sulfite should be added, depending on how many times the wine is being siphoned or how long it’s being bulk aged. You can find more information on this in the blog post: Using Campden tablets: The How, When And Why.

Shop Campden TabletsBy performing these simple steps your homemade wine will stay fresher much longer and will degrade in quality much slower. And, you will have have virtually eliminated the chance of your homemade wine experiencing out-right spoilage.

Sanitizing Your Wine Bottles
This is the second part of the equation. How long does a homemade wine last? It depends on how well the wine bottles were sanitized. Fortunately, it’s a simple process.

All you have to do is clean the wine bottles as you normally would anyway. Use some dish soap and a wine bottle brush. If the wine bottles are brand new, you can skip this part. Then use a cleaners such as Basic A on the wine bottles to sanitize them. Both of these products come with complete directions on their usage. Once the wine bottles are mostly dry, they are ready to be filled with wine.

The wine bottle can be cleaned ahead of time, but the sanitation part should only be done when you are actually ready to bottle.

Shop Basic AFinal Word…
It’s important to understand that these are the same critical steps that any winery would take. It’s what keeps all those bottles of wine consistently fresh on the store shelves, and that’s why your homemade wine can last just as long as any commercially made wine – stay fresh and free from going bad.

Follow these procedures. Make them habits. And you’ll never have a problem with any of your wines keeping while in storage.

Best Wishes,
Ed Kraus
—–
Ed Kraus is a 3rd generation home brewer/winemaker and has been an owner of E. C. Kraus since 1999. He has been helping individuals make better wine and beer for over 25 years.