The Virtues Of Adding More Fruit To A Wine Recipe

Bowl Of Wine Making Fruit
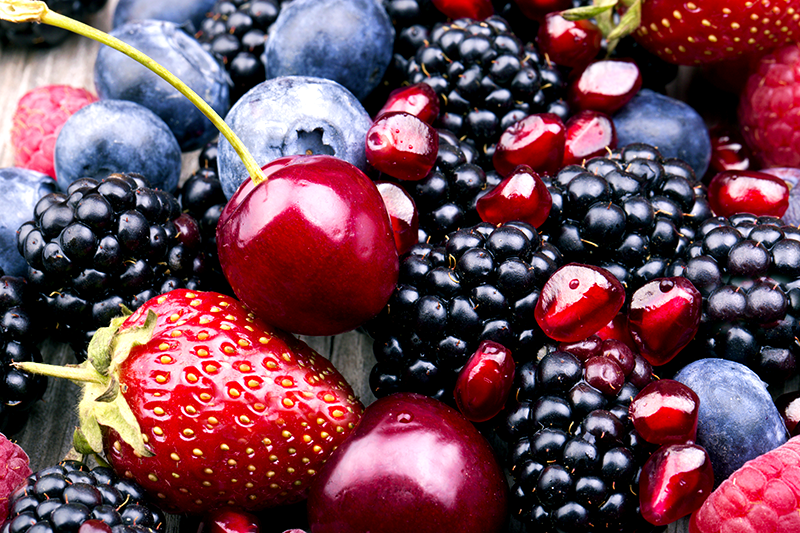
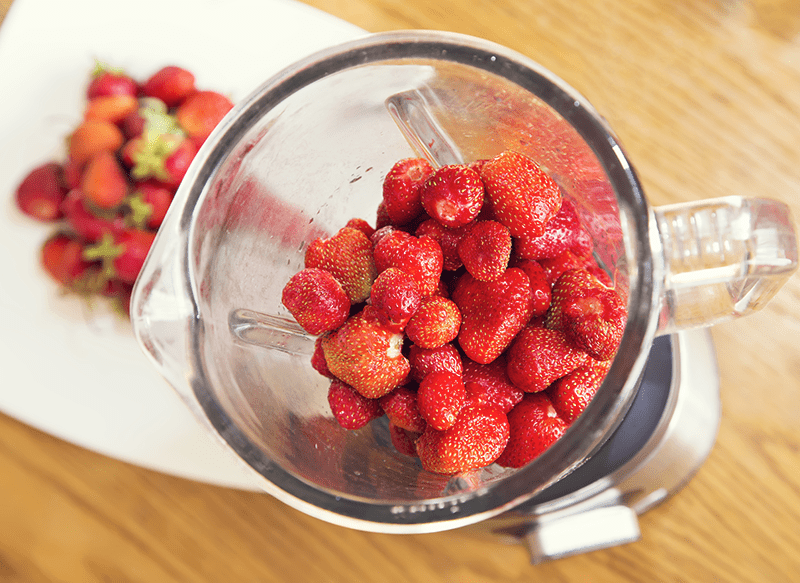
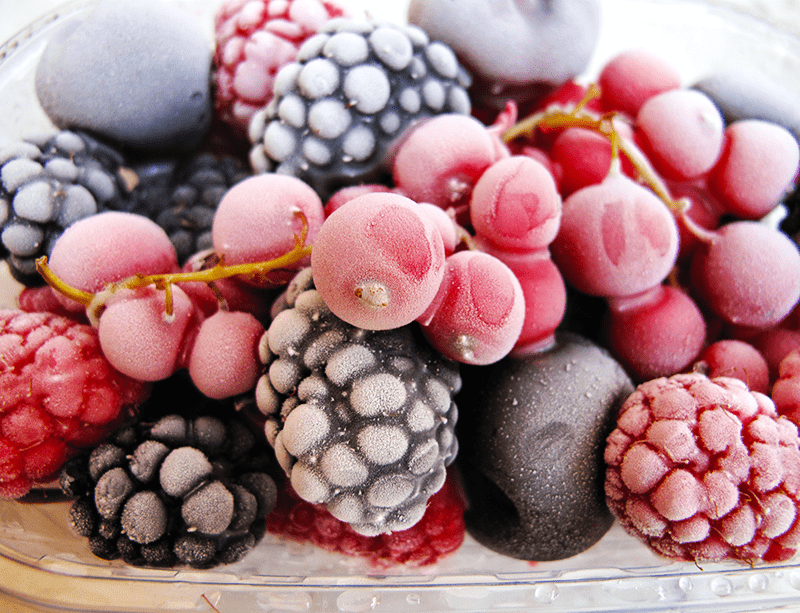
Your blueberry wine recipe on your website states you need 13lbs of blueberries for making 5 gals. Will adding more fruit to this wine recipe add more color and flavor to the finished wine?

Thank-you
Gary C.

—–
Yes, adding more fruit to any wine recipe is going to intensify the flavor and add more color. But, before you take this bit of information and go running with it, here are some considerations that you may want to think over first.

Do You Really Want More Flavor?

Almost all of the wine recipes on our website are shooting for a pleasant, medium-bodied wine. If you follow the amounts called for and follow the homemade wine instructions, you will end up with a wine that everyone can enjoy, wine drinkers and non-wine drinkers alike – a wine perfect for passing out as personal wine making gifts at parties, family gatherings, etc.

If you over-do the intensifying of the flavor by adding more fruit, it has been my experience that non-wine drinkers will not be as appreciative of what you’ve made. The flavors that will come forward will be very foreign and challenging for non-drinkers to like.

What About The Fruit Acid?

When you add more fruit to a wine recipe, you are obviously adding more fruit acid as well. A wine’s acidity needs to be in a certain range to have any chance of tasting right. By adding more fruit to a wine recipe, you are potentially taking the wine out of this range. This could lead to your wine tasting either too sharp or tart.

Fortunately, you can overcome this by reducing one of the other wine making products called for in the recipe, Acid Blend. This is a blend of the acids that are naturally found in fruit. In the case of the blueberry wine recipe, it calls for 2 tablespoons of Acid Blend. When adding more blueberries you would reduce this amount to compensate.Shop Acid Test Kit

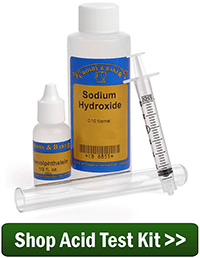
Now comes the question, “By how much does the Acid Blend need to be reduced?” This can only be answered with the aid of an Acid Testing Kit. Once all other ingredients – besides the Acid Blend – have been added to the wine must, you would use the Acid Testing Kit to determine how much Acid Blend, if any, is actually needed for the wine to taste in balance – not too sharp, or not too flat. Our acid testing kit comes with directions that will tell you how to get the wine acidity into the right range.

The Alcohol Level Needs To Kept In Balance.

In general, the fuller the flavor of a wine, the higher the alcohol level must be to keep it in balance. Wines that do not have enough alcohol as compared to their flavor intensity, will taste harsher. The astringent characters of the wine will be highlighted in the wine’s final flavor profile.

To help put this into better perspective, lighter white wines tend to be around 10% alcohol, while the heaviest of reds tend to be around 14%. The particular blueberry wine recipe you are considering is shooting for around 11.5% to 12%, that is, if you follow the homemade wine instructions.

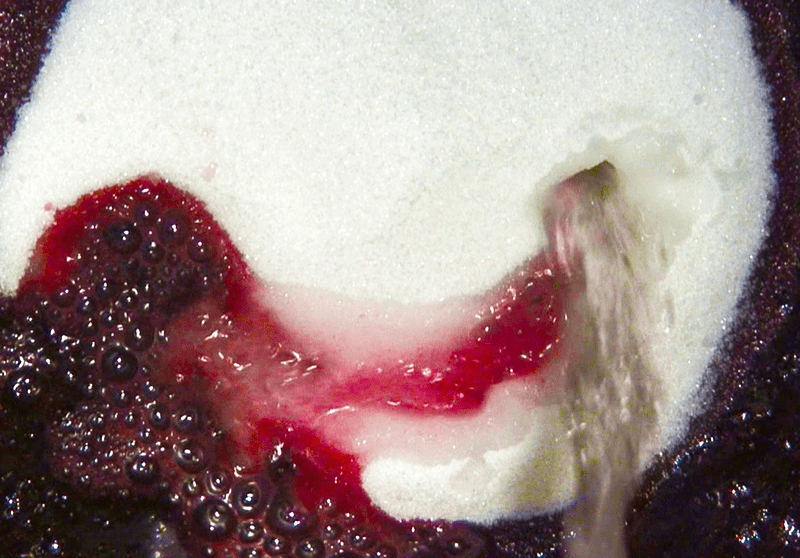
This alcohol level is based on both the amount of sugar and fruit called for in the wine recipe. Both of these ingredients are wine making materials that provide food for the wine yeast to turn into alcohol.

If you decide to add more fruit to your wine recipe, then you should probably shoot for more alcohol. Not necessarily 14%, but maybe somewhere around 12.5% or 13%. There is no exact amount that is correct. This is where art, finesse and experience come into play.

To control the finished alcohol level of a wine, you need to control the beginning sugar level. This is done with the “potential alcohol” scale on the wine hydrometer. Once the crushed fruit and water are mixed together, instead of adding 11 pounds of sugar as directed by the wine recipe on our website, just keep dissolving sugar into the wine must until the potential alcohol scale on the wine hydrometer reads 13%.Shop Hydrometers

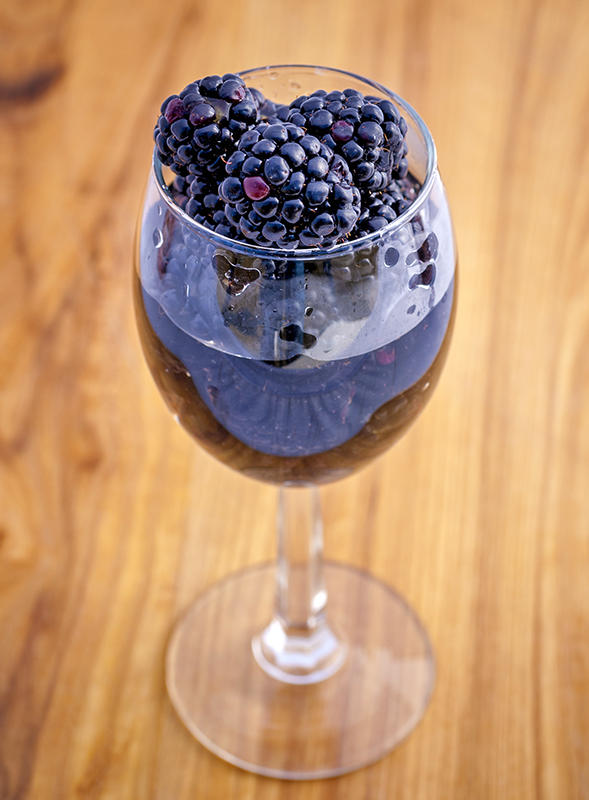
More Flavor Means More Aging.

Another consideration that must be thought through before increasing the amount of fruit is the amount of aging that will be required before the wine is considered mature and ready for consumption.

Here again, the more fruit you add to a wine recipe, the more aging the wine will need before it comes into its own. With the original 13 pounds of blueberries, maximum aging would be around 6 to 9 months. With 20 pounds it may take as long as 12 to 18 months before the improvement brought by aging is fully realized.

This does not mean that you can not drink the wine before this; it just means that you can expect the wine to continue improving with even more time. Again, neither I nor wine making books can tell you when the wine has reached full maturation, this is for you to learn how to determine on your own as you sample the wine through out the aging process.

As You May Begin To See…

There are a lot of factors that go into putting together a solid wine recipe: picking out the various wine making products; determining their amounts, etc.

Shop Wine Making KitsAll the wine recipes we offer on our website have been bench tested and used many, many times. While you can alter them as you like, realize that any changes you make to any one ingredient, usually means that you will need to change another ingredient to keep things in line.

Happy Wine Making,
Ed Kraus
—–
Ed Kraus is a 3rd generation home brewer/winemaker and has been an owner of E. C. Kraus since 1999. He has been helping individuals make better wine and beer for over 25 years.

6 Tips For Using An Acid Test Kit

Sample For Using With An Acid Test KitI have the hardest time with the acid titration kit as far as finding the right color stop (acid level) any suggestions on using an acid testing kit, how to tell when to stop at the right level.

Manuel Q. – NM
—–
Hello Manuel.

For those of you who have never used an acid test kit: basically what you are doing is taking a measured sample of wine and slowly adding sodium hydroxide to it until the wine permanently changes color. By knowing how much sodium hydroxide it took to get the color change, you can determine you wine’s acidity level.

An acid test kit can be a little awkward to use until you get the hang of it. I sometimes suggest to customers that they practice on some finished wine, first, before they actually need to use it. Here are some additional information for using an acid test kit. These are tips that go beyond the instructions you typically find with a titration kit.

  1. Run Through A Quick Test
    When I’m using the acid test kit, the first thing I like to do is go through a test quickly. This is to establish “about” where the color change will occur. Then when doing a second test, I start off by adding enough sodium hydroxide to get close to the point of a color change. Then I add the sodium hydroxide one drop at a time. Adding the bulk of the sodium hydroxide all at once will save you a lot of time and aggravation in the long-run. With each drop you will want to shake the test-tube and see that either a magenta or grey color is dissolving completely away in the sample of wine. Streaks of either color are okay. They just need to be swirled out. It’s when the color stays permanently and alters the color of the entire sample. That’s when you want to take your measurement reading.
  1. Use A White Background 
    This tip for using an acid test kit is the one I think is the one that is most helpful. By holding the test tube up to a white background like a wall or sheet of paper you will be able to discern the color change more easily. You are essentially blocking out colors from the room, giving you a cleaner frame of reference when taking a titration of the wine.Shop Acid Test Kit
  1. Use A Second Wine Sample For Comparison  
    Having a second test tube with another wine sample for comparison may be helpful. Put them side-by-side. Expect the color of the sample being tested to get lighter and lighter as more sodium hydroxide is added. That’s okay. You are not comparing the lightness or the darkness between the two wine samples. You are comparing the color hue of the two wine samples. 
  1. Dilute The Wine’s Color  
    This tip for using an acid test kit does not apply to every wine. If the color of the wine is too opaque to see a color change, you can dilute it. Some red wines are just to dark for performing a titration. You can dilute it with distilled water. You do not want to use tap water or drinking water. Use distilled water, only. Dilute as much as you need to. This will not alter at what point the color change will occur or the math you use to calculate it. 
  1. Make Sure The Wine Is Free Of CO2   
    The wine sample needs to be flat. You do not want CO2 (carbonation) from the fermentation to be in the wine sample. Carbon dioxide will throw off your reading. For this reason, the most opportune times to test your wine is before fermentation and before bottling. The wine must should be free of CO2 at both these times. If you are making your wine from fresh fruit, I would recommend testing at both times. The acidity level can change during a fermentation. The first test is to get the acidity close so that the fermentation can be healthy. Acidity plays a role in how well a yeast ferment. The test before bottling is to adjust for flavor – flat vs. tart flavors.
  1. Make Sure The Acid Test Kit Is Still Good    Shop Acid Reducing Crystals
    Here is the last tip for using an acid test kit. Both the activator and the reagent in your acid test kit will get old with time. This can throw off a titration reading – sometimes significantly. For this reason, it is not a bad idea to store these ingredients in the refrigerator for longer shelf-life. If you are not sure how old your acid test kit is, you can run a test on Welch’s grape juice – not from concentrate, straight Welch’s grape juice off the store shelf. It should have a reading of .67%-tartaric. If you get a reading that is higher than this, it means that your reagent (sodium hydroxide) is old and does not have its full strength.

Using an acid test kit is a great way for controlling your wine’s acidity. Hopefully these tips for using the acid test kit will help to make the process a little easier and an little more accurate.

Happy Winemaking,
Ed Kraus

—–
Ed Kraus is a 3rd generation home brewer/winemaker and has been an owner of E. C. Kraus since 1999. He has been helping individuals make better wine and beer for over 25 years.

Help! My Wine Fermentation Temperature Is Too High!

Wine Fermentation Temperature Is Too HighCould you tell me how I might control my fermentation temperature? I have been making wine for 15 or so years from real grapes. Many times the wine’s fermentation temperature is too high. What is the best way to control it. Thanks in advance.

Name: Al J.
State: NY
—–
Hello Al,

Thanks for the great question. This is something that plagues a lot of home winemakers, so I’m glad you brought it up.

For those of you who do not know, a fermentation creates heat. It’s usually not a problem during the cooler months or with smaller batches, say 5 gallons or less. But when the weather is hot or you are fermenting in 15 gallon batches or larger, heat can build up and should be on the winemaker’s radar.

Depending on the type of wine you are making and the type of wine yeast you are using, you would like your fermentation to around 70° to 75° F.  Once you start getting over 80°F. you run the risk of off-flavors and possible spoilage.

There are several ways you can go about keeping a fermentation cool. Unfortunately, most of them are a pain in the behind. For a professional winery it simple. They use fermentation vats with cooling jackets and/or refrigeration coils that keep the temperature stable under computerized control. Sweet! But for us home winemakers we have to use a little more ingenuity to keep our fermentation temperatures stable.

I’ll go through a few of the basic methods you can use if the wine fermentation temperature is too high, but it’s going to be up to you to figure out which one is going to be most practical for your situation:

  • Use Smaller Fermenters
    This one is pretty basic. A 5 gallon carboy is not going to over-heat as easily as a 15 gallon demijohn. This is because you have more external surface area per gallon as you go down in size. That means the heat can dissipate more readily from a smaller fermenter than it can with a larger fermenter.
  • Blocks Of Ice
    Shop CarboysThis is the one I hate the most, but is most used by home winemakers. It’s simply using blocks of ice in ziplock bags directly into the wine. I hate this for two distinct reasons: 1) you never know when a ziplock bag is going to fail and empty melted ice into the wine, 2) there is very little control. While it’s designed to help you out when the wine fermentation temperature is too high, you could easily get the fermentation too cool, stalling the fermentation. For these reasons I do not recommend this method, but it could be used in a pinch.
  • Evaporation Method
    The basis behind this method is when water evaporates it cools whatever it is touching. By keeping evaporating water against the outside of the fermenter, you can get the fermenter to cool down. A common way of accomplishing this is to sit the fermenter in a bath of water. It does not need to be deep, just a few inches. Next put fabric over the fermenter that drapes into the water. As an example, you could use a cotton t-shirt over a carboy. The water will then wick up the fabric and then evaporates, cooling the fermenter. You an use a fan to blow air across the fermenter to speed up the evaporation. The faster the evaporation, the more the fermentation gets cooled.
  • Heat Ex-changer
    This method is done simply by putting a coil of stainless steel tubing in the wine Buy Temp Controllerand then running cold water through the tube. This is a great way to cool the wine. The biggest problem with it is that you have to use stainless steel tubing which is expensive. Other metals will corrode which is detrimental to the wine, so stay away from copper, aluminum, etc.
  • Dedicated Refrigerator
    This is the ultimate solution for when a wine fermentation temperature is too high. This method involves using a refrigerator as a temperature controlling device. The obvious issue with this method is you need a refrigerator. The second issue is that the thermostat of a refrigerator does not go high enough. For this reason you will need to buy a electronic temperature controller with the correct temperature range to control the power to the refrigerator.

Unfortunately, all these methods involve some effort on your part. As mentioned before, all them work, it’s more a matter of picking out the method that is most practical for your situation.

Happy Winemaking,
Ed Kraus
—–
Ed Kraus is a 3rd generation home brewer/winemaker and has been an owner of E. C. Kraus since 1999. He has been helping individuals make better wine and beer for over 25 years.

Why Is Stirring A Fermenting Wine So Important?

Stirring Fermenting WineI have started making 5 gal of Blackberry wine and I am using your ingredients. One question is in your wine recipe you say after the first day add the yeast with the fermentation bag still in the must and leave it for an additional 7 days before transferring it to the carboy. Should I continue to stir the wine also ? Do I need to add make up water after removing the bag ?

Name: Charles P.
State: SC
—–
Hello Charles,

Once you add the yeast you will want to stir the fermenting wine must around as much as you can. The goal is to not allow any of the pulp to become too dry during the fermentation. Stirring it around once or twice a day should be sufficient.

In a winery they call this punching the cap. When fermenting grapes there is so much pulp involved that a thick solid cap is formed. The winemaker has to punch it down with a punch down tool that looks similar to a large potato masher with a long handle.

With your fermentation there is much less pulp. I’m assuming you used around 15 pounds of blackberries to make your five gallons, whereas with a grape wine there would be about 40 pounds, so simply stirring the fermenting wine should be sufficient in your situation.

If you have our regular size fermentation bag, just open it up and stir the pulp so as to circulate the dryer pulp towards the bottom. Rotate the pulp. If you have our jumbo fermentation bag, then it should be left open and rolled backwards over the brim of your primary fermenter. All you need to do is give the pulp a quick stir in kind of a folding manner.Shop Fermentation Bags

The reason you want to keep stirring the wine must is twofold. The first one is simple. When the pulp becomes to too dry for too long of a period, it provides a perfect place for mold an bacteria to grow – damp, nutritious pulp that is exposed to air. The second reason is if a solid dry layer forms it will interfere with the fermentation. Wine yeast needs air to successfully grow and multiply into a large enough colony to support a healthy, vigorous fermentation. If a dried cap forms it creates a barrier that traps the CO2 gas in the wine must and cuts the air off from the yeast.

As you suggested, once your primary fermentation is done and you are ready to remove the fermentation bag, there will be some loss in volume, but it will not be as much as you might think with your blackberries. What you are looking at now is the plump fruit. Once the fermentation gets hold of it, it won’t be so plump. The fermentation will break down the pectin in the blackberries making the pulp just a shell of what it was before.

If you do find your batch is excessively short then you should top up the wine when going into secondary, but is should not be a major issue. Just be sure to get as much liquid as possible when racking into your secondary fermenter — even if some sediment is coming along with it. Also, when you pull the fermentation bag out, wring it as best you can. The more juice the merrier.Shop Stirring Paddle

Charles, I hope this answers your questions about stirring fermenting wine. Just remember that stirring the wine must daily to keeping any cap from becoming hard and dried is a critical part of having a healthy, active fermentation.

Happy Winemaking,
Ed Kraus
—–
Ed Kraus is a 3rd generation home brewer/winemaker and has been an owner of E. C. Kraus since 1999. He has been helping individuals make better wine and beer for over 25 years.

Making Blended Fruit Wines

Berries For Making Blended Fruit WinesI am interested in blending a fruit wine with blackberries, blueberries and Concord grapes. Can you give me any input on a formula to use for 5 or 6 gallons. I’ve been ordering from Kraus for over 6 years and have had a lot of fun. Thank you for your input.

Name: Guy K.
State: PA
—–
Hello Guy,

This is a question we get from time to time, and one I don’t mind answering again because it’s such a fun subject. A big part of the enjoyment of making your own wine is the ability to experiment and play around a little bit.

Guy, there are two ways you can go about making blended fruit wines:

  • The first is to make all the fruits into wines, separately. Then blend them together before bottling.
  • The second way is to find a wine recipes for each of the fruits you want to blend. Then combine them together  into one recipe that includes all the different fruits.

Making each fruit into a wine separately has some disadvantages. It’s more work. It’s a lot easier to make on 5 or 6 gallon batch than making three 2 gallon batches. You would be making three odd-sized batches. Not many home wine makers have the fermenters that are the right size for these smaller-sized batches.Shop Wine Making Kits

But blending fruit wines together after they have been made separately has one big advantage. You can blend the three wines together in any ratio you like. This will allow you to optimize your wine’s flavor. You can decide at bottling time how much of each individual wine to use. A series of taste-testings can help in this respect. You may decide on a ratio of 20-50-30 instead of 33-33-33.

Making all three fruits together as one batch is a lot less work, but you are stuck with the ratio of fruit you used when starting your wine. Your wine will turn out either way, you’ll just have less control of the final product.

To make all three fruits together you need to have a wine recipe for each fruit. In your case, you need a blackberry wine recipe; a blueberry wine recipe; and a Concord wine recipe. Most of the wine recipes you’ll run across will be for 5 gallons. You could throw everything called for into one big fermenter and make a 15 gallon batch. Or, you could use one third of each wine recipe to make a 5 gallon recipe.

Cutting the batches down in size is a fairly straight-forward thing to accomplish. If you have three 5 gallon wine recipes, just use 1/3 of each ingredient called for in each of the three wine recipe to make a new 5 gallon wine recipe. It’s as simple as that.

If more than one type of wine yeast is recommend among the three wine recipes, just pick one and go with it. Do not try blending wine yeast.

Regardless of which method you choose for blending fruit wines, the most important thing is to have fun. Having blind taste-testings with friends to help you figure out your blending ratio can be a blast. Or, come up with your own exotic blend of fruits that makes a punch of a wine — one you call your own. Either way making blended fruit wines is a blast.

Happy Winemaking,
Ed Kraus
—–
Ed Kraus is a 3rd generation home brewer/winemaker and has been an owner of E. C. Kraus since 1999. He has been helping individuals make better wine and beer for over 25 years.

I Put Too Much Sugar In My Wine!

Sugar In Wine MustTo keep a long story short, while mixing ingredients for the first fermentation, instead of 2 pounds of sugar called for in the wine recipe, 4 pounds made it into the bucket. I let it go for the first fermentation. The hydrometer reading is 1.106. Could I add water to lower sugar concentration for the fermentation?
Thank you.

Name: Jan R
State: Ohio
—–
Hello Jan,

Adding an additional 2 pounds of sugar to the wine must is not as serious as you might think. Assuming this is a 5 gallon batch, the extra sugar will raise the final alcohol level by about 2%, so while you may have put too much sugar in the wine, it is far from being a disaster.

The general rule-of-thumb is for every pound of sugar you add to a 5 gallon
batch of wine, you increase the potential alcohol by 1%.

Based on your beginning Specific Gravity reading of 1.106 you took with your hydrometer, you have a beginning potential alcohol right at 14%. That means you have enough sugar in the wine must for the yeast to ferment 14% worth of alcohol content. If you can live with this, then doing nothing is your best course of action. Just finish the fermentation as you normally would.

If you would like, you can dilute the wine with water, but this will bring up another problem and that is the wine’s acidity or its tartness. Diluting the flavor profile of a wine with water is one thing. You can get away with reducing the intensity of the flavor without having too much noticeable overall affect on the wine. But you are diluting the acidity at the same time. Acidity is something that is very noticeable when it’s diluted. Because of this, an adjustment would need to compensate for the lowering of the acid level. This can be done by adding Acid Blend to the wine must.Shop Hydrometers

Now the question is: how much water and Acid Blend should you add? Again, I am going to assume this is a 5 gallon batch of wine.

You can use something called a Pearson’s square to calculate how much water to add to bring the potential alcohol down to its intended level, but I’ll do that for you, now. You need to add .83 gallons of water to the entire batch to bring the potential alcohol down from 14%  to 12%. This works out to 3 quarts and 8.5 fluid ounces of water.

Now, you need to figure out how much Acid Blend needs to be added to compensate for the addition of .83 gallons of water. This leads me to my second rule-of-thumb:

For every teaspoon of Acid Blend you add to a gallon of liquid,
you will raise the total acidity by .15%.

With a target range of around .65% to .75% TA, this means you would want to add between 4.33 and 5 teaspoons of Acid Blend per gallon of water. You would be adding .83 gallons — not a whole gallon — so this would adjust the range of Acid Blend needed for the batch to somewhere between 3.6 and 4.1 teaspoons. You could also use an our Acid Test Kit to take an acid reading after the water has been added and adjust according.

Shop Acid Test KitYou can add both the water and Acid Blend anytime you like during the winemaking process. The effects of both are immediate on the wine. The only thing you need to know is that if you add the water after the fermentation has completed, it needs to be distilled water. Using tap or bottled drinking water at this time would be introducing free oxygen into the wine and promote oxidation. Distilled water has no free oxygen.

As I’m sure you can start to see, there is a lot to be said for just leaving the wine alone and let is go as is, but if you feel that 14% alcohol is something you can’t live with, there are options. As I mentioned before, while you did put too much sugar in the wine must, the total effect on the resulting will not be disastrous or out ruinous. Either way I’m sure you wine will come out just fine.

Accidentally putting too much sugar in a wine must is something that happens from time to time. I know I’ve added to much sugar to my wine before, and I know lots of others have. Just realize that regardless of how bad the situation, there is usually a solution to remedy the problem.

Happy Winemaking,
Ed Kraus
—–
Ed Kraus is a 3rd generation home brewer/winemaker and has been an owner of E. C. Kraus since 1999. He has been helping individuals make better wine and beer for over 25 years.

3 Tips to Make Fruit Wine With More Fruit Flavor

Getting More Fruit In Homemade WineI recently entered a homemade blackberry wine into a judging contest. I did ok but two judges said my wine needed more fruit flavor. I used the wine recipe from Kraus. Do I need to add more fruit at the beginning of the fermentation? How do I get more fruit flavor in my wine? I usually make 5 gallons at a time.

Name: Thomas S.
State: Tennessee
—–
Hello Thomas,

Thanks for the great question! Flavor is a subjective topic. One person’s perception of a wine can be completely different from another’s. In fact, two of the tips I’m going to give you to make fruit wine with more fruit flavor (number 2 and 3) are based on perception and not reality:

  • Tip #1: Use more fruit – just as you suggested. This will also require you to add less acid blend than called for in the wine recipe. The reason for this is that more fruit acid is being provided by the fruit. An acid test kit may be the best way for you to tell how much acid blend is needed. The additional fruit will also provide more sugar to the wine must. You will want to use a hydrometer to know how much to add. This brings us to the next tip for getting more fruit flavor in your wine.
  • Tip #2: Make your wines with less alcohol. Lower alcohol wines tend to have more fruit flavor. High-alcohol wines numb the tongue, making flavor sensations tougher to experience. This wine can take on a watered-down characteristic. Instead of making your wines at 13%, 14%, or higher, try making them around 10% or 11%. Controlling your wine’s alcohol level is easily done by adding less sugar to the wine must. Again, a hydrometer is your friend in this situation. Add sugar to the wine must until the hydrometer gives you a potential alcohol reading in the 10% to 11% range.Shop Hydrometers
  • Tip #3: Back-sweeten the wine at bottling time. Don’t make your wine bone dry. When you pop a blackberry into your mouth, a lot of what makes a blackberry taste like a blackberry is its sweetness. The fermentation takes all that sweetness away by fermenting the sugars into alcohol. Sweetening the wine back just a little bit can give the perception of the wine having more fruit flavor. You don’t necessarily have to make the wine sweet. Use just enough sugar to take the bone-dry edge off the wine can make quite a difference. It is important that you stabilize the wine by adding potassium sorbate when sweetening. This will help to eliminate any chance of a re-fermentation in the bottle.

There are a couple of caveats that need to be brought up.

  1. Adding more fruit to increase the wines fruit flavor means that it will need more time to age. Bigger, bolder wines are harsher when they are first fermented. Aging plays a more important role in mellowing the harshness of these big wines.
  1. Shop Potassium SorbateThere is a limit to how much you can increase the fruit in a wine recipe. The limit is based on the acidity or tartness of the particular fruit being used. You do not want to add so much fruit that the wine ends up being too tart even without adding any acid blend, at all.

So Thomas, there you have it… three simple things you can do to get more fruit flavor into your homemade fruit wines. You can try just one of them, or you can try all three at the same time, on the same wine.

Happy Winemaking,
Ed Kraus
—–
Ed Kraus is a 3rd generation home brewer/winemaker and has been an owner of E. C. Kraus since 1999. He has been helping individuals make better wine and beer for over 25 years.

Using A Blender To Crush Wine Making Fruit

Wine Making Fruit In BlenderJust started a blueberry wine. Ran the berries through a blender instead of crushing them (lazy I guess). I did not add Campden tablets to it in the beginning, not sure if this is a problem. There is a pulp crust forming on top right now, I stir this each day, should I remove it after 5 or 6 days before I transfer the wine to a carboy?

Name: Lee P.
State: TN
—–
Hello Lee,

The fact that you did not add Campden tablets before the fermentation is probably not going to be a problem in this case.

The big issue here is that fact that you are using a blender to crush your wine making fruit. What this typically does is cause the resulting wine to be bitter. The over chopping and destroy of the pulp and seeds releases too much tannin into the wine. In turn, the wine will have a lower pH from excessive tannic acid, giving it an unpleasant, bitter-dry, puckering taste.

For future reference, you only want to crush the fruit. Using a blender is way overkill. You only need to make sure that the outer structure of the fruit has been busted in some way. This is something that can quickly be done by hand when dealing with 10 lb. or 15 lb. of fruit such as blueberries. If you are dealing with more fruit than this, then you may want to invest in a fruit crusher, but never use a blender to crush any kind of wine making fruit.

Shop Wine PressWhen the fermentation starts the wine yeast will produce enzymes that will naturally break down the fruit in a more natural, gentler way. The pectic enzyme that is called for in most fruit wine recipes will also help in the regard. For this reason you do not need to do a lot; let the yeast do if for you.

With that being said, there are still some things you can do to counteract using a blender to crush wine making fruit:

  1. Shorten the amount of time you leave the fruit in the fermentation. The shorter the better. I would recommend 2, maybe 3 days at most. This will give less time for the bitterness to leach from the fruit.
  1. Treat the wine with bentonite after the fermentation has completed. This will help to drop out the excessive tannin and other proteins that where extracted from the fruit. You may even want to use the bentonite more than once.
  1. Age the wine longer than you normally would. Many of the flavor affects of having too much tannin in the wine can be resolved with additional aging. Instead of 3 to 6 months, think more along the lines of 9 to 15 months. Quite often this will be enough to bring the wine back into a flavorful balance.Shop Pectic Enzyme

I hope this helps you out, and I hope your wine turns out great, regardless. Just remember that using a blender to crush your wine making fruit is not the way to go.

Best Wishes,
Ed Kraus

—–
Ed Kraus is a 3rd generation home brewer/winemaker and has been an owner of E. C. Kraus since 1999. He has been helping individuals make better wine and beer for over 25 years.

3 Reasons Freezing Wine Making Fruit Should Be On Your Radar

Frozen Wine Making FruitQuestion, is it better to make wine with fruit that has been frozen?

Thanks,
Gerald
—–
Hello Gerald,

Thanks for the great question and bringing up a great wine making subject. Freezing wine making fruit is a great tactic for the home winemaker. It’s one of the wine making tips I share with people quite often.

Just like you said, freezing the fruit breaks down the fiber that is holding it together. When it comes time to actually use the wine making fruit, just thaw it out and process as you normally would. You will find that the color and flavors will release from the fruit into the wine must more readily. This means you are getting more out of your wine making fruit.

Not only does freezing the wine making fruit have this subtle advantage, but there are a couple of more-obvious advantages as well. Freezing the fruit affords you the luxury of being able to make the wine when you are ready to make the wine. If the strawberries are ready, but your not… freeze ’em!

Another advantage is sometimes you don’t have enough fruit to make an entire batch of of a particular fruit wine recipe. Not all fruits come in evenly. The solution is to freeze the fruit as it comes in. Freezing the wine making fruit allows you to hoard until you do have enough to make a full batch of wine.

Shop Wine Making KitsThere’s really not much to know about freezing the fruit. Its okay to chop up your larger fruit. But for berries, you are better off leaving them whole. I strongly suggest sanitizing all wine making fruits in a bath of sodium metabisulfite and water solution before freezing. Drain the fruit thoroughly. Also, common sense would dictate that the “bad ones” be pick out and discarded.

If you plan on freezing the fruit for a longer period of time, say six months or more, you may want to consider packing the fruit in sugar syrup. This will help to eliminate any negative effects from freezer-burn. Just like it sounds, you use just enough sugar syrup to cover/submerge the fruit before freezing.

If you do decide to pack your fruits in sugar syrup you will want to add less sugar then your wine recipes calls for. This is to allow for the additional sugar that will be incorporated into the wine must along with the fruit.

A simple way of handling this adjustment is to rely on your wine hydrometer. Use the hydrometer to tell you how much sugar is needed in the recipe instead of adding the amount called for in the wine recipe. Just add sugar until the desired alcohol level is reached the the hydrometer’s potential alcohol scale.

Freezing wine making fruit is not a necessity to making wine. You can make incredible wines without freezing the fruit at all. Freezing fruit is just one more method you can use to help the fruit keep while waiting from more.

Happy Winemaking,
Ed Kraus
—–
Ed Kraus is a 3rd generation home brewer/winemaker and has been an owner of E. C. Kraus since 1999. He has been helping individuals make better wine and beer for over 25 years.

7 Wine Making Ingredients You Should Have On Hand!

Assorted Wine Making FruitsTime to stock up on your basic wine making ingredients.

It looks like it’s going to be a great year for fruits in most regions of our nation. It won’t be long before a cornucopia of fruit will be in season and ready for your wine making pleasure: blackberries, raspberries, blueberries, watermelon…

By stocking up on just a few, key wine making ingredients you’ll be ready for any type of fruit that may end up coming your way. You won’t need each ingredient in every recipe, but you’ll need most of them in all recipes.

Except for the wine yeast, just get one container of each. With the yeast you’ll want to have a variety of three or four different types to have on hand. Stock these wine making ingredients, and you’ll be ready for anything:

  • Yeast Nutrient – Just like it sounds, this wine making ingredient is nutrient for the yeast. It helps to invigorate the wine yeast and get it fermenting more quickly.
  • Yeast Energizer – A combination of Yeast Nutrient, vitamins and proteins. It is used for wines that lack the types of nutrients the wine yeast expect: Dandelion, honey, rose hips, etc.
  • Pectic Enzyme – Aids in pulling flavor from the fruit. It breaks down the fruits fiber so that more flavor will release. It also aid in the clearing of the wine.
  • Acid Blend – Brings the fruit acids up to a flavorful level. Any wine recipe that calls for water will need this wine making ingredient to bring the wine’s acidity up to a proper level.
  • Grape Tannin – Adds zests to the wine. It is the peel flavor of the fruit. Grape tannin also helps the wine clear and age properly.
  • Wine Yeast – This wine making ingredient is what actually turns the sugar into alcohol. There are several different types for various wines. I would recommend, at minimum, having some of the Red Star Montrachet and Pasture Blanc on hand.Shop Wine Making Kits
  • Campden Tablets – This is used to sanitize the juice and equipment. The tablets are crushed up and added to water to product a sanitizing solution that is safe and can be added directly to the wine to destroy any wild mold or bacteria.

You may also want to get Potassium Sorbate a.k.a. Wine Stabilizer. This is added to a wine if you decide you want to back sweeten it up before bottling. It keeps the residual wine yeast from fermenting the new sugars while in the bottle.

Recipes and Directions…
We have several wine recipes on our website for the more common fruits that utilize these wine making ingredients. We also have easy to follow wine making directions that are listed there as well. They will help you to stay on the right path.
—–
Ed Kraus is a 3rd generation home brewer/winemaker and has been an owner of E. C. Kraus since 1999. He has been helping individuals make better wine and beer for over 25 years.