 Part 1 | Part 2 | Part 3 | Part 4 | Part 5
Over the past couple weeks I took the next steps towards making my California Connoisseur Shiraz Kit: Secondary Fermentation and Degassing. I’m a few days behind schedule according to the kit instructions, but hopefully that shouldn’t make much of a difference. If I’ve learned anything from homebrewing, patience is a virtue and taking your time is often rewarded in the quality of the product. I’d imagine that’s the case with making red wine as well. We shall see! Let me walk you through the next steps of the process.
First a review:
In Part 1, I opened the box and reviewed all the ingredients, a few of which are new to me, but they seem easy enough to use. In Part 2, I mixed the kit together and started the fermentation. I was pretty impressed with how quick and easy it was to get things started! A quick mix of the juice concentrate with water, some bentonite, yeast, and away it went!
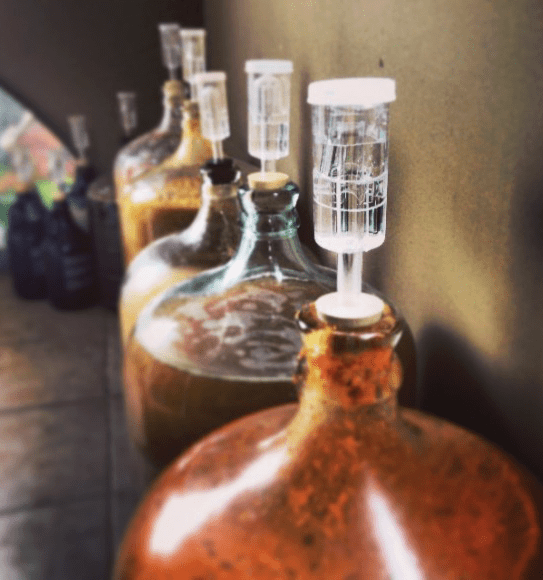
Secondary Fermentation
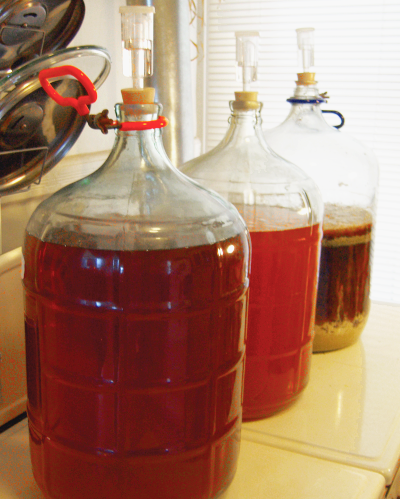
After about one week, the winemaking kit instructions had me transfer to a secondary fermenter. This is a process I’ve done numerous times through homebrewing, so no big deal there. I can’t stress enough for new homebrewers and winemakers how helpful it is to use an autosiphon when transferring, or racking, between fermenters. Sterilize the autosiphon and some transfer tubing, connect them together, then pump-pump and away it goes! If you don’t have an autosiphon yet, I highly recommend getting one! It’s probably the most cost efficient upgrade to your process you can get!
The hydrometer reading at this point was 1.004, so we’re right on track!
Degassing
About two weeks later, it was time for the degassing step. Technically the instructions called for degassing on day 20, but life kind of got in the way of my schedule. I ended up doing this step on day 25. I can’t imagine that this delay would negatively impact the wine. I took a taste of the wine and it was bright, fruity, and zippy. Acidity and alcohol were noticeable, but not too sharp. I’d imagine they will round out with time.
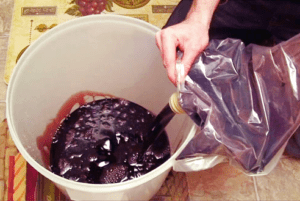
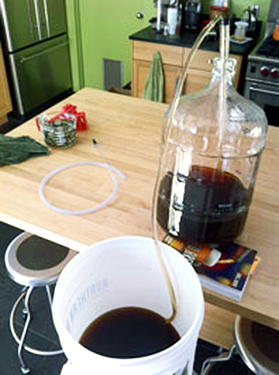
 The wine also had a bit of carbonation – I guess that’s why we need to degas! First, I racked the wine into a new fermenter. Technically this is the third fermentation step, and herein lies another big difference between winemaking and homebrewing. Whereas secondary fermentation in homebrewing is entirely optional, it seems that multiple rackings are the norm in winemaking. Though it takes a little extra time during the fermentation phase, I’m probably still ahead compared to the total time involved for homebrewing.
After racking, I added two additives: potassium metabisulfite (an antioxidant and preservative) and kieselsol (a clarifying agent). The sulfites sizzled as soon as they hit the wine; the keiselsol was less dramatic.
Finally, I’ve stirred the wine periodically over the past few days to release as much carbon dioxide as possible.
All in all, everything seems to be going smoothly! Check back soon to hear about stabilizing, clarification, bottling, and the best part – tasting!
Part 1 | Part 2 | Part 3 | Part 4 | Part 5
—–
David Ackley is a writer, brewer, and craft beer marketing consultant. He holds a General Certificate in Brewing from the Institute of Brewing and Distilling and is founder of the Local Beer Blog.