A Simple Guide to How Oak Chips Are Made

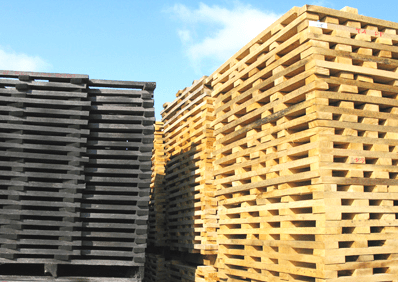
Stacked Staves Is Just Part Of How Oak Chips Are MadeA friend asked me what is the difference between wine oak chips and untreated oak fire logs. Can you explain

Arie E. — DE
—–
Hello Arie,

Thanks for such a great question. A lot of times home winemakers assume that the toasted oak chips they purchase are just any ole oak chips. This sometimes leads to the winemaker’s bold idea of making their own. While it is possible to make your own oak chips, it isn’t possible to do it successfully without some basic understanding of how oak chips are made. There are some important subtleties involved that will greatly influence how the oak chips will affect your wine.

The most basic of requirements is to use the right type of wood. Not any oak will do. It needs to be white oak, and even then only certain strains of white oak are sought after by barrel and oak chip producers. They use strains of white oak with an extremely tight grain. This keeps the tannin extraction into the wine under control while other flavor qualities are leached from the wood.

Once you have the right wood, it then needs to be aged. Normally, the wood is cut into strips called staves and cross stacked out in the weather for 1 to 3 years. This does two things: 1) it dries the wood out; 2) it leaches out the unwanted sap and other impurities. The cross stacks are re-stacked from time to time. This is to even out the effects of the weathering.
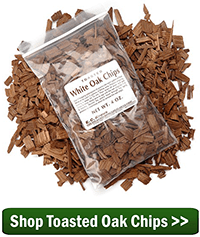
Shop Toasted Oak ChipsThis is the same process that is used to prepare wood for the production of oak wine barrels. In fact, many times toasted oak chips are made from the scraps of wood that barrel coopers cut off when making the barrel head, shaping staves, and such.

Now that you have the right type of wood that has been aged, it is now time to toast it. Toasting the wood is an import part of how oak chips are made. This is when the sweet flavors of the wood are risen to the surface through heat.

The heat turns the various carbohydrates that are in the wood into sugars. It also raises and concentrates flavor compounds such as vanillin to the surface so they can be easily extracted into the wine. These flavors compounds combined with wood sugars and tannin are what create the oak character in the wine.

The flavors that oak chips can add to a wine vary based on how the toasting is done. The temperatures and the length of time used are important in the creation of the oak chips’ flavor profile. As the temperature rises and time increases, different flavors are produced: sweet / vanilla / coconut / butterscotch / toast / clove / almond / burnt. The temperature range is typically from 320°F. to 420°F., but the length of time is just as important.

As you can see, there are a lot of specifics going on. It’s not like throwing a log on the fire or anything like that. It’s about controlling the specific. And, even then there is still a lot of room for variations.

Arie, this is the basics of how oak chips are made. Keep in mind this is just the basics. Over the decades a lot more science and precision has gone into the production of oak barrels and oak chips as well.

Happy Winemaking,
Ed Kraus
—–
Ed Kraus is a 3rd generation home brewer/winemaker and has been an owner of E. C. Kraus since 1999. He has been helping individuals make better wine and beer for over 25 years.

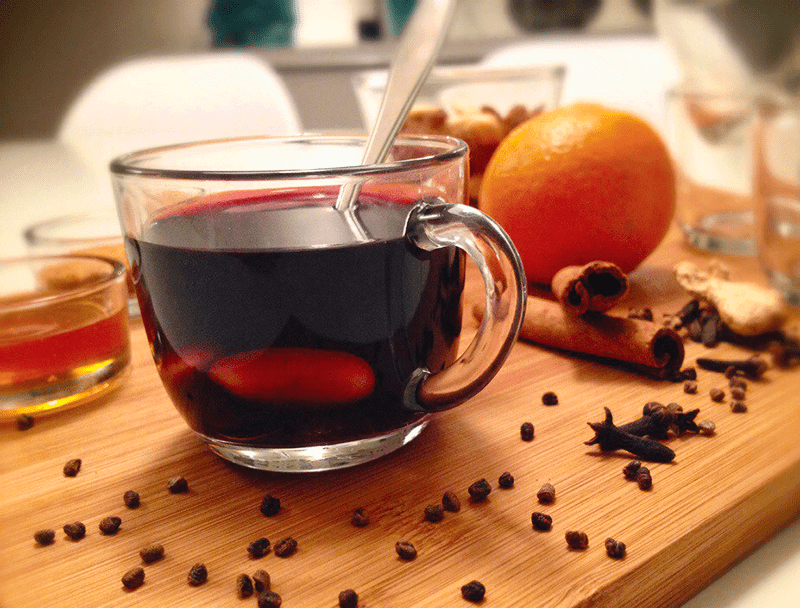
Making Mulled Wine For The Holidays

Mulled Wine I have been thinking about trying to make something to serve during the holiday. Possibly something with a slight cinnamon or clove flavor or maybe a cider flavor as well. Do you have any suggestions?

Thanks for your help.
Steven
—–
Hello Steven,

It’s hard to beat a hot cup of spiced wine. It’s actually called mulled wine. And, it’s very simple to make… All you need to start out is a bottle of your favorite wine. Usually, its a sweet or semisweet wine, but any wine you like will do.

Making Mulled Wine
Heat the wine up in a sauce pan. Add to this a mix of spices. Typically it’s a combination of spices such as cinnamon sticks, nutmeg, cloves, star anise, allspice and citrus peel. You can also go as simple as heating up the wine; add it to a coffee mug and throw in a couple of cinnamon stick and serve. If the wine’s not sweet enough add some brown sugar or honey, to taste.

When making a mulled wine a typical recipe would go something like this, but you also can play around with other ideas:

  • 8 Whole Cloves
  • 2 Cinnamon Sticks
  • 2 Star Anise

Regardless of how you make the mulled wine, it’s a great way to enjoy the cold winter months and holiday gatherings, and there’s not much fuss to preparing it.

I have been making mulled wine to warm up the holidays for years. Not only does it taste incredible, it fills the house with a wonderful, comforting smell of the holiday season.

Happy Wine Making,
Ed Kraus
—–
Ed Kraus is a 3rd generation home brewer/winemaker and has been an owner of E. C. Kraus since 1999. He has been helping individuals make better wine and beer for over 25 years.

Gifts for Wine Makers: These 5 Gifts are Absolutely Perfect for Wine Lovers

Champagne in a bucketSo it’s nearing the holiday season and you don’t have your gifts together just yet.
Maybe because you started shopping just a little late this year or you’ve just been looking for that perfect gift and have yet to find it.

Regardless of why you’re still searching, you’ve put a lot of thought behind what would really make your loved one excited.

Online wine sales have grown 22% year over year.

This means that more and more wine lovers are beginning to shop online for all their wine needs.

But, online wine shopping can be a double-edged sword. The endless options can be overwhelming and make finding the perfect gift more difficult.

In this article we’re going to show you some of the best gifts for home winemakers that they’ll be sure to love.

The Top 5 Gifts for Wine Makers

Fermenting Bag

Wine fermentation bag

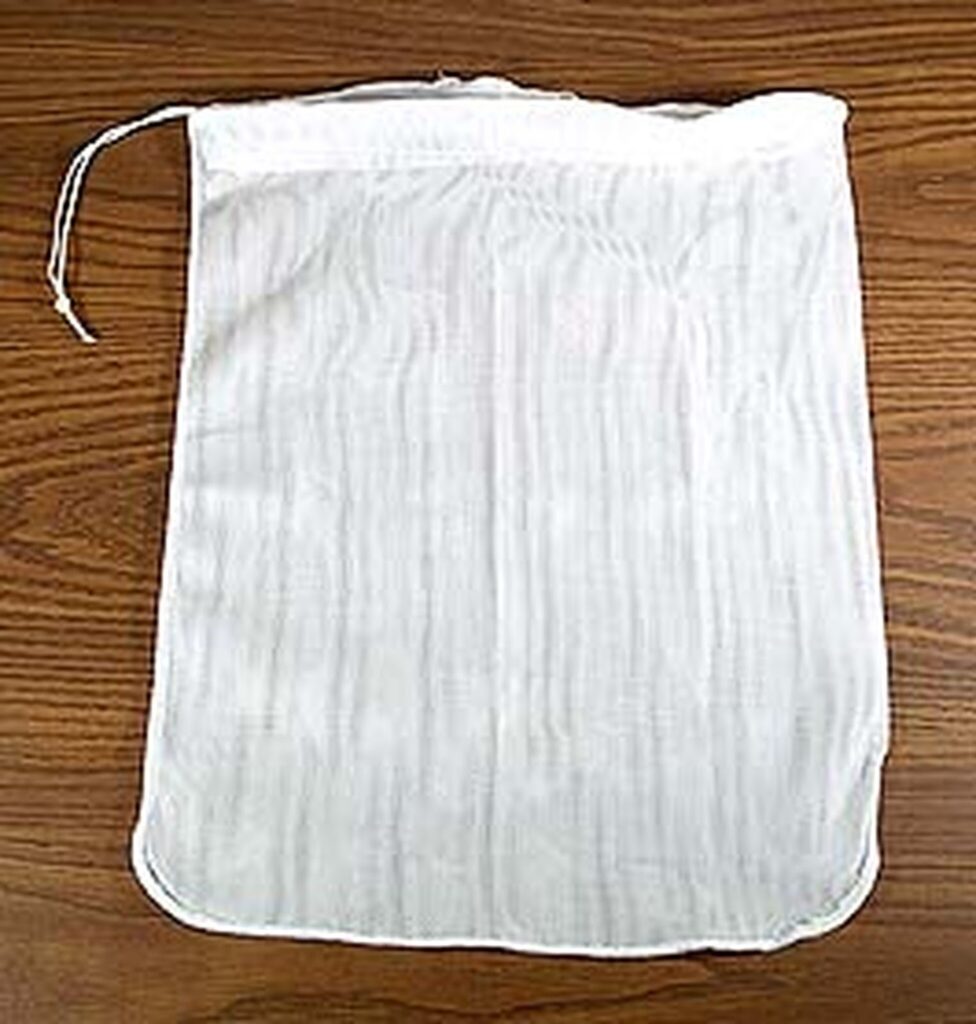
This handy jumbo fermenting bag is made from fine mesh, is heavy-duty and is designed to help with multiple uses. It’s extremely helpful in the different stages of the fermentation process because it keeps the pulp in control when the fruit is being crushed.

Being that this bag is 24” deep and 18” wide makes it excellent for wine creators that need a reliable fermenting bag. The drawstring included makes for easy handling while the durability enables it to withstand boiling temperatures.

This is a must-have for wine creators.

Glass Airlock

Wine glass airlock

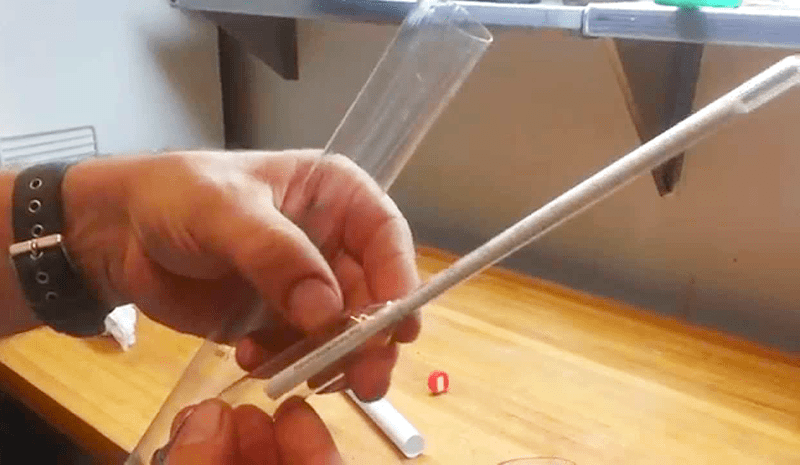
This glass airlock is a key tool for making wine. Like the fermenting bag, it’s used during the fermentation process. The beautiful twin ball design makes this an amazing conversation piece.

This glass airlock is highly durable and has great capacity, maintaining batches of up to 20 gallons. It’s also super easy to fill because of the fluted opening and very fun to watch.

Our glass airlock is handmade, ensuring that you’ll have the best experience with lasting quality.

Heat Shrink Capsules

Wine heat shrink capsules

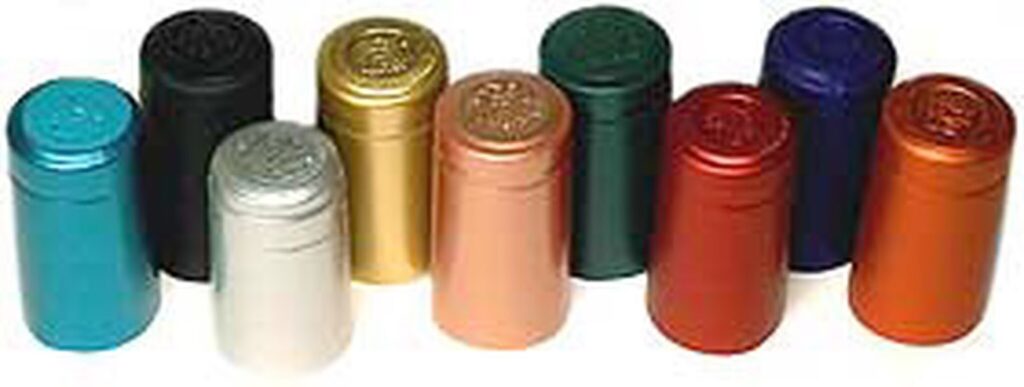
This is the perfect way to give your wine bottles a professional look. These capsules actually shrink and snug around both the neck and top of your bottle to give it that perfect fit.

They are very simple to use and work by placing the capsule over the neck of the bottle and placing it into hot water for around 10 seconds. The shrinkable PVC material fits the bottle perfectly.

These heat shrink capsules come with full instructions on how to use them and come in 9 different colors, including clear.

Sugar Scale Hydrometer

Wine sugar scale hydrometer

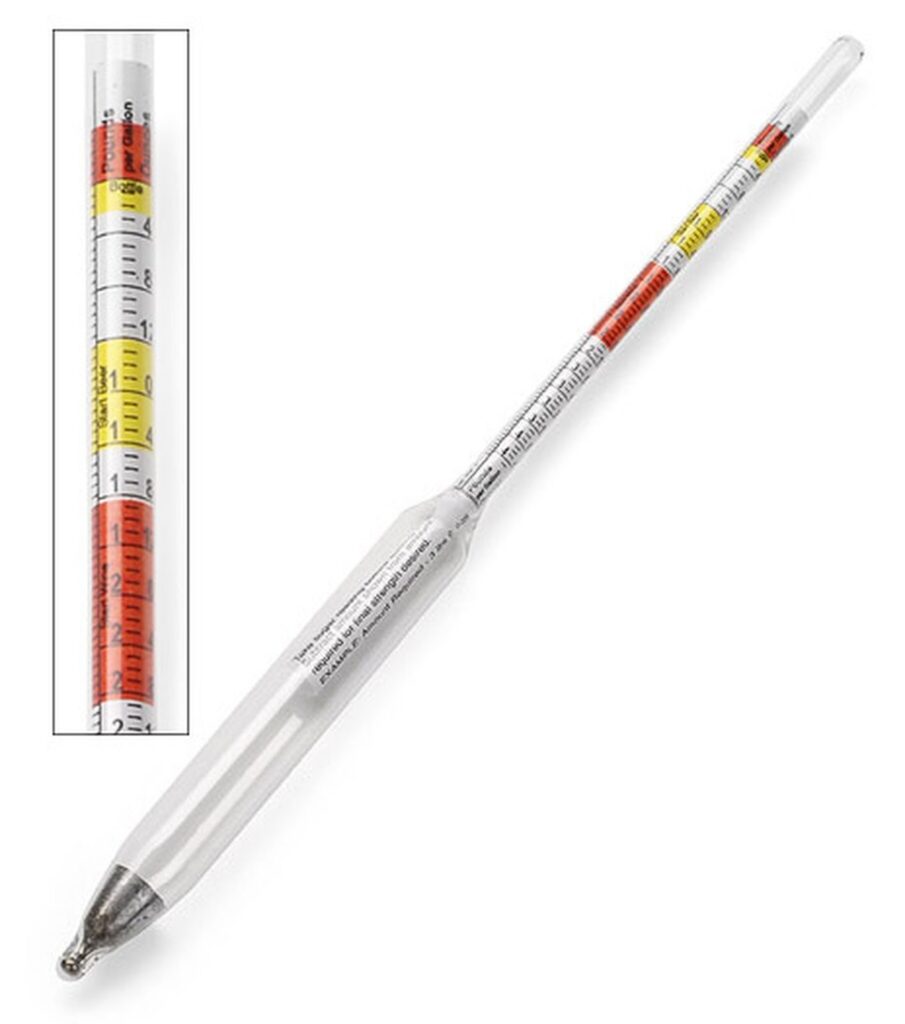
Our Sugar Scale Hydrometer is another great tool for winemakers. It helps keep track of the fermentation process and allows you to visually see the alcohol content before, during and after fermentation.

The included Sugar Scale shows how much sugar is contained in the liquid by ounces per gallon. The weighted glass sphere allows for the tube to stand in an upright position when placed in liquid.

The gravity scale ranges from .990 to 1.170 while the alcohol scale ranges from potentially -2 to +22%. This Sugar Scale Hydrometer also comes with a complete set of instructions.

Wine Making Books

Wine making books

One of the best gifts to give someone who is just beginning their wine making journey are books. While there are a slew of books online about wine making, our company has some of the best winemaking books that range from wine recipes to kit tips and woodworking for winemakers.

These make excellent add-on gifts that can be paired with some of our other products and make the ultimate wine gift basket.

Celebrate the holidays with Adventures in Homebrewing

Gift giving can be hard. But hopefully we just made it easier for you!

From beginner essentials to advanced tools for experienced makers, Adventures in Homebrewing has something for everyone.

If you’re looking for affordable, high-quality products, grab some gifts from our store for this upcoming holiday season.

Cheers!

Preparing Your Corks When Bottling Homemade Wine

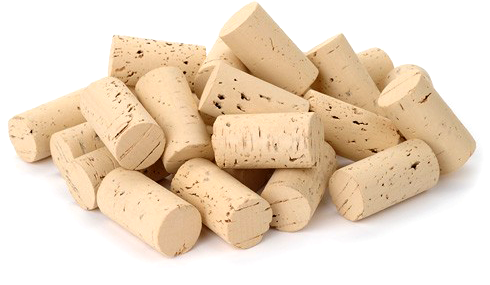
Wine corks waiting to be prepared for bottling wine.Correctly preparing corks for bottling wine is important. Not only should the wine corks be sanitary, but they should be softened just enough to allow your corker to put them in the wine bottle with ease.

There are two basic ways to go about sterilizing and softening wine corks: This first involves submerging the corks in a solution of sodium metabisulfite and cold water. The second, involves steaming the corks in water.

Cold Soaking The Wine Corks:

Sodium metabisulfite and cold water makes a solution that will sanitize the corks. This solution can also soften the corks if they are allowed to soak long enough, usually over night, and it’s very simple to do.

Shop Sodium MetabisulfiteMix 1/8 teaspoon of sodium metabisulfite to each pint of water and submerge the wine corks in the solution. Corks like to float. So I have found that using a container with a lid of some type will help you to get this accomplished. Use the lid to push down the corks into the solution.

Let the wine corks soak long enough to make them slightly soft. You do not want the them to be spongy. You want them to be firm, but still give just a little. Remove the wine corks from the sanitizing solution and allow them to drain for a few minutes in a colander, strainer or something similar.

Steaming The Wine Corks:

Preparing corks for bottling by steaming them is much quicker than just soaking them, but it does take some care. It is very easy to over-steam the wine corks making them very spongy and hard to press into the wine bottle without mangling them.

Also, too much heat on the wine corks for too long will cause them to become brittle and crumble later on when they are pulled from the wine bottle.  Excessive heat denatures the wine cork causing it to deteriorate while in the bottle.Shop Wine Bottle Corkers

Bring a pot of water to a boil then turn the burner off. Put the corks on the steaming water and place a lid over them. In just a matter of 2 or 3 minutes the corks should show some signs of softening. Once you feel the corks firmness start to give – just a little – rinse them in cold water to cool them down. They are then ready to be used.

Under no circumstances would I recommend preparing the wine corks by steaming them for longer than 5 minutes.

Which method you use for preparing corks for bottling is up to you. I feel the preferred method is to cold soak them, but if you forget to start that the day before bottling the wine, I can understand you wanting to steam the wine corks instead.
—–
Ed Kraus is a 3rd generation home brewer/winemaker and has been an owner of E. C. Kraus since 1999. He has been helping individuals make better wine and beer for over 25 years.

If You Have Sediment In Your Wine Bottles, Don’t Cry!

Crying Over Sediment In Wine BottlesSediment has long been an inconvenient reality for the home winemaker – one that if not dealt with properly can lead to sediment at the bottom of your wine bottles. It’s enough to make a grown man cry. But if one takes the proper precautions they can guarantee that such a flaw does not happen to their precious wines. Here’s how to stop sediment in wine bottles.

Sediment is something that occurs during the fermentation, and it is something that can still accumulate even after the fermentation has completed. Most of the sediment is yeast cells that have given their life to the cause. A smaller percentage is fiber and other proteins from the fruit, whether the wine be made from grapes or grapefruit.

The savvy winemaker knows that the wine needs to be transferred off the sediment once the fermentation begins to slow down. Transferring the wine is a process called racking. The first racking is to get the majority of the sediment out of the way, but the winemaker also knows that more sediment will be on the way, and that additional rackings will be necessary. With each progressive racking the wine will slowly becomes clearer and clearer.

This is all well and good, but the big question here is, how does the winemaker know when the sediment formation is done? When will it be okay to bottle? Do they just wait until the wine looks clear enough?

For most, it is a simple matter of watching and observing. If the wine is racked off the sediment into a clean secondary fermenter, such as a carboy, and no new sediment is created at the bottom, then one can reasonably deduce that all the sediment that is going to occur has done so. The wine looks clear; no more sediment; time to bottle the wine!

Most of the time this approach will result in a spectacular wine – one that is brilliantly clear and one with no sediment at the bottom in the wine bottles. But from time to time there will be that particular batch that mysteriously comes up with even more sediment after the wine has been bottled.

The wine looks perfect, beautiful, worthy of being shared with family and friends. Then a month or two later you go to the wine rack to pull another bottle only to find that sediment has somehow formed.

What caused this? Can I get rid of it? Is my wine ruined? How do I stop sediment from occurring in my wine bottles? These are all valid questions and questions I will answer here:

Is My Wine Ruined?
First, your wine is not ruined. Having sediment at the bottom of your wine bottles is the result of something falling out of the wine. It has nothing to do with a spoilage. If it were a contamination issue you would typically see a growth at the top, near the air-pocket in the wine bottle. Molds, bacteria and other little nasties need oxygen to grow and tend to form near it.

What Caused The Sediment?
There are three main reasons for having sediment at the bottom of your wine bottles:

  • You bottled the wine too soon
    This is by far the most common reason for sediment in wine bottles. It is possible for a homemade wine to look reasonably clear and still have some sediment to give. The last stuff to fall out from the fermentation is the finest of particles – as fine as flour. The heavier particles fall out sooner. Each one of these individual particle cannot be seen with the naked eye, but in numbers they can add a murkiness to the wine. Sometimes the murkiness is so slight as to go unnoticed. The best way to make sure that all the particles from the fermentation have settled is to use a wine clarifier or fining agent. A wine clarifier will collect and drag out the particles in a quicker, more efficient manner. Another thing you can do is be more patient. When you rack the wine into a fresh carboy, give it plenty of time to show the presence of sediment: two weeks, even a month. Sometimes more time is all that is needed.
  • Potassium bitartrate crystals are forming  
    Shop Mini Jet Wine FilterPotassium bitartrate is essentially tartaric acid that is crystallizing and then falling out of the wine. This most commonly occurs with grape wines that are made from actual fresh grapes. And, it is more common in white wines than reds. Grapes are high in tartaric acid. It’s the most abundant acid found in a grape. Sometimes there is more tartaric acid in the wine than the wine can hold in solution. The result is the formation of bitartrate crystals, sometimes referred to as wine diamonds. These are very tiny crystals that resembles salt. They form out of thin air, so to speak. It is important to note that the cooler the wine is the less tartaric acid the wine can hold. So It is possible for a brilliantly clear wine to form these crystals months later as cooler weather comes about. To combat this from happening, many wineries will chill the newly made wine so as to cause the crystals to form before bottling, making the wine cold stable. As a home winemaker, if you are making wine from grapes it would not be a bad idea to chill the wine down for a week or two before bottling to allow the opportunity for any potassium bitartrate crystals to form that can. To help entice the process even further you can add Cream of Tartar to the wine. This is the stuff you can buy at the spice rack at the store. Only a tiny amount is need: 1/4 teaspoon to 5 gallons is plenty. This will potentially set off a chain reaction of crystal formation.
  • Protein is dropping out of the wine   
    Much like excessive tartaric acid can drop out of a wine as tiny crystals, excessive protein can drop out of a wine as a dust or powdery-looking substance. Most of the protein is in the form on tannins. These tannins can start to form deposits months after the wine has been cleared and bottled. It is when a bottle of wine becomes slightly warmer that you can sometimes see them start to form and settle. You can sometimes observe this even in commercially made wine. It shows up as a dark, dusty sediment deposit at the bottom of the wine bottle. This is the least common reason for having sediment at the bottom of your wine bottles. Most homemade wines will not have excessive protein, but it does happen. It is most common in red wines, whether it be from grape or fruit. It is often the result of the fruit being over processed or left in the fermentation too long. It can also be from storing the wine at too warm of a temperature.Bentonite Fining Agent For Clearing Wine. One way to help prevent this instability from arising is to treat the wine with bentonite. This is a clarifier that is very effective in removing significant amounts of protein from a wine. It is routinely used by wineries after the fermentation to drop out the yeast more quickly.

Can I Get Rid Of The Sediment?
There is no magical way to get rid of any sediment you may find a the the bottom of your wine bottles.

It is possible to re-bottle a wine. You can decant the bottles of wine back into a common vessel; allow the wine a few days to clear; and then re-bottle. But, this treatment has a downside by way of excessive air exposure. The wine can become oxidized if one is not extremely careful. It will be important to treat the wine with potassium metabisulfite upon decanting and again before re-bottling. This will help to drive out oxygen that has saturated into the wine during decanting. It will also help to keep the wine fresh and free of spoilage.

Potassium MetabisulfiteIn reality, the best path for this type of wine fault is one of prevention. Do things things that will help stop sediment from occurring in the wine bottles: give the wine plenty of time to clear; use bentonite routinely; if you can, chill your grape wines; don’t over macerate your fruit; and don’t leave it in the fermentation too long – 3 to 6 days is plenty. If you do these simple things, having sediment in your wine bottles should never be an issue.

If you do discover that you do have sediment at the bottom of your wine bottles, you will be happy to know that it does not affect the wine’s flavor or character in any negative way. In fact, the wine will usually improve after such an occurrence. It is primarily an issue of esthetics. Who wants to share a wine with sediment at the bottom?

That being said, if you keep the wine to yourself, no harm, no foul. Carefully pour the wine into your glass. When you get to the bottom of the bottle, dump the little last down the drain. Problem solved!

Happy Winemaking,
Ed Kraus
—–
Ed Kraus is a 3rd generation home brewer/winemaker and has been an owner of E. C. Kraus since 1999. He has been helping individuals make better wine and beer for over 25 years.

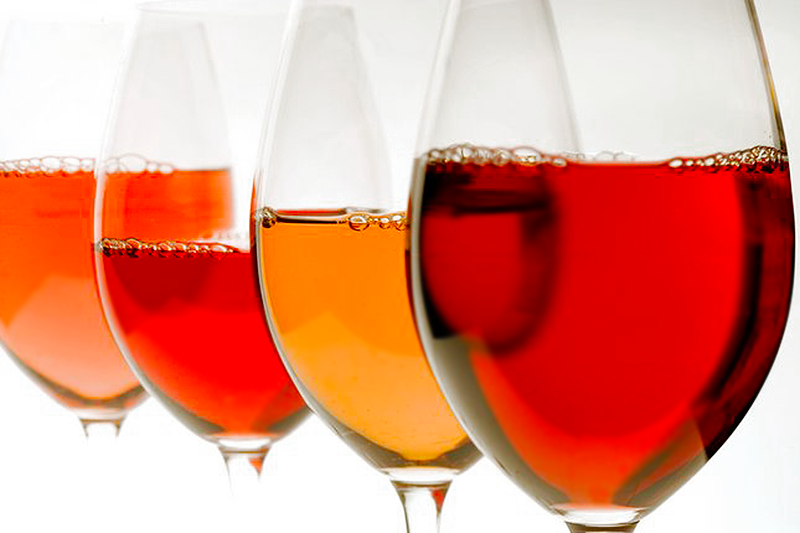
Crazy! But Why Is My Wine Turning Orange?

What you see when a wine turning orange.I recently made wine kit and bottled it at the end of October. While the taste of the wine is fine, any wine leftover in the bottle (re-corked) for two days starts turning orange. The wine fermented correctly, all directions were followed, and the wine was filtered prior to bottling. Why is my wine turning orange? Is this a health hazard?, and is there anything I can do now to prevent this colorization?

Terry – OH
—–
Dear Terry,

The reason why your wine is turning orange is very simple: your wine is oxidizing.

Oxidation is a process that occurs when a wine is exposed to excessive oxygen for too long of time. In your case, once the cork is pulled from a wine bottle, you are allowing air to enter with the wine. This allows the oxidative process to start.

This is no different that when an apple core turns brown. The first signs of your wine oxidizing will show itself as a light-orange tinge that will later turn to a light-amber, then dark-amber, then eventually brown. If you have ever seen a Shop Potassium BisulfiteSherry or a Port, these are examples of wines that are oxidized on purpose.

The wine is perfectly safe to drink. There is nothing going on that would make the wine harmful. However, you will probably notice some deterioration in the wine’s overall character. This is normally first noticeable as a loss of fruitiness and a collapse of any complexities the wine may have had. In other words, the wine will typically start to have a flat and lifeless impression. Then as the oxidation progresses on you may start to notice a caramel or raisin smell, then in later stages, as a caramel or raisin taste.

There are some things you can do to help keep your wine from turning orange and experiencing the other effects of oxidation:

  • Add sulfites to the wine at bottling time. Shop Ascorbic AcidDoing this will delay the oxidative process once the bottle has been opened. It will also help the wine to keep better while aging in the wine bottle.
  • Add ascorbic acid to the wine at bottling time. This will help to slow the effects of oxidation by lowering the wine’s pH.
  • Keep partial bottles in the refrigerator. Cooler temperatures will slow down the oxidative process as well as keeping the wine out of direct UV rays such as sunlight.
  • And, then there’s the solution I find most effective of all… drink the whole bottle!

If you want to read more about oxidation and why a wine will start turning orange you may also want to take a look at the article, “Controlling Oxidation In Your Homemade Wines.”

Happy Wine Making,
Ed Kraus

—–
Ed Kraus is a 3rd generation home brewer/winemaker and has been an owner of E. C. Kraus since 1999. He has been helping individuals make better wine and beer for over 25 years.

What’s The Difference Between Shiraz And Syrah?

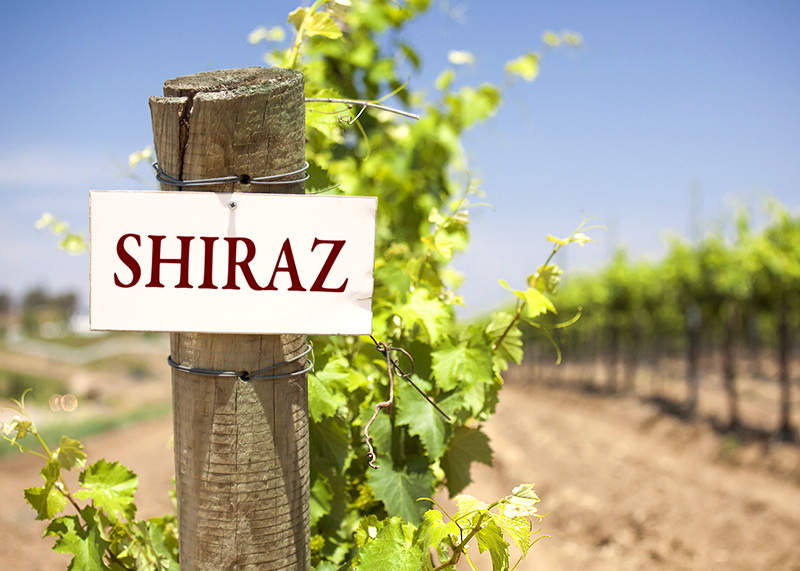
Picture showing difference between Shiraz and Syrah.This is a story of two wines, Syrah and Shiraz, and how they both are the same, yet different. On the surface it seems to be somewhat of an exercise in semantics, with their names being the only difference, but after taking a closer look, it starts to become clear that there is much more to the story than just names.

The difference between Syrah and Shiraz teaches us a lesson, one that illustrates how a grape’s environment and the way in which it is processed can influence the outcome of a resulting wine.

Any wine expert will tell you that Syrah and Shiraz are two varietal wines that are made from the exact same grape. If you analyze the DNA of each grape used to make these wines you will find that there is no difference between them.

Then Why The Two Names?

The French refer to the grape and the varietal wine they make from it as Syrah. In other notable regions such as: South America, Australia, New Zealand, Canada and the United States, the grape and the wine is referred to as Shiraz.

But there is something more than just a difference in name. There is a difference in style and character as well. While both wines are very assertive red wines, a Syrah tends to be a little more elegant and complex. It usually has more of a smokey, earthy character with flavors of plum and spicy pepper. Shop Wine KitsA Shiraz on the other hand is more crisp and fruity, less layered with slight, jammy flavors of berry as compared to a Syrah. This is a very wide generalization of each wine, but even so, it would be safe to say that if you tasted both wines side-by-side you would notice more differences than similarities between the two.

So, Why Is There A Difference Between Shiraz And Syrah?

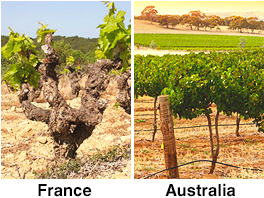
Difference Between Shiraz And Syrah VineyardWhile the grape remains the same, in each wine there is so much else that is different. The soil, the climate, the cultivation, and the fermentation all vary to make a Syrah, a Syrah, and a Shiraz, a Shiraz.

While different soils can not assert their own character onto a grape, they can guide the way in which a grape develops its own flavor. This is referred to as the terroir of the wine. The French vineyards are heavy in limestone which can hold moisture better and deeper than most soils. This forces the vines to get more of their nutrients from deeper soils. The result is a wine with more layered, complex flavors.

The French are not allowed to use irrigation or fertilization on their vines, either. This stems from governmental laws designed to keep the grape productionBuy Oak Powder limited. This leads to stressed vines with fewer berries, but with each berry packing more flavor.

This is all in contrast to places like Australia, South Africa and New Zealand where Shiraz grapes are produced in sandy soils with plenty of fertilization and irrigation. The cultivation is abundant. This creates a wine with a more even character than a Syrah and with the ability to mature more quickly.

The Syrah is also grown in France’s cooler climate. This lends to the plum-like, smokey character of this wine. This is in comparison to Shiraz which is grown in warmer climates which makes the wine more jammy and berry-like.

Even the rate of fermentation plays some role in the flavor development of the wine. A Syrah is fermented more slowly so as to increase the time the pulp can stay on the fermentation. A Shiraz is fermented at a faster, more-normal rate which helps to make the wine, in general, more fruity.

In Summary:

So as you can see there is much more than just the grape when it comes to bringing a wine to fruition. While a wine’s character always begins with the grape, it ends upon many other factors, including the human touch. There are many other examples of how this is true, but most not quite as clear as the difference between the Shiraz and Syrah.
—–
Ed Kraus is a 3rd generation home brewer/winemaker and has been an owner of E. C. Kraus since 1999. He has been helping individuals make better wine and beer for over 25 years.

Thanksgiving! Togetherness And A Bottle Of Wine…

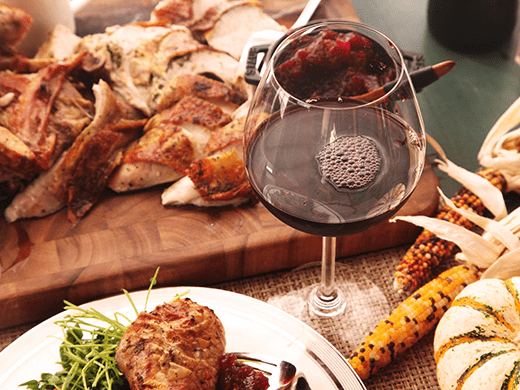
Thanksgiving Dinner With WineTo me, nothing describes Thanksgiving better than the word togetherness. Whether it be with family, friends, co-workers or someone you just met, being together is what seems to make Thanksgiving come to life. Togetherness is what makes Thanksgiving worth celebrating.
While this year may bring some challenges, it is my deepest wish that wherever you may be this Thanksgiving holiday, that you may find and share some togetherness with others. Whether it be by phone with someone 1,000 miles away or in person.

Break out some homemade wine. Maybe even pass a few bottles out as gifts, and experience the joy that Thanksgiving was meant to bring.

I personally like to make a red Zinfandel for Thanksgiving. It’s big, jammy flavors seem to couple well with the turkey and stuffing. Plus, it’s not a complicated wine. It’s one that is easy to like. Even non-wine-drinkers will appreciate the zest and compliment it brings to the meal.

Here’s a toast: to hoping you have a pleasant and enjoyable Thanksgiving!

Happy Thanksgiving,
Ed Kraus
—–
Ed Kraus is a 3rd generation home brewer/winemaker and has been an owner of E. C. Kraus since 1999. He has been helping individuals make better wine and beer for over 25 years.

My Wine’s Starting Specific Gravity Is Too High

Starting Specific Gravity Is Too HighHi, I followed a recipe for blueberry wine that called for 15 pounds of sugar and 20 pounds of frozen blueberries for a 6 gallon batch. I just measured it with my wine hydrometer and got a reading of 1.148 ! I know this starting specific gravity is too high. Is there anything I can do other than hope for the best ? I am new to wine making and have no idea ?

Marshall S. – IA
—–
Hello Marshall,

Well, that’s an interesting wine recipe. The starting specific gravity reading you got on your hydrometer, does make since with that much fruit and sugar being added. The bad news is that the odds of a fermentation even starting at that high of a specific gravity reading is very low. When the concentration of sugar gets too high, it starts to act as a preservative, keeping the yeast from fermenting.

The good news is that I think we can fix it. Simply put, your wine’s starting specific gravity is too high, and we need to think about how we can lower it.

Shop Hydrometer JarsIn reality, there are two concerns. The first one is the most obvious: too much sugar for the yeast to start fermenting. That’s what the specific gravity reading is telling – how much sugar. But there is also a concern that there may be too much blueberry – enough to make the wine overly tart and astringent. With that being said, here’s what you can do:

  • Dilute the wine must with water until you get a reading of 1.100. If you like, you can use a Pearson square to calculate how much water to add to get from 1.148 to 1.100. (Water has a S.G. of 1.000) There will still be plenty of blueberry flavor to go around. Our blueberry wine recipe only calls for 13 lbs. to 5 gallons, so don’t worry about weakening the wine’s flavor too much. And besides, you really don’t have much choice when your wine’s starting specific gravity is too high. The yeast aren’t even beginning to think about fermenting with that much sugar.
  • Take an acid reading with an acid test kit. This will tell you if the blueberries are still providing enough tartness to make the resulting wine taste right. The directions in the acid test kit will tell you what range you are shooting for. My guess if that you will need to add a little Acid Blend after diluting with water to bring the acidity up a bit. But, if the acid level is still too high, Shop Acid Test Kityou will want to dilute the wine must with even more water. Just try to keep your wine’s starting specific gravity above 1.075.
  • Once you have the sugar level and acidity in a decent range, it’s all smooth sailing. If you haven’t added add yeast nutrient at this point, I most certainly would, now. The same goes for pectic enzyme, and wine tannin. If you got the ingredients from us, you will find recommend dosages on the side of each container.

If you have already added the wine yeast you can still do all of the above. The yeast will be fine. If you have not, be sure to use and actual wine yeast. Don’t add a bread yeast.

Once you’ve got the specific gravity and acidity level ironed out, you will continue on like you normally would with any winemaking process. Here’s an wine making infographic that lays out the basic steps for you.

Hope this information helps you out. I urge you to do the above steps. Don’t dump it out. Nothing you have done or will do in the above steps will compromisedShop Wine Making Kits this wine in any way, so it will be well worth the effort. Believe me, you are not that only one that’s ran into this problem. Many home winemaker’s have gotten their wine’s starting specific gravity too high. Just take things a step at a time and your wine will be out of the woods.

I would like to welcome you to take a look at our wine recipes that are free for anyone to use. These a solid, time-tested wine recipes that will keep you out of trouble in your future wine making adventures.

Happy Wine Making,
Ed Kraus
—–
Ed Kraus is a 3rd generation home brewer/winemaker and has been an owner of E. C. Kraus since 1999. He has been helping individuals make better wine and beer for over 25 years.

Darn It! My Wine Smells Like Rotten Eggs

Homemade WineFor the first time ever I ordered juice concentrate, your merlot and blackberry, to try making a large batch of my favorite flavors. Well, I followed the directions to the letter and it all fermented nicely in the primary. After 5 days racked it to the secondary, 6 gallon glass carboy but for the first time left a little head space of a couple inches figuring that it would be ok since it it was still bubbling a little. It has been two weeks and I racked it again to get it off the sediment and OMG it smells of sulfur, or rotten eggs! Once the wine was in my plastic bucket the smell dissipated and the wine tasted ok but today I checked it and there is still a smell. What did I do wrong? I’ve heard of adding egg white to try to take away the smell…. what can I do? I really hope I don’t have to dump it. HELP!

Name: JoAnn S.
State: WI
—–
Hello JoAnn,

All fermentations put off some sulfur or rotten egg smells. Some much more than others. When a wine smells like rotten eggs, what you are actually smelling is hydrogen sulfide. There are many of reasons why one fermentation might produce more hydrogen sulfite than others, but here are the big four:

  1. Fermenting With Wild Yeast: Shop Wine Yeast
    In your case, we can rule this out because you are using a wine ingredient kit that comes with a domesticated wine yeast. But if you were relying on wild yeast to do your bidding, this would most likely be the reason why your wine smells like rotten eggs. Some wild yeast can produce tremendous amounts of hydrogen sulfide.
  1. Lack Of Nutrients:
    Not having enough nutrients in the fermentation is another cause of high hydrogen sulfide output. But again, you are using a wine ingredient kit that has been nutritionally balanced. The yeast nutrient is at its ideal level in the wine concentrate, so we can also rule this out for your particular situation.
  1. Fermenting At Too Warm Of Temperature:
    Fermenting your wine too warm is another common reason for a fermentation to produce and abundance of hydrogen sulfide. Temperatures that are above 75°F. are suspect, and anything over 80°F. are likely to be problematic to some degree.
  1. Overworked Yeast: Shop Yeast Nutrients
    This happens when there is too little wine yeast to do too much job. There have been many times when a winemaker will accidentally kill a significant portion of the wine yeast when rehydrating it in warm water. If the wine yeast is put in rehydrating water that is too hot, or the yeast is left in the water for too long, more yeast cells will be killed than anticipated by the wine yeast producer. This sets the stage for a fermentation with too little yeast, and in turn, produces too much hydrogen sulfide.

The Overall Theme:
It is important to point out that all the above reasons relate to allowing the yeast to ferment under stress. When a wine smells like rotten eggs, start look at thing that might be putting fermentation in a stressful situation.

Having a wild yeast that is fermenting out of its normal element is stressful; having any yeast ferment with a shortage of nutrients, or ferment in a temperature range that is uncomfortable to it is stressful; and having a little bit of wine yeastShop Potassium Bisulfite doing a lot of work are all stressful things that will lead to high hydrogen sulfide production. Having said this, the whole idea is to keep the wine yeast happy and you will keep the hydrogen sulfide production down.

What To Do Now:

— Give It Time: A lot of the hydrogen sulfide will release and dissipate on its own. It sounds like this may be the case with your wine currently. And, more will dissipate when you bottle the wine.

— Add Sufites: Also, adding a dose of sulfite to the wine will help to drive out the hydrogen sulfide. You can add the sulfite in the form of Campden tablets, sodium metabisulfite or potassium metabisulfite. Just following the directions that are on the package and let the wine sit for a few days.

— Use Copper: If the wine still smells like rotten eggs, you can pour the wine through a copper scouring pad. When the wine comes into contact with copper a reaction will occur the encourages the hydrogen sulfide to release as fumes. The reaction will cause the copper to corrode, so your may need to use more than on copper pad.

Happy Winemaking,
Ed Kraus

—–
Ed Kraus is a 3rd generation home brewer/winemaker and has been an owner of E. C. Kraus since 1999. He has been helping individuals make better wine and beer for over 25 years.