Winemaking Terms You Should Know: Part 8

IsinglassIn several earlier posts, we introduced a few home winemaking terms that you may or may not be familiar with.  There are many terms to learn in home winemaking, and this post, like all the previous posts, gives you a short introduction to a few of those terms to help you get started in home winemaking, or perhaps brush up on some of the terms you may not have seen in a while.

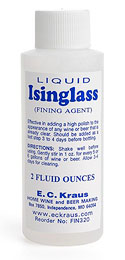
  • Isinglass:  Isinglass is a commonly used fining agent in winemaking, and originates from gelatin isolated from fish. As long as you aren’t trying to make vegan wine, Isinglass is an animal protein-based clarifier that has been used over and over again in the wine industry, both in commercial and home winemaking settings.  It is argued by many winemakers to have a more gentle effect on the color of your wine, thus ideal for white or lightly colored rosé wines.
  • Beaujolais:  Beaujolais is a wine making region in France located south of Burgundy.  Wines made in this region are referred to as “Beaujolais”, and not referred to by the grapes that make up the blend (as is the case in all of France and other parts of Europe).  Even though this name refers to a region in France, you can still create your own Beaujolais-style wine in your very own home, no matter where you are in the world.  Beaujolais wines tend to be fresh and fruity wines, made up primarily of the Gamay grape.  Thus, a Beaujolais-style wine would be something made in a very similar manner.
  • Jammy:  Though you sometimes think of jam when you imagine a ripe, plump grape, that’s not what we’re going for with this winemaking term.  “Jammy” is a sensory quality or taste of a wine that is reminiscent of baked, cooked, or stewed fruit.  You tend to run into “jammy” wines in regions where the climate is much too warm for the particular grape variety that is being grown.  “Jammy” is typically a negative tasting term, though in all honesty, if you like your wines “Jammy”, then make them as “Jammy” as you darn well please and enjoy it!
  • MW:  Why do some people have an MW after their names?  Well, just like M.A., M.S., M.D., J.D., or Ph.D., etc, M.W. stands for someone who has successfully completed a particular educational program and the rigorous tests required of them.  In this case, MW stands for “Master of Wine”.  It is an extremely difficult qualification to attain, and is only held by a few hundred people throughout the entire world.  If you see MW after someone’s name, it indicates they know nearly everything there is to know about wine, and passed the insanely difficult tests to prove it.

———————————————————————————————————
Ed Kraus is a 3rd generation home brewer/winemaker and has been an owner of E. C. Kraus since 1999. He has been helping individuals make better wine and beer for over 25 years.

Leigh Erwin: A Beginner's Wine Making Journey: Part 15

Carboy Full Of Homemade WineHi there, folks!  Leigh here!
I have finally started batch #2 of homemade wine from Homebrewing.org and I wanted to share with you all my/its progress!
As I mentioned in an earlier post, this time I wanted to try making the wine using individual wine making ingredients instead of a wine making kit, to see if 1) I could do it without that much instruction and 2) it was better or worse in the end than making the wine with a kit.  I think there are positive points either way, so really there is no right or wrong answer, but I thought it would be fun to experiment anyway!
Last time I left you with a progress update, I had just finished sterilizing all the wine making equipment and mixing together all the ingredients and wine yeast at the proper temperature and said I was going to let it sit for 5 days.
So, where is everything at now?
Well, on Day 5 of the fermentation, I actually had a relatively last-minute meeting to attend, so I decided to put off the next step (the first racking) until the next day, Day 6.  I figured one extra day in primary fermentation shouldn’t hurt, right?
So, on Day 6 I first took a specific gravity measurement wine my hydrometer before launching into the next phase.  I remembered the instructions I had with the first batch of wine using the wine making kit, it told me a certain specific gravity reading to shoot for to know that primary fermentation was just about finished.  However, there was no such number listed on the SunCal grape concentrate wine making instructions, so I wasn’t sure exactly what to do.
Well, ask the internet and you’ll come up with an answer!  I checked out some information on various websites, including wine making articles on Homebrewing.org (Wine Fermentation 101), and the general consensus was that if the wine’s specific gravity was at or below 1.030.  Low and behold, the specific gravity of my second batch of wine was 1.011 with the temperature correction, which was definitely below the cut off of 1.030.  Considering I let the wine sit for 6 days instead of 5, I’m not too surprised at the difference.  There was plenty of foam/bubbling going on still at this time, so I’m glad I had a solid number reference I could use to know for sure it wine was ready for the next wine making step!
Satisfied that primary fermentation was complete, I then siphoned the wine into a sterilized carboy per the instructions.  I used the fill-up-the-tubing-with-wine-first method of siphoning, and it worked like a charm for me.  I didn’t lose any yield this time, and the wine filled up close to the top of the carboy very nicely.  I then sealed everything up with a rubber stopper and air lock, and then let the wine sit and rest for a while!
The wine making instructions want me to rack the wine after 2 weeks and again after 2 months, the latter of which I’m not sure I’ll follow exactly.  I do plan on racking the wine at 2 weeks, but I haven’t decided if I’m going to treat the wine with stabilizing and/or clarification agents, or if I’m just going to let it sit alone for two months.  I think I may end up adding something to the wine to help clarify it a little quicker, but I think I’ll do some more research and ask a few more questions first!

————————————————————————————————————-
Leigh ErwinMy name is Leigh Erwin, and I am a brand-spankin’ new home winemaker! E. C. Kraus has asked me to share with you my journey from a first-time dabbler to an accomplished home winemaker. From time to time I’ll be checking in with this blog and reporting my experience with you: the good, bad — and the ugly.

Winemaking Tip: Protect the Counters

Winemaking Tip: Rubber Mat On Kitchen CounterIt’s been about 14 months since I started making wine (one of the best hobbies ever!). In that time I made about 70 gallons or a little over 360 bottles. And saved a lot of money too!
We live in Florida (the land with no cellars/basements and almost everyone uses salt-water softeners), so my wine making production line gets hauled into and out of the kitchen almost weekly.
One wine making tip/trick I can share that my wife “taught” me was to protect her kitchen counters and floor for that matter. After scratching her non-scratchable counters up pretty good, she suggested I use those rubber type mats you might put in your kitchen drawers or cabinets!! No more unhappy wife.
Also, while in my early learning stages I really spilled quite of bit until she threw down some old worn out “pool” towels. Yes, I now know the difference between “pool” towels and “guest” towels.
In closing, I was surprised to read many negative comments on the website on using distilled water. Using our tap water, again which is water-softened, is definitely NOT recommended; I only use distilled water and I airlock my primaries 100% of the time. I never had a slow/stuck fermentation or had any issues with using distilled water. I always use yeast nutrients and/or energizers, and primaries with at LEAST 20-25% head room plus I stir, stir, stir during primary and aerate when racking secondary. My fermentation temps are always between 68-78F.
Thanks for your great store, website and tips.
Name: Matt S.
State: Florida

Classic Rauchbier All Grain Recipe

Beer Made With Rauchbier All Grain Recipe.
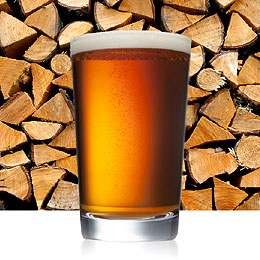
At long last, barbeque season is upon us! The perfect homebrewing accompaniment? Rauchbier!
Rauchbier is a style of smoked beer from Bamberg, Germany, notable for its use of smoked malt (rauch means “smoke” in German). The traditional rauchbier recipe is essentially a smoked Oktoberfest amber lager. The smoky flavor from the malt pairs exceptionally well with grilled meats and vegetables, so why not give it a try for this summer grill season?
To get a sense of how much smoke flavor you want in your rauchbier all grain recipe, try some different commercial rauchbiers. One popular brand from Bamberg is Brauerei Heller-Trum/Schlenkerla. Domestically, Sam Adams occasionally brews a smoked lager, as do Victory, Ballast Point, and a number of other American craft breweries. Ask your local bottle shop for rauchbier recommendations.
If you’re looking for a subtler smoked flavor, 20% smoked malt may be all you need in your rauchbier all grain recipe. For smoked beer die-hards, up to 100% smoked malt can be used in the grain bill.
Several breweries in and around Bamberg smoke their own malt using beech, cherry, or alder wood. If you so choose, you can smoke your own malt on your home grill.
Rauchbiers, such as the one below, are often brewed using a decoction mash and fermented as a lager. This rauchbier all grain recipe, from the book Homebrewing for Dummies, won 1st Place at the American Homebrewers Association National Competition. Happy brewing!
Beech Beer (a classic Rauchbier)
(five-gallon recipe, all-grain)
Specifications
OG: 1.056
FG: 1.014
ABV: 5.54%
IBUs: 20.5
SRM: 9
Ingredients
4.5 lbs. Klages (base) malt
2.5 lbs. smoked malt
2.25 lbs. Munich malt
1 lb. Vienna malt
.5 lb. Crystal 40L
1 oz. Hallertauer hops (:105 minutes)
.5 oz. Hallertauer hops (:15 minutes)
.25 oz. Hallerauer hops (:02 minutes)
.25 oz. Saaz hops (dry hop)
Wyeast 2206: Bavarian Lager (4L yeast starter recommended)
Directions for the decoction mash: Mash crushed grains in four gallons of clean water at 105˚F. After 20 minutes, remove one-third of the mash and bring it to a boil. Return this portion to the mash. The new mash temperature should be 125˚F. After 10 minutes, remove one-third of the mash and bring it to a boil. Return this portion to the mash. The new mash temperature should be 149˚F. After 30 minutes, raise mash temperature to 154˚F. After 30 minutes, raise mash temperature to 168˚F. After 30 minutes, sparge with clean water at 168˚F, collecting about 6.5-7 gallons of wort in the brew kettle.
Directions for boil and fermentation: Add one ounce of Hallertauer hops at beginning of 1 hr, 45 min boil. Add half an ounce of Hallertauer hops with 15 minutes remaining. Add a quarter-ounce of Hallertauer hops with 2 minutes remaining. Chill wort to approximately 50˚F and ferment at that temperature for 28 days. Rack to a secondary fermenter and condition at 35˚F for 28 days. Add Saaz hops during the last 5-7 days of the secondary fermentation. Bottle or keg, aiming for 2.2-2.5 vols CO2.
Are you a fan of smoked beers? Do you have a rauchbier all grain recipe you’d like to share with us?
——————————————————————————————————–
David Ackley is a beer writer, brewer, and self-described “craft beer crusader.” He holds a General Certificate in Brewing from the Institute of Brewing and Distilling and is founder and editor of the Local Beer Blog.

Leigh Erwin: A Beginner's Wine Making Journey: Part 14

Wine Filtering Equipment Was Not Used On This Wine
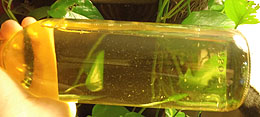
Hi Everyone!  I hope you all are staying safe and warm with all this ridiculously cold arctic air that’s been hanging around much of the continental US this winter!  All these cold temperatures got me thinking about how you all were handling the extremes in your home, and in particular pertaining to your fermentations and wine storage.  Thankfully, we never lost electricity for any reason (not yet anyway), and we have a pretty decent heating system, so my little fermentation is still just happily going along just fine in lower 70s!
As far as storage is concerned, I don’t really have any storage space other than the floor of the guest bedroom (seems to be the coolest room in the house).  It’s not ideal storage, but let’s be honest, I’m not aging my first batch of wine long enough for it to cause a problem!  I’ve got my bottles laying on their sides and they are on the floor where it is coolest.

I wonder how others have been handling their storage conditions in, for example,
freezing cold cellars?

Speaking of waiting for wine to age, it’s kinda like waiting for paint to dry, no?  I suppose it has been a little while since I checked in with my first batch of homemade wine (the Pinot Grigio).  It’s been a little over a month now since bottling, so I figured now is as good a time as any to check up on her!  I did notice that the bottles seem to have little white “specks” that have floated to the bottom, and when agitated, float around in the wine and eventually settle back down.  As far as I could guess, this is probably something that naturally occurs if one does not filter the wine, or if the clarification process wasn’t enough?  Even though the instructions recommended filtering the wine, I didn’t have the proper wine filtering equipment with me at the time, so mine went unfiltered.

Have any of you noticed this sort of
precipitate in your wine?

Not going to be deterred, I still wanted to try the wine!
On the nose:  I still feel like I can smell “plastic”, but I think that could be a bias that I have.  What I really need to do is have an unbiased nose smell it to see if what I’m smelling is real, or if I’m just crazy!
When I taste the wine, I was pleasantly surprised with how it has progressed so far.  Granted, it’s only been a month so it’s not that different than it was 4 weeks ago, but I have to say it seems a little more round to me, with the citrus fruit notes starting to become more integrated and balanced with the acidity of the wine.  Previously, I noted that the wine would be much better with food than alone, but now it’s starting to come in on its own and a teeny bit more complex by itself.
I’m happy with the progress so far, and am looking forward to enjoying more of it!
Cheers!

————————————————————————————————————-
Leigh ErwinMy name is Leigh Erwin, and I am a brand-spankin’ new home winemaker! E. C. Kraus has asked me to share with you my journey from a first-time dabbler to an accomplished home winemaker. From time to time I’ll be checking in with this blog and reporting my experience with you: the good, bad — and the ugly.

Why Won't My Sugar Water Ferment?

Fermenting Sugar Water With Yeast
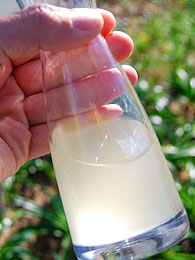
I typically make really high octane wine. I mean I like to make wines that are just short of whiskey. (Because not allowed to distill). But, when trying a new one I ran into a interesting problem. This particular one mostly water and sugar (trying for more of a vodka style) but it doesn’t seem to want to ferment at all. Never had one not ferment at all before. Go bad yes but not at all…. even tried a different yeast in case I killed the first one but still nothing?
Name: Jerry
State: MO
—–
Hello Jerry,
Fermenting sugar water is something that will not work, straight up. This is for a couple of reasons:

  • The wine yeast needs nutrients
  • The wine yeast needs acidity (lower pH)

Both of these things are normally supplied naturally by the fruit in a wine recipe.
It is possible to substitute these items artificially for fermenting sugar water, but not in the well-rounded, holistic way that the yeast expect. The yeast will struggle along slowly with its fermentation under a lot of stress. The result will be an alcohol beverage that has many repulsive, off-flavors — nothing pleasant to drink.
The reason for this is that as the yeast struggle they put off a lot of nasty tasting enzymes. The enzymes is their effort of trying to break down and consume any nutrients that may be in the wine must. For this reason I would suggest that you abandon the idea of fermenting sugar water.
So that you don’t waste the sugar water you currently have, you can use it in other fruit wine recipes. If you know how much sugar is represented in each gallon of water, you should be able to calculate its use in other recipes you have successfully done before.
If after reading this you still feel like fermenting sugar water, then here is what I would suggest:

Even after doing all these things, you still have the issue of low acidity. You could add Acid Blend to the wine must to remedy this, but this would make the final product weirdly tart.
However, if you do all these other things you will have, at minimum, some marginal success at fermenting sugar water, but do not expect it to taste clean, with no off-flavors, and do not expect the fermentation to be able to complete all the way.
Best Wishes,
Ed Kraus
———————————————————————————————————
Ed Kraus is a 3rd generation home brewer/winemaker and has been an owner of E. C. Kraus since 1999. He has been helping individuals make better wine and beer for over 25 years.

Ray Leeota’s Freezer Cleaner Extra Pale Ale Recipe

Extra Pale Ale From All-GrainToday’s beer recipe comes from a Popular Mechanics article that shares ten award-winning homebrew recipes from a homebrew club in New York. This one won first place in the American ale category at the 2010 Hudson Valley Homebrew Competition.
I was drawn to this extra pale ale recipe by its use of the hop bursting, a technique in which large amounts of hops are added later in the boil in lieu of the traditional early addition. This results in an assertive hop flavor and aroma without excessive hop bitterness.
The mix of specialty malts in this beer recipe creates a blend of toasty, caramel, and bready malt flavors to support the big-time hop flavor and aroma. If you’re looking for a sessionable, yet hoppy homebrew recipe, this could be the one!
Tips: You’ll need an 8-10 gallon boil kettle in order to do the all-grain version of this extra pale ale recipe. I’d also recommend using Irish moss and gelatin to avoid haze and to help hop trub settle out. Add the Irish moss with 10 minutes left in the boil; add the gelatin during secondary fermentation.
If you’d rather do this extra pale ale recipe’s extract version, see the partial-mash option at the end.
Happy brewing!
Ray Leeota’s Freezer Cleaner Extra Pale Ale
(All-grain recipe, 6-gallon batch)
Brewers: Ray Girard & Lee Jacobson
Style: American Pale Ale
OG: 1.053
FG: 1.013
IBUs: 40 IBU
ABV: 5.3%
9 lbs. American two-row malt 
1 lb. wheat malt
1 lb. crystal 40L malt
1 lb. Munich malt
0.5 lb. Victory malt
1 oz. Columbus hops (14 AAUs) at :20
0.5 oz. Amarillo hops (4.25 AAUs) at :10
0.5 oz. Centennial hops (5 AAUs) at :10
1 oz. Columbus hops (14 AAUs) at :5
1 oz. Centennial hops at flame out
1 oz. Amarillo hops at flame out
Wyeast 1056: American Ale Yeast
Directions: The day before brewing, prepare a 2L yeast starter. On brew day, clean and sanitize equipment. Mash crushed grains in 4.5 gallons of water. Hold at 152°F for 60 minutes. Sparge and collect about 7.5 gallons of wort. Boil wort for 60 minutes, adding hops according to the schedule. Add flame out hops when heat is turned off. Chill wort, transfer to a sanitized fermented, aerate, and pitch yeast. Ferment at 68°F.
Partial-mash option: Replace the American two-row malt with 6.6 lbs. of Steam Freak Light LME. Do a mini-mash with the specialty grains in 5 qts. water, strain wort into a brew kettle, and add malt extract. Top off with water to bring boil volume to 7.5 gallons and proceed with recipe as above.
This extra pale ale recipe as already proven itself to be a winner, so why not give it a try with either all-grain or extract. Either way it sound delicious!
Interested in other hoppy brews? Check out the Brewers Best: Imperial Pale Ale Recipe Kit!
——————————————————————————————————-
David Ackley is a beer writer, brewer, and self-described “craft beer crusader.” He holds a General Certificate in Brewing from the Institute of Brewing and Distilling and is founder and editor of the Local Beer Blog.

Leigh Erwin: A Beginner's Wine Making Journey: Part 13

Wine Making IngredientsHi everyone!  I just finished the first phase of my new batch of homemade wine made from a wine juice concentrate, and I’m very hopeful at the moment for its success!  It smells and looks great, so here’s hoping fermentation will start right up and get cranking (though I do realize it could take a day or two to really get moving).
First thing is first—I sterilized the equipment I was going to use today: the primary fermenter, stirring spoon, hydrometer, the cylinder to hold the hydrometer, as well as measuring cups/spoons for the various wine making ingredients I added.  I really liked using the sodium bisulfite, as it is a sterilization product that does not require rinsing!  One of the things I was most concerned about during my first batch of homemade wine was the fact that my cleaning/sterilizing agent required rinsing, and I could never be 100% sure if I got it all or if I’d left a little bit to ultimately cause hard times or even ruin the wine.
Can of Wine Juice ConcentrateAfter I sterilized everything, I opened up the can of wine juice concentrate and poured it into the primary fermenter (with the spigot in the CLOSED position!).  Next, according to the wine making instructions on the side of the can of wine juice concentrate, I was to add 13 can’s worth of warm water.  I had several gallons of room temperature bottled drinking water, but I wasn’t sure if that was warm enough, so I just popped the water in the microwave for a couple of minutes to increase the temperature a couple of degrees.  Hopefully that was not a bad idea 😉
Once I added all the water, I proceeded to add 6.5 lbs of sugar, per the instructions.  Now, I didn’t have a scale (add that to the list of things to buy), so I just googled ‘how many cups of granulated sugar in a pound’ and got my answer.  Apparently, 2 cups of white granulated sugar equals 1 pound, so since the recipe called for 6.5 pounds, that meant I needed 13 cups of sugar.  Easy! Done!
I stirred the sugar up for a bit to get it dissolved, then I added the next several ingredients.  The can called for this pre-made nutrient mix, but also underneath described the individual components of that mix in case that mix was not available.  I had the individual ingredients, but not the mix, so add them one at a time I did!  I added 3 ounces of Acid Blend (which I weighted using a simple postage stamp scale), 5 level teaspoons of Yeast Nutrient, and 1 level teaspoon of Grape Tannin.  Actually, it said “lvl. tsp” on the can, so hopefully my assumption that “lvl” means “level” was correct.
After I stirred all these ingredients together with my stirring spoon, I went ahead and measured the specific gravity of the must with my hydrometer, which read 1.072.  Looking at the instructions on the can of wine juice concentrate, it said the specific gravity should be 1.075.  Did I do something wrong? I scratched my head for a minute or two and then had an “ah ha!” moment.  My must was somewhere in the upper 70s low 80s F., but the hydrometer I have is calibrated to 60°F!  There must be a conversion factor to take differences in temperature into consideration!  Low and behold, ask Google, and get the answer, so that I did and I discovered a few sites that adjusts specific gravity based on the temperature of the must and the temperature for which the hydrometer is calibrated.
Now, silly me does yet have a thermometer (yep, add that to the list of things to buy, too), so I just guessed that the temperature of my must was 80°F., since I had microwaved the water a little bit prior to adding it to the primary fermenter.  Based on the online specific gravity converter, my must actually has a specific gravity of 1.074 instead of 1.072, which is much closer to the predicted 1.075 on the can.  Of course, there is most likely a little error here due to the fact that I randomly guessed the temperature of the must, but it’s close enough for me to be happy and move forward.
After I take a little break to let the temperature of the must come back down to between 70 and 75, I’ll go ahead and add the wine yeast and ferment this bad boy for 5 days.  Cross your fingers for me that this all goes well!

——————————————————————————————————–
Leigh ErwinMy name is Leigh Erwin, and I am a brand-spankin’ new home winemaker! E. C. Kraus has asked me to share with you my journey from a first-time dabbler to an accomplished home winemaker. From time to time I’ll be checking in with this blog and reporting my experience with you: the good, bad — and the ugly.

5 Of The Best Beer Brewing Blogs To Ever Hit Your Monitor

Charlie Papazian Has One Of The Best Beer Brewing BlogsWhether you just started beer brewing or have been making beer at home for years, we all need some inspiration from time to time. Luckily, many professional brewers are very open about sharing their passion for beer brewing and even go as far as to share their insights online.
Check out five of the best beer brewing blogs for recipes, advice, industry trends, and more!

  1. Charlie Papazian – President of the Brewers Association
    OK, Charlie Papazian doesn’t own or work at a brewery, but as founder of the Great American Beer Festival and President of the Brewers Association, he damn well deserves to be on top of this list. Many of you know the godfather of the American craft beer movement as author of The Complete Joy of Homebrewing, but he is also the National Beer Examiner at Examiner.com. He regularly contributes thought provoking posts like “What if Prohibition Never Happened?” and “Origin of Beer Species”. Be sure to check out his beer recipe for a Homebrewed Coconut Porter.
  2. Mitch Steele – Stone Brewing Company
    Brewmaster at Stone Brewing Company since 2006, Mitch Steele wrote the book on IPAs — literally. Last year, Brewers Publications released IPA: Brewing Techniques, Recipes and the Evolution of India Pale Ale, probably the most comprehensive resource on the style. If you want to learn how to nail an IPA or learn more about the life of a pro brewer, follow Mitch’s beer brewing blog, the Hop Tripper.
  3. John Cochran – Terrapin Brewing Company 
    John Cochran is the President and co-founder of Terrapin Brewing Company, makers of the infamous Terrapin Rye Pale Ale. He began home brewing in college and helped found Terrapin in 2002. Through his beer brewing blog, John at Terrapin, he gives a brewery executive’s perspective on the beer industry, writing about trends and news from Terrapin.
  4. Mike Karnowksi – Green Man Brewing Company 
    Mike is a brewer at Green Man Brewing Company, one of Asheville’s original craft breweries. He’s responsible for some of their latest specialty craft beers, including a series of IPAs and stouts brewed from historical records. On his beer brewing blog, Asheville Brewer, he shares some of his homebrew experiments, including a series of Czech lagers and a rye stout with caraway seeds.
  5. Michael Tonsmeire – The Mad Fermentationist
    Known as the Mad Fermentationist, Michael Tonsmeire writes one of the most comprehensive and dedicated beer brewing blogs around, sharing his beer recipes and techniques since 2007. He has contributed numerous articles to Brew Your Own magazine and is set to release his book, American Sour Beers in Spring 2014.

So there they are: some of the best beer brewing blogs around. Are there any others you consider a valuable resource? Let us know, and comment below…
————————————————————————————————————-
David Ackley is a beer writer, brewer, and self-described “craft beer crusader.” He holds a General Certificate in Brewing from the Institute of Brewing and Distilling and is founder and editor of the Local Beer Blog.

Express Your Love For Homebrewing!

Man Writing About Home BrewingHomebrewing can be such a personal hobby. After all, we spend time researching, preparing and making the beer we love so much.
This Valentine’s Day, let’s not lose track of why we fell head over hydrometer for homebrewing in the first place. Today, I’m looking back at some of the special moments I’ve spent – and will spend – with that boozy love of ours.
——————————————-
Dear Homebrew,
It’s been a wild ride since things first started fermenting years ago. I feel like our relationship is still hotter than my propane burner blasting 55,000 BTUs to warm you up. I’ve been thinking about all our wonderful time together…
Meeting Homebrew
It’s crazy how things like this happen, isn’t it? A lot of people use the Internet to find brews like you these days, but I guess I’m just old fashioned. It was really nice for Andrew to introduce me to you. A friend of a friend. You inoculated me with love at first sight. No adjuncts needed.
I thought it was kind of weird that Andrew wanted to chaperone the first time we met, but it was his brew day and I was just along for fun.
The First Date
Wow. You really looked great that afternoon. I’ll never forget how your boiling wort frothed up twice during the boil. But you never overflowed. I knew from the start you were a kind and gentle soul. Your IBUs were low because how could you ever treat me bitterly? It’s like this was meant to be.
I really appreciated the care you put into how you looked and smelled. I know I was only steeping grains for you, but that aroma of 2-row and Crystal 20 malts was intoxicating. You sure do know how to drive a homebrewer wild.
The First Overnight
I’m usually pretty bad at this – I was so nervous. I mean, you had already come home with me and the owner at the local homebrew shop was really nice when he sold me your ingredients. I couldn’t wait to pay attention to your attenuation.
I felt bad about leaving you all alone in the downstairs closet. Do you get lonely? I thought I heard you crying, but it was just the “glug, glug, glug” of active fermentation. Your microorganisms sure do work fast. Wyeast 1056 seemed like such a good fit. I was so happy you liked it too.
Getting Engaged
It wasn’t clear when we first met, but I knew you came into my life to fill a beer-shaped hole in my heart. We have a hot break that lasts and lasts. That’s why I never want to let you go.
I loved that you could leave all your stuff at my place – I primed the perfect spot in the attic for all your pots, buckets and airlocks. There’s even a nice location for you in the fridge. A shelf that I knew you’d like a lot and will always be ready for you.
Marriage
At first I thought my wife would get jealous of our relationship, but it became clear that we could all co-exist. It was real ale love.
When we argued about you, I promise it wasn’t meant to make you upset. It’s just that sometimes when we have our dates, you take up three or four hours of my time and that can get in the way of other things. Especially when I pay extra attention to your partial mash.
Don’t worry, though. I’m committed to you. Long term. The Missus knows I love her; it’s just different with you. That’s why I knew I needed to put an O-ring on your keg.
A Long Life
I have a feeling this relationship will go on for a long time. Let’s not get caught up in the threat of terminal gravity.
You don’t know how much I look forward to spending anniversaries with you. We’ve already celebrated a few and when we mark our fourth year together in 2014, I’m pretty sure I already know what kind of traditional fruit present I’m going to get you. Here’s a hint: you’ll be a wheat ale soon.
———————————————————————————————————–
Bryan Roth is a beer nerd and homebrewer living in Durham, North Carolina. You can read his thoughts on beer and the beer industry on his blog, This Is Why I’m Drunk, and send him suggestions on how to get his wife to drink craft beer via Twitter at @bryandroth.