Simple Style Guide: Brewing A Schwarzbier Recipe

Two Mugs Of Schwarzbier
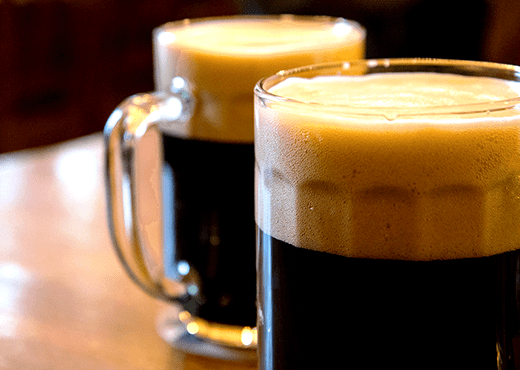
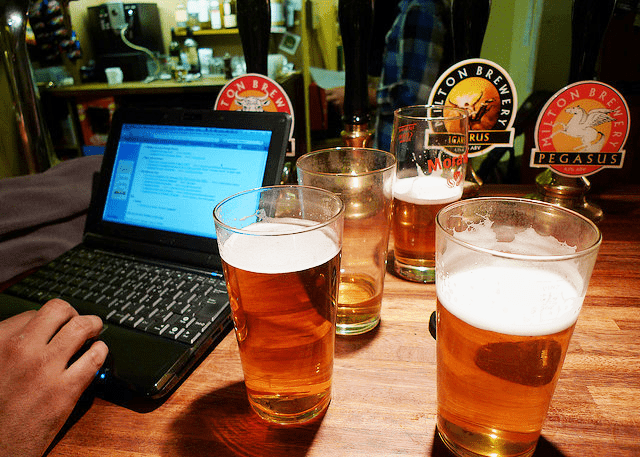
One of my all-time favorite beer styles is the German Schwarzbier. Brewing a Schwarzbier recipe is a great experience, as well. This “black beer” is a dark lager, similar to the Munich dunkel. Though sometimes more brown than black, schwarzbier is an interesting combination of dark, roasty flavors and a smooth, light mouthfeel. While many drinkers assume dark beer is heavy, schwarzbier is in fact quite smooth, and yet full of flavor. It features the chocolate and coffee malt flavors of a stout, but without the aggressive roasty flavor or the fruity and spicy esters from ale yeast.

According to the BJCP Guidelines, schwarzbier generally falls within the following specs:

  • OG: 1.046 – 1.052
  • FG: 1.010 – 1.016
  • ABV: 4.4 – 5.4%
  • IBUs: 22 – 32
  • SRM: 17 – 30

Consider the following tips when brewing a schwarzbier recipe.

Water
As Randy Mosher points out, “Water is a key element, not just marketing fodder.” Never is this more important than when brewing a lager. For starters, be sure to dechlorinate your water by boiling it or treating it with Campden tablets. The Munich water profile is well-suited for brewing dark lagers, so you may wish to add some calcium carbonate to your brewing water. Use a mash water calculator to help you figure out what additions to use.
Shop Malted Barley Grains
Malt
German dark lagers are famous for using a large proportion (sometimes 100%) of Munich malt in the grain bill. Some interpretations may include a portion of pilsner malt as well.
The dark color in a Schwarzbier recipe usually comes from debittered malt, such as Carafa II, which contributes the dark color and chocolate/coffee flavors of a stout, but without the astringent bitterness of roasted barley or black malt. Only about 4-8 oz. of Carafa is needed to adjust color.
Hops
Since this is a malt-forward beer, we’re not too worried about flavor and aroma contributed by late addition hops. That said, all the hops in this beer should be of the noble hop or German hop variety. Hallertauer, Tettnanger, and Spalt would all be good options. Aim for about 22-32 IBUs.
Yeast
A German lager yeast will be the most authentic for brewing a Schwarzbier recipe, though some homebrewers get good results with a Kölsch yeast. Whichever you use, be sure to do a nice, long secondary fermentation to lager the beer and smooth it out, about two months.
Try the all-grain schwarzbier recipe below, or the malt extract schwarzbier recipe here!
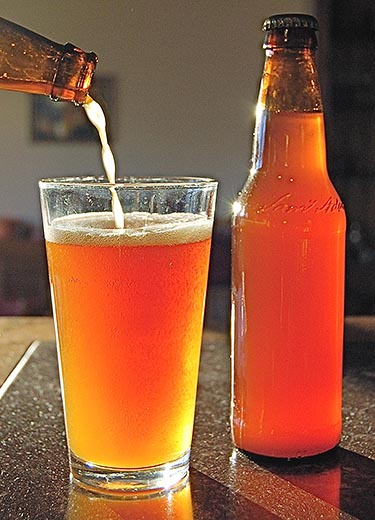
Recipe: Doktor Schnurrbart Schwarzbier (via Radical Brewing)
(5-gallon batch, all-grain)
Specs
OG: 1.061
ABV: 4.1 – 4.9%
IBUs: 26
Color: ruby brown
Ingredients
9 lbs. Munich malt
1 lb. pale malt or pilsner malt
8 oz. Carafa II malt
2 oz. Spalt hops at :90
Wyeast 2206: Bavarian Lager Yeast, Wyeast 2565: Kölsch Yeast, Mangrove Jack’s M84: Bohemian Lager Yeast, or Saflager W-34/70
Directions
Perform a two-step mash: 30 minutes at 95˚F followed by 60 minutes at 153˚F. A decoction mash is the most authentic, though a double infusion mash will work just fine. Sparge with enough water at 170˚F to collect about 6.5 gallons of wort. Add Spalt hops and boil for 90 minutes. Primary fermentation for about 3-4 weeks according to yeast package instructions (usually about 50˚F), followed by about 6 weeks at 35-40˚F.
Have you ever thought about brewing a Schwarzbier recipe? If so, then this is a great time to try it!
——————————————————————————————————————
David Ackley is a beer writer, brewer, and self-described “craft beer crusader.” He holds a General Certificate in Brewing from the IBD and is founder of the Local Beer Blog.

Should I Filter Homemade Wine Before Or After Barrel-Aging?

Wine Barrel With Barrel-Aging.
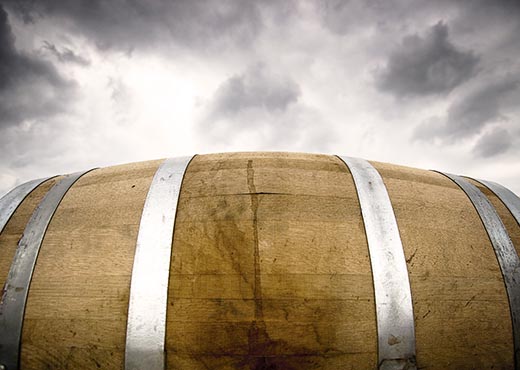
I am about to age Cabernet Sauvignon in a six-gallon barrel. Should I filter the wine before it goes into the barrel or after it comes out before bottling?
John S. — VA
—–
Hello John,
Thanks for the great question. I don’t think this question has ever been asked or answered on our blog before, so here we go…
You want your homemade wine to go through the barrel-aging process before filtering. But having said this, it is important to understand that you want to give the wine some time before going into the barrel. You don’t want it to go straight in to the wine barrel the moment the fermentation completes. Give time for the solids to settle out, first. This might only take a few days or it could be a couple of weeks. Regardless, give the wine whatever time it needs.
The goal is to keep the bulk of the sediment from getting into the wine barrel. Most of the sediment at this stage will be comprised of dead yeast cells. Typically, this is something you do not want your wine resting on while in the barrel. The result could be something called autolysis. This is a process that leads to a bitter-nut to metallic taste in the resulting wine.
Shop Wine BarrelsThe reason you want to filter your wine after barrel-aging is because of what happens while the wine is in the barrel. There are a lot of processes that go on. One of the more significant ones is tannin precipitation. As tannin is leached from the wood of the barrel, it sets off a chain-reaction, of sorts, that causes the excessive tannins that are normally in a young wine to solidify and drop out as sediment. This is one of the key factors in reducing the harshness of a wine.
There are many other organic process that go on during aging besides this that can contribute to other precipitates as well. With this in mind, it only makes sense to filter the homemade wine after the barrel-aging and not before. Why filter the wine when there is more sediment on the way.
John, I hope this answers your question. Just remember to also give your wine plenty of time before going into the barrel and then plenty of time while its in there. You can filter your homemade wine after the barrel-aging is complete.
Happy Winemaking,
Ed Kraus
—————————————————————————————————————–
Ed Kraus is a 3rd generation home brewer/winemaker and has been an owner of E. C. Kraus since 1999. He has been helping individuals make better wine and beer for over 25 years.

10 Best Home Brewing Resources

Home Brewing Resources On Computer With BeerIn the wide world of homebrew information, what resources to you use for information? When I need to look up a concept, technique, or research for a beer recipe, these are some of the resources I come back to time and again. Along with this blog, these are the 10 best home brewing resources.

  1. How to Brew – John Palmer’s seminal title is available in its entirety on the web. His book walks the beginning homebrewer through brewing a batch from start to finish, eventually diving into more detailed concepts for the advanced brewer. The book is also available in print.
  2. Brew Your Own Magazine – Brew Your Own is a great magazine for all levels of homebrewer. Each issue has a good mix of techniques, beer recipes, experiments, and projects. Many articles are also available online.
  3. Zymurgy Magazine – One of the benefits of American Homebrewers Association membership is a subscription to Zymurgy magazine. It’s full of great tips and beer recipes, and is also available as a mobile app. It’s a great home brewing resource.
  4. Homebrewing for Dummies – An excellent “how to” book for extract, partial mash, and all-grain brewers. Despite the name, it actually gets pretty technical. Also contains a number of award-winning beer recipes.
  5. Designing Great Beers– This home brewing book is a must read for anyone who wants to build their own beer recipes. Ray Daniels analyzes hundreds of recipes to determine some guidelines for brewing the major BJCP beer styles.Download Home Brew eBook For Free
  6. BJCP Style Guidelines – For the competitive homebrewer, the BJCP style guidelines is an indispensable resource. They detail what a homebrewer should seek to achieve when brewing a particular style, from flavor, aroma, and appearance, to overall impression and standard ingredients. The 2008 guidelines have recently been updated in favor of the 2014 version.
  7. Brewer’s Friend – Brewer’s Friend is a free website with dozens of calculators for building beer recipes, calculating IBUs, adjusting mash water, and more. There’s also a premium membership option, which allows you to create and store an unlimited number of recipes on the site, as well as apps for your mobile phone.
  8. HomebrewTalk.com – Has anyone else ever tried your great homebrewing idea? Chances are they have, and chances are someone has written about it on the HomebrewTalk forums. Also look into the HomebrewTalk articles section for a variety of tips and tricks.
  9. Homebrewing on Reddit – Perhaps the most active homebrewing forum on the Internet these days is on Reddit. If you’re unfamiliar with Reddit, it’s basically a massive forum with a variety of subjects, or subreddits, to which users can post content and questions. The homebrewing subreddit has close to 100,000 subscribers and includes some good advice along the sidebar. Be sure to look into the weekly roundtable discussions and the annual competitions.
  10. The E. C. Kraus Homebrewing Ebook – Our new ebook is the ultimate jumpstart guide to homebrewing! It guides you through how to brew extract and all-grain batches of beer, addresses some key FAQs, and also includes several of our favorite beer recipes. It’s one of the best home brewing resources around, and it’s free to download!

What do you think are some of the best home brewing resources?
————————————————————————————————————–
David Ackley is a beer writer, brewer, and self-described “craft beer crusader.” He holds a General Certificate in Brewing from the IBD and is founder of the Local Beer Blog.

Leigh Erwin: Stuck Fermentation?

Frustrated About Her Meads Stuck FermentationHello everyone!
You’re probably all getting sick of me talking about my mead at this point, but I suppose the whole point of this diary is to take you through both the good and the bad times of my home winemaking adventures, so there are bound to be problems that arise and stick around for a while!
I actually think the “issue” I am having isn’t really that big a deal, but since I haven’t had as much time on my hands, it has dragged out a lot longer than I had hoped.
Anyway, last I checked the specific gravity, it was 1.000. Still not quite were I want it to be (want it around 0.998 or so), but since it’s been holding pretty steady around this point for many weeks now, I came to the conclusion that I have a stuck fermentation.  Also, between when I racked the mead the first time and when I racked it the second time, there was little to no sediment left over but still a ton of “stuff” in suspension.  All that plus the fact that it still tastes a little yeasty to me, leads me to believe that there is still some yeast in there but it’s on strike, thus a stuck fermentation.
Shop Yeast EnergizerWhat I decided to do is add both yeast nutrient and yeast energizer.  According to the packaging on both products, I can use them to try and jump start a stuck fermentation at ½ a teaspoon per gallon (each), so if the instructions say I can do that, then I’m going to go ahead and do that!
Since I have roughly 5 gallons of mead (maybe a little less at this point, but for easy math I’m sticking with 5), that equals 2.5 teaspoons of yeast nutrient and also 2.5 teaspoons of yeast energizer.  I added both to my mead, then gave it a nice stir to get everything in suspension and hopefully waking up that remaining yeast.
I also put an airlock on the carboy, so hopefully I’ll start to see a little activity (albeit very slow most likely) over the next few days, and put this stuck fermentation behind me.
I’ll probably give it another week or so, then test the specific gravity again.  If the fermentation is still stuck, then I think I’ll add some new yeast to try and finish the job.  Also, it would probably be wise of me to purchase a pH testing strips as well, as knowing the pH of the mead would probably be helpful in figuring out how to address this issue!

——————————————————————————————————————–
Leigh ErwinMy name is Leigh Erwin, and I am a brand-spankin’ new home winemaker! E. C. Kraus has asked me to share with you my journey from a first-time dabbler to an accomplished home winemaker. From time to time I’ll be checking in with this blog and reporting my experience with you: the good, bad — and the ugly.

A Simple Guide To Adding Wine Making Ingredients

Adding Wine Making Ingredients To A Batch Of Wine.How do you add the yeast and yeast nutrients to the wine juice? Do you pour it on top and leave it be or do you mix/stir it in? This is for the primary fermentation.
Daniel — CA
—–
Hello Daniel,
Thanks for the great question. Adding wine making ingredients to a batch of wine is something that can be taken for granted, but there is good way to do it, and a not-so-good way to do it.
In general, it’s a good idea to dissolve any winemaking ingredients in a little bit of the wine before adding it to the entire batch. This includes both the wine yeast and yeast nutrient.
Having said this, I can tell you that I am guilty of not following my own advice. I have often added acid blend, nutrients, tannin and other wine making ingredients directly to whole batch and then stirred to dissolve them.
How we like to go about adding wine making ingredients wouldn’t make much difference one way or the other except that when you add these ingredient directly, you are never 100% sure that they are getting completely dissolve. My guess is they usually are — at least with some time — but this is only a guess on my part. For this reason I would play it safe and pre-dissolve the wine making ingredients in a little sample then blend that back into the batch.
As for adding wine yeast to a batch of wine, there are some different opinions. Even the directions on the packets of dried wine yeast say to do something different than dissolving it into some of the wine must. So why do I differ?
Shop Digital ThermometerWine yeast directions typically say to put the yeast into warm water, at a specific temperature, for a specific length of time. This is to re-hydrate the wine yeast… to wake it up, so to speak. Even if these directions are being followed exactly, a portion of the wine yeast is being killed, but not nearly enough to cause the fermentation to fail. When these directions are not being followed precisely, a very large number of the yeast cells can be killed — even all of them.
I have discovered over the years that many home winemakers do not follow these directions precisely. The water temperature is not checked and the length of time is not timed. Sometimes the yeast is left sitting on the counter until completely cooled, when it should have been at that temperature for maybe 10 minutes. The result is dead yeast and a failed fermentation. Every minute the yeast remain at that high temperature, more yeast cells are dying. For every degree higher then the temperature specified, more yeast cells are dying. So as you may be starting to see, there are pro’s and con’s to using either method of adding wine making yeast.
When you add dried wine yeast to a little wine at room-temperature you do not have all these risks. The wine yeast will not take off quite as fast as if it had been re-hydrated per directions, but usually we are talking only a few hours. Some of the yeast cells will die using this method because of cell wall damage, but not anything even close to the extent as if the yeast were over-heated.
For these reasons, I suggest dissolving the dried wine yeast in wine must. Unless you’re actually planning on taking the waters temperature and timing the length of time the yeast spend at that temperature, this is usually your best option.
Daniel, I hope this answers your question about adding wine making ingredients. Just make sure you pre-dissolve everything and you should be good to go!
Best Wishes,
Ed Kraus
—————————————————————————————————————–
Ed Kraus is a 3rd generation home brewer/winemaker and has been an owner of E. C. Kraus since 1999. He has been helping individuals make better wine and beer for over 25 years.

Help! There’s Mold Growing In My Airlocks

There is no mold growing in this airlock.I am making several batches of wine and every one of them has formed a ring of black mold growing at the top of the airlock. I use cleanser water in the airlock assuming it will kill anything it comes in contact. What would cause this mold to form and will it hurt the wine?
Greg R. — ID
—–
Hello Greg,
Not only is there mold growing in your airlock, there’s mold floating in the air, in our cars, on our clothes, in our homes. There’s mold spores everywhere, just in small enough numbers as to be of no consequence to anything or even to be detectable. But, if mold gets the right conditions, it can grow and colonize. Because of this, no matter how well you clean and sanitize a surface, mold can land and grow there if the conditions are right — temperature, humidity, sunlight, nutrients, etc.
The mold growing in your airlock, by itself, is not going to hurt the wine by being there. If there is a fermentation, CO2 gas will be blowing off keeping any mold spores from getting to the wine. However, this can become a big problem once the fermentation has stopped. Not only is there no protective gas blowing out through the airlock, there is a possibility that some air can flow backwards through the airlock and into the wine, taking mold spores along with it. If fact, if your fermentation is already complete, I would strongly urge you to add a dose of sulfite to the wine, if you have not done so already, This could be either Campden tablets, potassium metabisulfite or sodium metabisulfite.
Shop Potassium BisulfiteI normally don’t recommend this, but since you have a stubborn mold growth going on, you may want to consider filling your airlock with a high-alcohol distillate such as grain alcohol or Everclear. This will keep your airlock continuously free of mold growth and kill any mold spores that my be trying to get their way into your precious wine. Also, if the alcohol gets sucked into the wine for whatever reason, it would not harm it. Any mold spores in the alcohol will be dead.
The reason I don’t normally recommend using alcohol in an airlock is because the alcohol evaporates rather quickly and can cause the airlock to go dry if you are not paying attention. But you can go this route. Just understand that you will need to add more alcohol every few days. Don’t let the airlock go dry; check it often.
Having mold growing in airlocks is not a pressing issue that winemakers normally have to deal with. Sanitizing the airlocks and filling them with water is usually enough, but it seems that there is a lot of mold in your neck of the woods right now, so it is something that needs to be dealt with. Don’t feel that you will always need to use alcohol in your airlocks. Next time you make wine there may be no mold growth in the airlock at all.
Happy Wine Making,
Ed Kraus
—————————————————————————————————————–
Ed Kraus is a 3rd generation home brewer/winemaker and has been an owner of E. C. Kraus since 1999. He has been helping individuals make better wine and beer for over 25 years.

Leigh Erwin: Racking Mead

Leigh ErwinHi everyone!
Just finished a successfully racking my mead.  Well, I think it was successful—nothing ended up on the floor anyway.
I also decided to rack the mead into my plastic carboy from ECKraus instead of back into the glass carboy, as I think the glass one I have is a little bigger than my plastic one and I wasn’t as comfortable with the amount of head-space that left compared with how much is left when it’s in the plastic carboy.
When I checked the specific gravity of the mead right before it was racked, it was 1.000.  A little higher than I’d like still, which indicates to me that perhaps I have a stuck fermentation?  Just a little stuck though, since it’s nearly done?  When I racked it, there was almost no sediment on the bottom (this is the second time I’ve racked the mead—there was a lot of sediment the first time).  From what I’ve been reading online, I THINK it means there are still some yeasts in there (which I can taste) but they are stuck in “Never Never Land”.
Looking around the internet, it sounds like there are a bunch of different options.  Figuring out which option is best for my mead is what the issue is.
Shop Yeast EnergizerSome are saying to add more yeast along with some yeast nutrient or yeast energizer.  I’m hesitant to do this, as I am not yet convinced that the remaining yeasts are dead, I just think they are a little tired and worn out and in need of a boost.
Some were saying things about temperature, however, other than changing the temperature of the entire apartment, I don’t really have a good way to do this right now.
I think what I’m going to do is just add a little yeast nutrient and/or energizer, to see if whatever remaining yeasts are in there will get their little butts in gear and finish out that remaining 0.002 on the specific gravity scale!  I’m also hoping that this will help with the clearing up process, as the mead did not clear up even in the slightest between when I racked the mead today and when I had racked the mead a few weeks ago.

————————————————————————————————————-
My name is Leigh Erwin, and I am a brand-spankin’ new home winemaker! E. C. Kraus has asked me to share with you my journey from a first-time dabbler to an accomplished home winemaker. From time to time I’ll be checking in with this blog and reporting my experience with you: the good, bad — and the ugly.

What Does Mead Taste Like?

Glass Of Mead
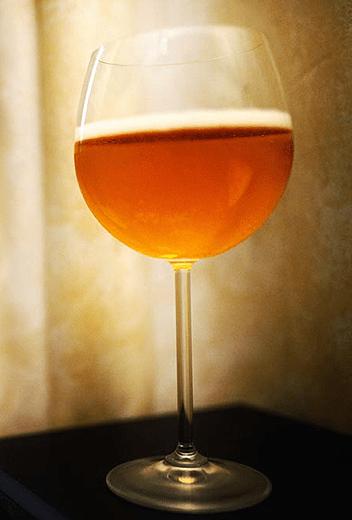
I know nothing about mead. What does mead taste like? Dry or sweet.
Jerre — TN
—–
Hello Jerre,
This is a very loaded question because there are is such a wide varieties of meads. There are meads made with herbs or spices added in addition to the honey (metheglin). There are meads made with the fruit (melomel). You can mix honey with apple juice to make a cyser. You can also mix honey with grape juice to make a pyment. This list goes on and on. This makes it hard to answer the question: “What does mead taste like?
Not all honey is the same, either. What the bees use to spin the honey can make a great difference. There’s apple blossom honey, clover honey, buckwheat honey, tupelo honey… Again, the list is endless. The source of nectar will have an effect on the resulting mead. The cheapest, generic honey will be wild flower honey.
Just like any wine, mead can be made sweet or dry. This is completely up to you, based on your personal preference. It is simply a matter of sweetening to taste at bottling time with sugar, more honey, or anything else you’d like to experiment with. A wine stabilizer (potassium sorbate) should be added at the same time to prevent the chance of a re-fermentation in the bottle.
The point here is that there are an extremely wide range of flavors that can be experienced when drinking meads. For this reason putting a good description as to what a mead tastes like is almost impossible. It is similar to the question, “what does a grape wine taste like?” The flavors vary to greatly to encapsulate in a few words or paragraphs and there is nothing to accurately compare it to.
Shop Wine ConditionerHere’s what I will say, all meads do have a subtle core flavor or character that can be identified. There is a flavor of honey. If it is a dry mead, imagine what honey would taste like without the sweet. Now take that flavor and imagine what it would taste like with the heat of alcohol. This is the best possible way I can think of to answer the question, what does a mead taste like? However ,I do confess that this is completely inadequate.
If you need more description than this, I would suggest buying a bottle. Actually taste a mead for yourself before expending time and effort on making your own mead. There is no other way to really know what a mead tastes like other than to try if for yourself. In my personal experience there is nothing to hate about a mead. I find most meads very pleasant and some even interesting. I also like to use honey two back-sweeten my other wine or to raise the potential alcohol of my other wines. Here’s a mead recipe to get you started.
Best Wishes,
Ed Kraus
—————————————————————————————————————–
Ed Kraus is a 3rd generation home brewer/winemaker and has been an owner of E. C. Kraus since 1999. He has been helping individuals make better wine and beer for over 25 years.

Infected Homebrew Beer? 4 Ways to Step Up Your Cleaning & Sanitation

Pour What Beer. This Is Not An Infected Homebrew Beer.Having an infected homebrew beer happens to the best of us homebrewers at least once. In the interest of time or effort, you start cutting corners on your cleaning and sanitation regime. Maybe you notice a strange white film growing on the surface of your beer. Maybe something tastes sour or just plain “off.” It’s time to take a close look at your equipment and procedures to make sure everything is properly cleaned and sanitized before brewing another batch.
1. Check your bottles. A telltale sign that you’re experiencing some kind of infection is a ring of scum that forms in the neck of the beer bottle. This is a classic symptom of an infected homebrew beer. If you’ve had problems with back-to-back batches it’s possible that this is the source of the contamination. Soak the beer bottles in a hot water bath of One Step, then scrub them with a bottle brush to remove the deposits. Rinse well. Just to be sure, give them a nice long soak in a solution of bleach and water. Use unscented bleach, cold water, and a ratio of 1 ounce bleach per gallon of water. Give them at least 20-30 minutes to soak. (Note: Do not soak stainless steel in bleach.) Rinse well with hot water to drive off any residual chlorine. Follow this with a soak in your regular sanitizer before bottling your next batch.
2. Check your fermenters. If you’ve seen scum or mold on the surface of your beer while it’s in the bucket or carboy, you can be sure the source of the contamination is further up the line. Try the cleaning regimen above on your fermenter. If there is one, pay special attention to the spigot, taking it apart to scrub it inside and out.
Shop One Step Cleanser3. Check your racking equipment. Another possible cause of an infected homebrew beer is your racking equipment. Your auto-siphon, tubing, and bottling wand are a little more difficult to clean, so it’s important to clean them immediately after using them. If you suspect that your racking equipment is the source of your contamination, you may want to consider replacing them. Luckily these items are relatively inexpensive. It’s much better to replace a few feet of tubing rather than dump a batch.
4. Avoid aeration and too much headspace. Infection often comes from air being introduced to your homebrew after fermentation. After primary fermentation, a nice blanket of CO2 covers the beer, but you may lose that protective blanket if you move your homebrew to secondary fermentation. Minimize headspace in the secondary fermentation to avoid contact with air. Also, do your best to avoid splashing during racking from one fermenter to another or into your bottling bucket.
Making sure you don’t have infected homebrew beers isn’t difficult once you identify the common contamination points. Scrub well, use bleach when necessary, and replace equipment that’s past it’s prime to keep your beer fresh and tasting great!
—————————————————————————————————————–
David Ackley is a beer writer, brewer, and self-described “craft beer crusader.” He holds a General Certificate in Brewing from the Institute of Brewing and Distilling and is founder of the Local Beer Blog.

Leigh Erwin: Sampling My Mead

Woman Sampling A MeadHi everyone!
I was very curious to sample my mead, which as you may already know has been sitting around in a carboy for goodness knows how long (read: months).  I have had to put the wines on the back burner for now, as my life is just insane (good insane!) right now and something needed to go by the wayside for a short period of time.
I realized I hadn’t made a batch of sterilizing solution for my winemaking equipment in a while, so I dumped out the old stuff, then made some new stuff using a teaspoon of sodium bisulfite and a gallon of water.  Now that tickles the nose just a bit when dissolved, so I know it must be working!
I just stole a little sample of the mead from the carboy with my make shift wine thief (it’s just a turkey baster- ha!) and gave it a little taste.  Now, I’m still not a huge fan of the nose, as it smells kind of yeasty to me, but I’m thinking that’ll change after it goes through a wine filter.  I hope…
Tasting the mead, I actually don’t think it’s too terrible.  Again, I have no experience with mead during the winemaking process (only the finished product!), so for all I know, it could be disgusting crap.  To me and my fiancé though, it’s actually not that bad and once I add a little sugar back I’m sure it’ll be just fine for the two of us. (Now 10 minutes later, I don’t have any nasty after taste in my mouth, so that’s a good sign, right?).
Shop pH Testing StripsI checked the specific gravity again, and it does look like it dropped a teeny weeny little bit to 1.000.  It’s still not exactly where I was hoping it would be, but at this point I might say “screw it” and continue on with the process.  You might recall, I had tested the acid at one point, but the results were somewhat inconclusive since learning after the fact that you can’t really test the acid this way for mead—oops.  Maybe what would be better is testing the pH, but I foolishly did not buy any of those pH testing strips this time.  That would be an excellent investment for sure, particularly since they are so cheap and easy to use!
Anyway, after sampling my mead I’m not too disappointed, so I think I’m going to rack the mead at least one more time, and then order some clarifying agents to speed that puppy up a little faster.  After it’s clear (or clear enough), I’ll run it through my new wine filter and bottle!

——————————————————————————————————————–
Leigh ErwinMy name is Leigh Erwin, and I am a brand-spankin’ new home winemaker! E. C. Kraus has asked me to share with you my journey from a first-time dabbler to an accomplished home winemaker. From time to time I’ll be checking in with this blog and reporting my experience with you: the good, bad — and the ugly.